10 - Design a Dashboard
Last updated 27/03/2025
This documentation will explain how to design a dashboard to display the Daily Volume chart and the Daily Volume data view together in the same view in the Portfolio application.
When you design a dashboard, you can add any action in Five except a dashboard or custom action.
Five's Actions- Charts
- Custom Actions
- Forms
- Data Views
- Dashboards
- Mail Merges
- Processes
- Reports
Navigate to Dashboards
1. Click Visual in the menu.2. Click Dashboards in the sub-menu.
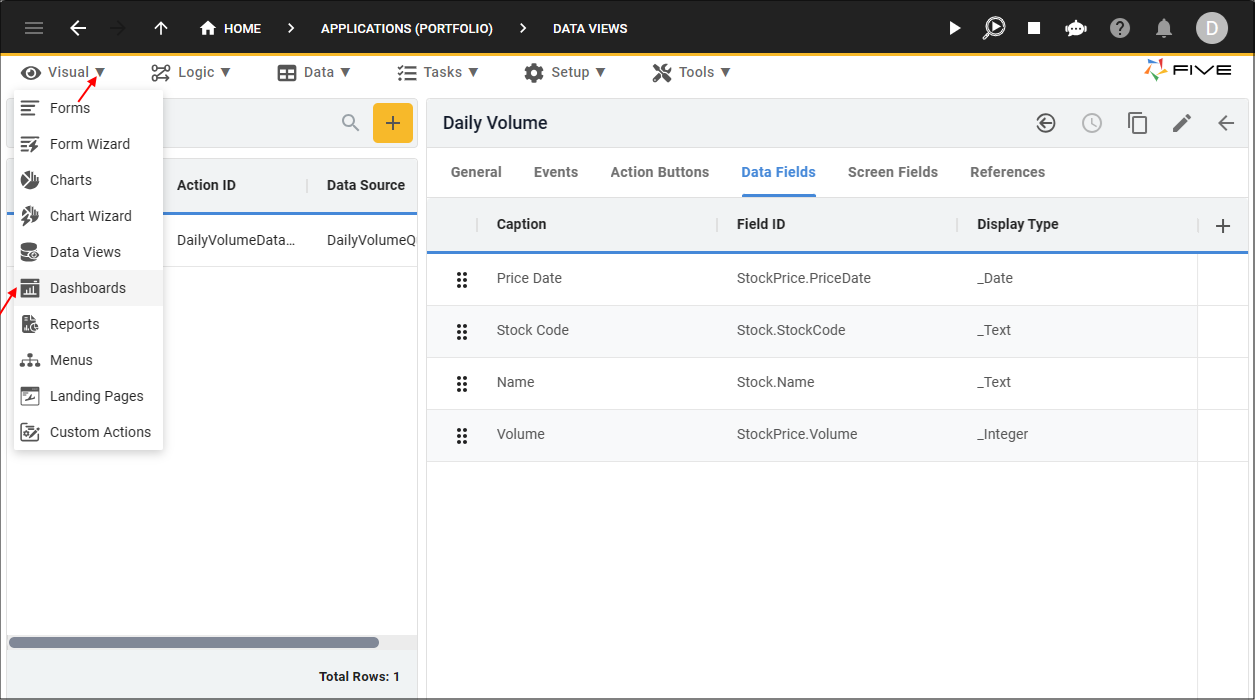
Figure 1 - Dashboards menu item
Add the Daily Volume Dashboard
1. Click the Add Item button in the list app bar.2. Type Daily Volume in the Title field.
3. Type Dashboard after DailyVolume in the Action ID field.
4. Type 2 in the Rows field.
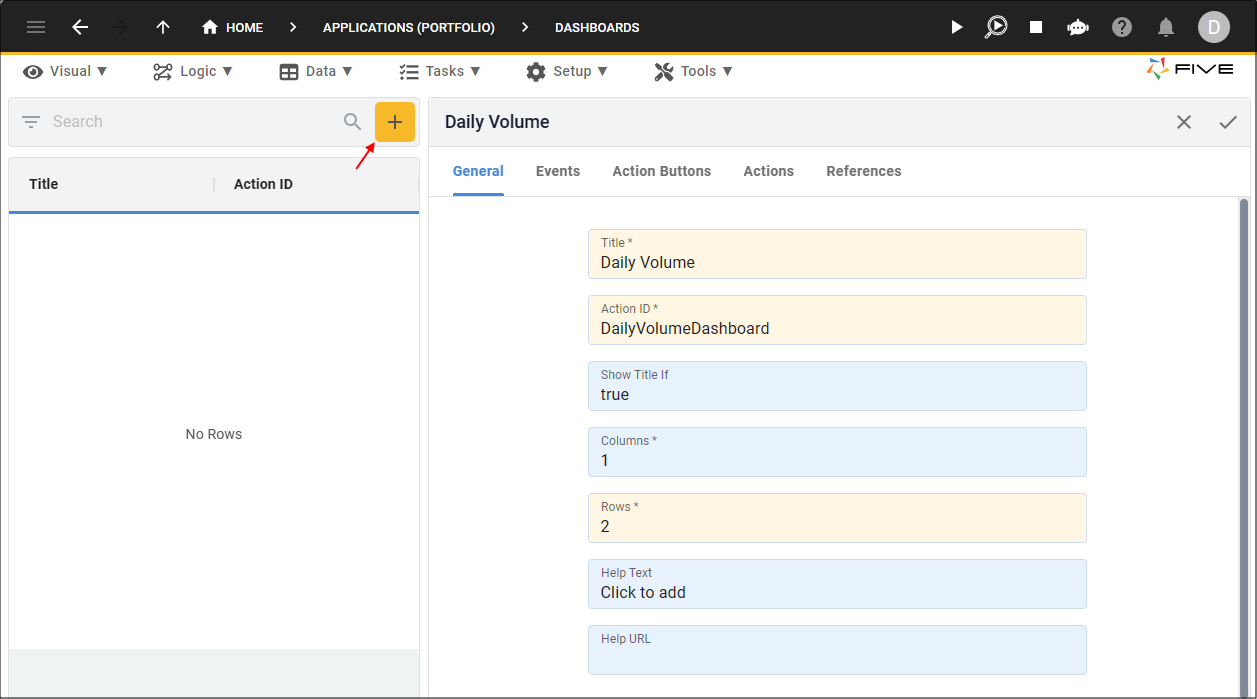
Figure 2 - Add the Daily Volume dashboard
5. Click the Actions tab.
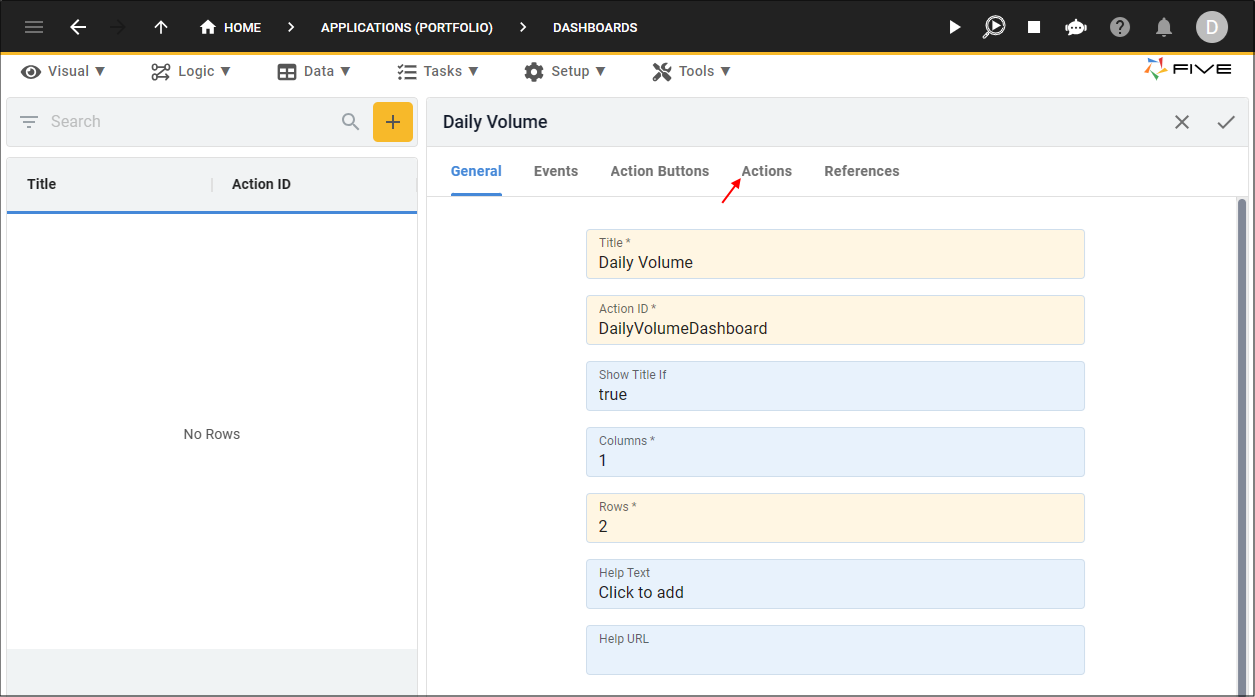
Figure 3 - Actions tab
6. Click the Add Actions button.
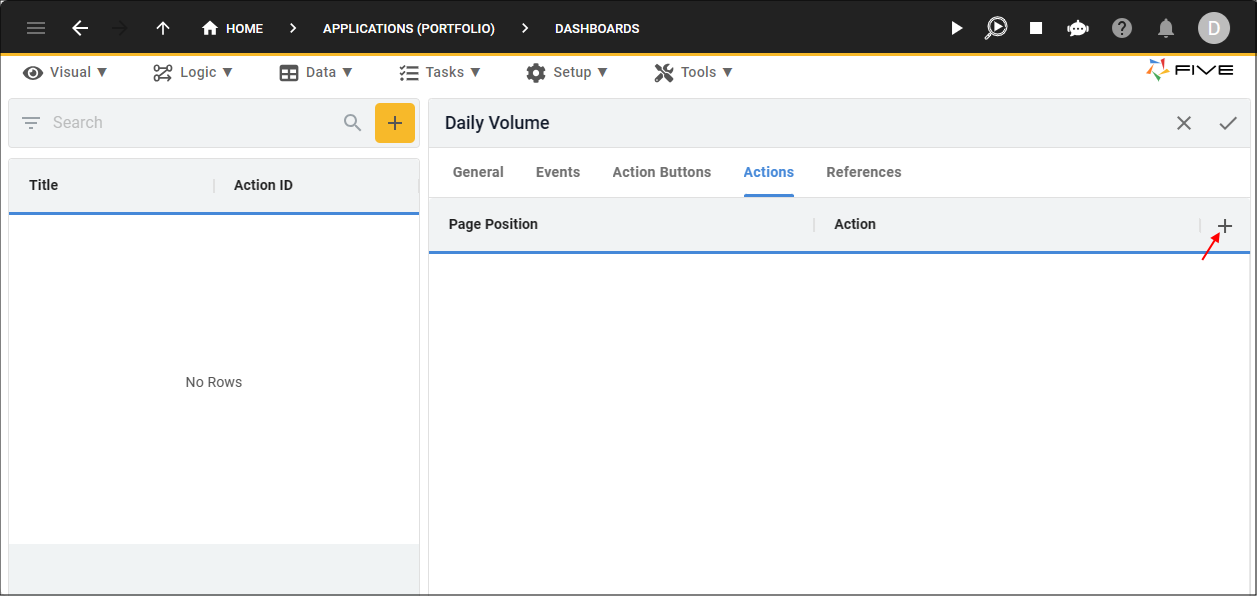
Figure 4 - Add Actions button
7. Click the Edit button in the Page Position field.
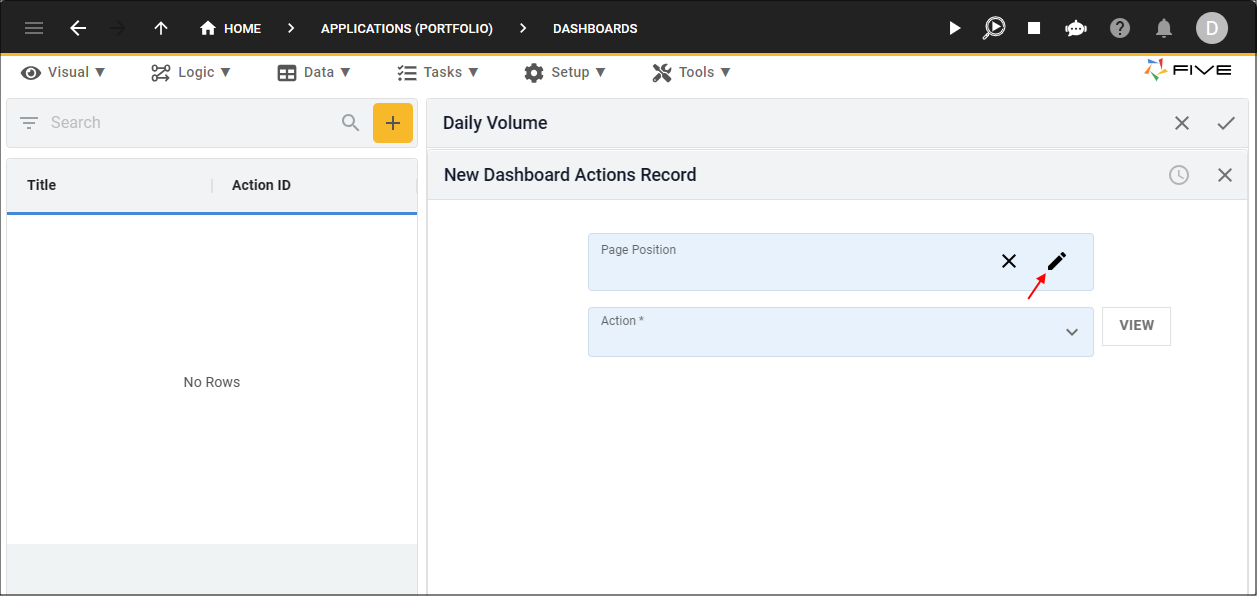
Figure 5 - Edit button
8. Select A1 in the Grid Picker.
9. Click the Save button in the Grid Picker app bar.
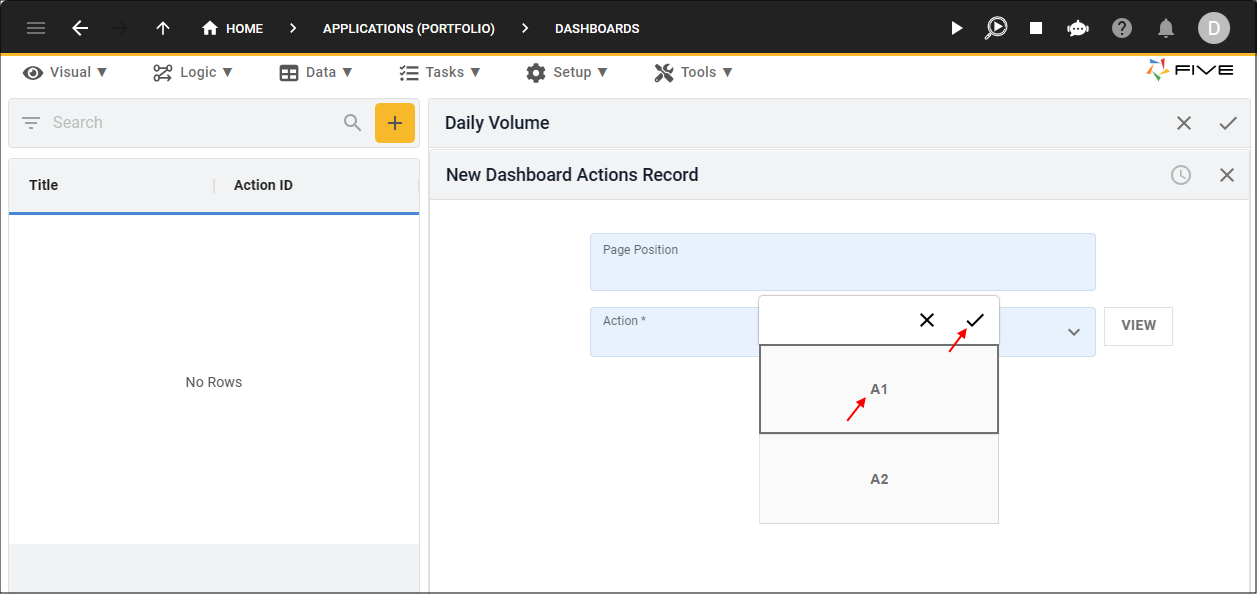
Figure 6 - Select A1 position
10. Click the lookup icon in the Action field and select DailyVolume (Chart).
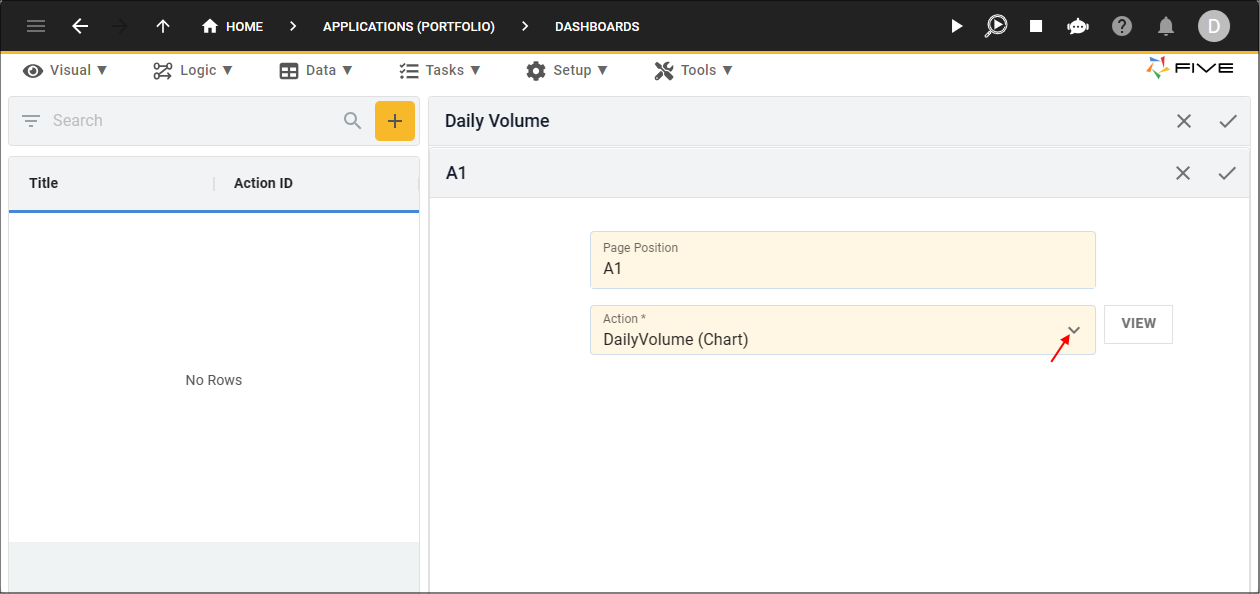
Figure 7 - Add the Daily Volume chart
11. Click the Save button in the form app bar.
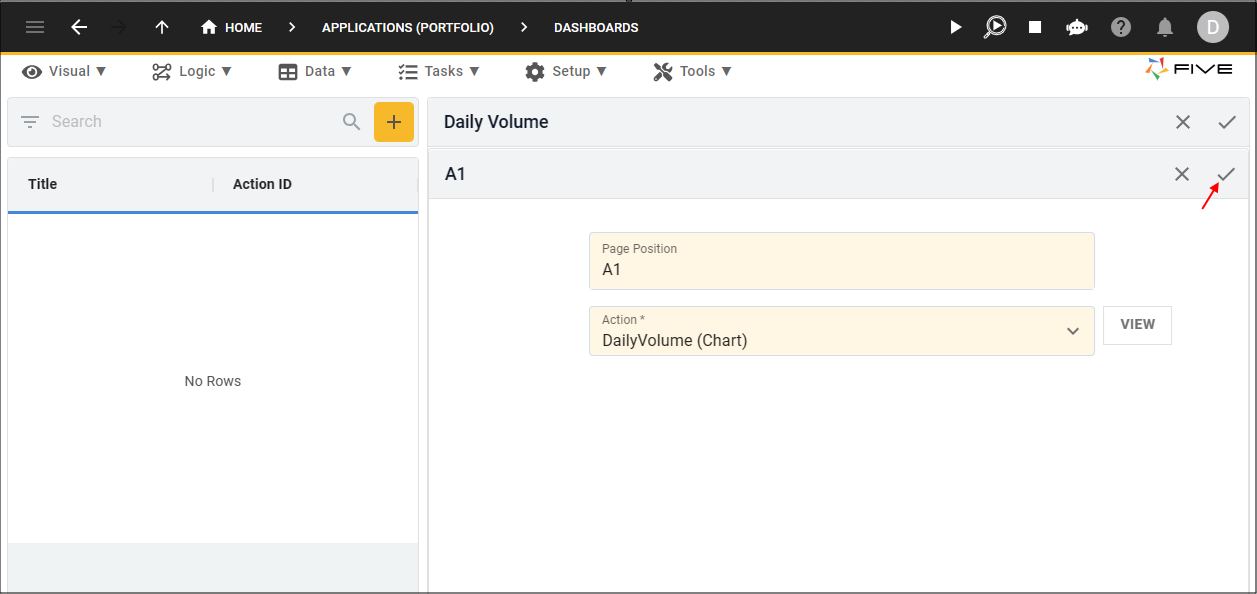
Figure 8 - Save button
12. Click the Add Actions button.
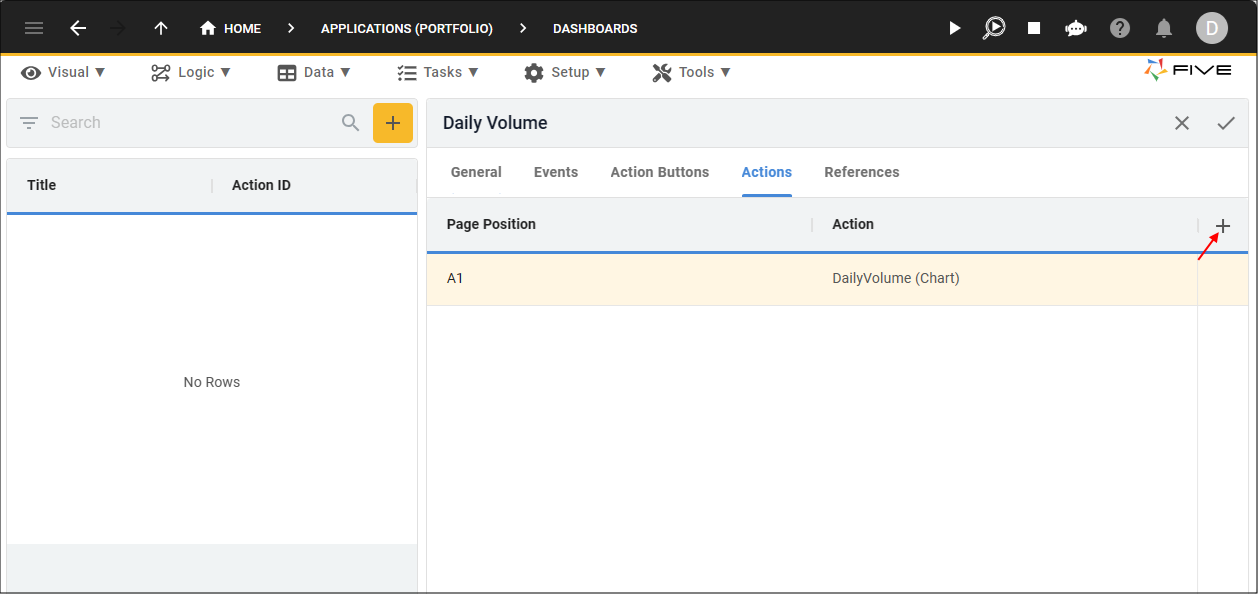
Figure 9 - Add Actions button
13. Click the Edit button in the Page Position field.
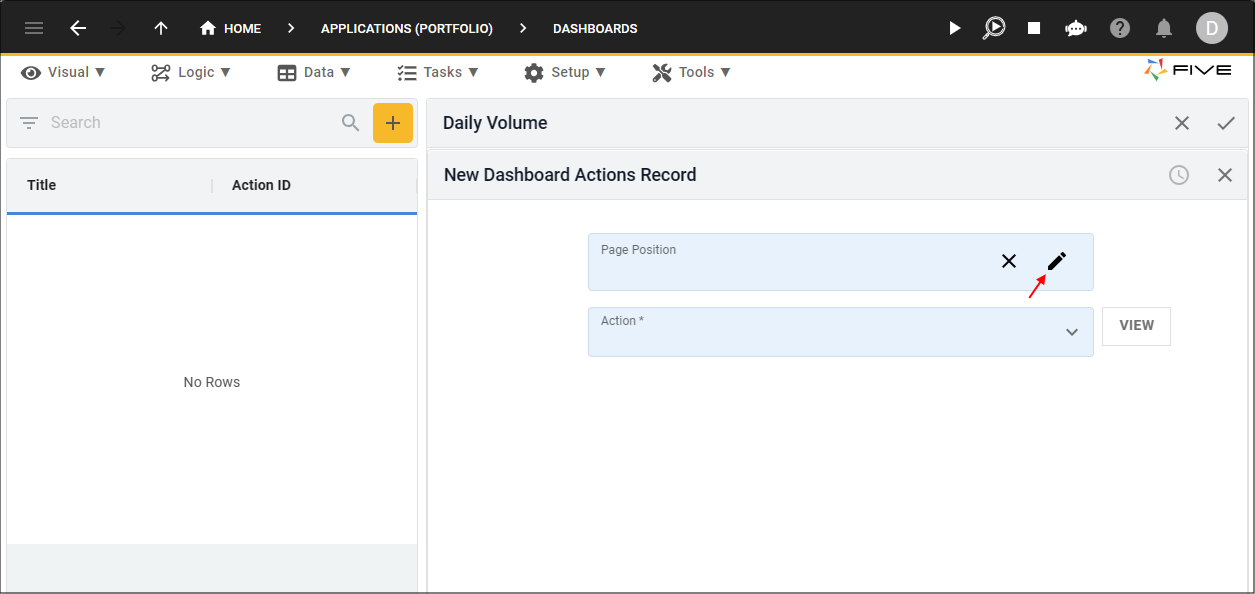
Figure 10 - Edit button
14. Select A2 in the Grid Picker.
15. Click the Save button in the Grid Picker app bar.
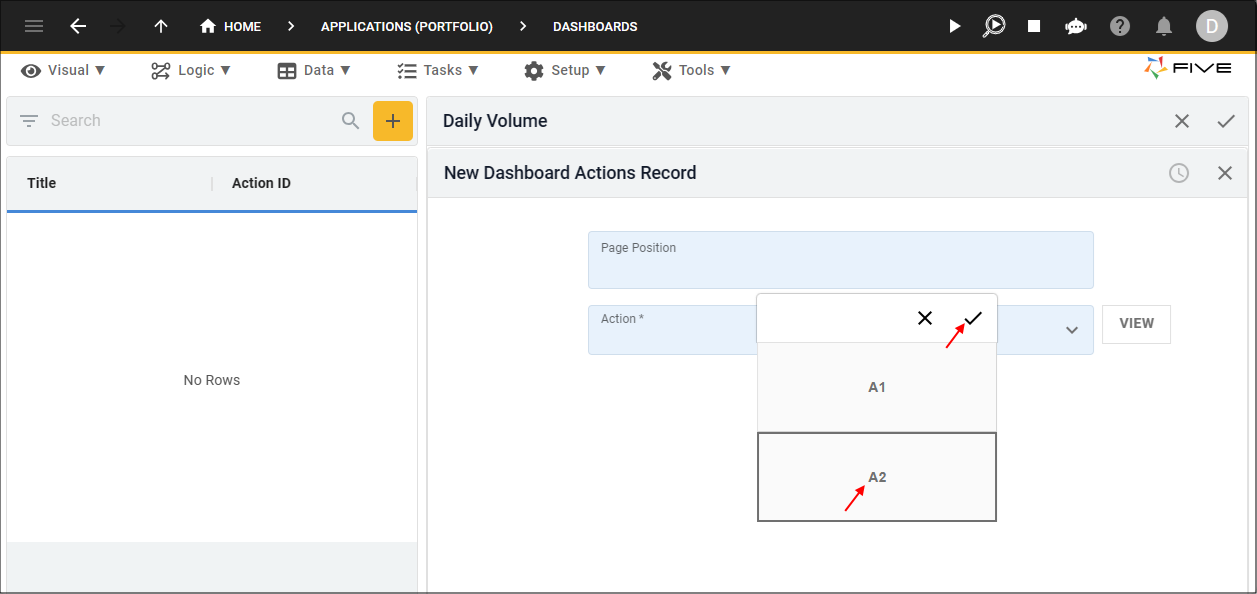
Figure 11 - Select A2 position
16. Click the lookup icon in the Action field and select DailyVolumeDataView (DataView).
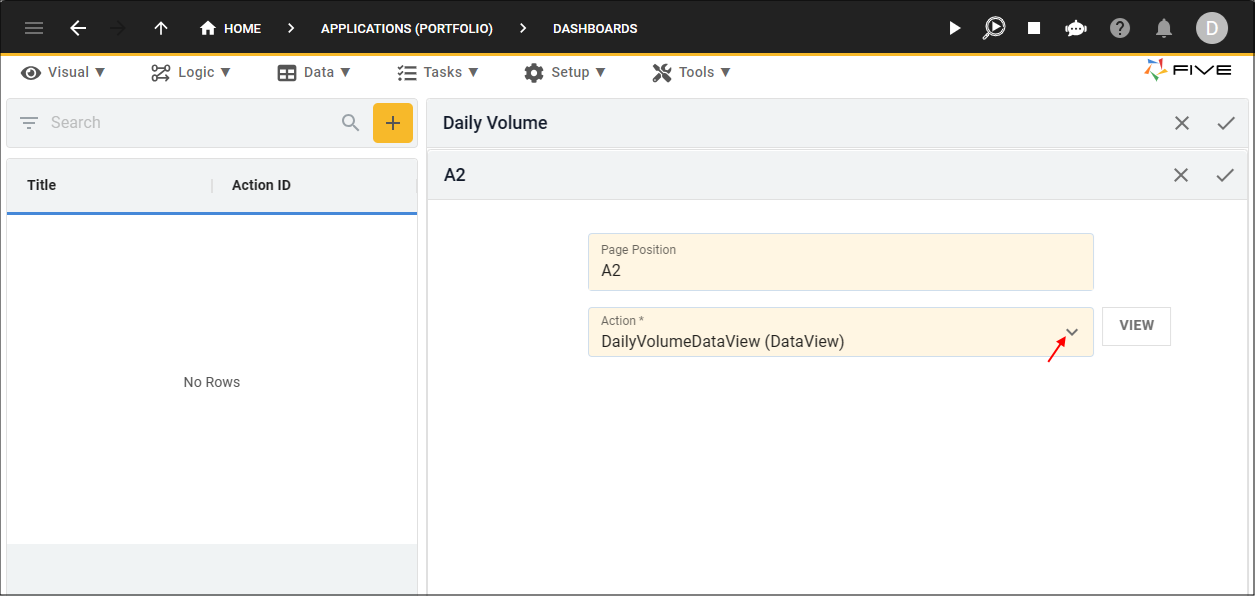
Figure 12 - Add the Daily Volume data view
17. Click the Save button in the form app bar.
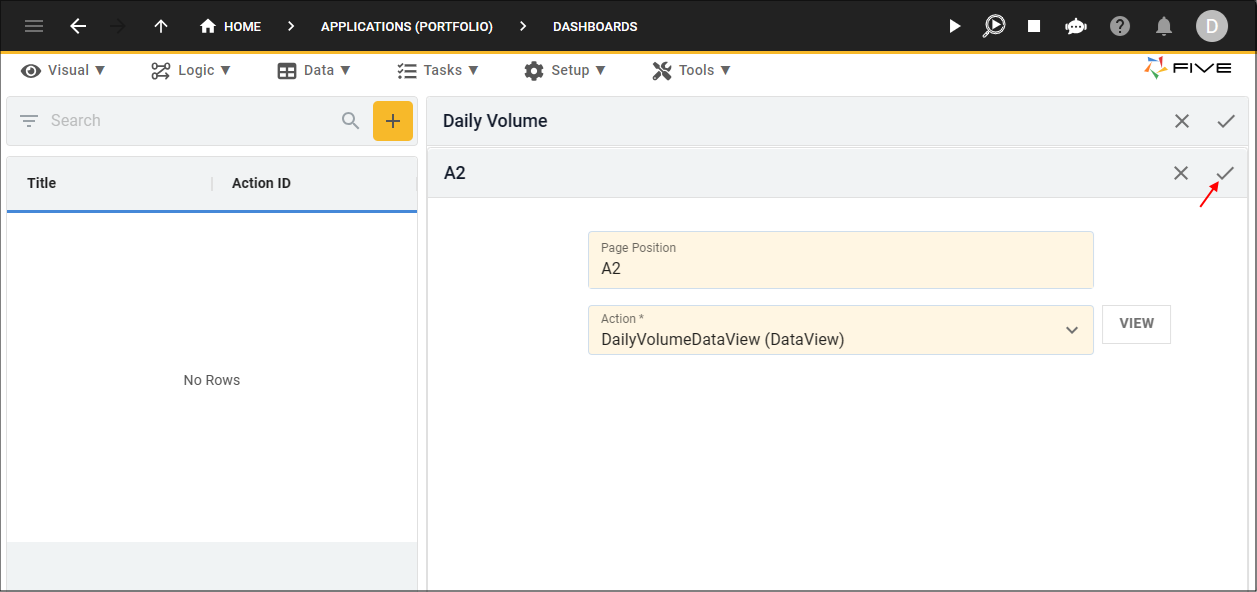
Figure 13 - Save button
18. Click the Save button in the form app bar above the list.
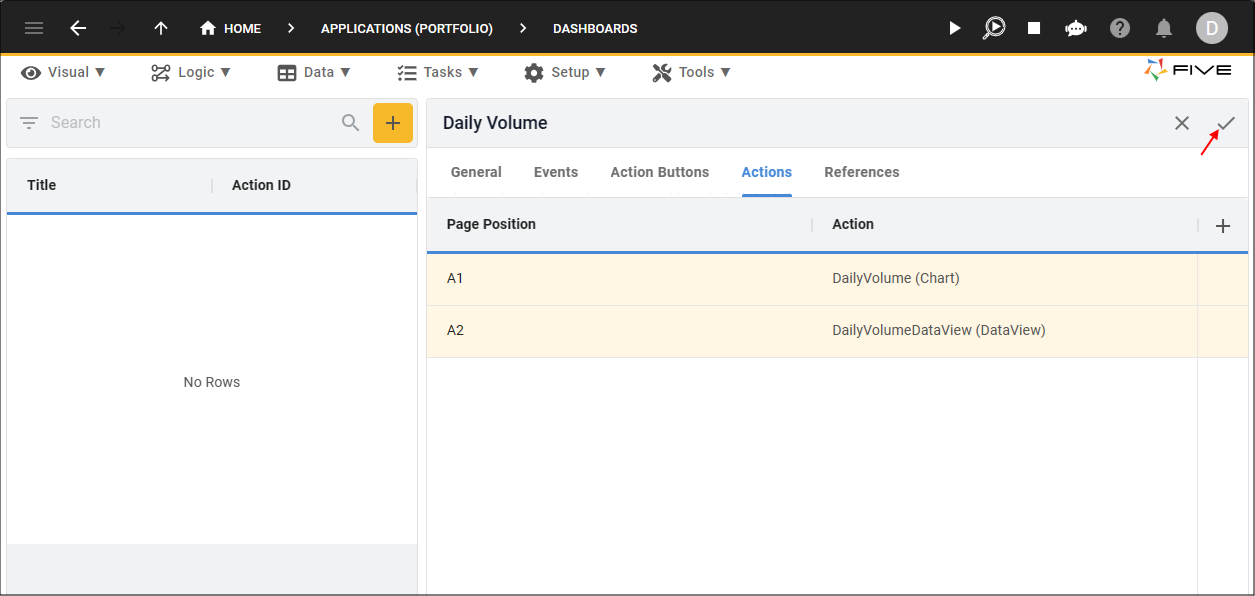
Figure 14 - Save button