Create a Dashboard
Last updated 19/06/2024
The following instructions show you how to add a dashboard. Once you have added your dashboard, you will need to create a menu item and attach the dashboard record to make the dashboard available in your application.
Add a Dashboard
1. Navigate to the Dashboards view by selecting Visual in the menu and Dashboards in the sub-menu.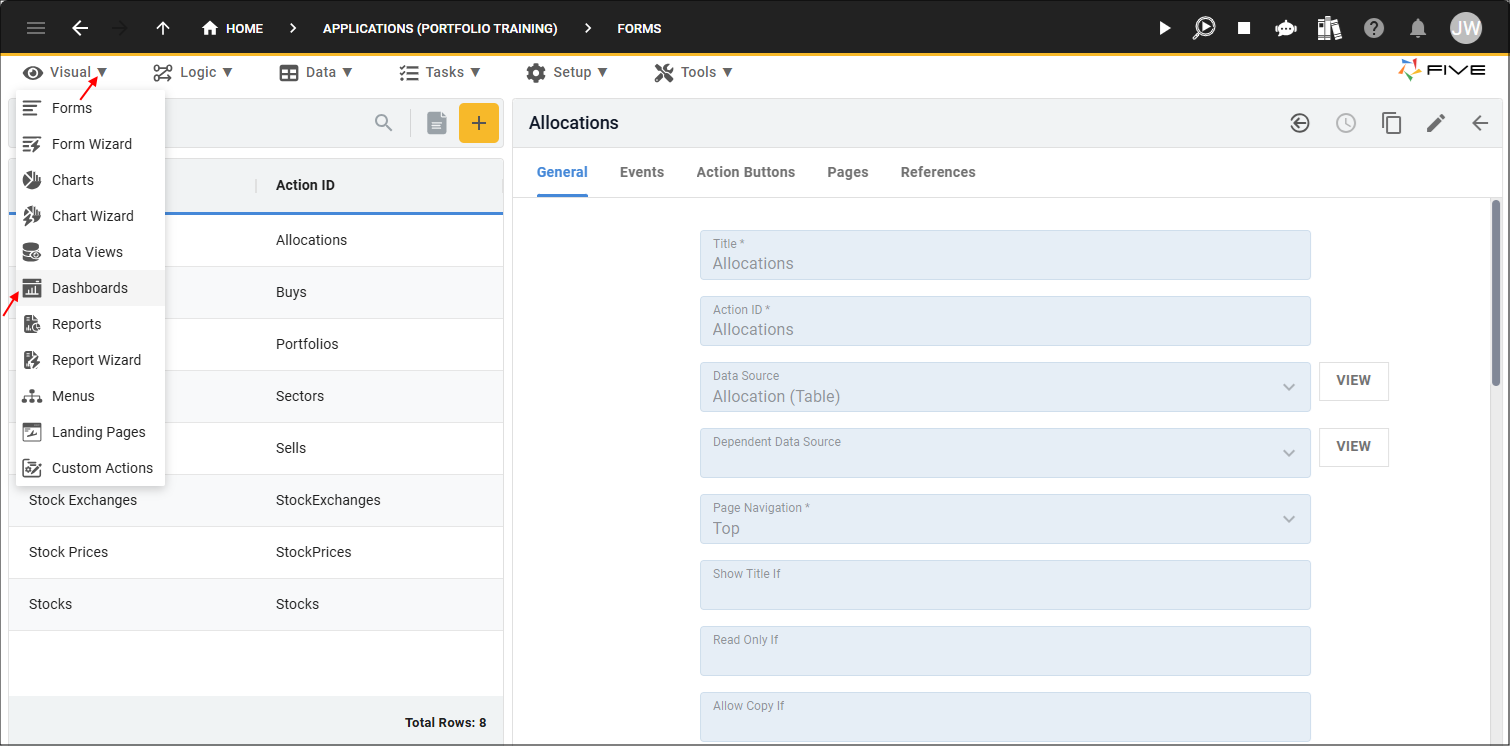
Figure 1 - Dashboards menu item
2. Click the Add Item button and give your dashboard a title.
info
You will need to set your grid for the amount of actions you are going to add to your dashboard. It does not matter if you have more grid positions than actions, Five will dynamically fit your actions so there is no white space left on your dashboard.
3. Type the number of required columns in the Columns field.
4. Type the number of required rows in the Rows field.

Figure 2 - Add a dashboard
5. Click the Actions tab.
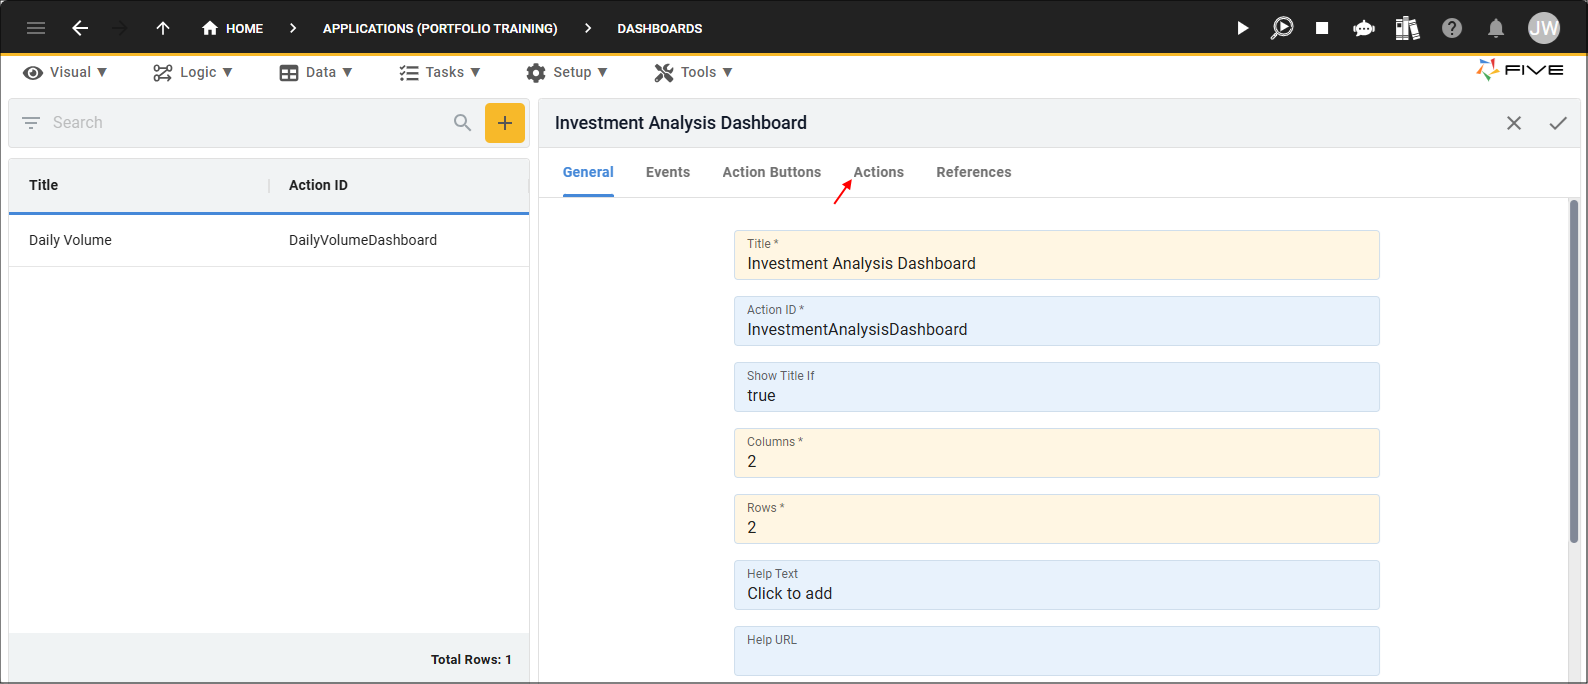
Figure 3 - Actions tab
6. Click the Add Actions button.

Figure 4 - Add Actions button
7. Click the Edit button in the Page Position field.
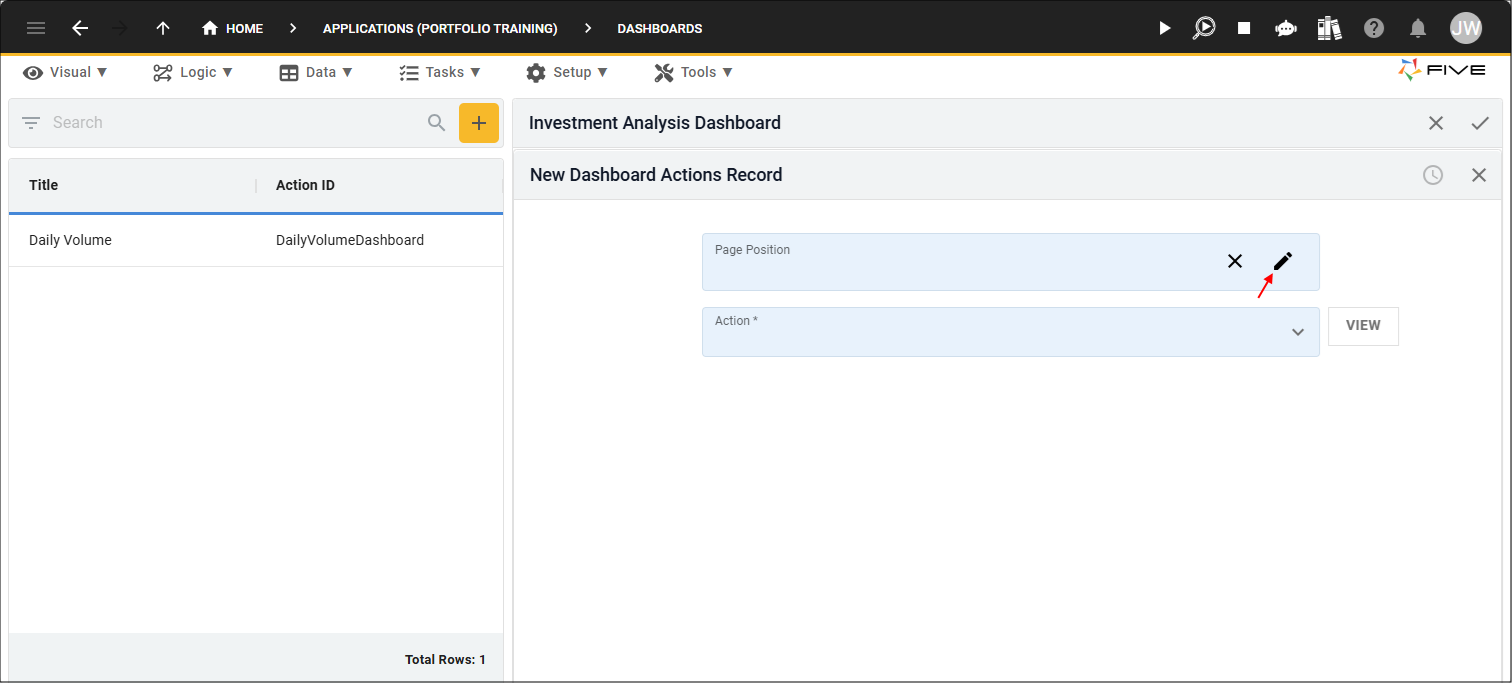
Figure 5 - Edit button
8. Select the position you want your action to be displayed.
9. Click the Save button in the grid picker app bar.
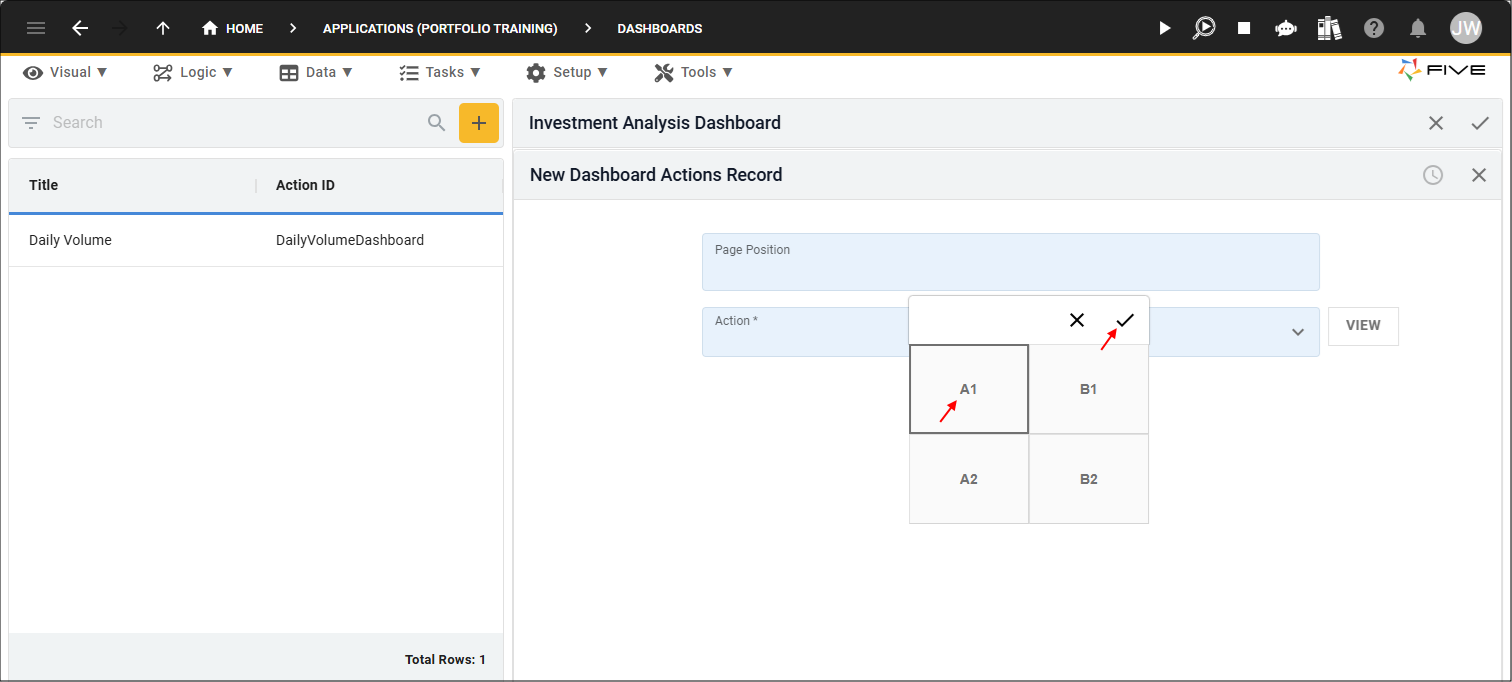
Figure 6 - Save button
10. Select an action in the Action field.
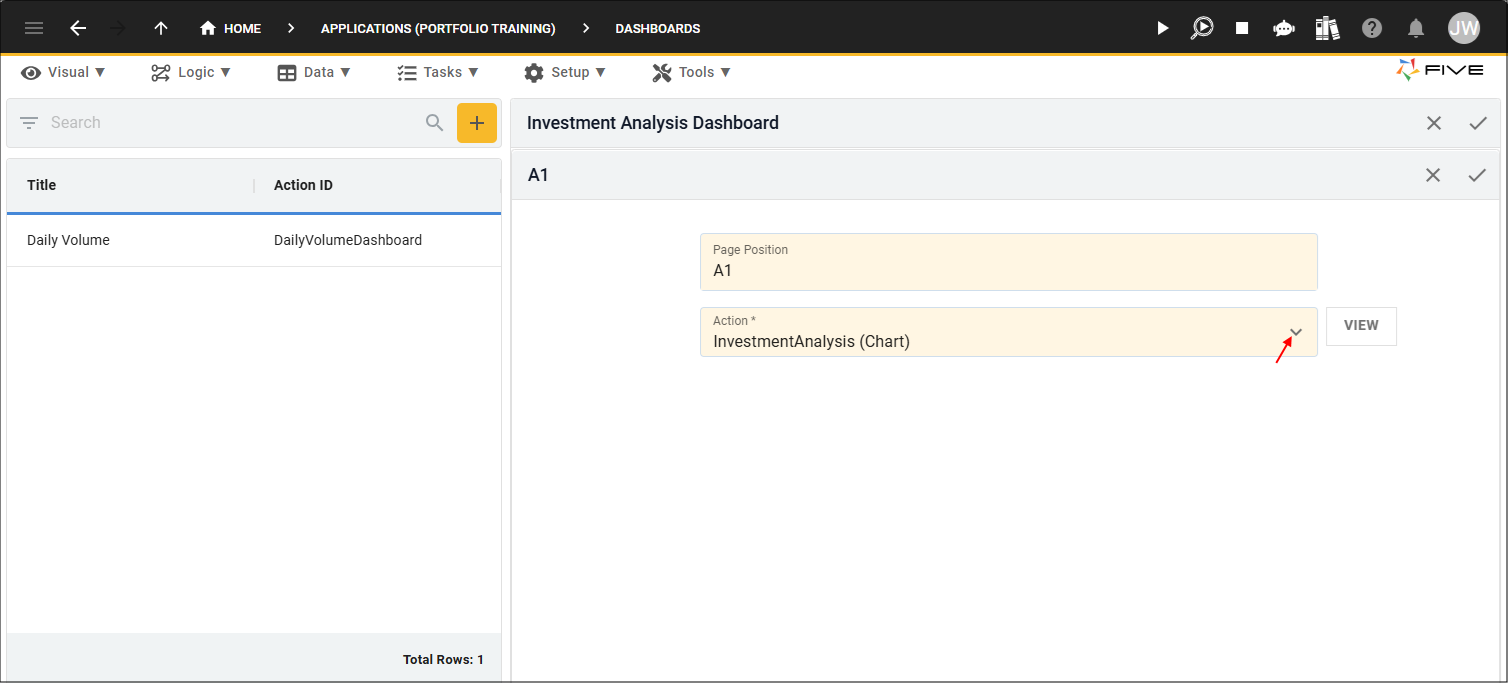
Figure 7 - Select an action
11. Click the Save button in the form app bar.
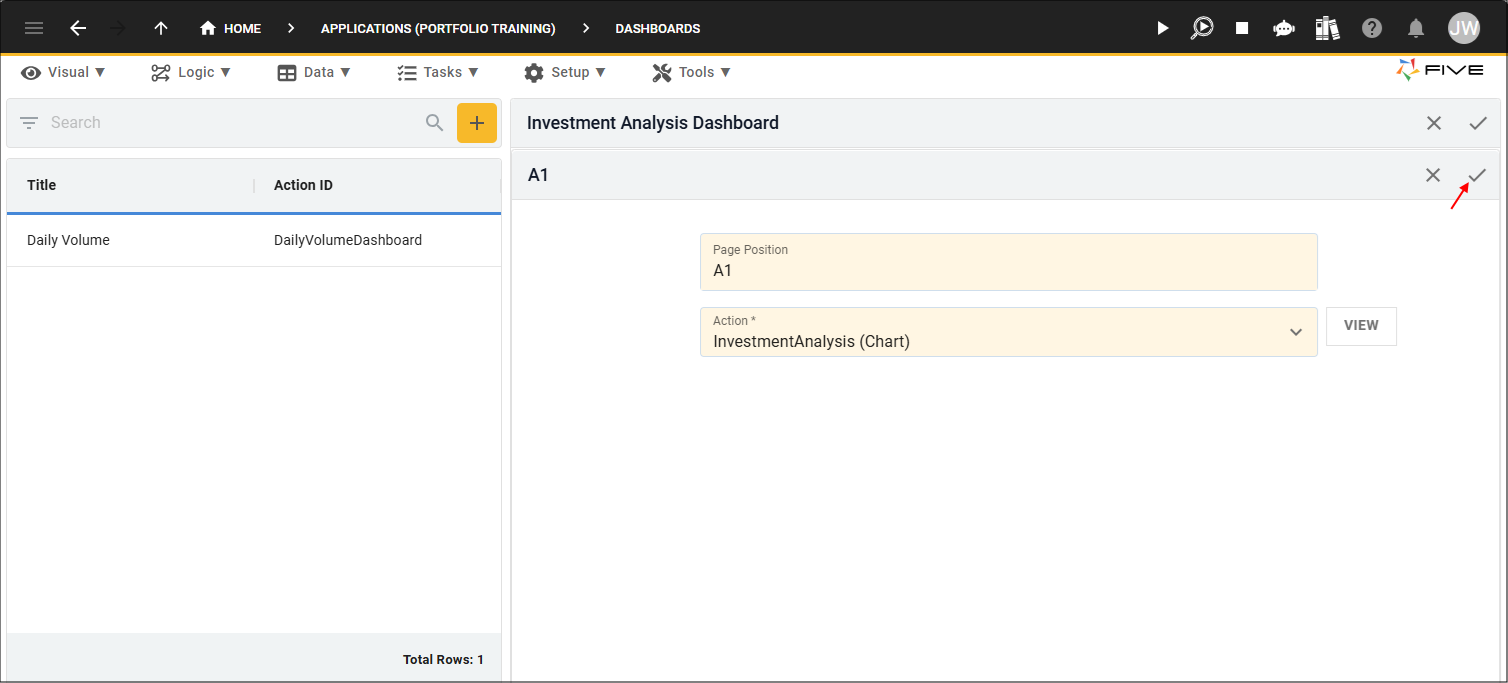
Figure 8 - Save button
12. Continue to add all the actions your dashboard needs by clicking the Add Actions button each time.
13. On completion click the Save button in the form app bar.
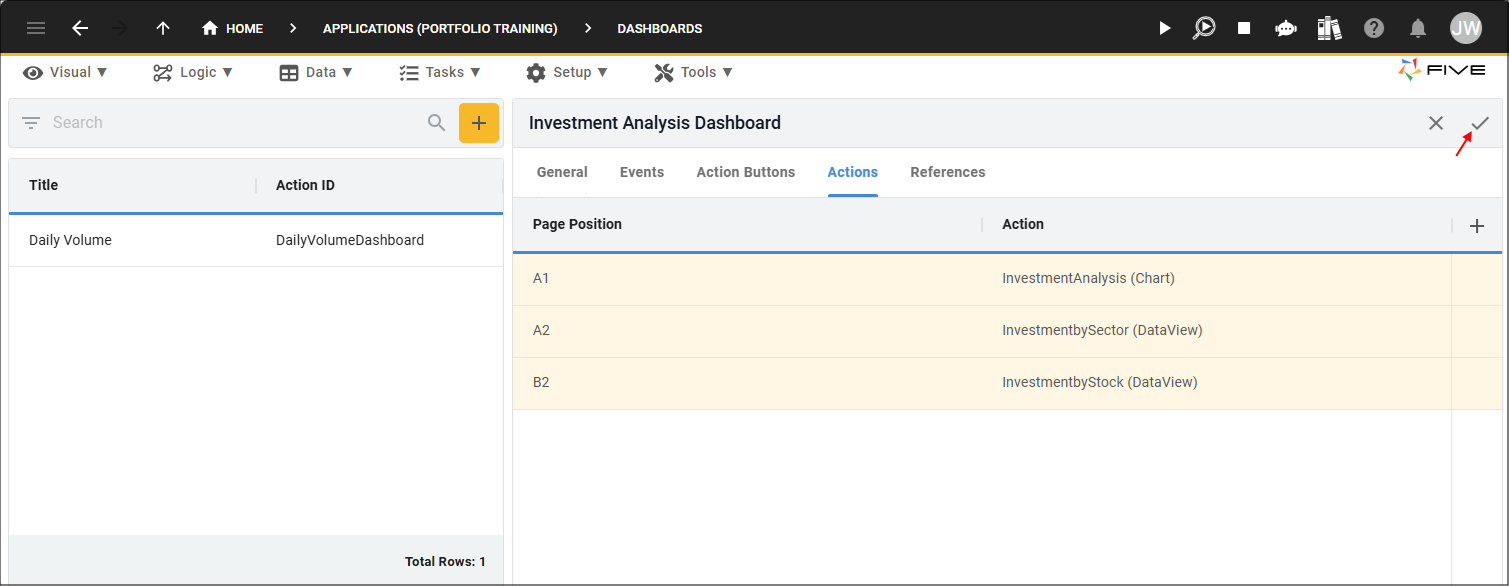
Figure 9 - Save button