Add a Join Page
Last updated 10/04/2024
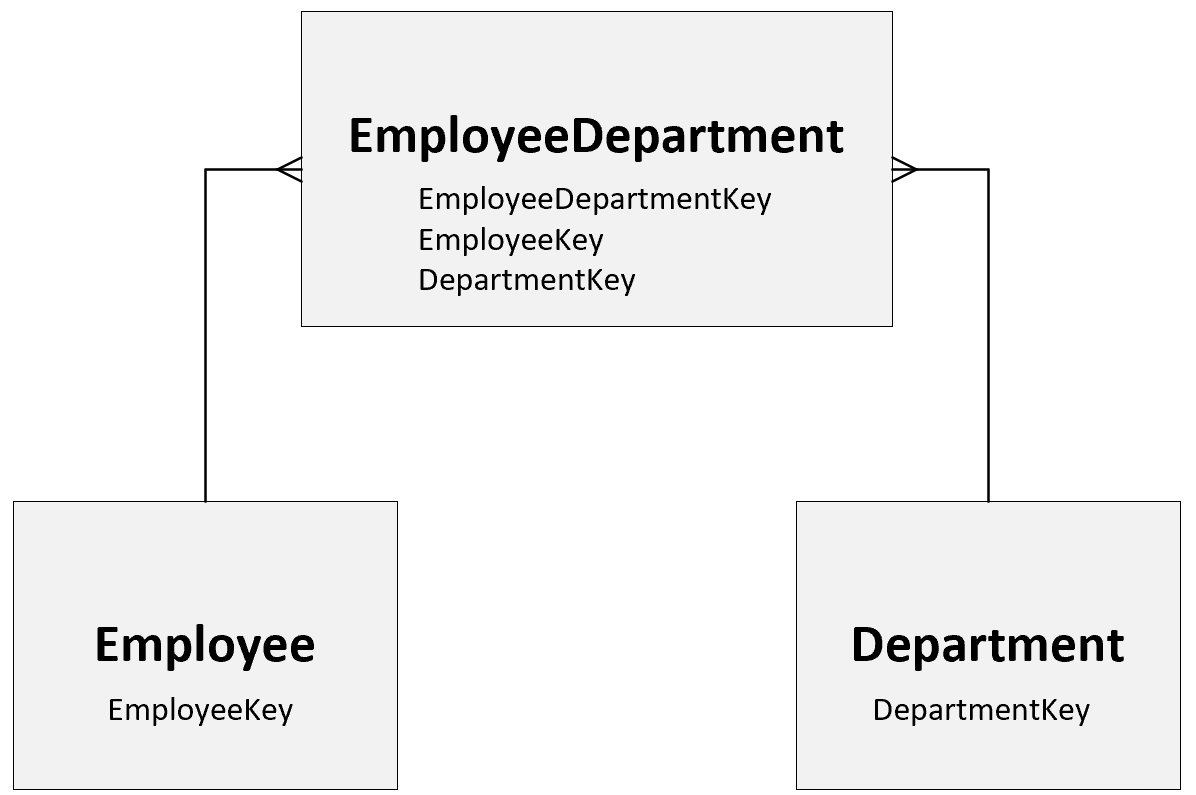
To add a Join page type you will need to have a many-to-many relationship in your database. A many-to-many relationship occurs when multiple records in a table are associated with multiple records in another table. For example, a many-to-many relationship exists between Employee and Department: employees can work in various departments, and departments can have many employees.

A third table is required to resolve this many-to-many relationship. This acts as a middle table. The original many-to-many relationship effectively becomes two one-to-many relationships. The unique identifier (Primary Key) of the Employee and the Department tables are taken on by the middle table as foreign keys. This is represented in the diagram below.
For this example, we will create an Employees form that has a Departments join page to enable us to assign departments to an employee.
Add a Join Page Type
Add Form One (Departments)
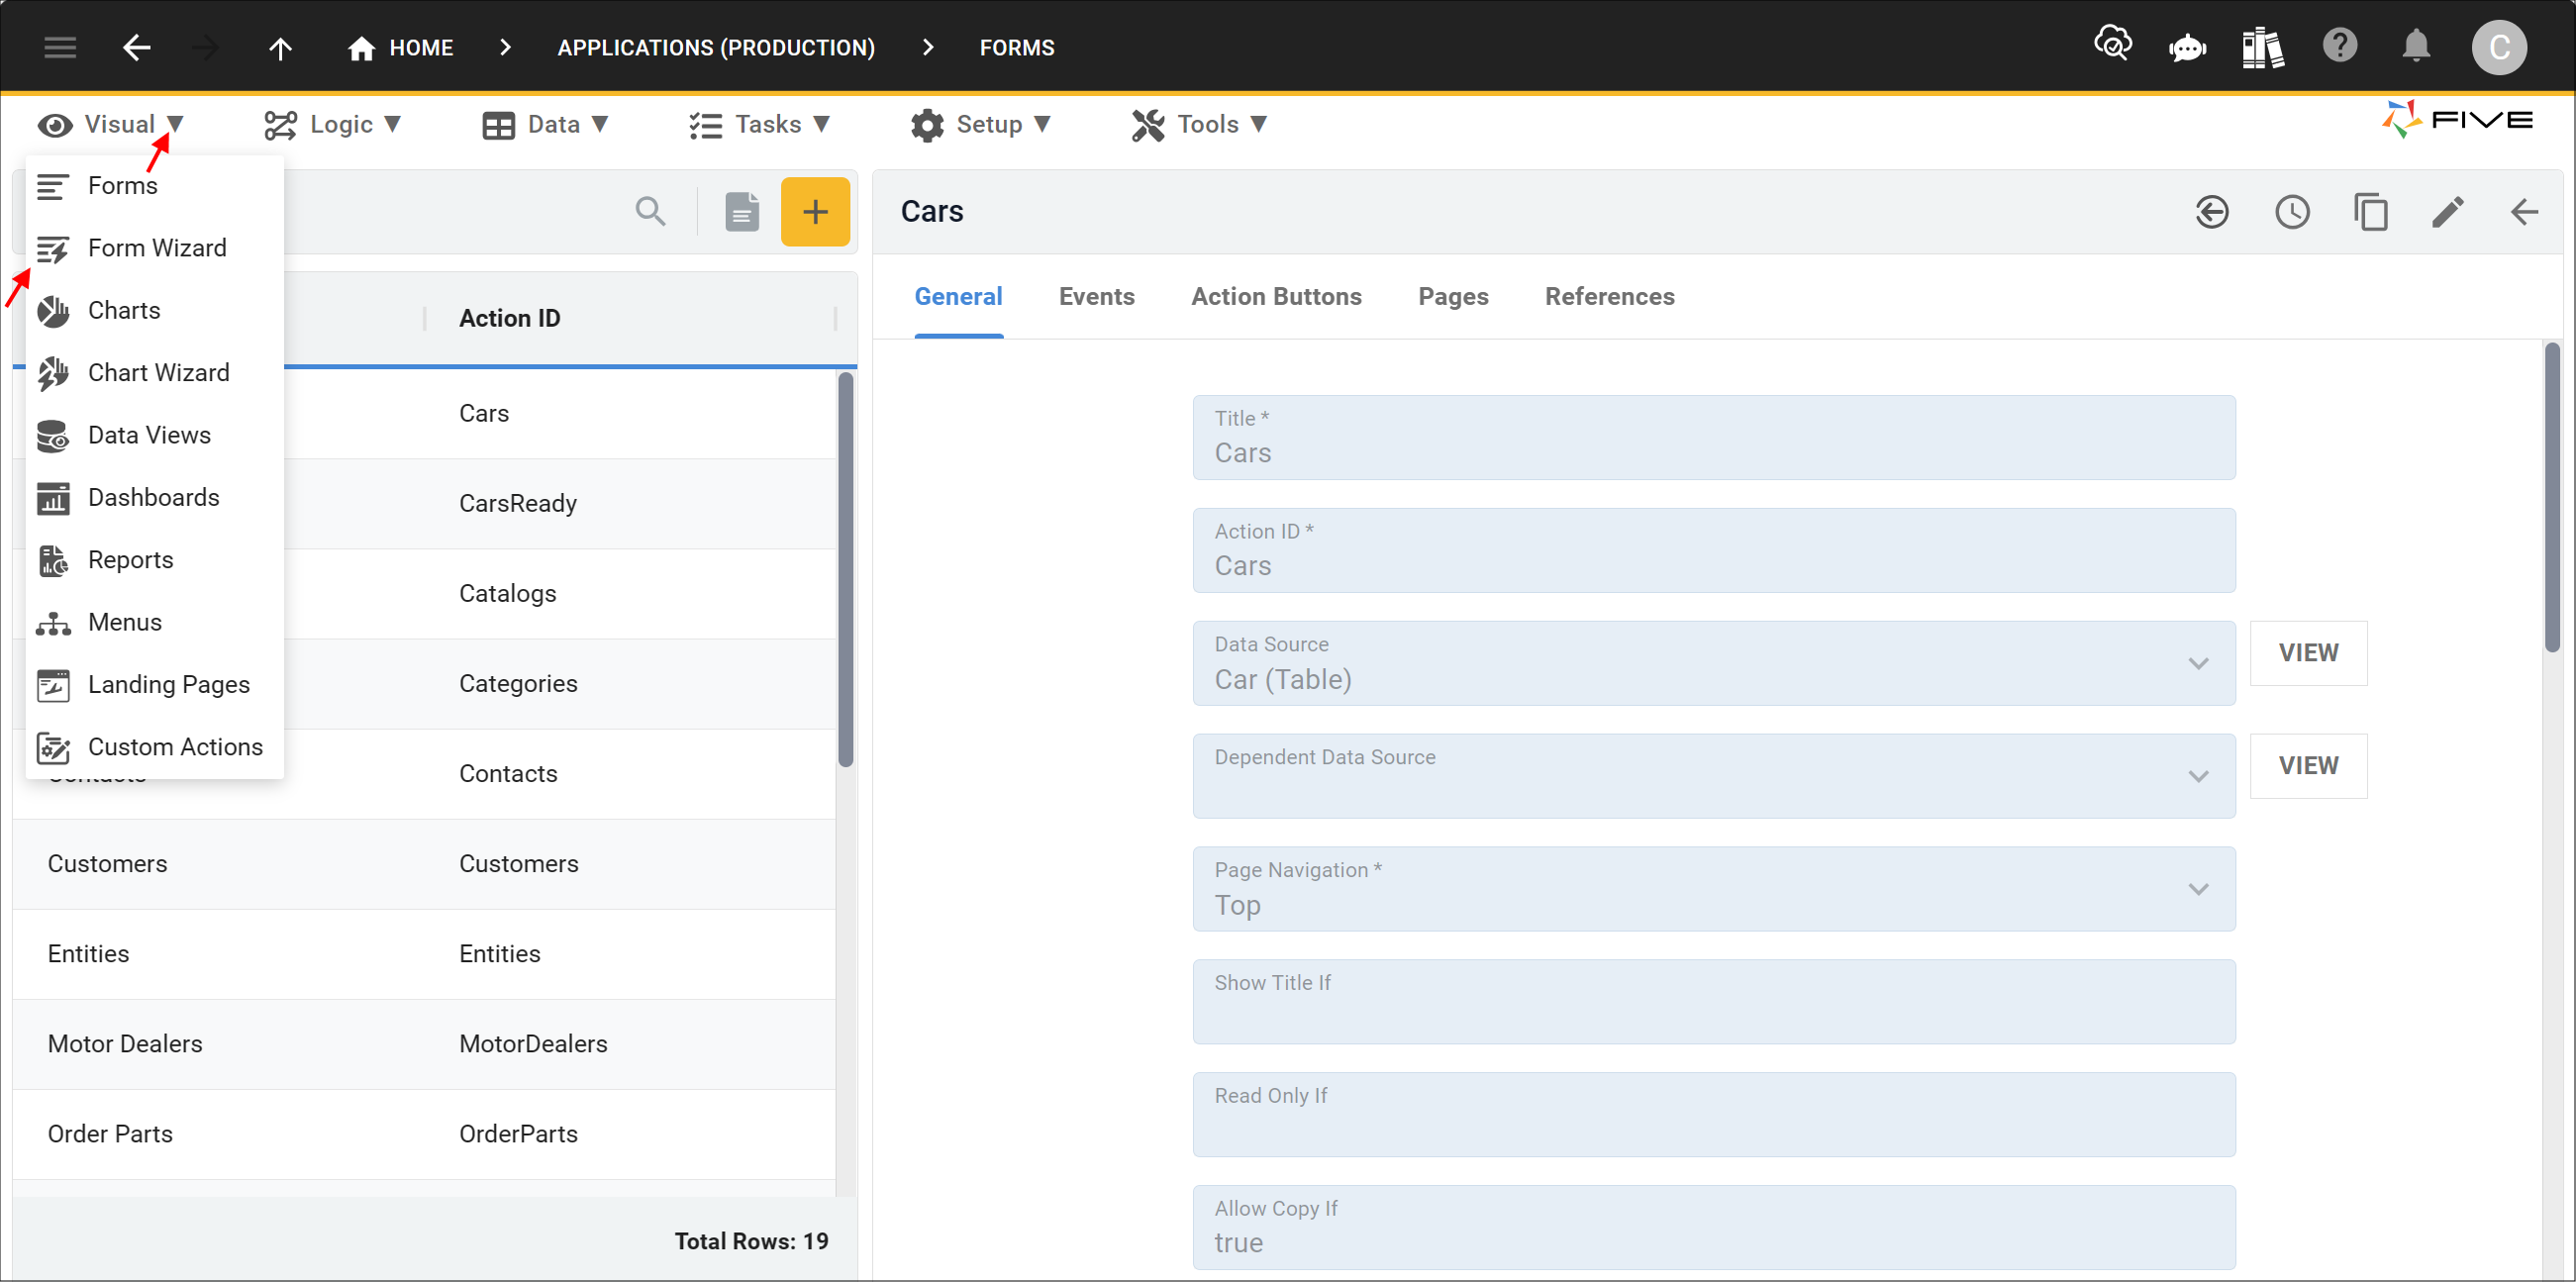
1. Select Visual in the menu and Form Wizard in the sub-menu.
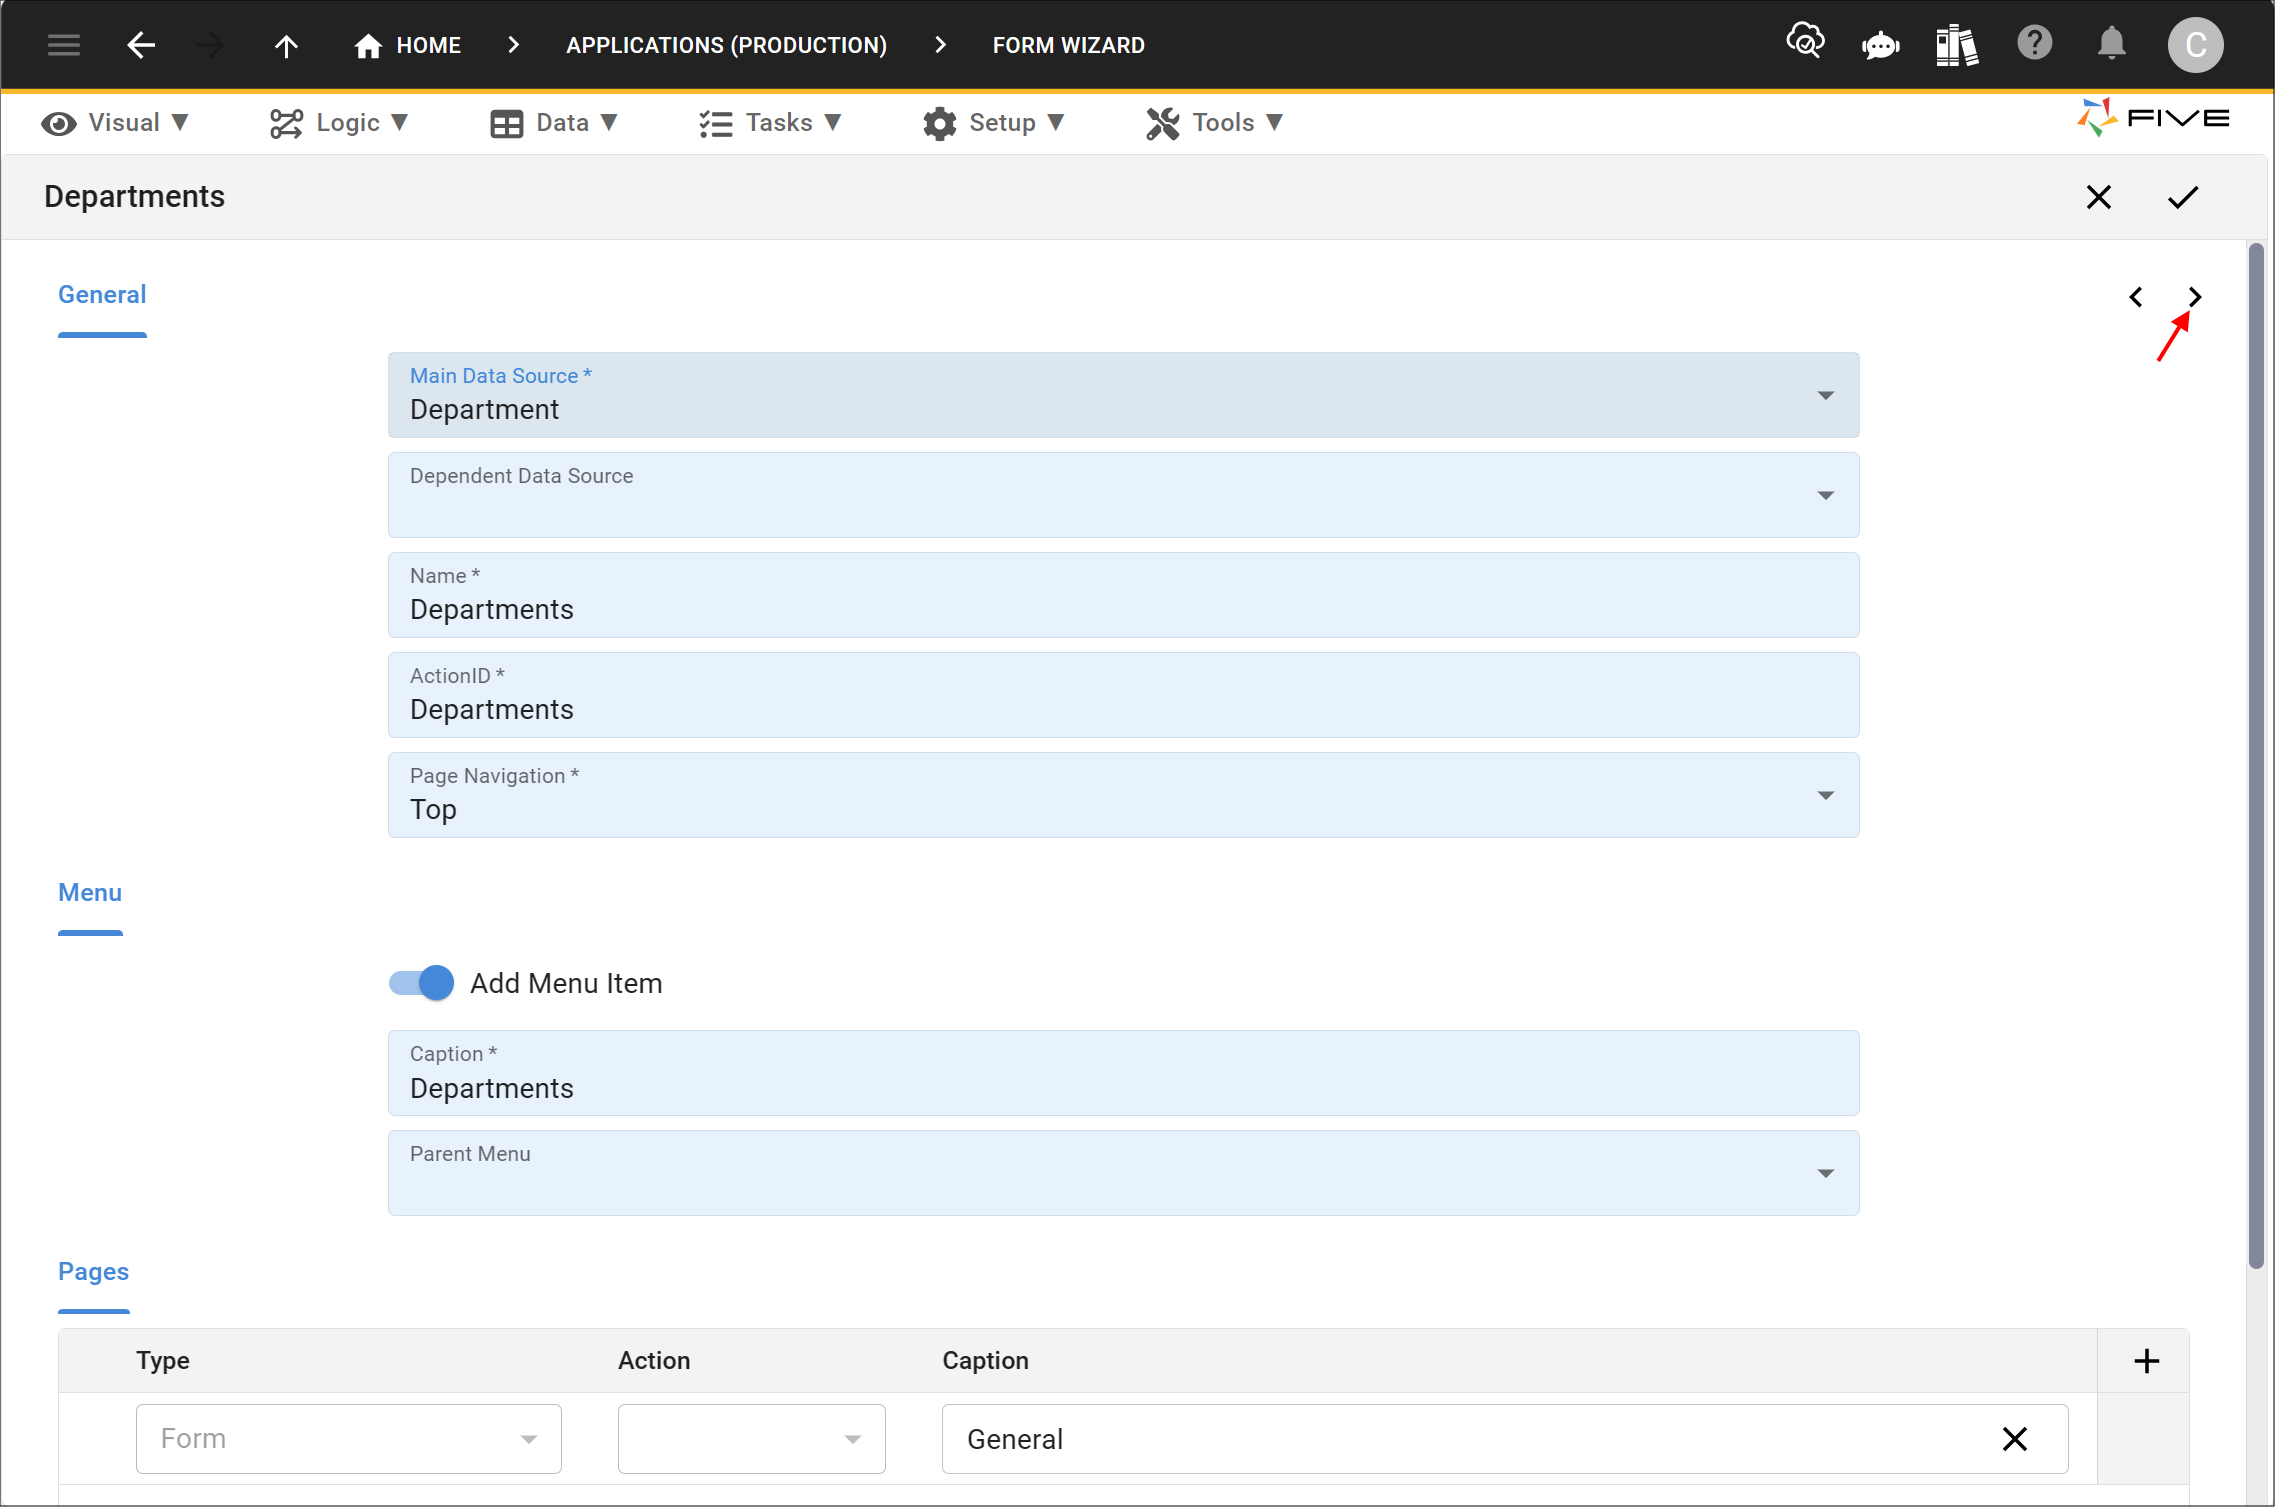
2. Select your data source (Department) in the Main Data Source field.
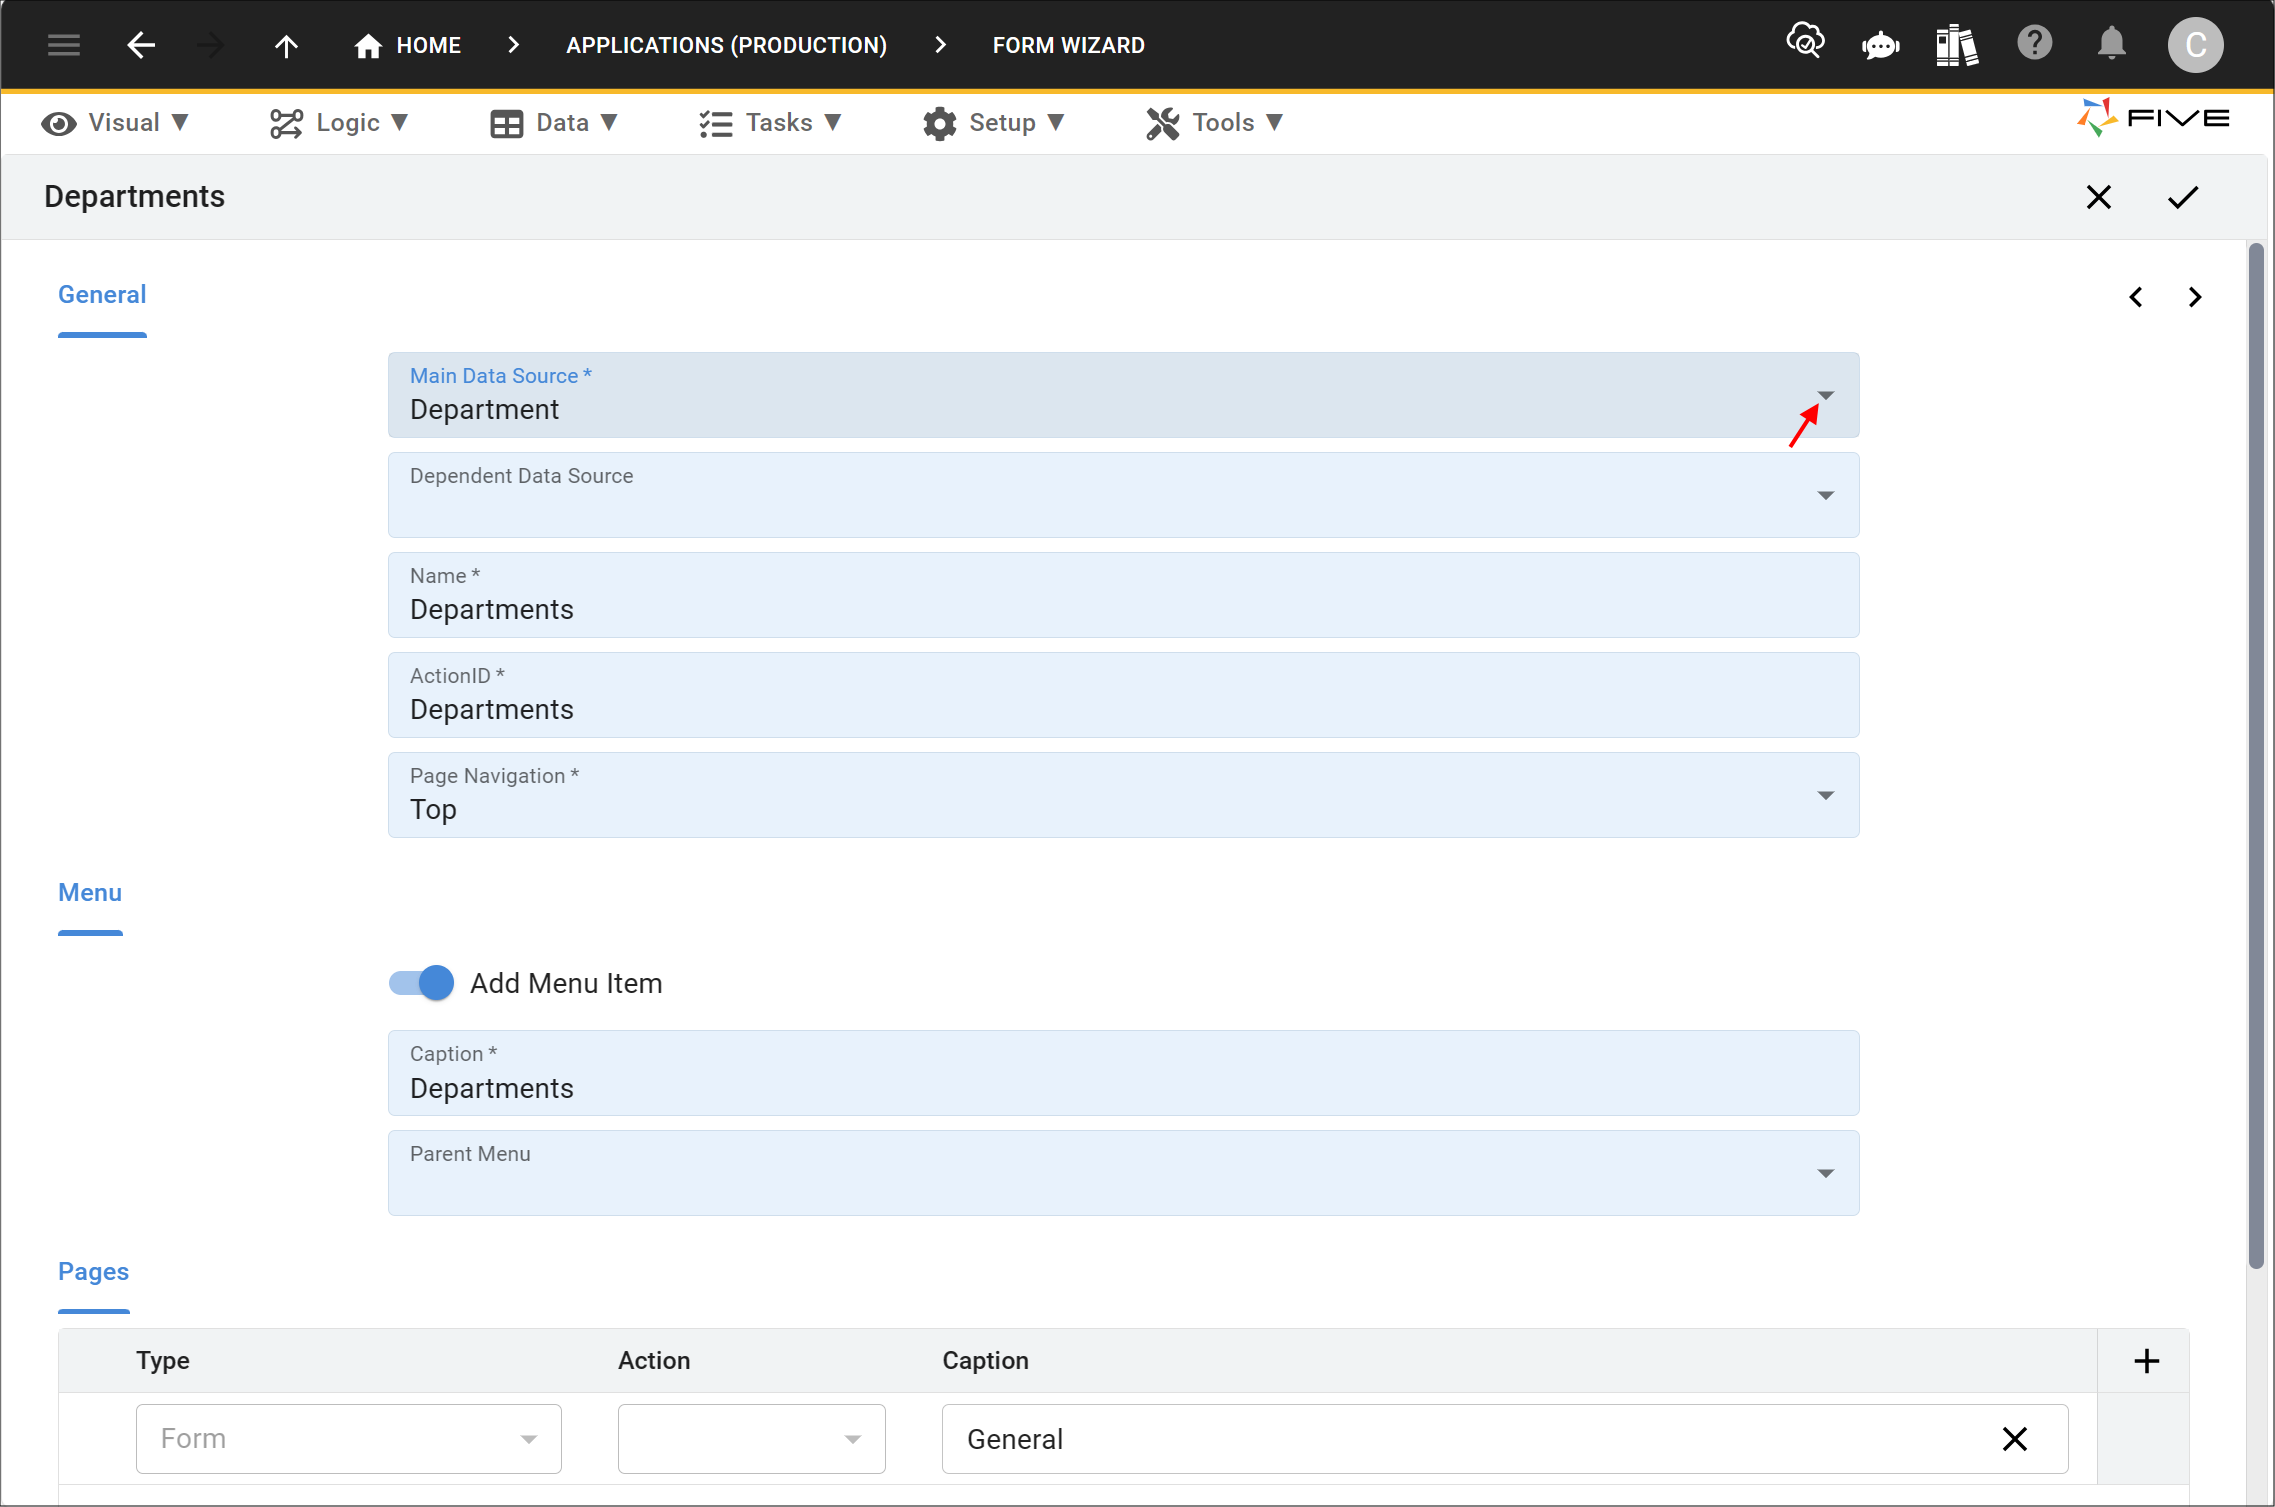
3. Click the Next button.
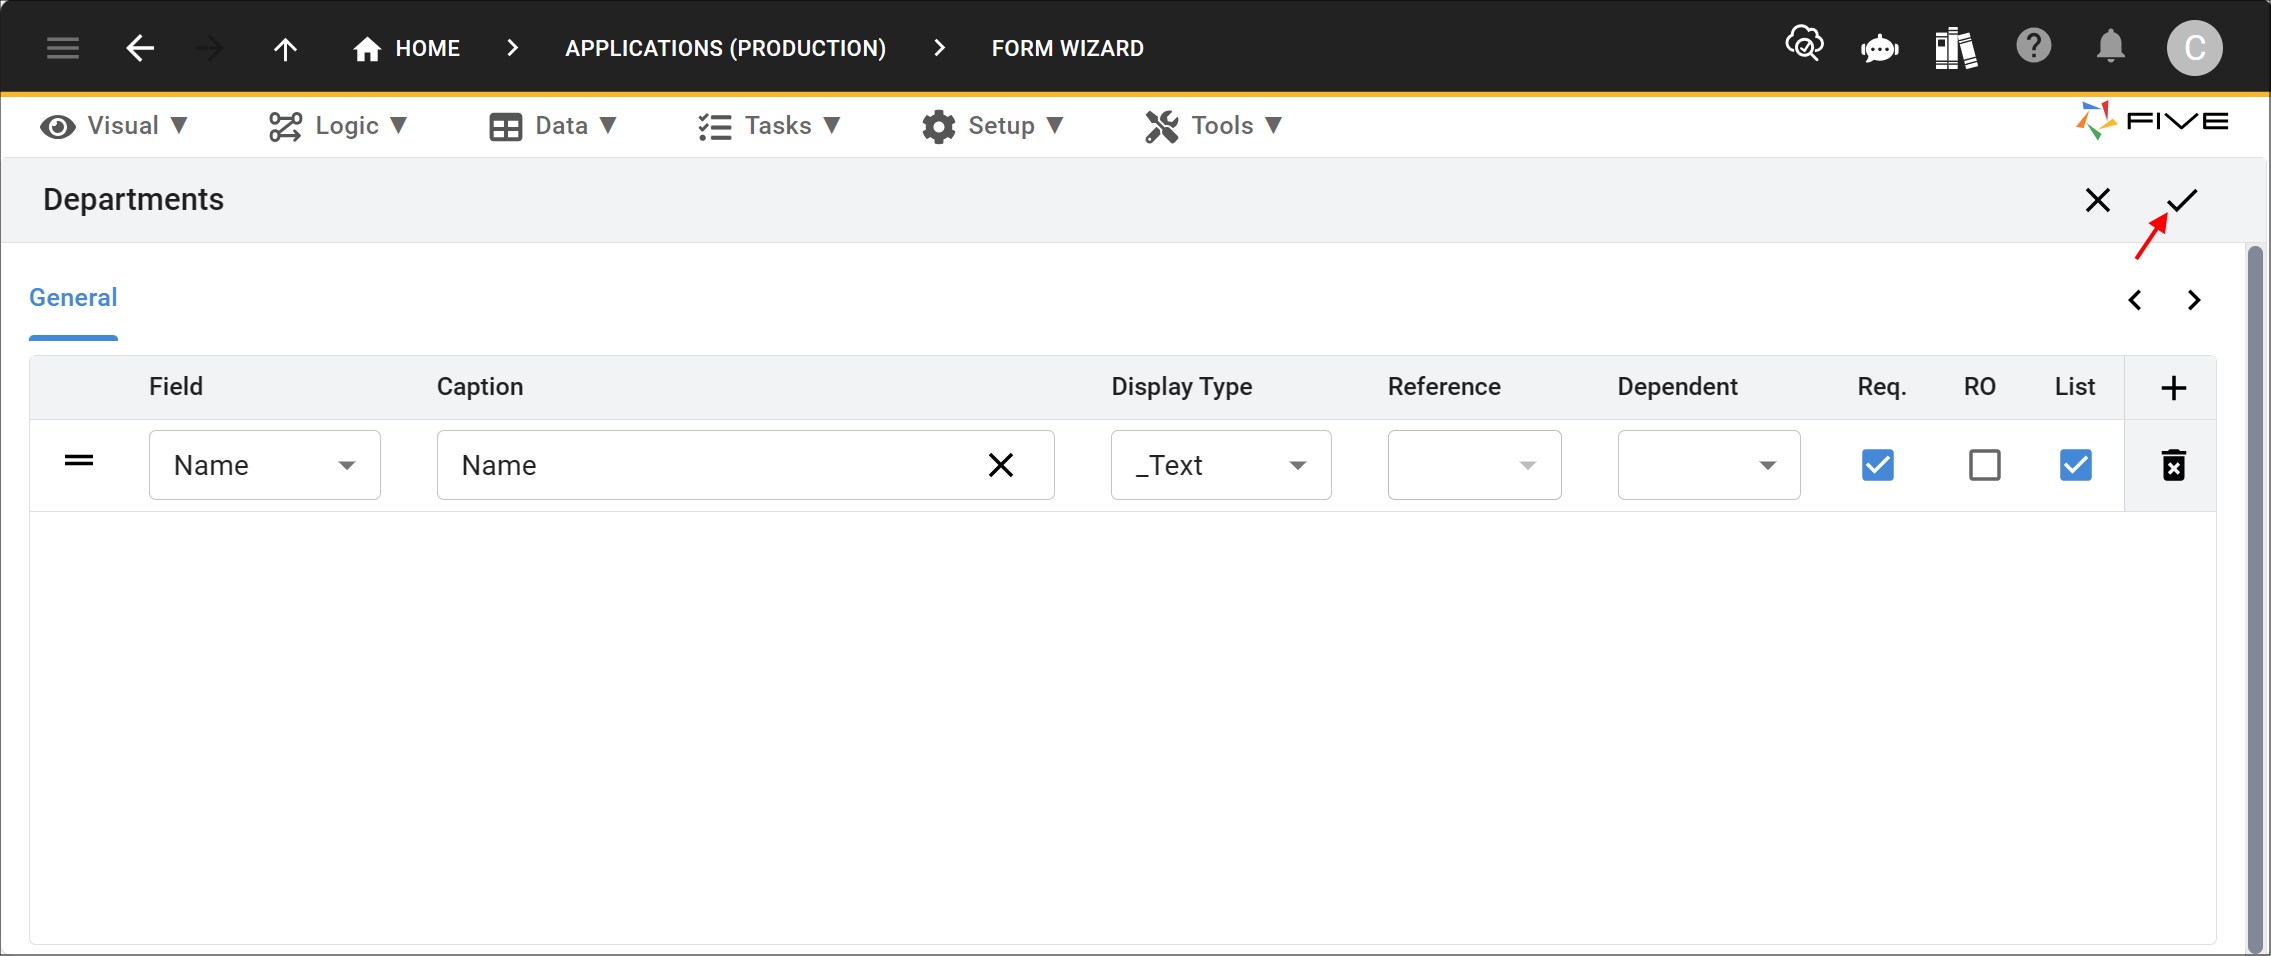
4. Perform any changes required for your form fields and click the Save button in the Form Wizard app bar.
Add Form Two (Employees)
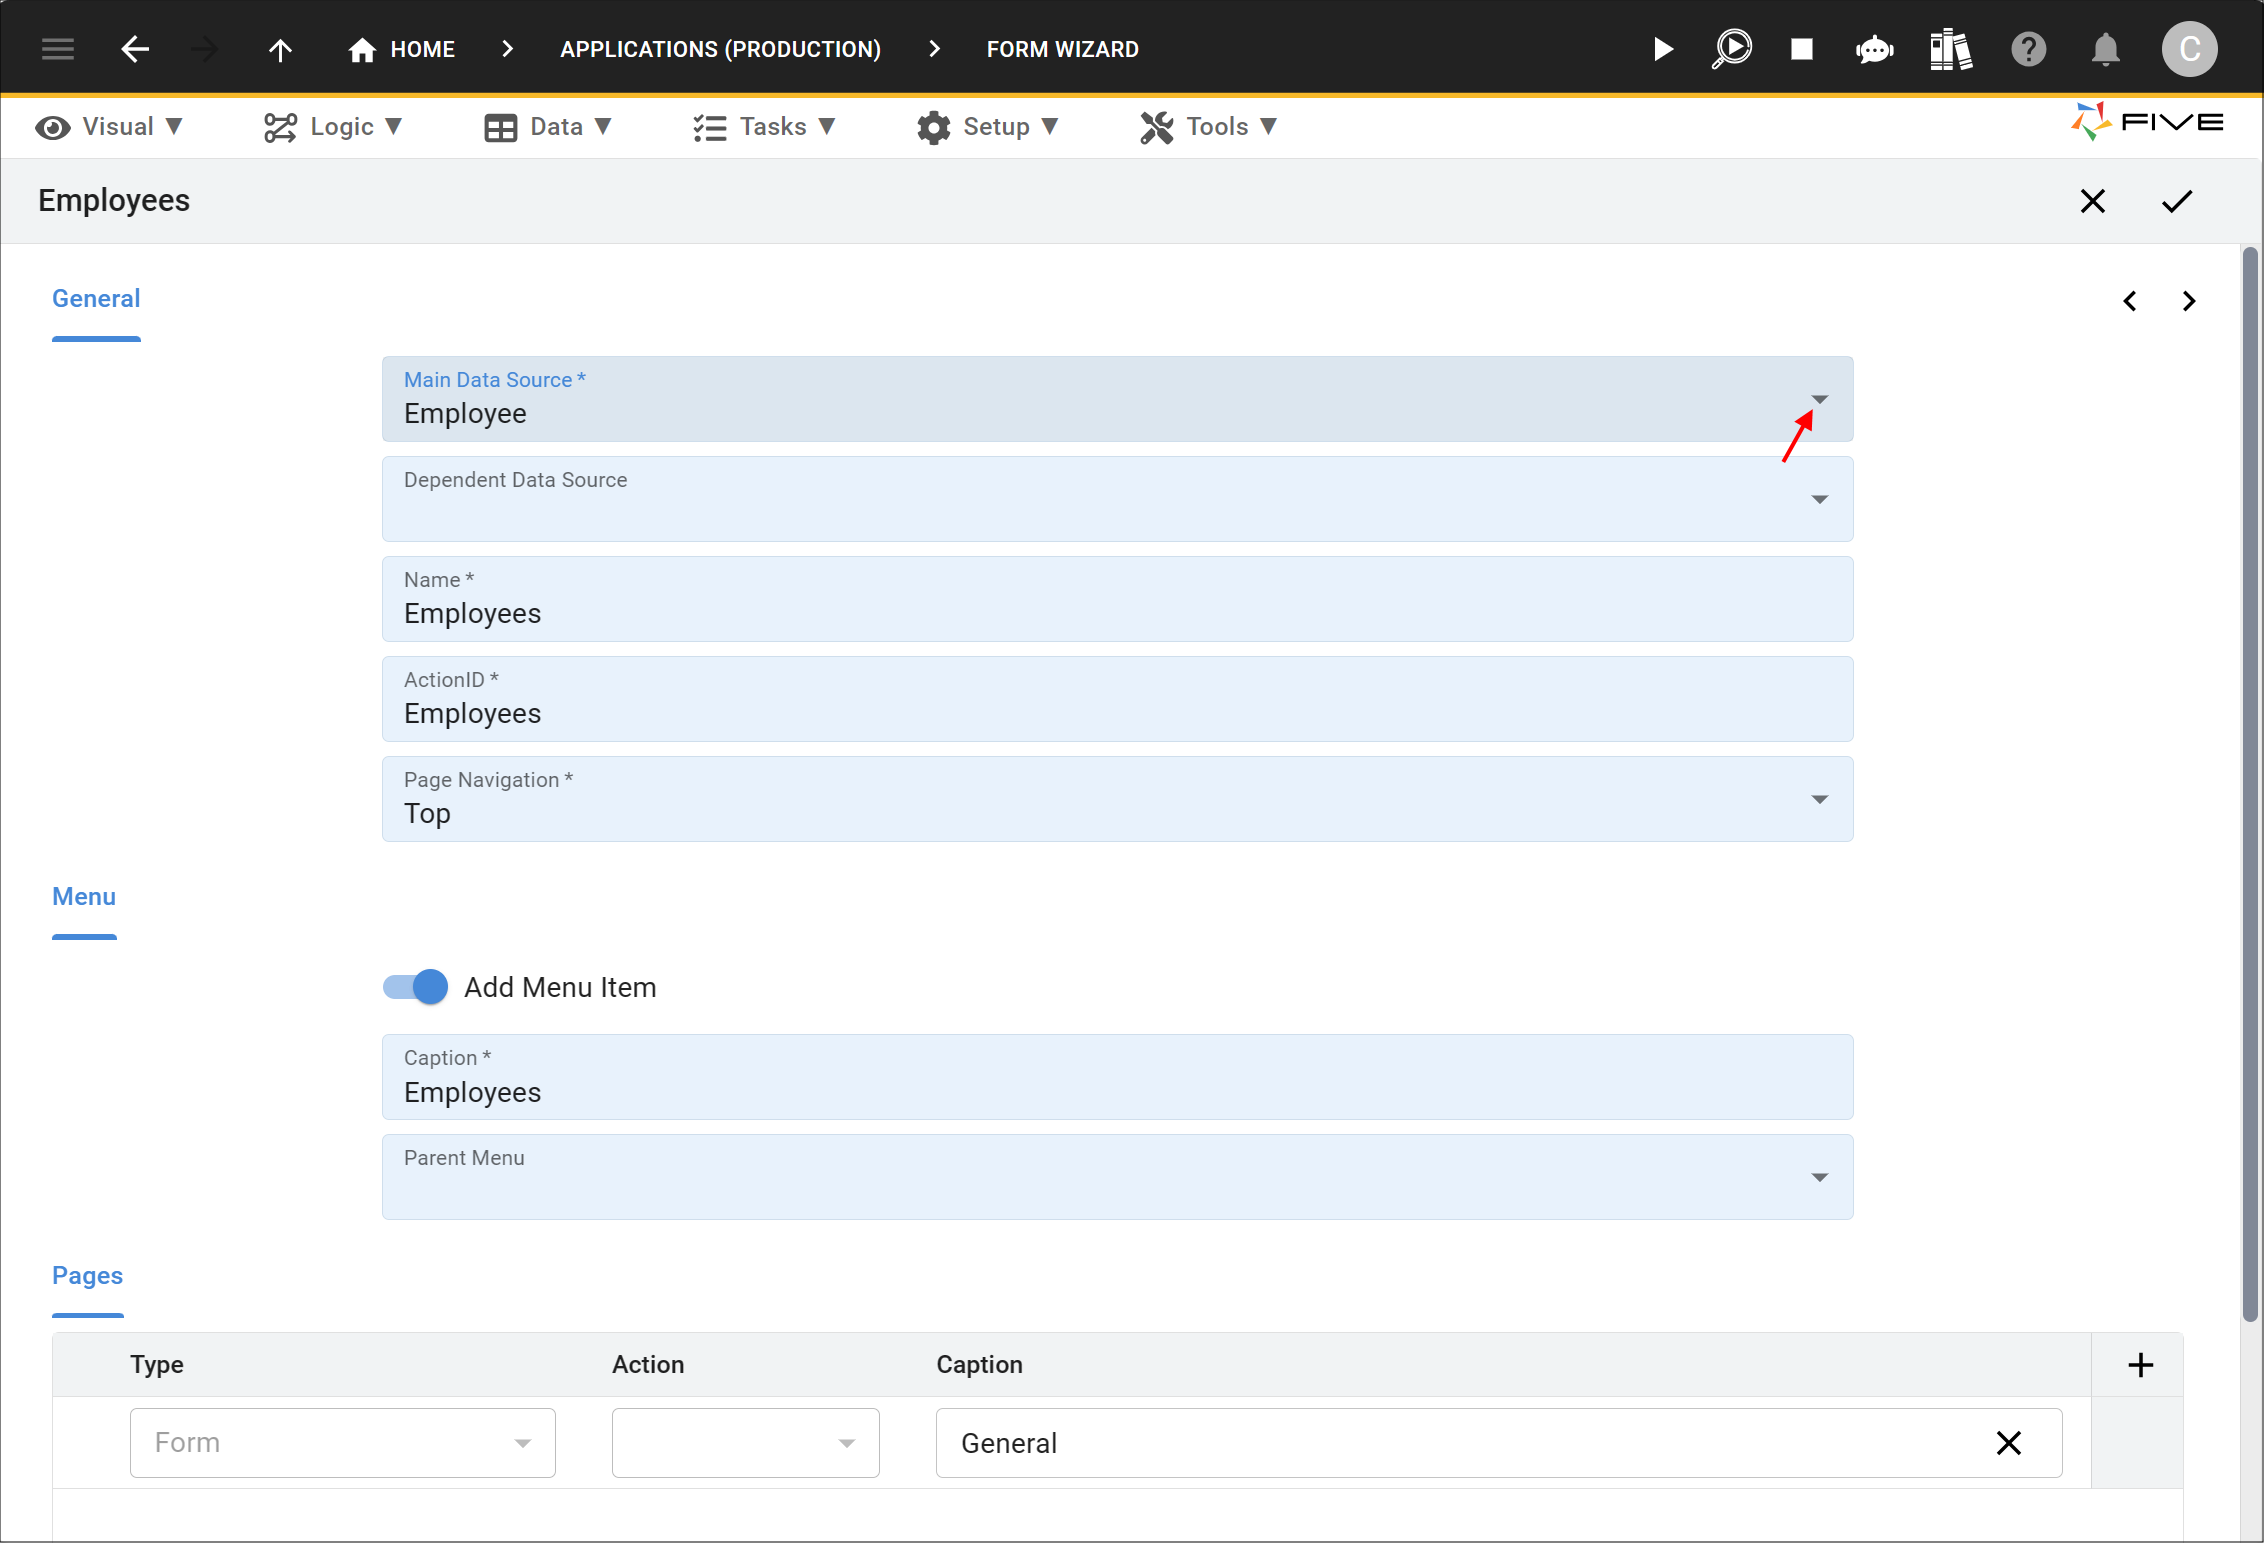
1. Select your data source (Employee) in the Main Data Source field.
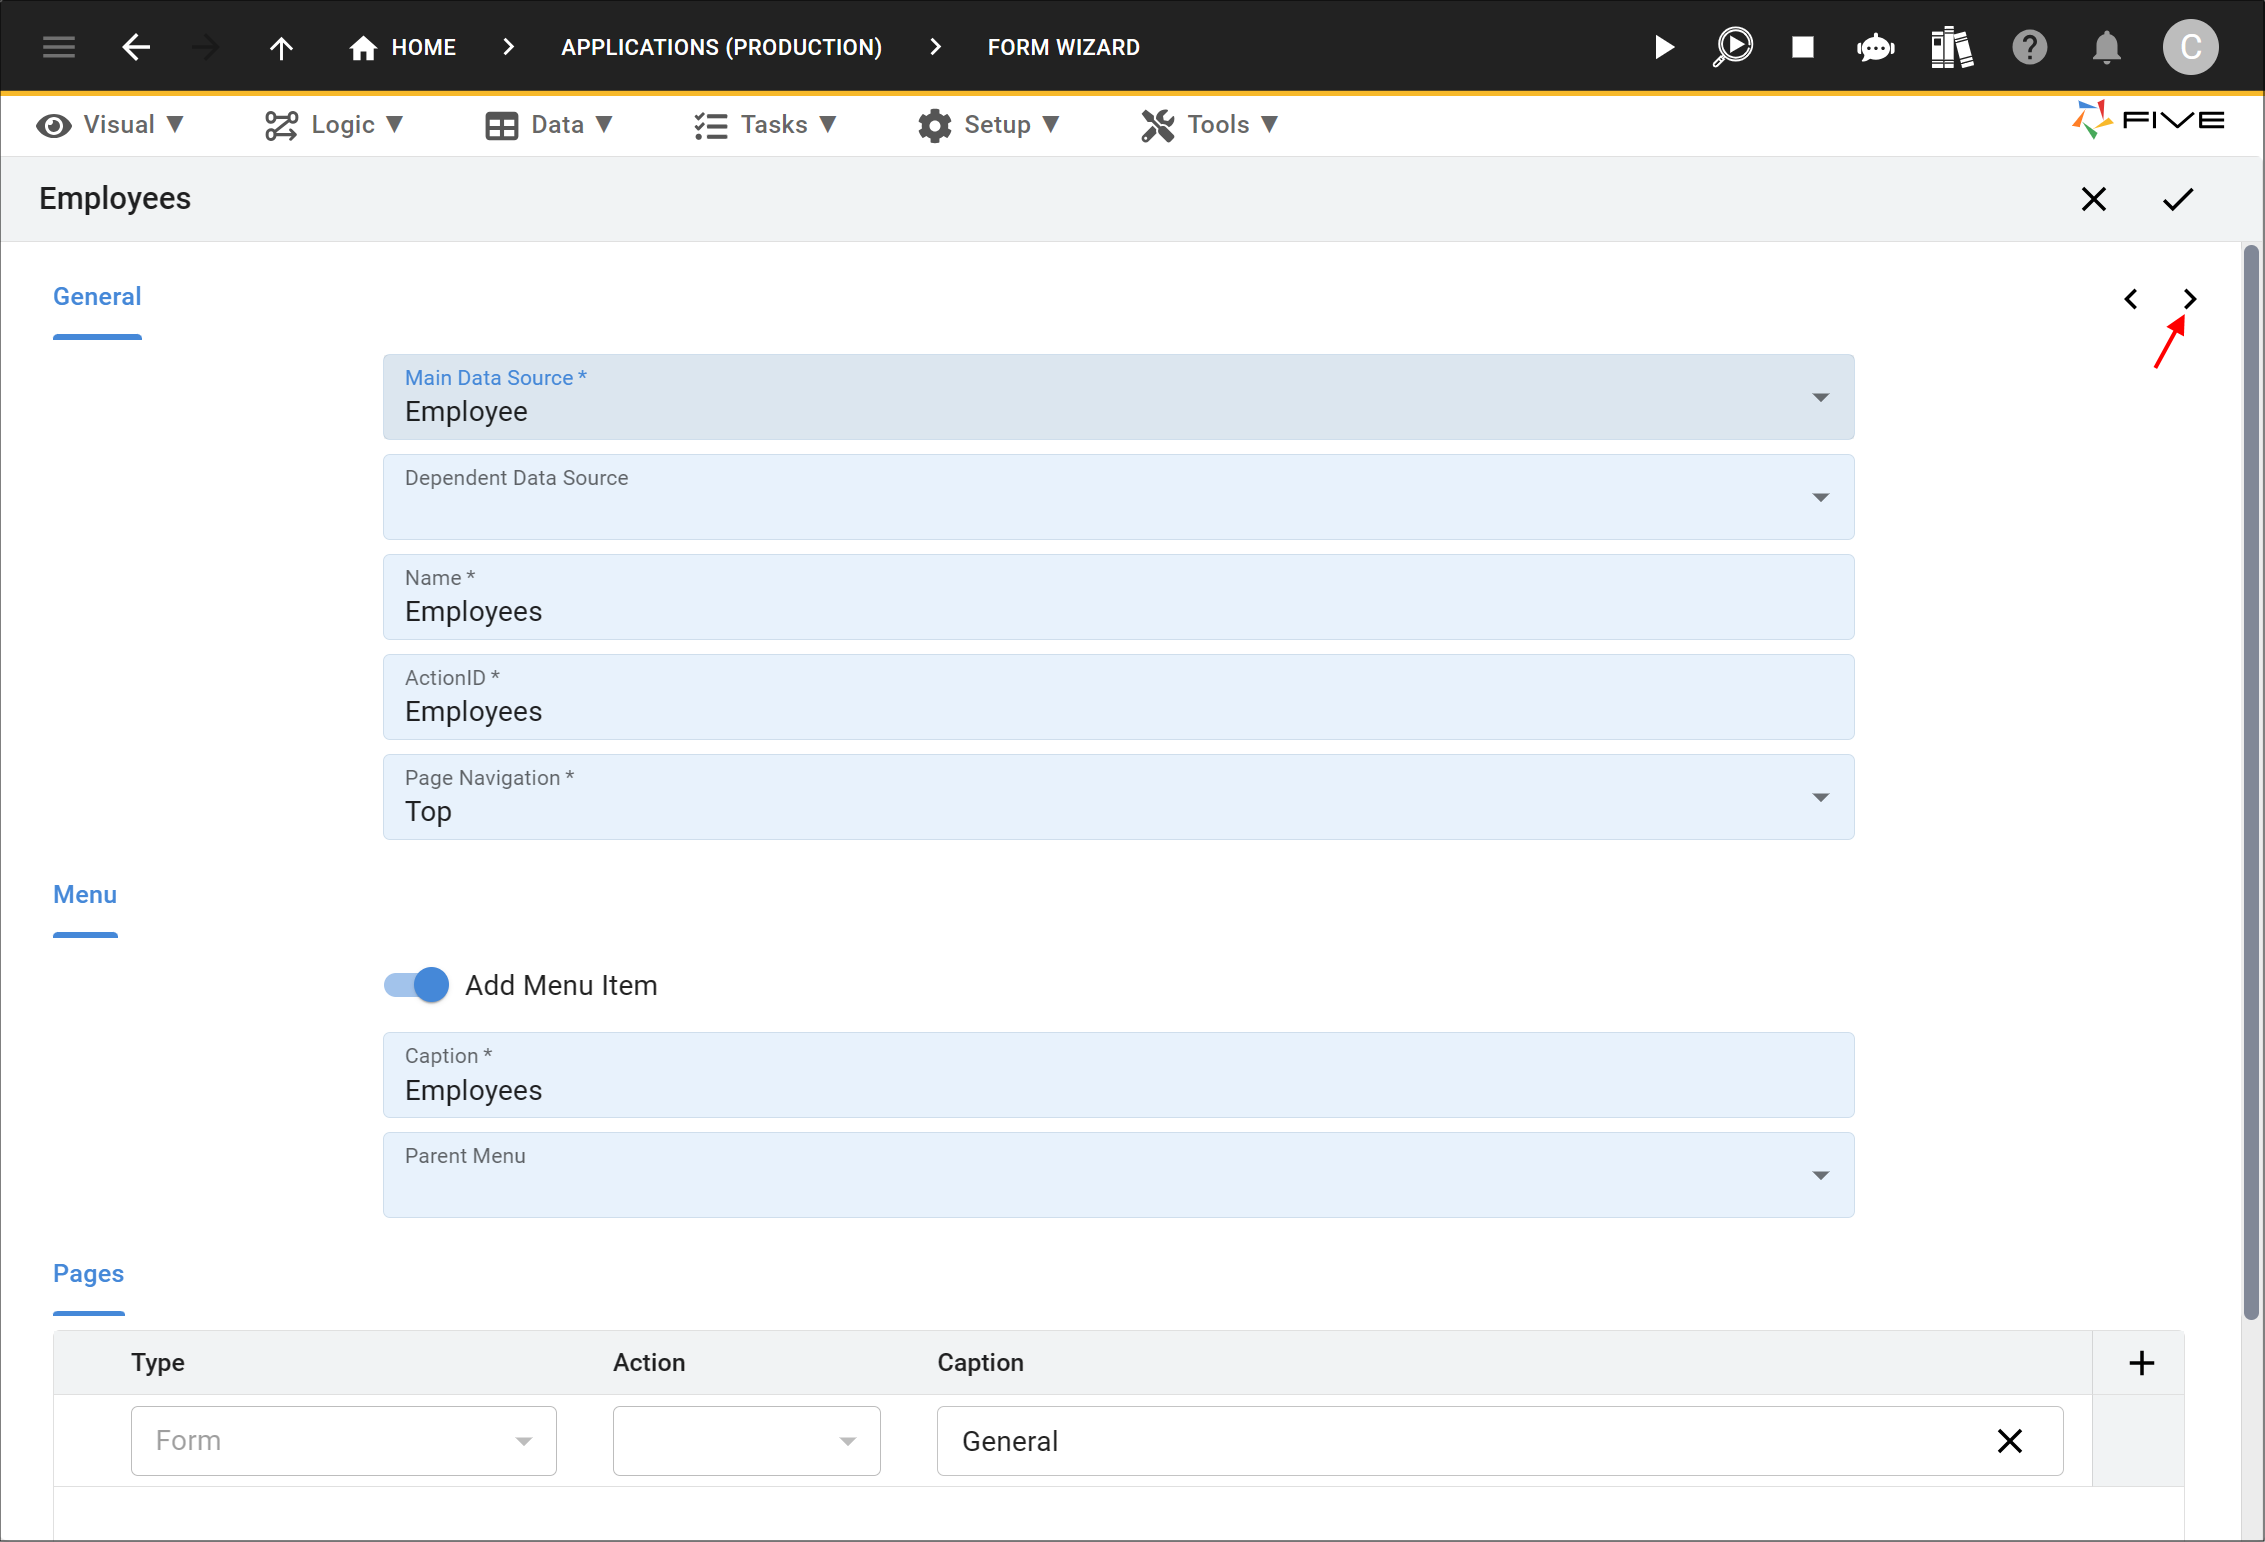
2. Click the Next button.
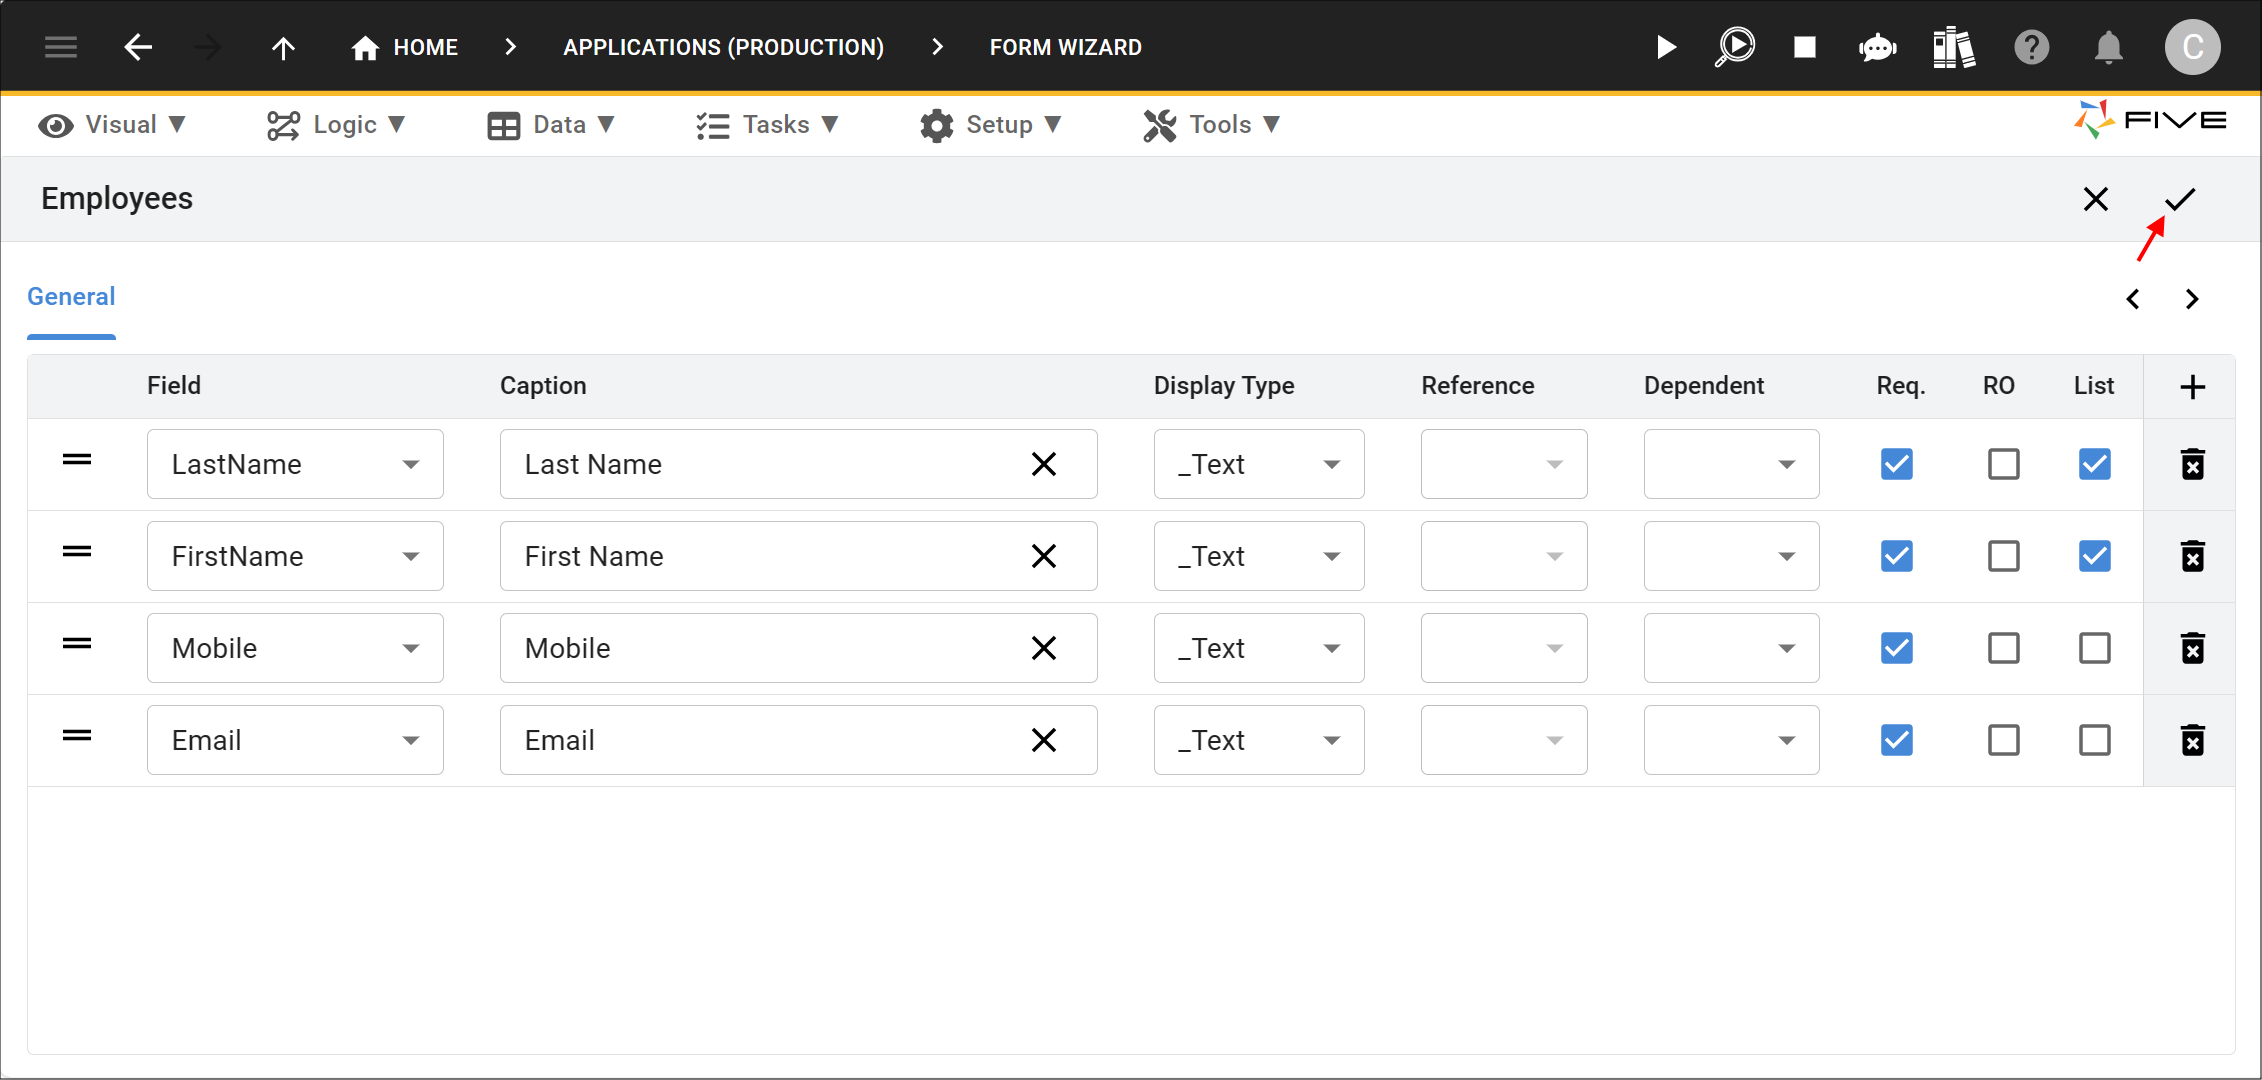
3. Perform any changes required for your form fields and click the Save button in the Form Wizard app bar.
Add Form Three (EmployeeDepartments)
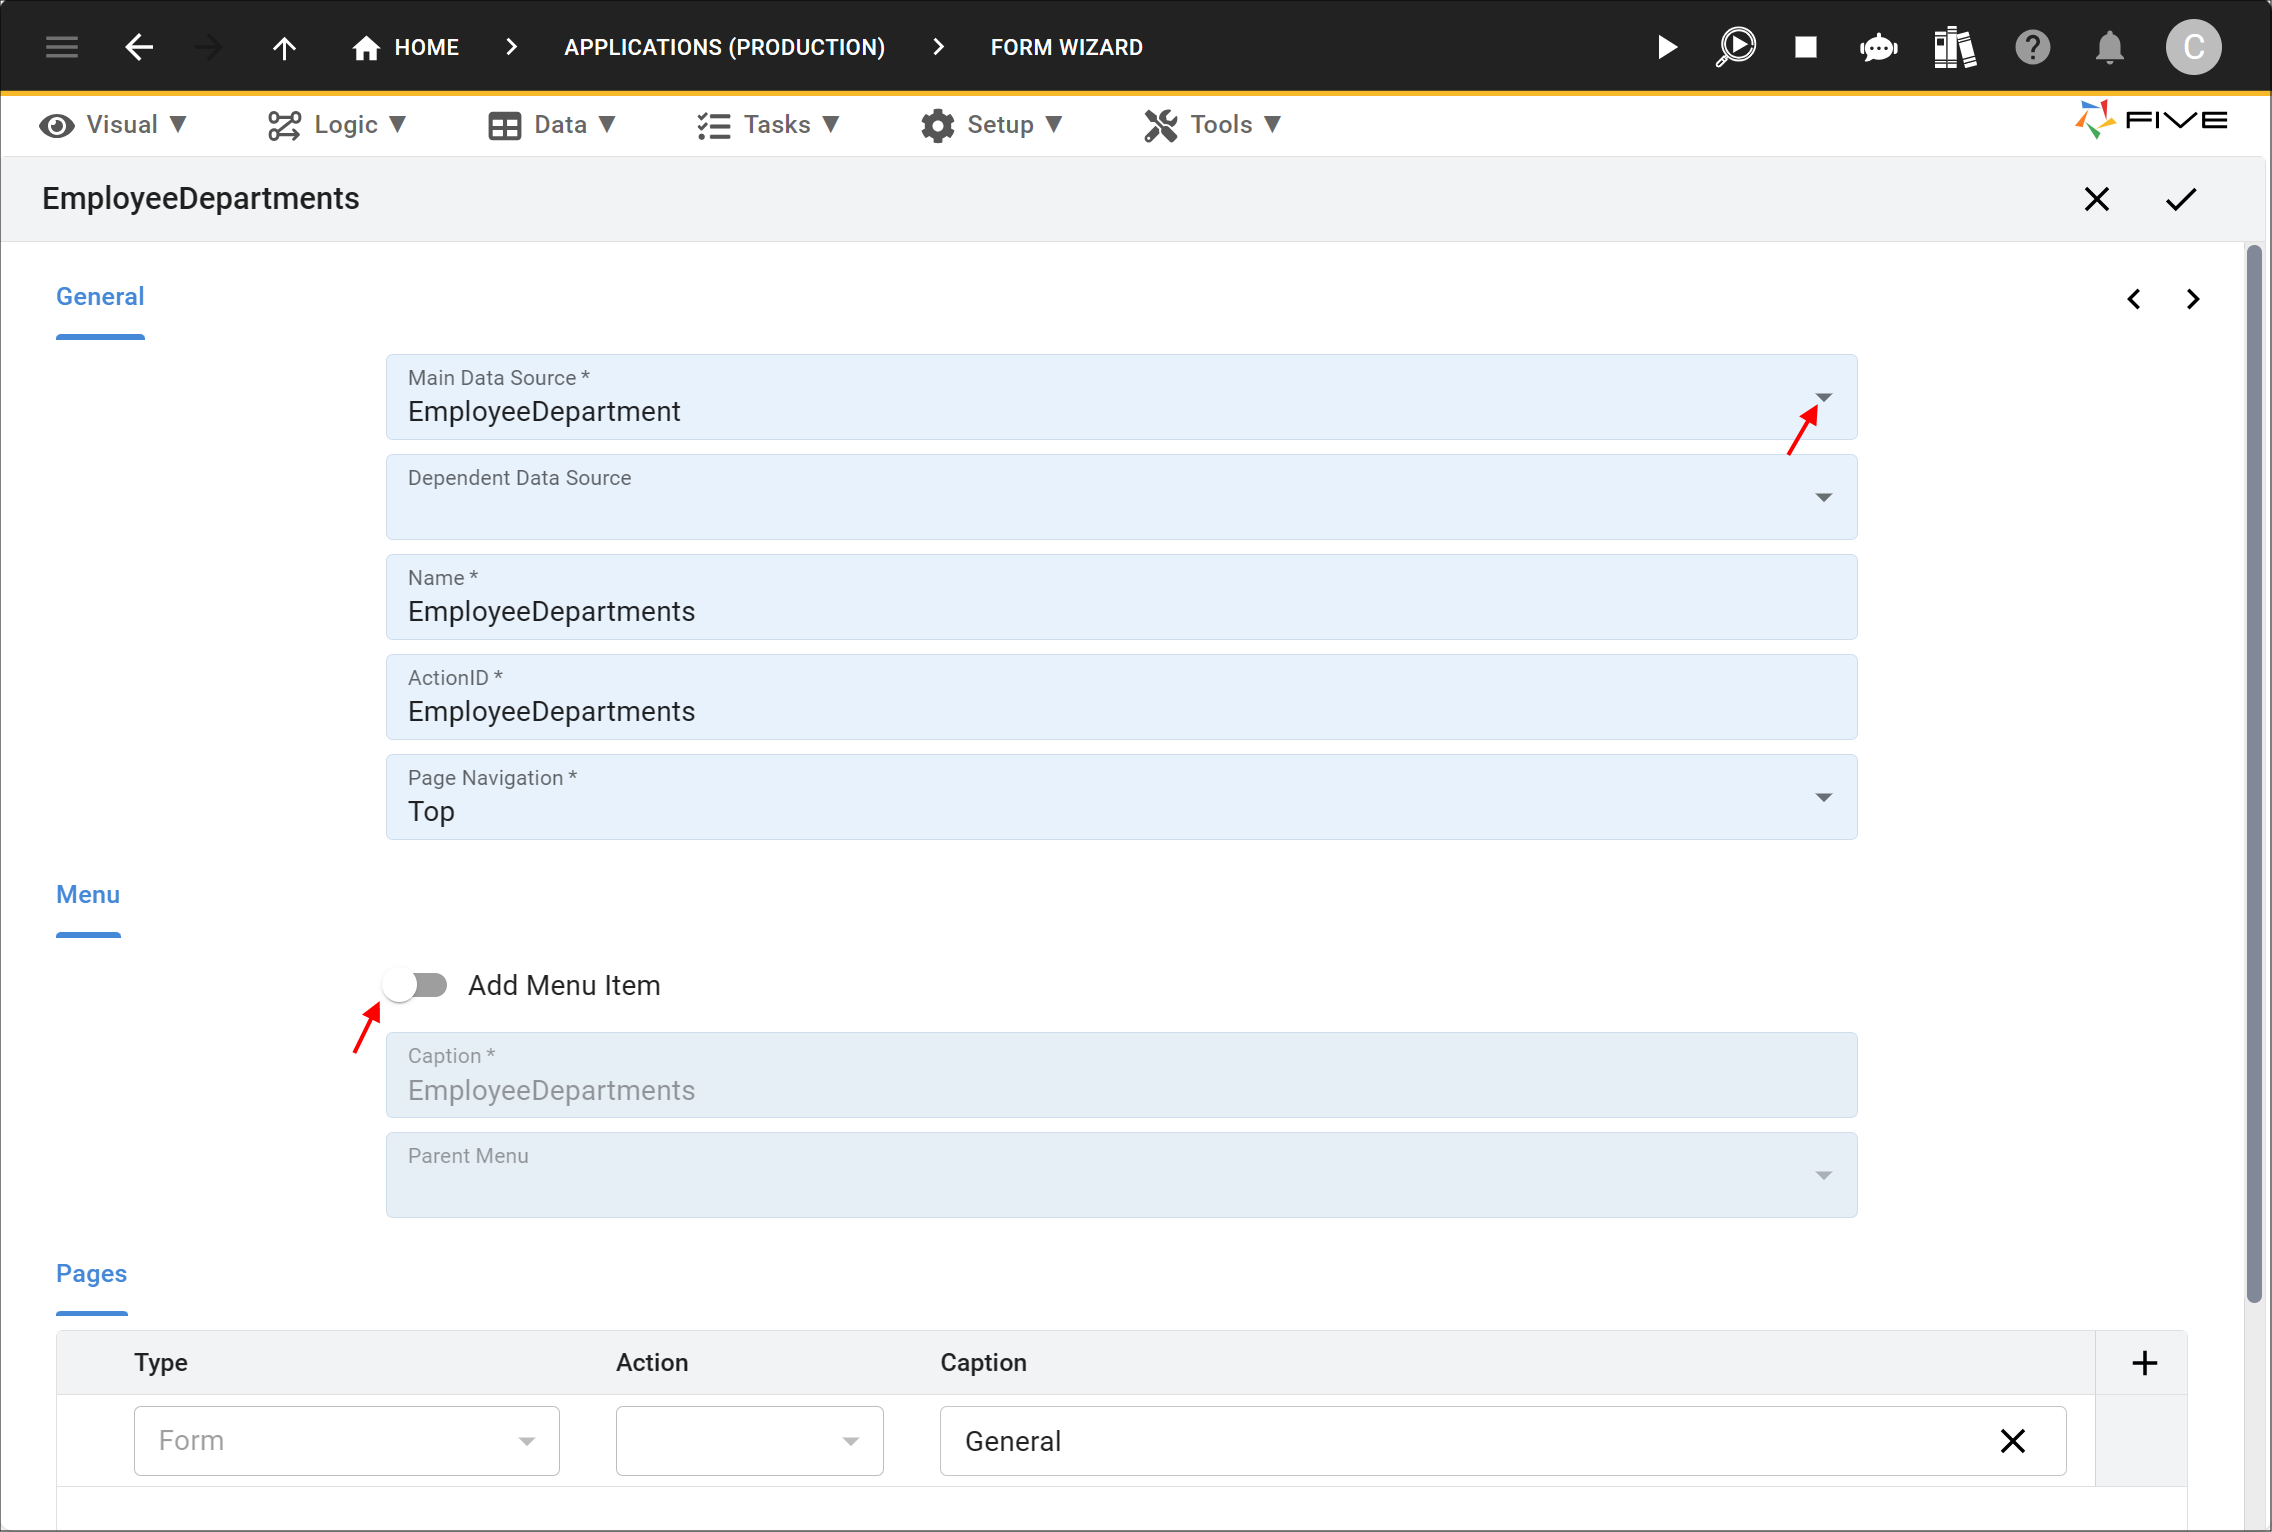
1. Select your join table as the data source in the Main Data Source field.
2. Click the menu item switch off.
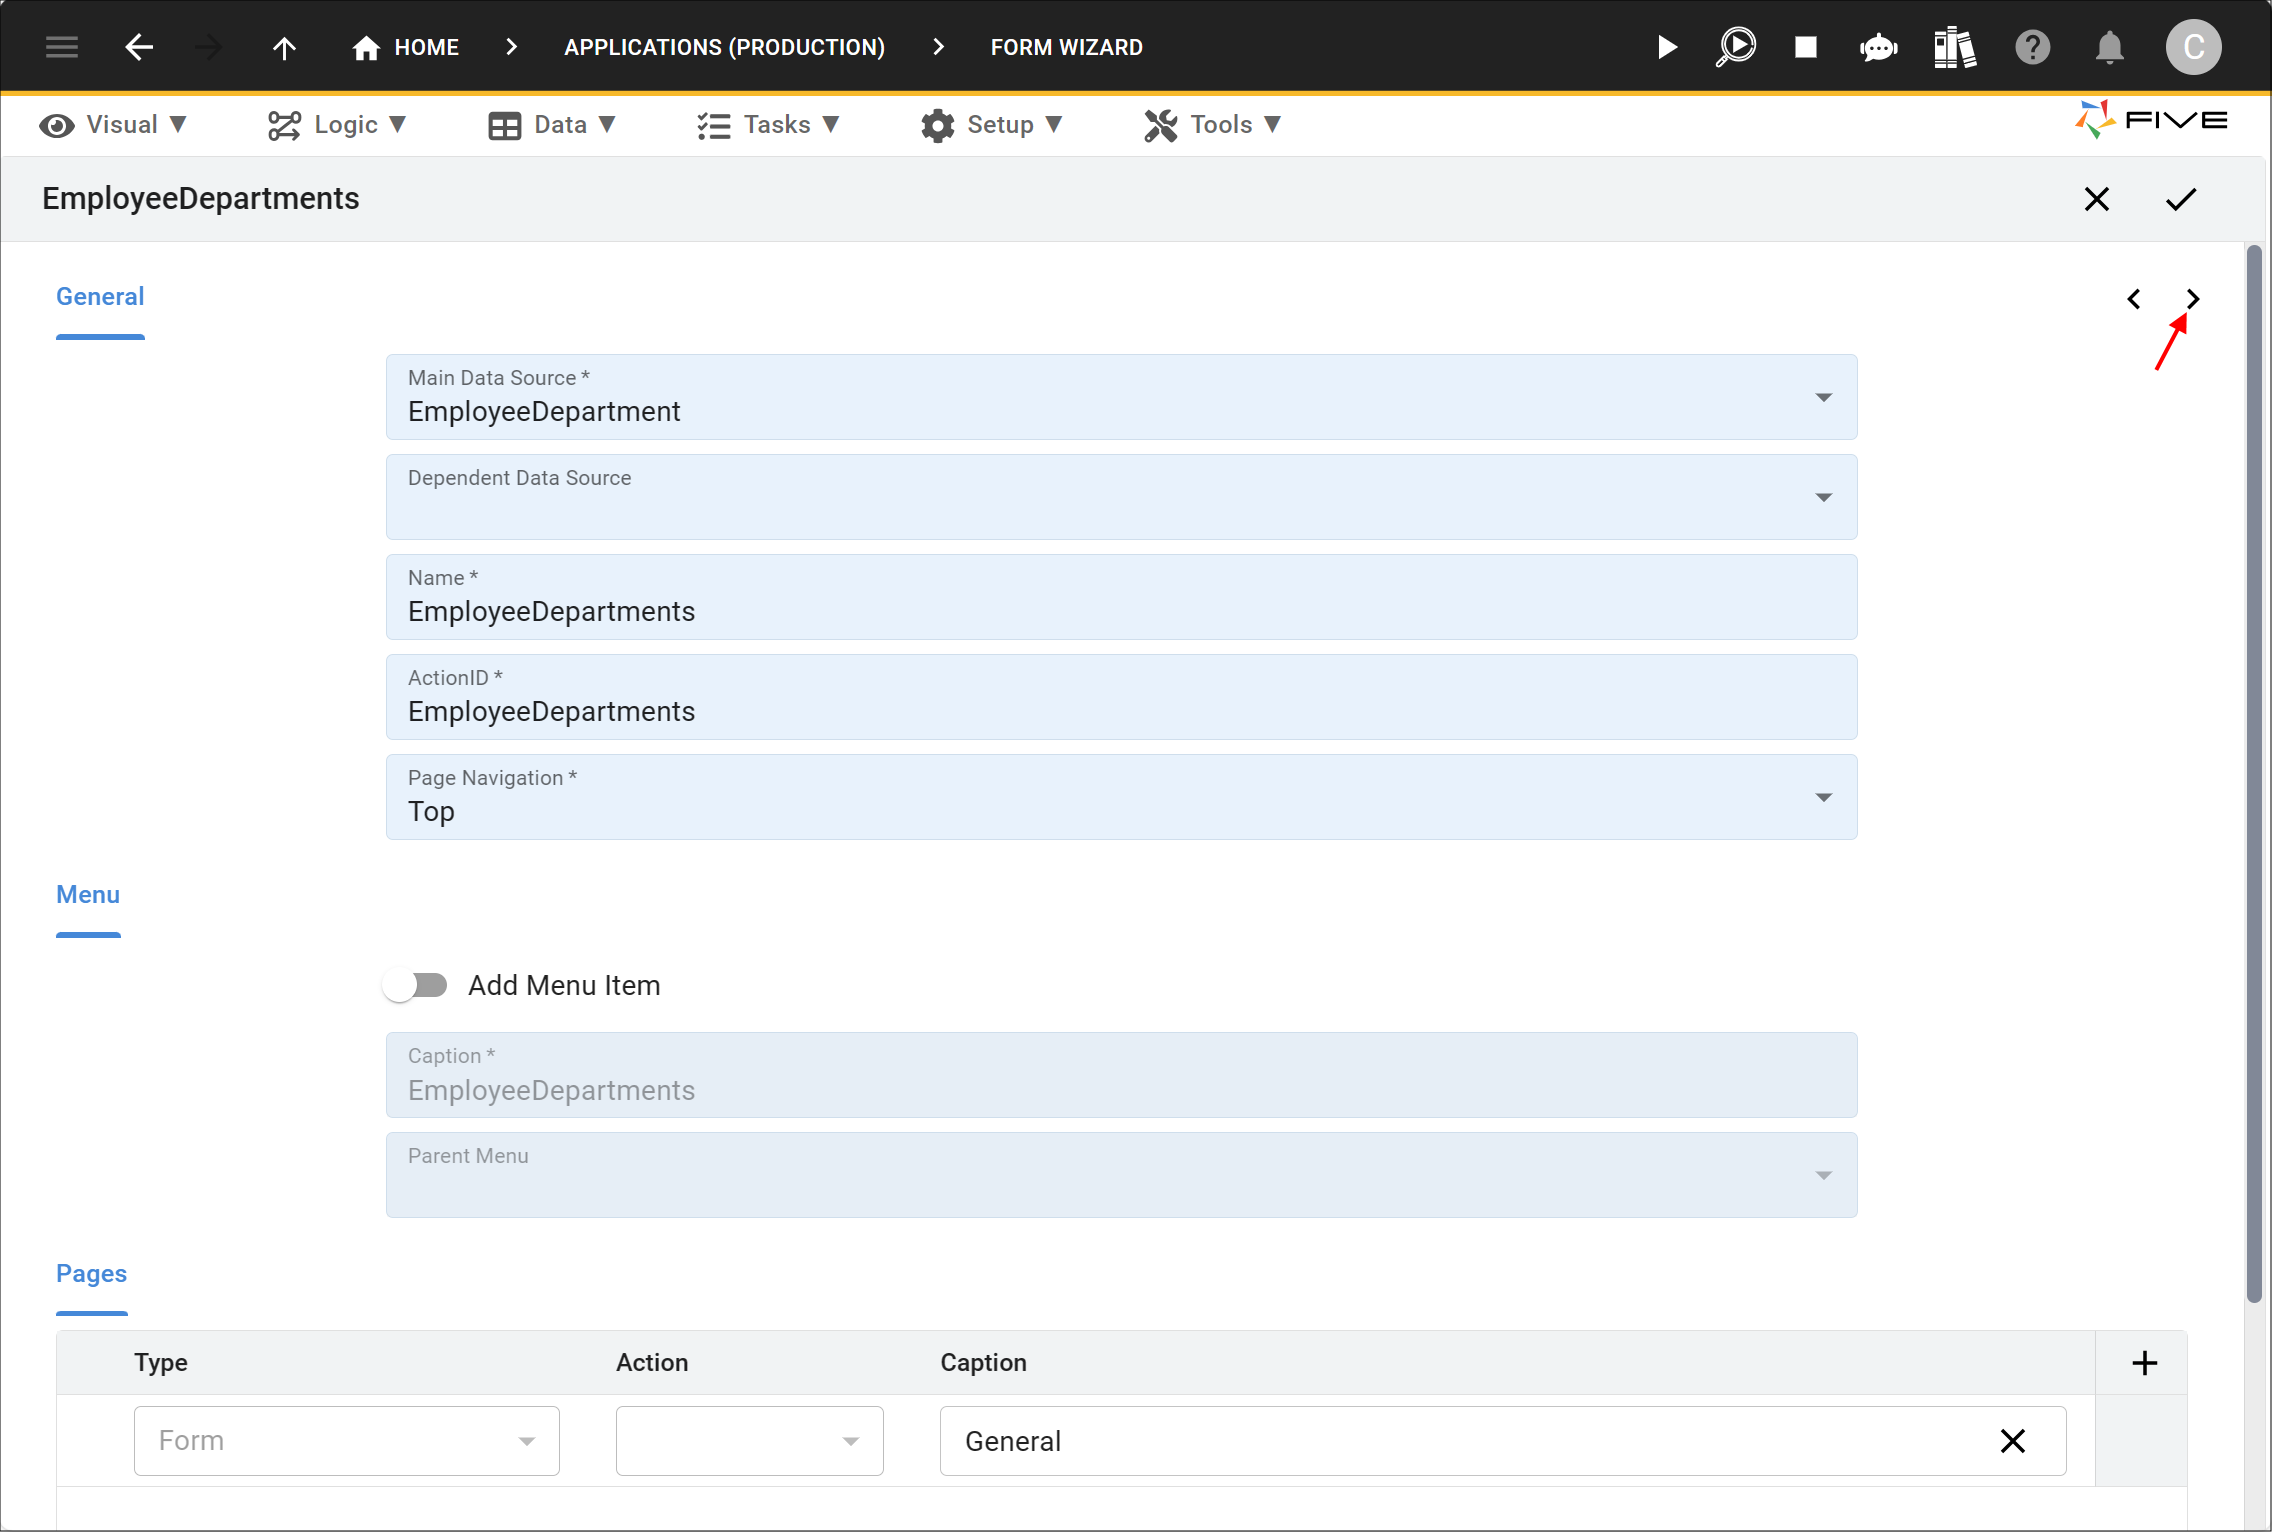
3. Click the Next button.
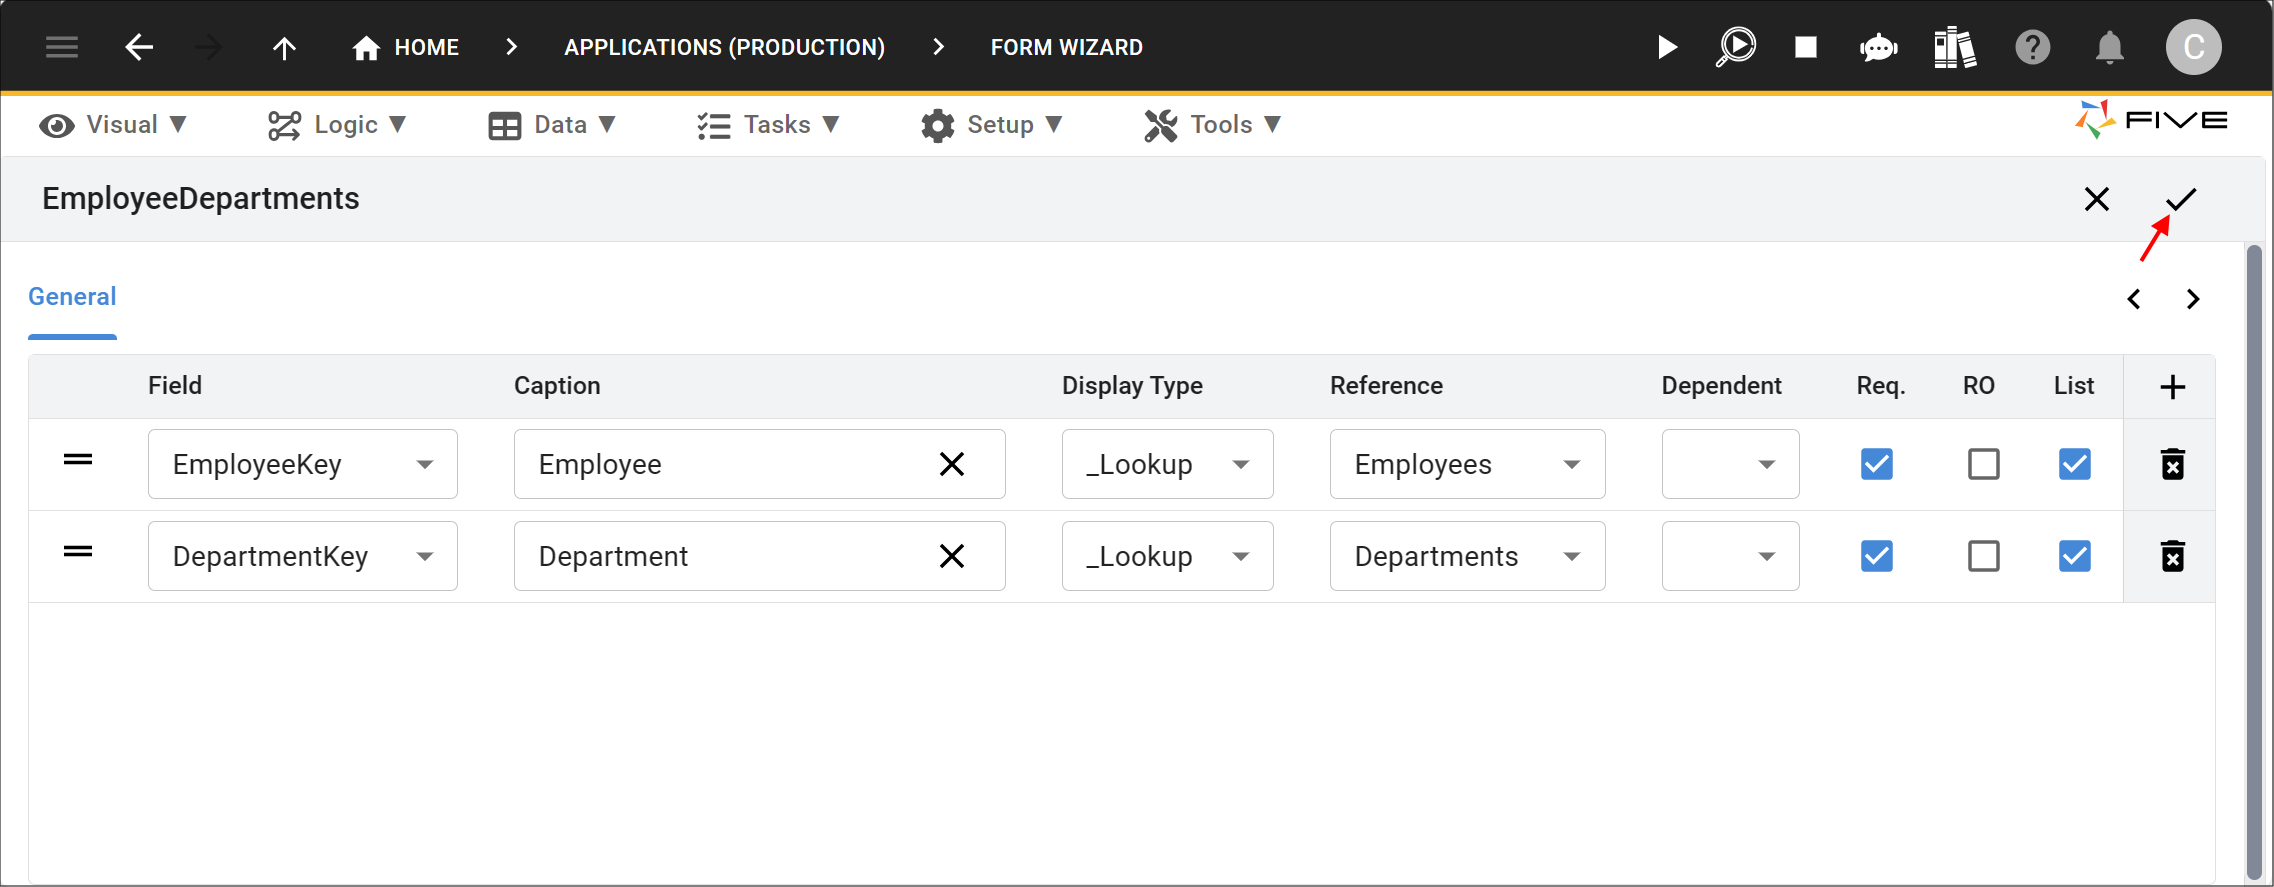
4. Ensure that the Req. and List checkboxes are clicked for both of the foreign key fields.
5. Click the Save button in the Form Wizard app bar.
Edit the Employee Form to Add the Join Page
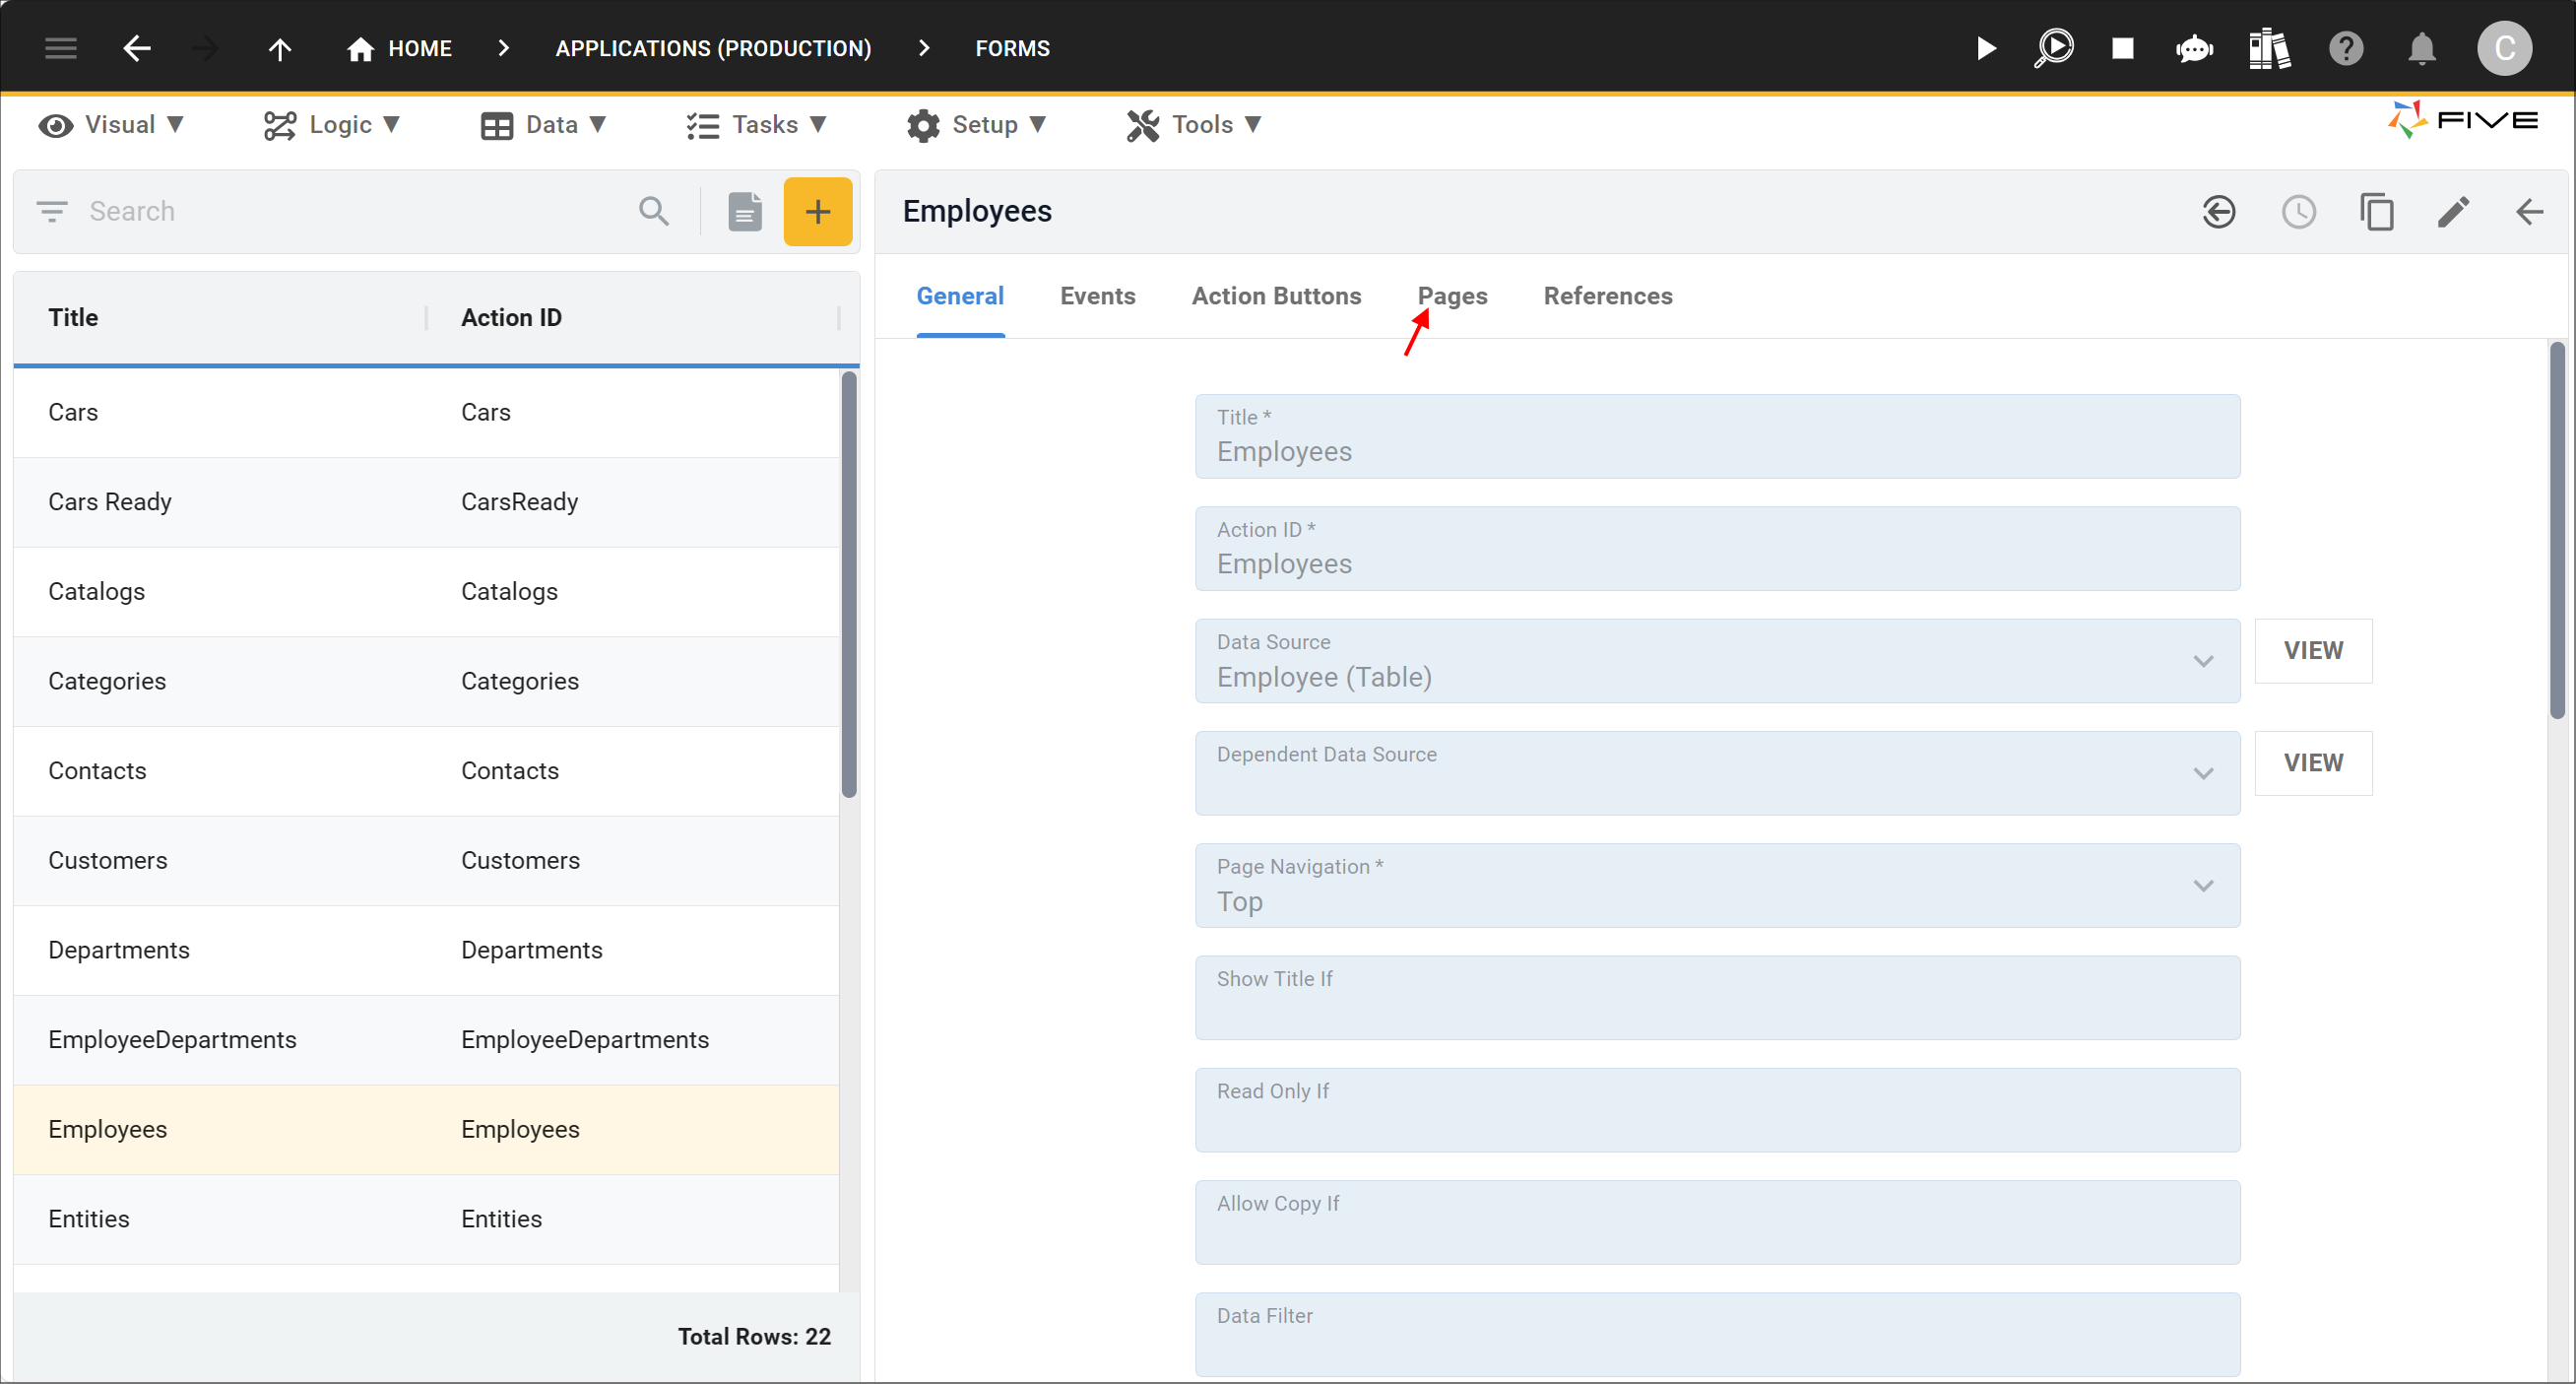
1. Select Visual in the menu and Forms in the sub-menu.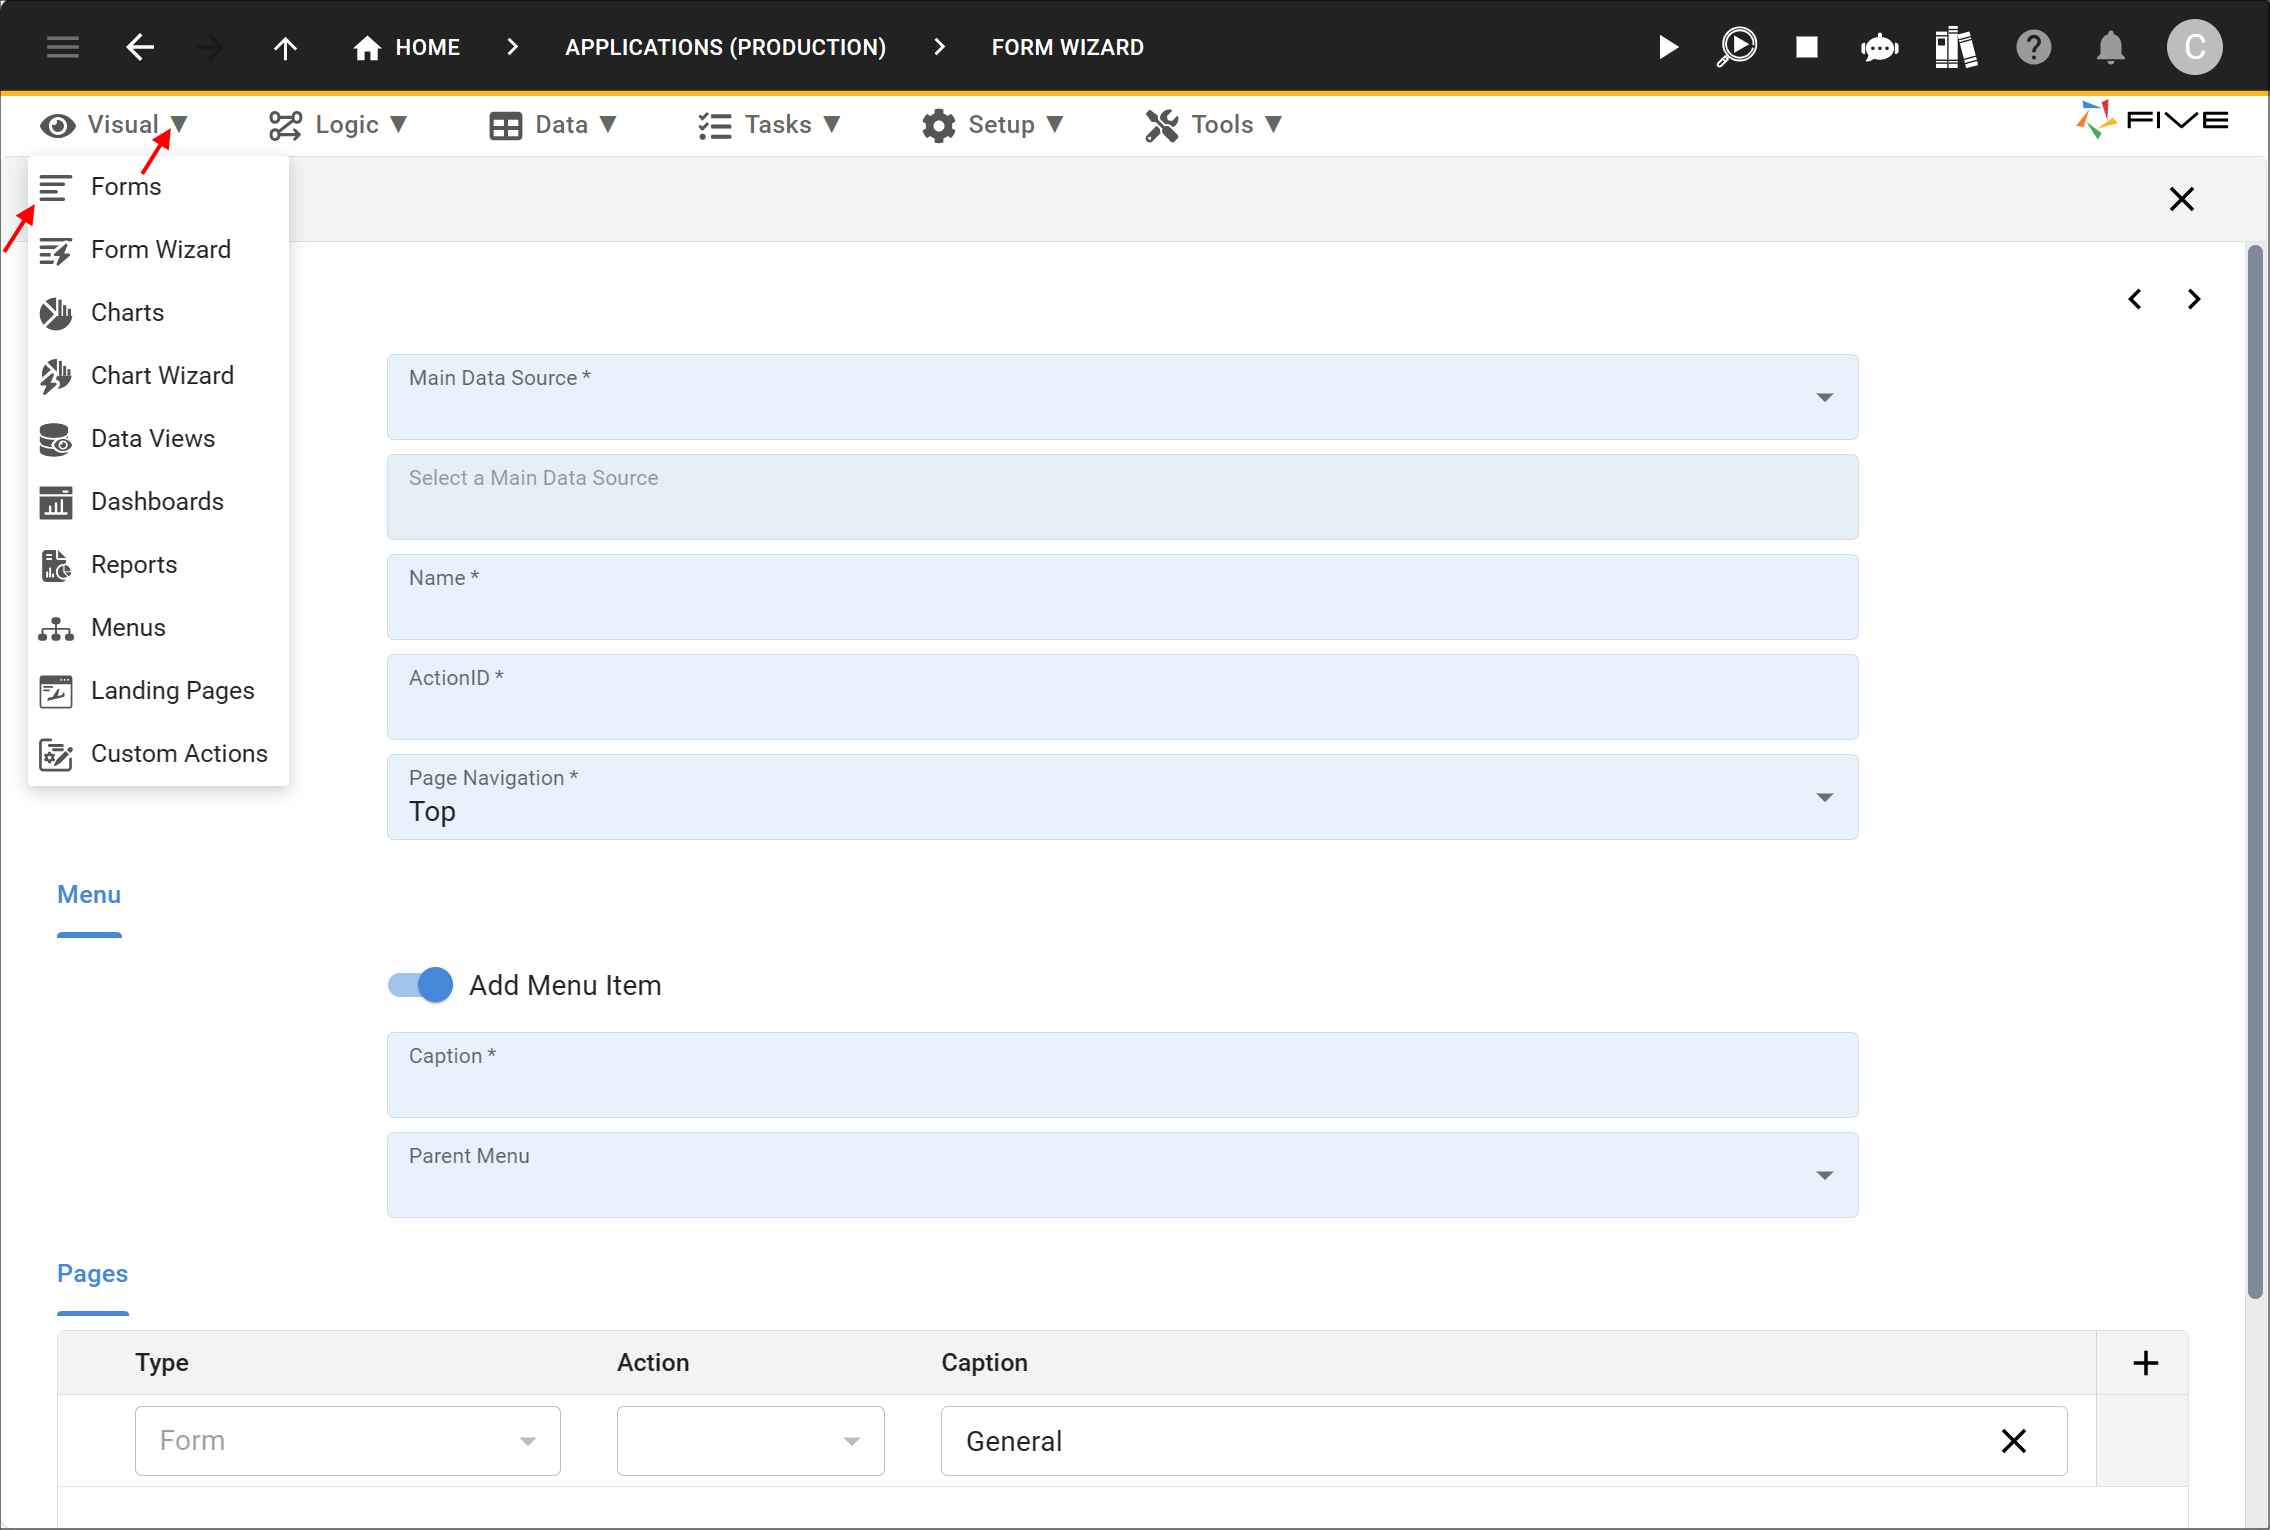
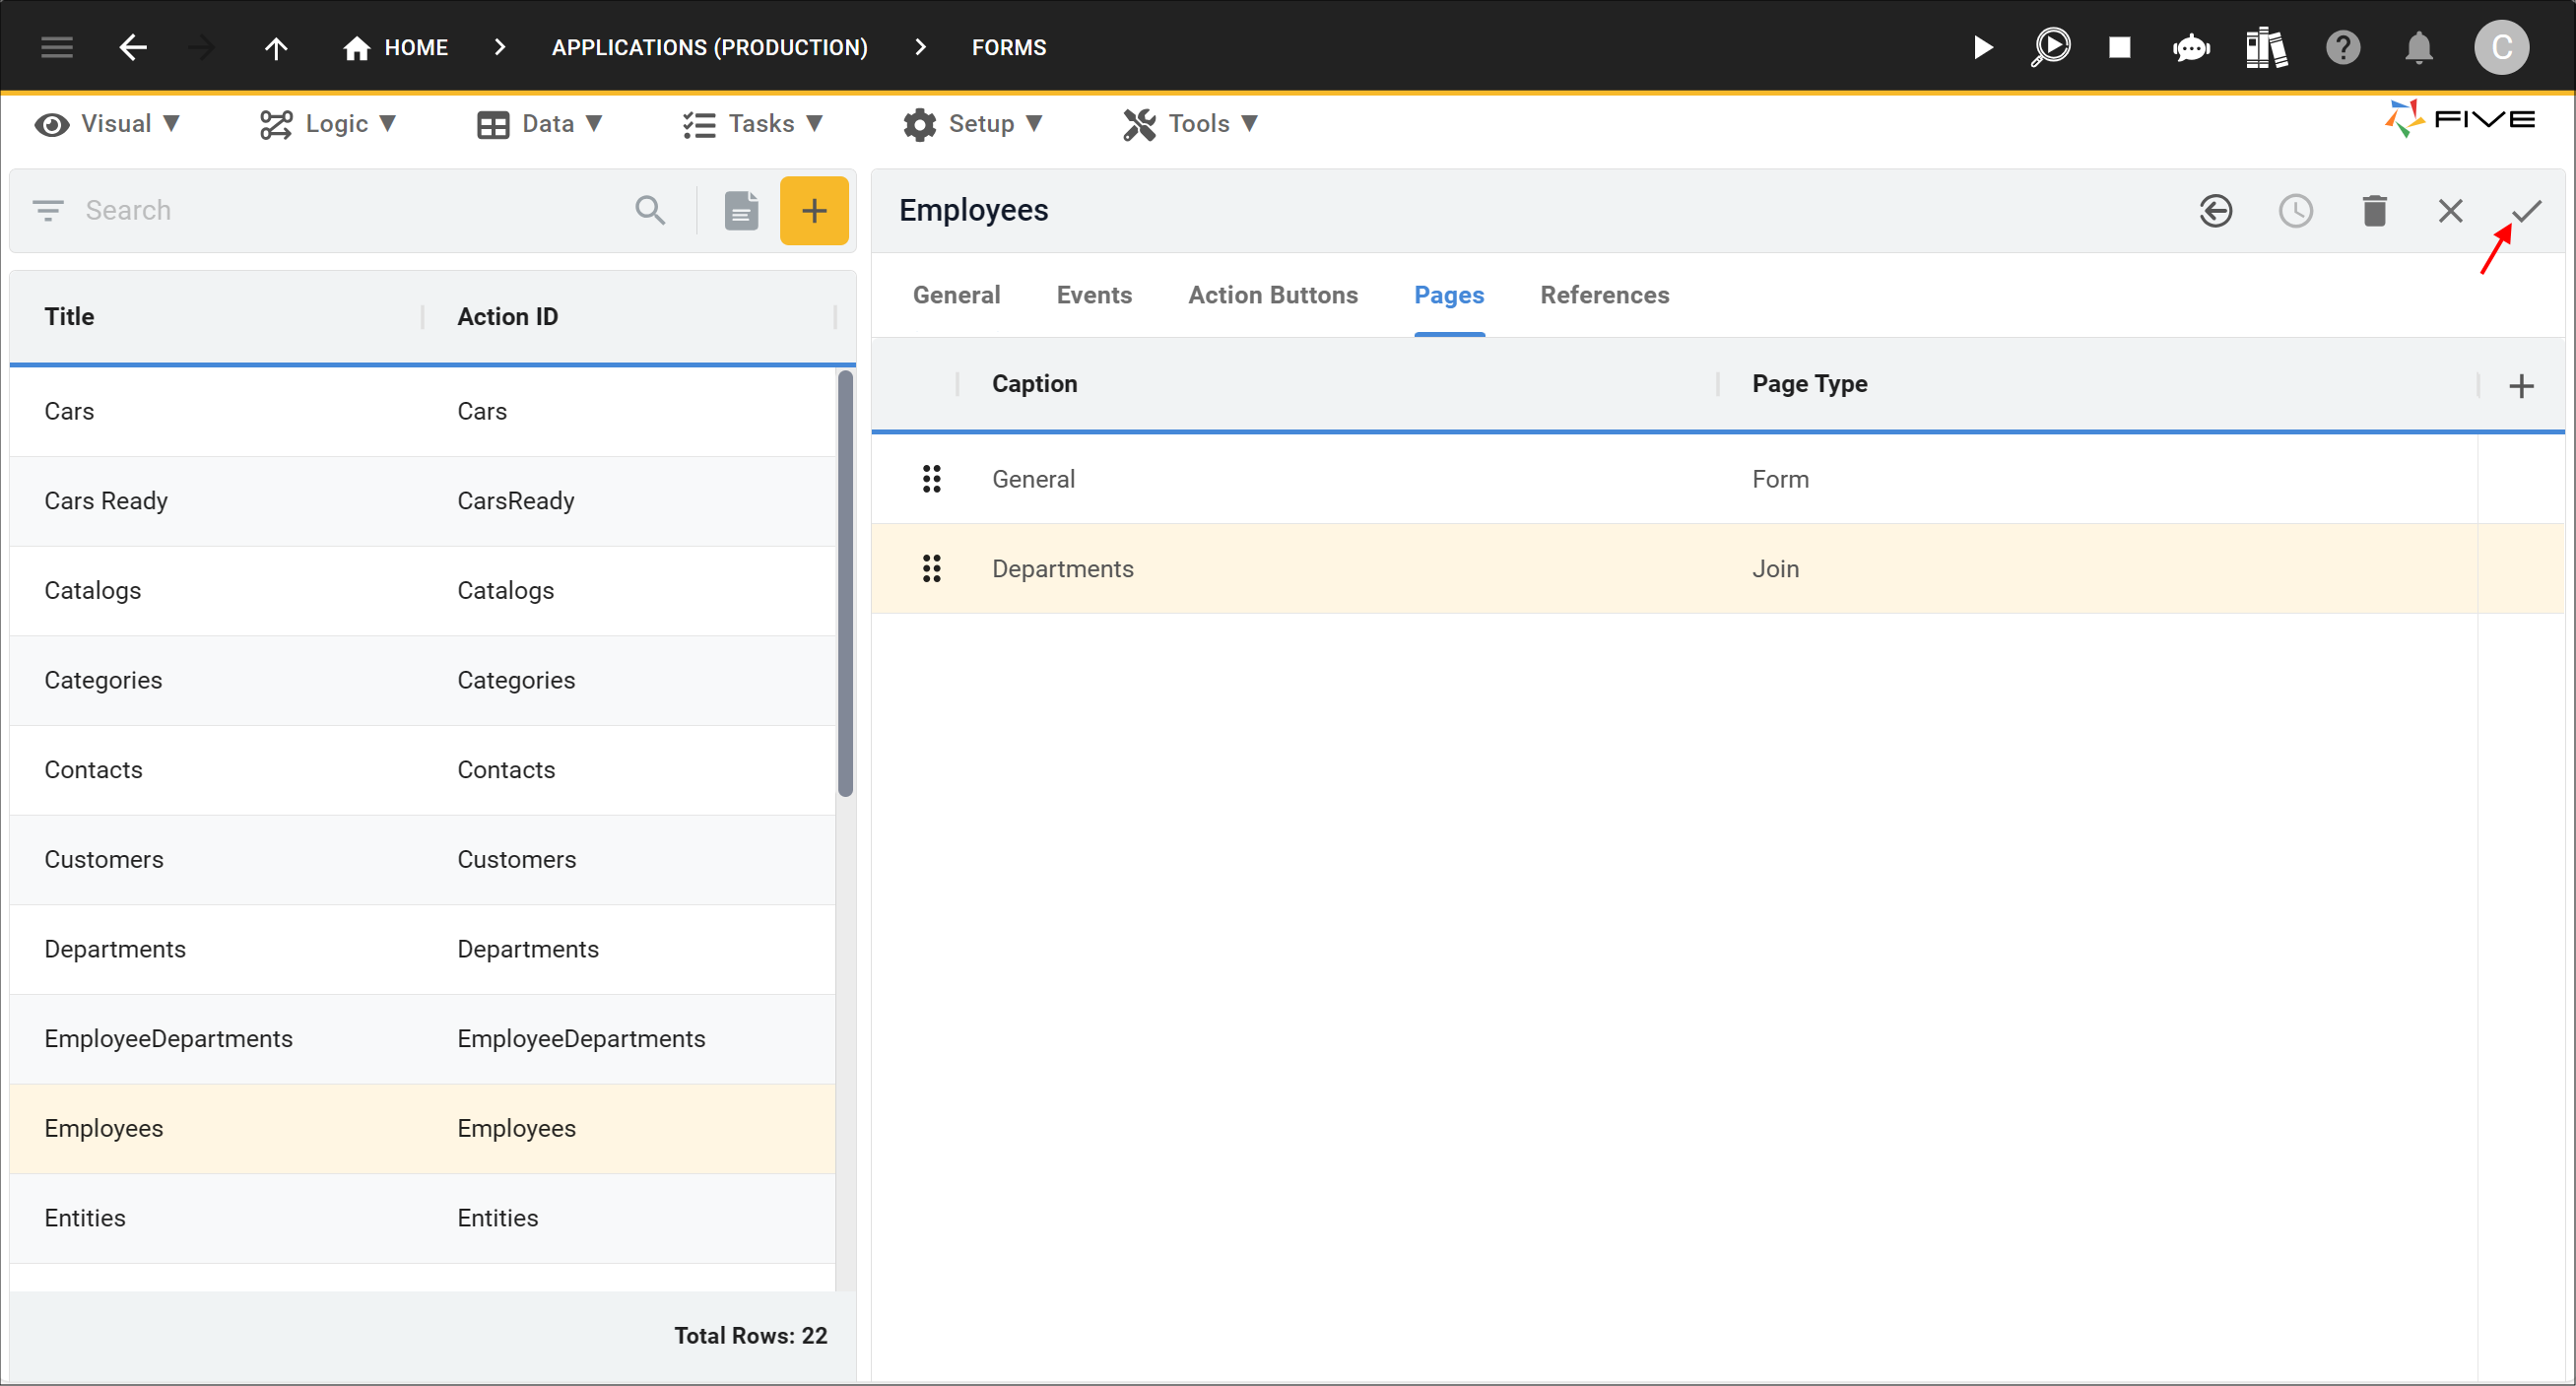
2. Select the form (Employees) in the list to add the join page and click the Pages tab.
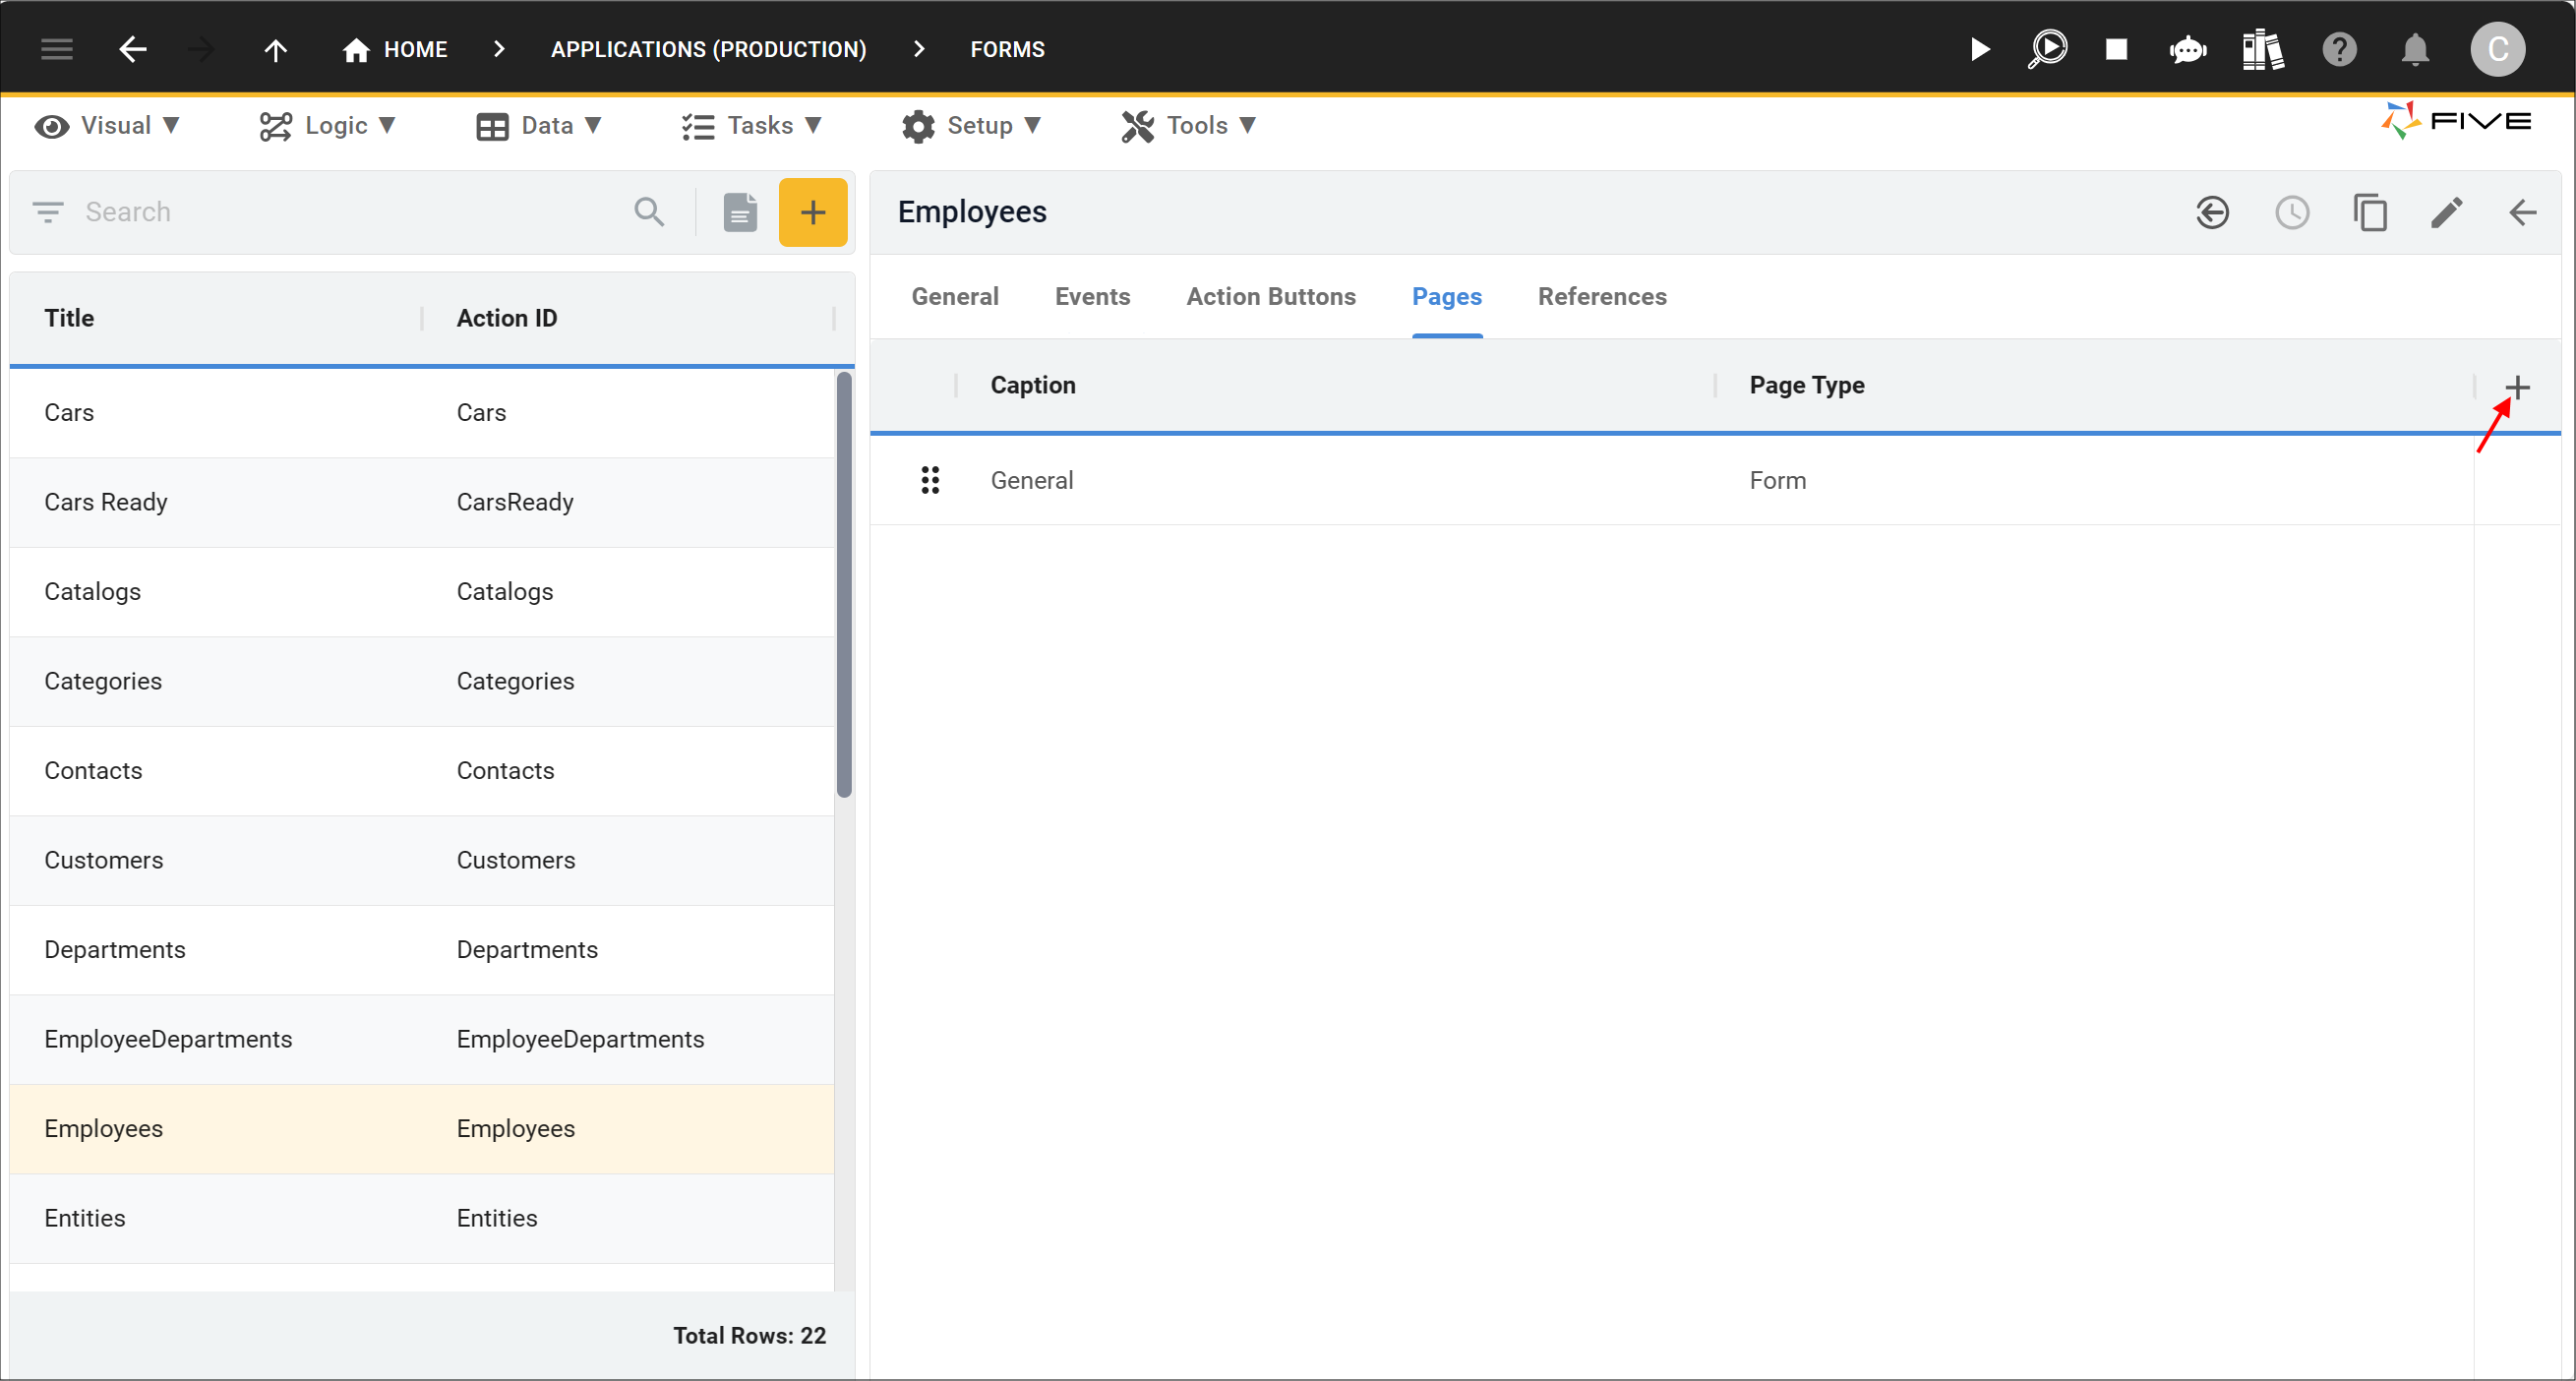
3. Click the Add Pages button.
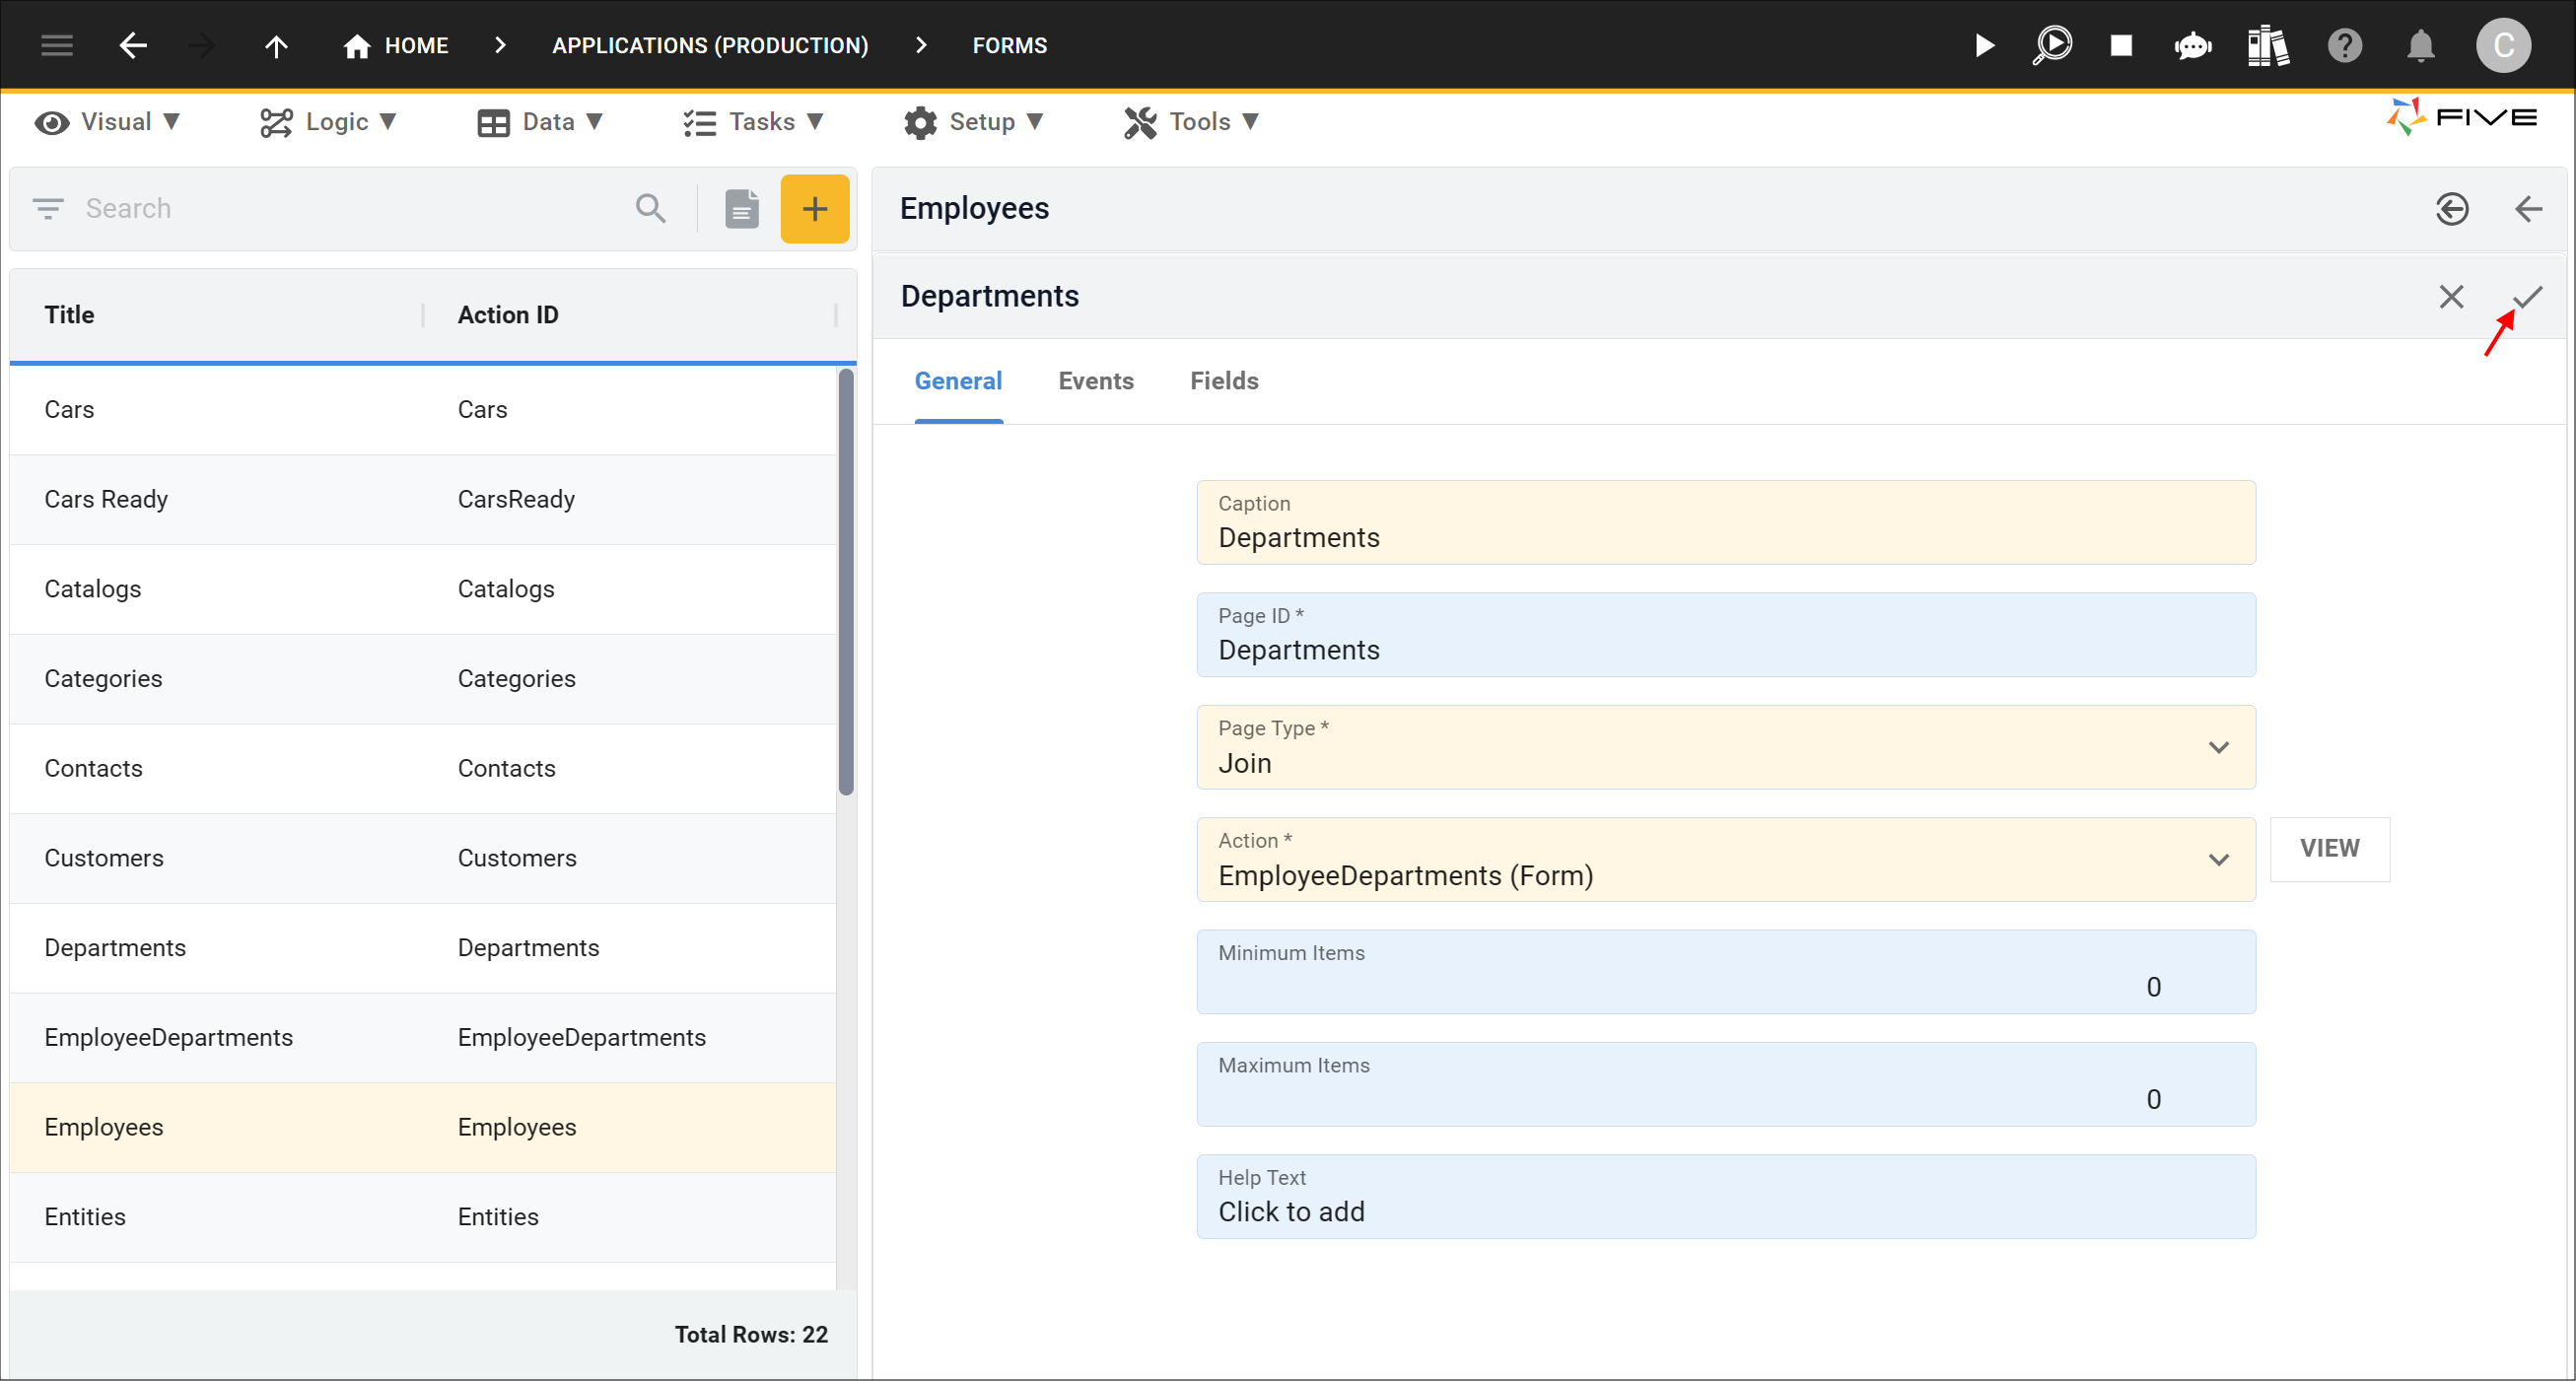
4. Give your page a caption in the Caption field.
5. Select Join in the Page Type field.
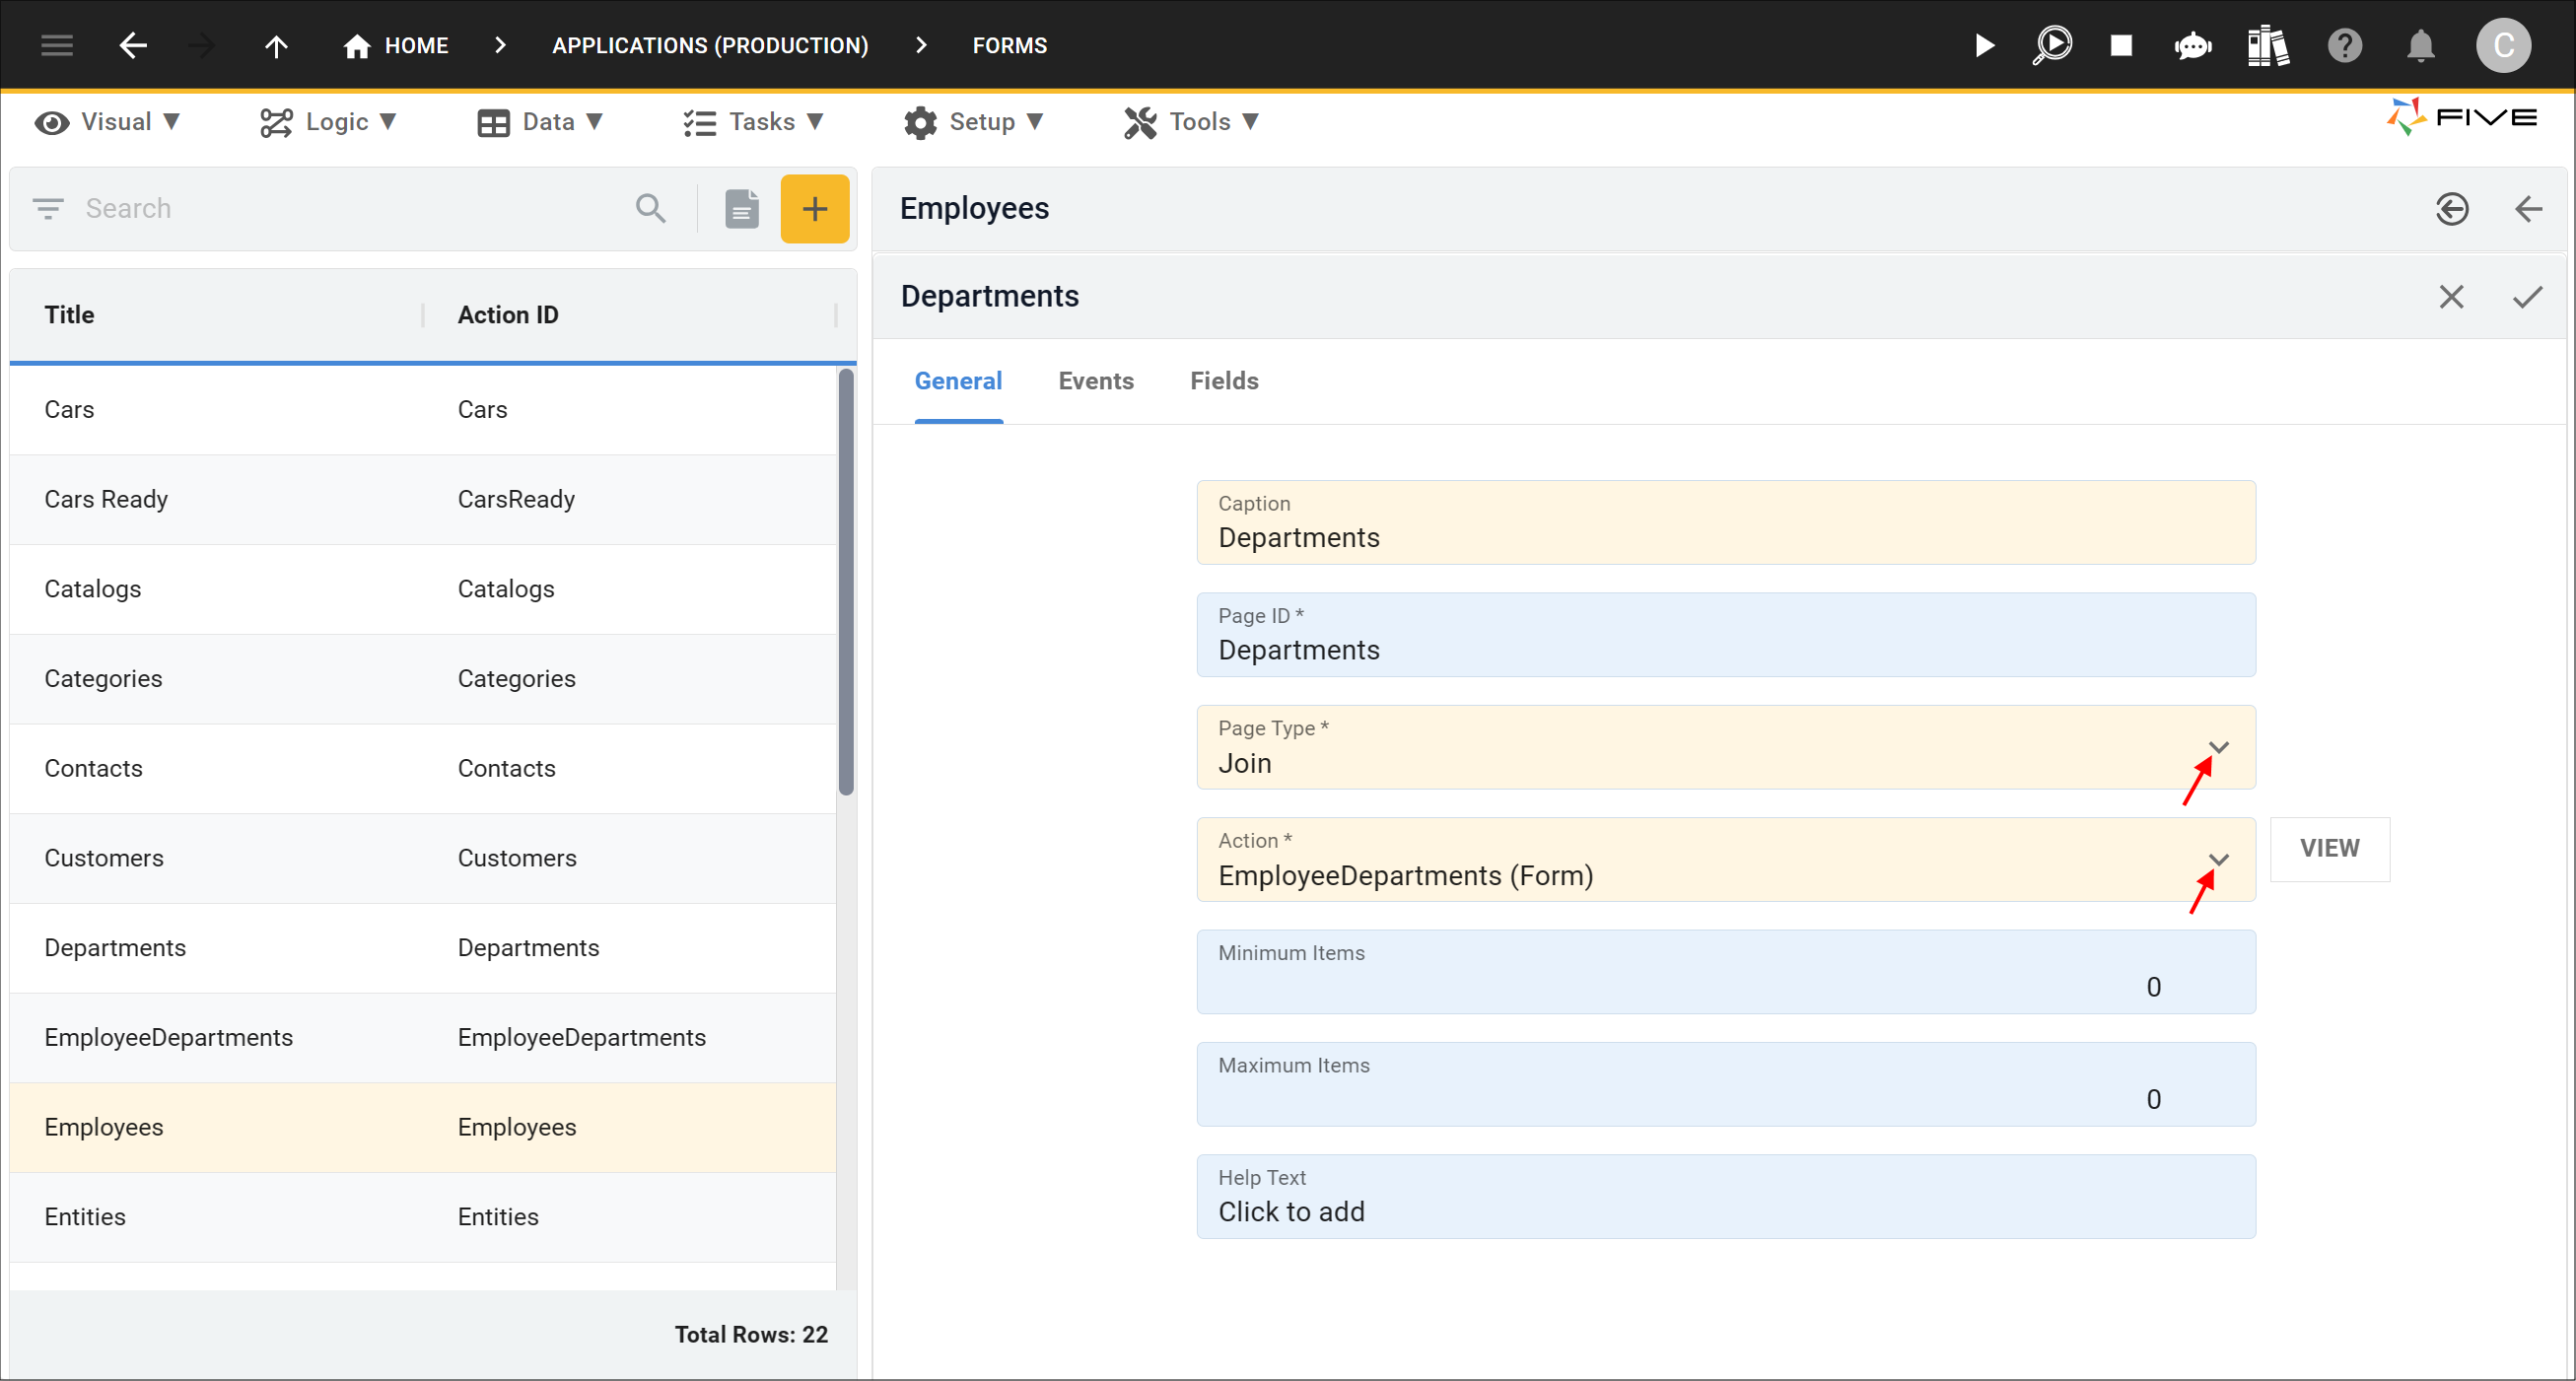
6. Click the Save button in the form app bar.
7. Click the Save button in the form app bar above the list.
How This Works in an Application
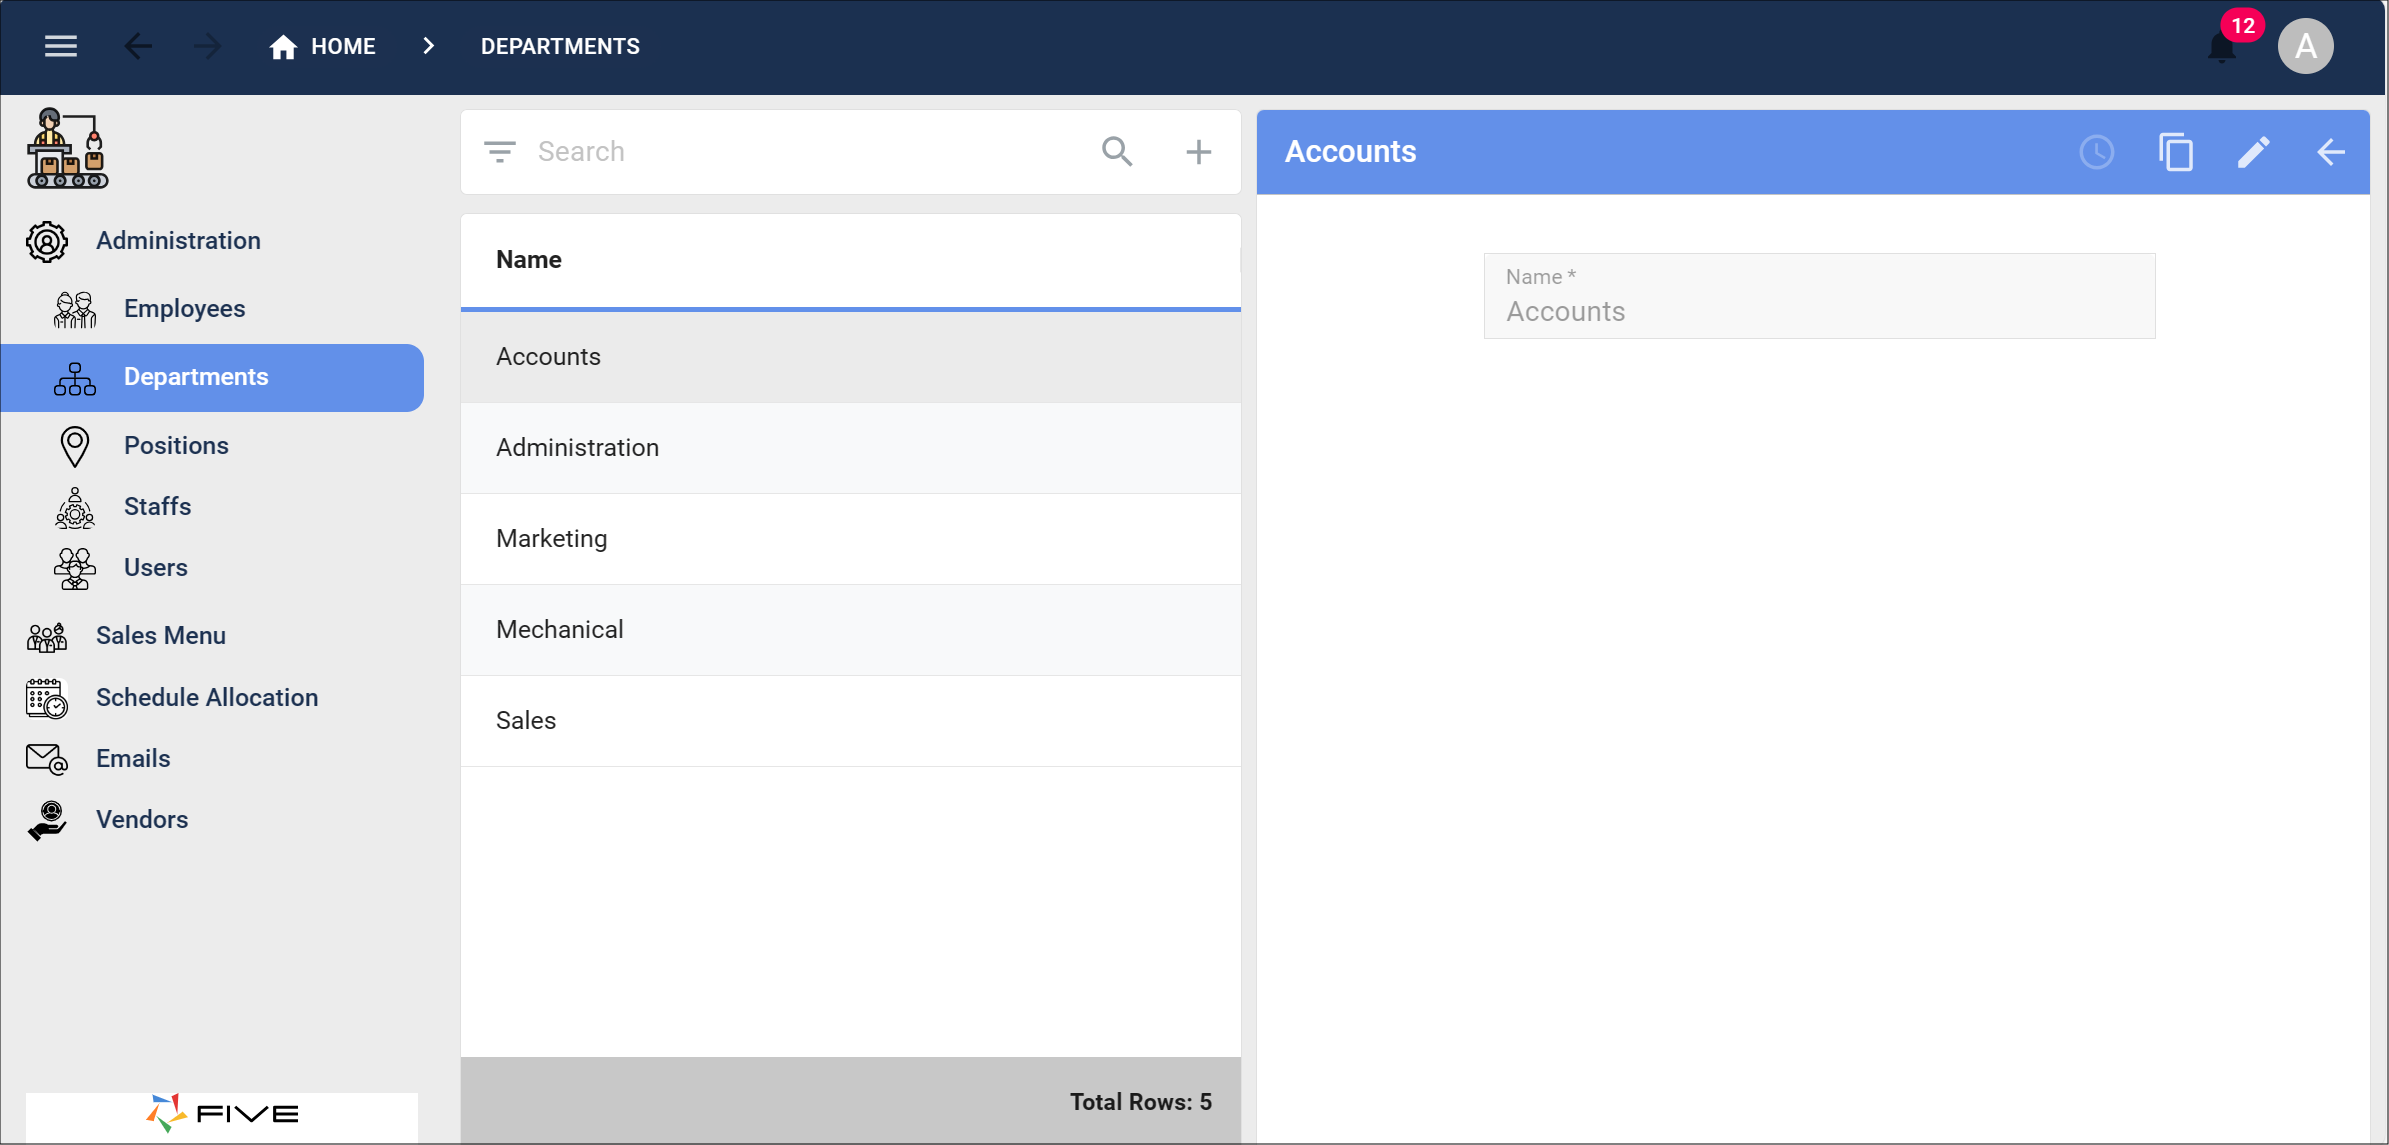
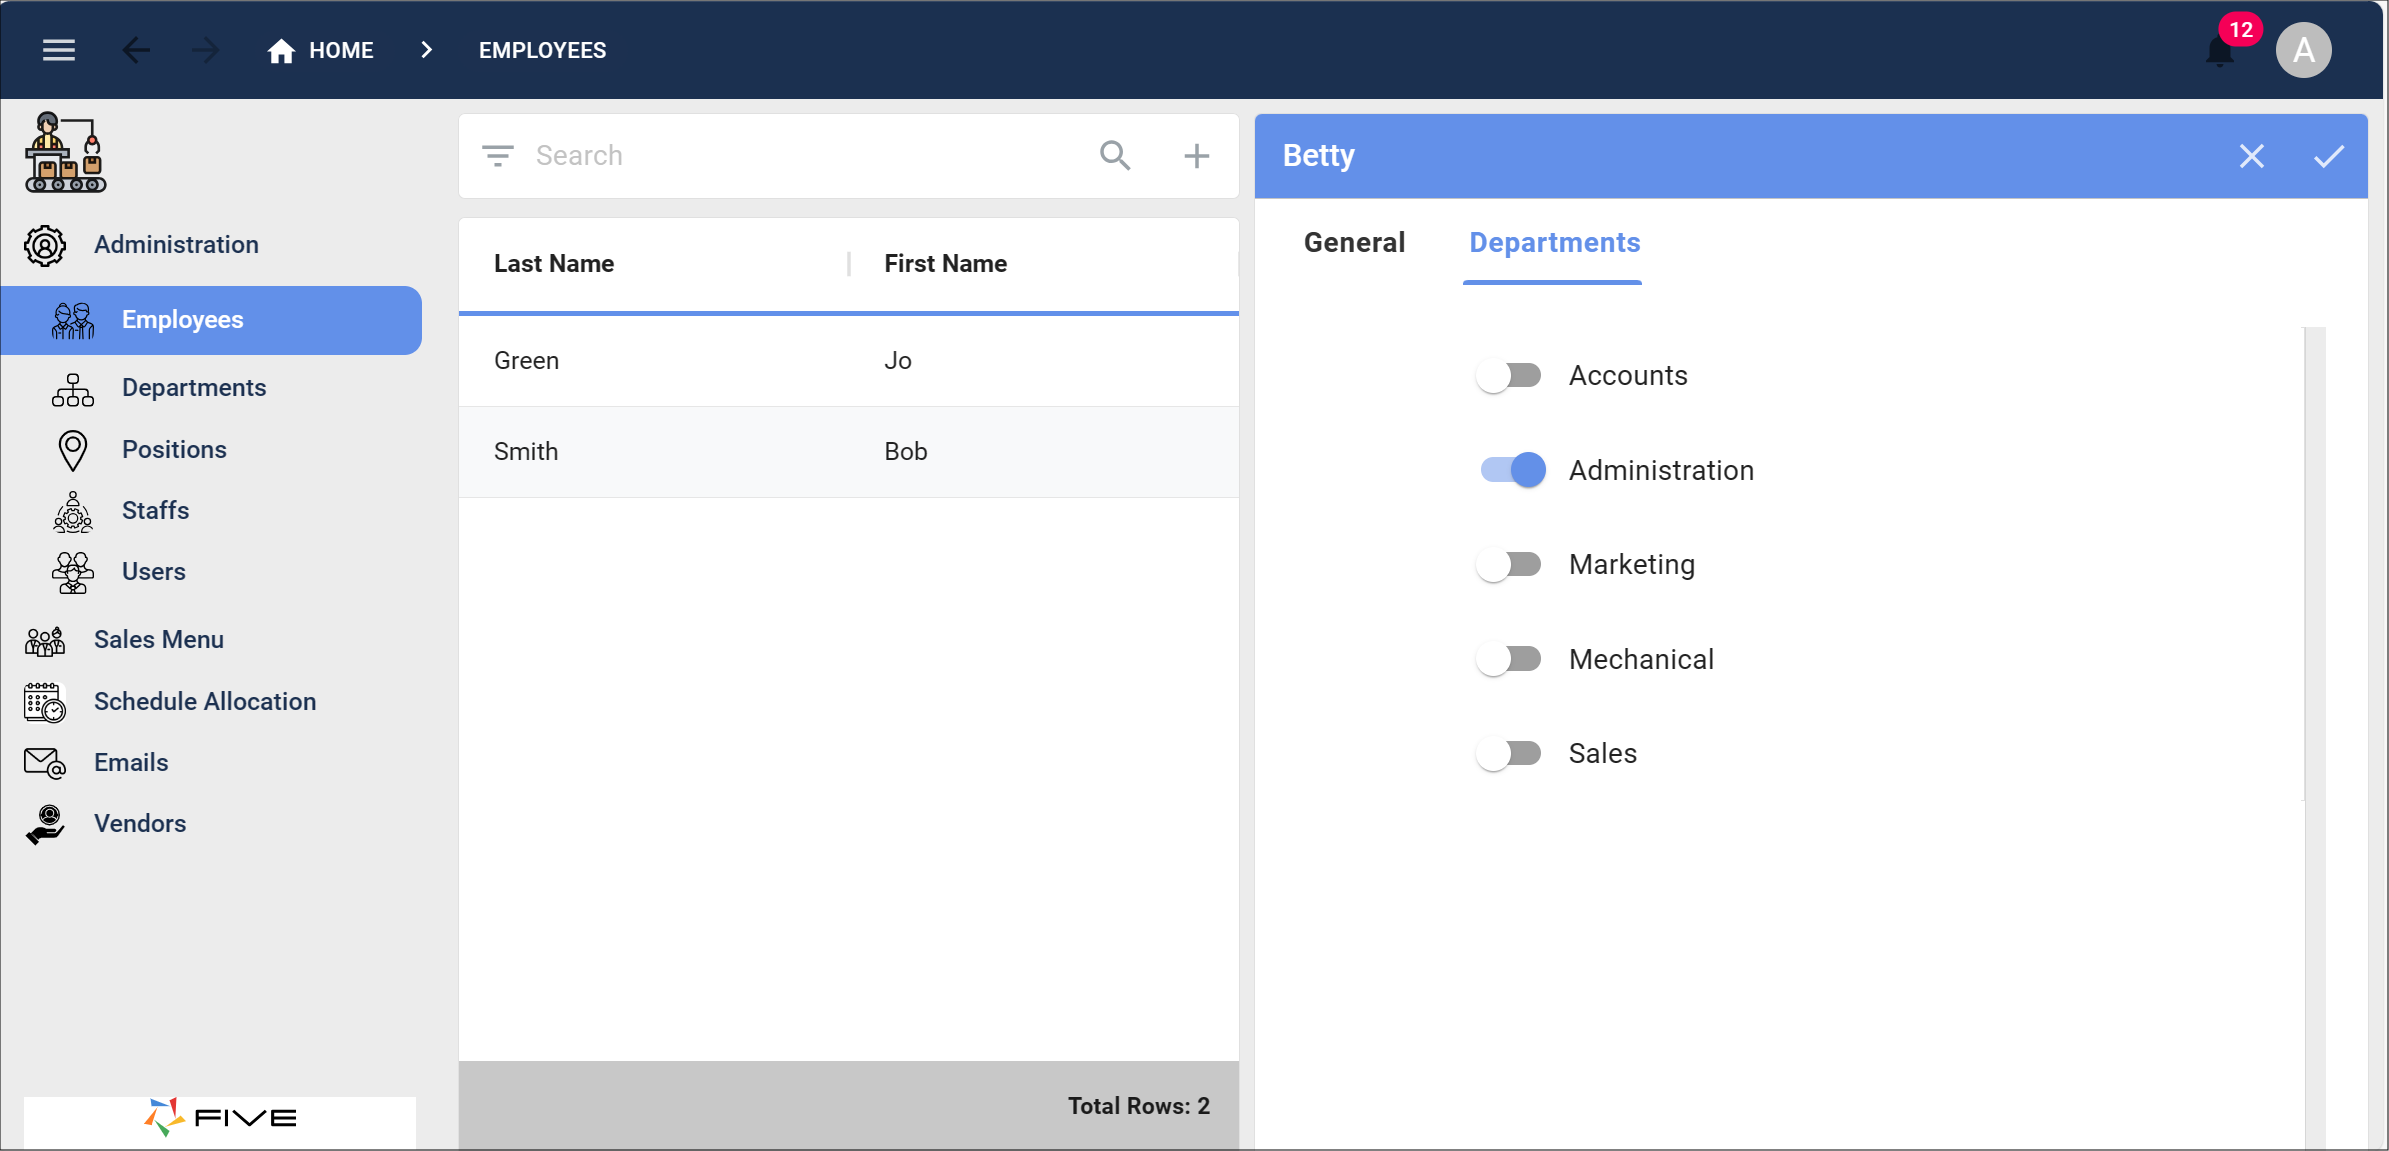
Firstly, select the first form (Departments) you added. This is where you add the names that will be positioned next to a switch.
Next select the menu item holding your second form (Employees), add a new record and click the tab holding your join page.
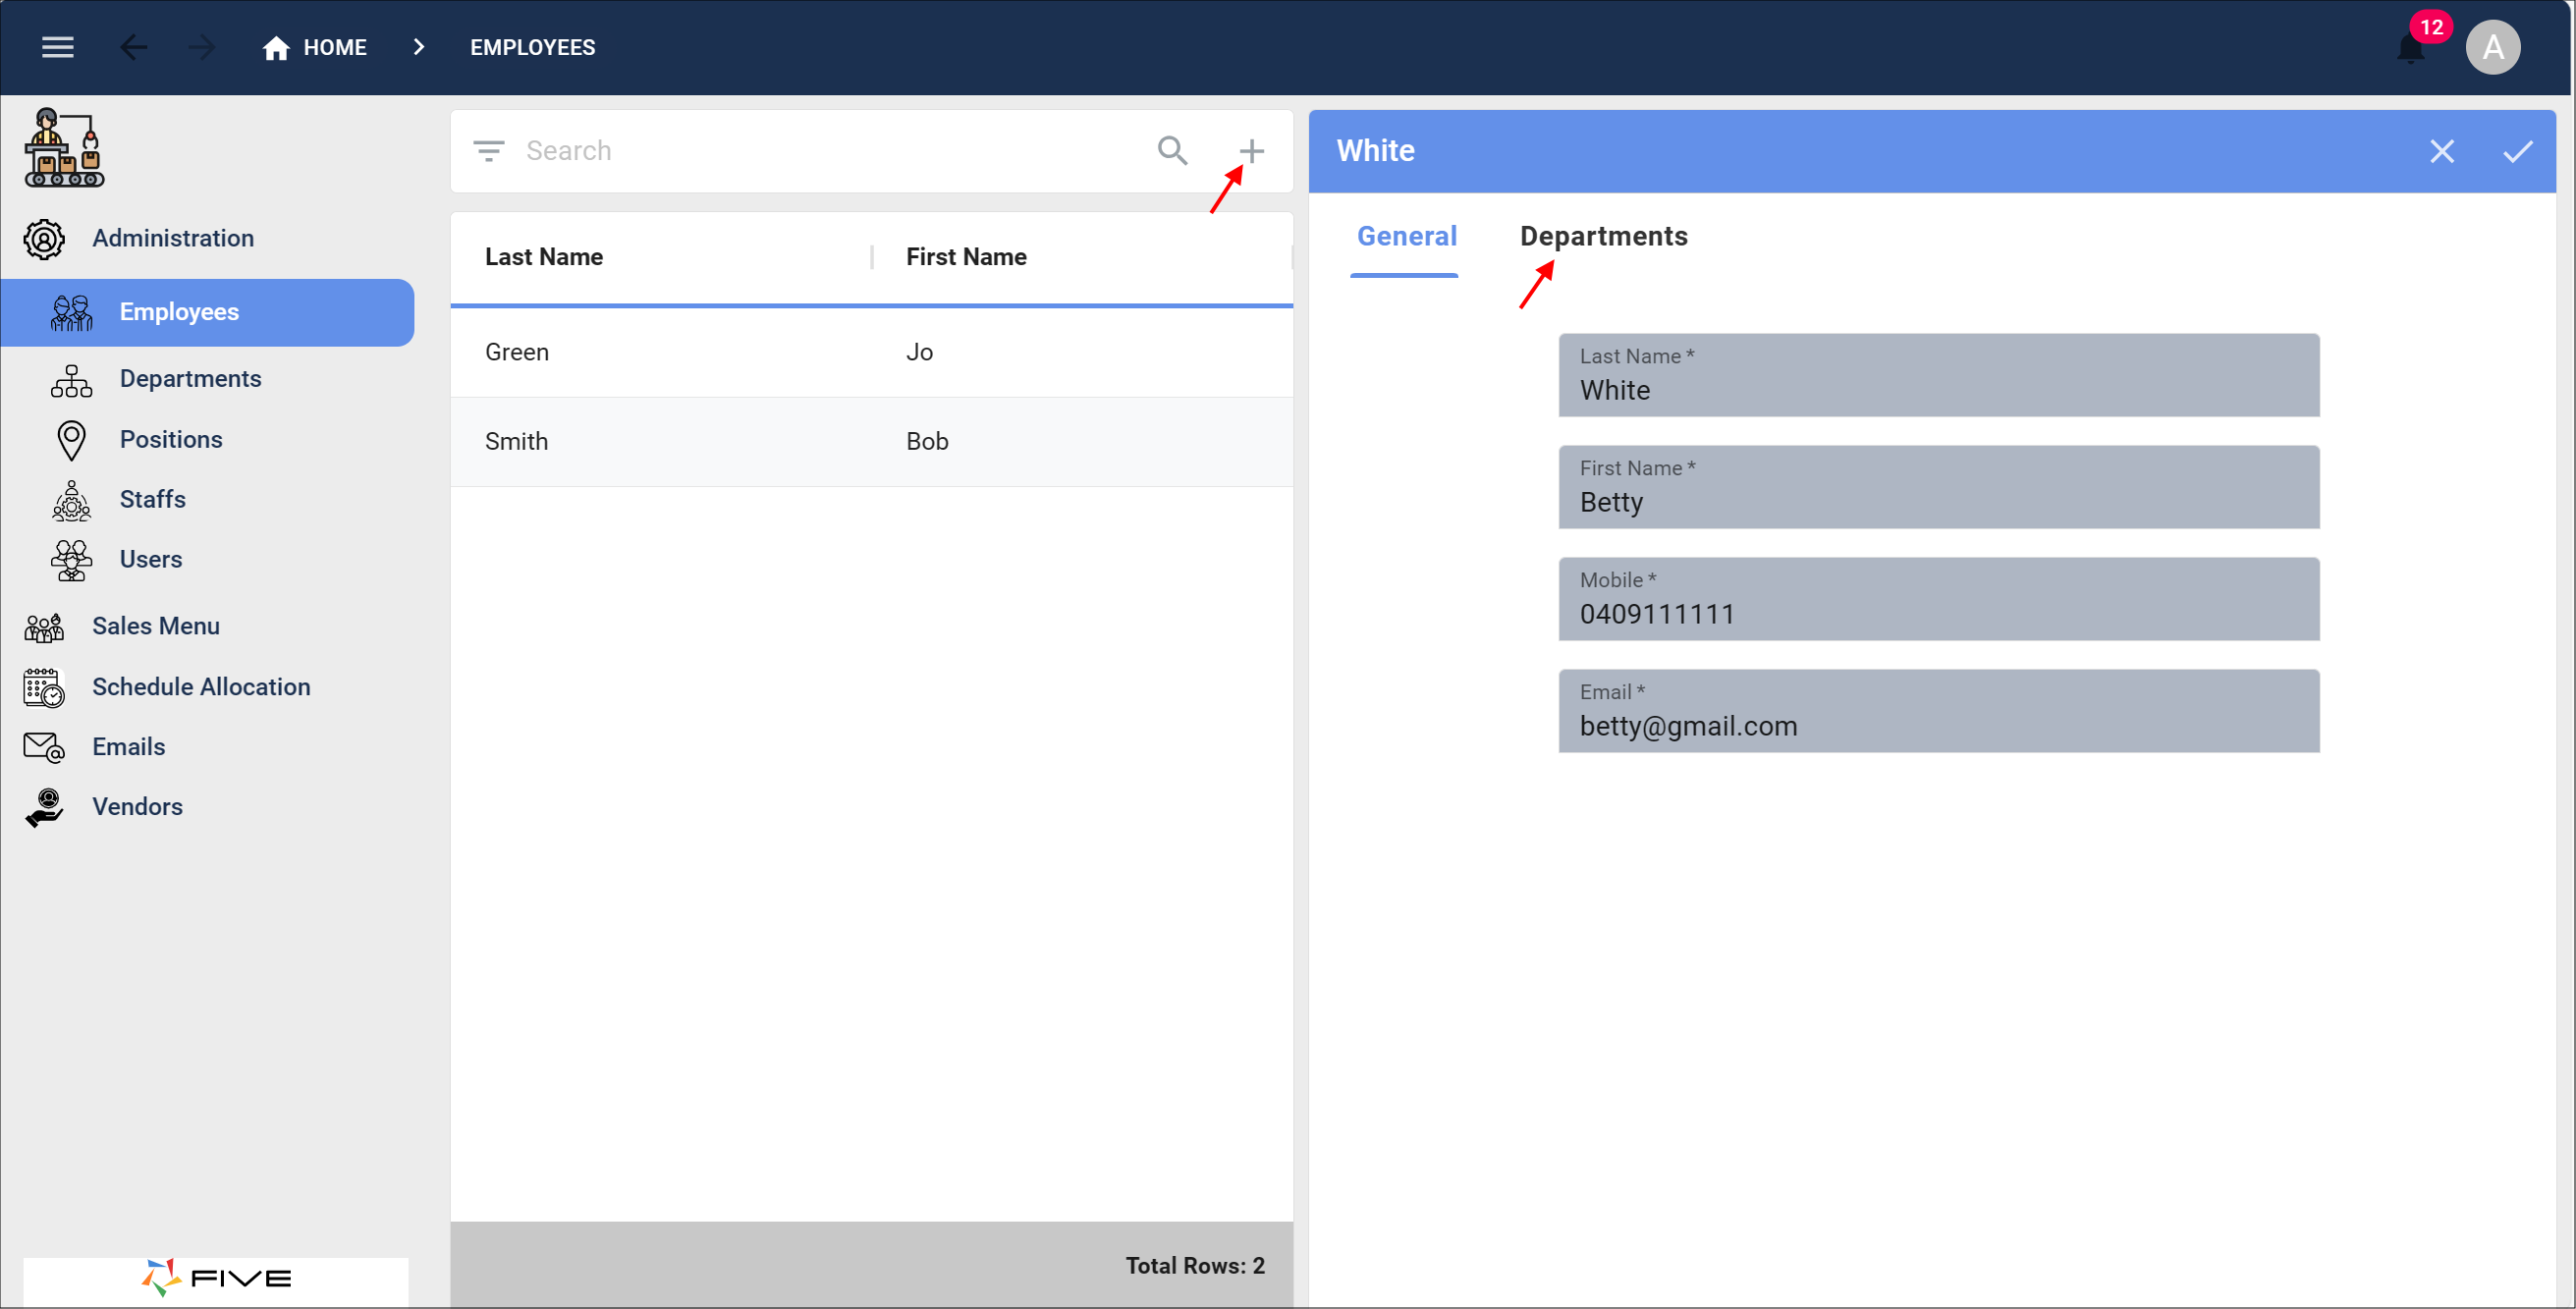
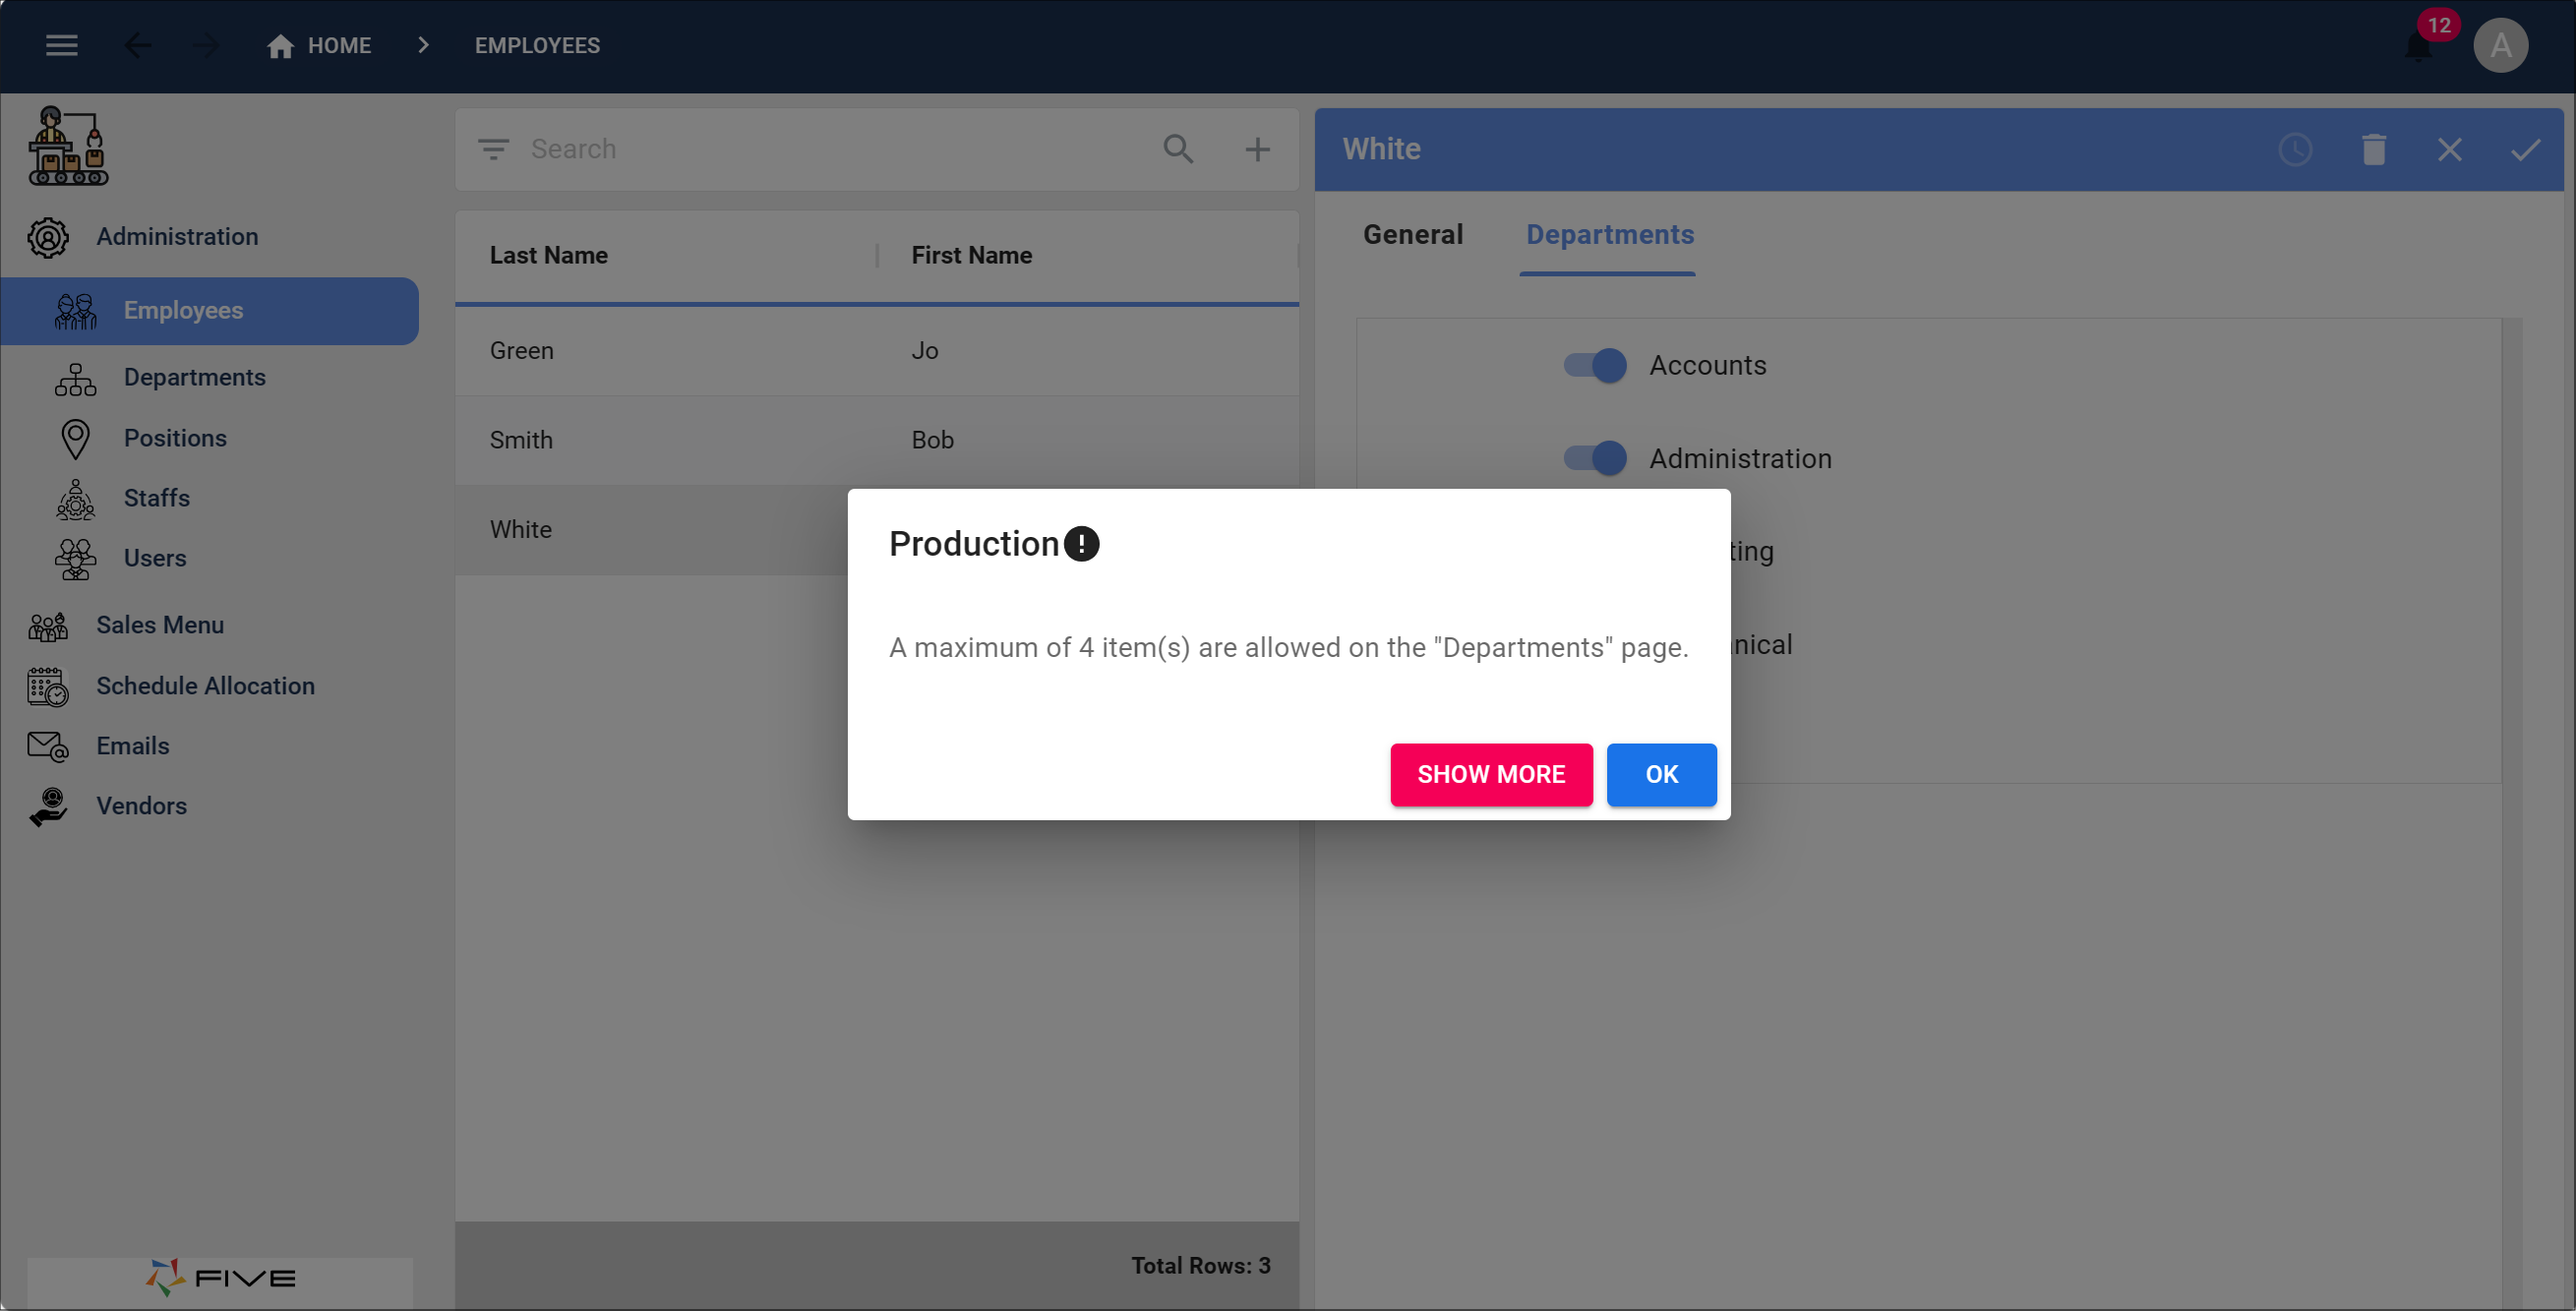
Once you click the tab holding the join page, your switches will be available to select.
Set Minimum and/or Maximum Items to Select
Whe creating a join page, you can define a minimum and/or maximum amount of items that can be selected. The following options can be selected.
- A minimum amount of items with no maximum amount set.
- A maximum amount of items with no minimum amount set.
- A minimum and maximum amount of items. The selected amount of items must fall between the minimum and maximum criteria.
- No minimum and maximum amount of items. Any amount of items, including zero, can be selected. This is the default.
Set Minimum Items
1. Type an integer value in the Minimum Items field.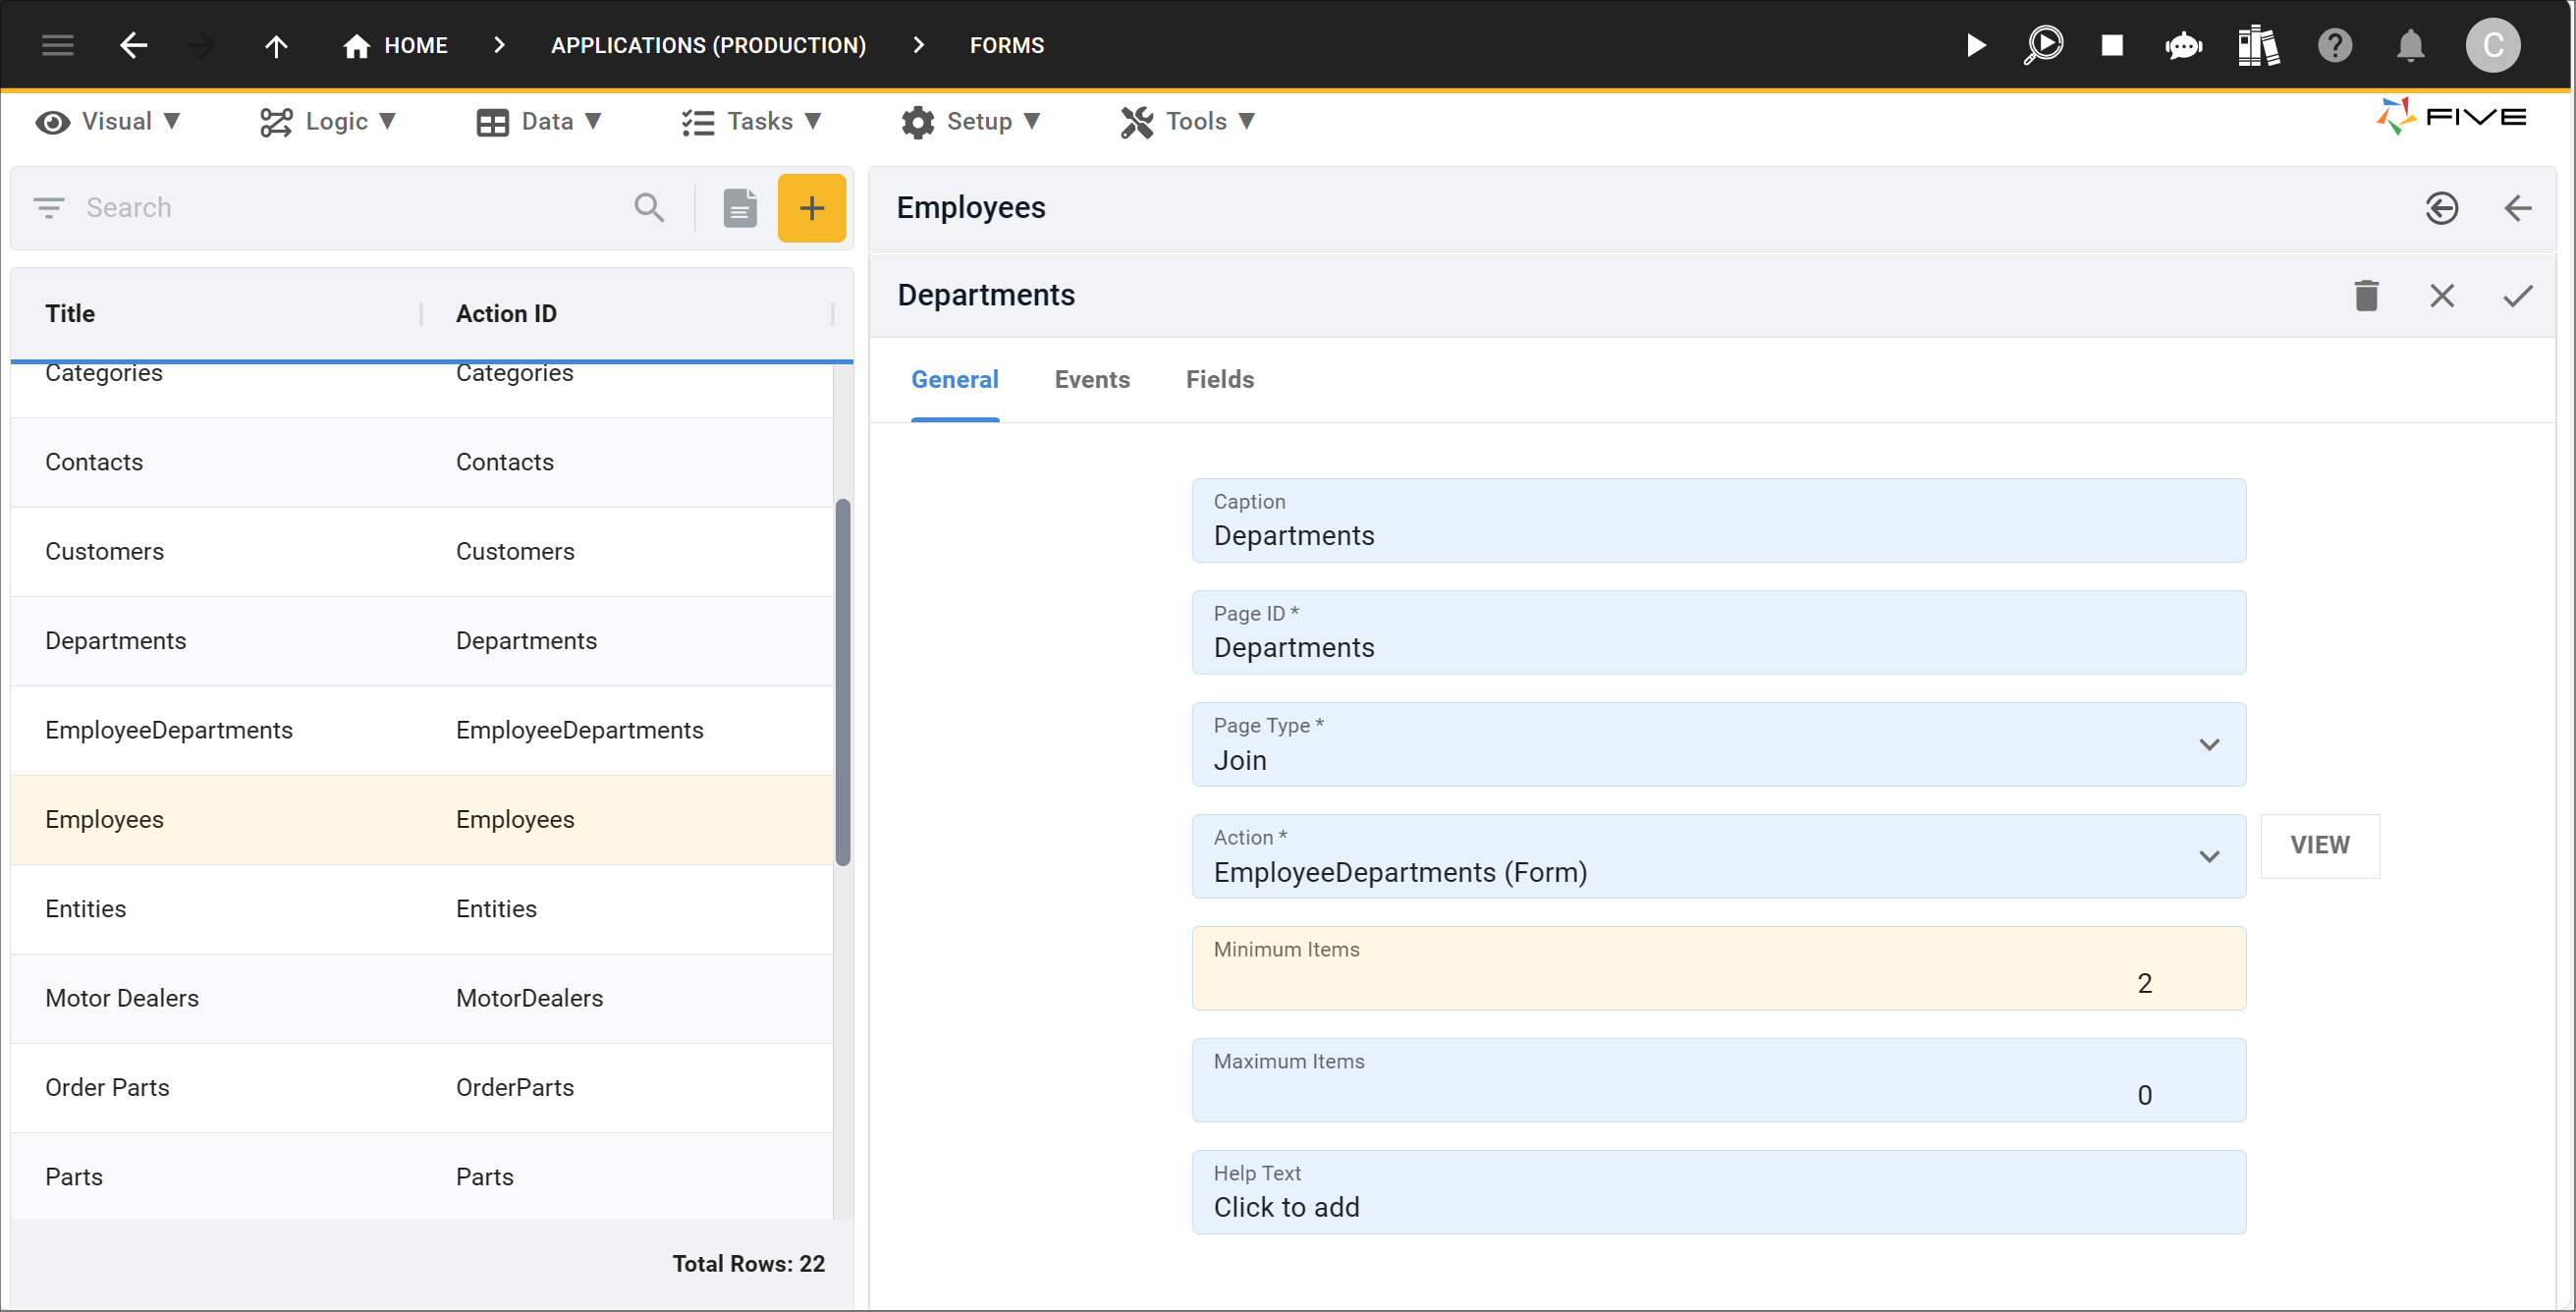
Set Maximum Items
1. Type an integer value in the Maximum Items field.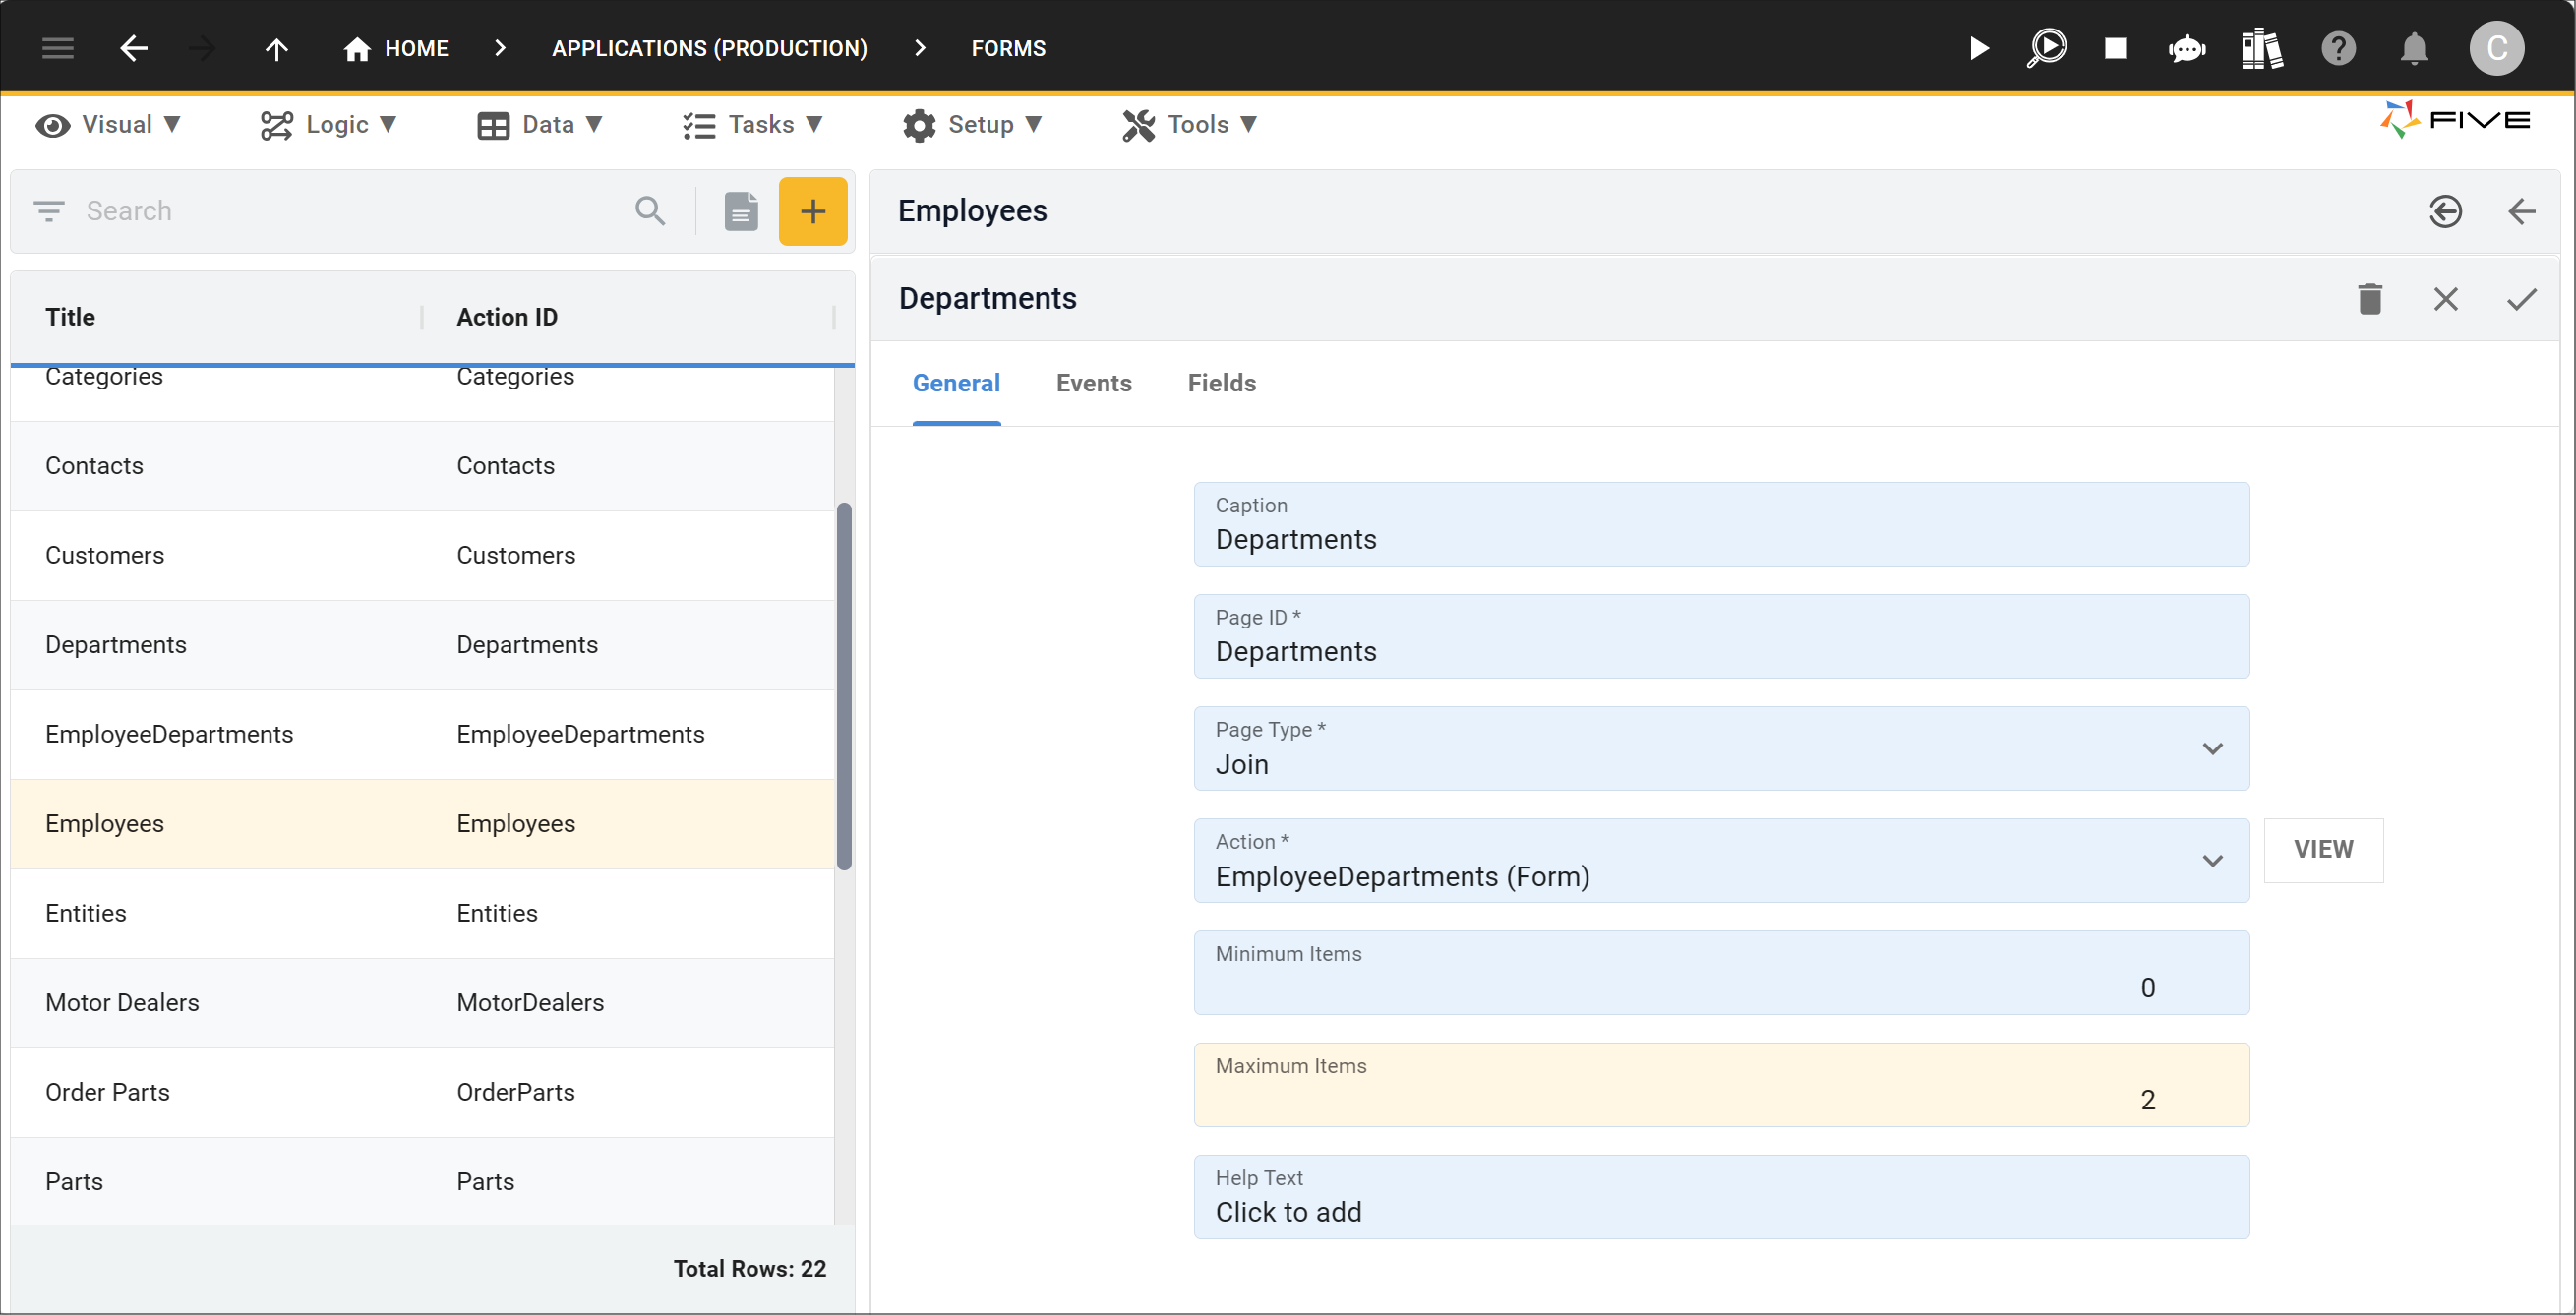
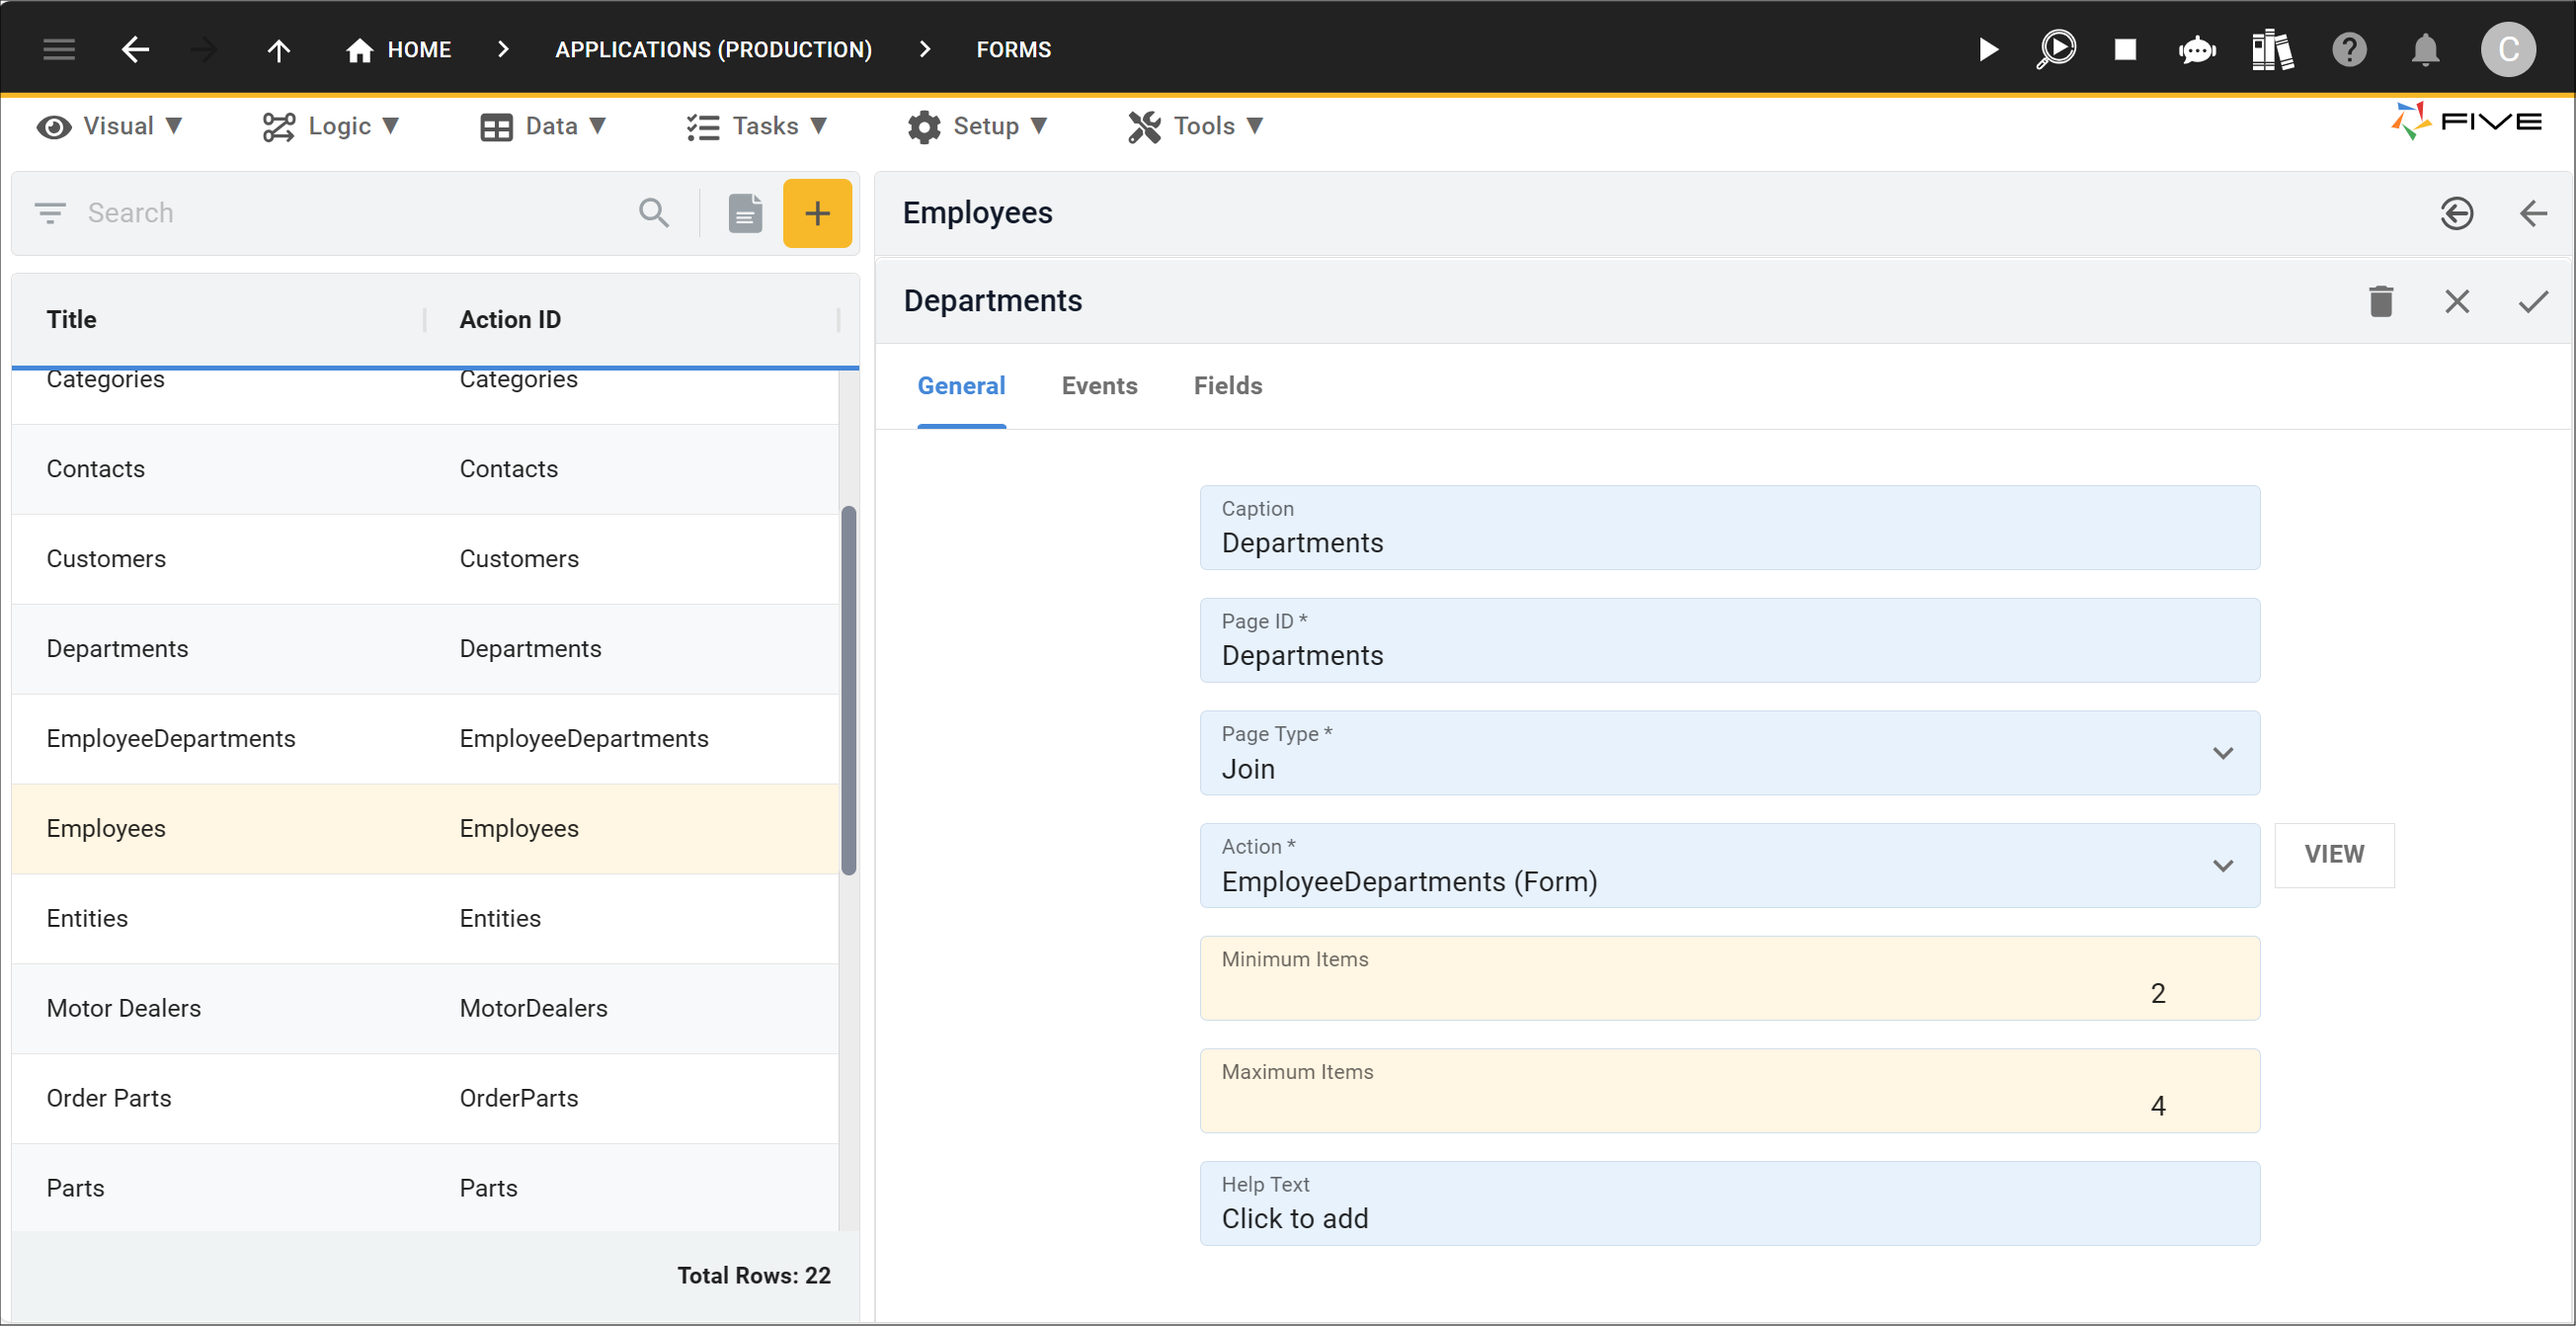
Set Minimum and Maximum Items
1. Type an integer value in the Minimum Items field.2. Type a larger integer value in the Maximum Items field.
How This Works in an Application
If the minimum is not reached, an error will return.

If the maximum exceeds, an error will return.