9 - Call a Server-Side Function From the Client
Last updated 16/12/2025
This documentation will explain how you can add a function that executes on the client and calls a function in the backend to interact with the database.
Problem
In the Portfolio application, when a buy transaction is made, there is no warning that you maybe buying under the low price or over the high price for the day.
In Five, we can create two functions, the
In Five, we can create two functions, the
CheckPrice()
function will execute on the client and call the CheckPriceServer()
function from the backend to get the results from the database so we can display a message alerting that the buy price is lower or higher than the daily price.When in Five's Code Editor you will be interacting with Five's API. In the
CheckPriceServer()
function you will be using the following functions and properties:
- is a function on the Five
object that executes SQL statements on the Five server and returns results.
- is a function on the Five
object that returns a indicating success.
- is a function on the Five
object that returns an error with an optional message and notification parameters.
Add the CheckPriceServer Function
1. Click Logic in the menu followed by Code Editor in the sub-menu.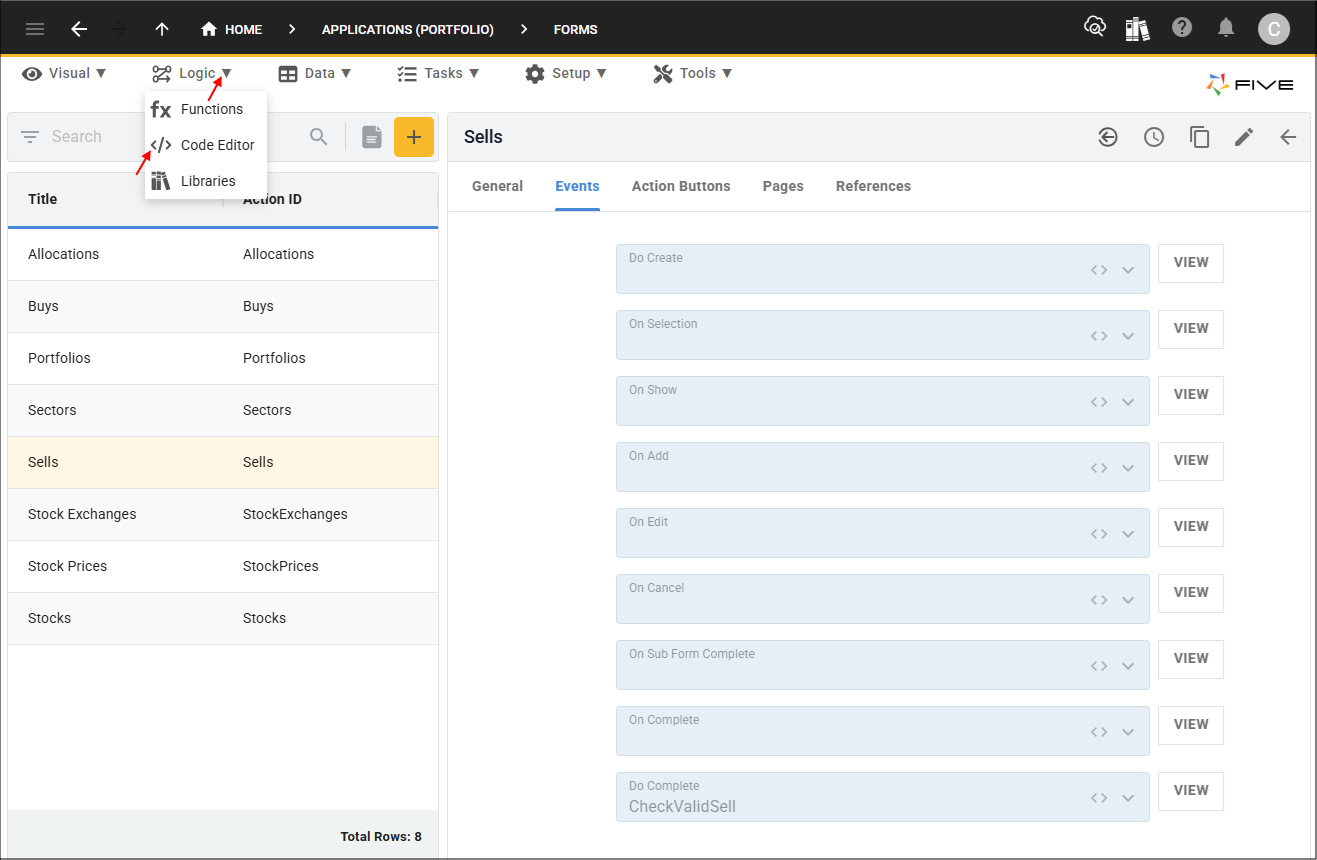
Figure 1 - Code Editor menu item
2. Click the Add New Code button.

Figure 2 - Add New Code button
3. Type CheckPriceServer in the Function ID field.
4. Select TypeScript in the Language field and click the OKAY button.
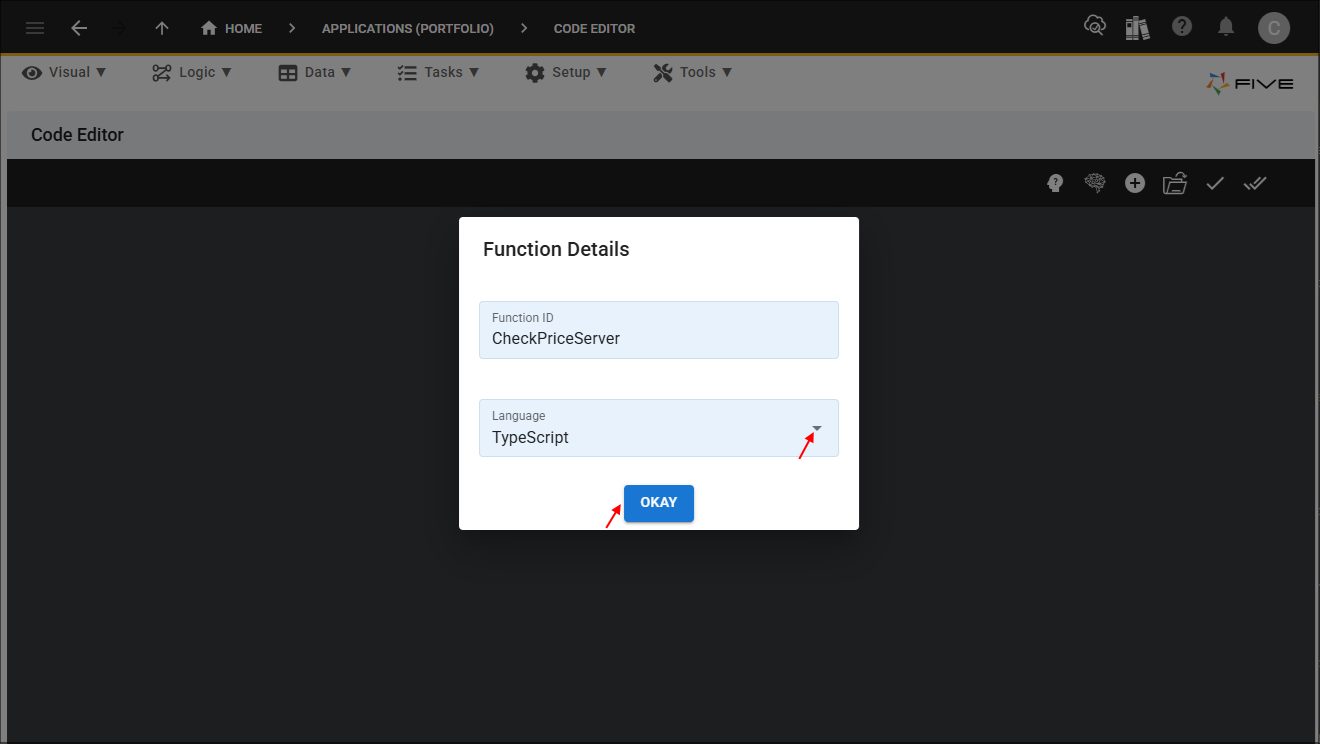
Figure 3 - Add CheckPriceServer function
5. Click the Copy button on the code block below.

CheckPriceServer
function CheckPriceServer(five: Five, context: any, result: FiveError) : FiveError {
    const sqlStatement: string = "SELECT HighPrice, LowPrice FROM StockPrice WHERE StockKey = ? AND PriceDate = ?";
    const queryresults: QueryResult = five.executeQuery(sqlStatement, 0, context.StockKey, context.TransactionDate);
    if (queryresults.values === null) {
        return five.success(result);
    }

    const highPrice: number = queryresults.records[0].HighPrice;
    const lowPrice: number = queryresults.records[0].LowPrice;
    const price: number = context.Price;
    let message = '';

    if ((highPrice === null) || (lowPrice === null)) {
        return five.success(result);
    } else {
        if (Number(price) < Number(lowPrice)) {
            message = 'Price is lower than price low for the day';
        } else if (Number(price) > Number(highPrice)){
            message = 'Price is higher than price high for the day';
        } else {
            return five.success(result);
        }
    }

    return five.createError(result, message)
}
6. Paste the code block over the template in the Code Editor.

Figure 4 - CheckPriceServer code
Add the CheckPrice Function
In the
CheckPrice()
function you will be using the following functions and properties:
- is a property on the Five
object which returns the value associated to the field ID on the current form.
- is a function on the Five
object that executes a function on the Five server.
- is a function on the Five
object that is used to display a message to the user.
ErrErrorOk
- is a defined error code which indicates successful execution.
- is a function on the Five
object that returns a indicating success.
1. Click the Add New Code button.
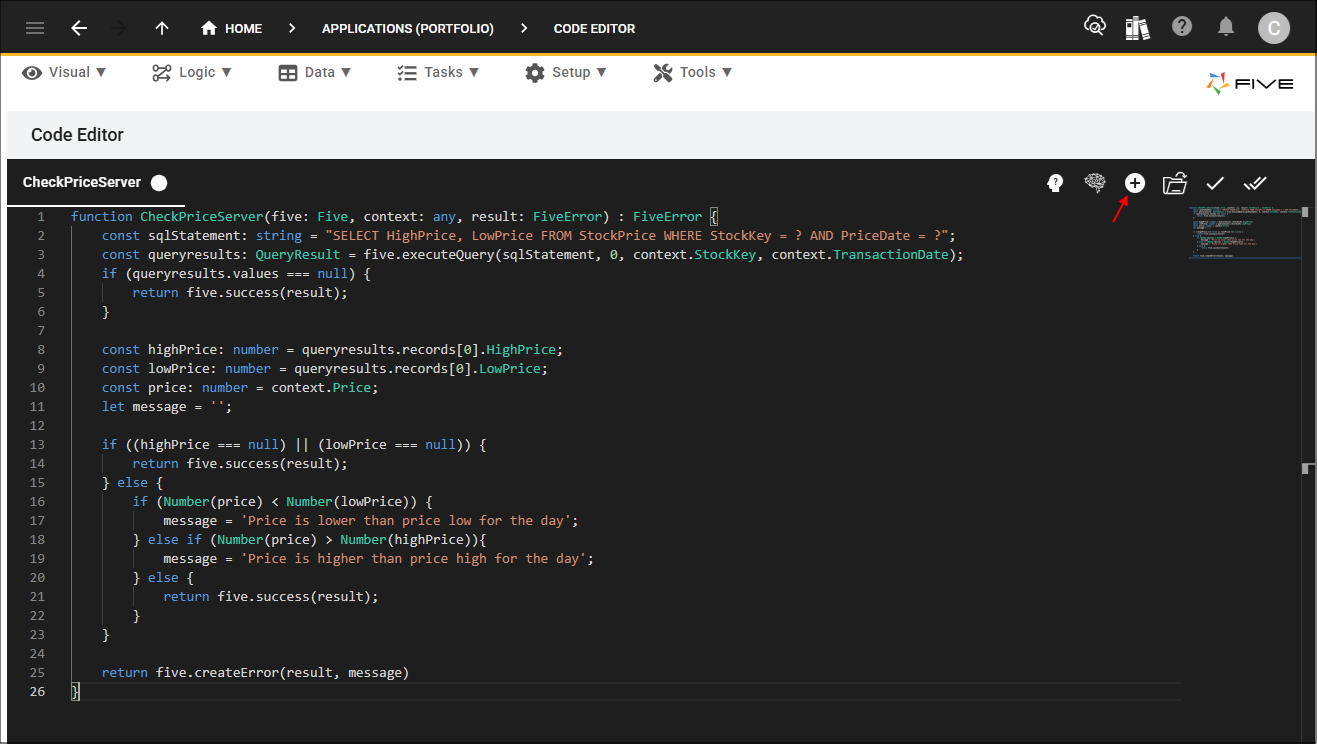
Figure 5 - Add New Code button
2. Type CheckPrice in the Function ID field.
3. Select TypeScript in the Language field and click the OKAY button.

Figure 6 - Add CheckPrice function
4. Click the Copy button on the code block below.
CheckPrice
function CheckPrice(five: Five, context: any, result: FiveError) : FiveError {
    const functionKey: string = '';
    const applicationKey: string = '';
    const selectedFile: any = null;
    const functionName: string = 'CheckPriceServer';

    const variables: any = {}
    variables['StockKey'] = five.field.StockKey;
    variables['TransactionDate'] = five.field.TransactionDate;
    variables['Price'] = five.field.Price;

    const _five: Five = five;
    five.executeFunction(functionName, variables, selectedFile, functionKey, applicationKey, function (result) {
        if (result.serverResponse.errorCode === 'ErrErrorOk') {
            return;
        }

        const functionMessage = result.serverResponse.results;
        if (functionMessage !== '') {
            _five.showMessage(functionMessage);
        }
    });

    return five.success(result);
}
5. Paste the code block over the template in the Code Editor and click the Save All Tabs button.

Figure 7 - Save All Tabs button
Attach the CheckPrice Function
The
CheckPrice()
function needs to be attached to the Price field on the Buys form. When a user enters an amount in the Price field, the CheckPrice()
function will call
the CheckPriceServer()
function in the backend to validate they are not buying lower or higher than the daily price.
Path: Buys form > General page > Price field > On Validate event
1. Click Visual in the menu followed by Forms in the sub-menu.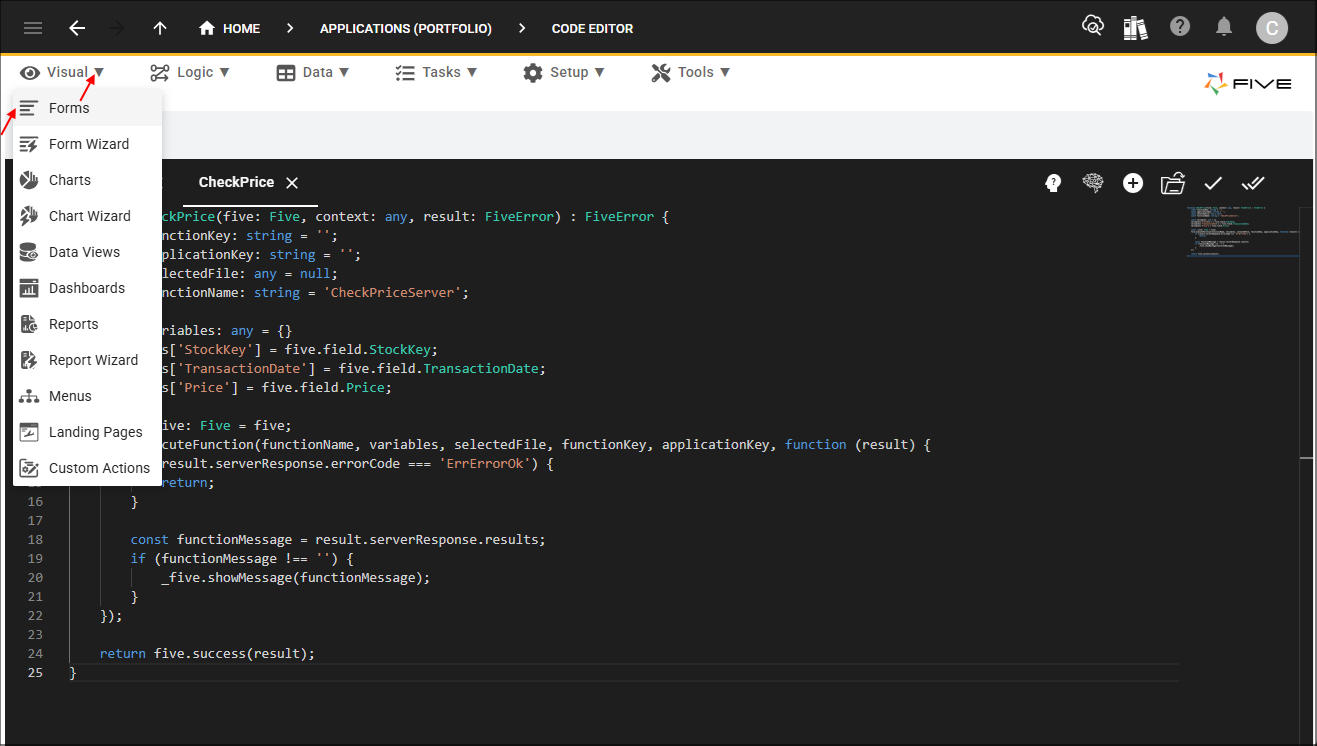
Figure 8 - Forms menu item
2. Select the Buys record in the list and click the Pages tab.
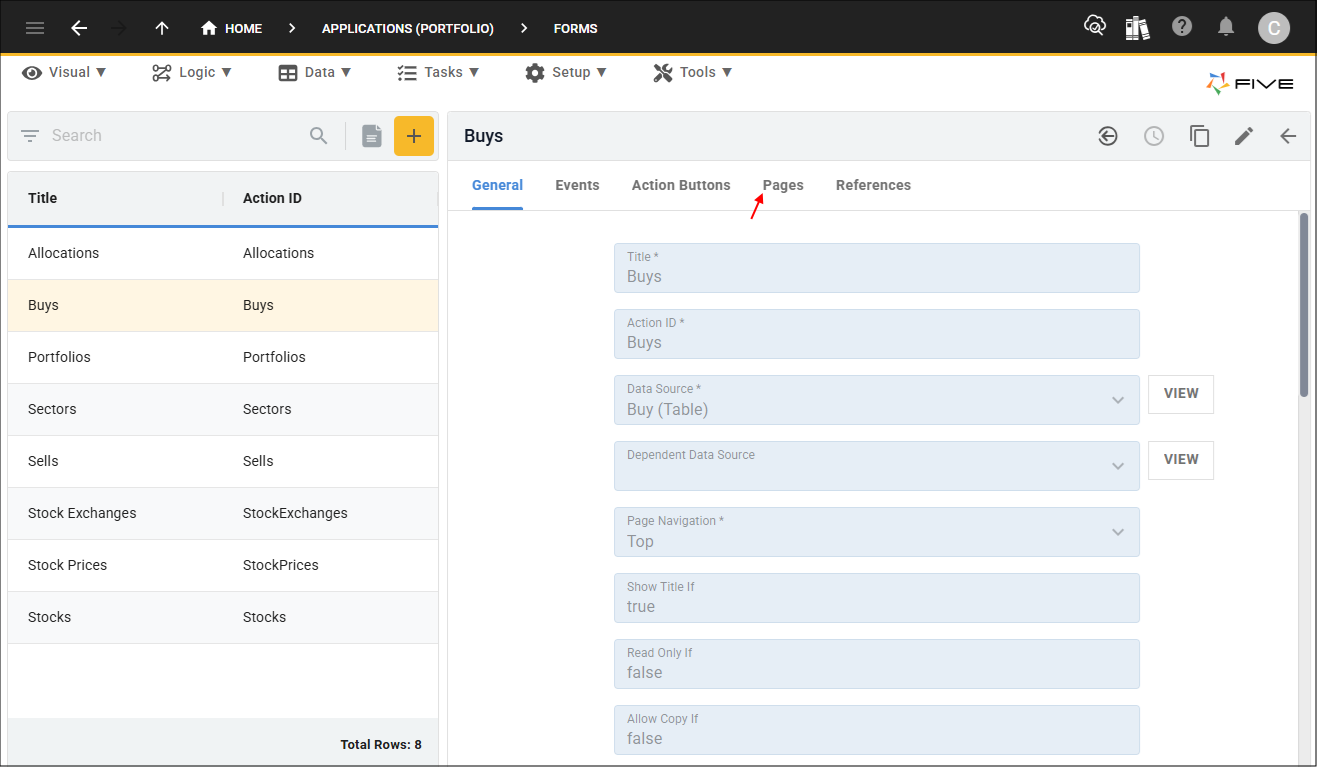
Figure 9 - Pages tab
3. Select the General record.

Figure 10 - General record
4. Click the Fields tab.
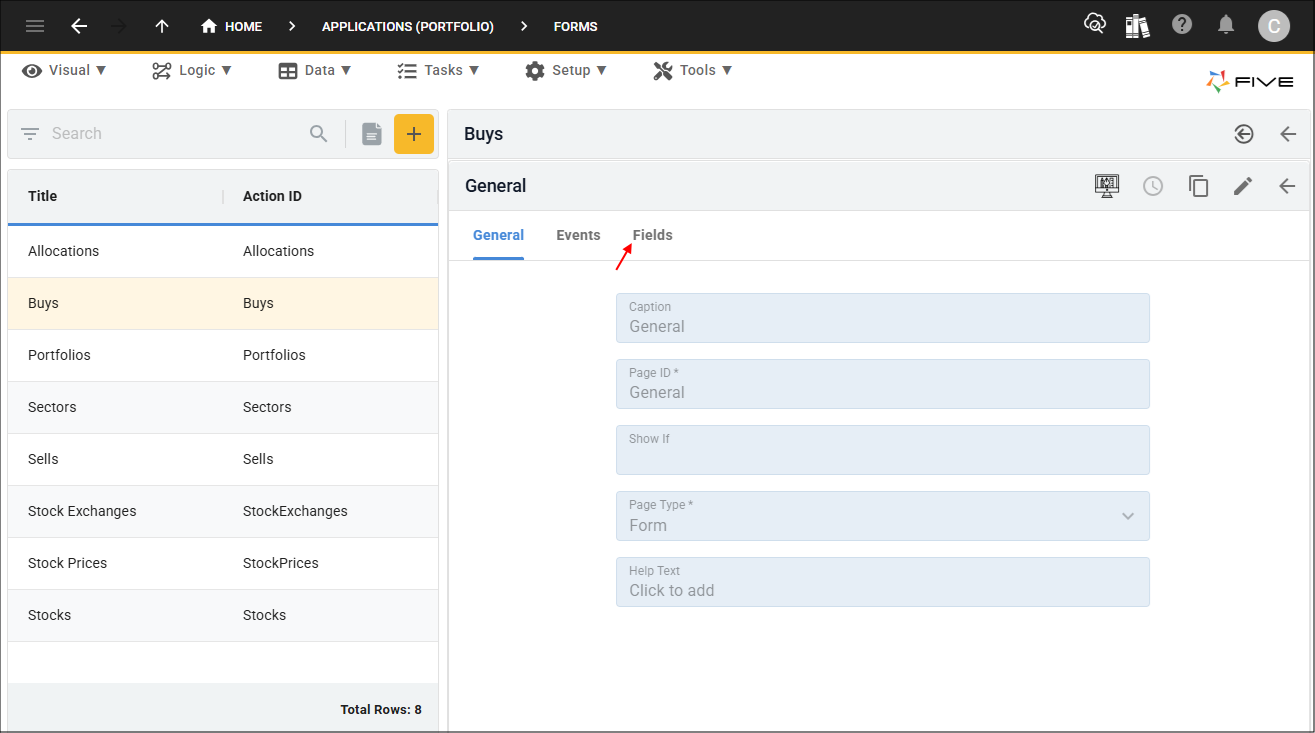
Figure 11 - Fields tab
5. Select the Price record.

Figure 12 - Price record
6. Click the Events tab.

Figure 13 - Events tab
7. Either click the Edit button in the form app bar or click directly in the On Validate field.
8. Select CheckPrice in the On Validate field.

Figure 14 - On Validate field
9. Click the Save button in the form app bar.
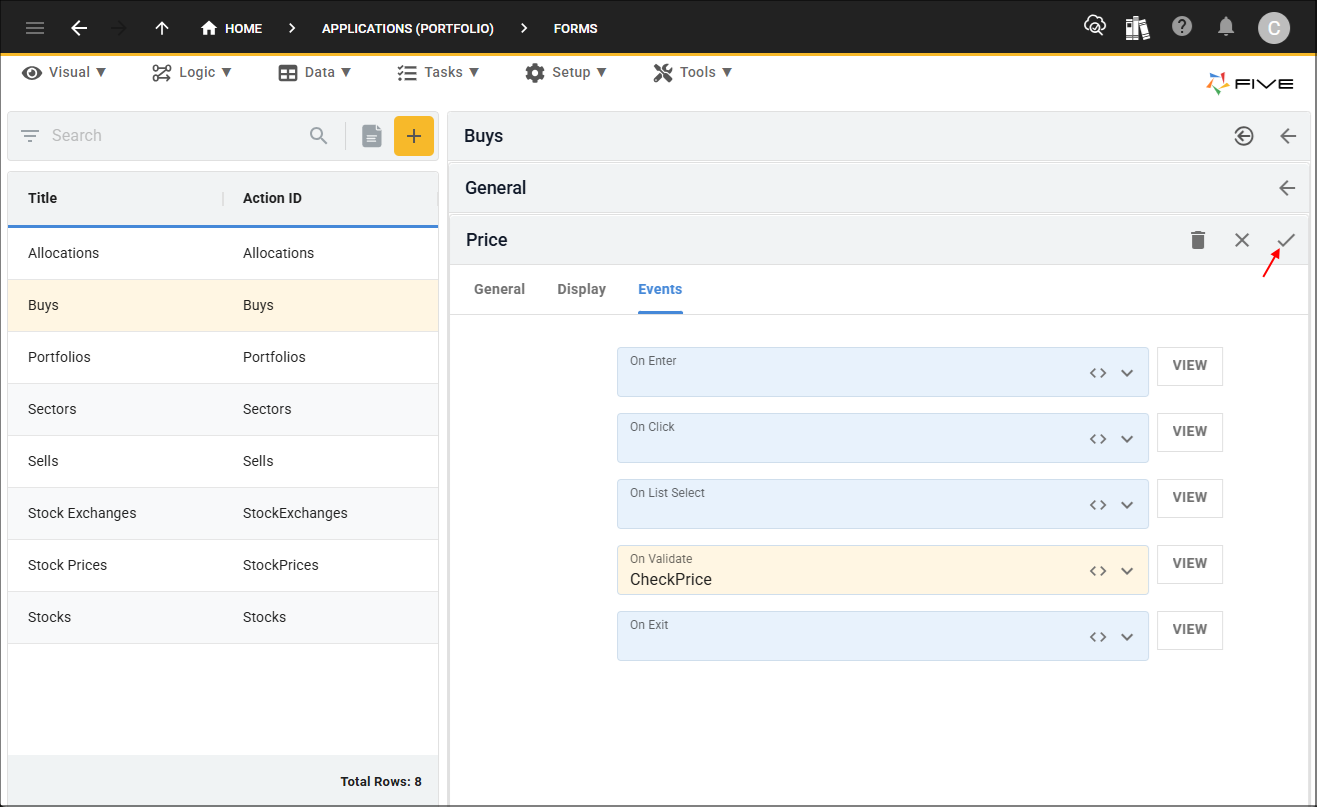
Figure 15 - Save button
10. Click the Save button in the form app bar above the list.
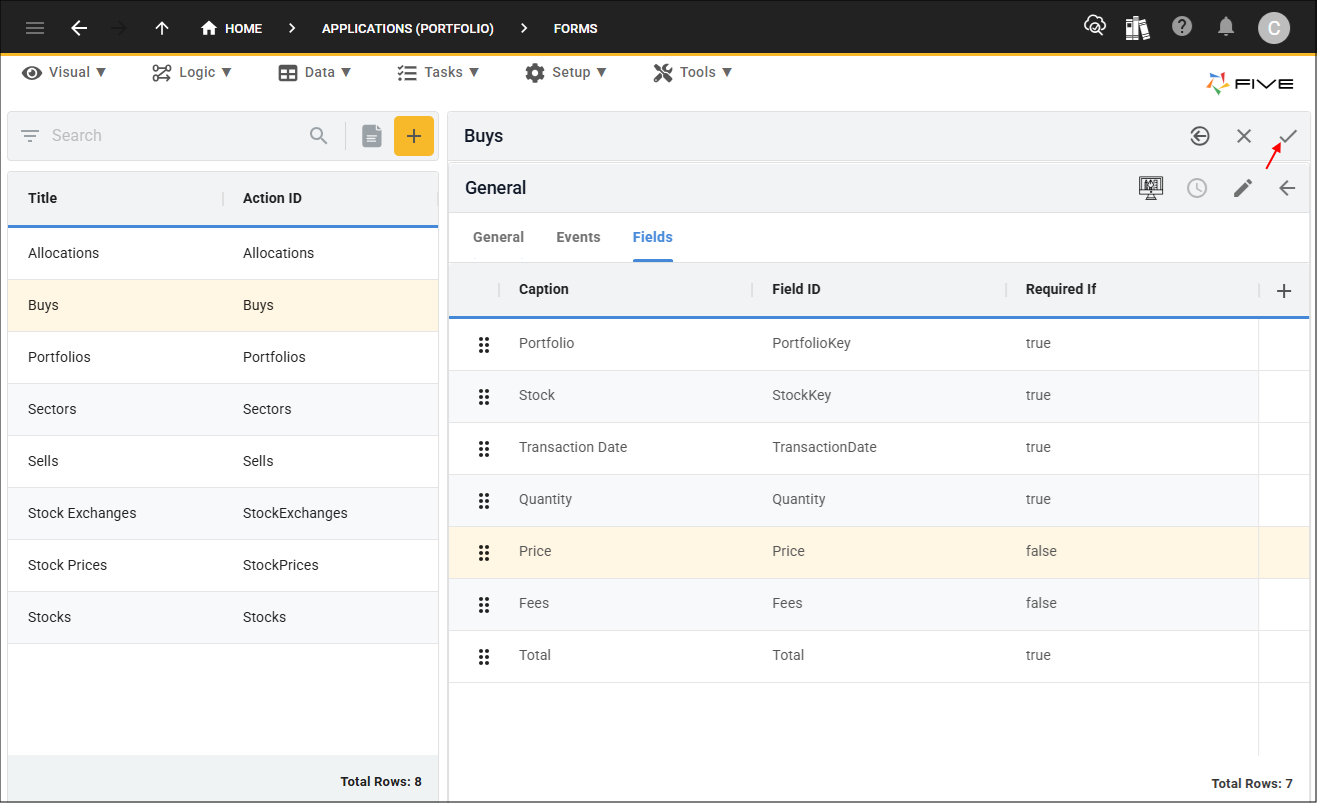
Figure 16 - Save button
tip
This is a good time to deploy/run the Portfolio application to see how the
CheckPrice()
and CheckPriceServer()
functions work!Test the Buys Form
1. Select the Growth Portfolio record in the list and click the Down button in the form app bar.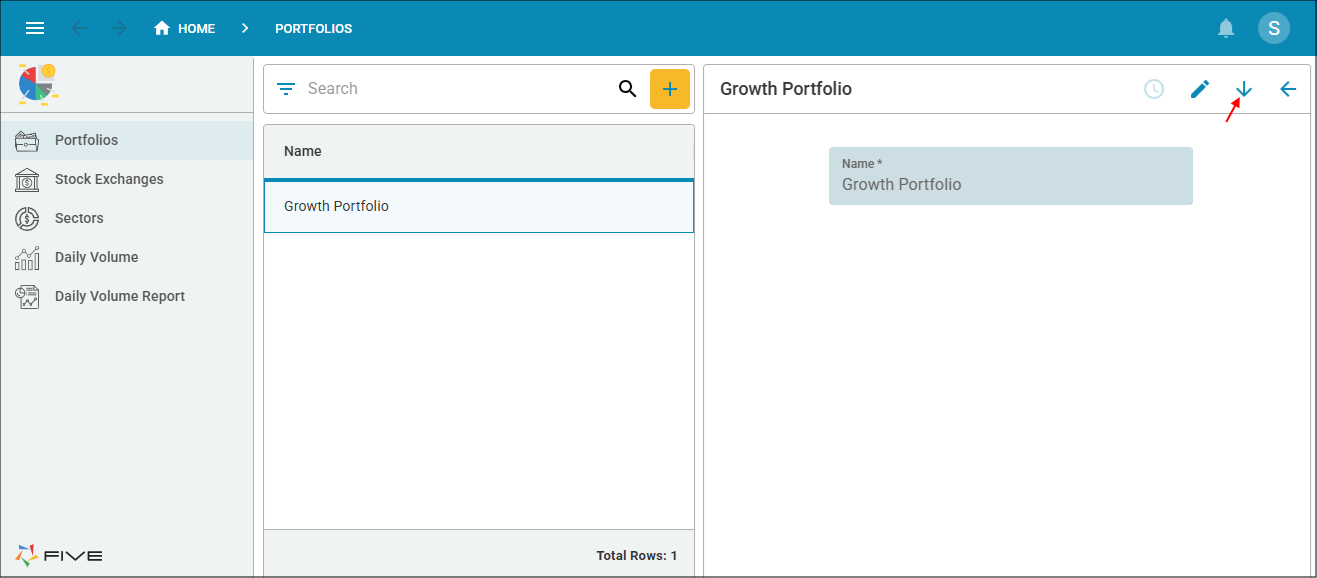
Figure 17 - Down button
2. Select Buys in the menu and click the Add Item button.
3. Select AAPL in the Stock field and click the calendar icon in the Transaction Date field.
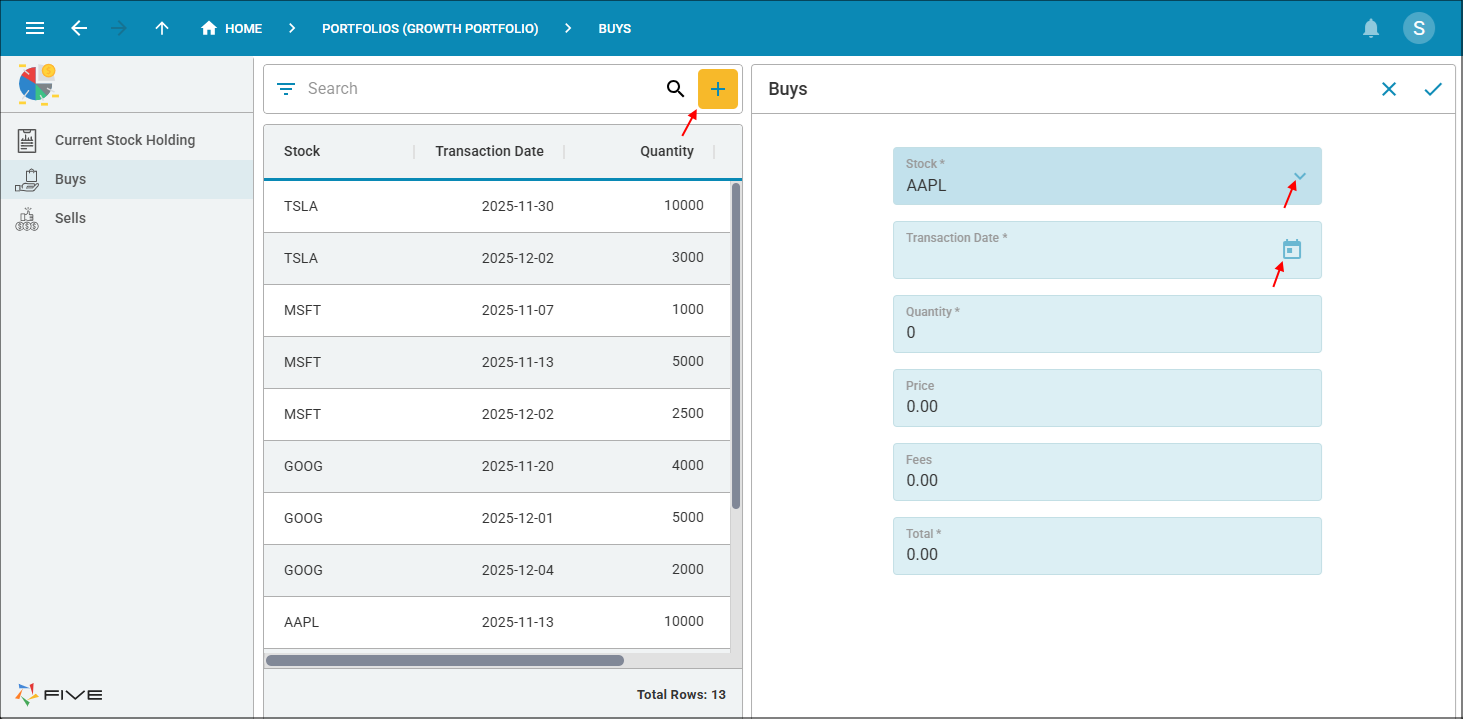
Figure 18 - Add AAPL buy record
info
Our selected record will be back dated as we are working with the data that is currently in the Portfolio application.
The APPL stock record we are going to check has a high price of 247.98 and a low price of 240.73 for the date 2025-01-02, shown in the image below. You can verify this by looking on the Stock Exchange or Sector forms.
The APPL stock record we are going to check has a high price of 247.98 and a low price of 240.73 for the date 2025-01-02, shown in the image below. You can verify this by looking on the Stock Exchange or Sector forms.
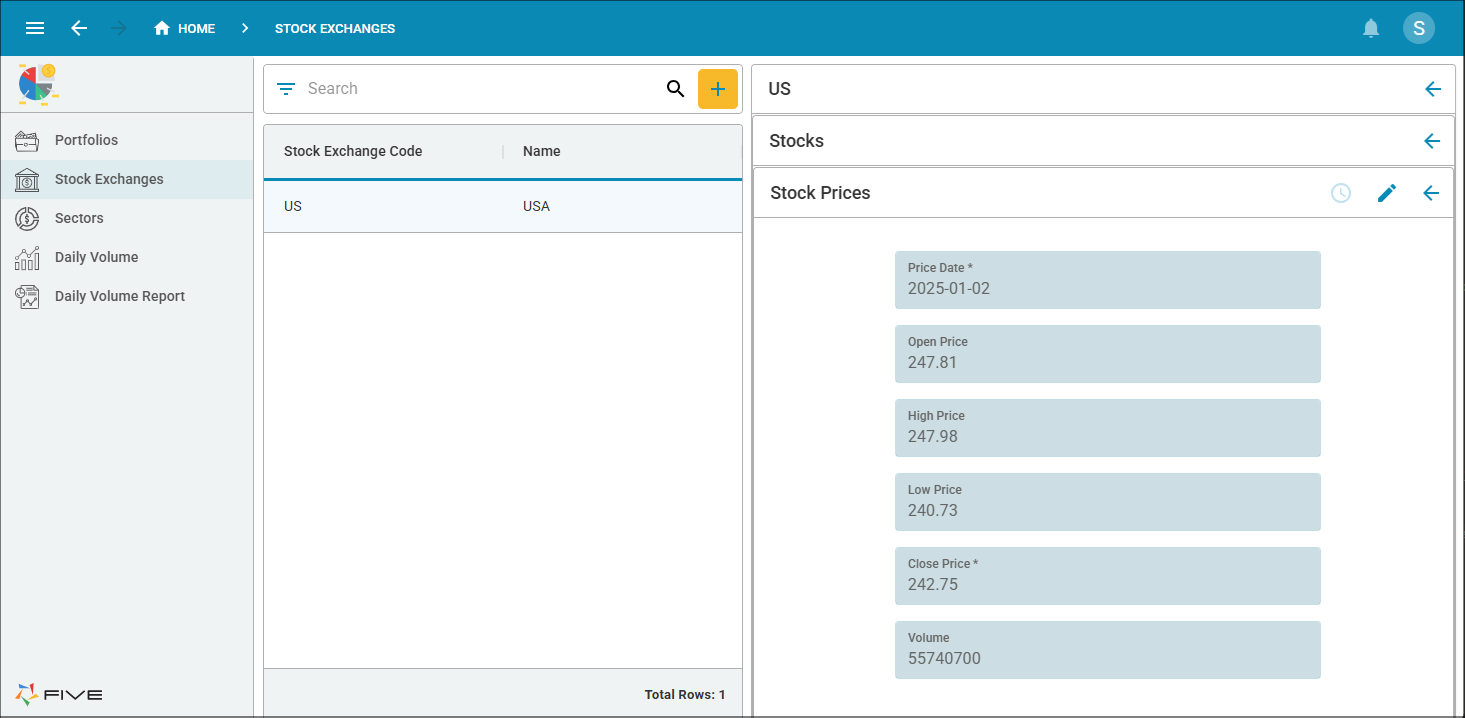
Figure 19 - APPL record
4. Select 2025.
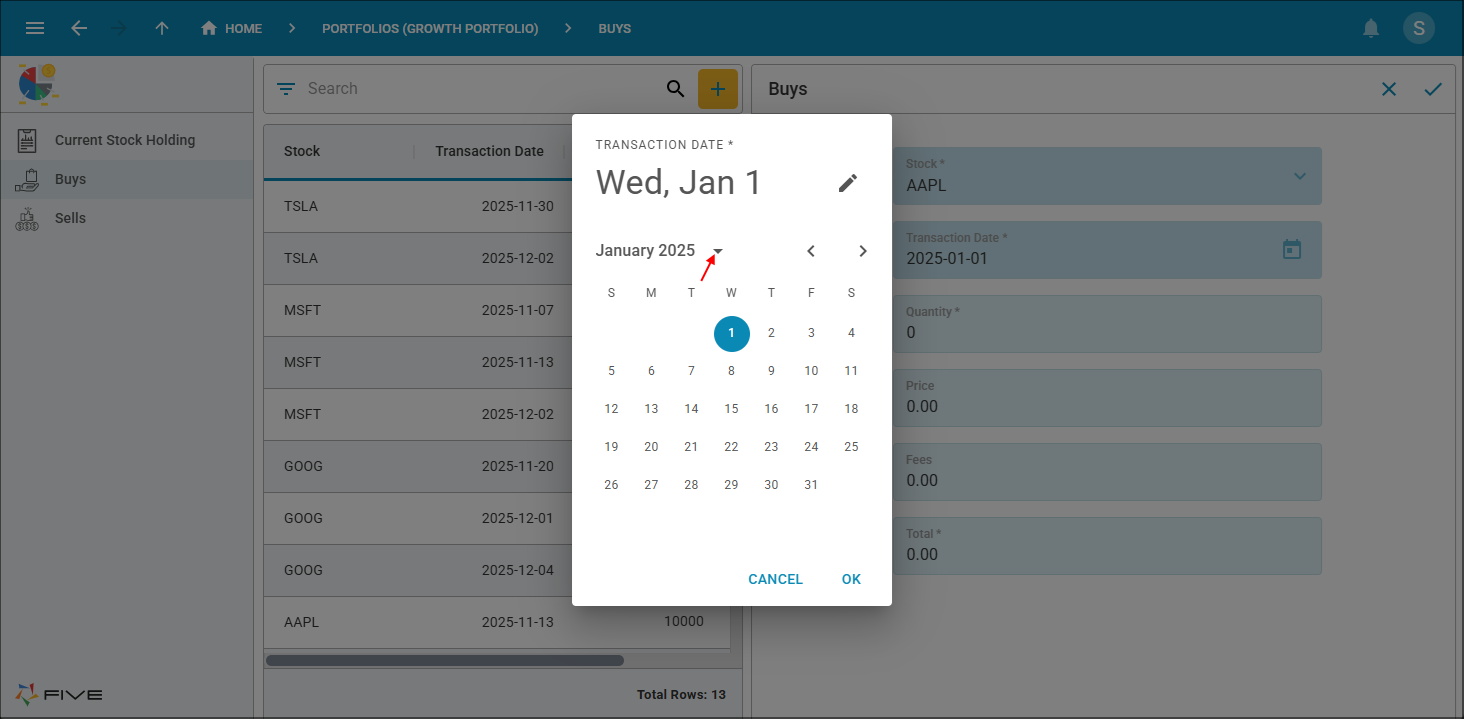
Figure 20 - Select year
5. Select the 2nd and click the OK button.
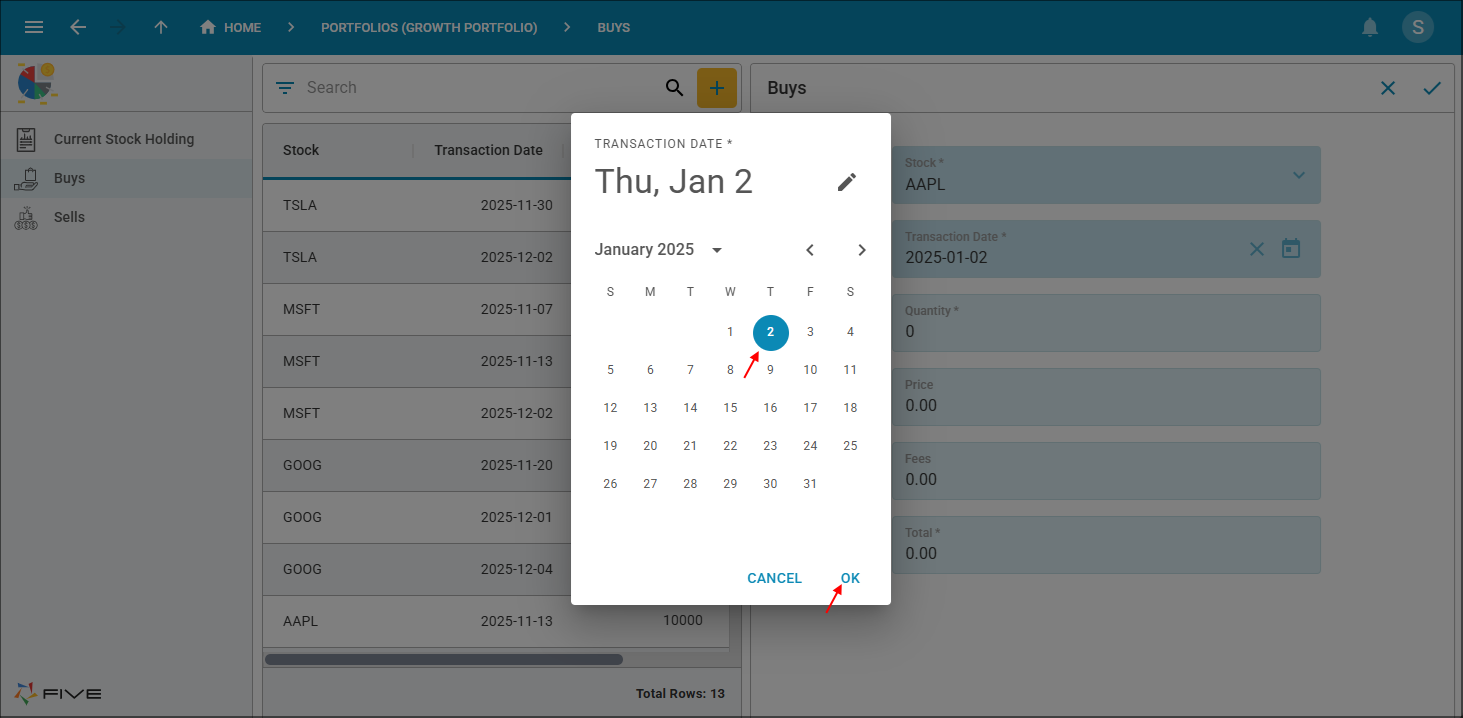
Figure 21 - Select date
6. Type 1 in the Quantity field.
7. Type 250 in the Price field, press tab.
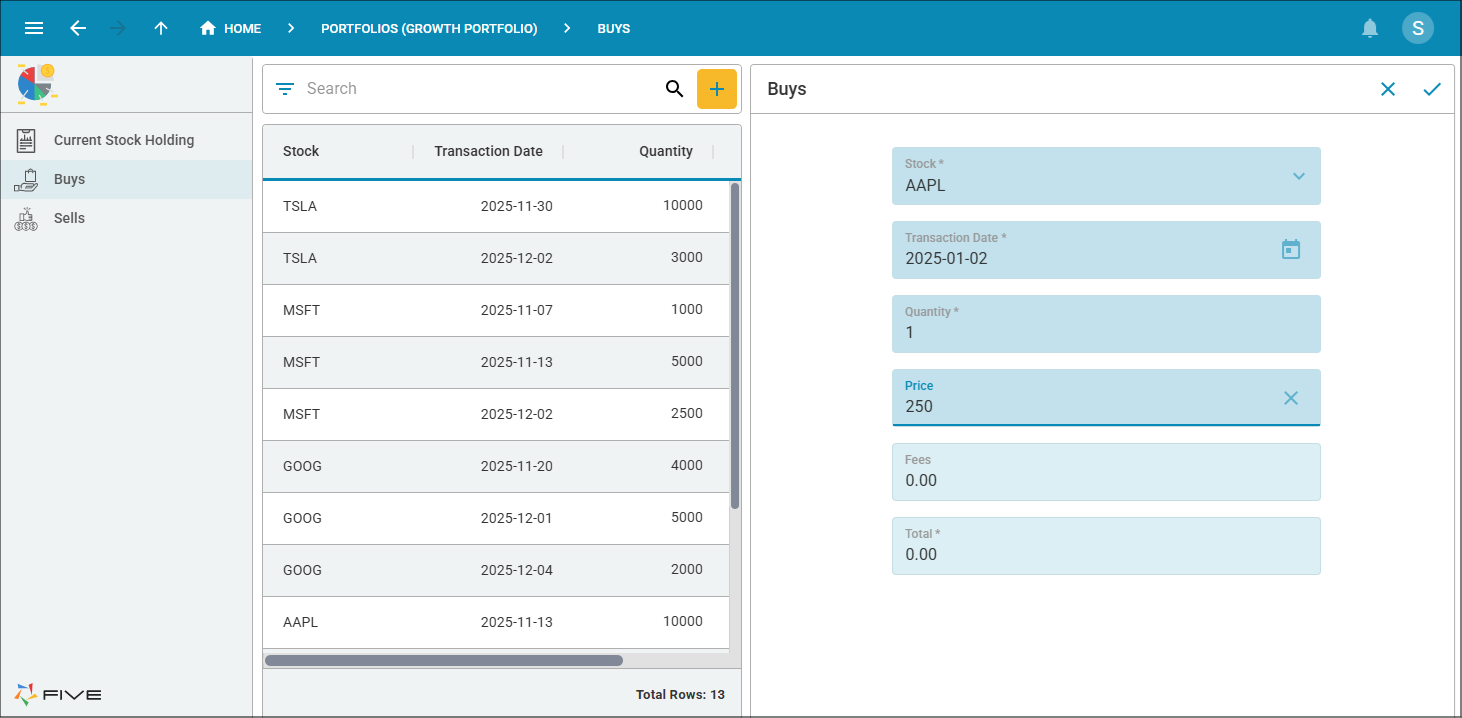
Figure 22 - High price
info
An error is returned warning us that we are buying above the high price for the day.
8. Click the OK button.
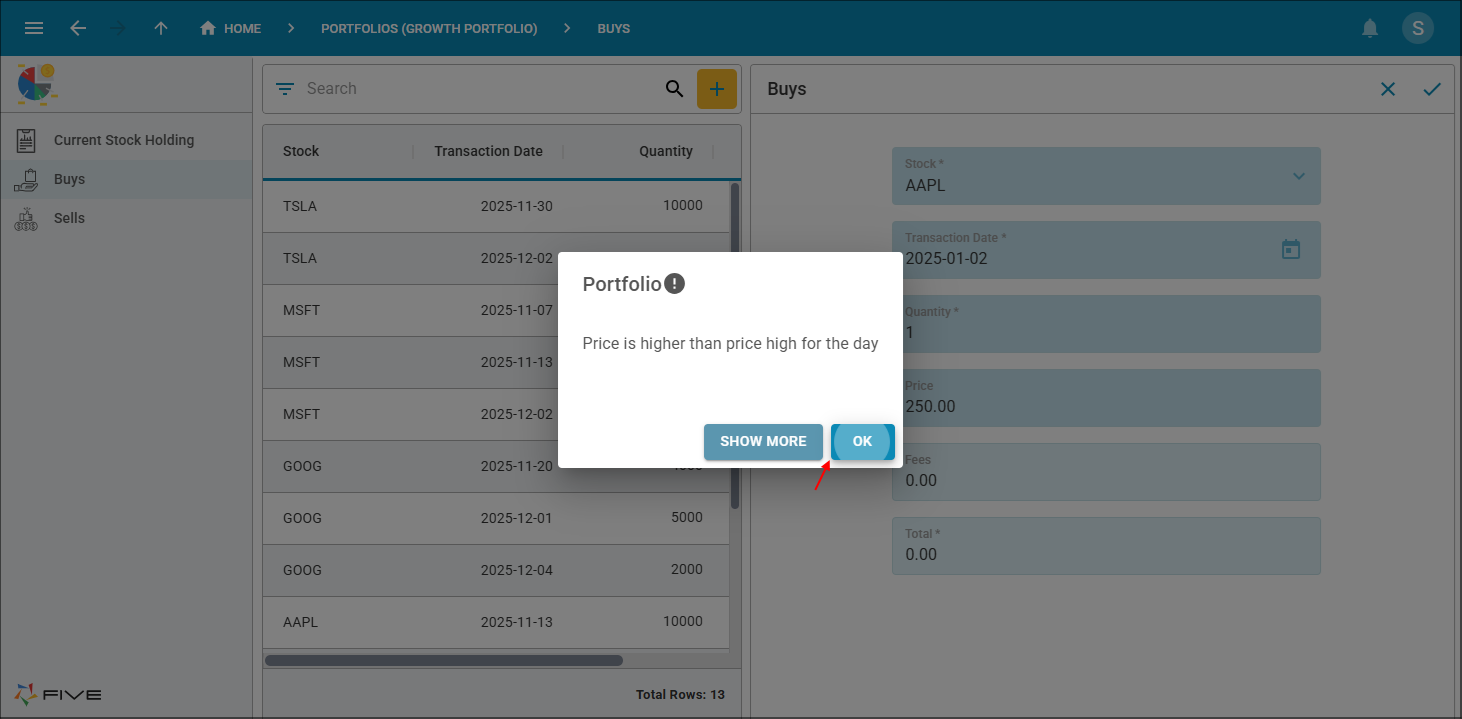
Figure 23 - OK button
9. Click the Cancel button in the Price field and type 230, press tab.

Figure 24 - Low price
info
An error is returned warning us that we are buying under the low price for the day.
10. Click the OK button.
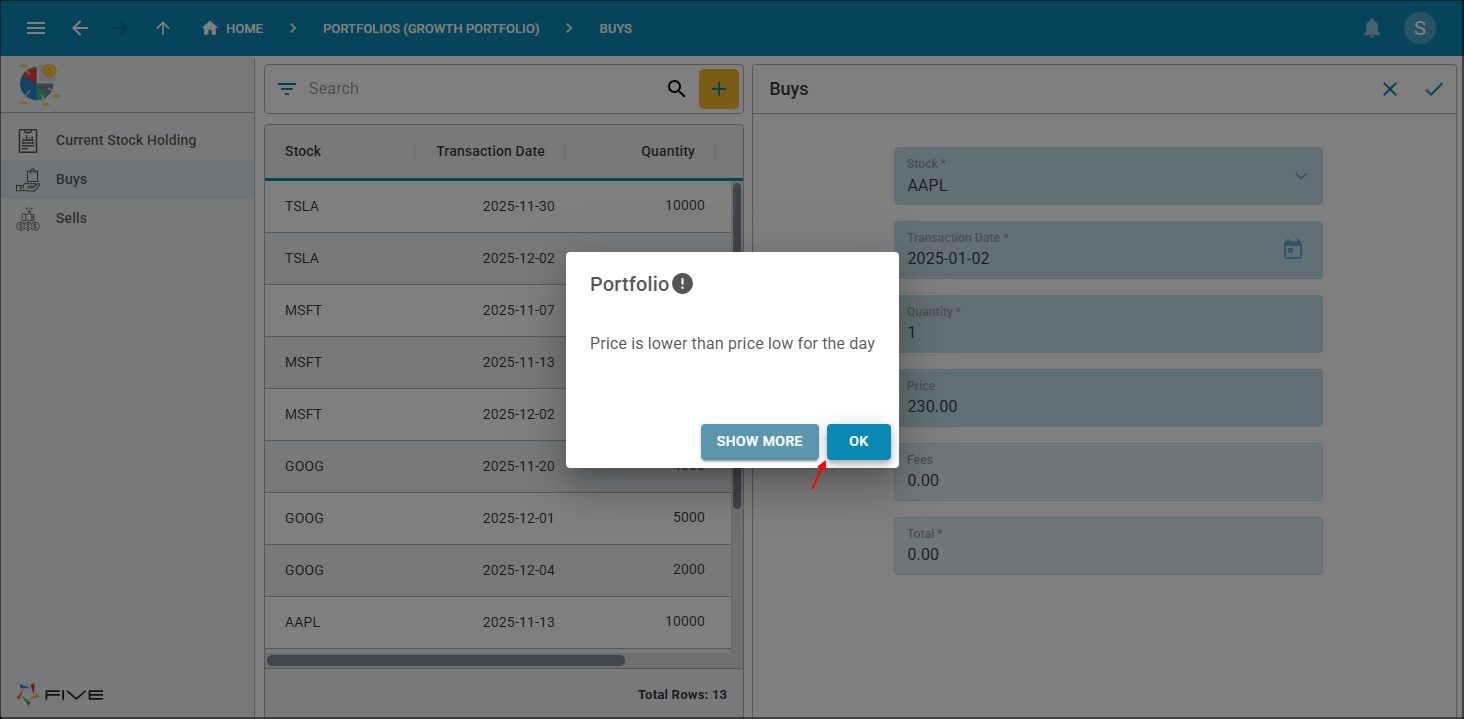
Figure 25 - OK button
11. Click the Cancel button in the form app bar.

Figure 26 - Cancel button
12. Close the browser tab and return to Five.