Submission Approved and Submission Rejected Mail Merges
Last updated 30/01/2024
The Submission Approved and Submission Rejected mail merges are called by theSubmissionApproval()
and sends
the required mail merge depending on whether the submission is approved or rejected.
These mail merges need to be added before the
SubmissionApproval()
so the function can call the mail merges by their Action ID.
Add the Submission Approved Mail Merge
1. Click the Add Item button.2. Type Submission Approved in the Title field.
3. Optional: Type the sender's name in the SMTP From Name field.
4. Optional: Type the sender's email in the SMTP From Email field
info
The SMTP From Name and SMTP From Email fields are optional. If you do not fill in these fields, the values in the SMTP From Name and SMTP From Email
fields on the Instance form will be used.
5. Type Submission Approved in the Subject Text field.
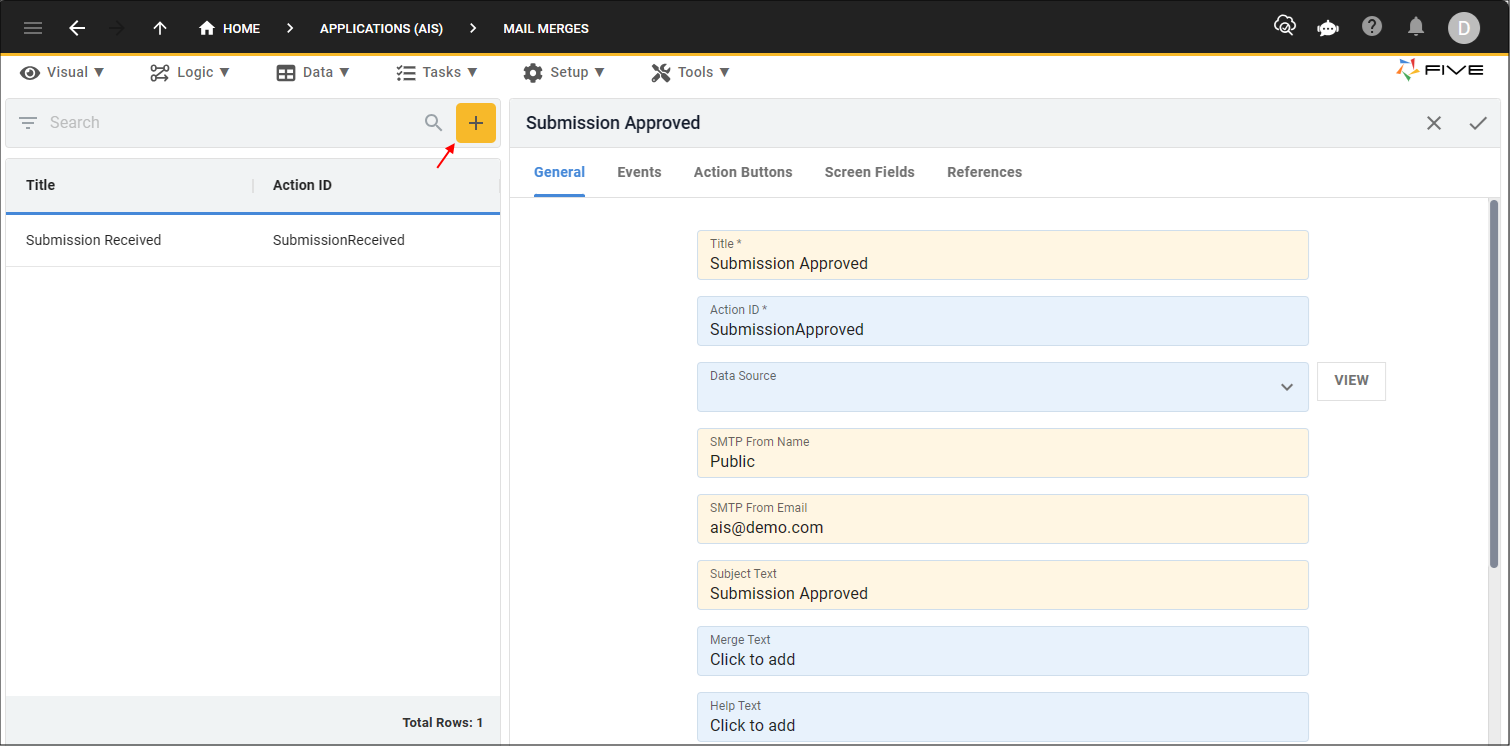
Figure 1 - Add the Submission Approved mail merge
6. Click in the Merge Text field.
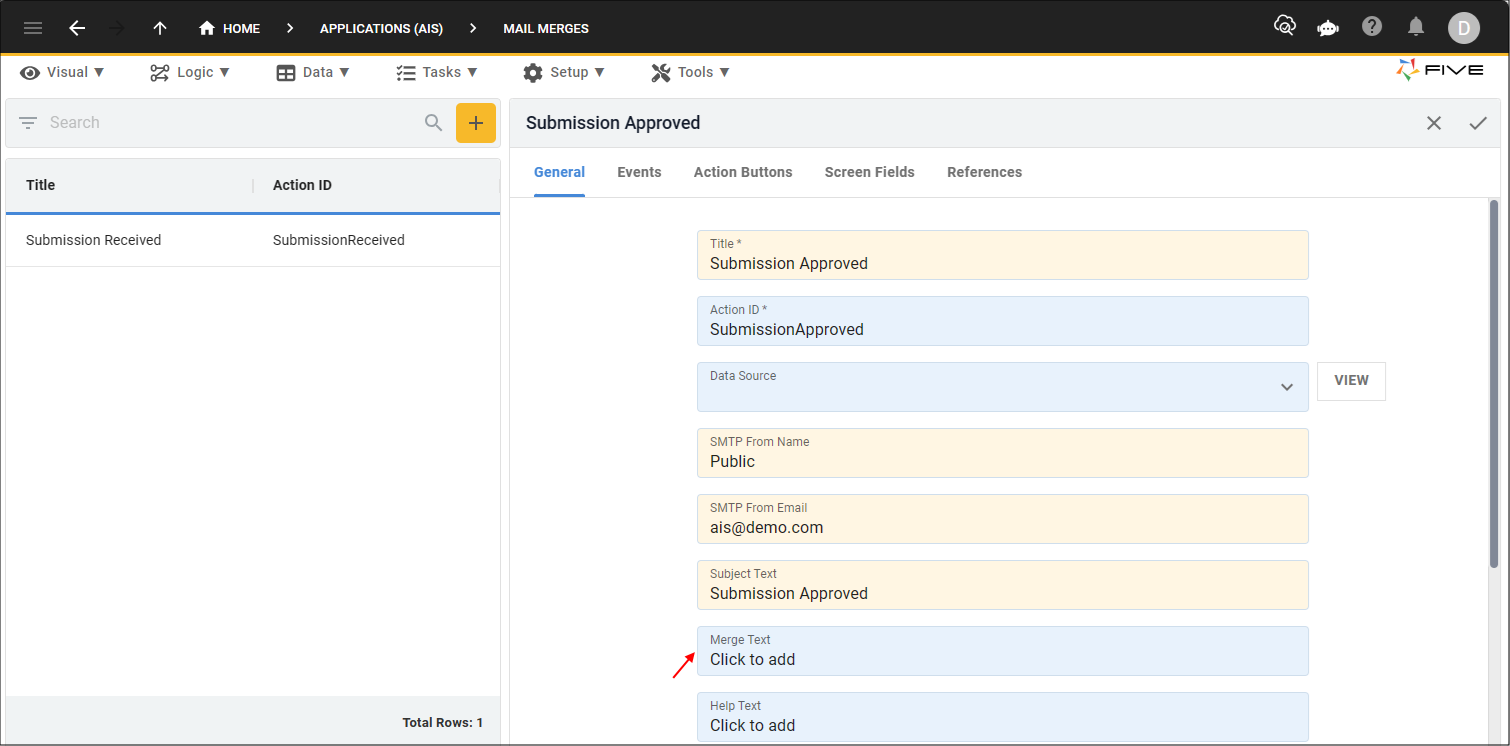
Figure 2 - Merge Text field
7. In the editor type Your submission has been approved!
8. Click the Save button in the editor app bar.
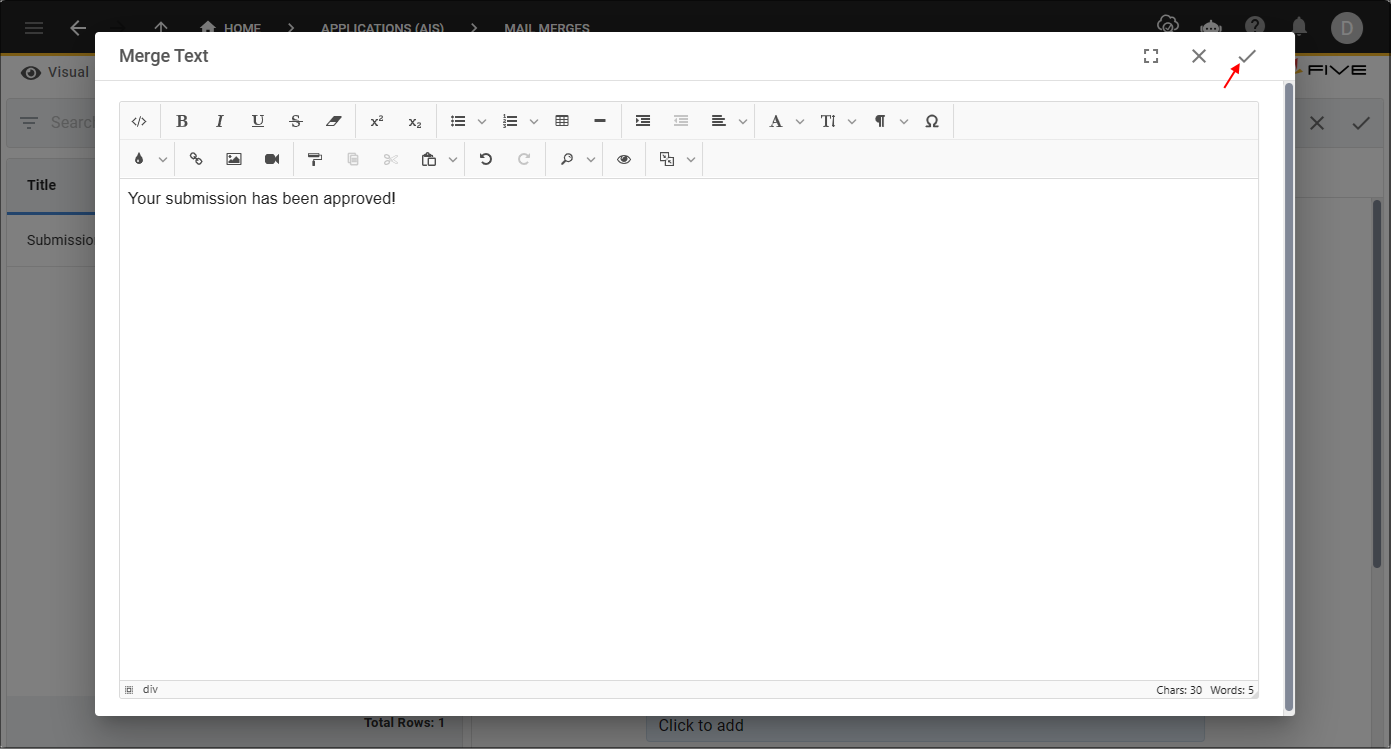
Figure 3 - Save button
9. Click the Save button in the form app bar.

Figure 4 - Save button
Add the Submission Rejected Mail Merge
1. Click the Add Item button.2. Type Submission Rejected in the Title field.
3. Optional: Type the sender's name in the SMTP From Name field.
4. Optional: Type the sender's email in the SMTP From Email field
5. Type Submission Rejected in the Subject Text field.
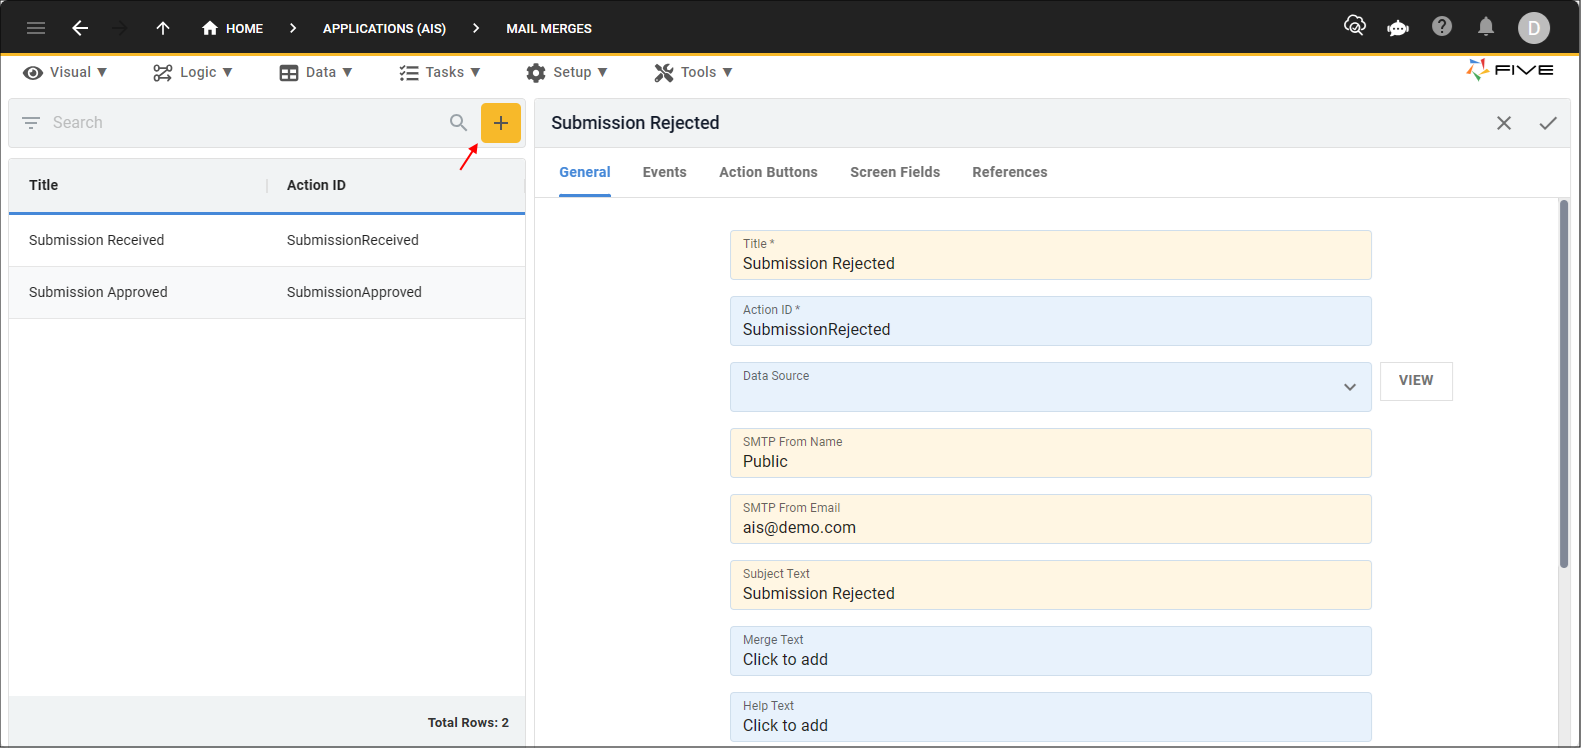
Figure 5 - Add the Submission Rejected mail merge
6. Click in the Merge Text field.

Figure 6 - Merge Text field
7. In the editor type Sorry, your submission has been rejected!
8. Click the Save button in the editor app bar.
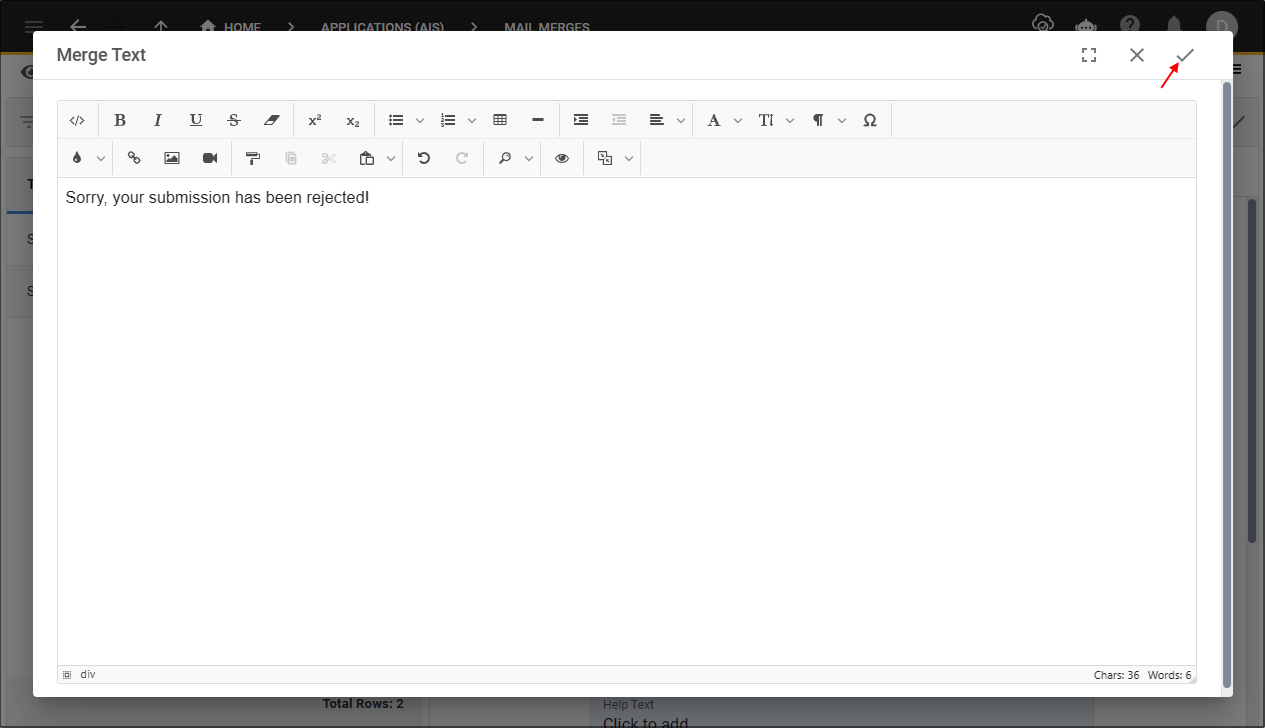
Figure 7 - Save button
9. Click the Save button in the form app bar.

Figure 8 - Save button