6 - Use Data in a Stacked Form
Last updated 3/04/2023
This documentation is to demonstrate how you can create a lookup query using the data in a stacked form to have the data filtered. To do this, we use the property: five.form.<FormID>.<FieldID>
When you ran the Portfolio application you saw that on the Allocations form the Buy field was listing the purchase transaction dates for all the stocks. We will write a query interacting with Five's API to know the transaction dates specific to the selected stock on the Sells form located above the Allocations form.
Navigate to Queries
1. Select Visual in the menu.2. Select Queries in the sub-menu.
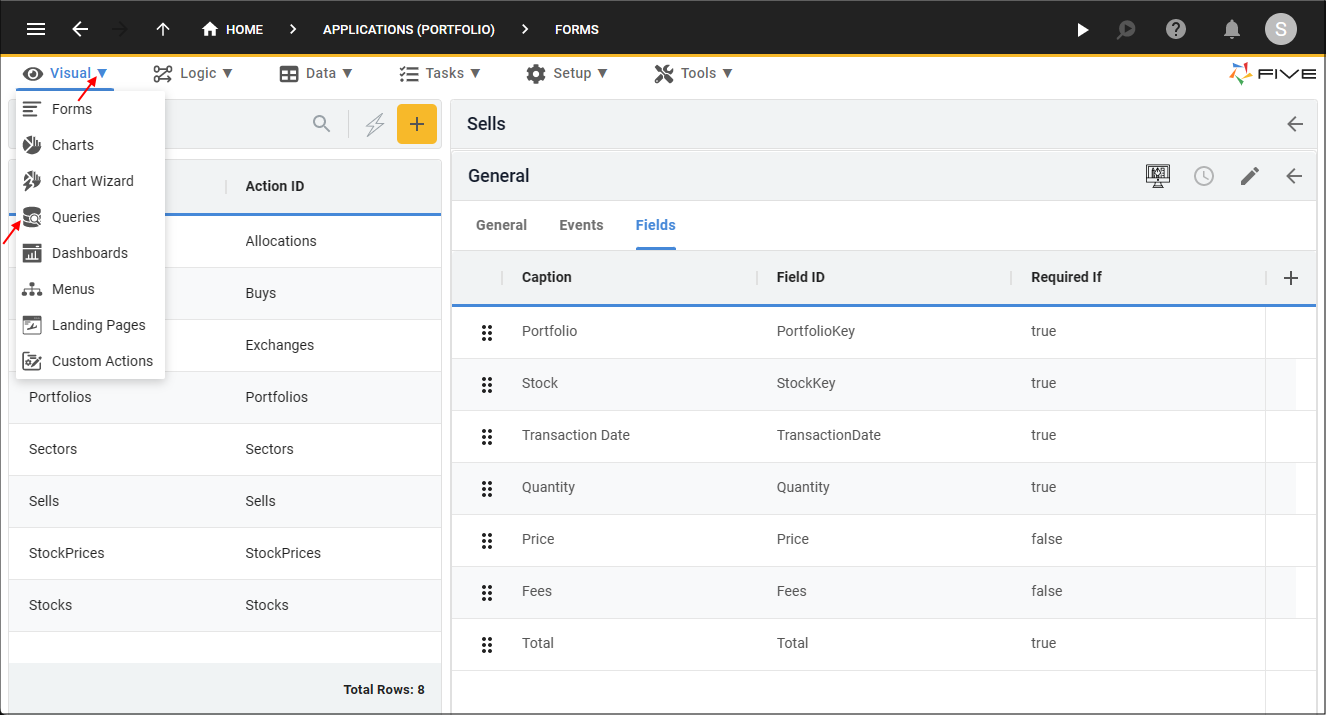
Figure 1 - Queries menu item
Add the Buy Stock Remaining Query
1. Click the Add Item button.2. Type Buy Stock Remaining in the Title field.
3. Click in the Query field to open Five's Query Builder.
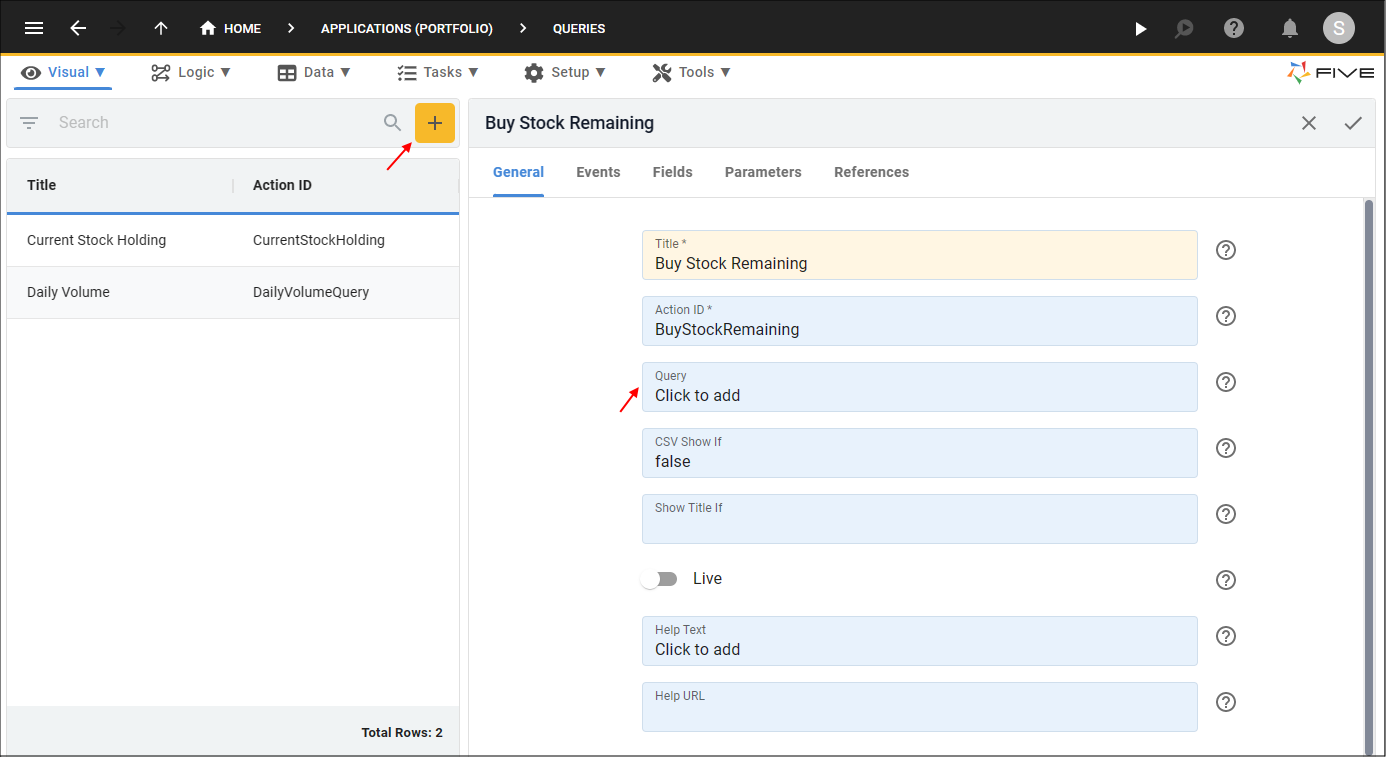
Figure 2 - Add the Buy Stock Remaining query
4. Click the SQL tab.
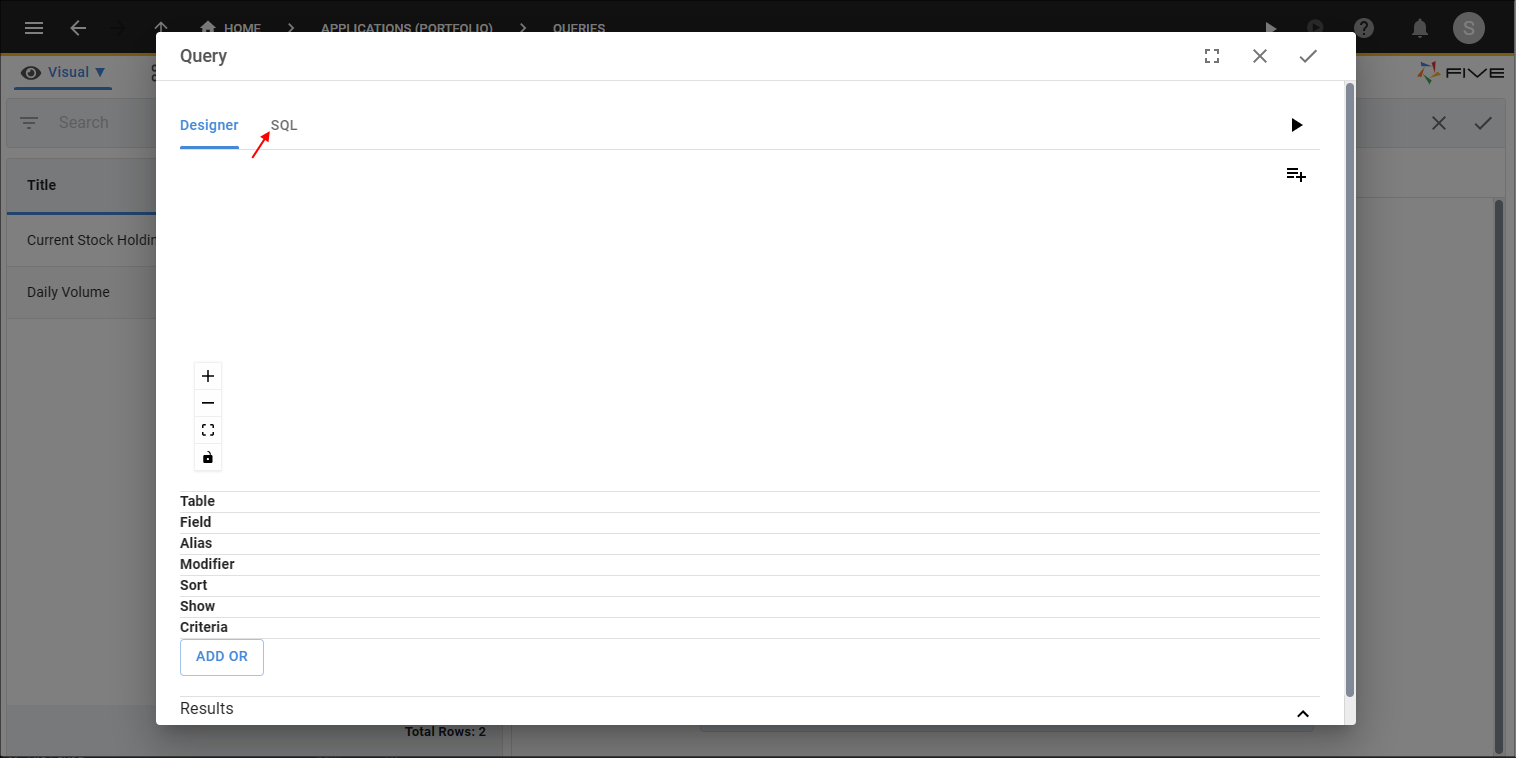
Figure 3 - SQL tab
5. Click the Copy button for the below syntax.
Buy Stock Remaining
SELECT
    BuyKey,
    DATE_FORMAT(TransactionDate, "%Y-%m-%d") AS TransactionDate,
    Quantity - IFNULL((SELECT SUM(Allocation.Quantity) FROM Allocation WHERE Allocation.BuyKey = Buy.BuyKey),0) AS Holding,
    Buy.PortfolioKey AS PortfolioKey,
    Buy.StockKey AS StockKey
FROM
    Buy
HAVING
    (PortfolioKey = ?) AND
    (StockKey = ?)
ORDER BY
    TransactionDate
info
The query is going to use the TransactionDate and Holding query fields to know how much we are currently holding of each stock per transaction date.
6. Paste the syntax in the SQL Editor.
7. Click the Save button in the SQL Editor app bar.
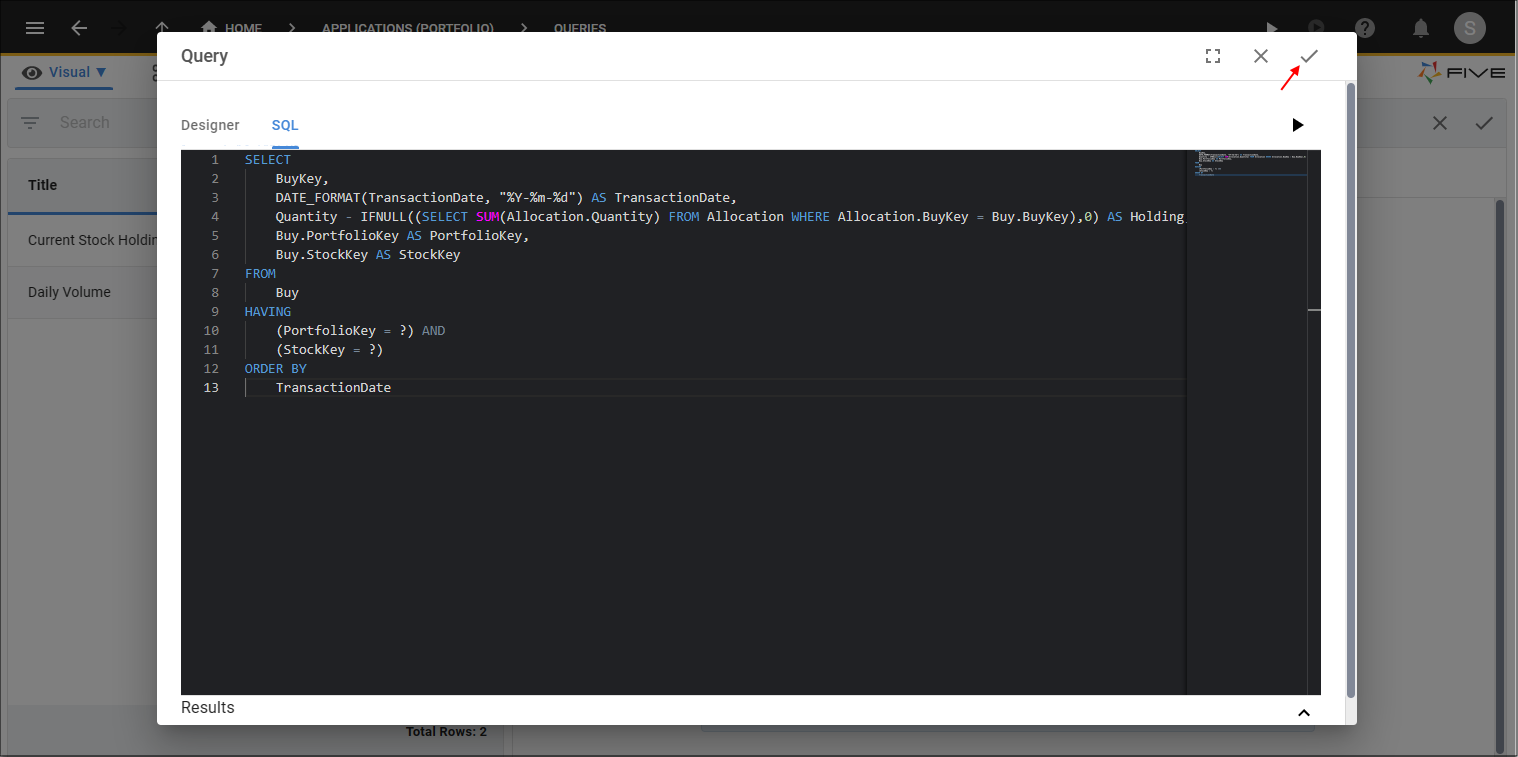
Figure 4 - Add the Buy Stock Remaining syntax
8. Click the Fields tab.
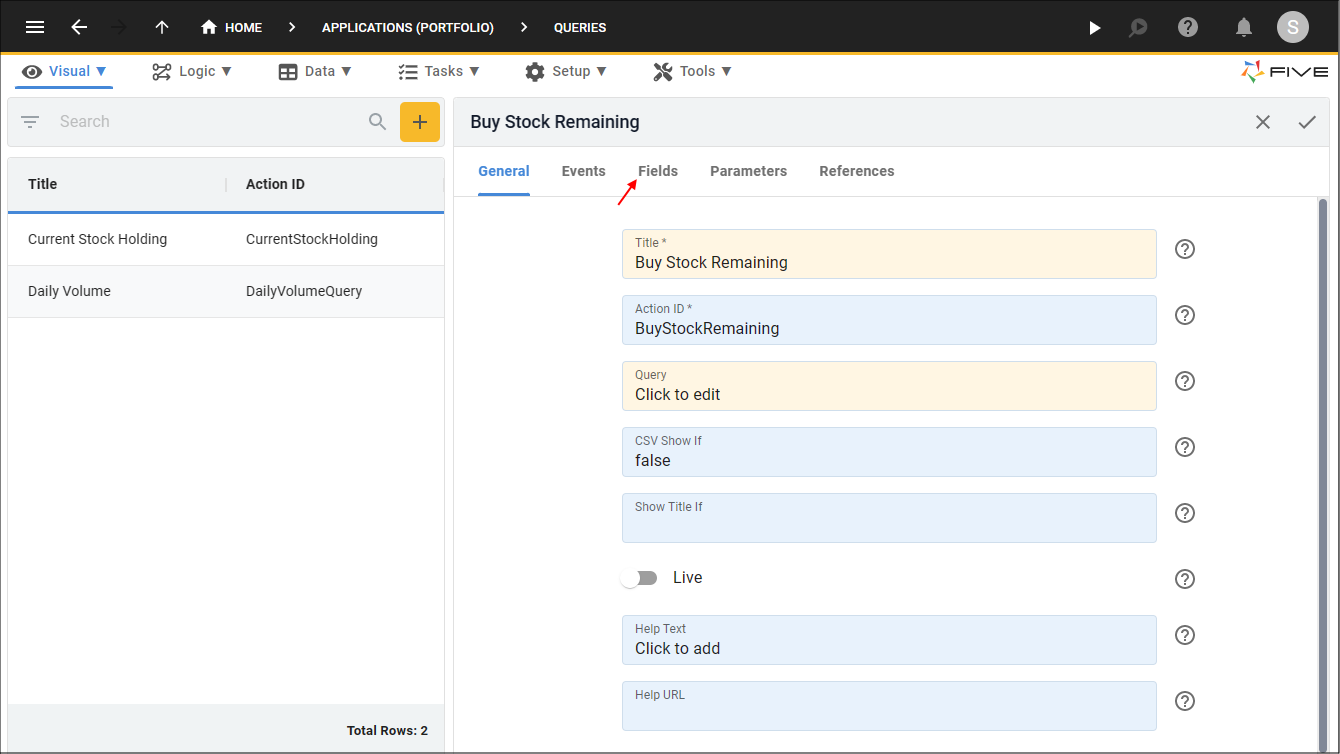
Figure 5 - Fields tab
9. Select the BuyKey record.
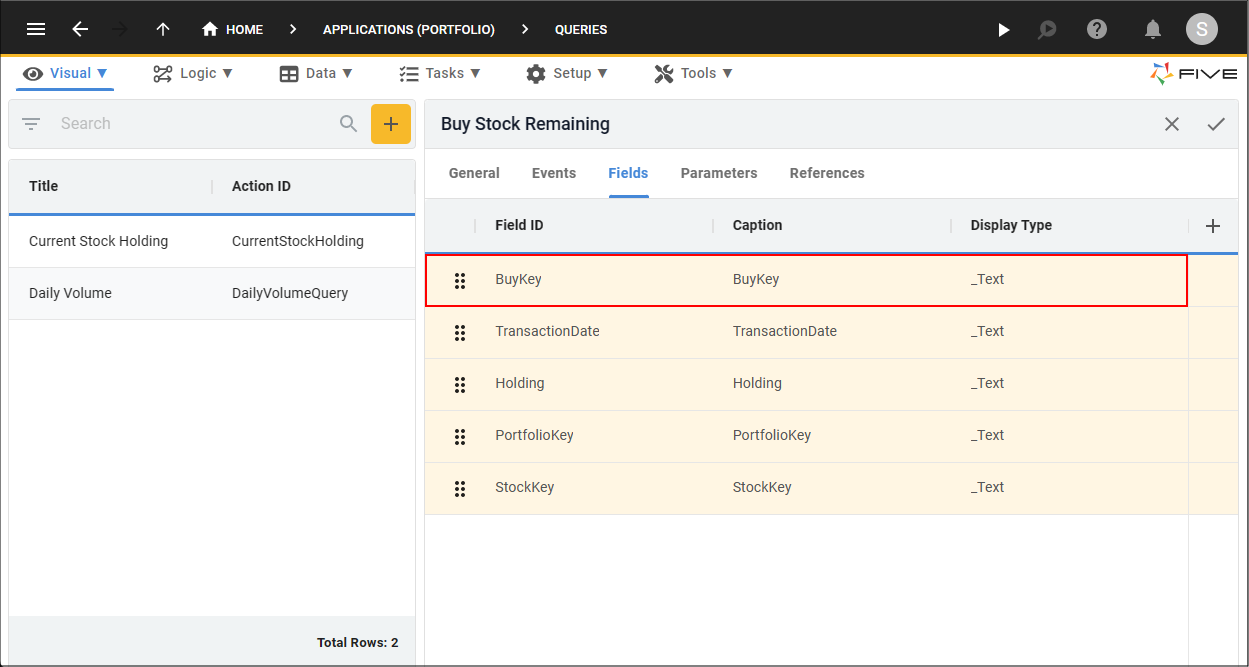
Figure 6 - BuyKey record
10. Type false in the Show If field.
11. Click the Save button in the form app bar.
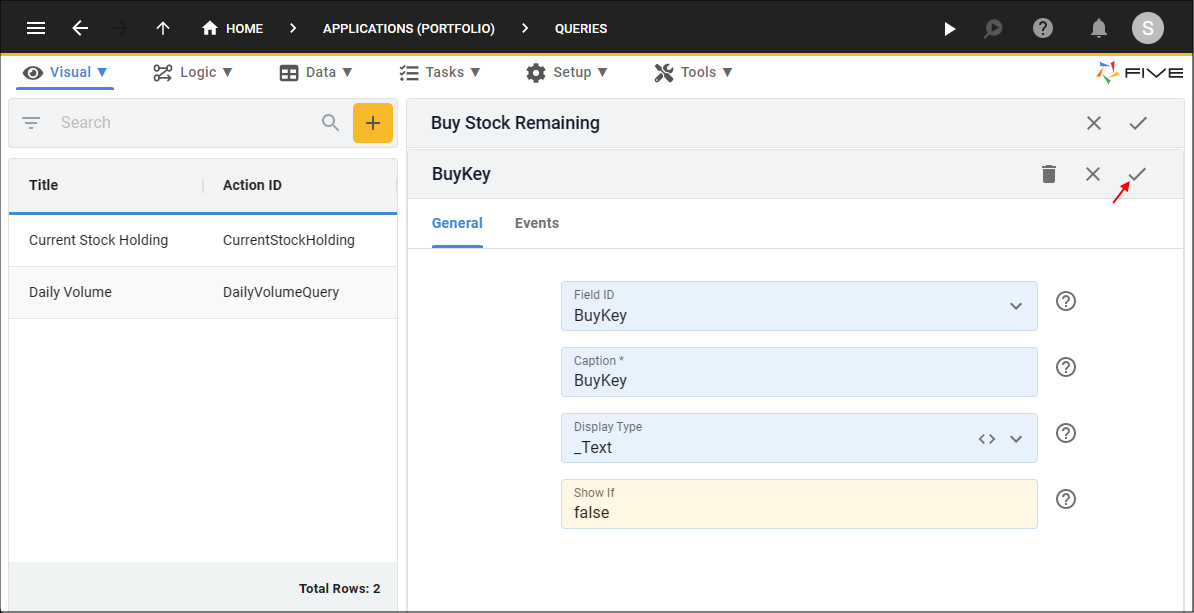
Figure 7 - Edit the BuyKey field
12. Select the TransactionDate record.
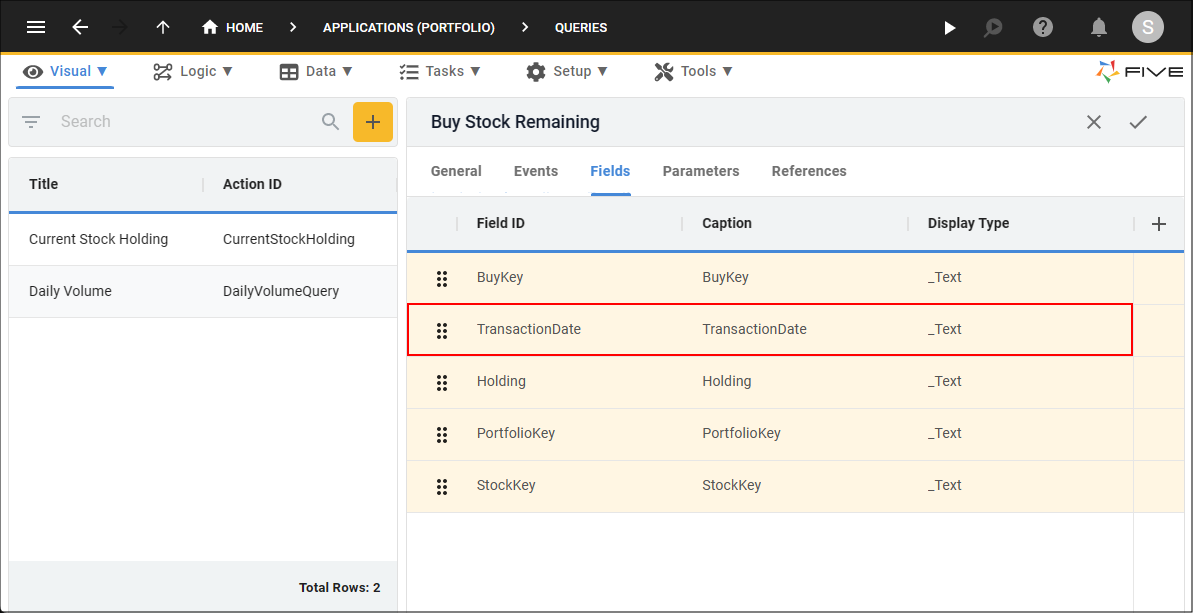
Figure 8 - TransactionDate record
13. Click the lookup icon in the Display Type field and select _Date.
14. Click the Save button in the form app bar.
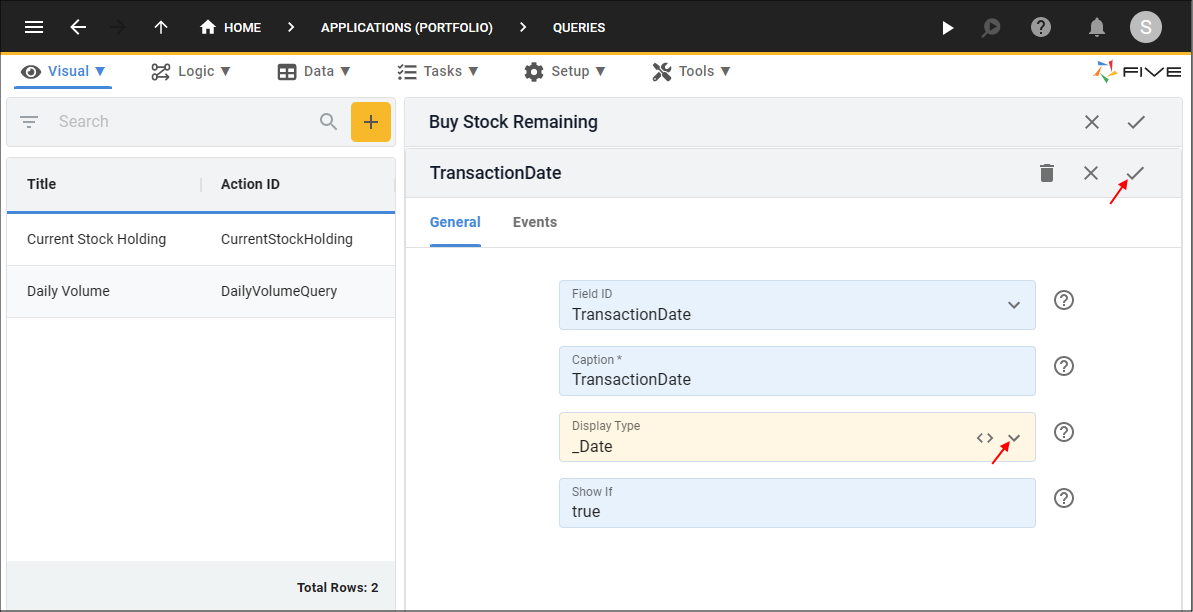
Figure 9 - Edit the TransactionDate field
15. Select the Holding record.
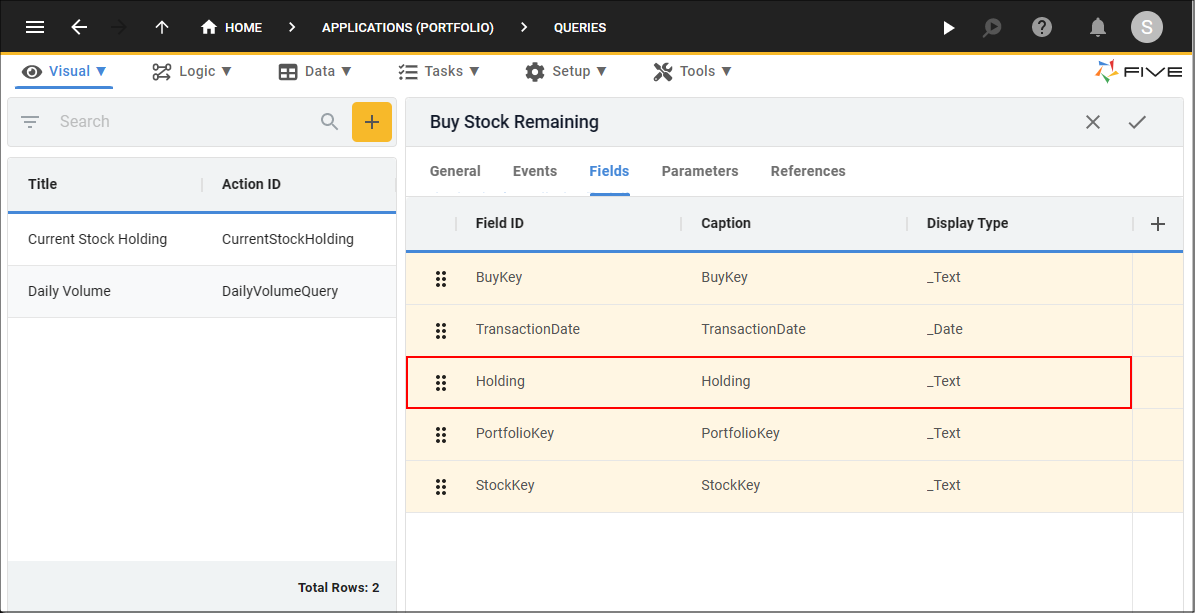
Figure 10 - Holding record
16. Click the lookup icon in the Display Type field and select _Integer.
17. Click the Save button in the form app bar.
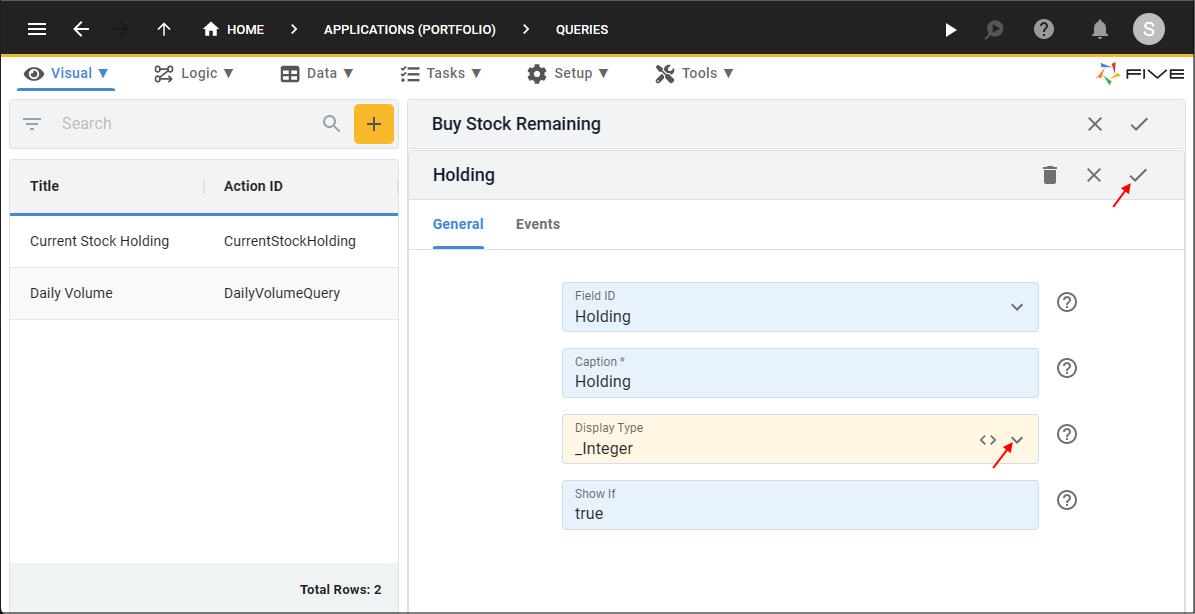
Figure 11 - Edit the Holding field
18. Select the PortfolioKey record.
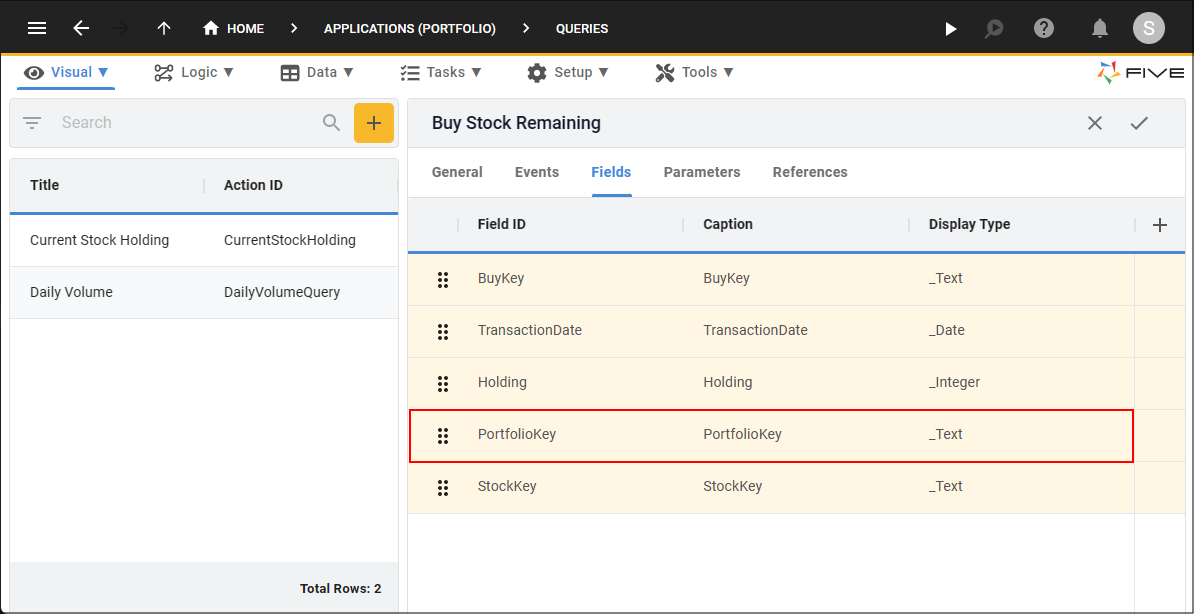
Figure 12 - PortfolioKey record
19. Type false in the Show If field.
20. Click the Save button in the form app bar.
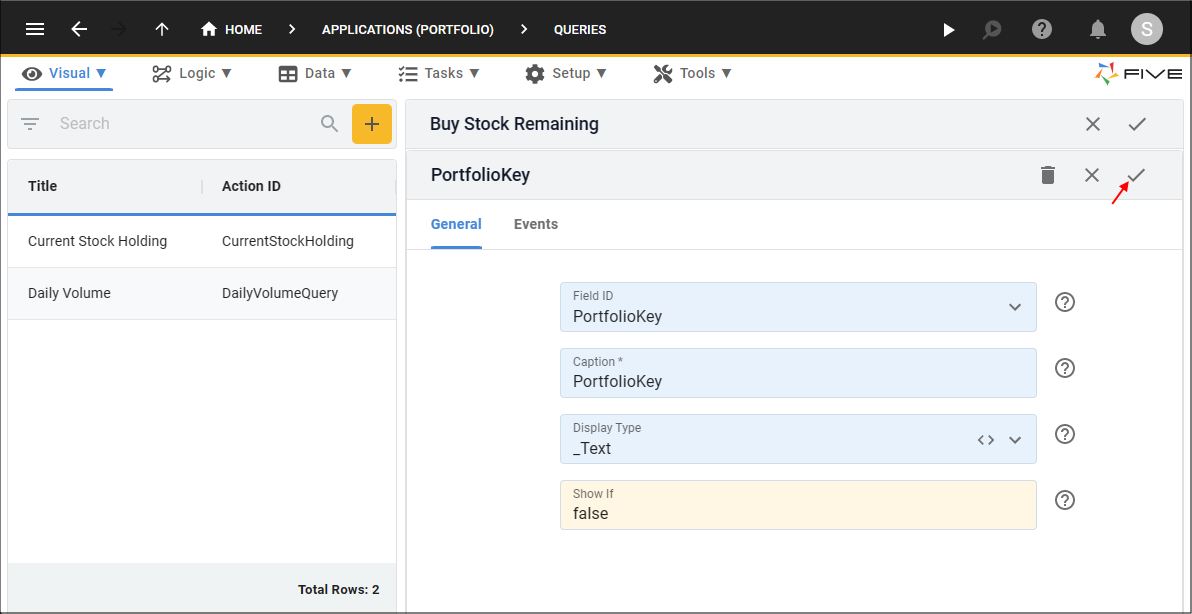
Figure 13 - Edit the PortfolioKey field
21. Select the StockKey record.
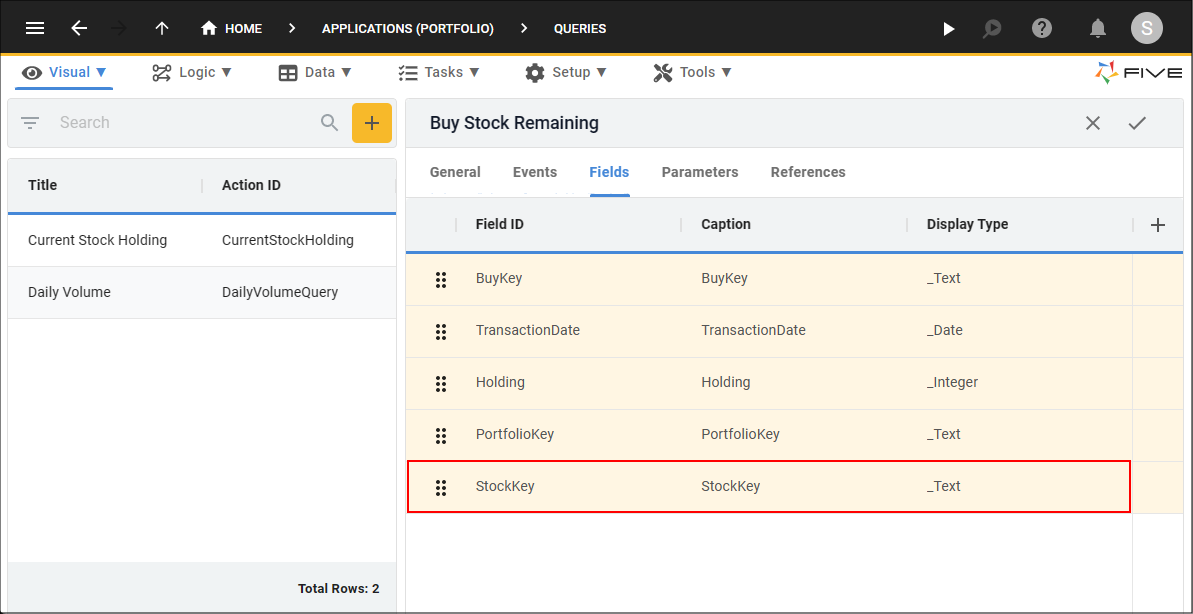
Figure 14 - StockKey record
22. Type false in the Show If field.
23. Click the Save button in the form app bar.
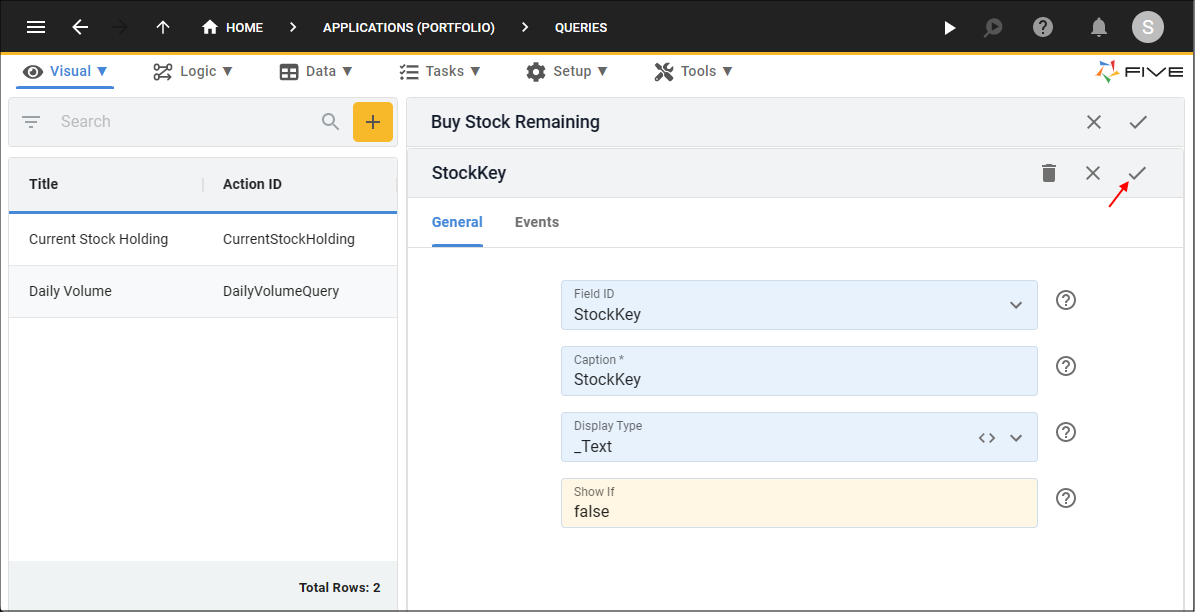
Figure 15 - Edit the StockKey field
24. Click the Parameters tab.
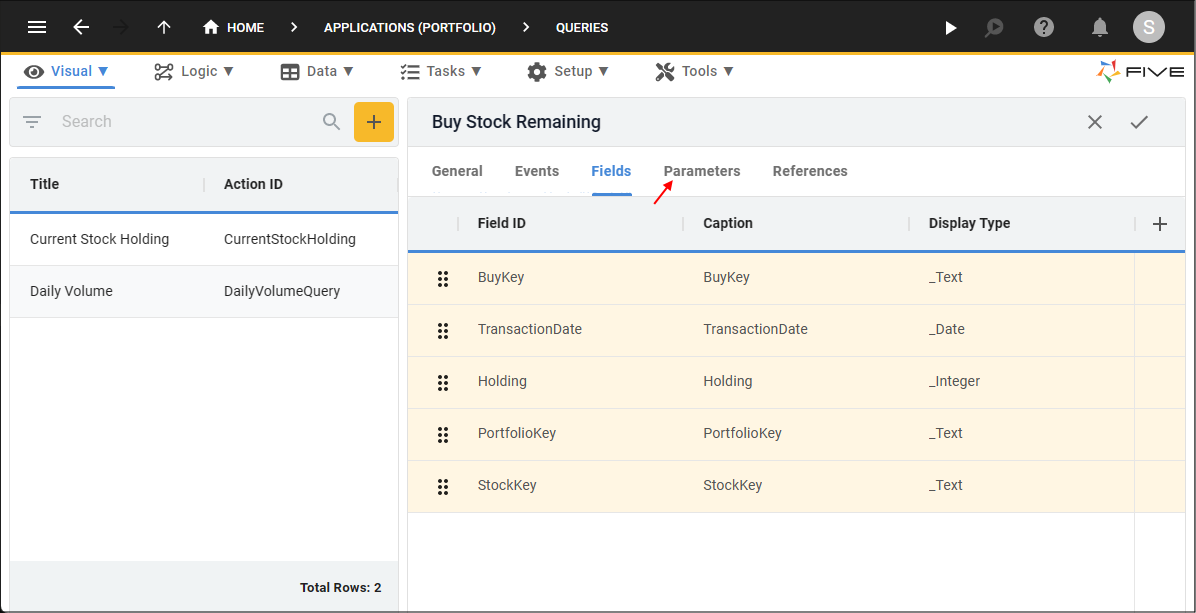
Figure 16 - Parameters tab
25. Click the Add Parameters button.
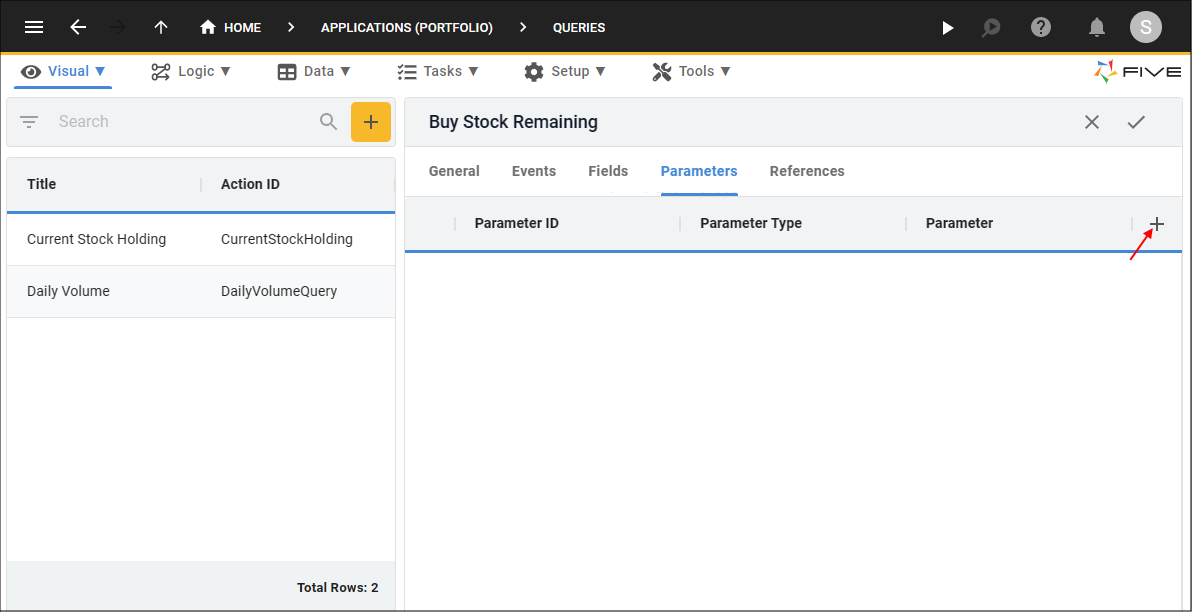
Figure 17 - Add Parameters button
26. Type PortfolioKey in the Parameter ID field.
27. Type {{five.stack.Portfolio.PortfolioKey}} in the Parameter field.
28. Click the Save button in the form app bar.
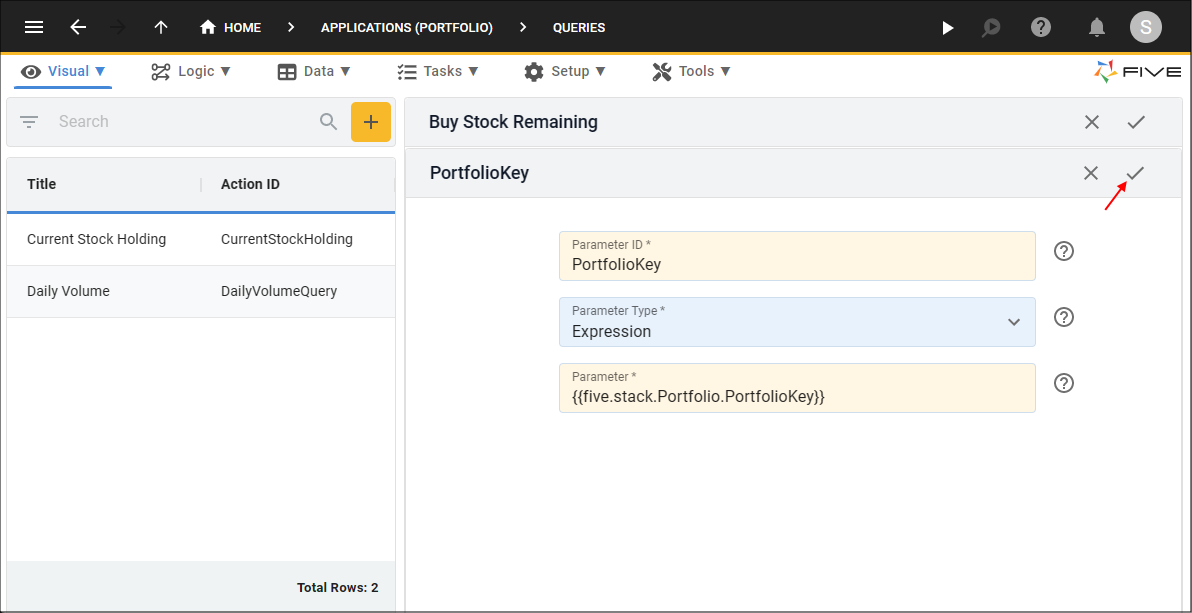
Figure 18 - Add the PortfolioKey parameter
29. Click the Add Parameters button.
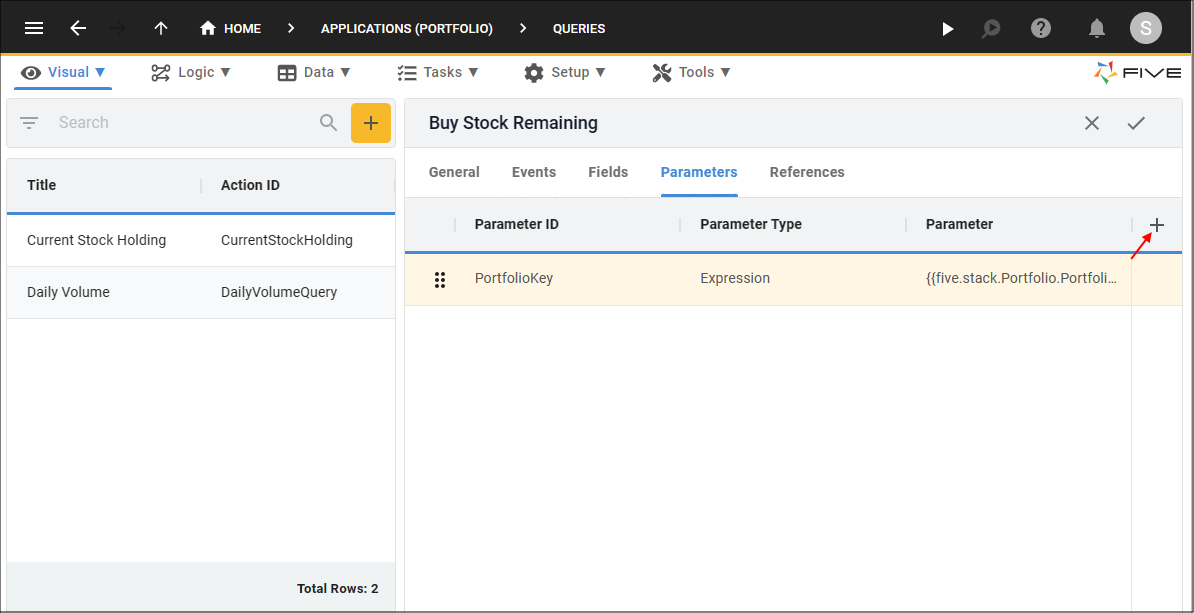
Figure 19 - Add Parameters button
30. Type StockKey in the Parameter ID field.
31. Type {{five.form.Sells.StockKey}} in the Parameter field.
32. Click the Save button in the form app bar.
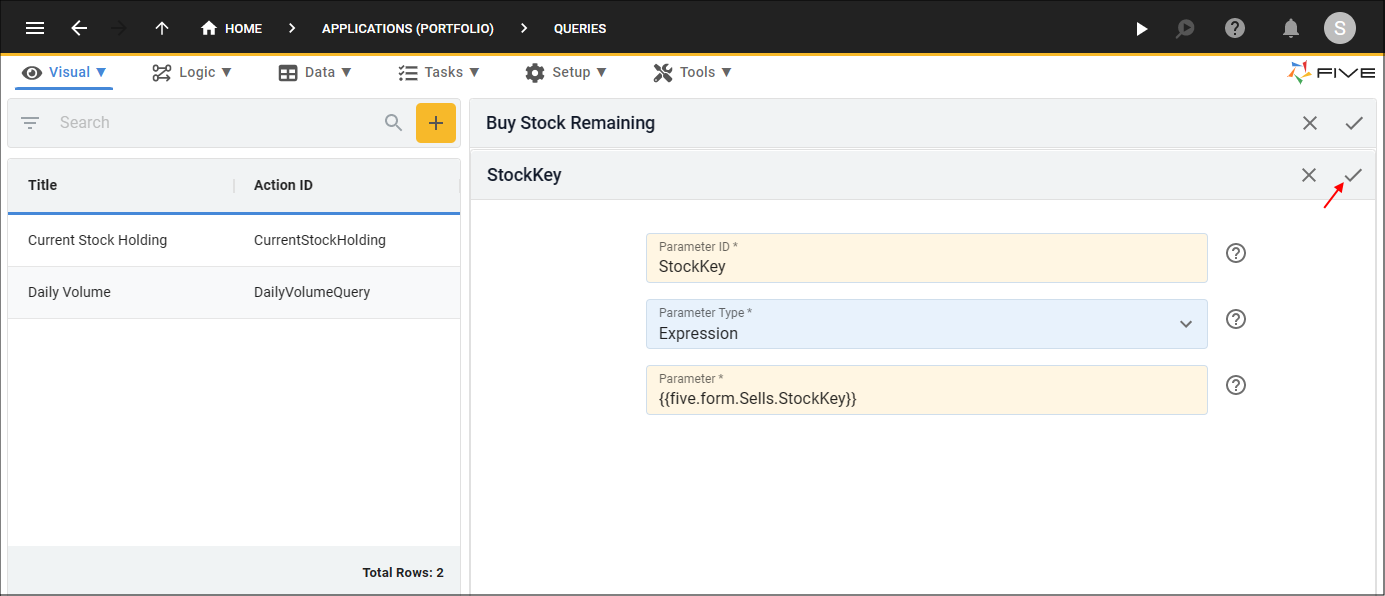
Figure 20 - Add the StockKey parameter
33. Click the Save button in the form app bar above the list.
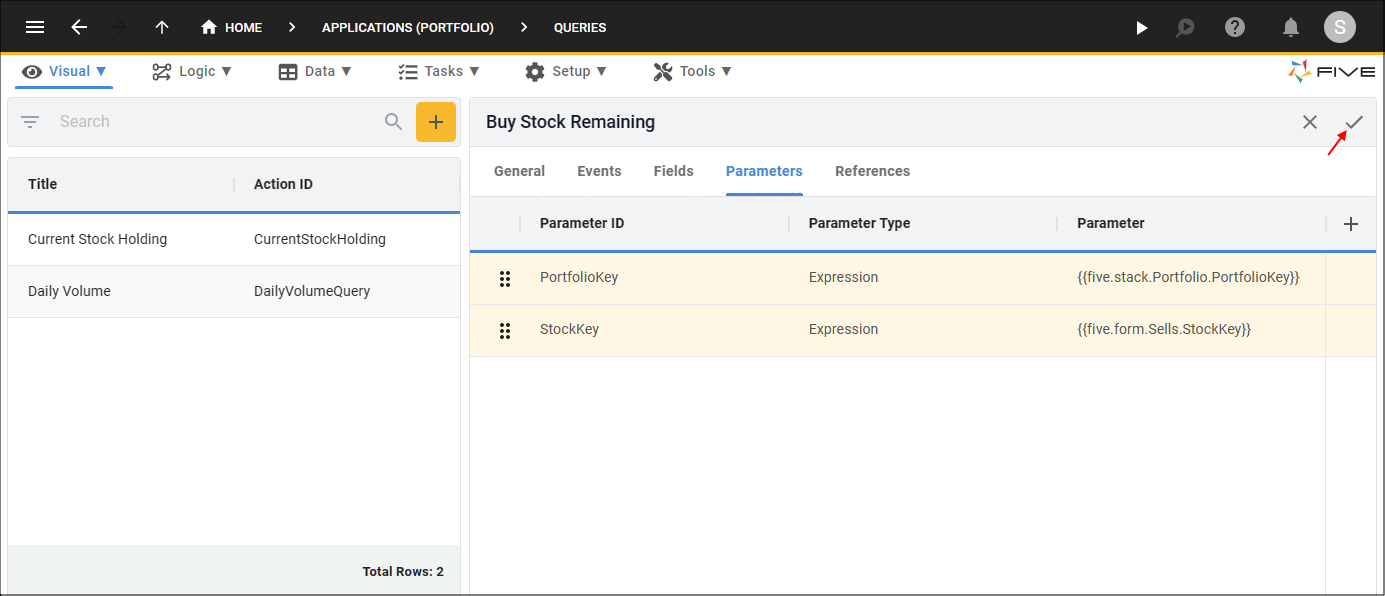
Figure 21 - Save the Buy Stock Remaining query
Attach the Lookup Query to the Buy Field on the Allocations Form
Path:Allocations form > General page > Buy field1. Select Visual in the menu.
2. Select Forms in the menu.
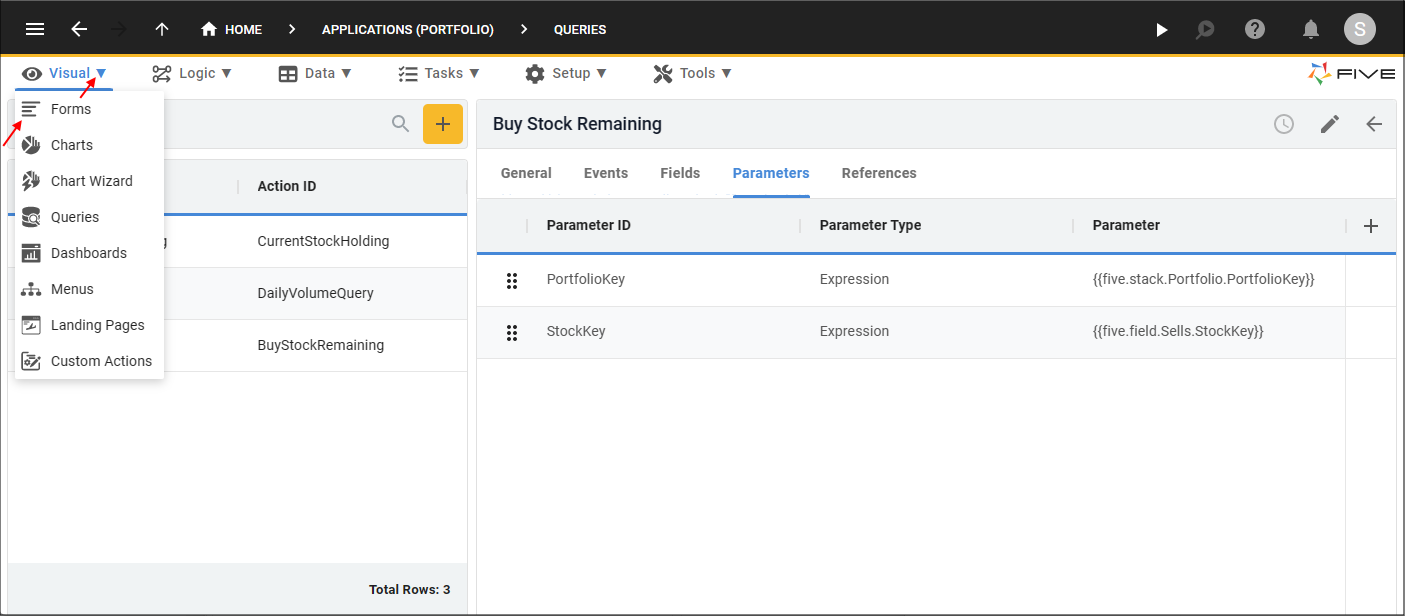
Figure 22 - Forms menu item
3. Select the Allocations record in the list.
4. Click the Pages tab.
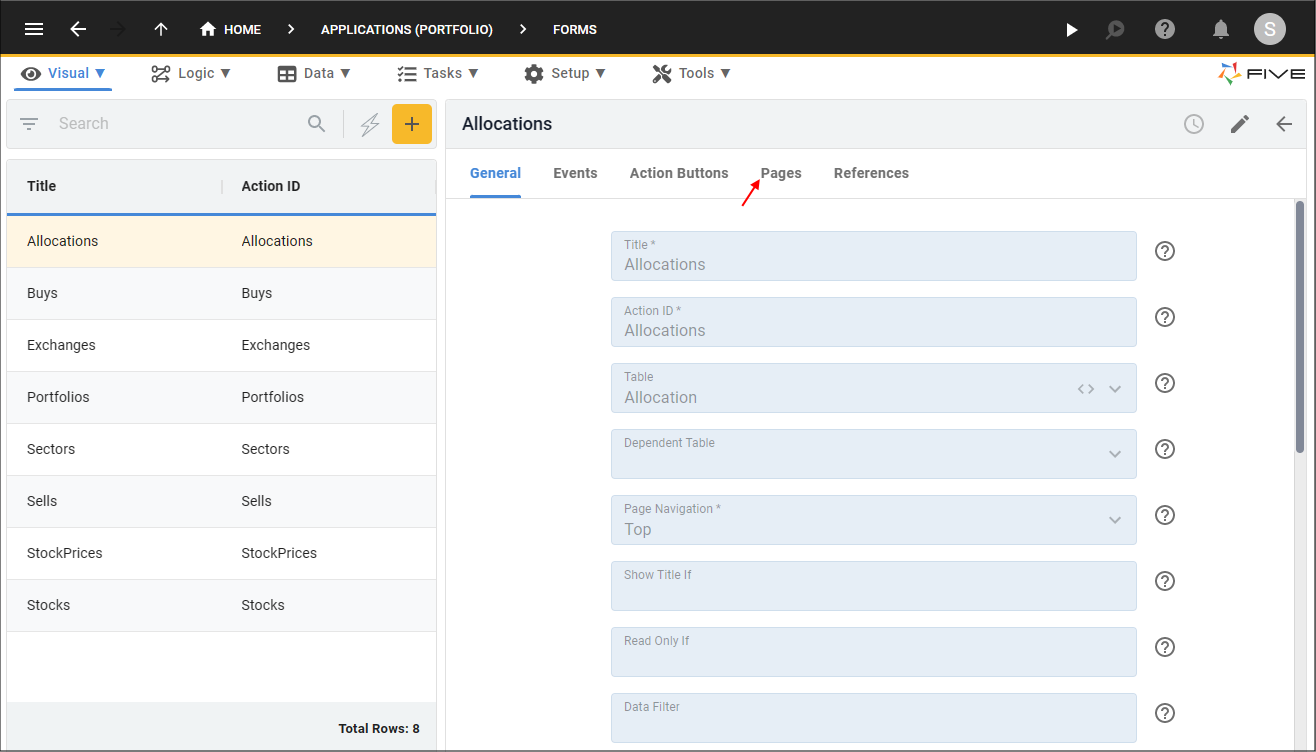
Figure 23 - Pages tab
5. Select the General record.
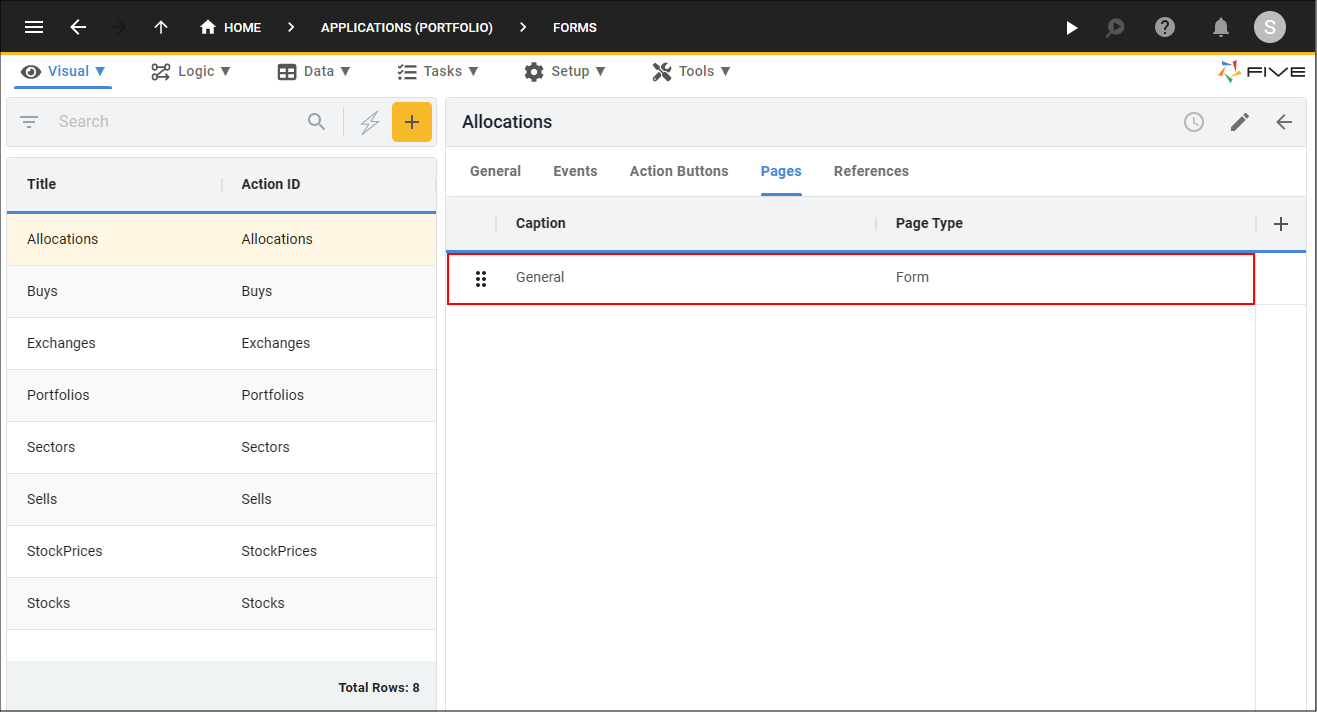
Figure 24 - General record
6. Click the Fields tab.

Figure 25 - Fields tab
7. Select the Buy record.
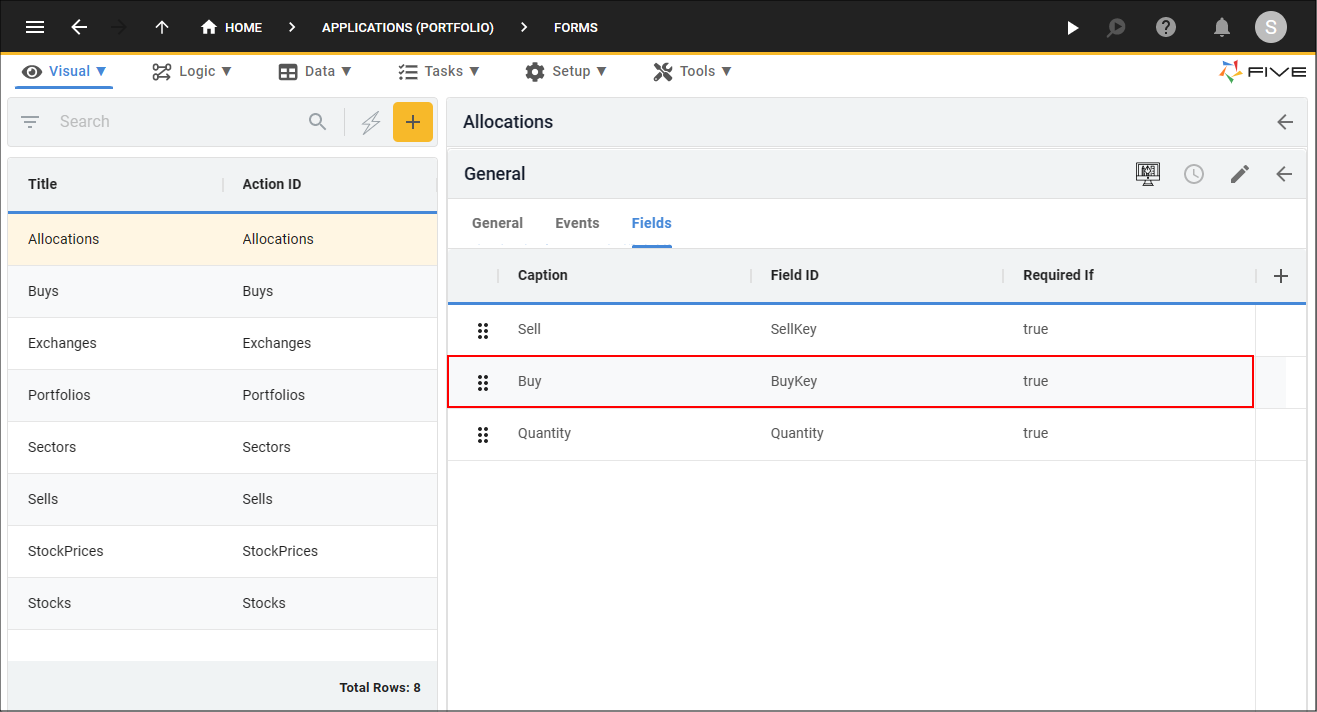
Figure 26 - Buy record
8. Click the lookup icon in the Display Type field and select _LookupQuery.
9. Click the Cancel button in the Reference Form field.
10. Click the lookup icon in the Lookup Query field and select BuyStockRemaining.
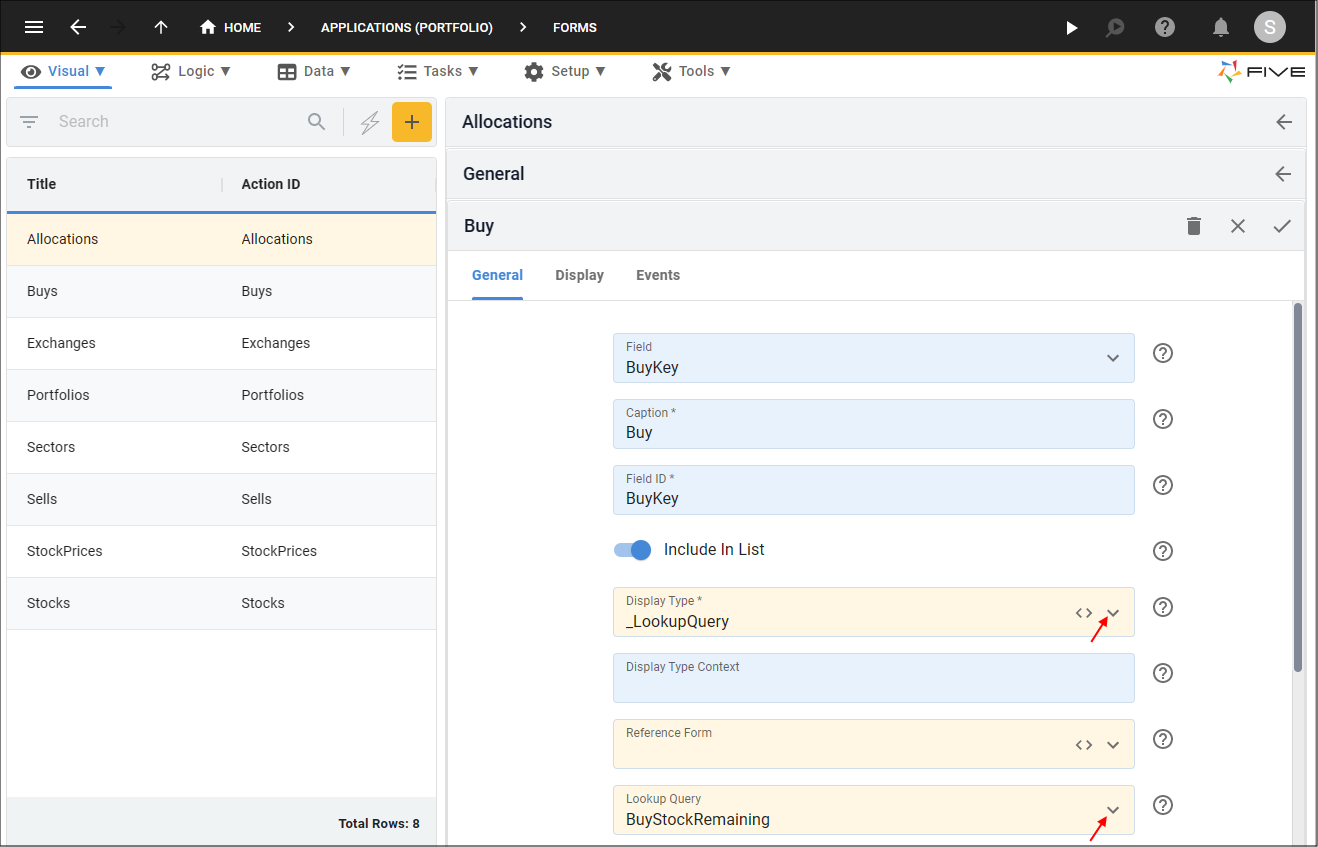
Figure 27 - Attach the BuyStockRemaining query
11. Click the Save button in the form app bar.
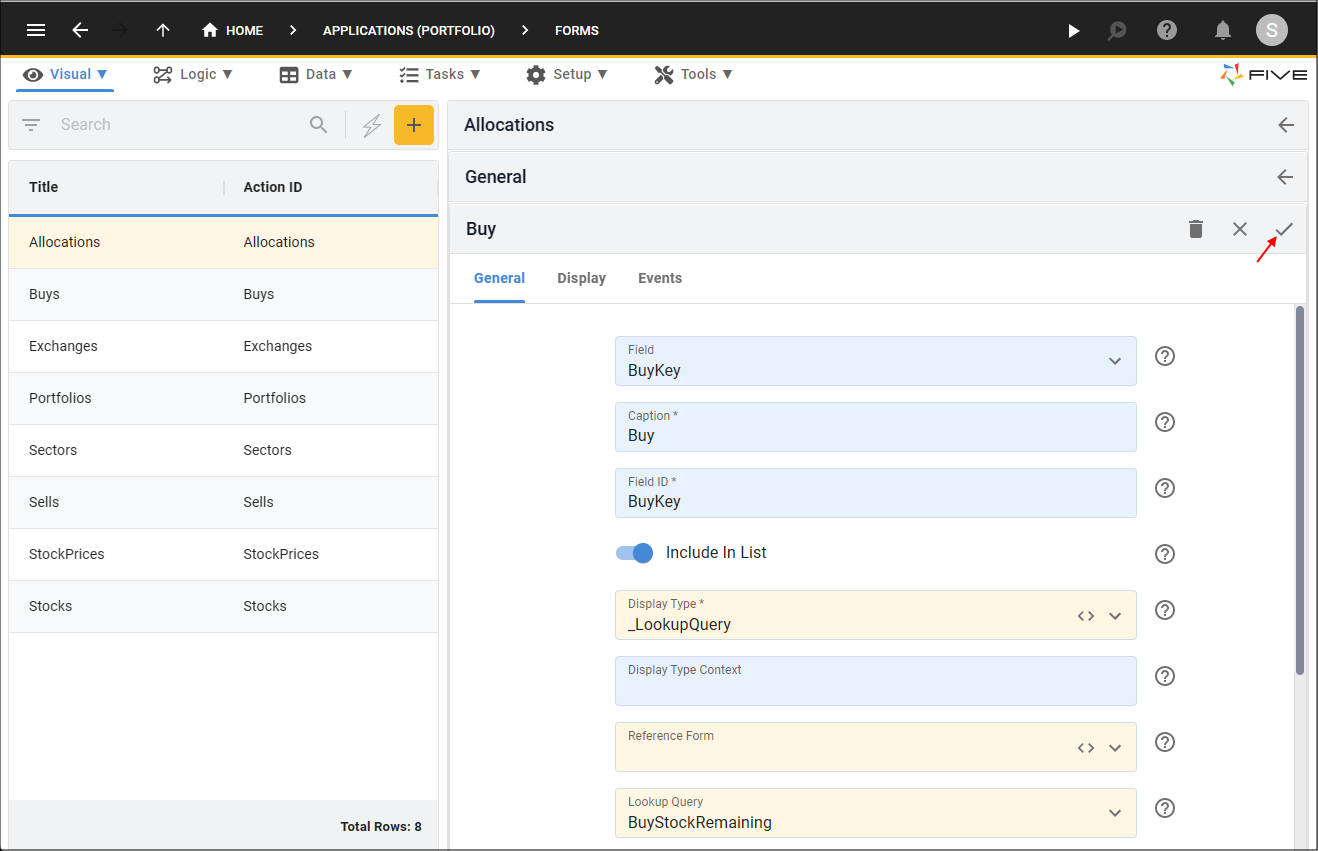
Figure 28 - Save the Buy field
12. Click the Save button in the form app bar above the list.
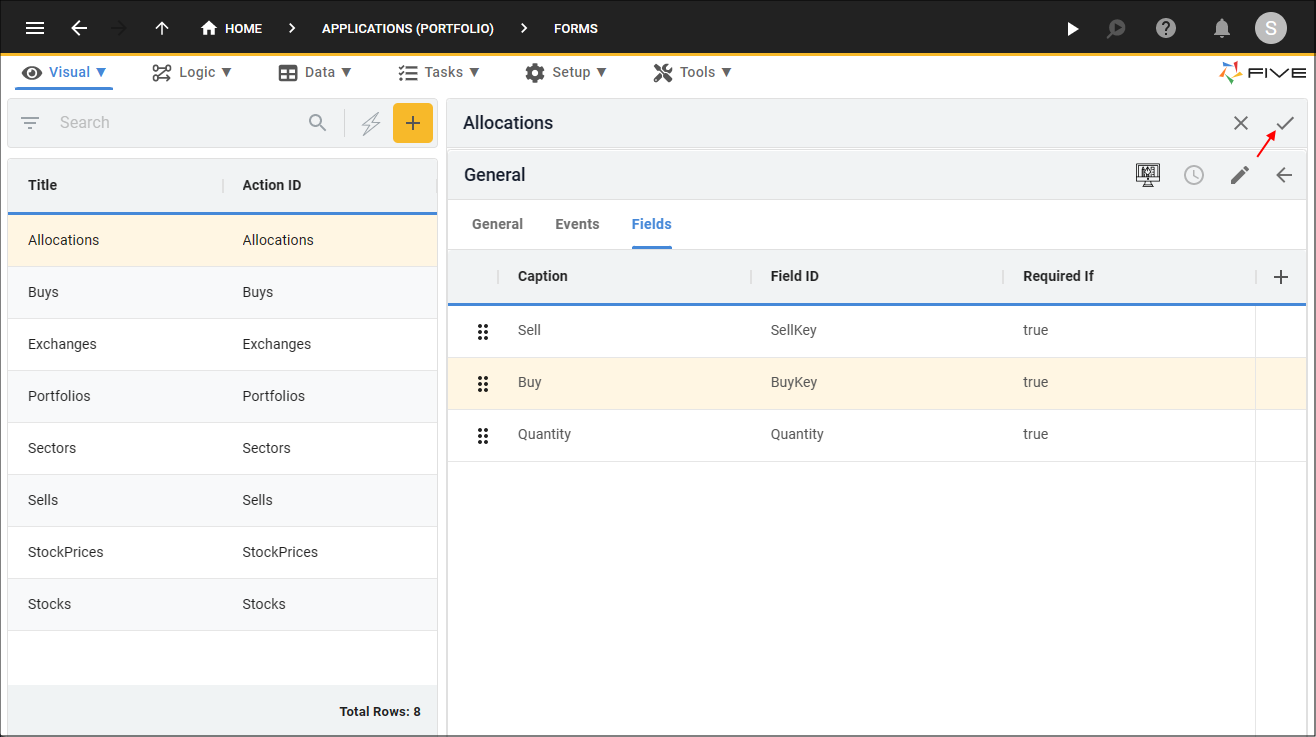
Figure 29 - Save the Allocations form
Run the Portfolio Application
This documentation is to demonstrate how the Buy Stock Remaining query works in the Portfolio application.1. Click the Run button in Five's toolbar.

Figure 30 - Run button
2. Select the Growth Portfolio record.
3. Click the Down button in the form app bar.
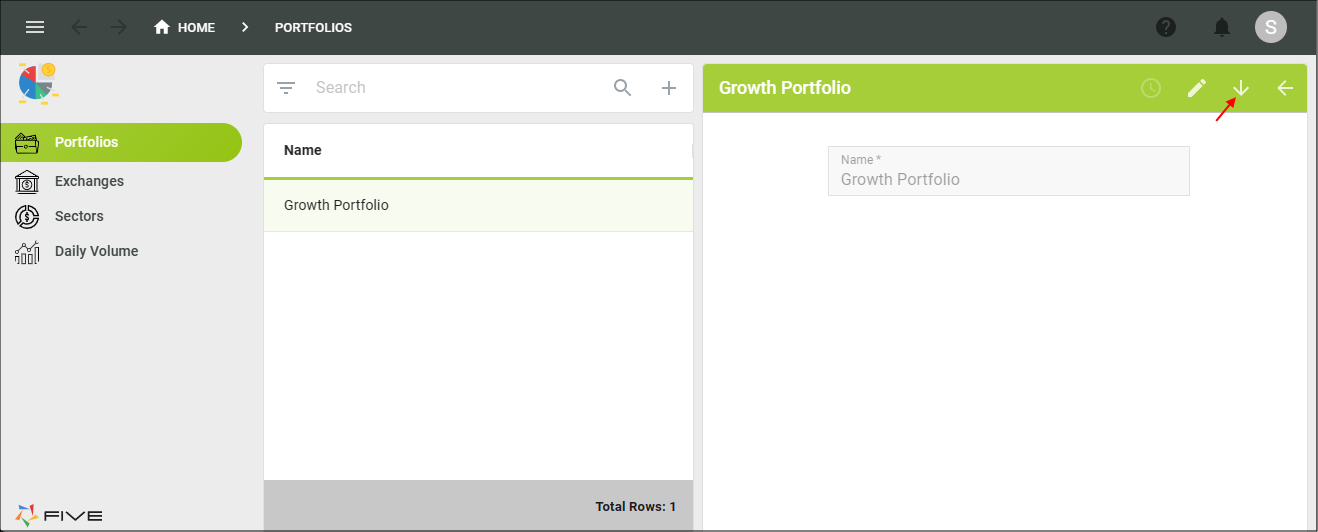
Figure 31 - Down button
Test the Buy Stock Remaining Query
1. Select Buys in the menu.info
In the Buys list, there are two AEI buy transaction records:
- 2023/03/27 - 1000 shares
- 2023/03/28 - 120 shares
Your transaction dates will be different from mine!
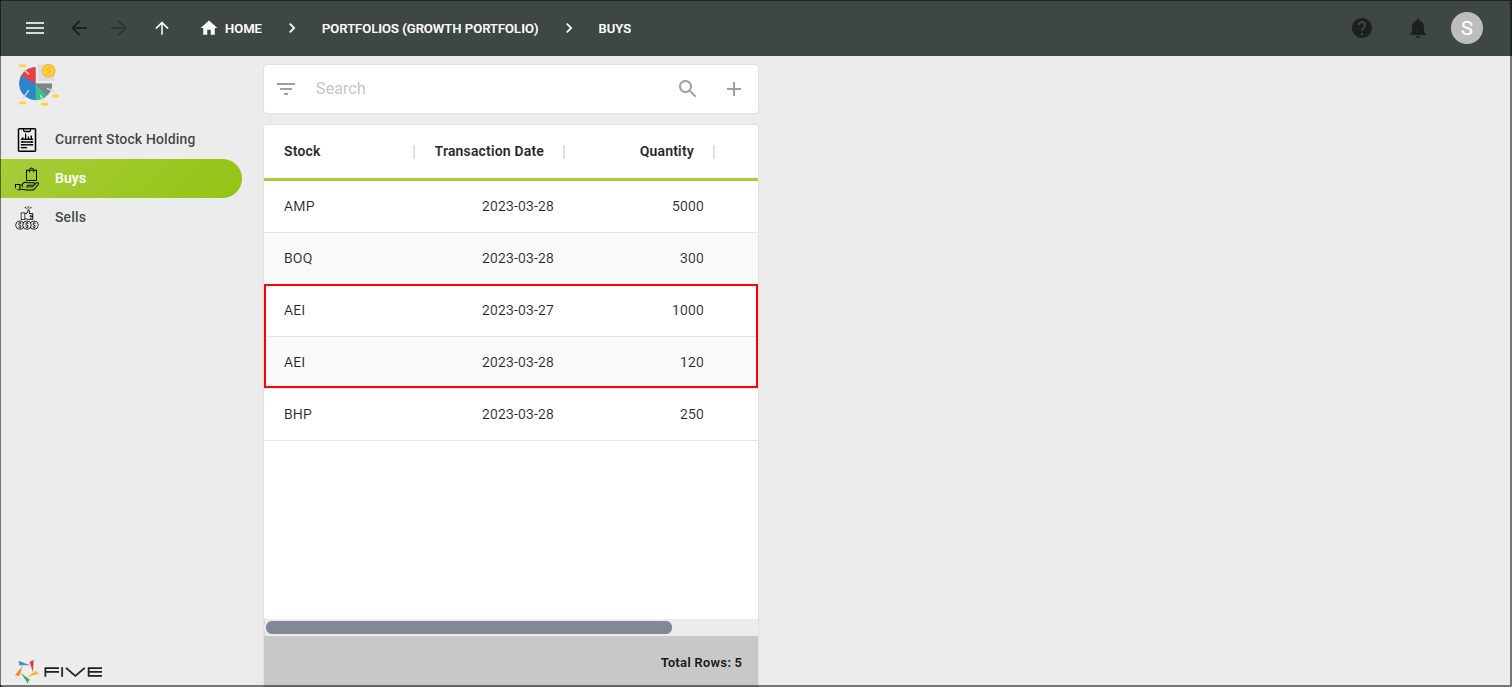
Figure 32 - Buys list
2. Select Sells in the menu.
3. Click the Add Item button in the list app bar.
4. Click the lookup icon in the Buy field and select AEI.
5. Click the calendar icon in the Transaction Date field.
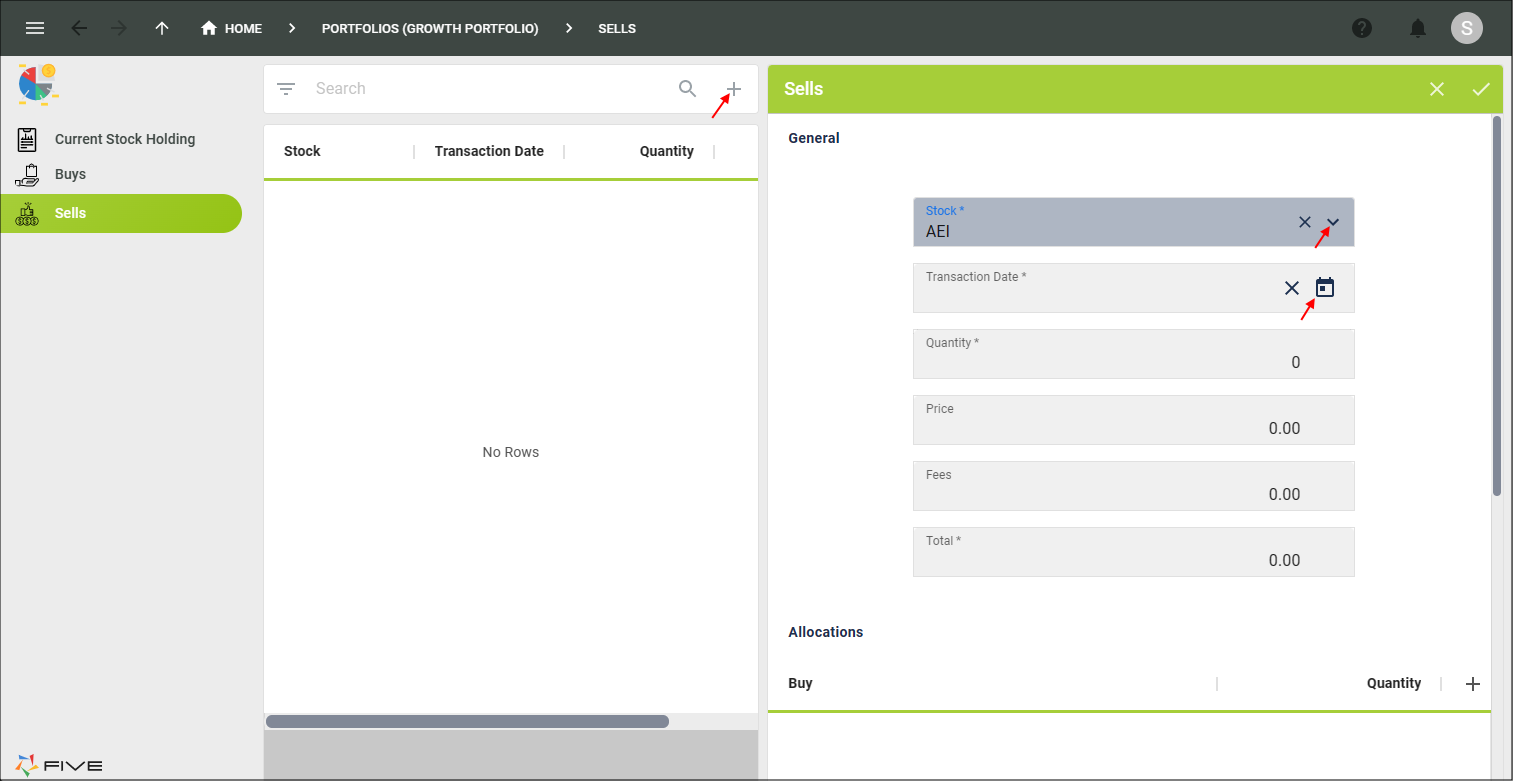
Figure 33 - Add an AEI sells transaction
6. Select the current date and click the OK button.
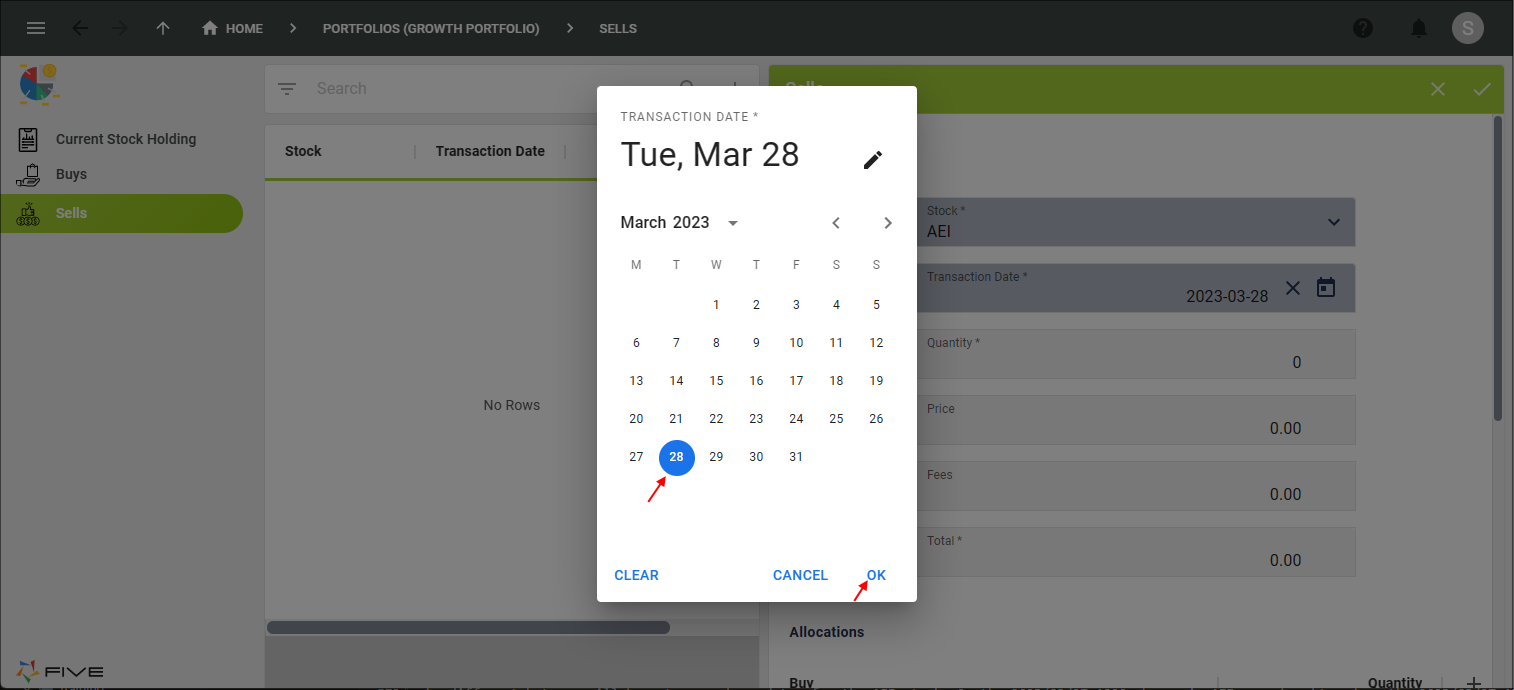
Figure 34 - Date picker
7. Type 1100 in the Quantity field.
8. Type 1.00 in the Price field.
8. Type 10.00 in the Fees field, press tab.
9. Click the Add Allocations button.
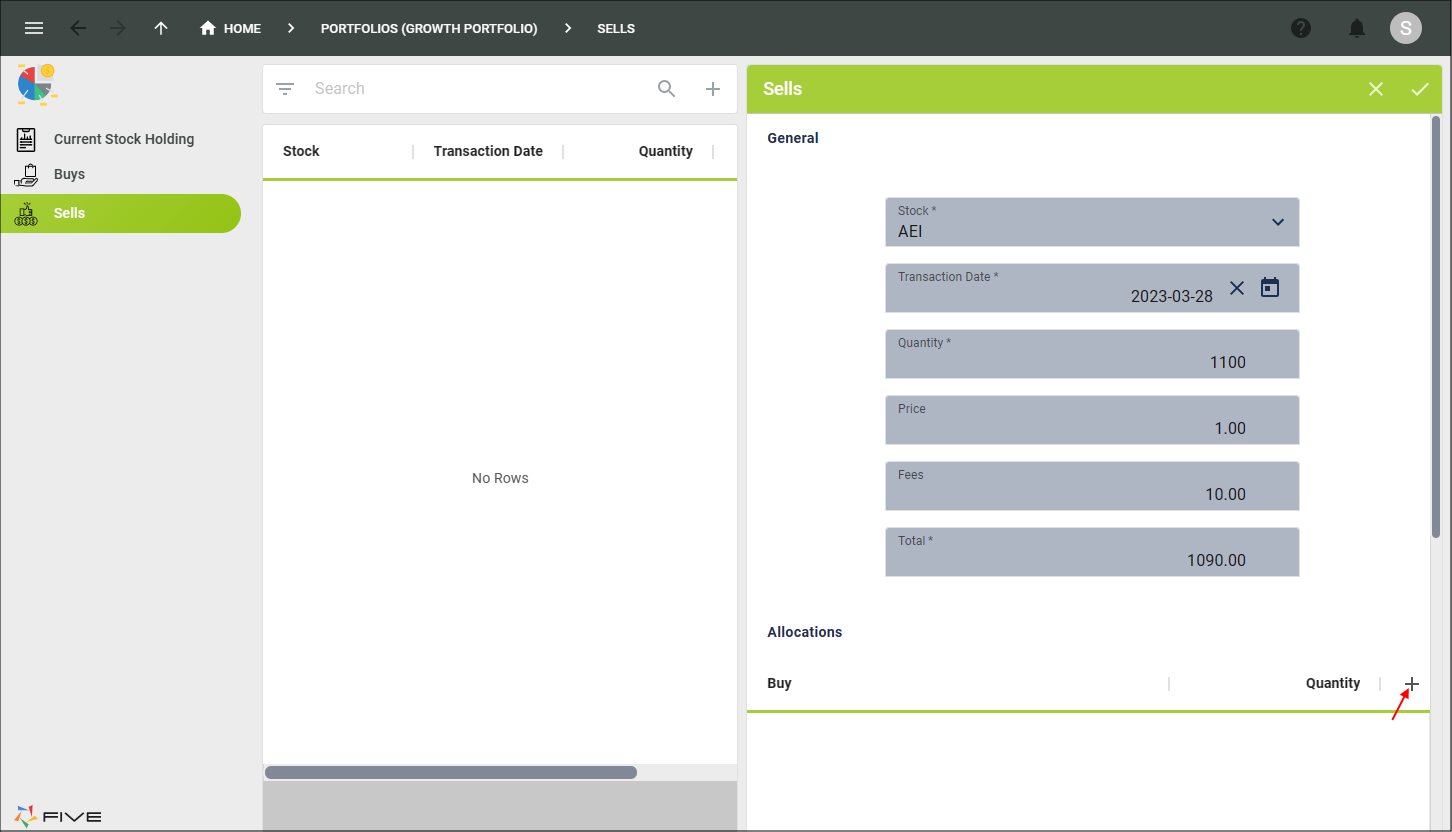
Figure 35 - Add Allocations button
10. Click the lookup icon in the Buy field.
info
The Buy Stock Remaining query is now filtering the list to only show the buy transaction dates for the selected stock (AEI).
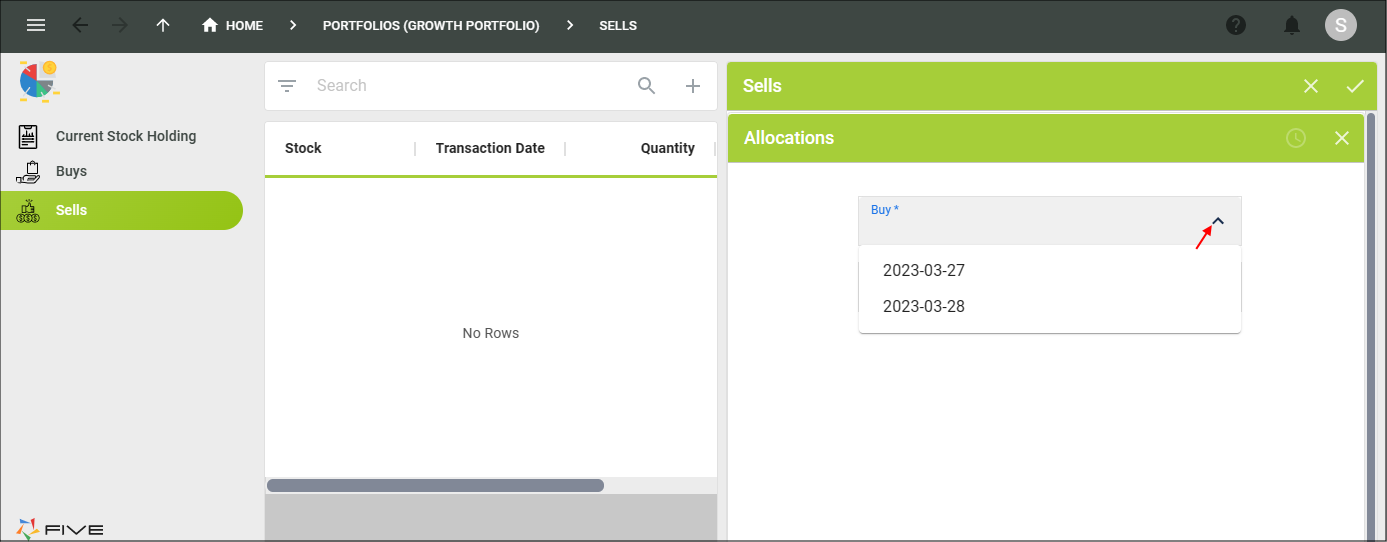
Figure 36 - Filtered buy lookup list
11. Select your yesterday date in the Buy field.
12. Type 1100 in the Quantity field.
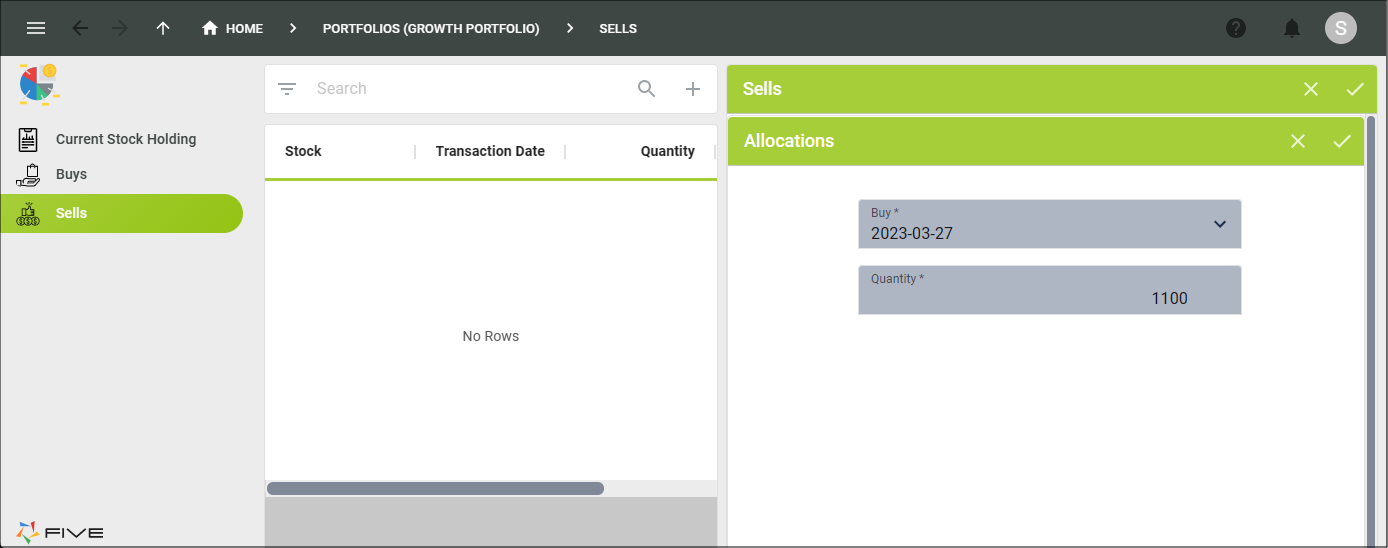
Figure 37 - Select your yesterday date
Problem
At this point we have been allowed to enter 1100 in the Quantity field. This is because in total we own 1120 shares in the AEI stock, however, we need to validate we aren't selling more than we own for a specific transaction date as the stock could of been bought at different prices and we want to ensure the value we are selling. In Five, we can attach a function to the Quantity field that will use the metadata provided in the Buy field to allocate stock to a specific date.
13. Click the Cancel button in the form app bar.
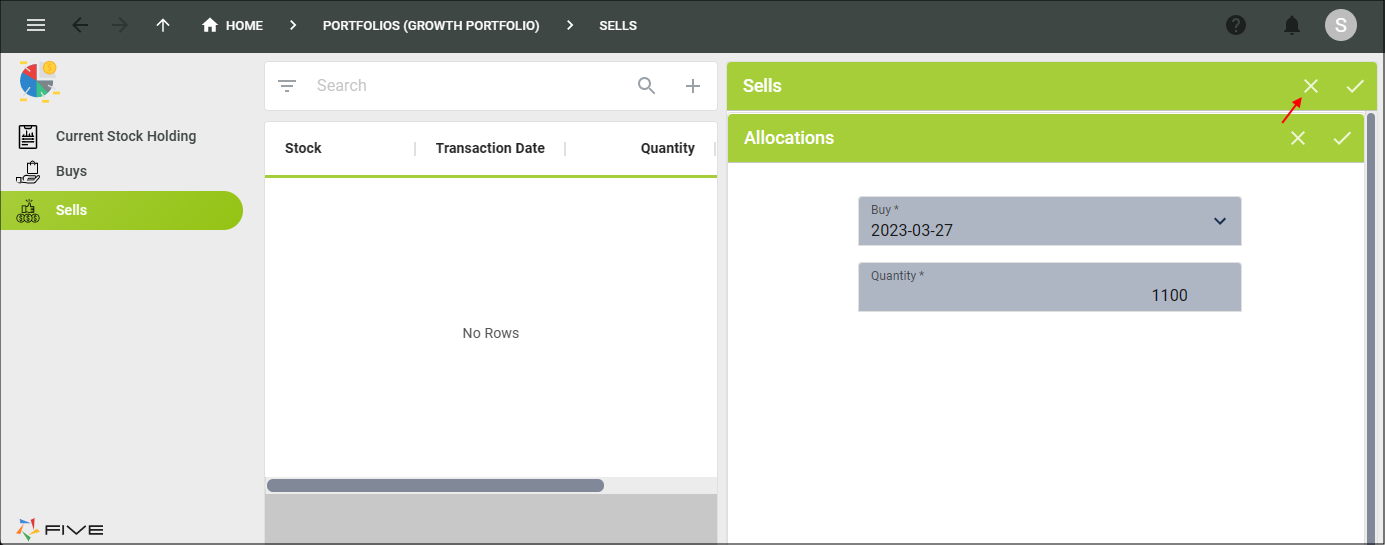
Figure 38 - Cancel button
14. Close the browser tab and return to Five.