Deploy to the Development Environment
Last updated 28/08/2025
The Deploy to Development button is located in Five's toolbar and this will deploy your application to cloud in the development environment. Your default instance, can be deployed from any view in Five. Please be aware that the initial deployment may take up to Five minutes to be available as the new domain name system entry for the URL needs to propogate.
Once deployed, your application will open in a new browser tab, and you can accept or decline the cookie settings.
Back in Five, the Deploy to Development button has been replaced with the Run and Remove from Development buttons, along with several other buttons. When your application is deployed, you will only need to click the Run button to see the changes you make to your application.
It is important to know that if you have not interacted with your application in the development environment for more than two hours, it will drop out and you will need to remove it from deployment and deploy to the development environment again, except if you are on the Basic plan.
Deploy Your Application
1. Click the Deploy to Development button.
Login to Your Application
When initially logging into your application, use admin as the username and the password. The admin user is a default user that Five provides and this user has full access to your application.
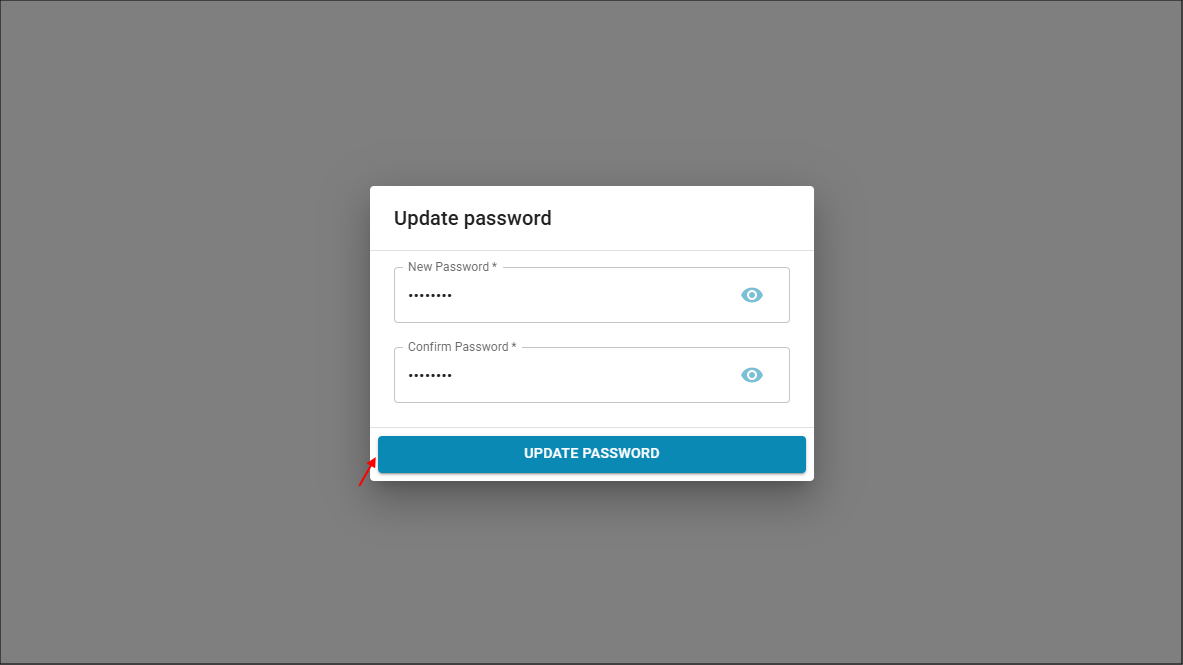
Just like the firt time logging into Five, you will be forced to change your password. You must reach the criteria that Five uses, however, you can change the password strength for future logins back in Five or change the authentication method.
For your next login use the username admin and the password you just set.
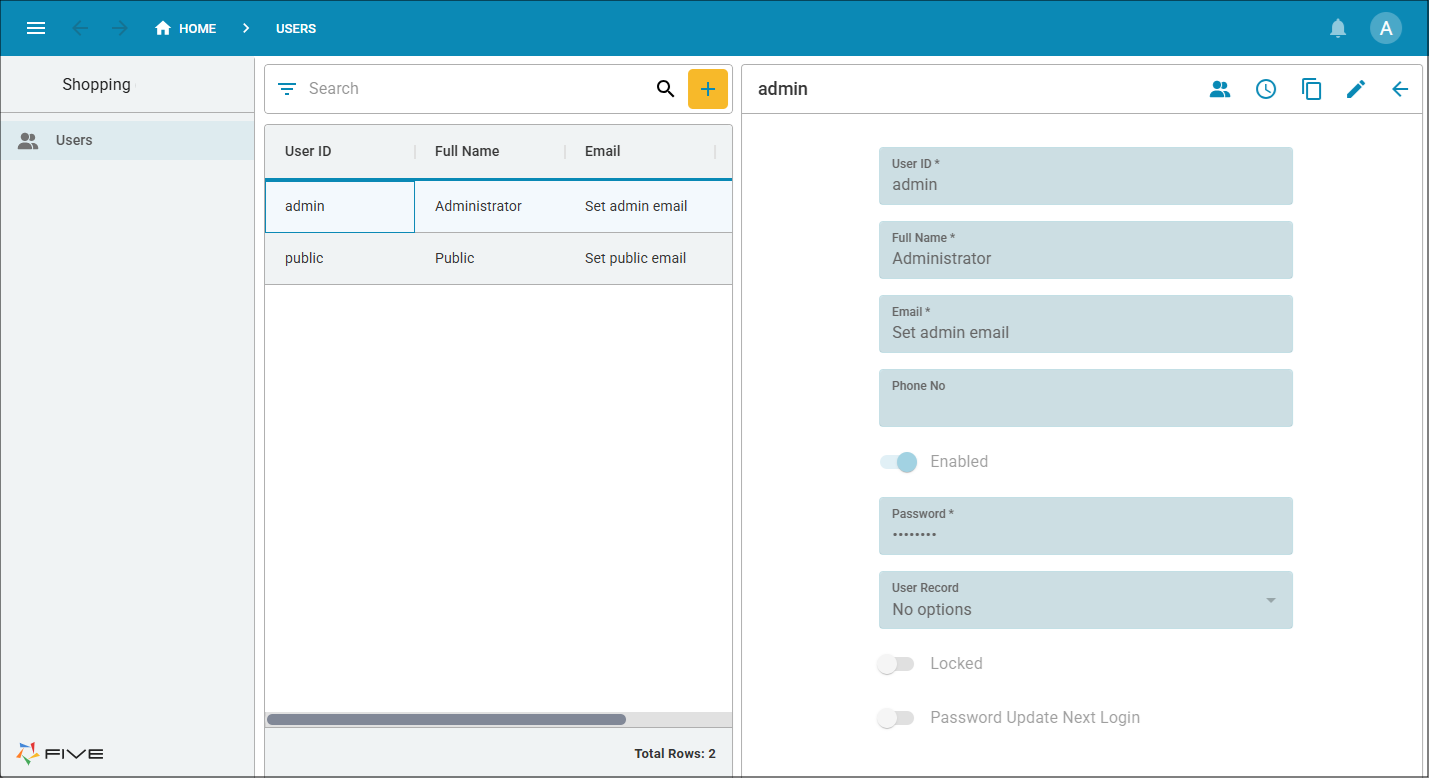
When you log into your application, at this stage you will only have the Users form that Five provides. There are two users in the list, admin, which we are currently using, and public which you will learn about later in this series.
1. Enter admin in the Username and Password fields in the Sign in window and click the Sign In button.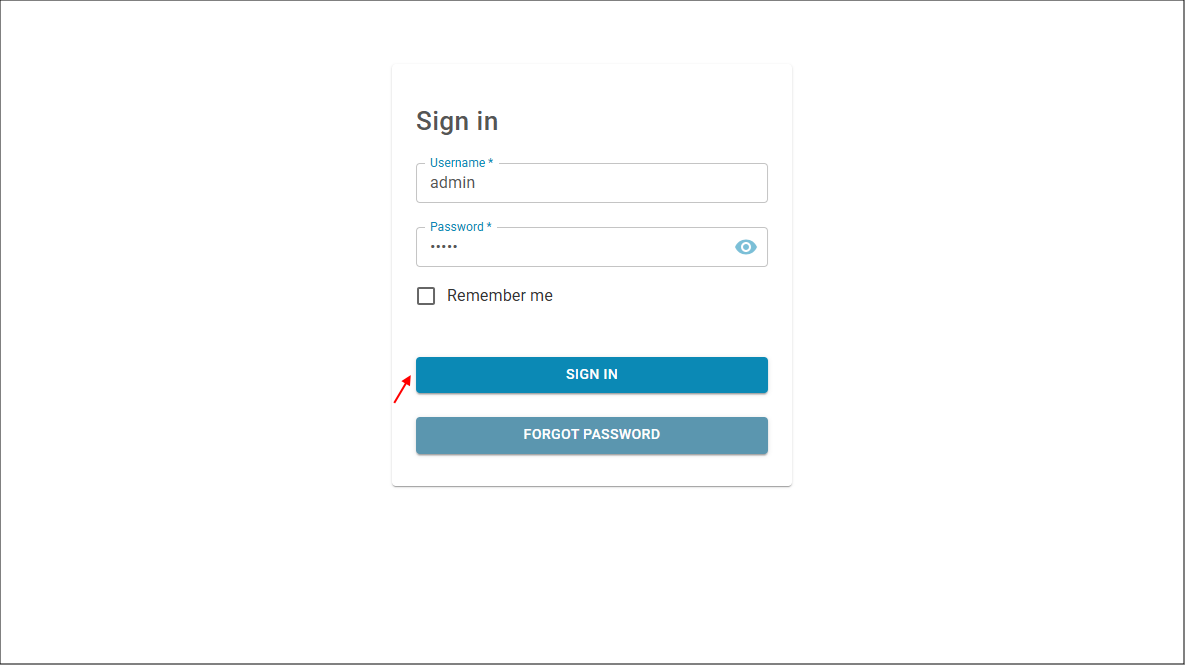
2. Enter and confirm your new password in the Update password window and click the Update Password button.