Action Buttons
Last updated 9/04/2025
When you add a process, by default it will have no action buttons. You can add the following buttons to a process:
- Five's Cancel button
- Five's Run button
- Your own custom action button
Add Five's Cancel Button
By default, if there is no function attached to the On Cancel event, there will be no Cancel button on your process. If a function is attached to the On Cancel event, a Cancel button will be added to your process.
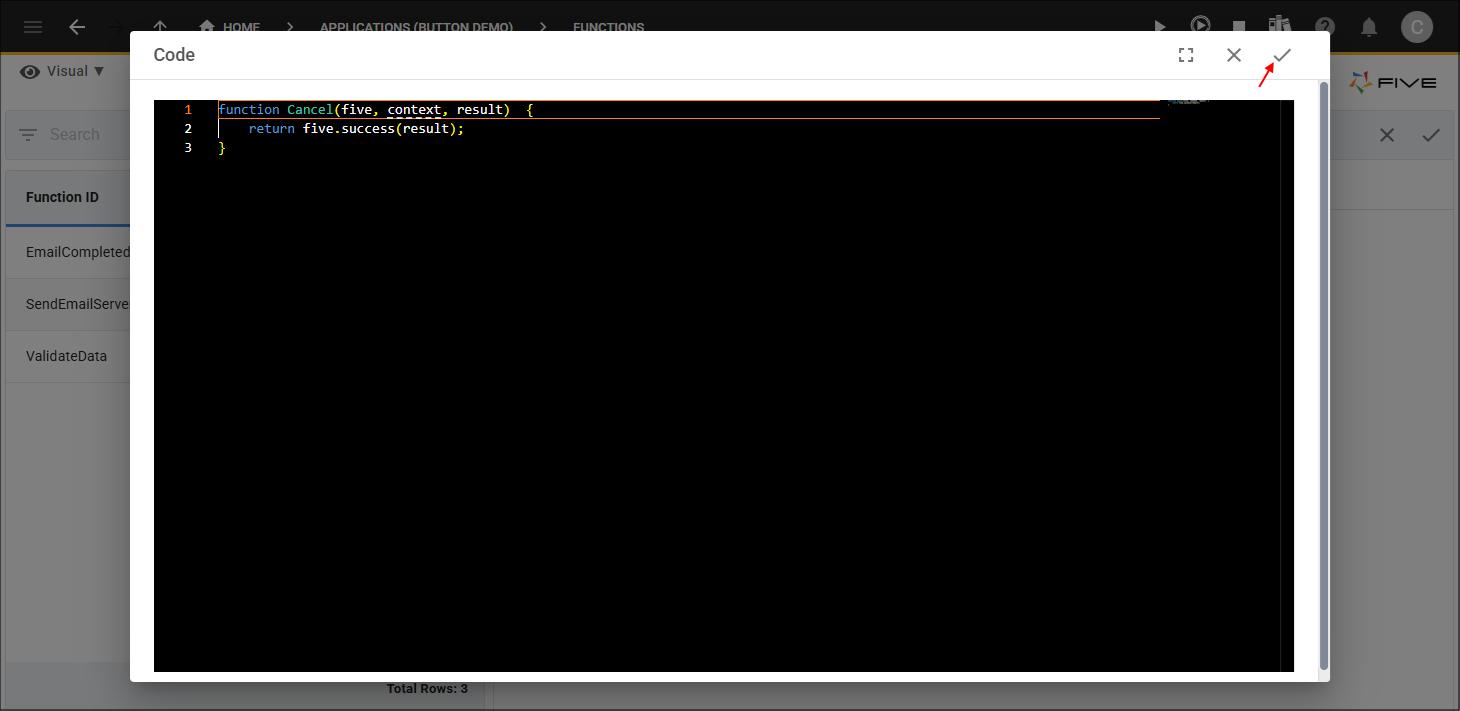
A function just using Five's default template supplied in the Code Editor will add a Cancel button on your process.
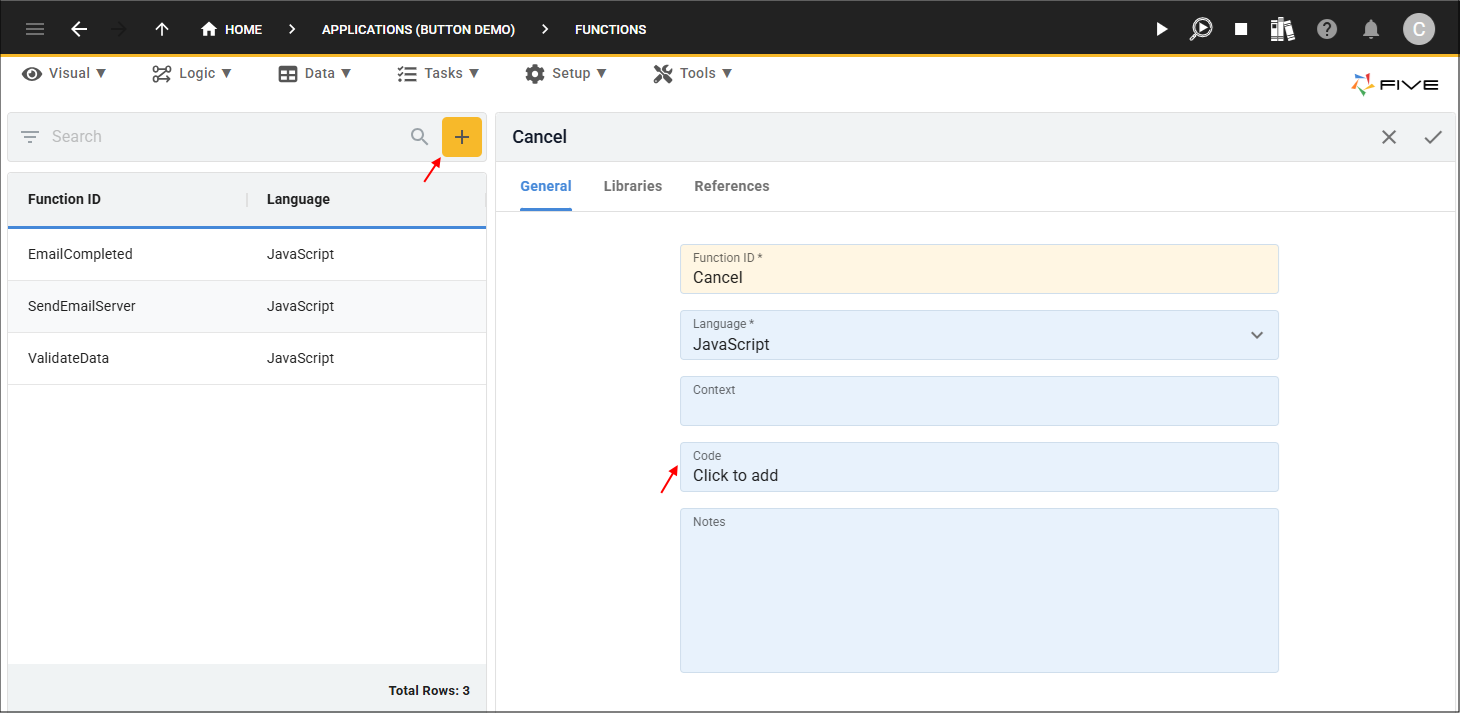
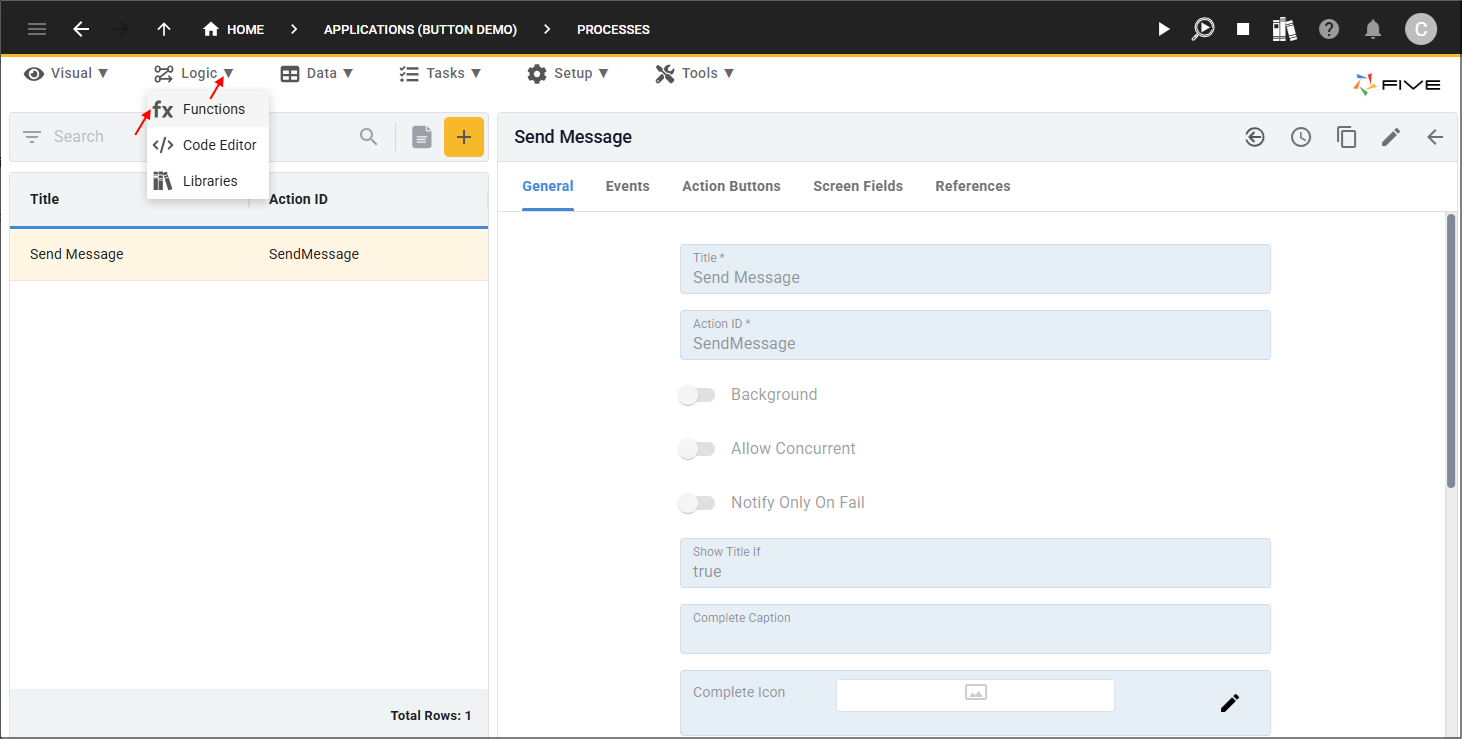
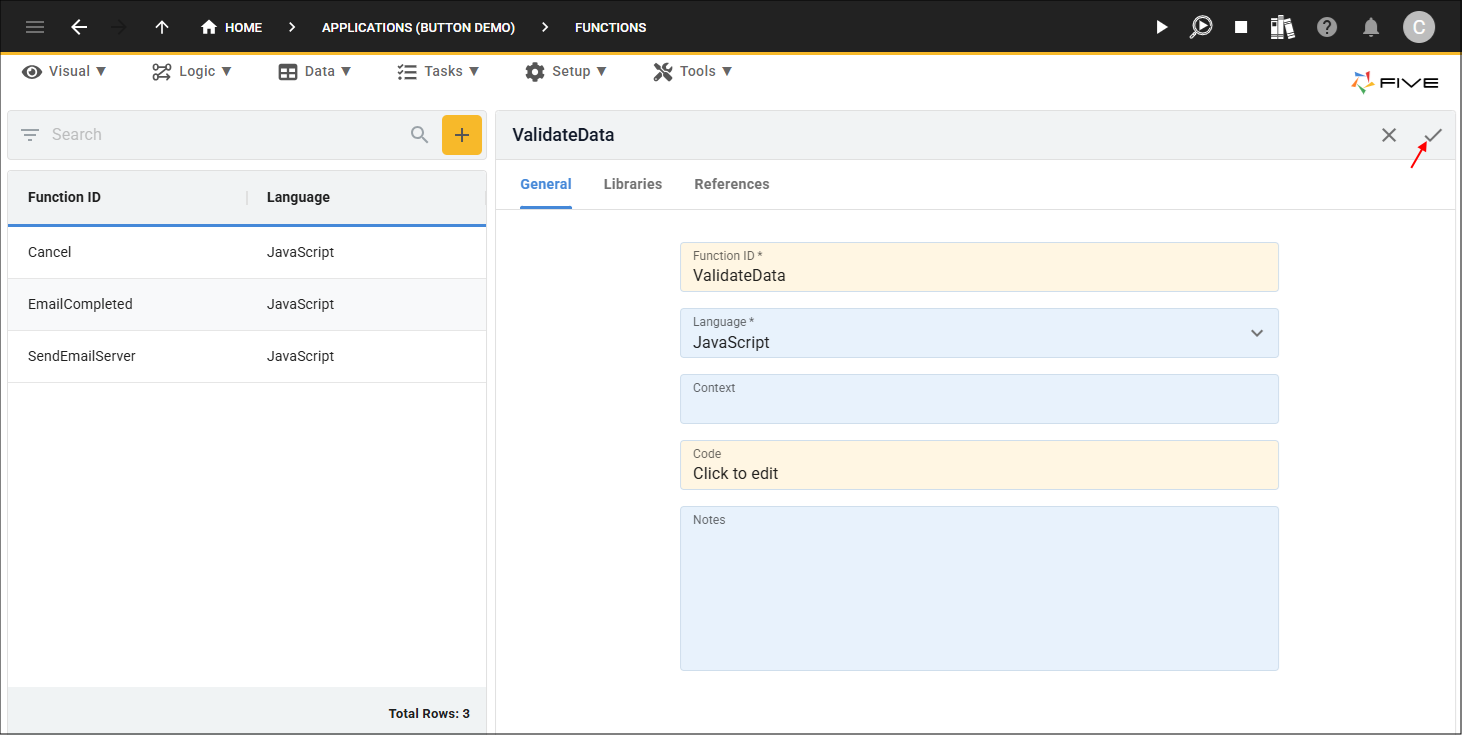
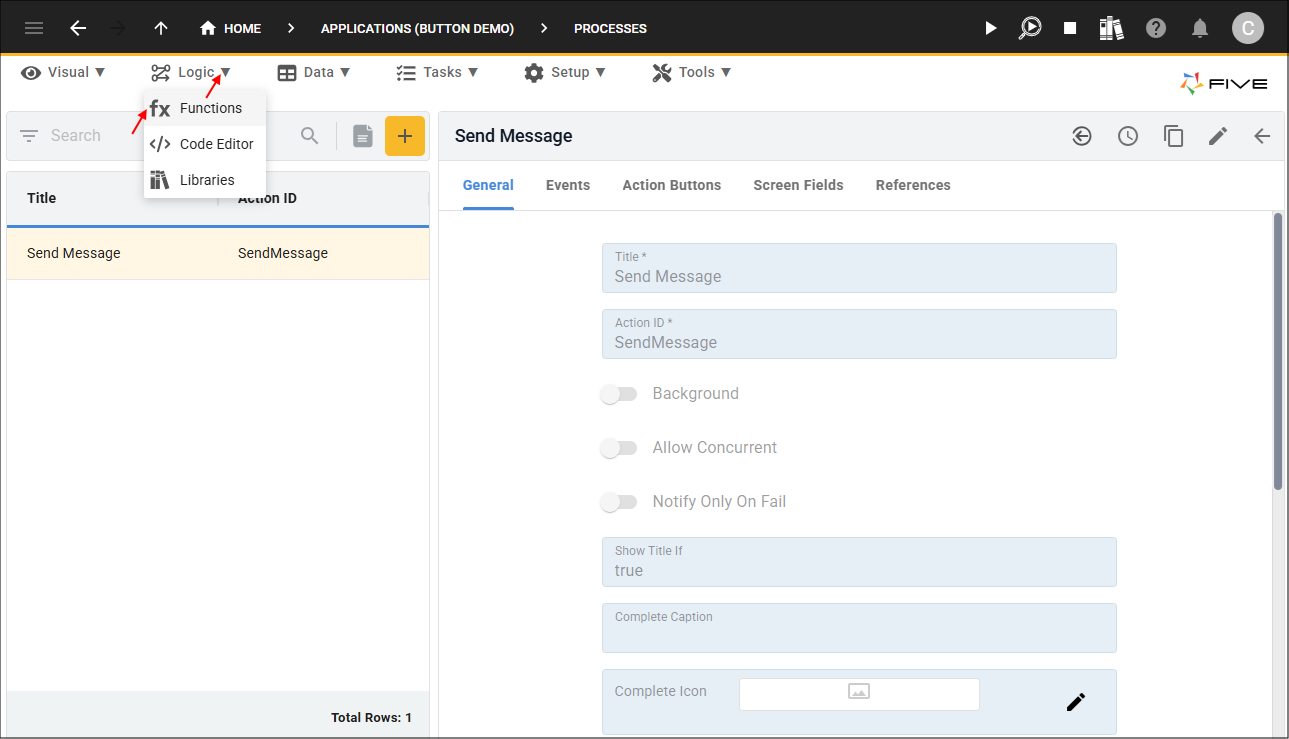
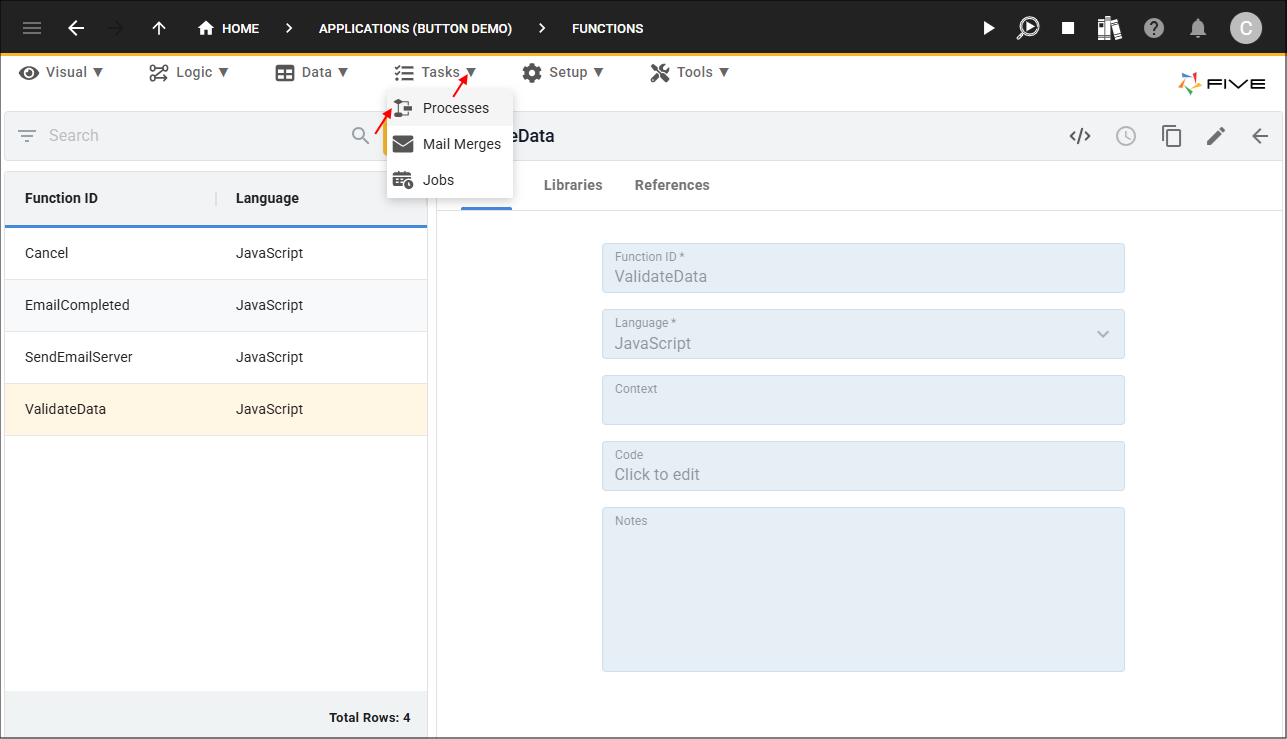
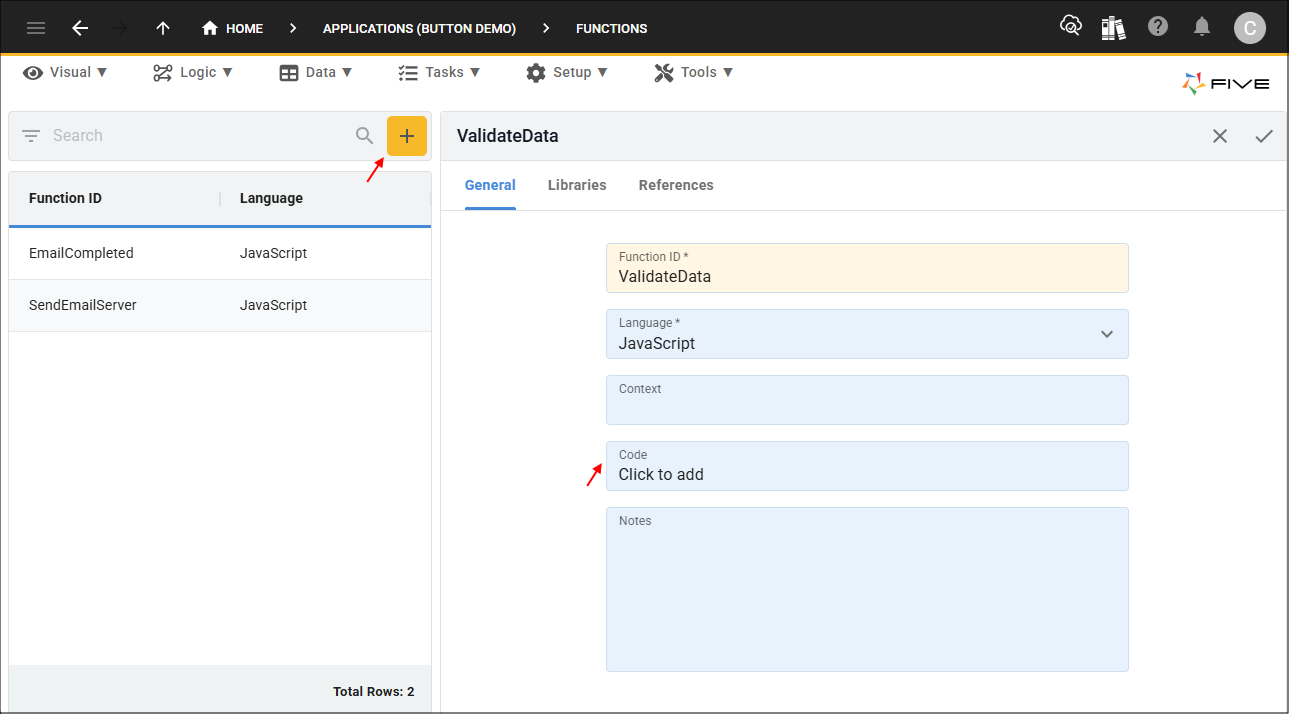
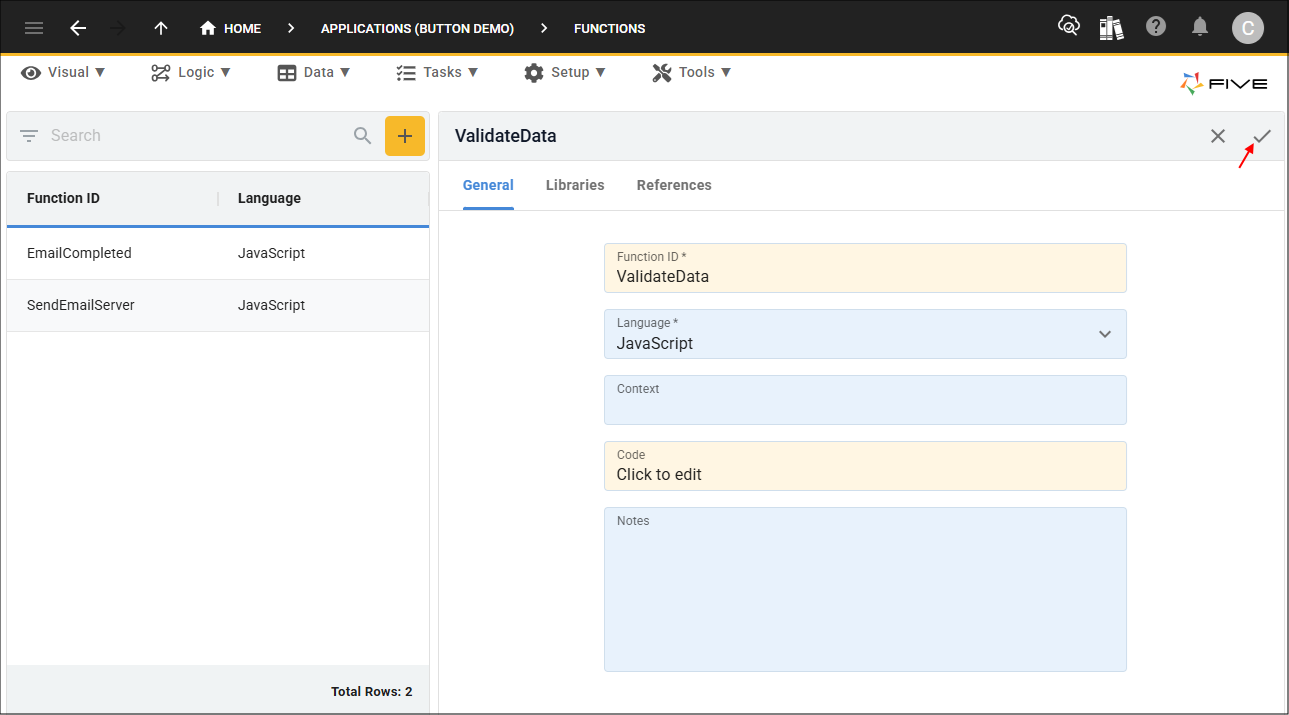
1. Navigate to the Functions view by selecting Logic in the menu and Functions in the sub-menu.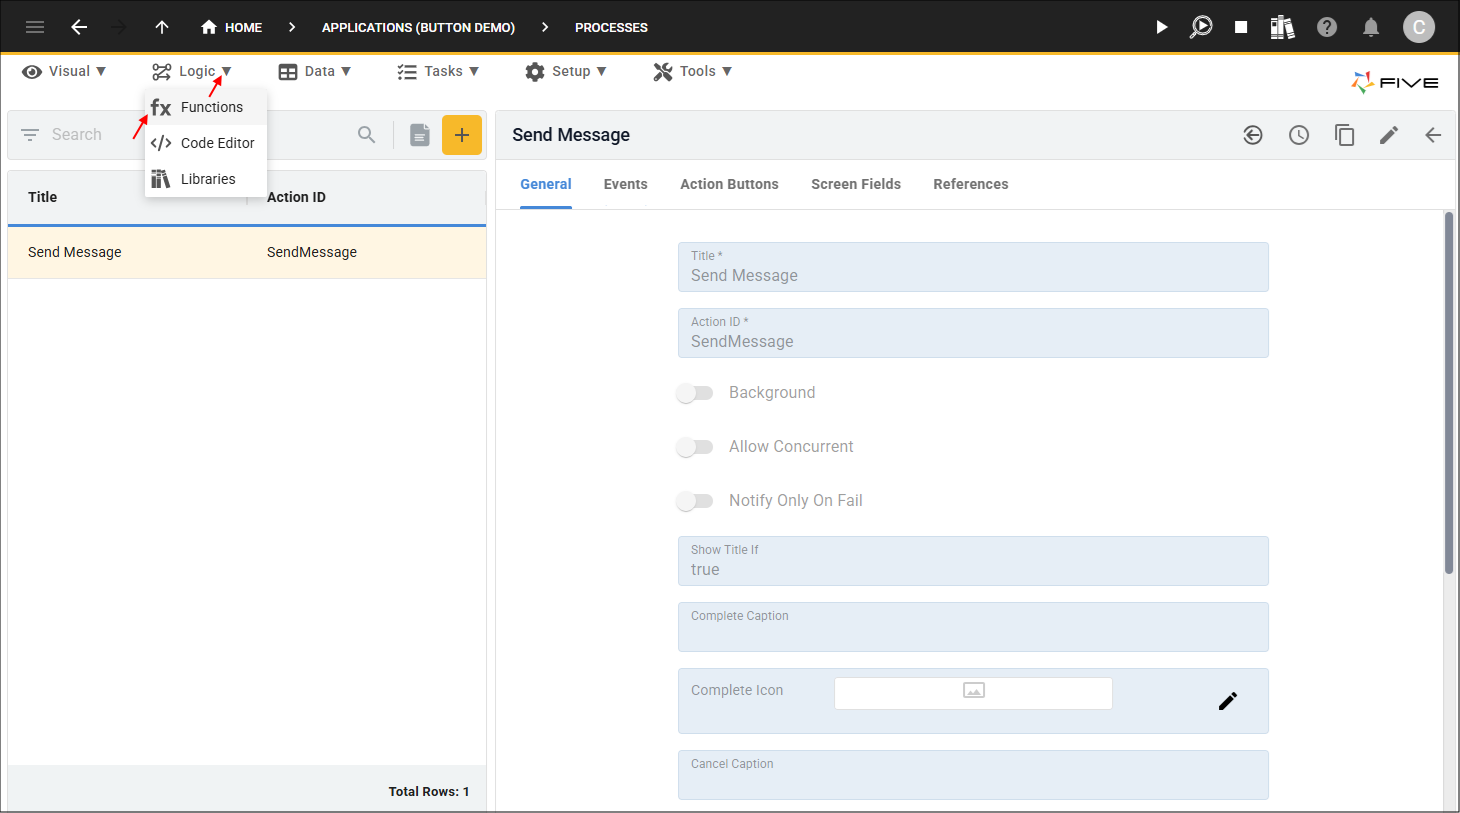
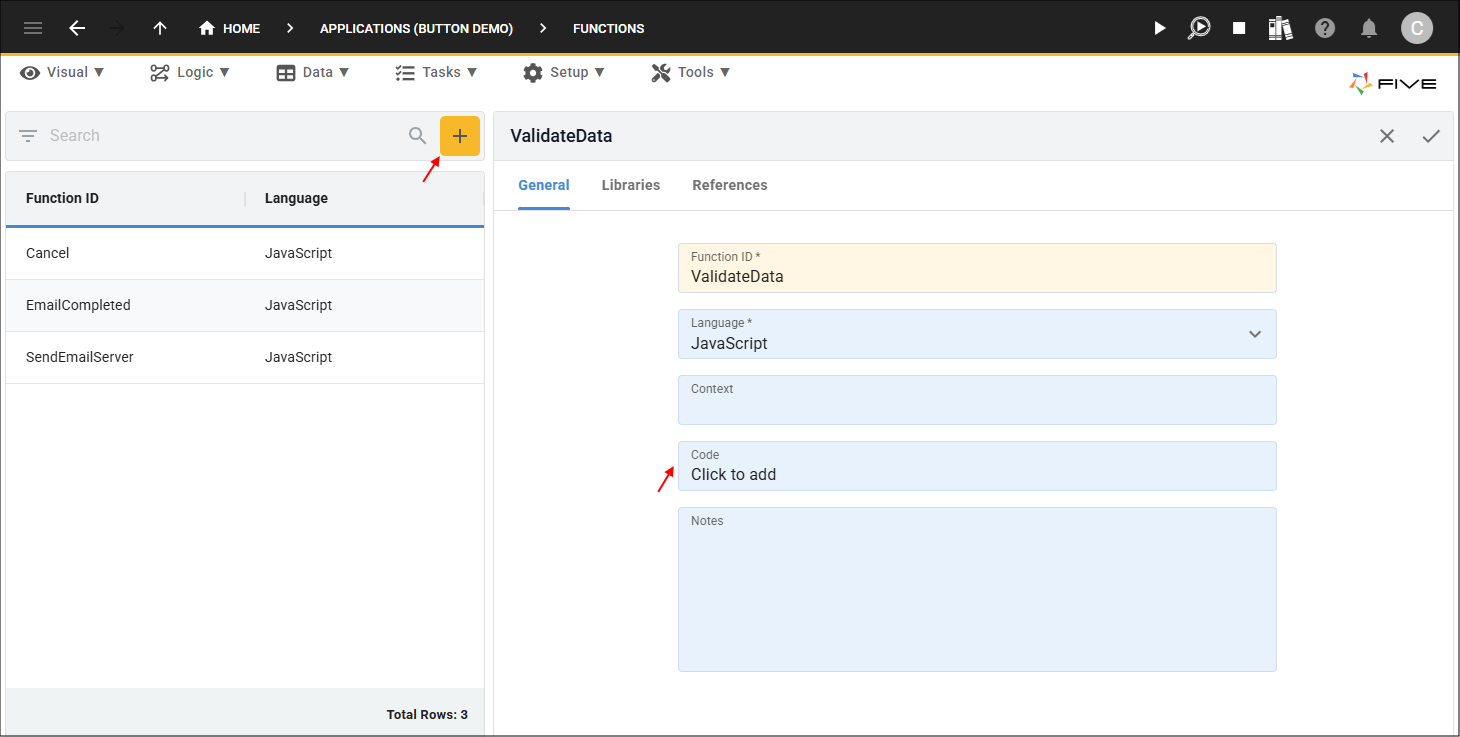
2. Click the Add Item button, give your function an ID, and click in the Code field to open the Code Editor.
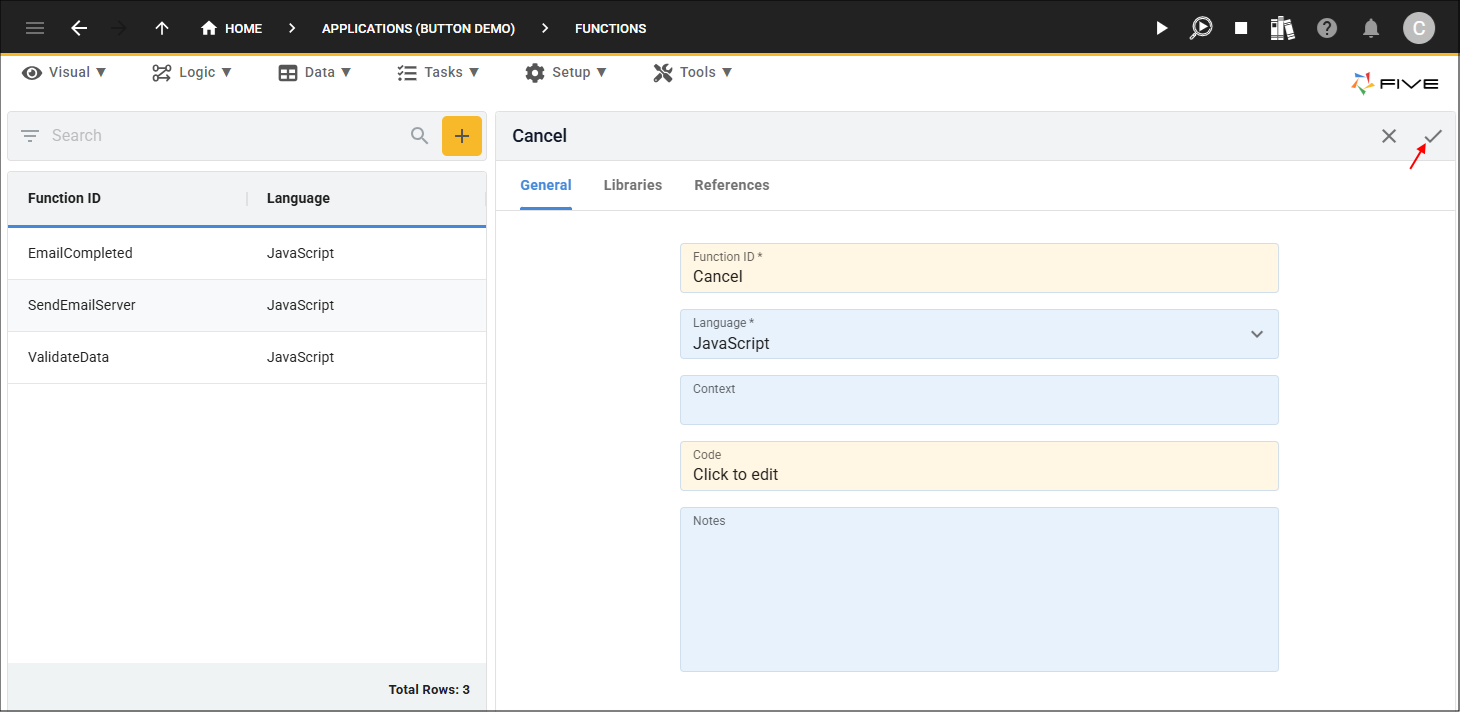
3. Click the Save button in the Code Editor app bar.
4. Click the Save button in the form app bar.
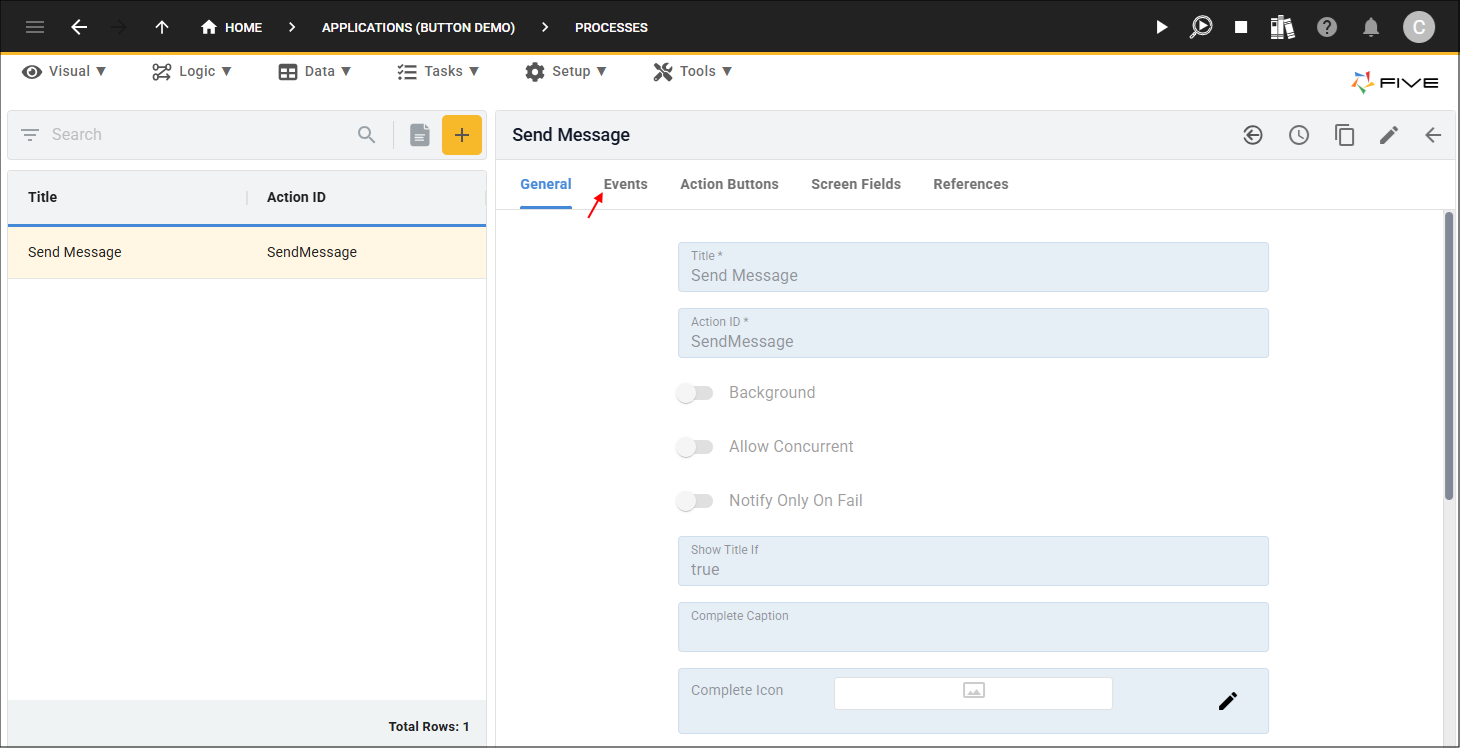
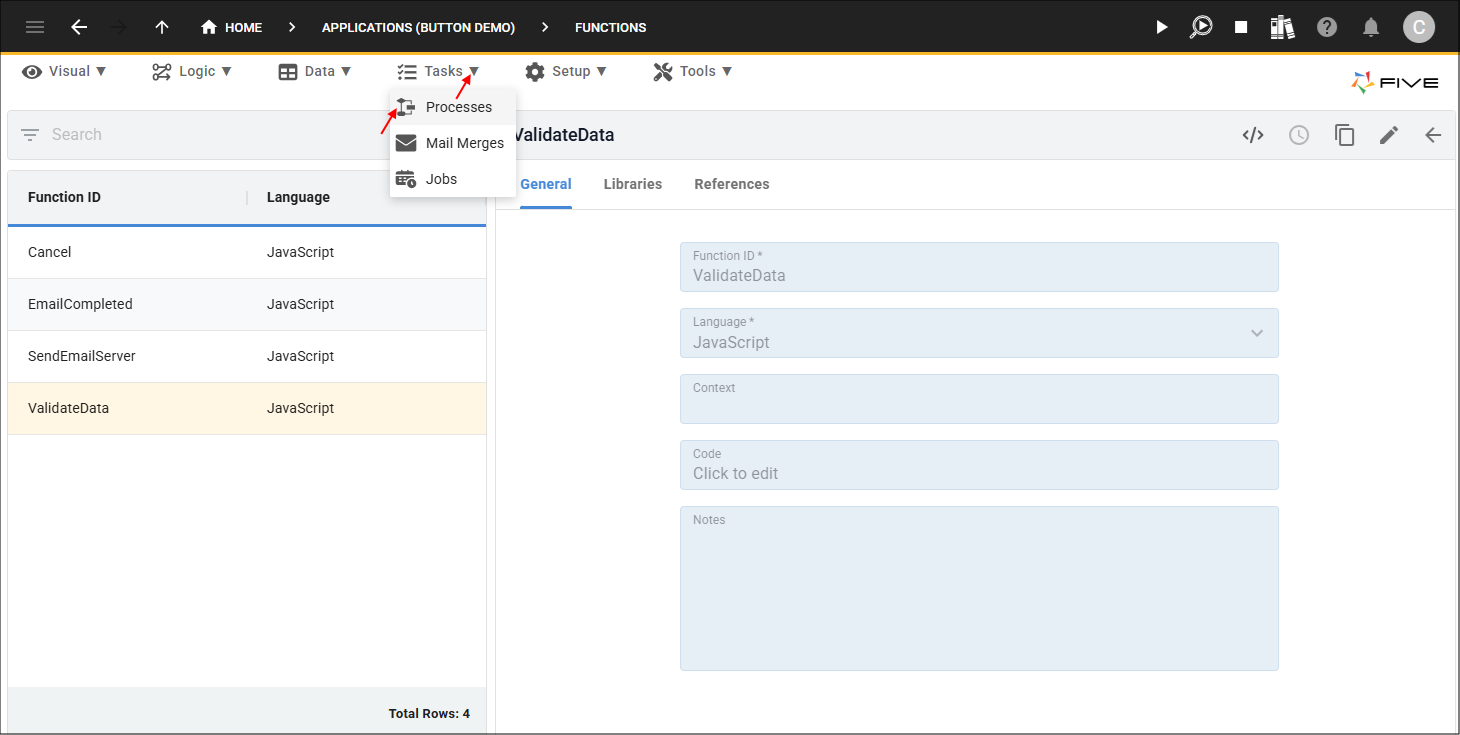
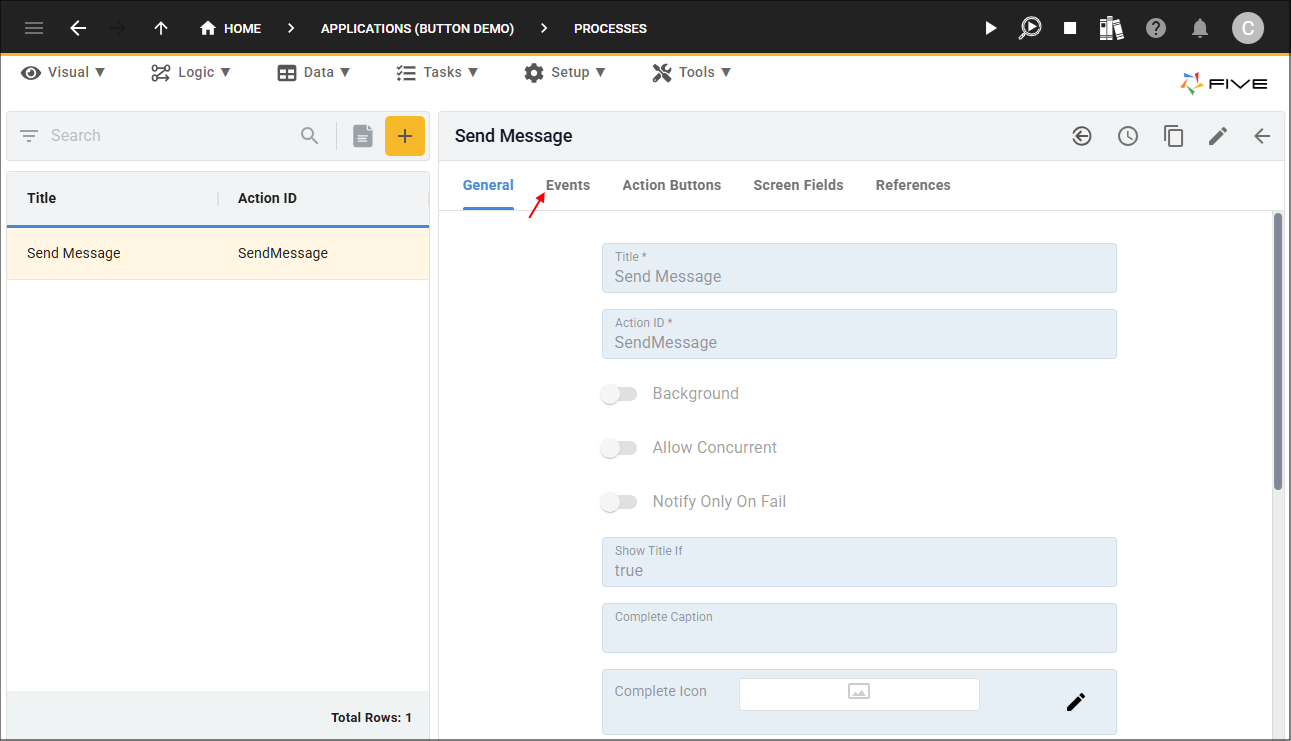
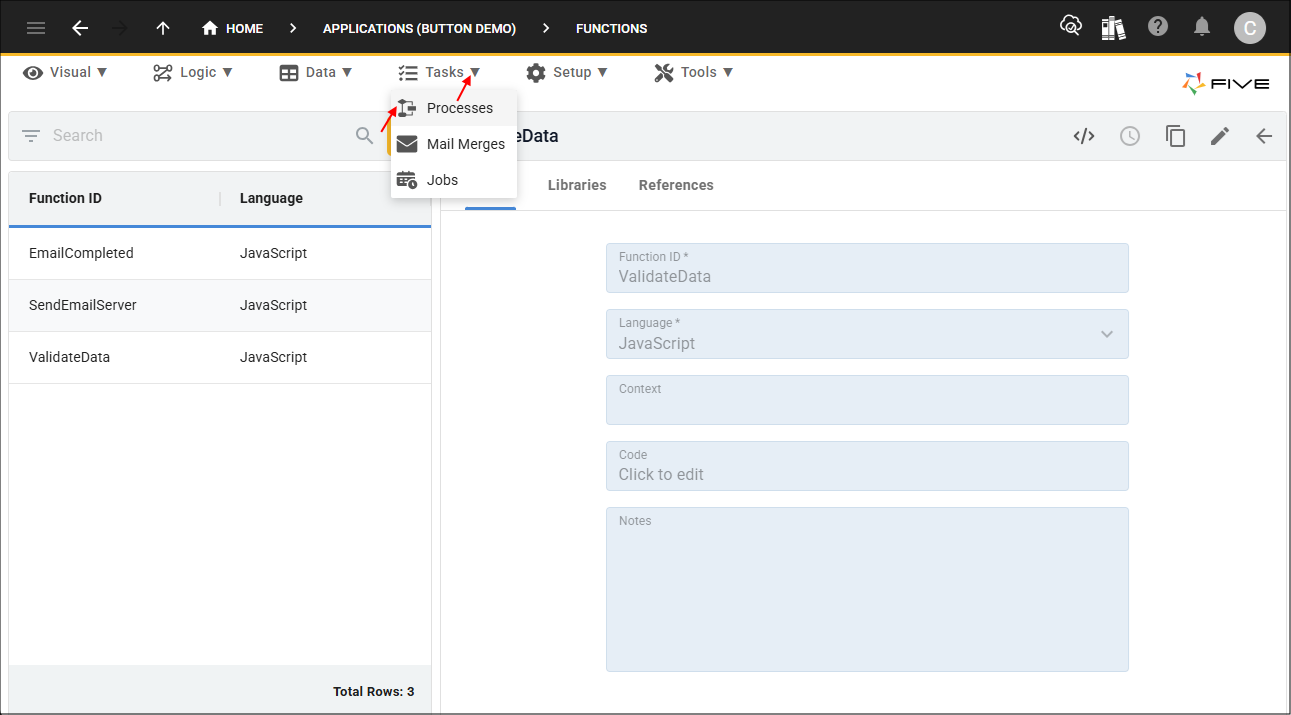
5. Navigate to the Processes view by selecting Tasks in the menu and Processes in the sub-menu.
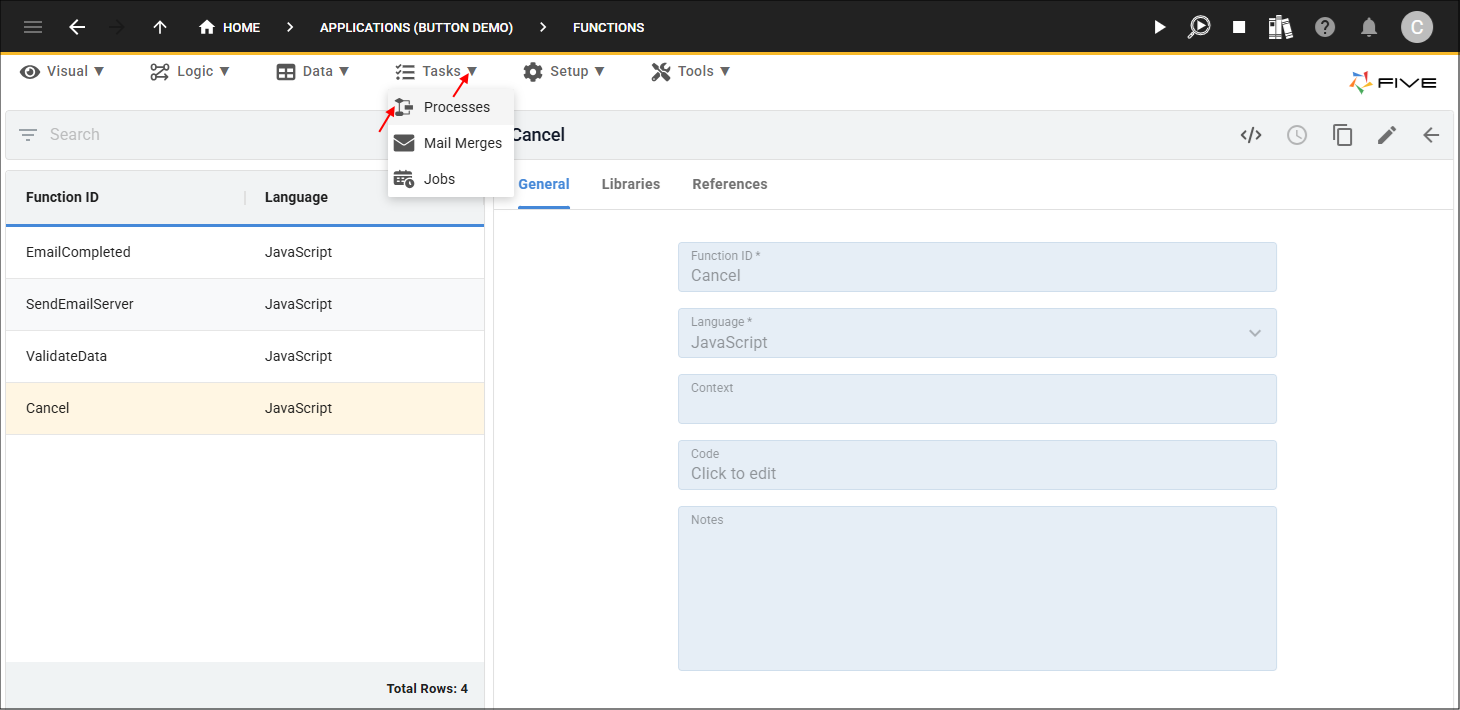
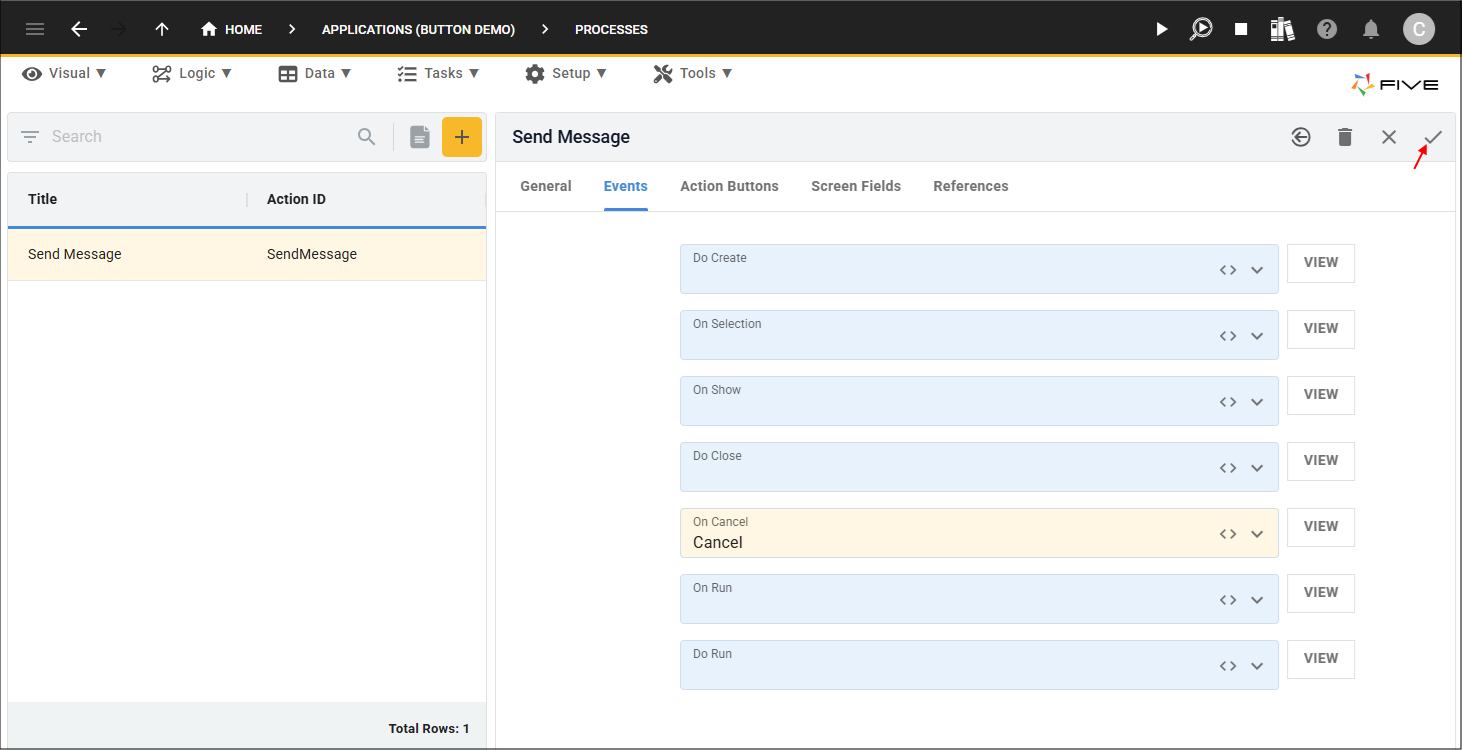
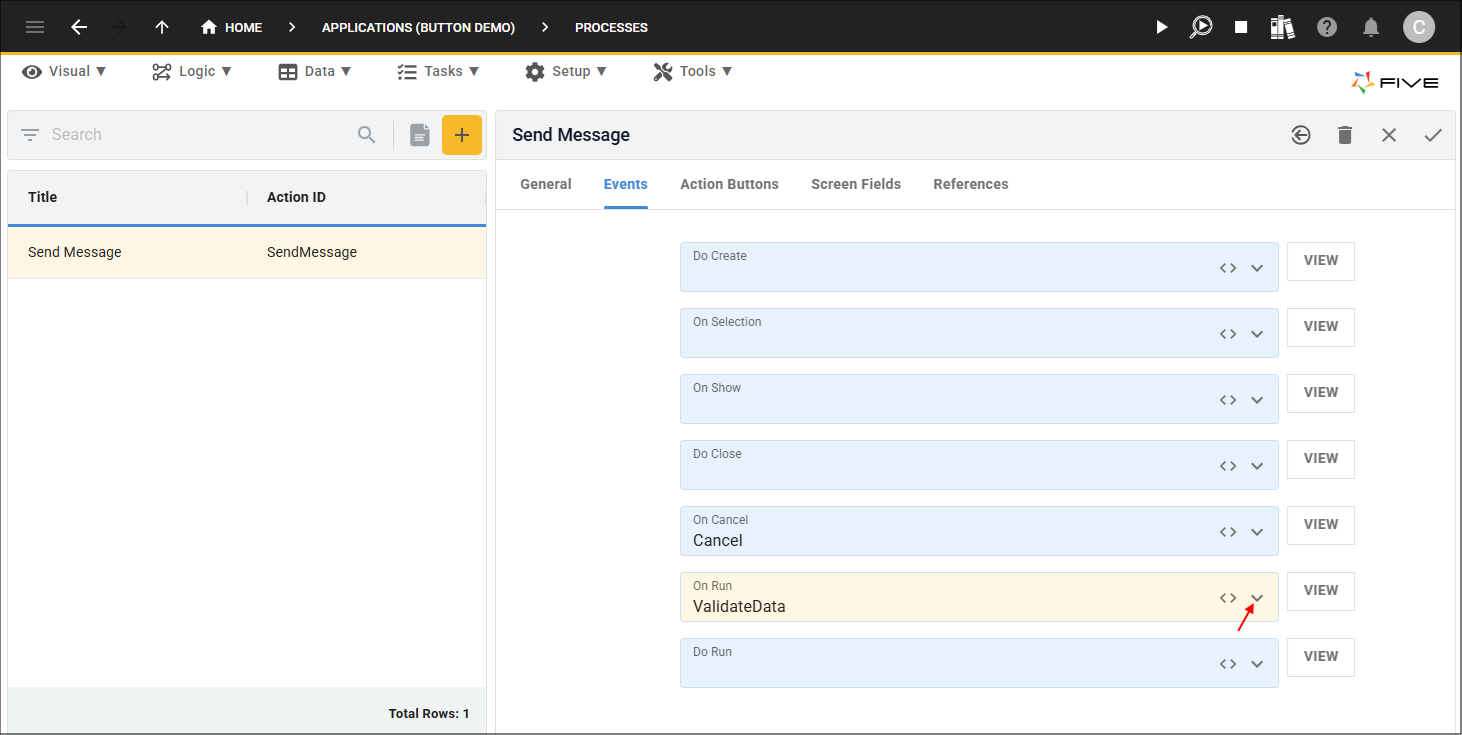
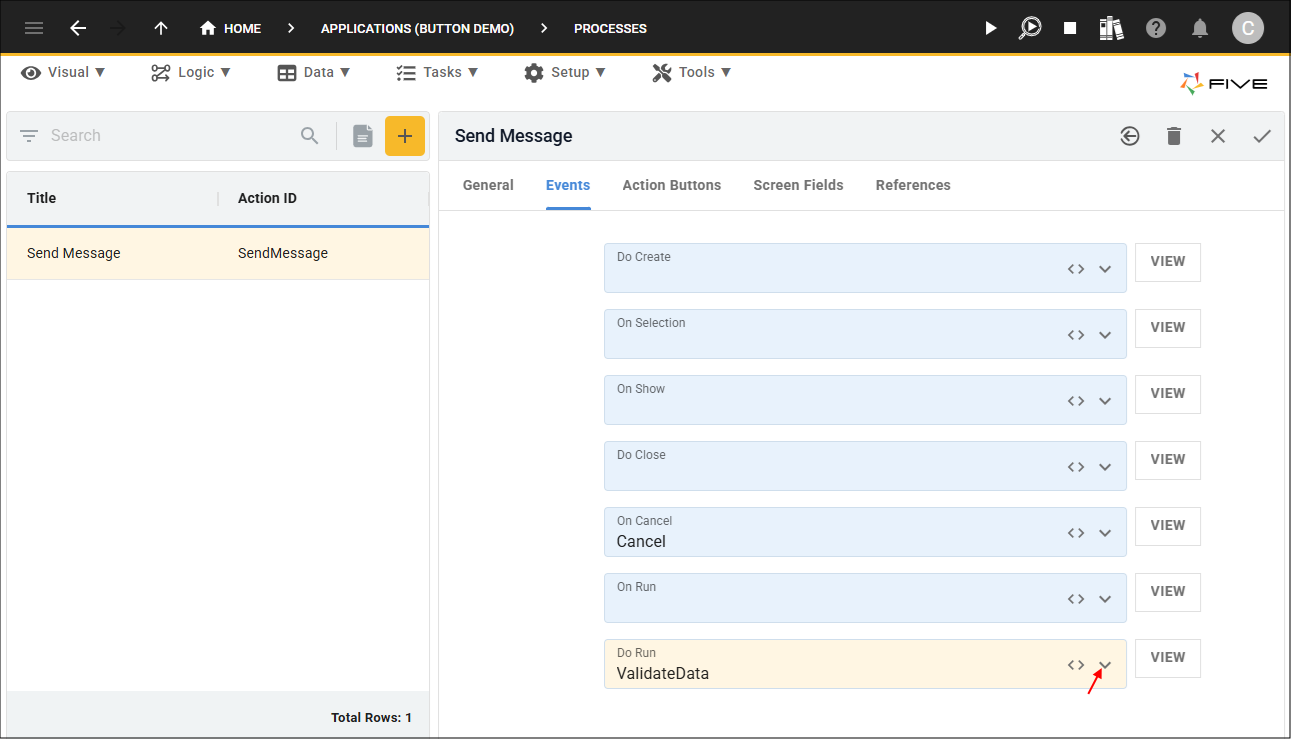
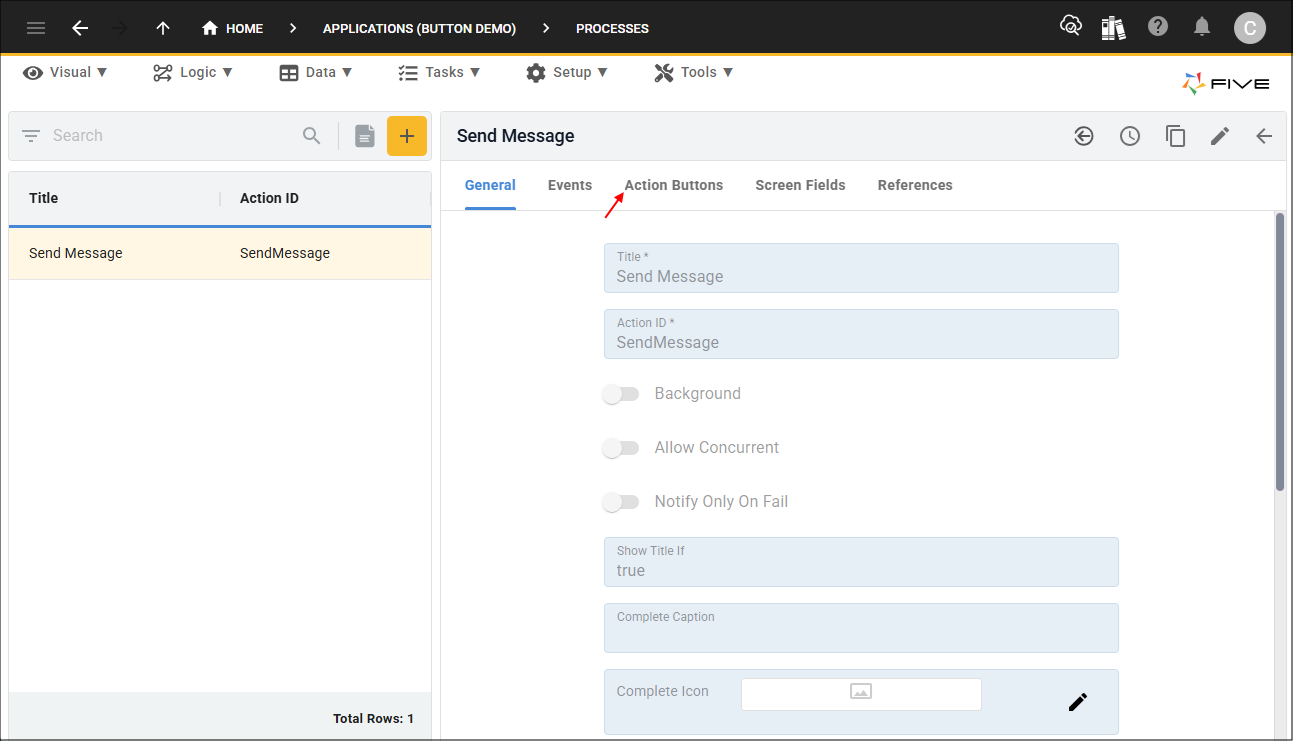
6. Select your process record in the list and click the Events tab.
7. Click the lookup icon in the On Cancel field and select your function.

8. Click the Save button in the form app bar.
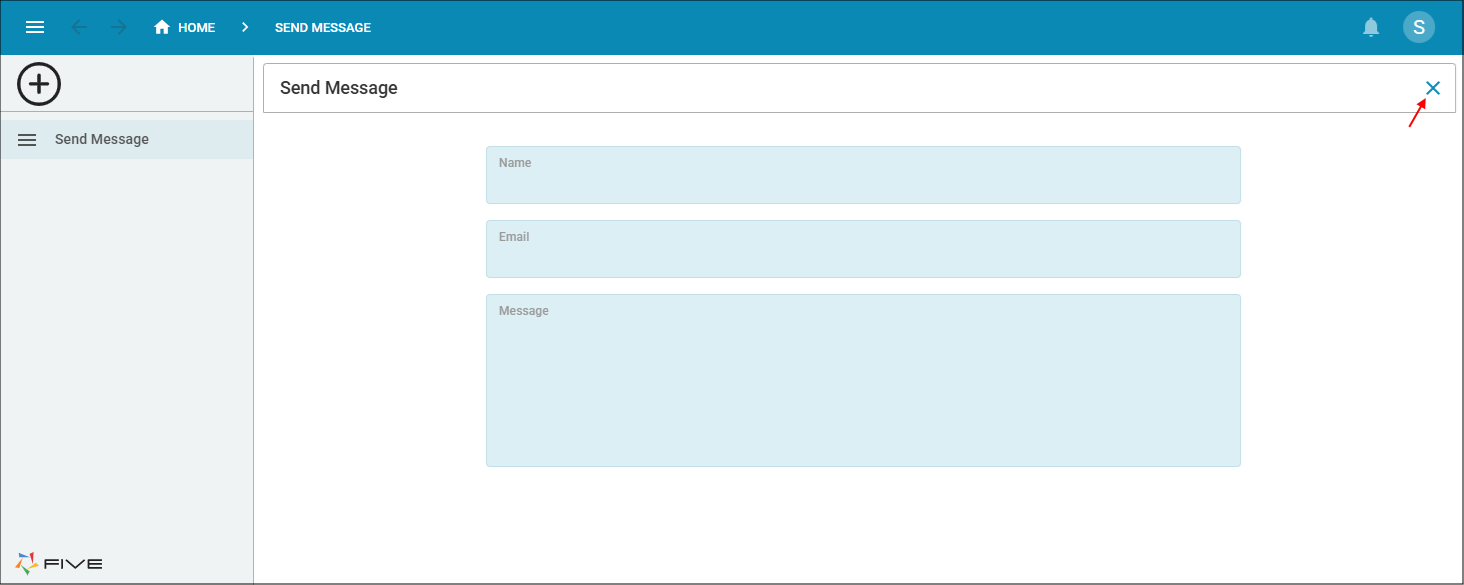
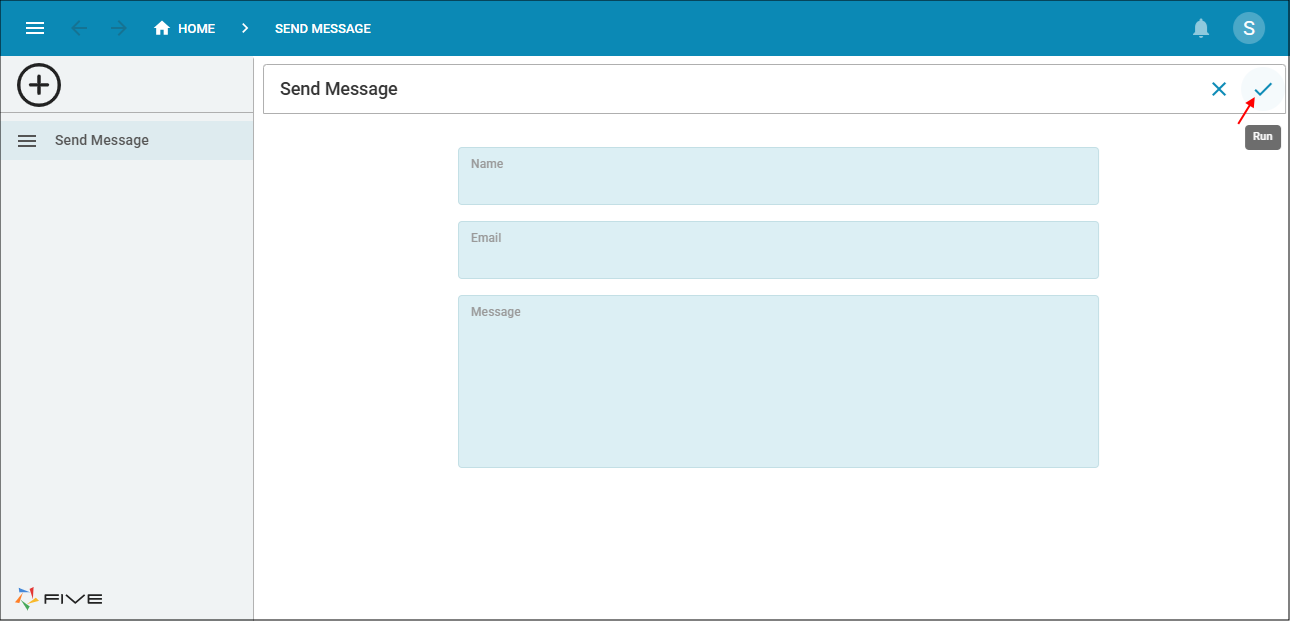
A Cancel button will be added to your process.
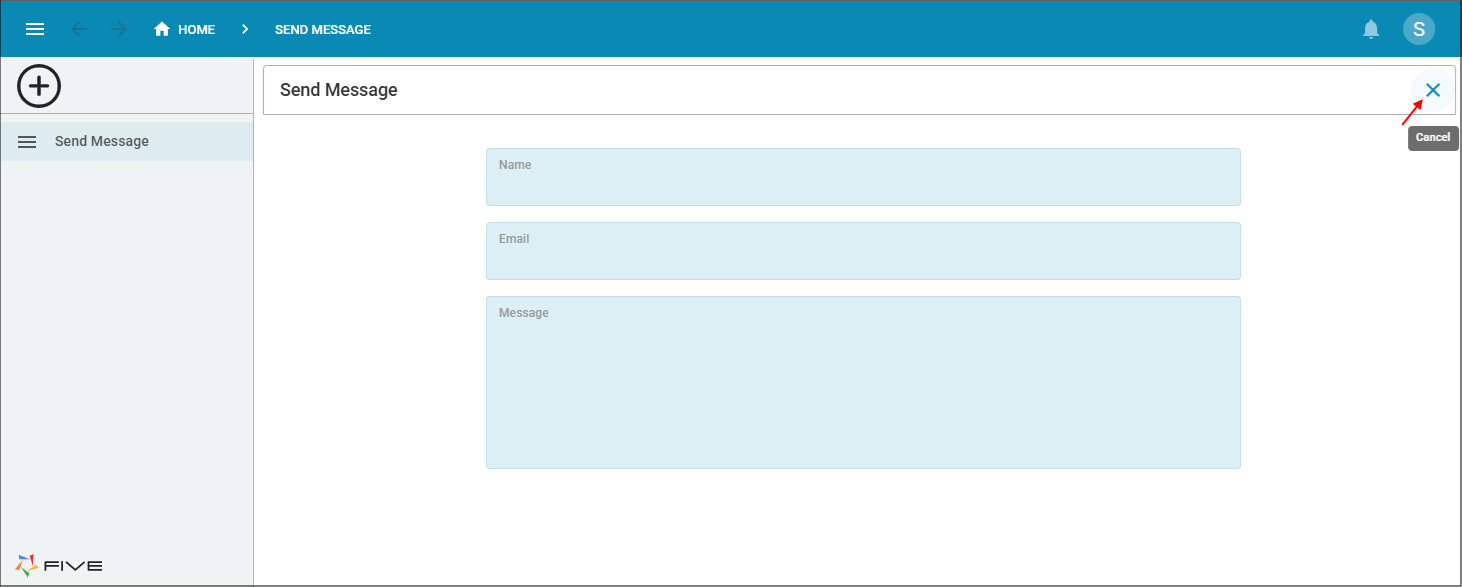
Data can be entered into the screen fields.

When the Cancel button is clicked, all the fields will be cleared.
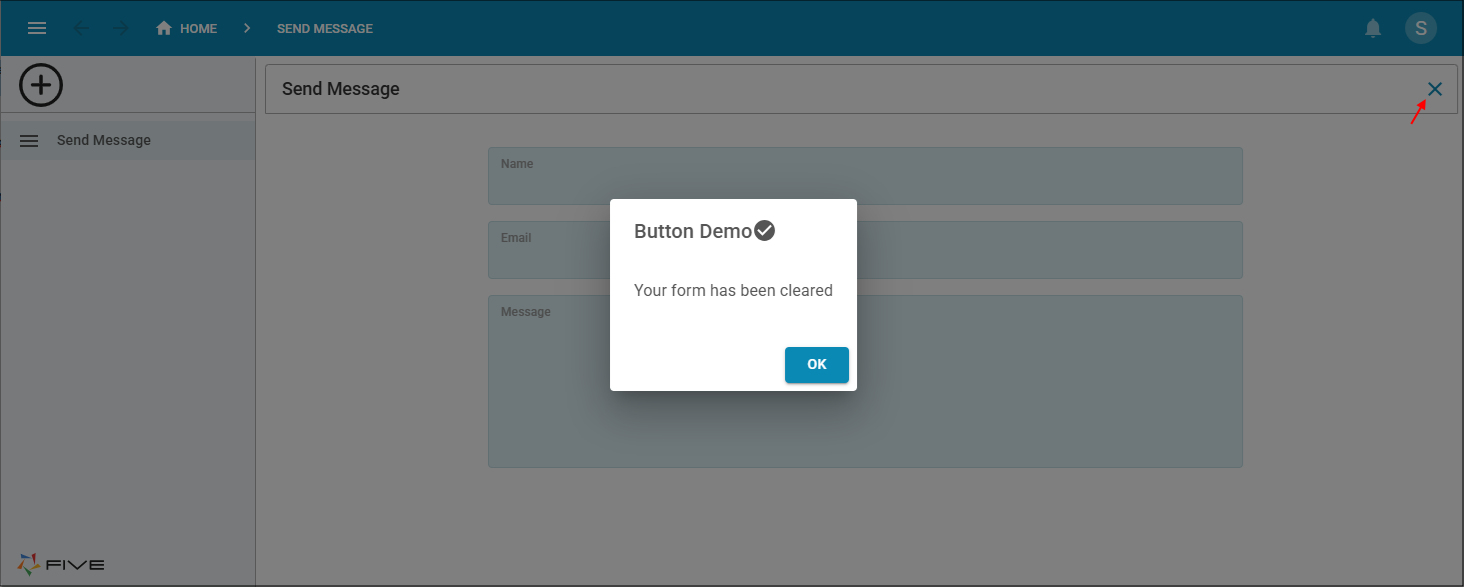
Of course you can add more functionality to your Cancel button if required. An example of this is in the function below.

function Cancel(five, context, result) {
    five.showMessage('Your form has been cleared');
    return five.success();
}
With the function attached to the On Cancel event, when the Cancel button is clicked, all fields are cleared and a message will be shown in the UI.
Add Five's Run Button
By default, if there is no function attached to the On Run or the Do Run events, there will be no Run button on your process. If a function is attached to the On Run or the Do Run events, a Run (tick) button will be added to your process. When the button is clicked your process will run and your function will be executed.
On Run
When attaching a function to the On Run event, you can access the screen field values a user enters via the
The On Run event is executed in the frontend and when used in conjunction with the Do Run event, the On Run event will be called first.
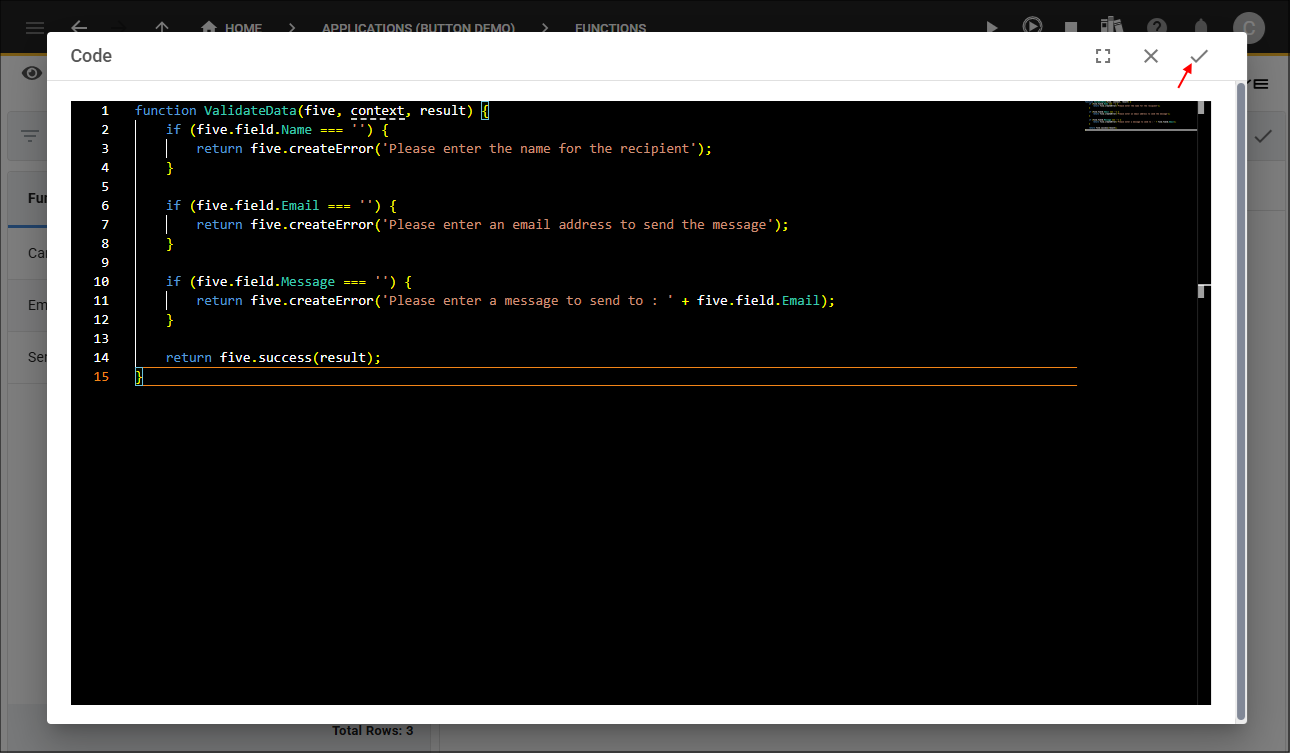
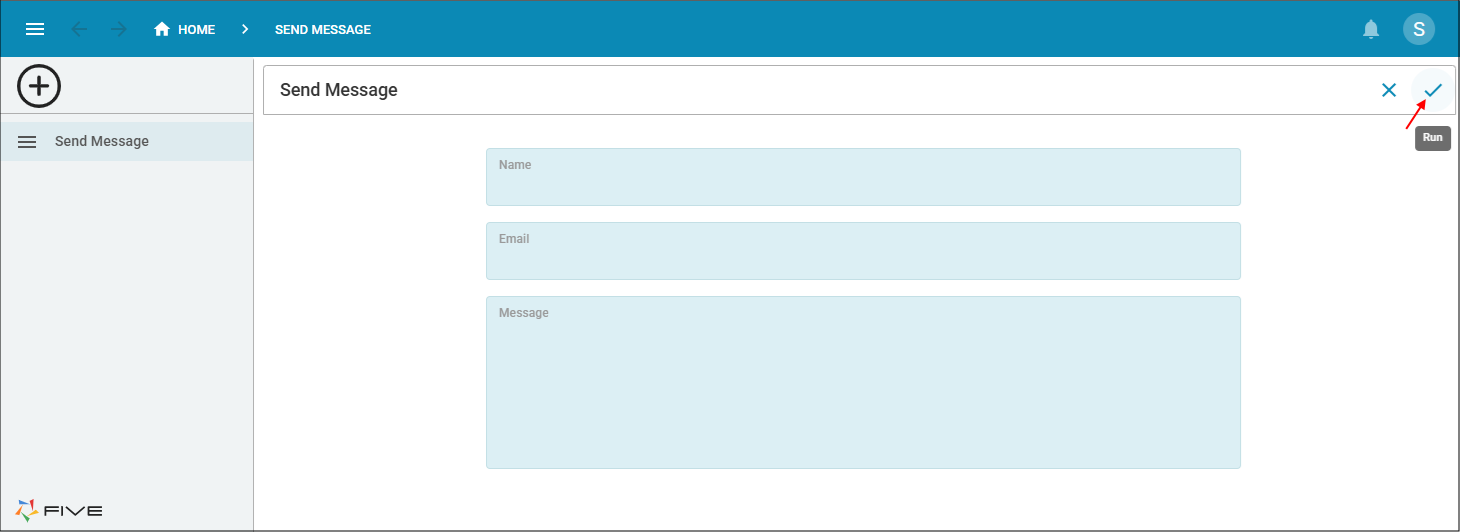
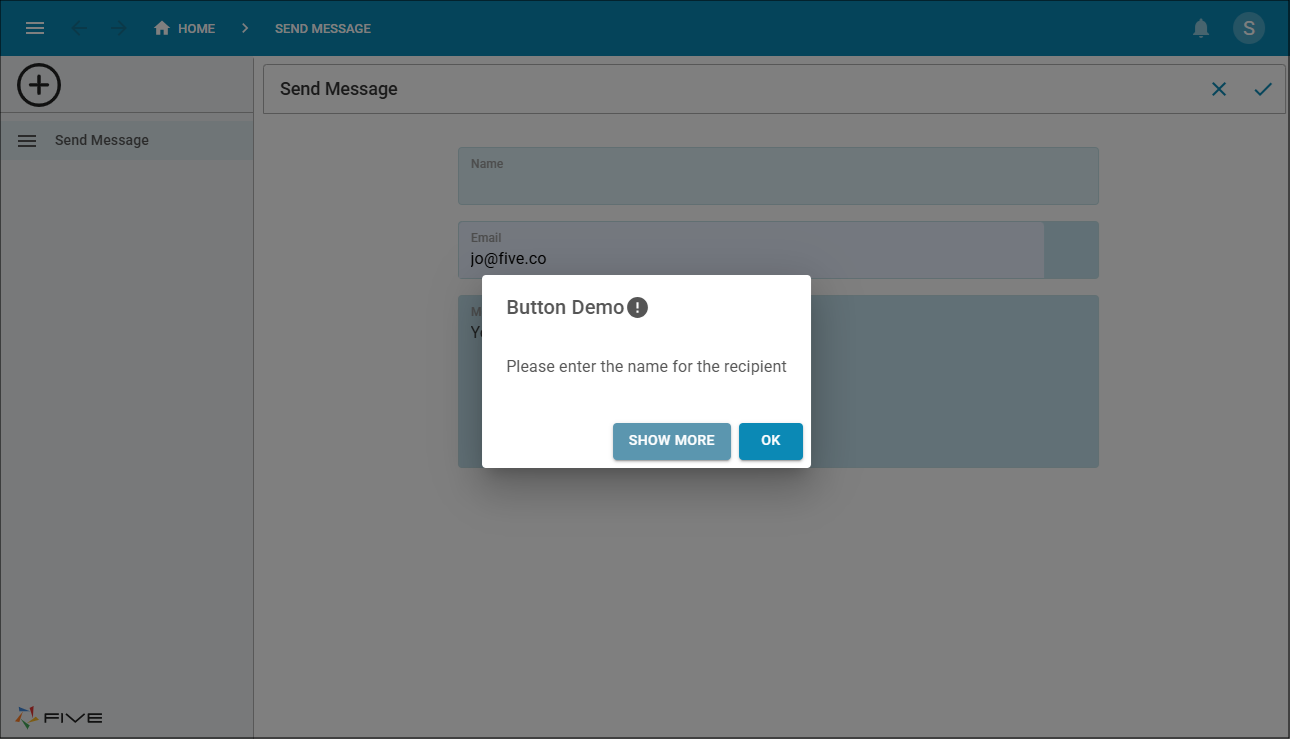
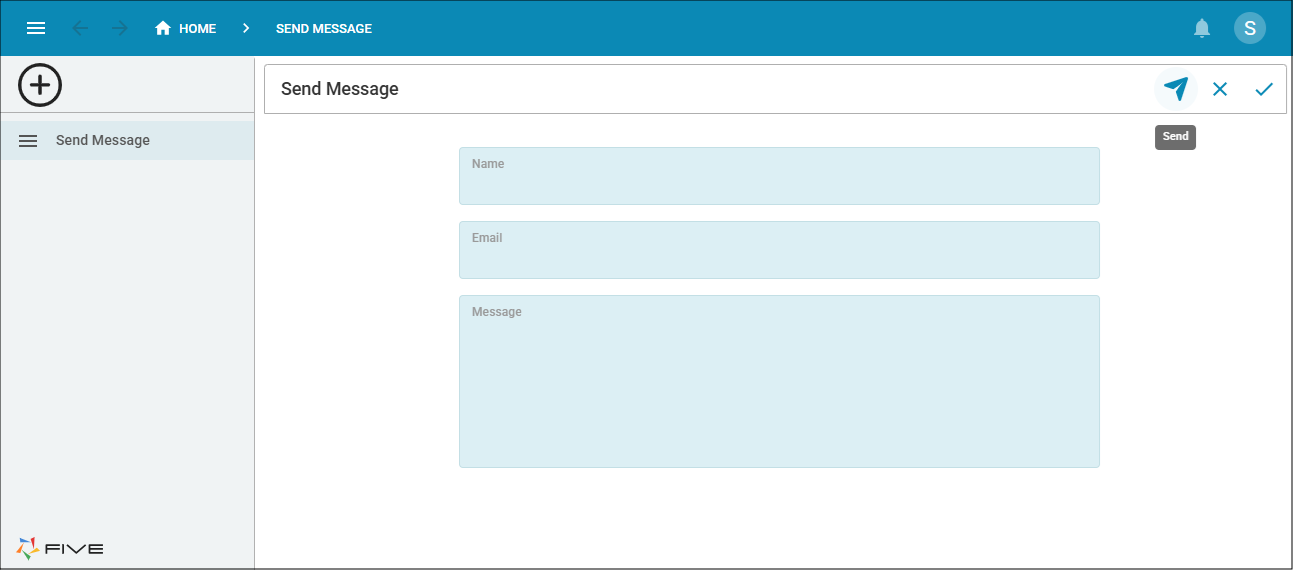
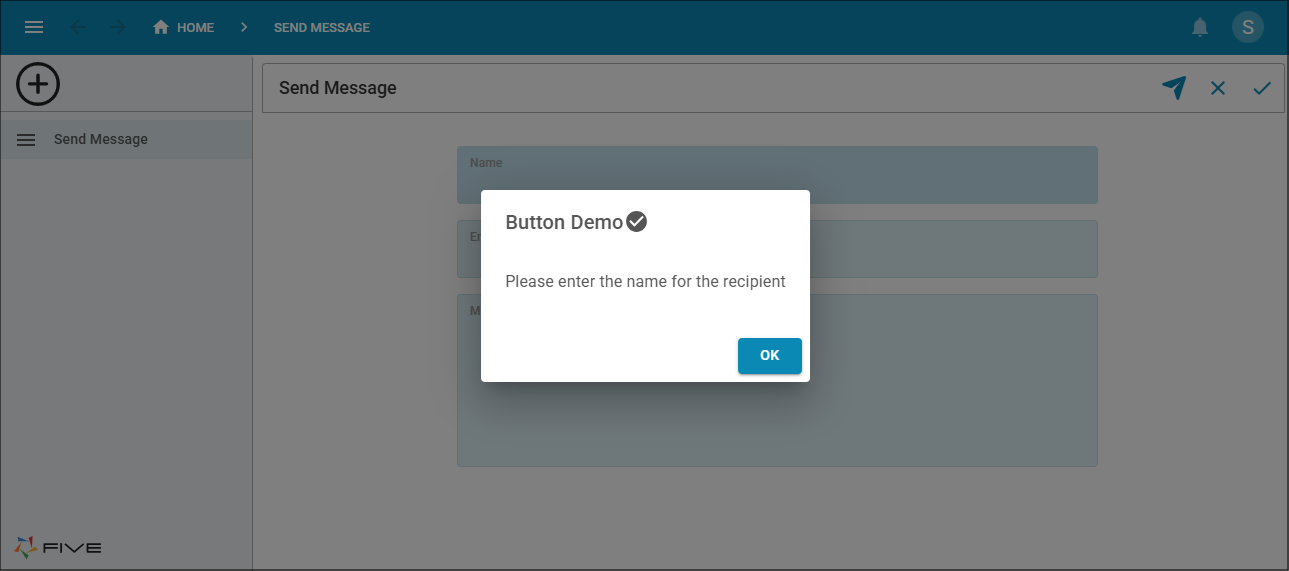
ExampleThe Send Message process has three screen fields and the field ID's for these fields are Name, Email, and Message.

Below is the sample code that is going to be attached to the On Run event for the Send Message process. When using the On Run or Do Run event, if you want to signal an error you
need to use Five's
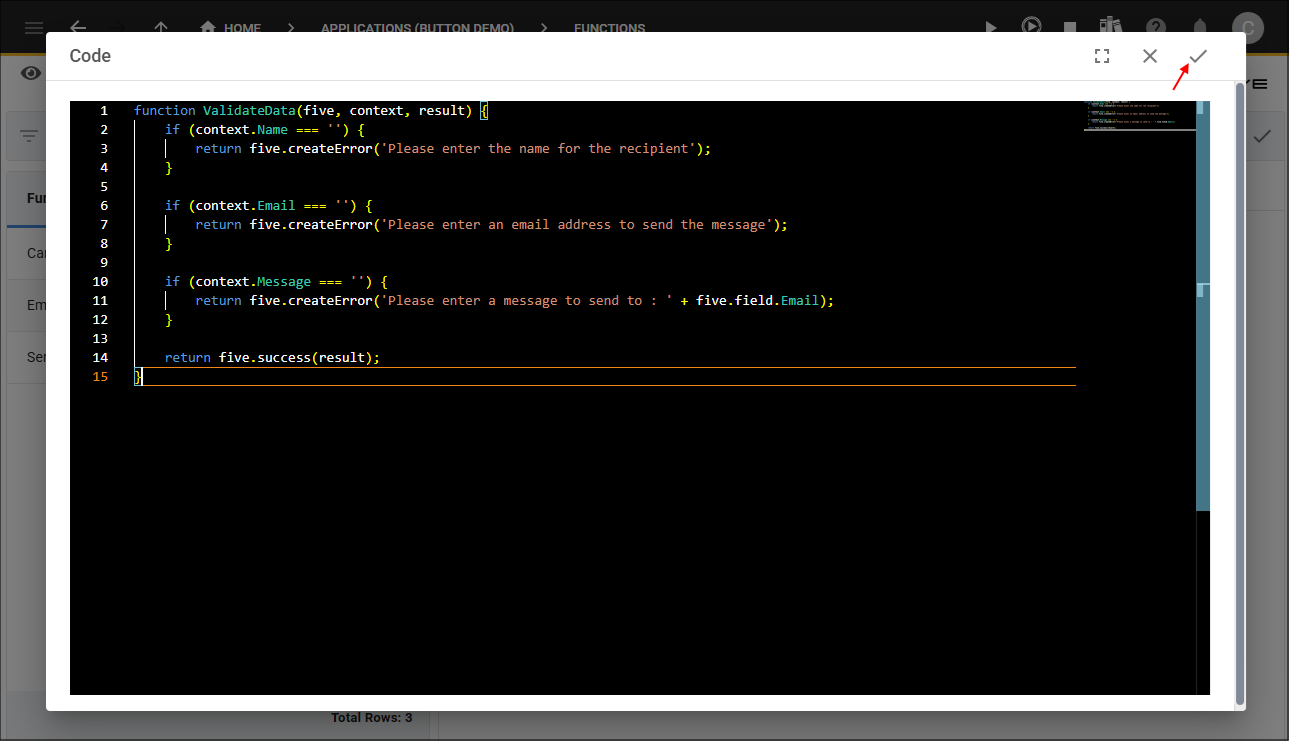
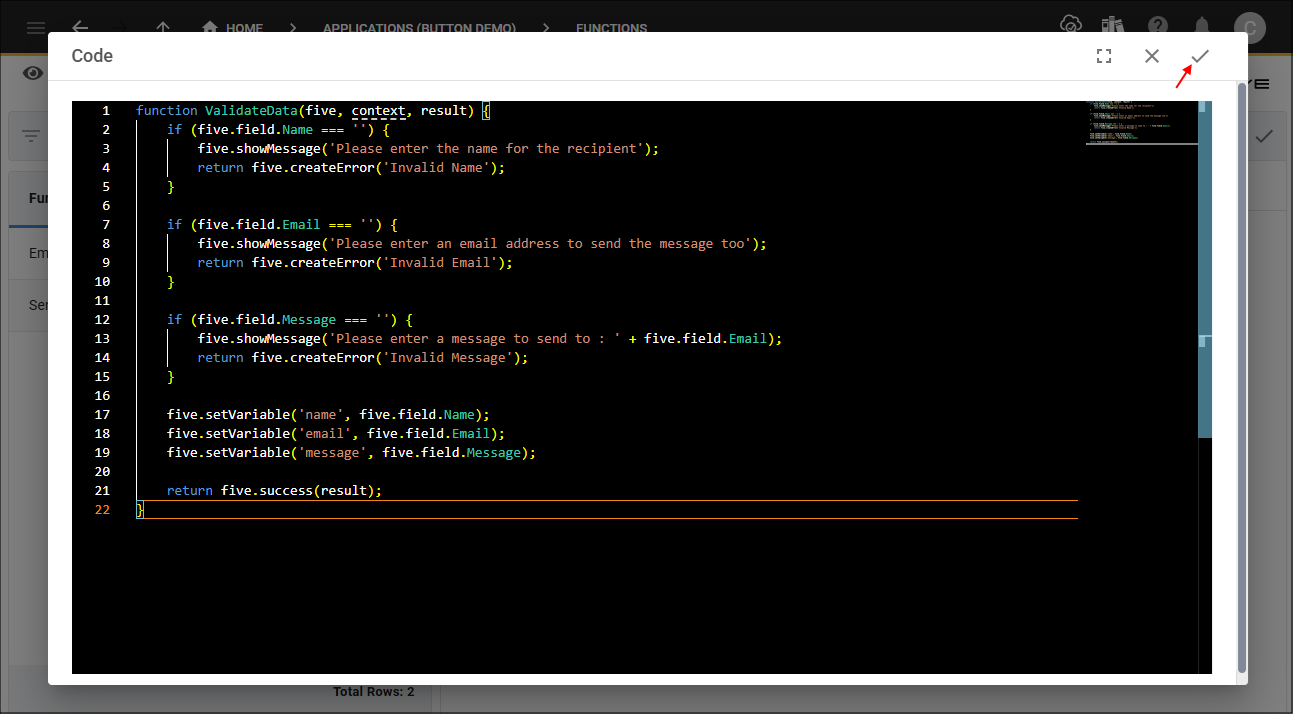
function ValidateData(five, context, result) {
if (five.field.Name === '') {
return five.createError('Please enter the name for the recipient');
}
if (five.field.Email === '') {
return five.createError('Please enter an email address to send the message');
}
if (five.field.Message === '') {
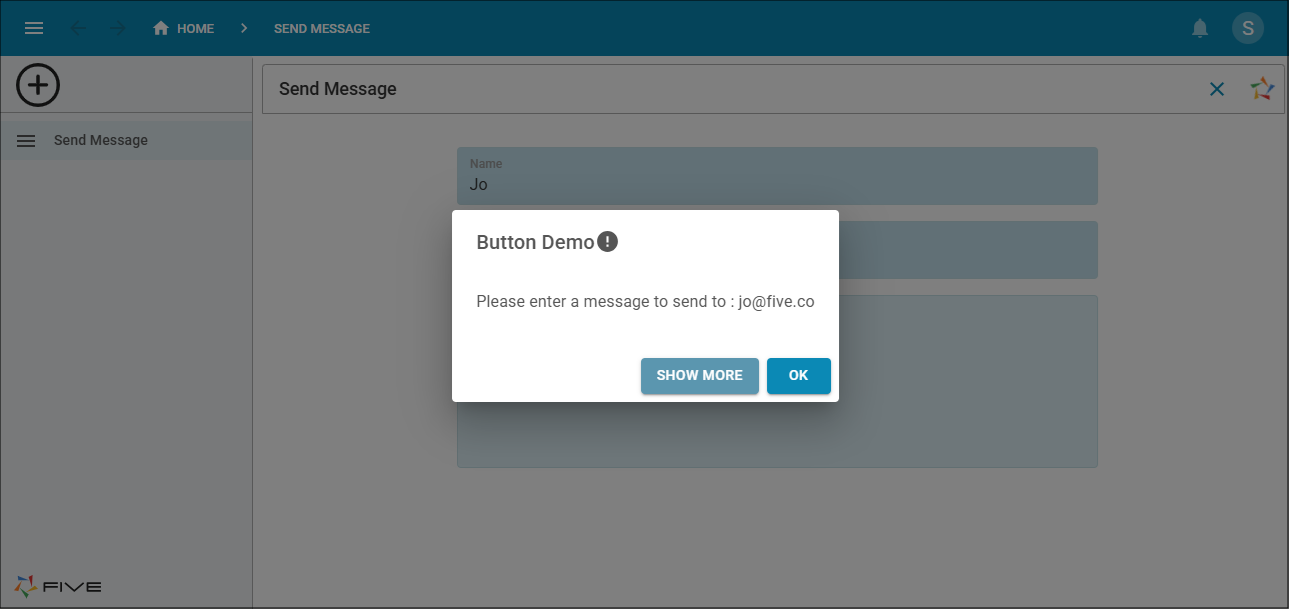
return five.createError('Please enter a message to send to : ' + five.field.Email);
}
return five.success(result);
}
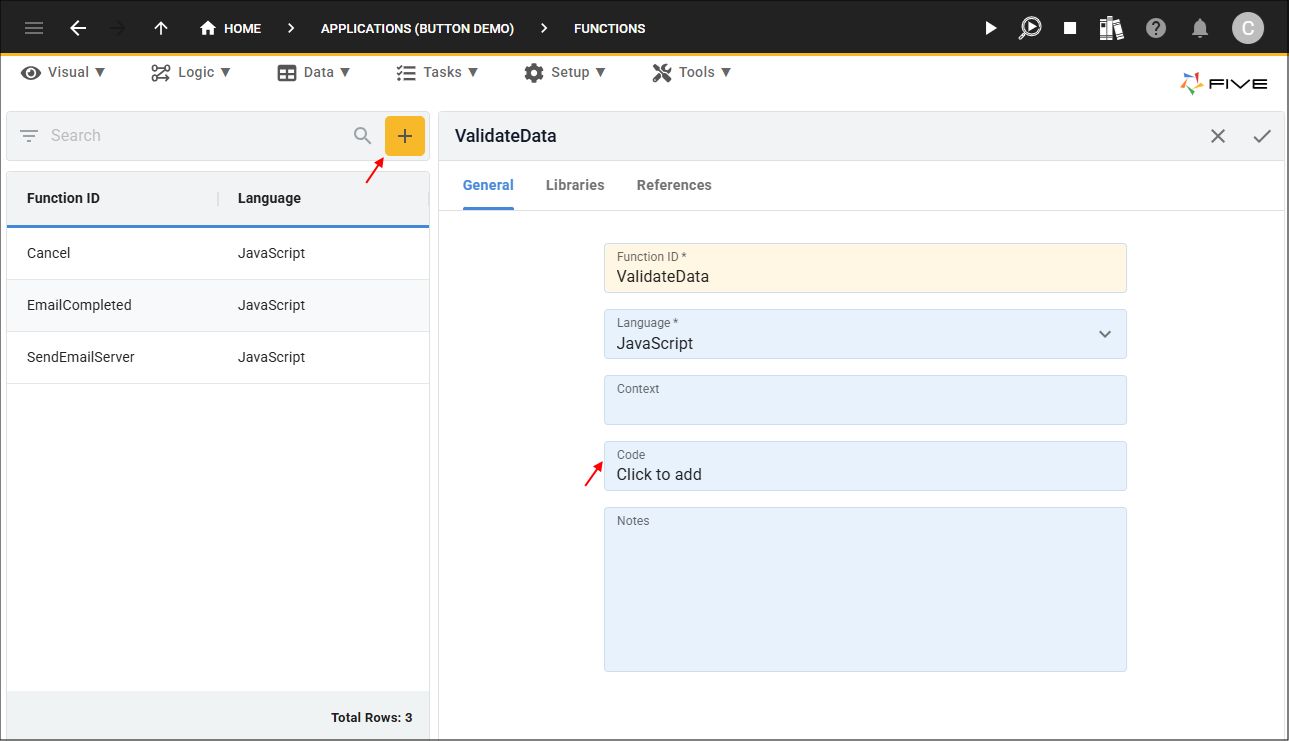
1. Navigate to the Functions view by selecting Logic in the menu and Functions in the sub-menu.
2. Click the Add Item button, give your function an ID, and click in the Code field to open the Code Editor.
3. Add your code and click the Save button in the Code Editor app bar.
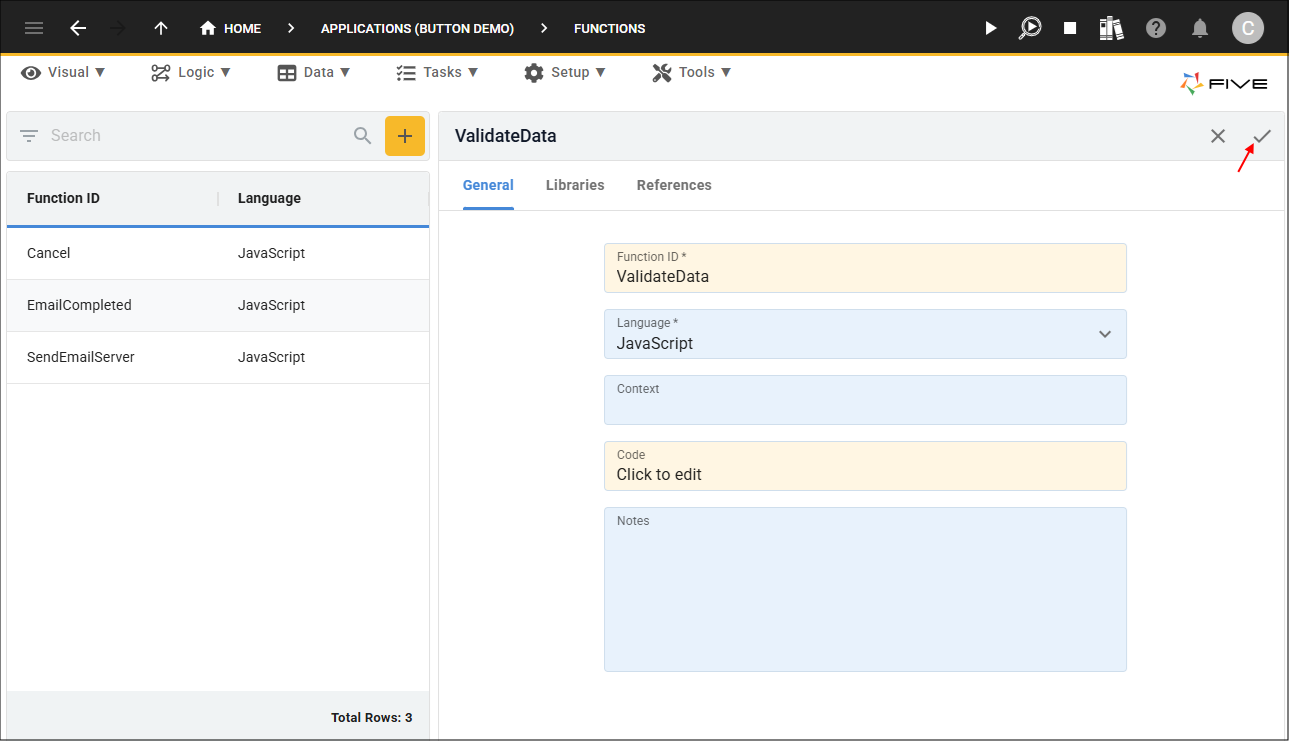
4. Click the Save button in the form app bar.
5. Navigate to the Processes view by selecting Tasks in the menu and Processes in the sub-menu.
6. Select your process record in the list and click the Events tab.
7. Click the lookup icon in the On Run field and select your function.
8. Click the Save button in the form app bar.
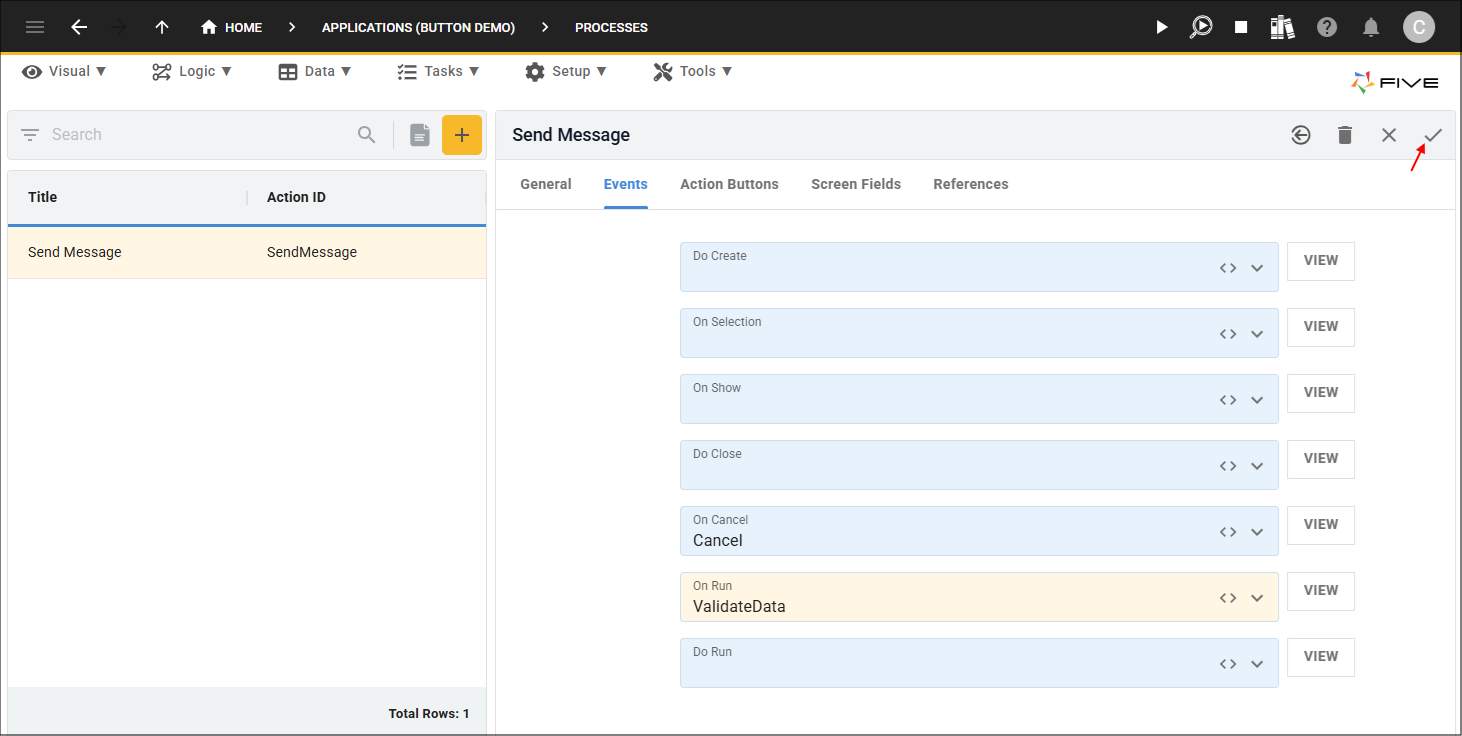
A Run button will be added to your process.
When the Run button is clicked the process will run unless an error is created from the
Do Run
When attaching a function to the Do Run event, you can access the screen field values a user enters via the
The Do Run event is executed in the backend and when used in conjuntion with the On Run event, the On Run event will be called first.
ExampleThe Send Message process has three screen fields and the field ID's for these fields are Name, Email, and Message.
Below is the sample code that is going to be attached to the Do Run event for the Send Message process. When using the Do Run or On Run event, if you want to signal an error you
need to use Five's
function ValidateData(five, context, result) {
    if (context.Name === '') {
        return five.createError('Please enter the name for the recipient');
    }

    if (context.Email === '') {
        return five.createError('Please enter an email address to send the message');
    }

    if (context.Message === '') {
        return five.createError('Please enter a message to send to : ' + five.field.Email);
    }

    return five.success(result);
}
1. Navigate to the Functions view by selecting Logic in the menu and Functions in the sub-menu.
2. Click the Add Item button, give your function an ID, and click in the Code field to open the Code Editor.
3. Add your code and click the Save button in the Code Editor.
4. Click the Save button in the form app bar.
5. Navigate to the Processes view by selecting Tasks in the menu and Processes in the sub-menu.
6. Select your process record in the list and click the Events tab.
7. Click the lookup icon in the Do Run field and select your function.
8. Click the Save button in the form app.

A Run button will be added to your process.
When the Run button is clicked the process will run unless an error is created from the
Customizing the Default Action Buttons
Five's Cancel and Run default action buttons can be customized using the caption and icon fields.
| Field | Description |
|---|---|
| Complete Caption | Add a caption for the Run button. |
| Complete Icon | Add an icon for the Run button. |
| Cancel Caption | Add a caption for the Cancel button. |
| Cancel Icon | Add an icon for the Cancel button. |
Please refer to the Customize Five's Default Action Buttons how to guide to know how to customize these buttons.
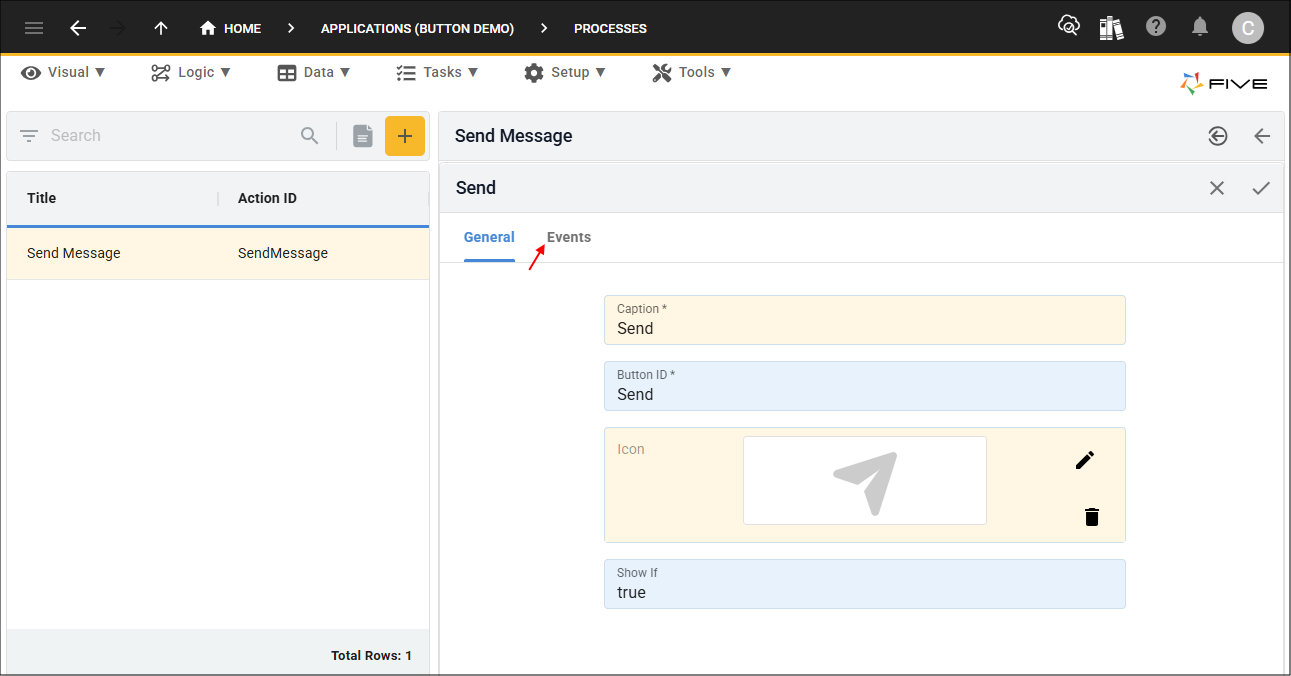
Add a Custom Action Button
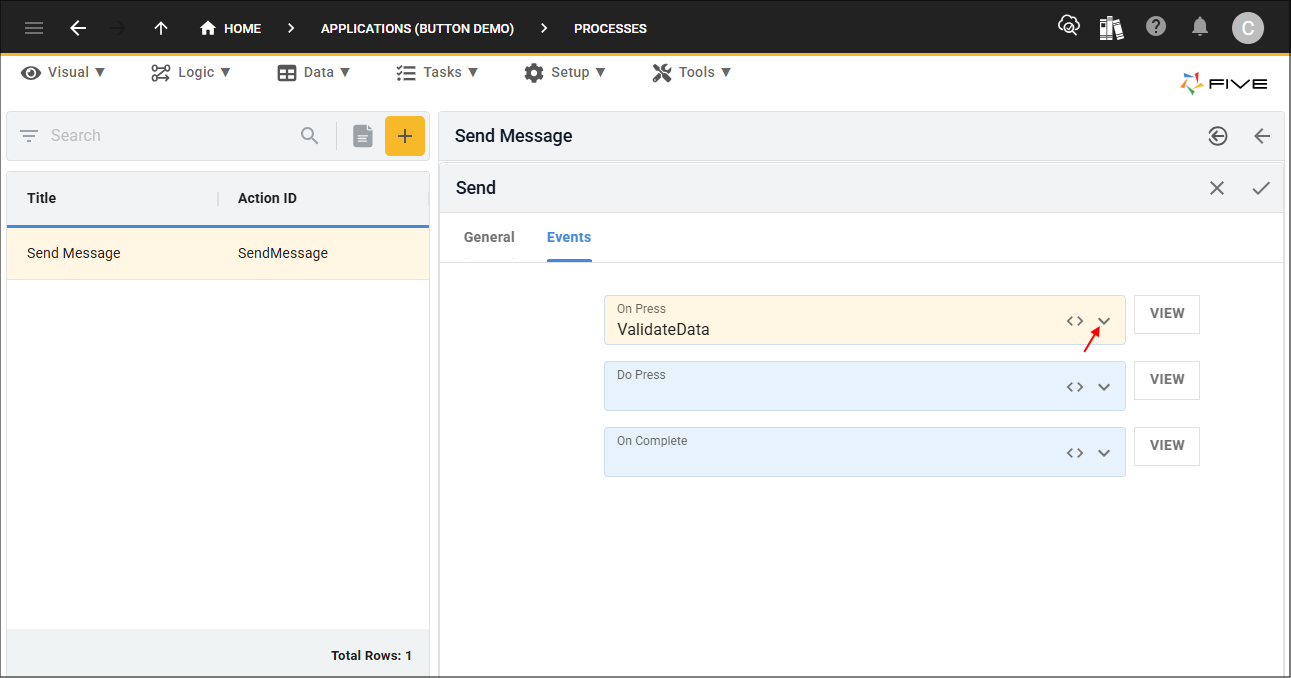
You can add your own action button that will be available in the process's app bar. Adding an icon is optional for an action button. If no icon is supplied, the button's caption will be displayed on the button. If an icon is supplied, the icon will be the button and when hovering on the button, the button's caption will be displayed as a tooltip. A button will need a function added to at least one of the button events. To understand how the button events work, please refer to the help on action buttons under the Events chapter.
1. Navigate to the Functions view by selecting Logic in the menu and Functions in the sub-menu.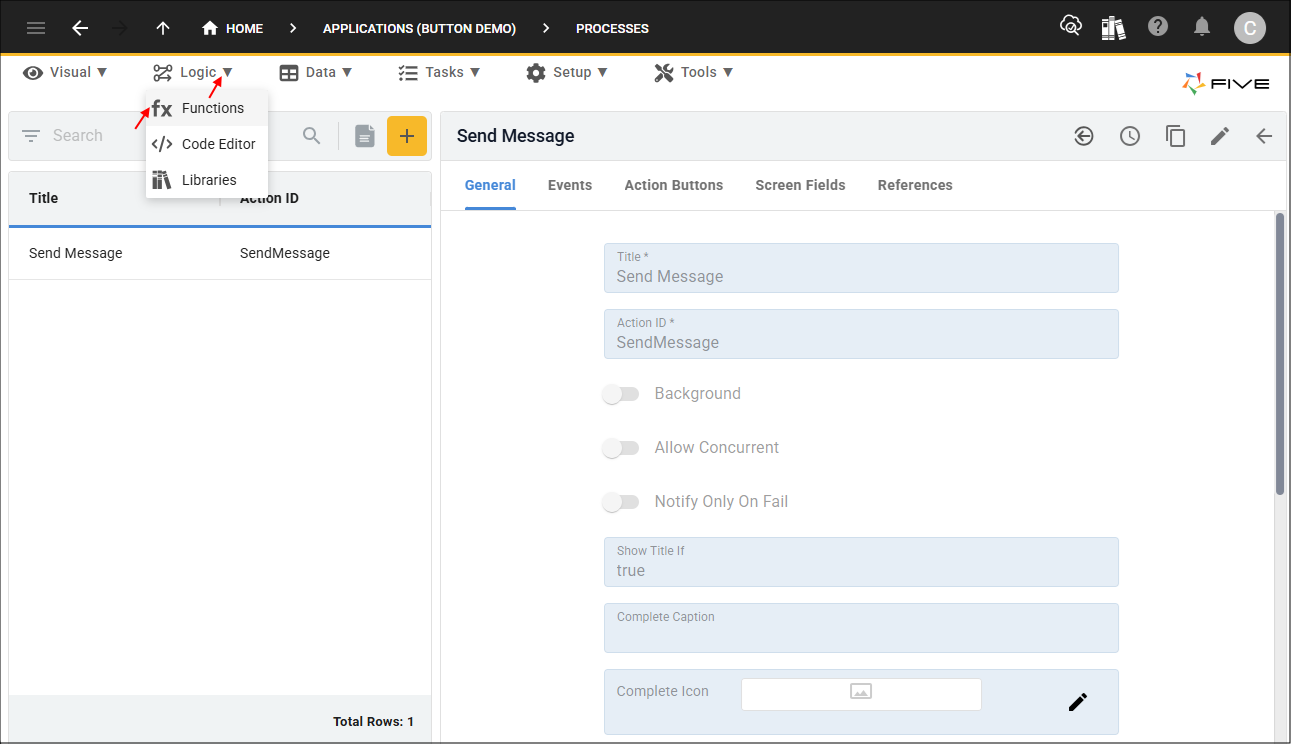
2. Click the Add Item button, give your function an ID, and click in the Code field to open the Code Editor.
3. Add your code and click the Save button in the Code Editor app bar.
Variables are set for the process's screen fields using Five's
4. Click the Save button in the form app bar.
5. Navigate to the Processes view by selecting Tasks in the menu and Processes in the sub-menu.
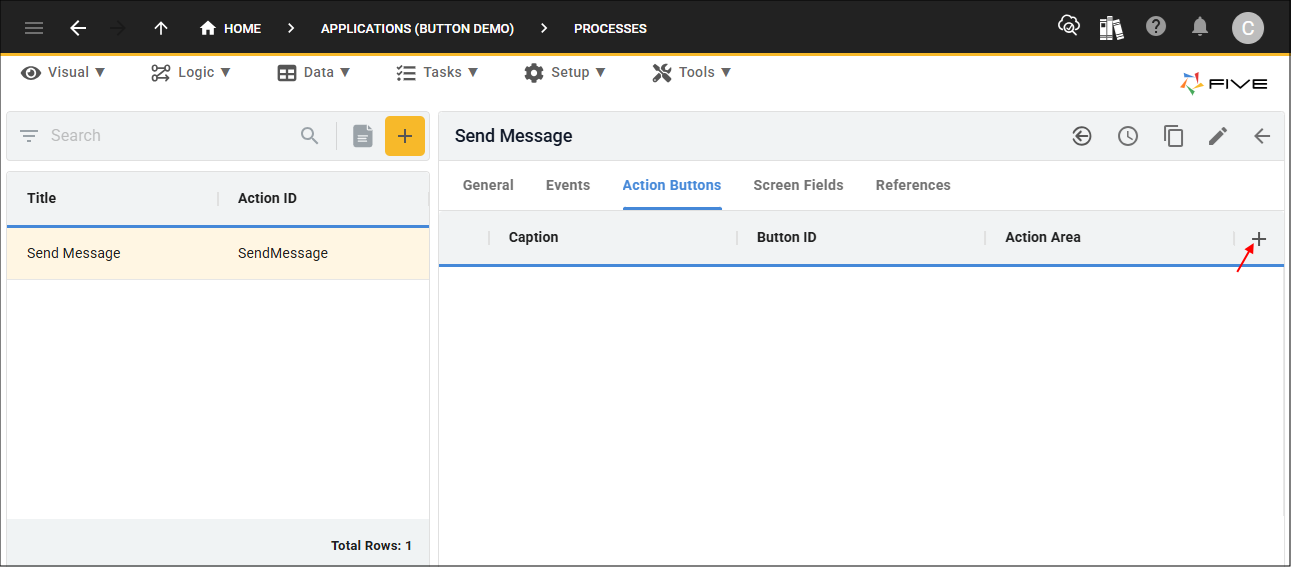
6. Select your process record in the list and click the Action Buttons tab.
7. Click the Add Action buttons button.
8. Give your button a caption.
9. Optional: Click the Edit button in the Icon field, navigate your files and open an image.

10. Click the Events tab.
11. Click the lookup icon in one of the event fields and select your function.
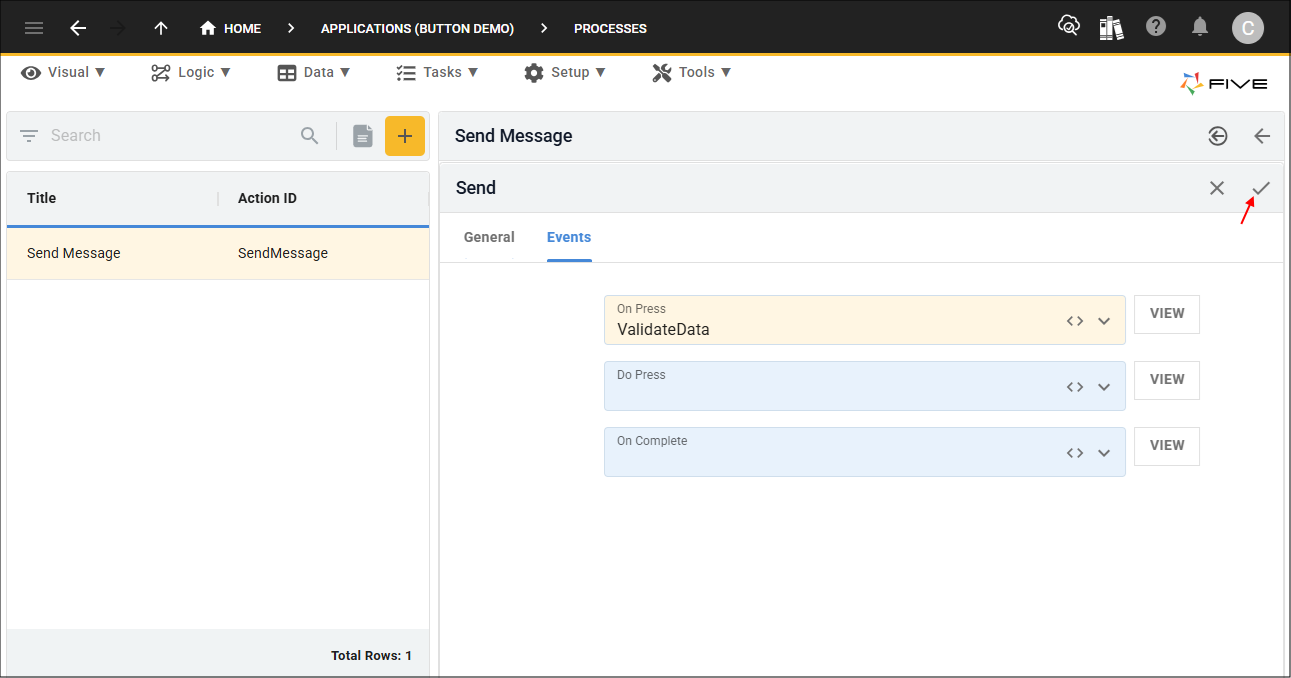
12. Click the Save button in the form app bar.
13. Click the Save button in the form app bar above the list.

Your button will be added to your process.
When the button is clicked, your process will run, unless a problem occurs which will cause the process to be unsuccessful and display the message in the
Without an icon, the button's caption will be displayed on the button.