Custom Field and Custom Editor
Last updated 25/07/2023
As Five uses React, it will treat your plugin as a React Component and therefore pass it aprops
object, holding various objects and functions
for your plugin to use. If you are not using React for your plugin, you will still have access to these in the form of the parameter to the function that is your plugin (see the JavaScript Form example plugin).
Custom Field/Editor Properties
Both the Custom Field and Custom Editor components get supplied with the same properties, which can be seen below.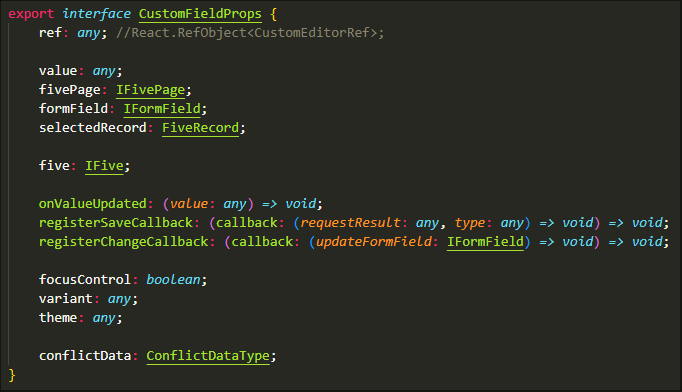
Figure 1 - Custom Field and Custom Editor properties
ref
The React Reference Object used on the Custom Editor to call your plugins implementation of the various call backs associated with the buttons in the toolbar. In the case of the Custom Field, the
ref
property will be null
. The available callbacks and their signatures can be seen below.
In order to utilise the
ref
property, you will need to use the React.forwardRef and useImperativeHandle functions to expose your implementation of the four available callbacks to the Five system. See CustomEditorRef below for more details.
value
The current value of the form field being displayed in the plugin.
fivePage
The page of the form that the plugin is being displayed on.
formField
The form field that is being displayed in the plugin.
selectedRecord
The current selected record that is being displayed in the form.
five
The Five API object.
onValueUpdated()
This function updates the value of the form field in Five. It takes in the new value as a parameter.
registerSaveCallback()
This function allows you to register a callback with Five that will be called once the saving of the current form is complete. The callback will be passed the result of the save request as well as the type of request (create or update). This allows your plugin to do any cleaning up or refreshing required after the record has been saved.
registerChangeCallback()
This function allows you to register a callback with Five that will be called whenever a change is made by a user to the data. The callback will be passed the updated value contained within this field.
focusControl
A boolean telling your plugin whether it should be focused or not.
variant
The Material UI variant being used by the current theme. This allows you to style your plugin to match the rest of your application.
theme
The Material UI theme being used by the application. This can be placed into a ThemeProvider to ensure your plugin matches the rest of your application.
info
You can find out more on the
variant
and theme
properties in the Material UI Docs.CustomEditorRef Interface
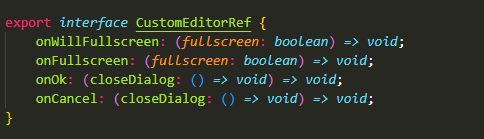
Figure 2 - CustomEditorRef interface
info
You do not have to implement any or all of the callbacks, only the ones you require.
onWillFullscreen()
The
onWillFullscreen()
is called after the Full Screen button is clicked, but before the plugin is put into full screen mode. The fullscreen
boolean
parameter describes whether the plugin has been put into full screen mode or not.
onFullscreen()
The
onFullscreen()
is called after the Full Screen button is clicked and after the plugin is put into full screen mode. The fullscreen
boolean
parameter describes whether the plugin has been put into full screen mode or not.
onOk()
The
onOk()
is called after the Save button is clicked. The closeDialog
function parameter, when called, will close the editor dialog. If you have an onOk()
function
defined, it is your responsibility to close the dialog. This allows you to perform asynchronous tasks in the onOk()
and be in control of when the dialog closes.
onCancel()
The
onCancel()
is called after the Close button is clicked. The onCancel()
function parameter, when called, will close the editor dialog. If you
have an onCancel()
function defined, it is your responsibility to close the dialog. This allows you to perform asynchronous tasks in the onCancel()
and be in control of
when the dialog closes.
ConflictDataType
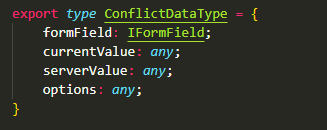
Figure 3 - ConflictDataType
formField
The form field that is being displayed in the plugin.
currentValue
The current value stored for this form field.
serverValue
Corresponding value stored on the server that is conflicting with this form field's current value.
Plugin Options
You can add merge handling to your plugin by adding a key-value pair ofMERGE_CAPABLE
and true
in the Plugin Options
field on the Display Type form. The option is only available when you are adding a custom field or a custom editor to your application.
When adding the key-value pair, the plugin will be passed the conflict data (only when there is a conflict). The conflict data contains the form field object that is in conflict, which will be the form field displaying the custom field or editor, as well as the two different values that have been saved and are causing the conflict.
If a plugin has MERGE_CAPABLE enabled, it's expected that the plugin will completely handle the merge process, resulting in a single value, which is saved in the same way the value is saved normally (ie when not in conflict).
If a plugin doesn't have MERGE_CAPABLE enabled, the form field will use Five's default merge resolution, rendering multiple copies of the plugin, allowing the user to choose and modify the value before resolving the conflict.
Add Merge Conflict
Prerequisites:- You have written the code for your plugin and uploaded the final zip file on the Display Type form.
- The display type must be a Custom Field or a Custom Editor.
2. Either click the Edit button in the form app bar, or click directly in the Plugin Options field.
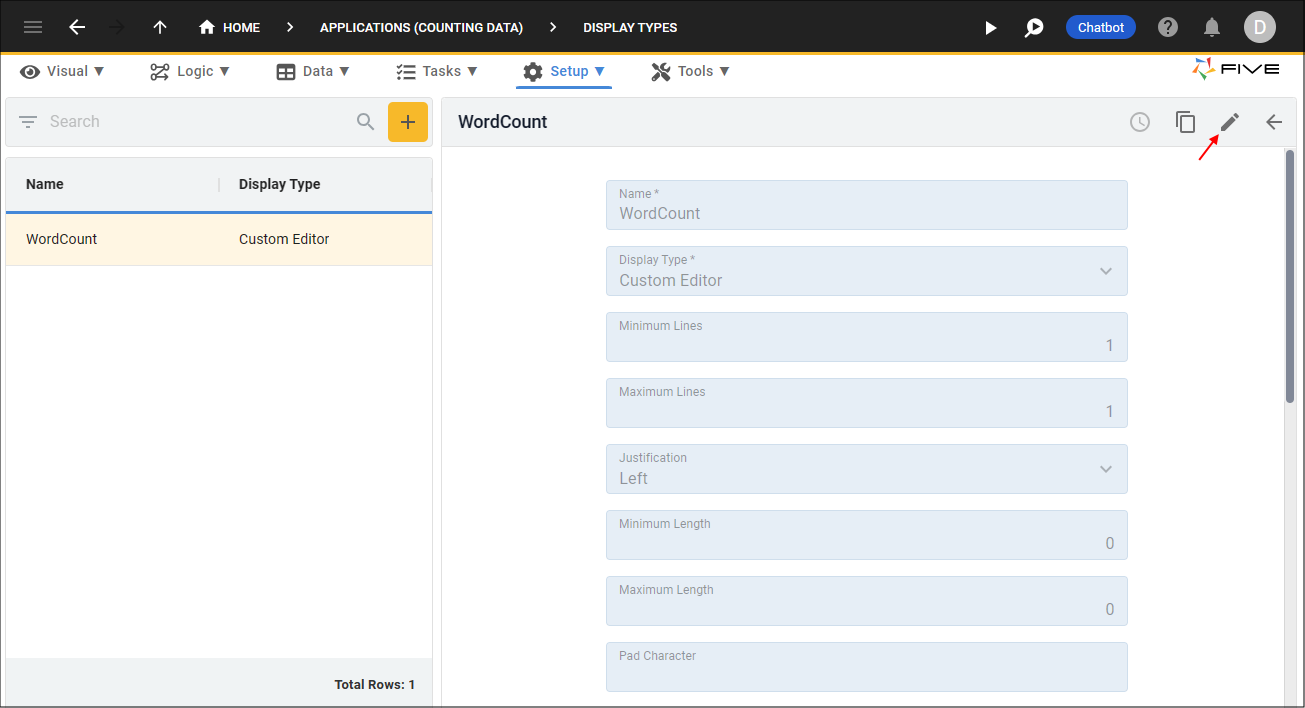
Figure 4 - Edit the display type record
3. Click the Edit button in the Plugin Options field.
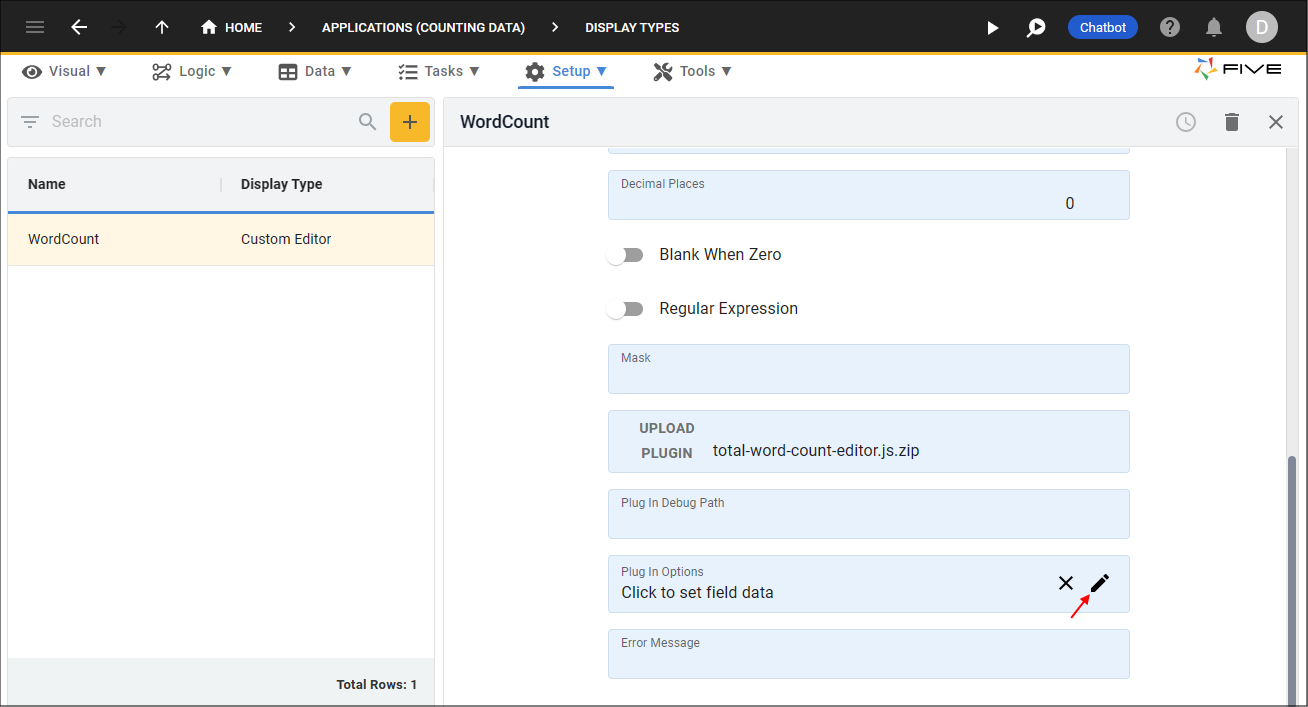
Figure 5 - Plugin Options field
4. Type
MERGE_CAPABLE
in the Key field.
5. Type
true
in the Value field.
6. Click the Save button in the Field Data window.
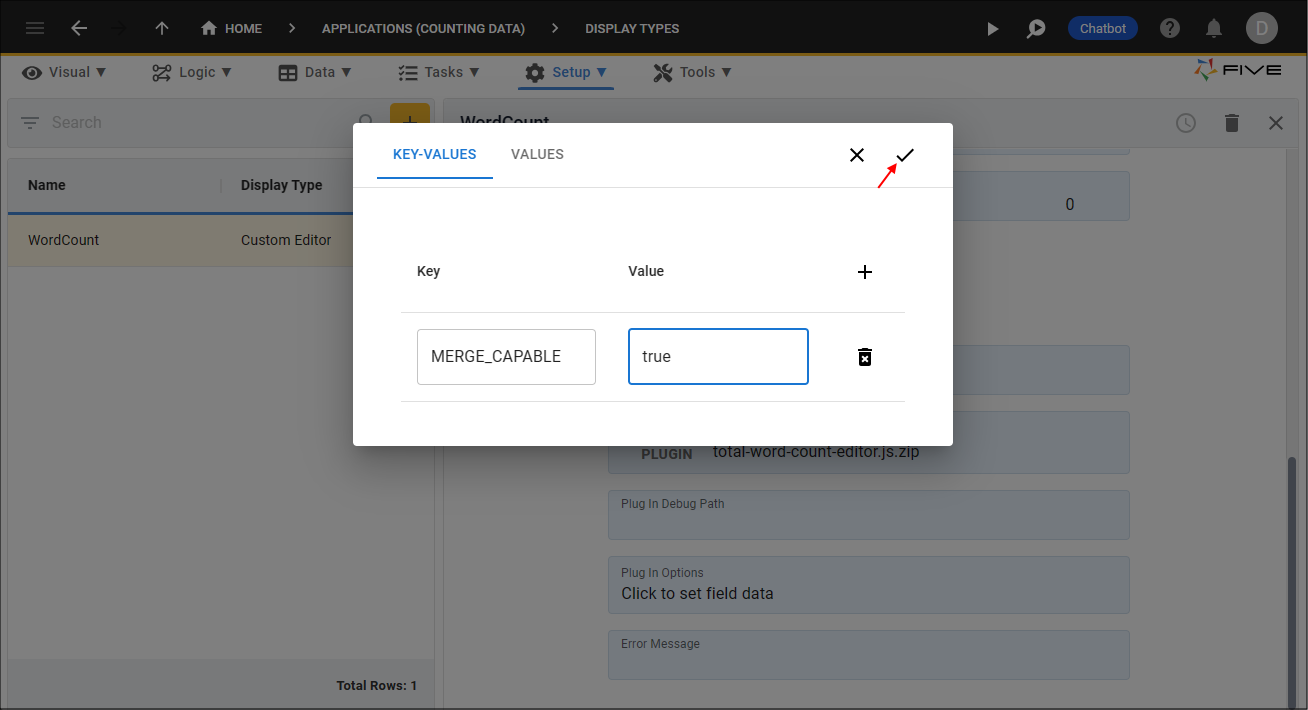
Figure 6 - Add the key-value pair
7. Click the Save button in the form app bar.
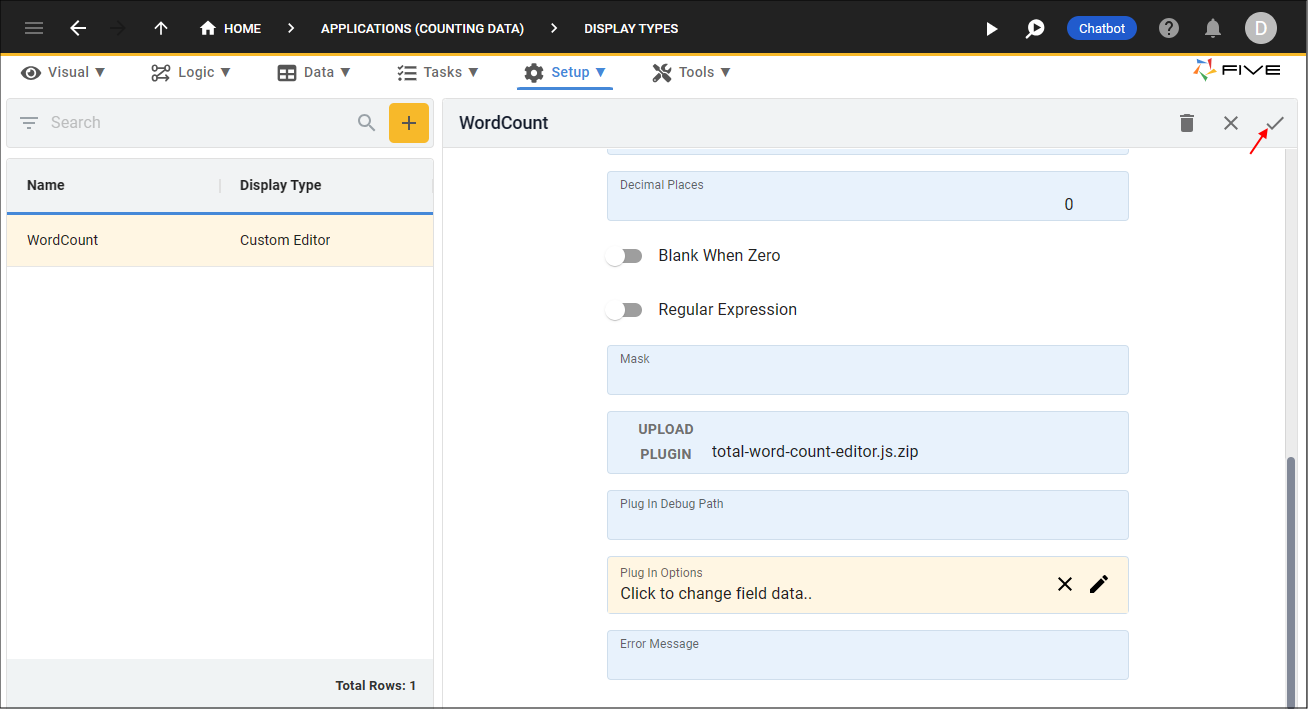
Figure 7 - Save the display type record.