Add a Mail Merge
Last updated 16/01/2023
You can use any data source in Five to get the fields that you need to personalize the data being merged.Five's Data Sources
- Tables
- Queries
- Connections
Add a Mail Merge Using a Data Source
info
For this example, the data source is a table. The sample mail merge will send out an email to all employees in the company inviting them to
the annual Christmas party.
Prerequisites
- Your data source is saved in Five.
- Your SMTP settings are set up in Five.
A menu item needs to be created for the Mail Merge as it is not automated.
1. Click the Add Item button.
2. Type a title in the Title field.
3. Click the lookup icon in the Data Source field and select your data source.
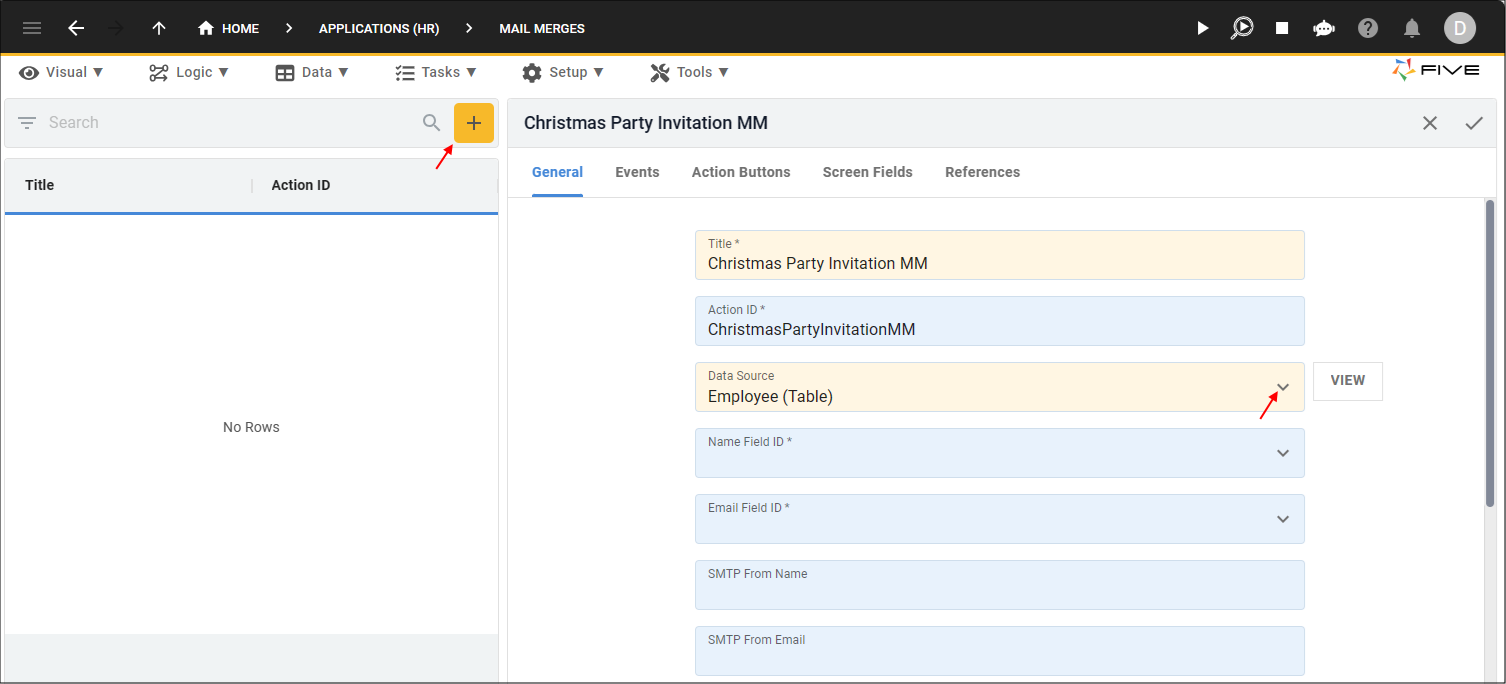
Figure 1 - Add a mail merge
info
When you select a data source, the fields Name Field ID and Email Field ID are shown, these fields are required when using a data source
for your mail merge. In the Name Field ID field, you must select the field from the data source that holds your recipient names. In the Email Field ID field, you must
select the field from the data source that holds your recipient emails.
4. Click the lookup icon in the Name Field ID field and select the field holding your recipient names.
5. Click the lookup icon in the Email Field ID field and select the field holding your recipient emails.
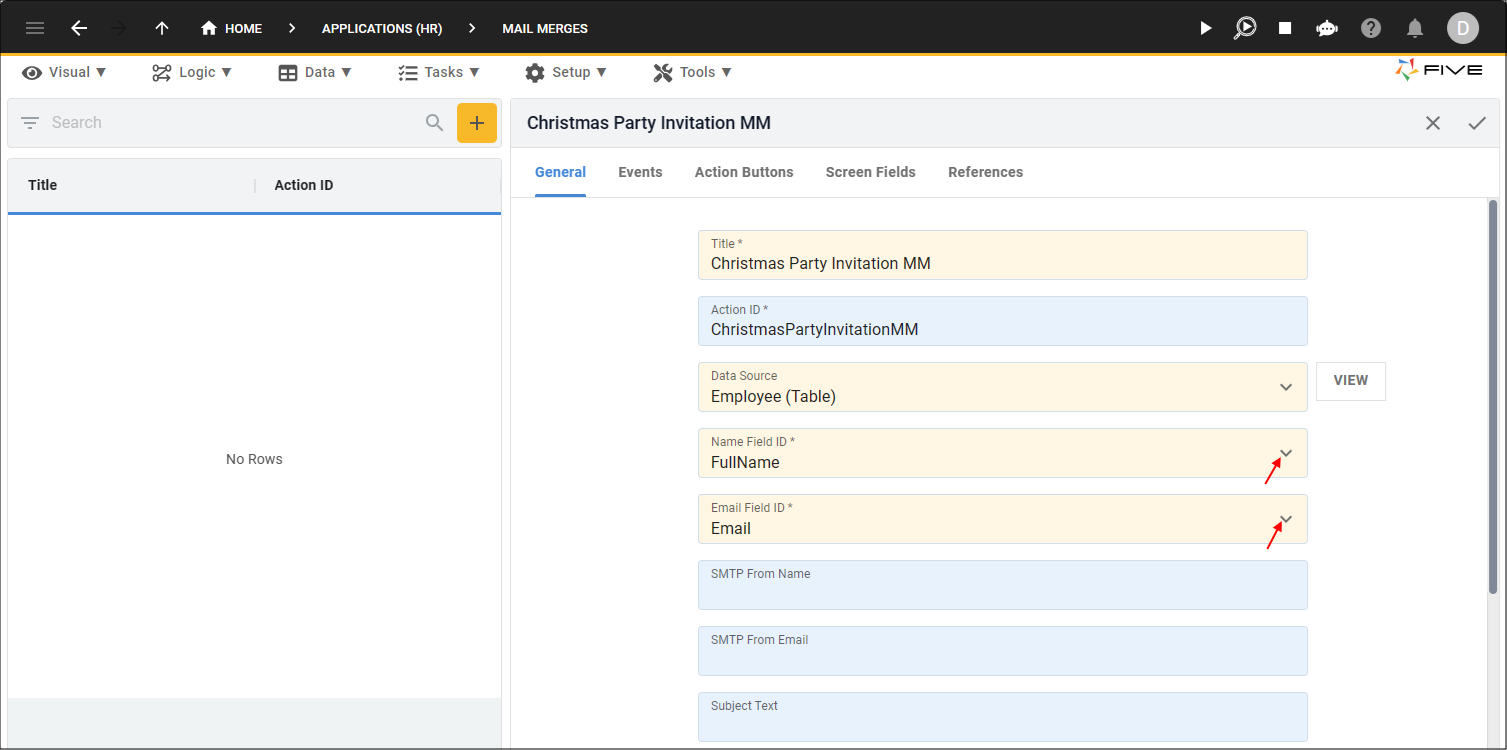
Figure 2 - Field ID fields
info
When you set up your SMTP settings on the Instances form, you may of filled in the SMTP From Name and SMTP From Email fields. By default, these values will be
used for all mail merge records for the instance of your application.
The SMTP From Name and SMTP From Email fields are not required here on the Mail Merge form if you just want to use your defaults set on the Instances form. If you want them to be different, you can fill in the fields here and they will take precedence over the defaults on the Instances form.
The SMTP From Name and SMTP From Email fields are not required here on the Mail Merge form if you just want to use your defaults set on the Instances form. If you want them to be different, you can fill in the fields here and they will take precedence over the defaults on the Instances form.
6. Optional: Type the sender's name in the SMTP From Name field.
7. Optional: Type the sender's email in the SMTP From Email field.
8. Type a subject line in the Subject Text field.
9. Click in the Merge Text field.
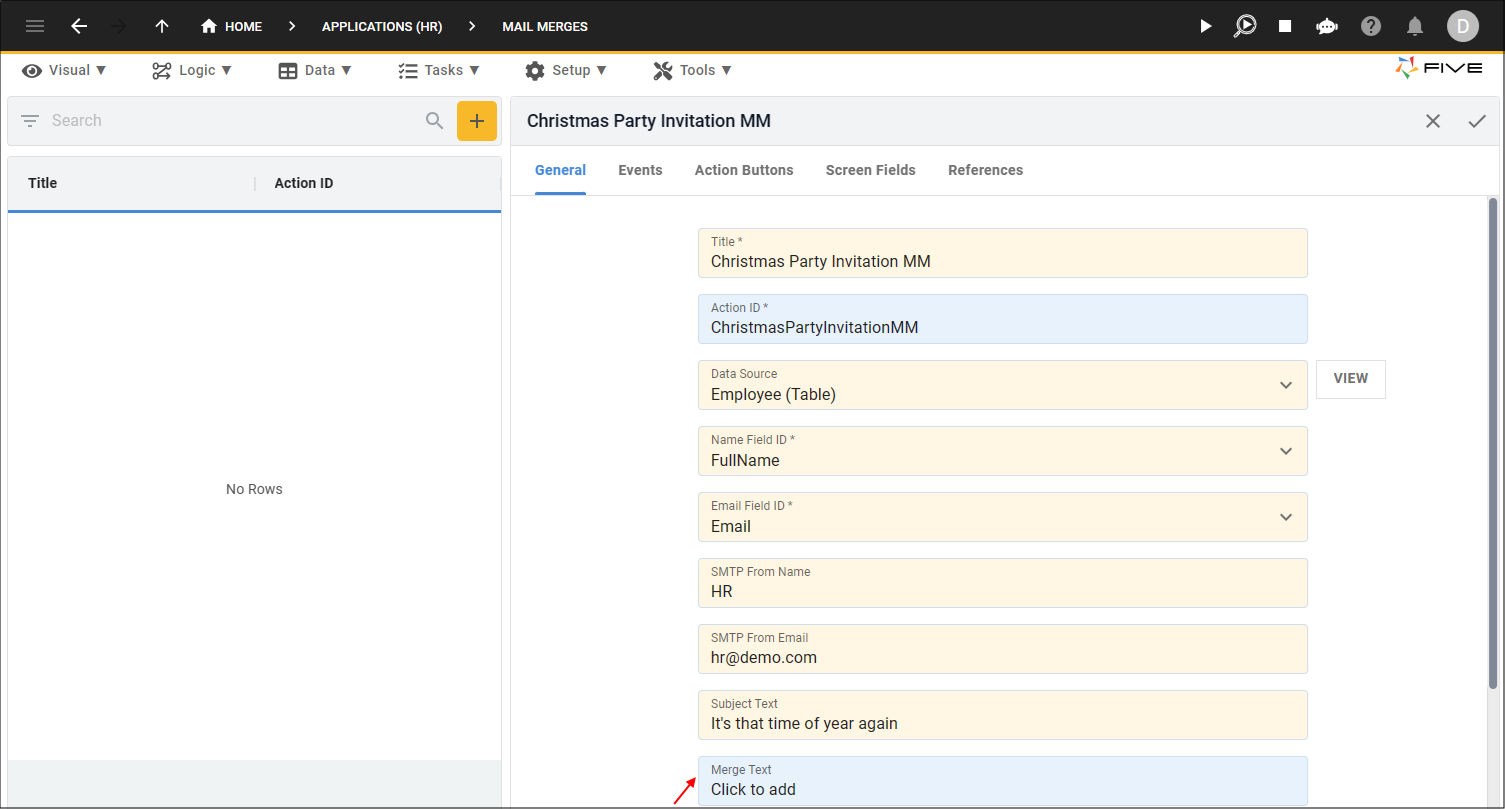
Figure 3 - Merge Text field
10. Use the icons in the toolbar to select your fields and design your template.
info
All the fields from your data source are available by clicking the Tags icon. As a data source is being used for the mail merge, the placeholders will be available as
{{five.datasource.<fieldID>}}
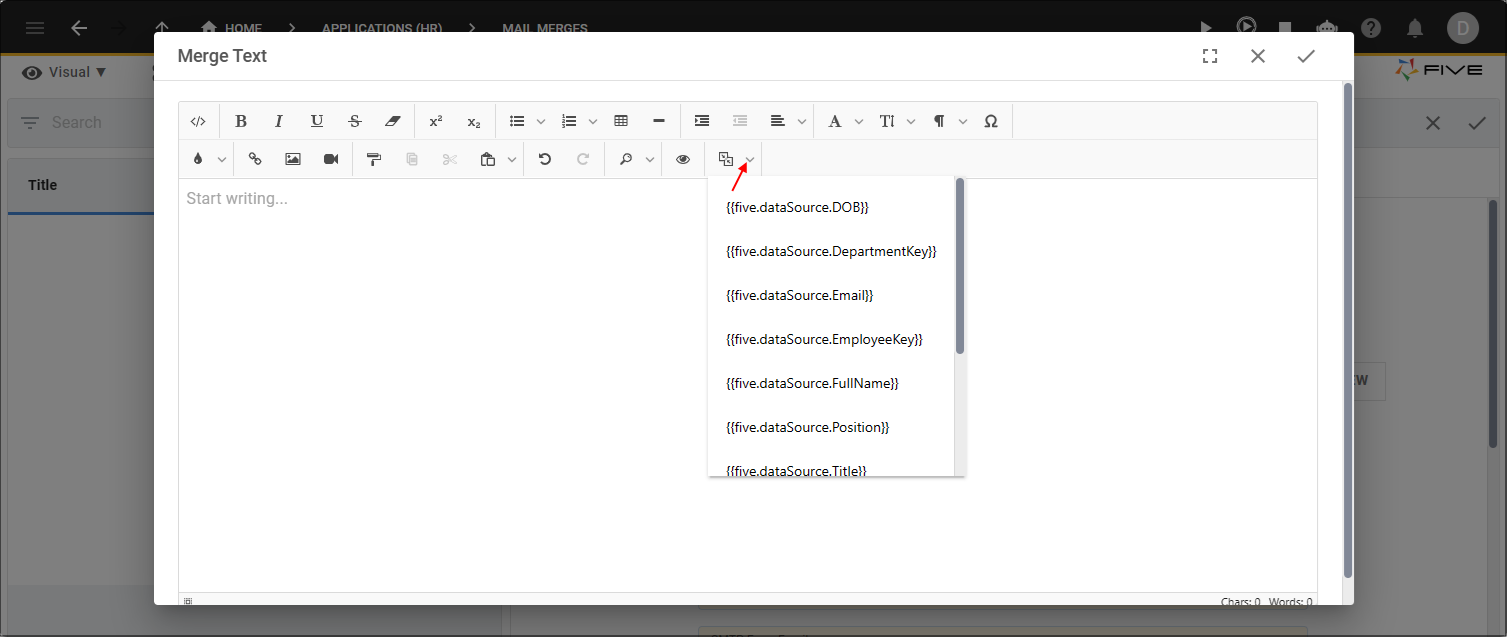
Figure 4 - Tags icon
11. Click the Save button in the editor app bar.

Figure 5 - Save button
12. Click the Save button in the form app bar.
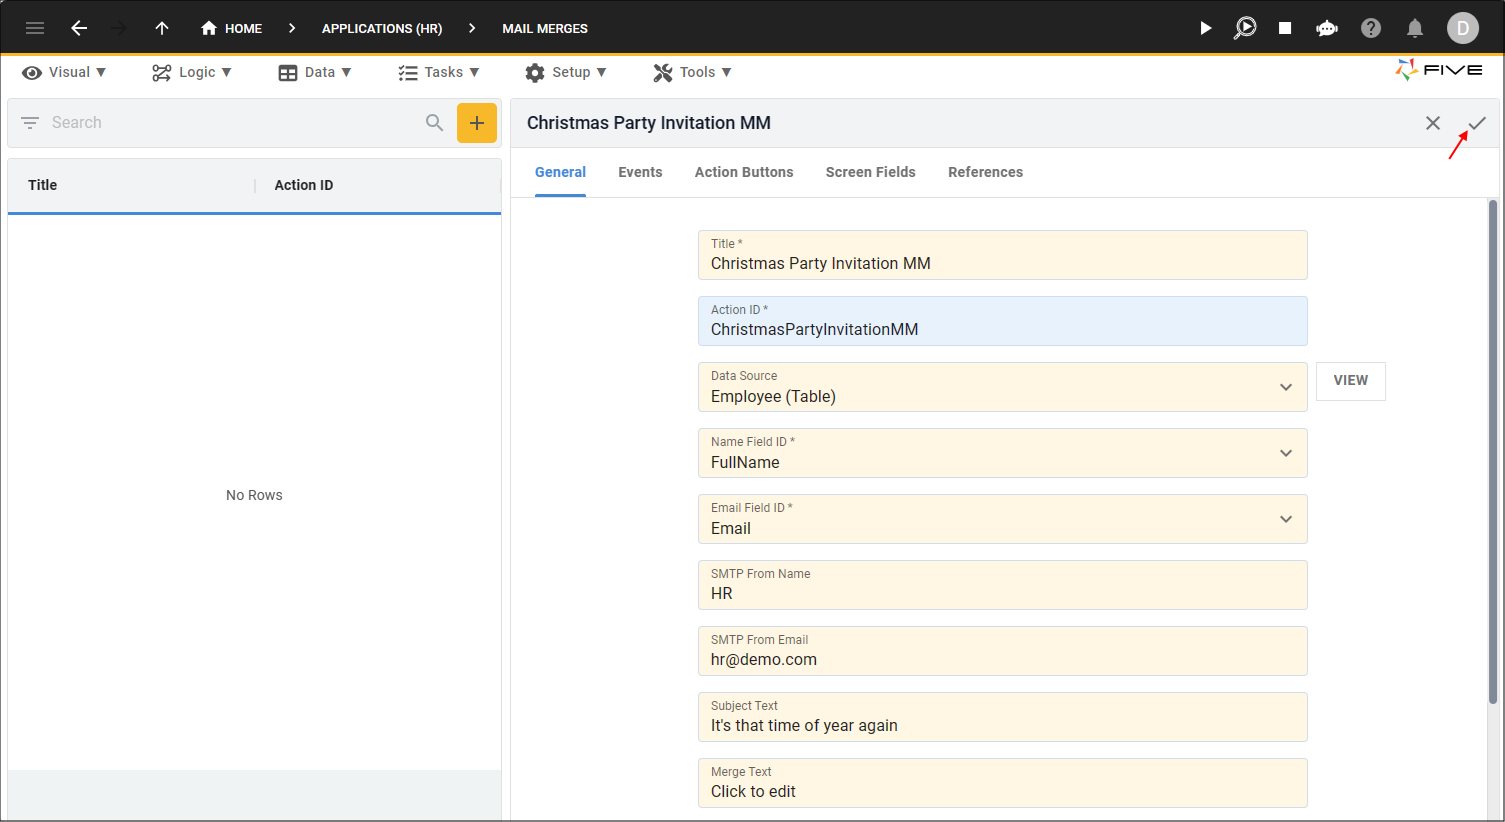
Figure 6 - Save button
How This Will Work in Your Application
1. Select the menu item holding your mail merge.2. Click the Run button.
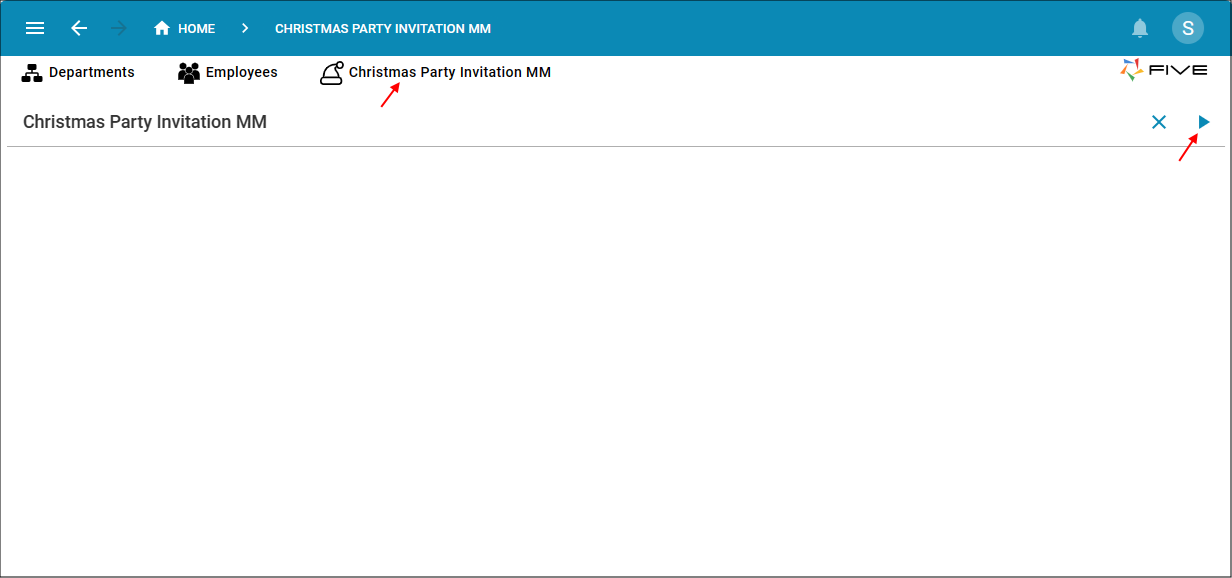
Figure 7 - Run button
info
When the Run button is clicked the sending of your mail merge will commence.
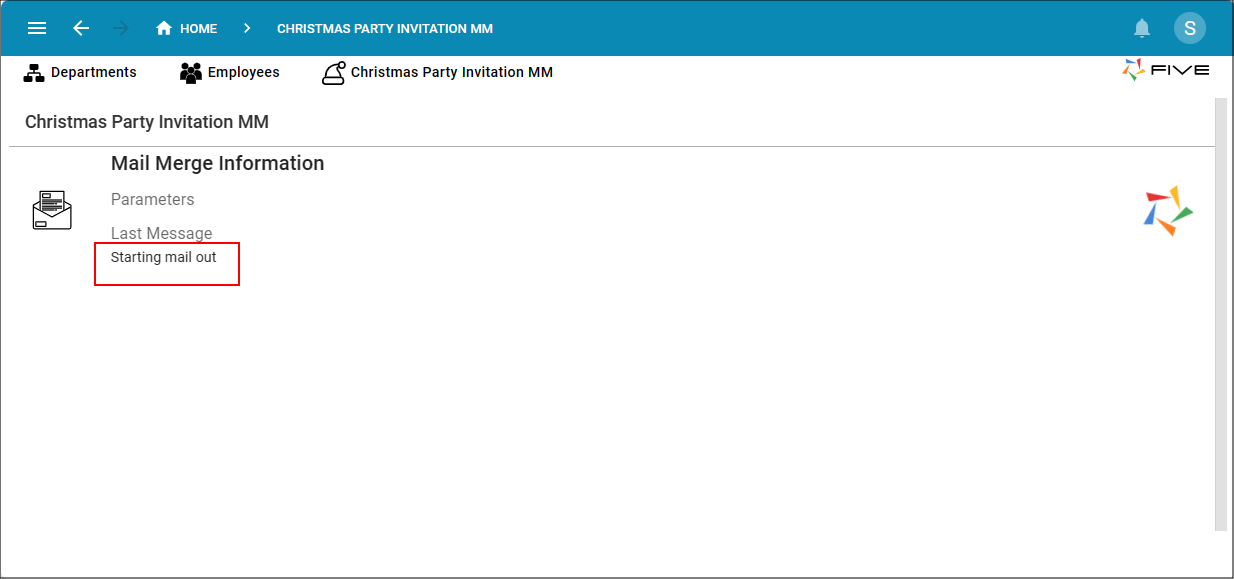
Figure 8 - Mail merge starts
info
You will be notified on the screen when the mail merge is completed.
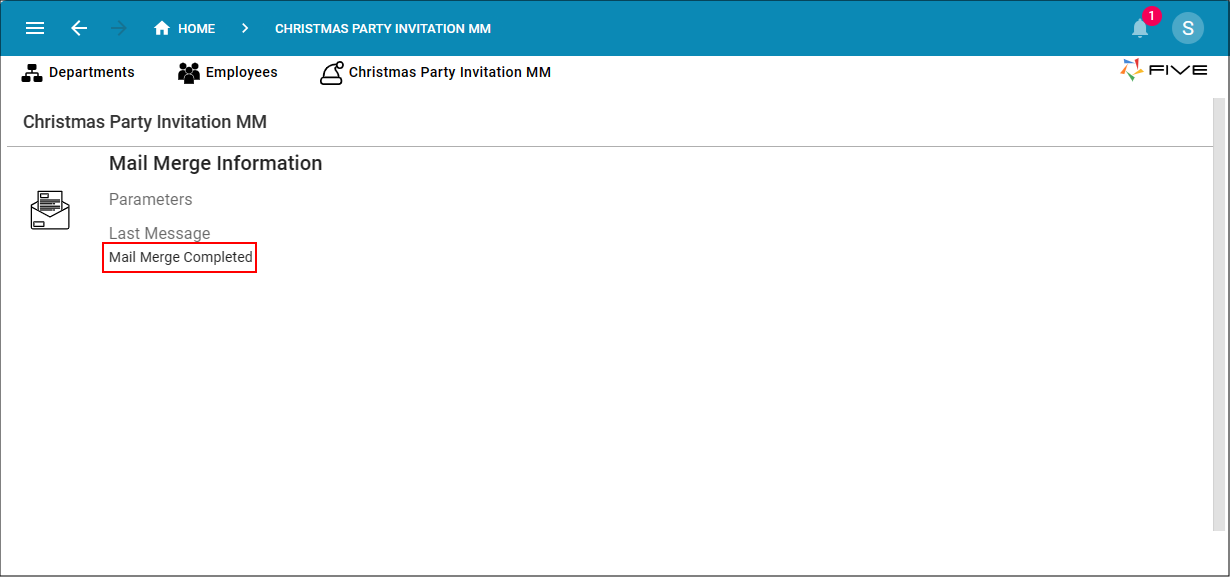
Figure 9 - Mail merge completed
info
An in-app notification will also be delivered stating the mail merge is complete.
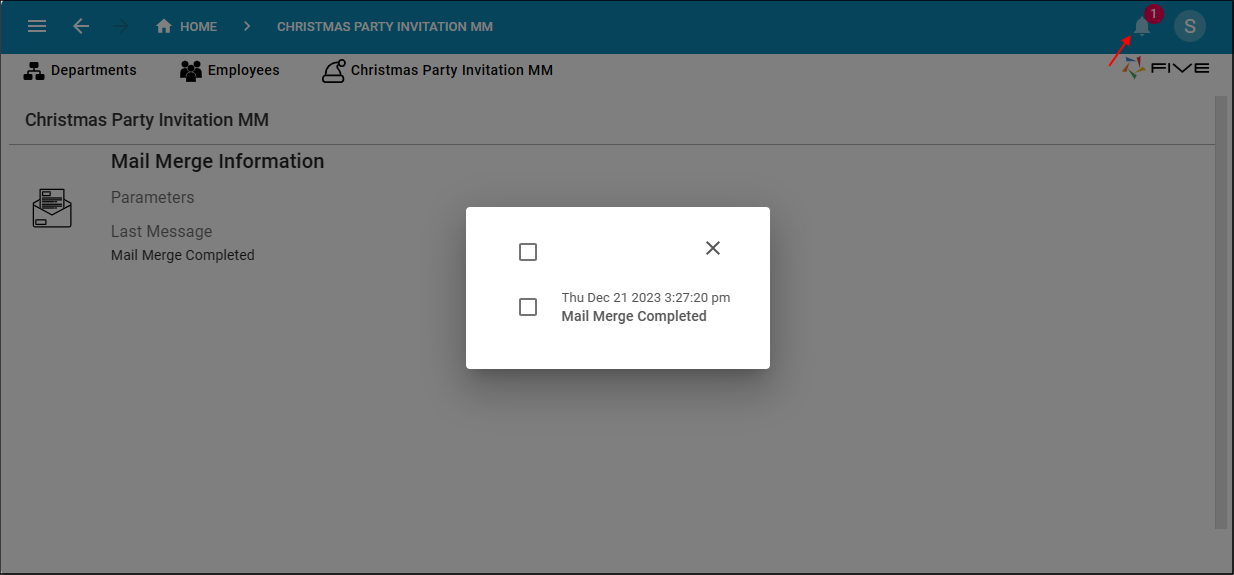
Figure 10 - Mail merge completed notification
info
Your recipients will receive their personalized email.
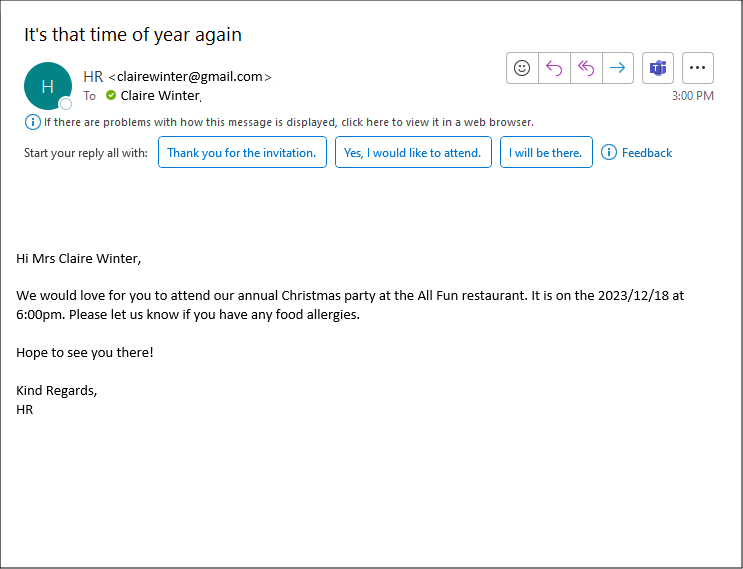
Figure 11 - Personalized emails
tip
You can add a job to automate this mail merge so you do not need to click the Run button!