Join Page Type
Last updated 24/11/2021
Add a Join Page
To create a join page you will need to have a many-to-many relationship in your database. This occurs when several records in a database table are linked with multiple records in another table.
Example
In the Production application the following occurs:
- An employee may work in one or more departments.
- Each department may have one or more employees.
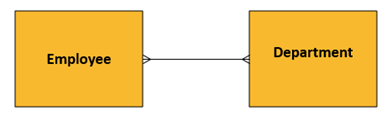
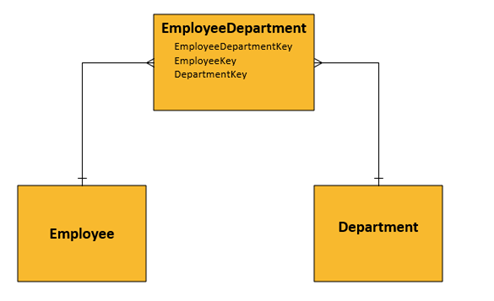
A third entity is required to resolve this many-to-many relationship. This is like the middle entity. The original many-to-many relationship will become two one-to-many relationships. The unique identifier (Primary Key) of the Employee and the Department tables are taken on by the middle entity as foreign keys. This is represented in the diagram below.
For this example, we will create an Employees form that has a Departments join page to enable us to assign a department/s to an employee. Three forms will need to be created to achieve this.
Prerequisite
A many-to-many relationship must be established at the table-level.
Post Requisite
A menu item will need to be created for each of the forms that is not the join form. For this example, a menu item will need to be created for the Departments and Employees forms.
Steps
The following steps to add a join page are broken into stages.
Stage 1 - Add the First Form
For this example, the Departments form will be the first form.
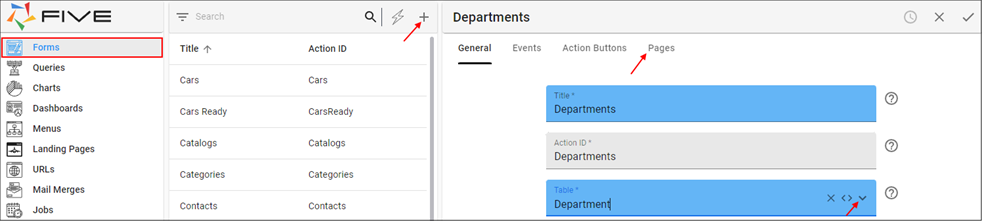
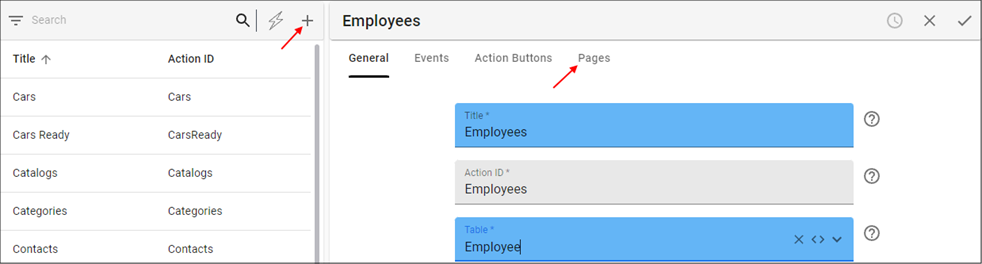
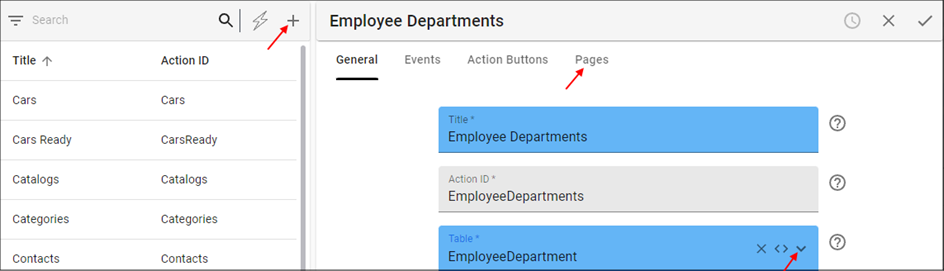
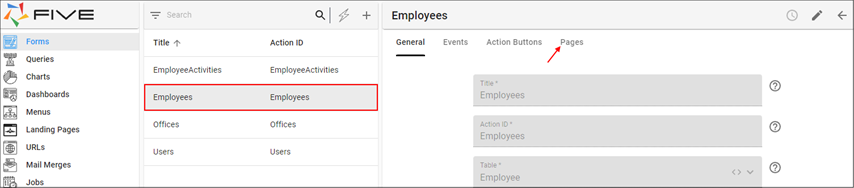
- Select Forms in the menu.
- Click the Add Item button in the list app bar.
- Type a title in the Title field. For this example, Departments.
- Use the lookup icon in the Table field and select the required table. For this example, The Department table.
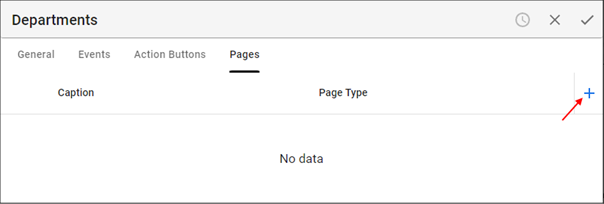
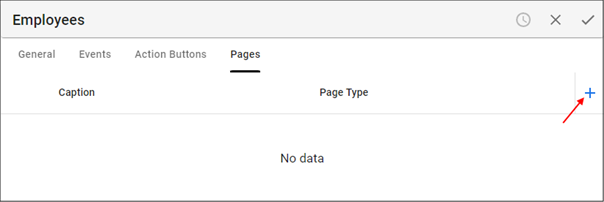
- Click the Pages tab.
- Click the Add Pages button.
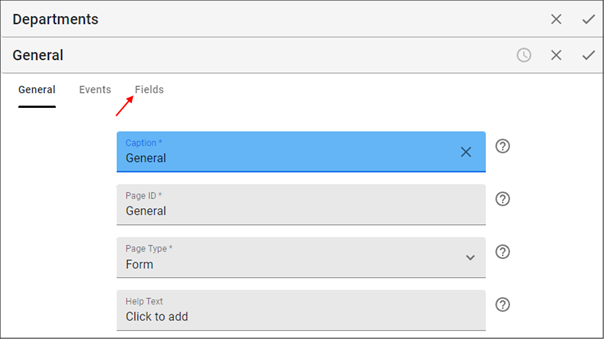
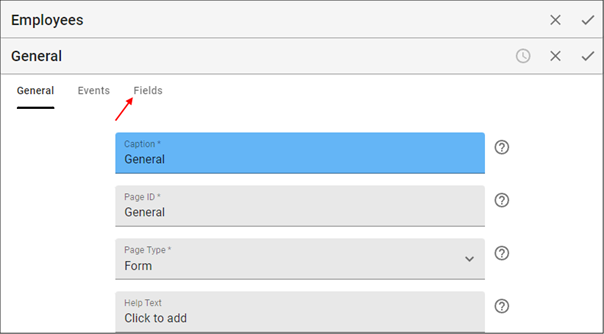
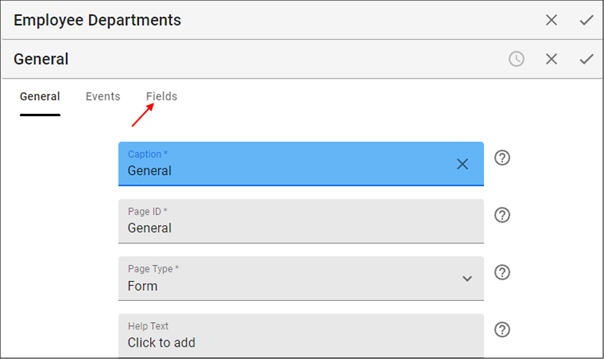
- Type a caption in the Caption field. For this example, General.
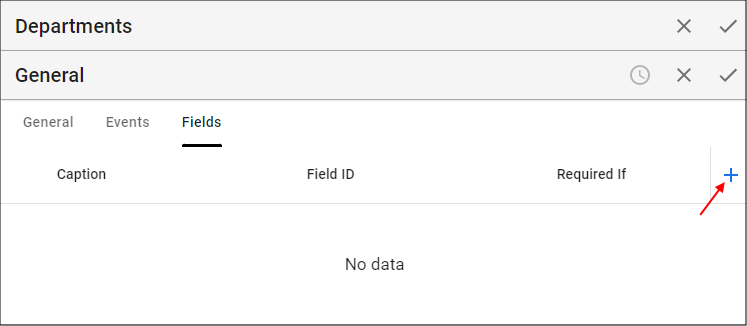
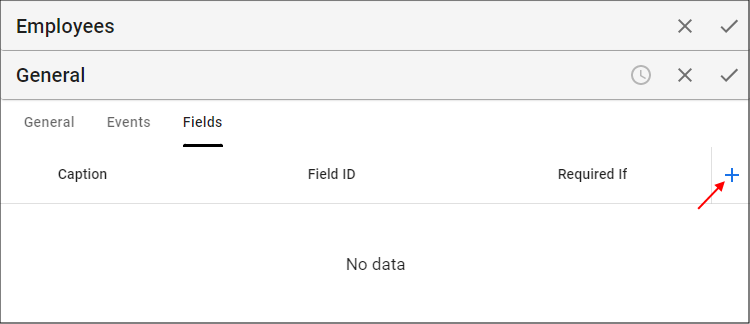
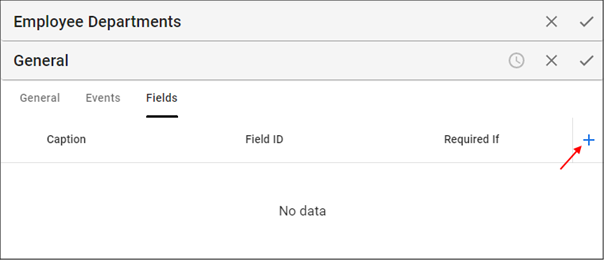
- Click the Fields tab.
- Click the Add Fields button.
- Add the details for the required fields to the form.
- On completion of the last field, click all three Save buttons in the stacked form app bars.
- Create a menu item for the form.
Stage 2 - Add the Second Form
For this example, the Employees form will be the second form.
- Click the Add Item button in the list app bar.
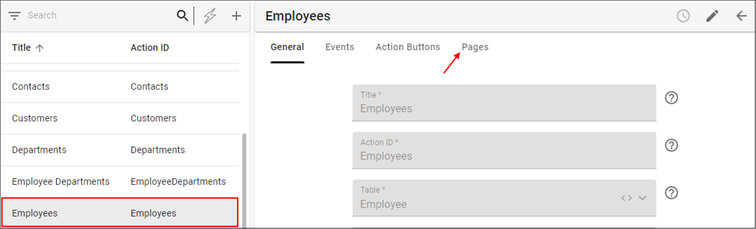
- Type a title in the Title field. For this example, Employees.
- Use the lookup icon in the Table field and select the required table. For this example, the Employee table.
- Click the Pages tab.
- Click the Add Pages button.
- Type a caption in the Caption field. For this example, General.
- Click the Fields tab.
- Click the Add Fields button.
- Add the details for the required fields to the form.
- On completion of the last field, click all three Save buttons in the stacked form app bars.
- Create a menu item for the form.
Stage 3 - Add the Join Form
For this example, the EmployeeDepartments form will be the join form.
- Click the Add Item button in the list app bar.
- Type a title in the Title field. For this example, EmployeeDepartments.
- Use the lookup icon in the Table field and select the required table. For this example, the EmployeeDepartment table.
- Click the Pages tab.
- Click the Add Pages button.
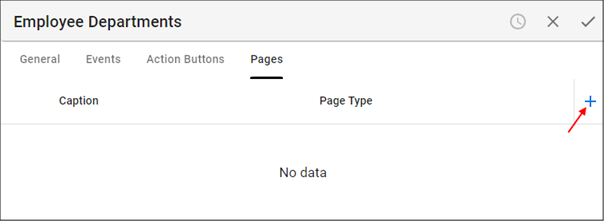
- Type a caption in the Caption field. For this example, General.
- Click the Fields tab.
- Click the Add Fields button.
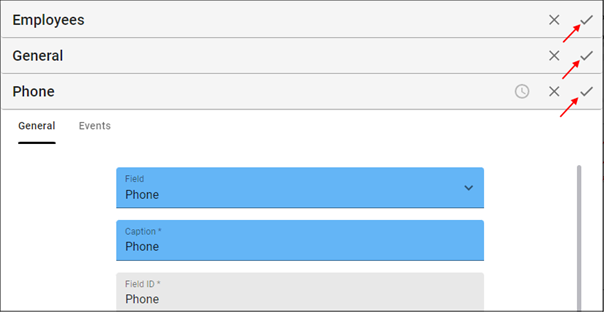
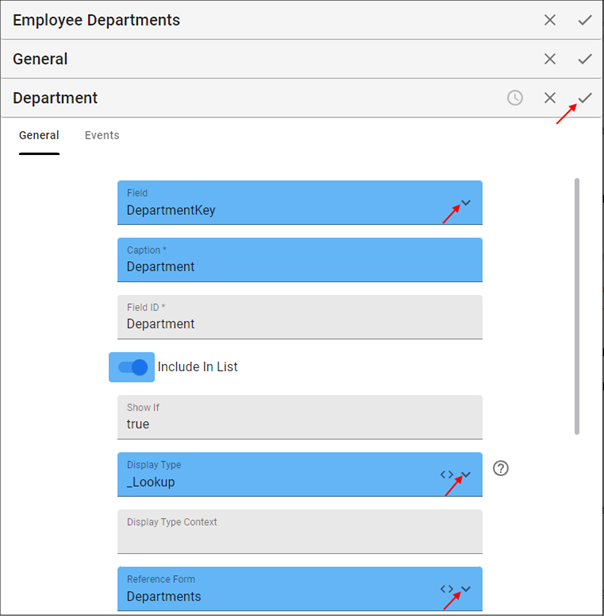
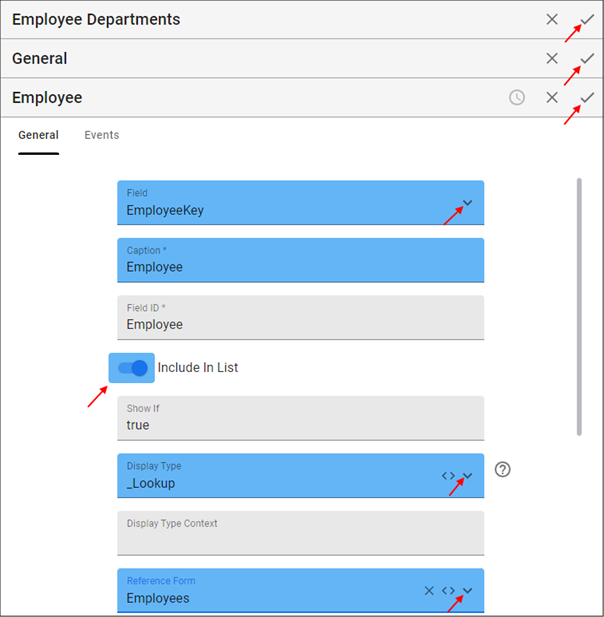
- Use the lookup in the Field field and select one of the foreign key fields. For this example, the DepartmentKey field.
- Type a caption in the Caption field. For this example, Department.
As this is the first field for the form, the Include In List switch will be in a true state. We need both of the foreign key fields to be included in the list for the join page to work.
- Use the lookup icon in the Display Type field and select _Lookup.
- Use the lookup icon in the Reference Form field and select the required form to reference. For this example, the Departments form.
- Click the Save button in the form app bar.
- Click the Add Fields button.
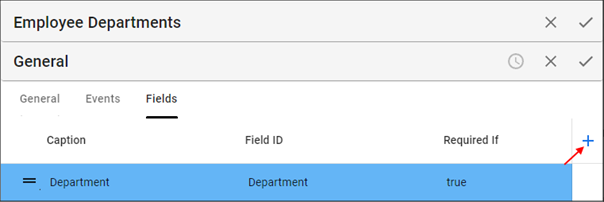
- Use the lookup icon in the Field field and select the other foreign key field. For this example, the EmployeeKey field.
- Type a caption in the Caption field. For this example, Employee.
- Click the Include In List switch to a true state.
- Use the lookup icon in the Display Type field and select _Lookup.
- Use the lookup icon in the Reference Form field and select the required form to reference. For this example, the Employees form.
- Click all three Save buttons in the stacked form app bars.
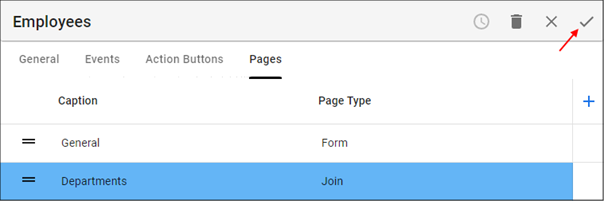
Stage 4 - Edit the Employee Form to Add the Join Page
For this example, the join page is going to be added to the Employees form. This will allow us to assign department/s to an employee.
- Select the form record in the list to add the join page. For this example, the Employees record.
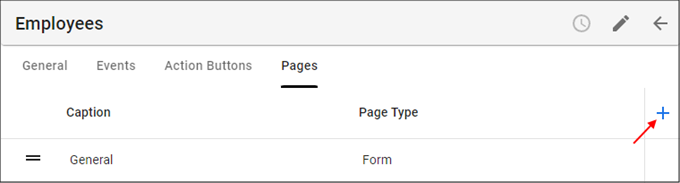
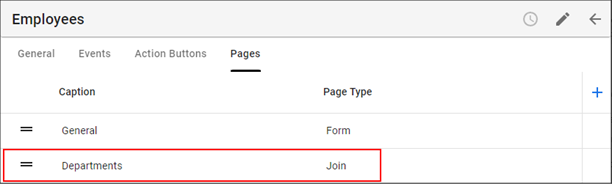
- Click the Pages tab.
- Click the Add Pages button.
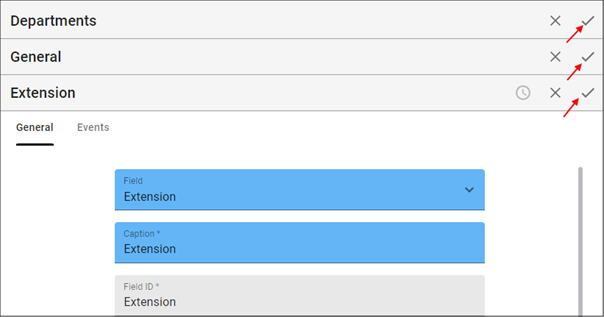
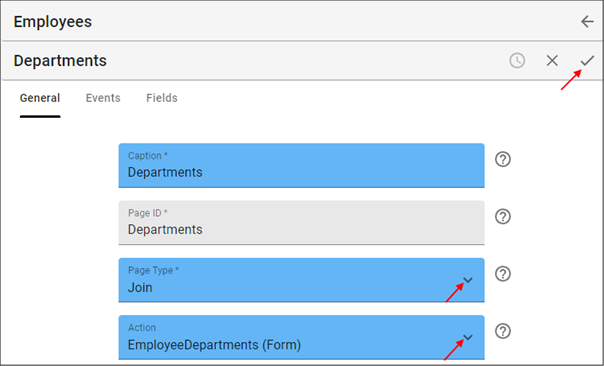
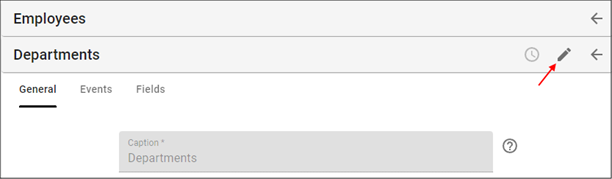
- Type a caption in the Caption field. For this example, Departments.
- Use the lookup icon in the Page Type field and select Join.
- Use the lookup icon in the Action Field and select the join form's Action ID. For this example, EmployeeDepartments (Form).
- Click the Save button in the form app bar.
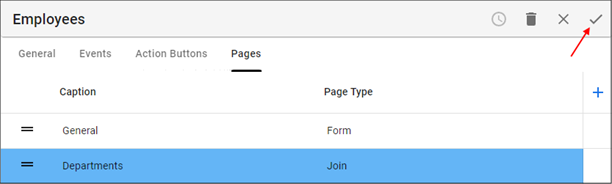
- Click the Save button in the form app bar above the list.
How This Will Look in Your End-User Application
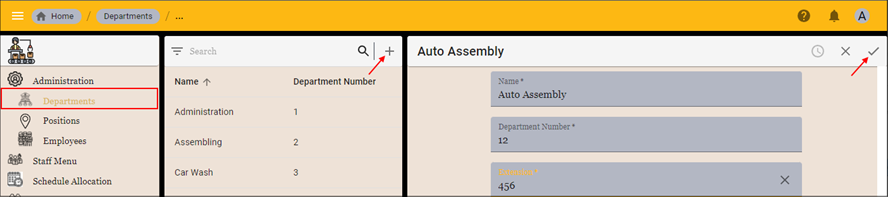
- Select the menu item for the form not holding the join page. For this example, the Departments menu item.
- Click the Add Item button in the list app bar.
- Fill in the fields on the Departments form.
- Click the Save button in the form app bar.
- Repeat the above steps to add a few more departments.
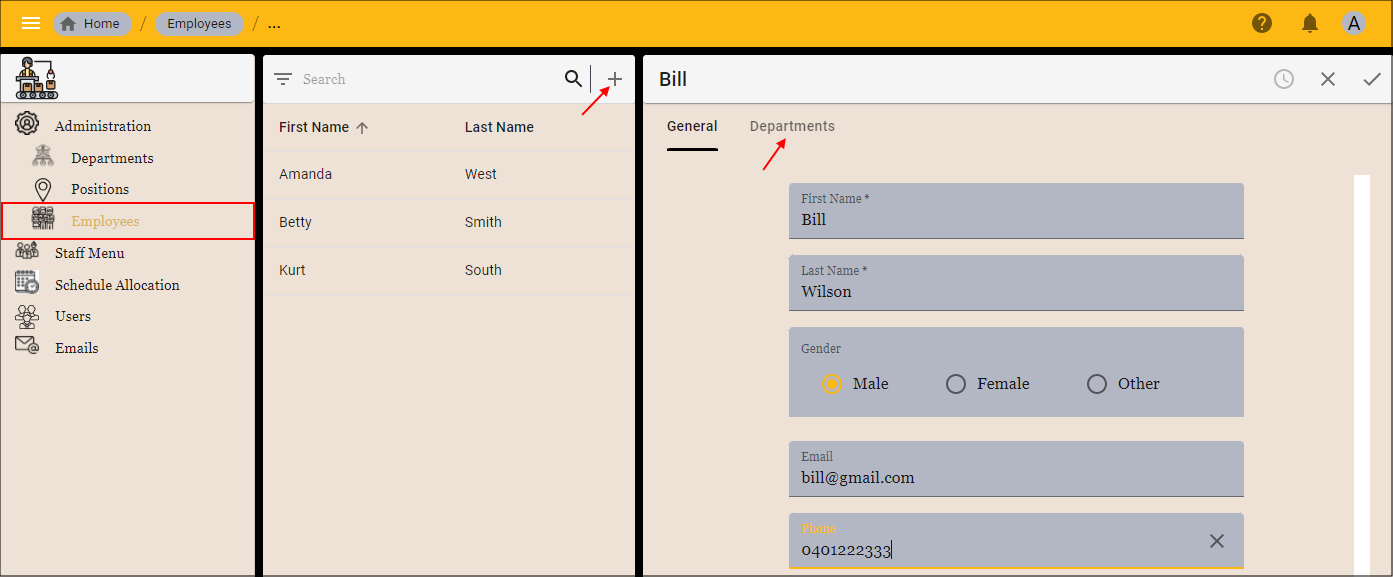
- Select the menu item referencing the form that holds the join page. For this example, the Employees menu item.
- Click the Add Item button in the list app bar.
- Fill in the fields on the Employees form.
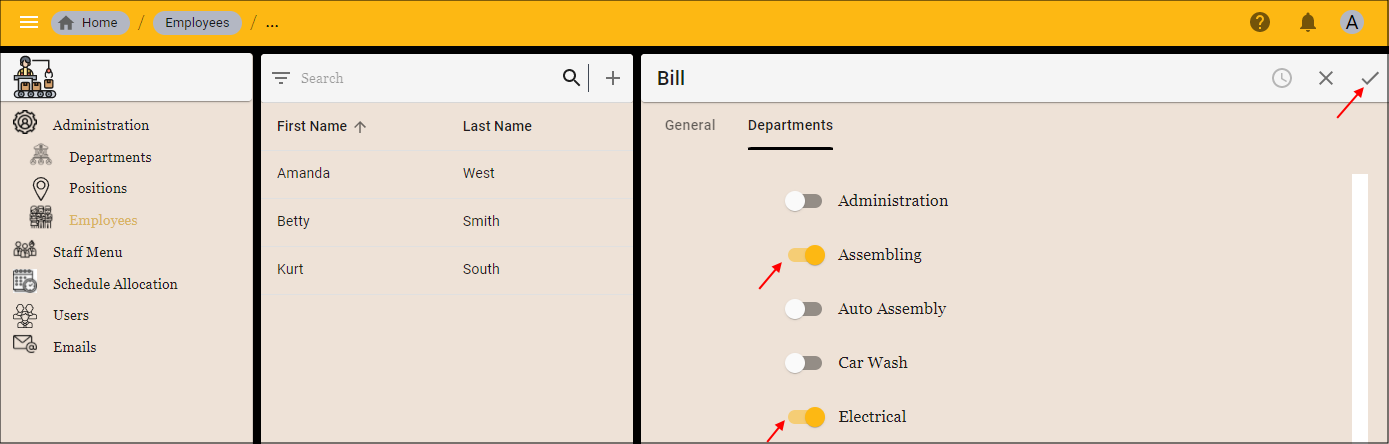
- Click the tab to navigate to the join page. For this example, the Departments tab.
- Select a switch/es to turn to a true state.
- Click the Save button in the form app bar.
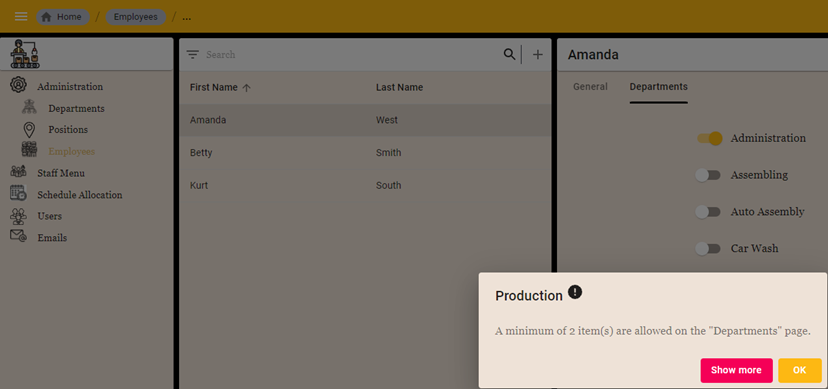
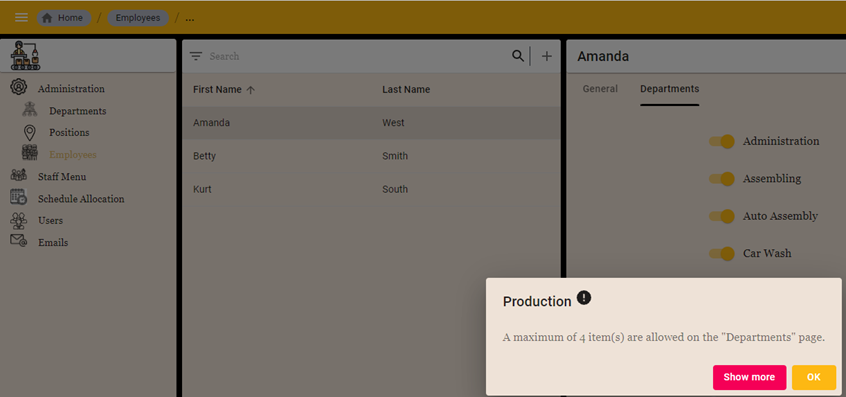
Set Minimum and/or Maximum Items to Select
When creating a join page, you can define a minimum and/or maximum amount of items that can be selected. The following options can be set.
- A minimum amount of items with no maximum amount set.
- A maximum amount of items with no minimum amount set.
- A minimum and maximum amount of items. The selected amount of items must fall in-between the minimum and maximum criteria.
- No minimum or maximum amount of items. Any number of items, including zero, can be selected.
Default: No minimum and maximum values.
Set Minimum Items
- Select Forms in the menu.
- Select the required form record. For this example, the Employees form.
- Click the Pages tab.
- Select the required page record. For this example, the Departments record.
- Click the Edit button in the form app bar.
- Type an integer value in the Minimum Items field.
- Click the Save button in the form app bar.

- Click the Save button in the form app bar above the list.
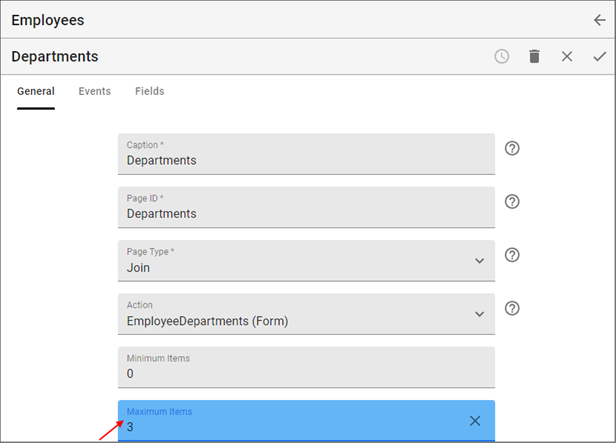
Set Maximum Items
- Type an integer value in the Maximum Items field.
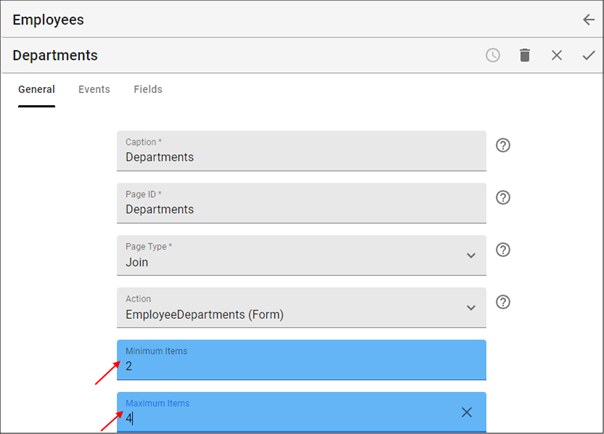
Set Minimum and Maximum Items
- Type an integer value in the Minimum Items field.
- Type a higher integer value in the Maximum Items field.
How This Will Look in Your End-User Application
When a user selects the options they will be delivered a notification if the amount of choices is below the minimum amount or above the maximum amount if the Minimum Items and Maximum Items fields are set.