How the ROS Application Works
Last updated 24/01/2022
This chapter will explain how the ROS application works. The video below demonstrates how each user login works in the ROS application.Understanding the ROS App
User Logins
The ROS application has three user logins.- Administration
- Client
- Dispatch
Administration Login
The following documentation provides the steps required to add records while logged in with the Administrator role.Prerequisite - Administrator login credentials
Add a Restaurant
1. Select Administration in the menu.2. Select Restaurants in the menu.
3. Click the Add Item button in the list app bar.
4. Type a name in the Name field.
5. Type an ABN in the ABN field.
6. Click the Addresses tab.
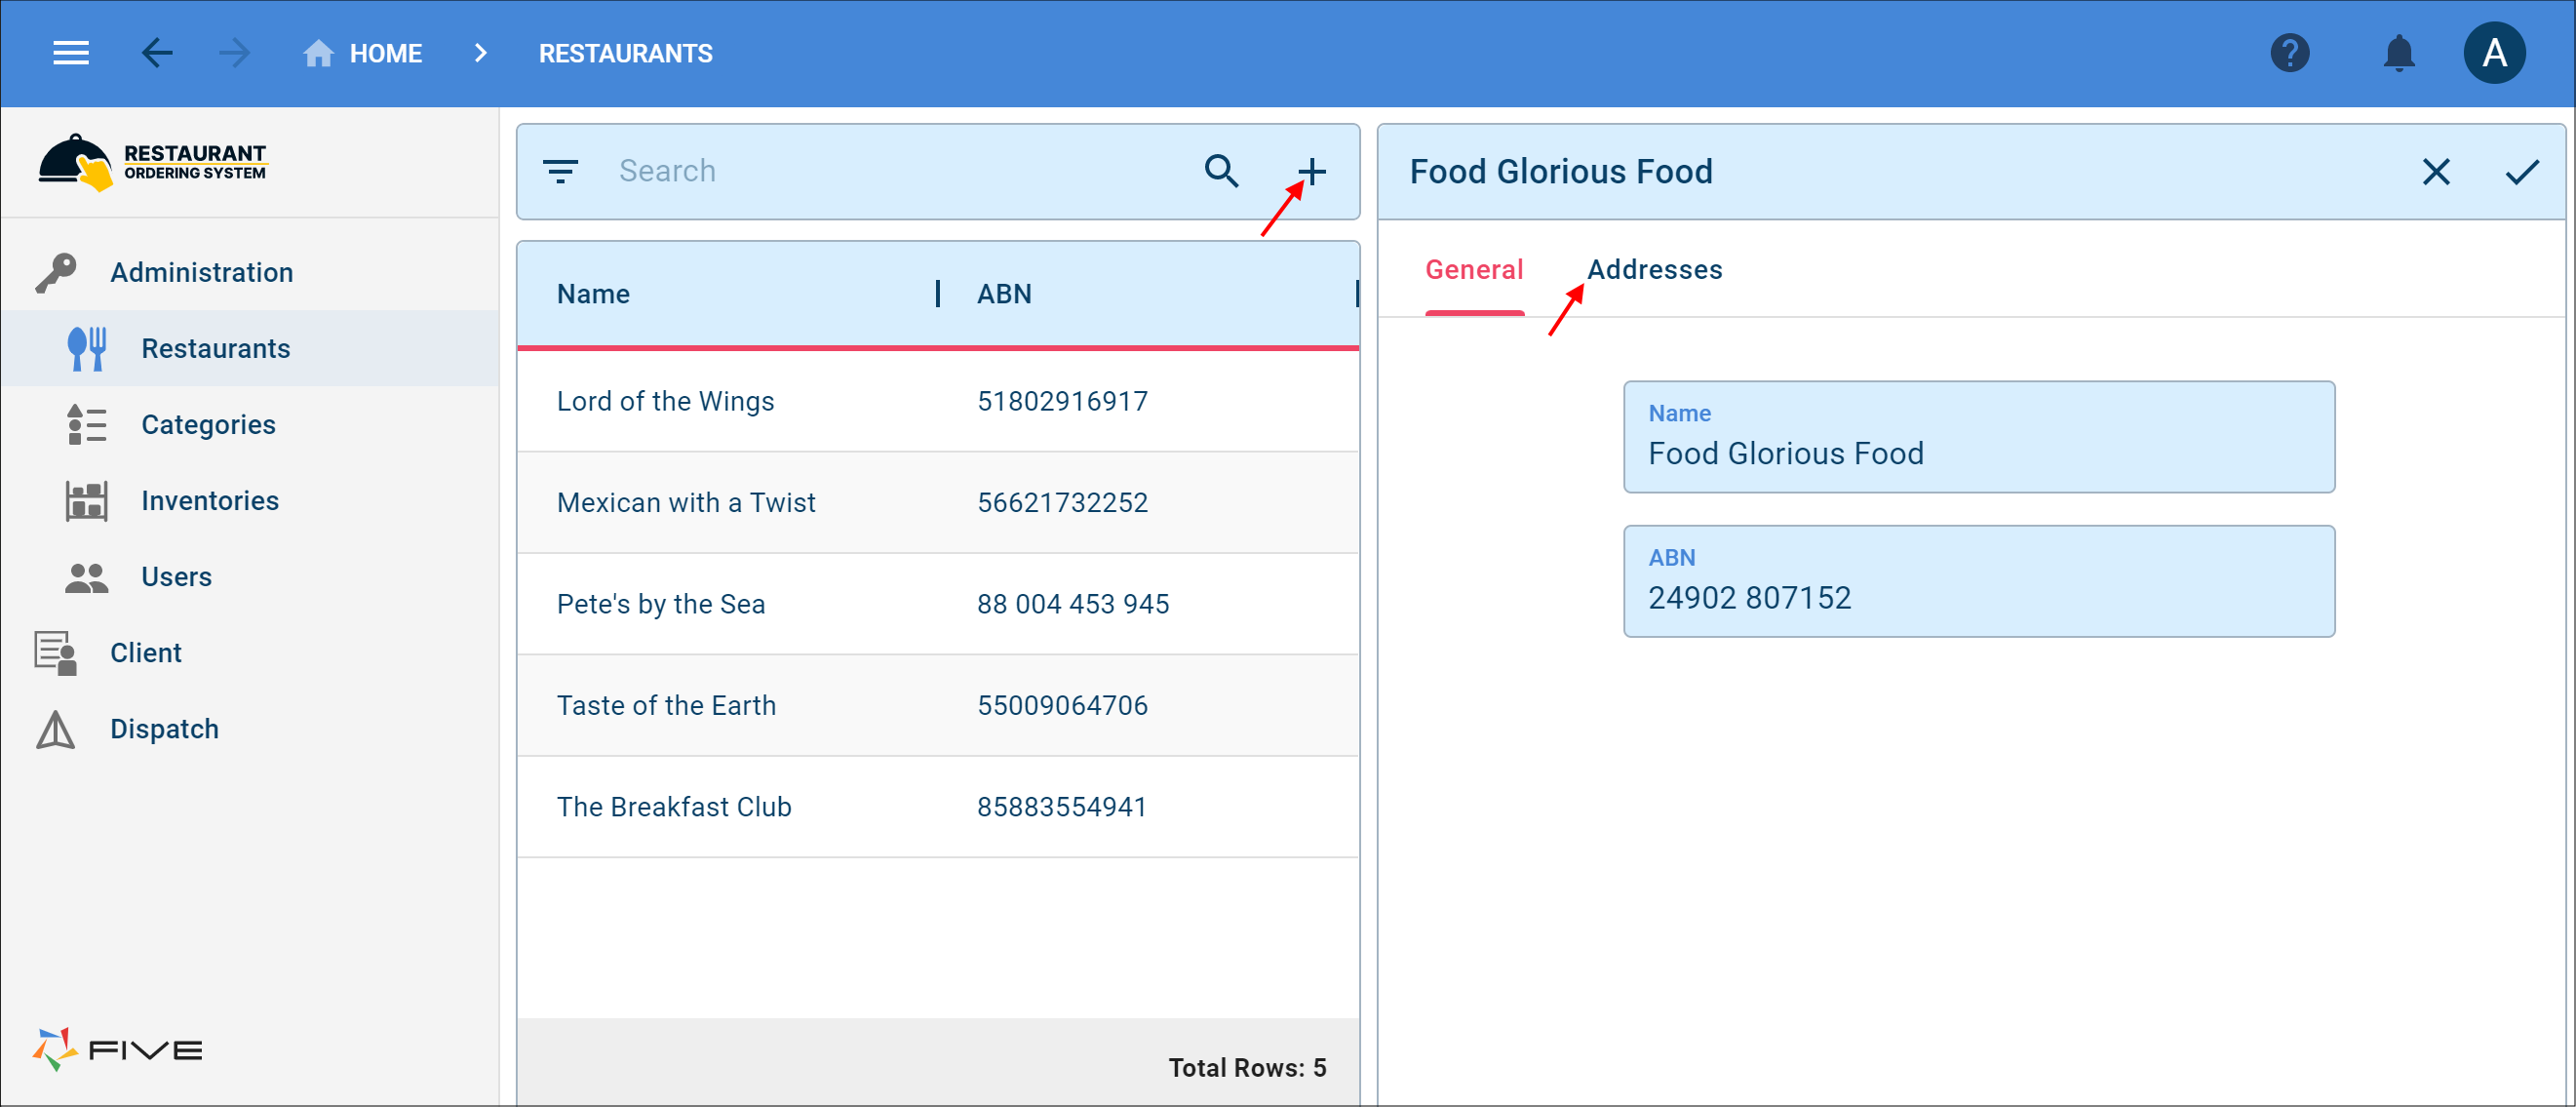
Figure 1 - Add a restaurant
7. Click the Add Addresses button.
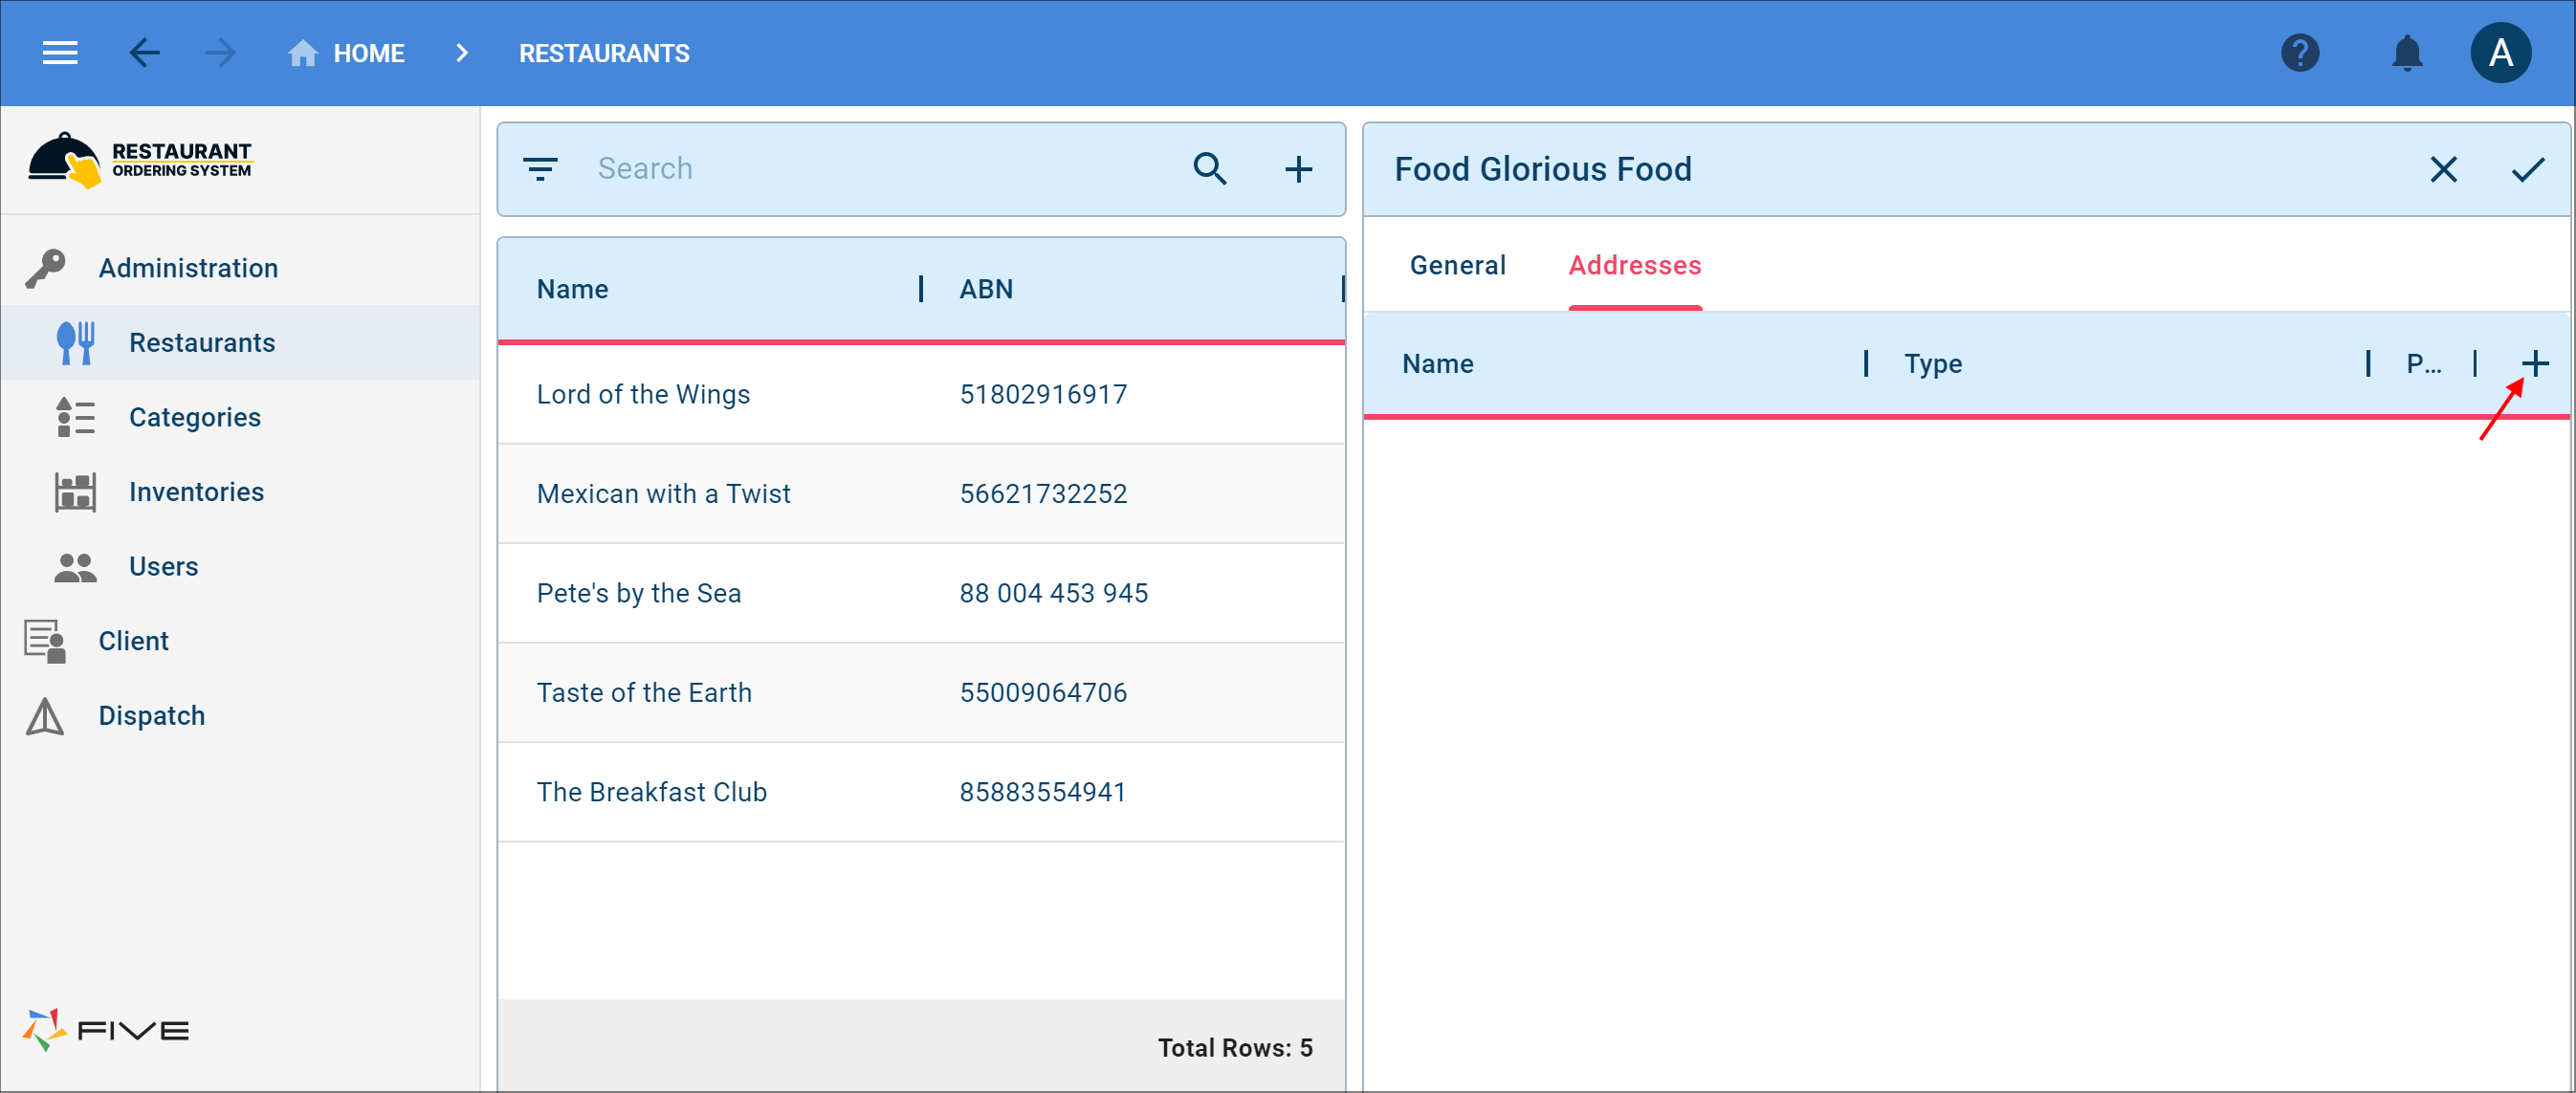
Figure 2 - Add Addresses button
8. Type a name in the Name field.
9. Click the lookup icon in the Type field and select a type.
10. Type an address in the Address Line 1 field.
11. Type a suburb in the Suburb field.
12. Type a state in the State field.
13. Type a post code in the Post Code field.
14. Click both Save buttons in the stacked form app bars.
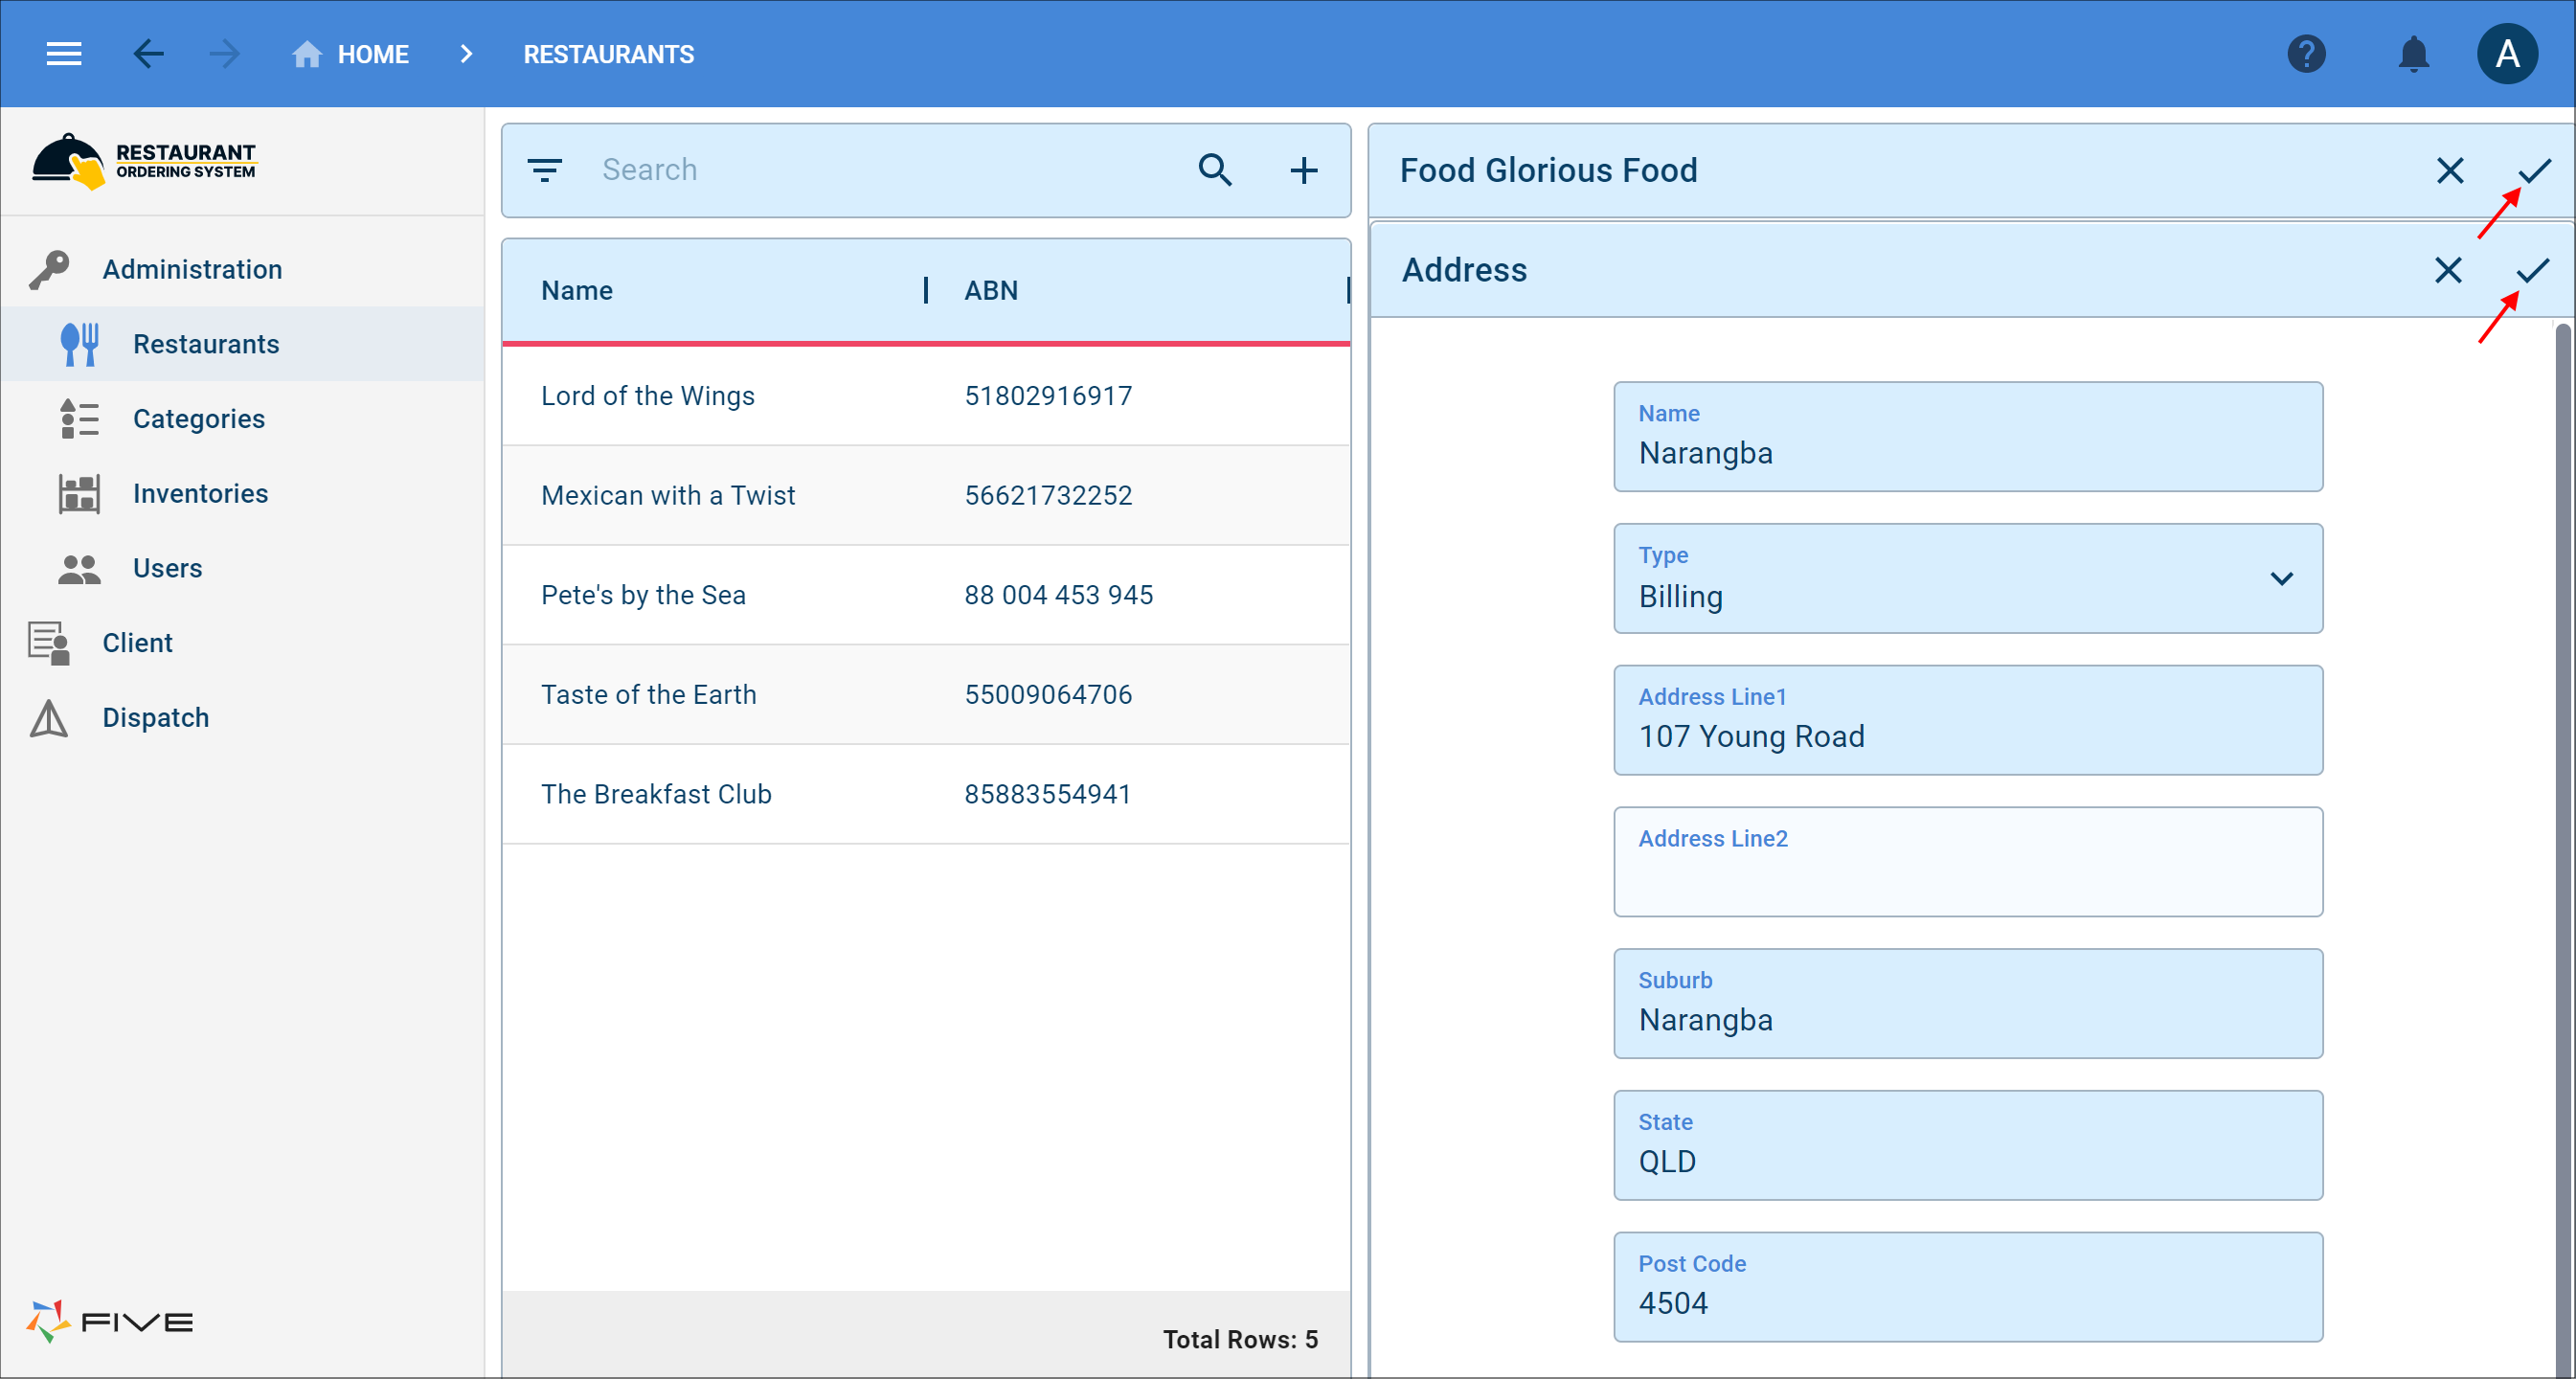
Figure 3 - Add an address and save the Restaurant form
info
A restaurant can have many addresses!
Add an Order for a Restaurant
1. Select a Restaurant record in the list.2. Click the Down button in the form app bar.
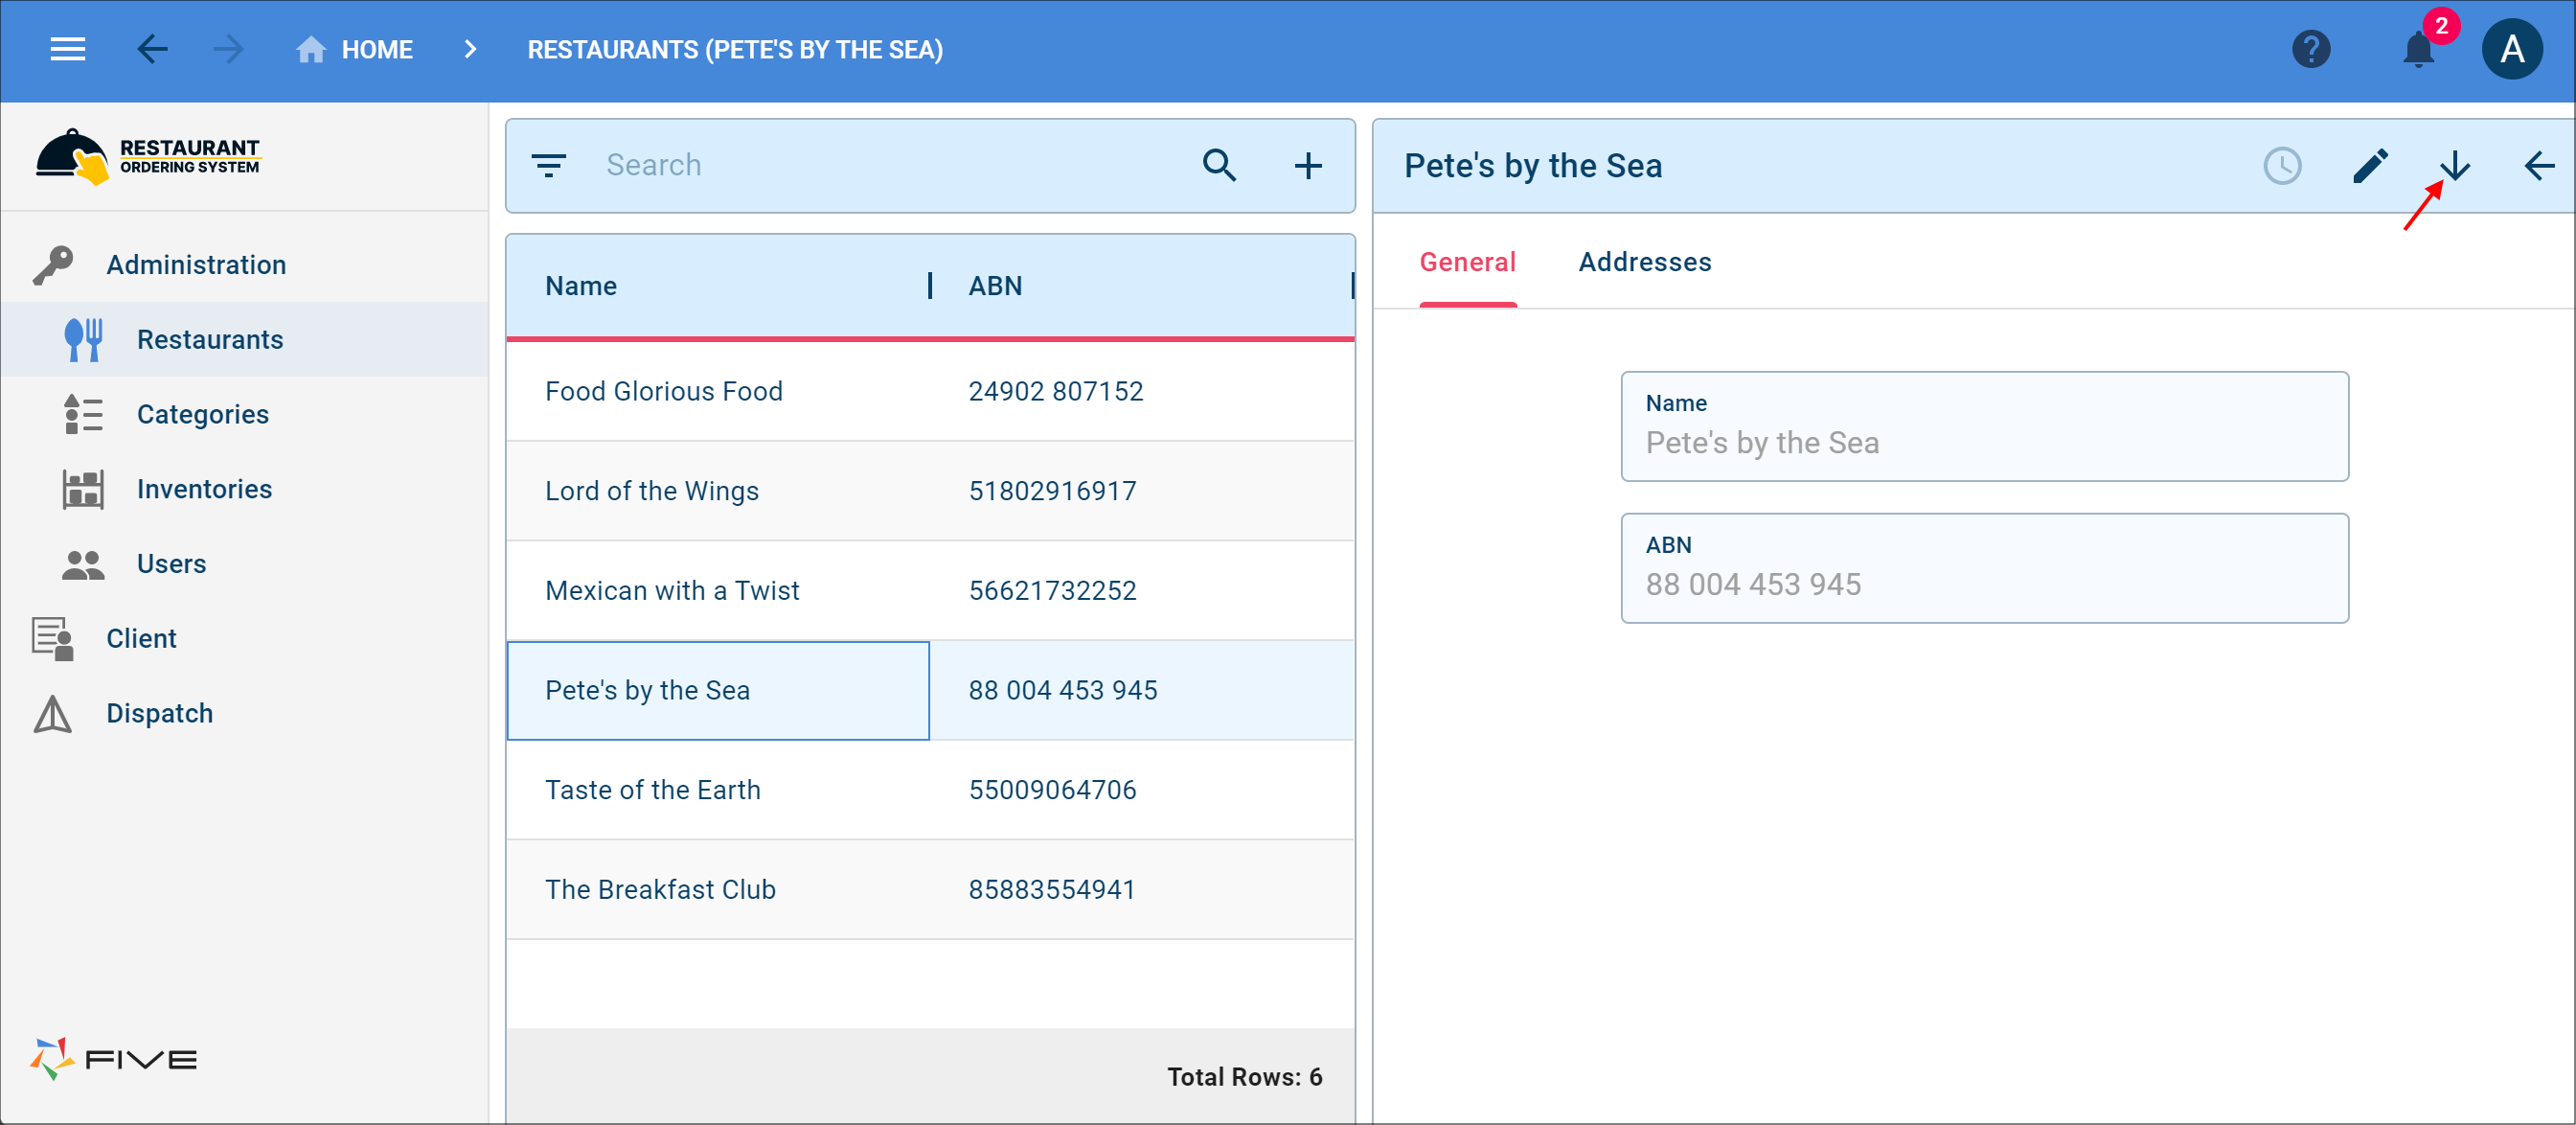
Figure 4 - Down button
3. Click the Add item button in the list app bar.
4. Click the lookup icon in the Delivery Address field and select an address.
5. Click the lookup icon in the Invoice Address field and select an address.
6. Click the Calendar icon in the Date field and select a date.
7. Type an order number in the Order Number field.
8. Type the sub total in the Sub Total field.
9. Type the total in the Total field.
10. Click the Items tab.
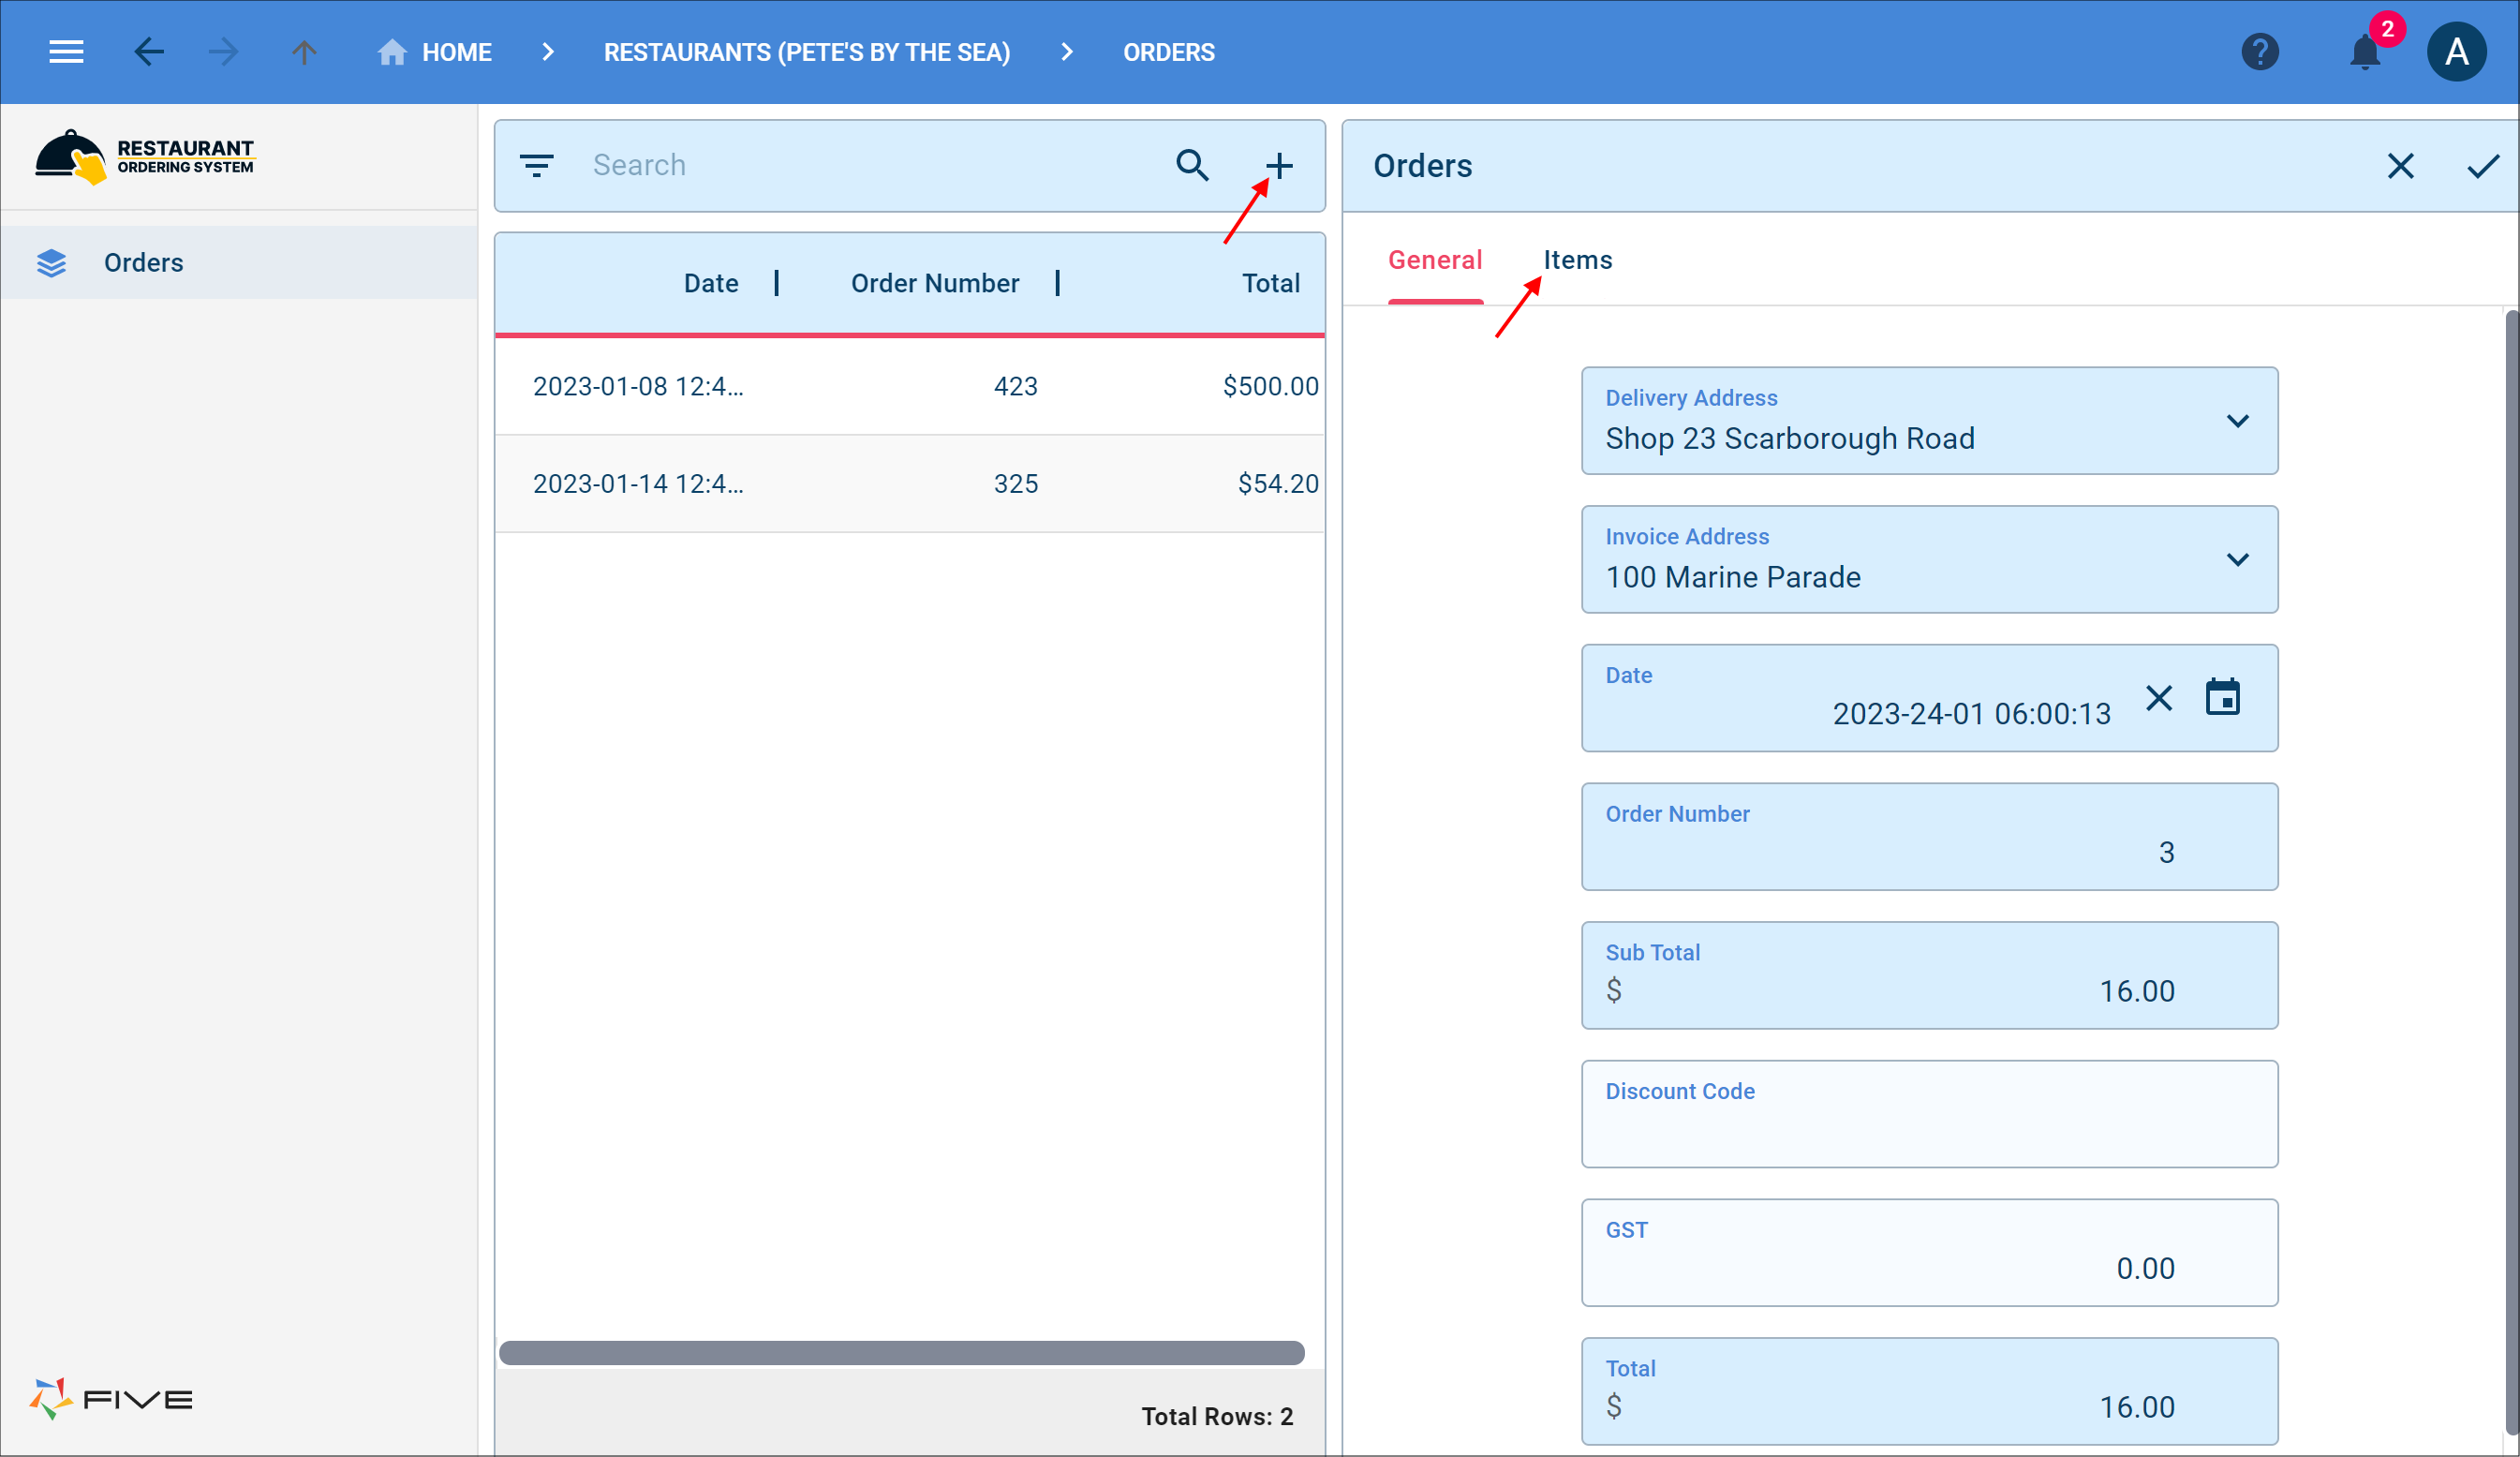
Figure 5 - Add an order
11. Click the Add Items button.
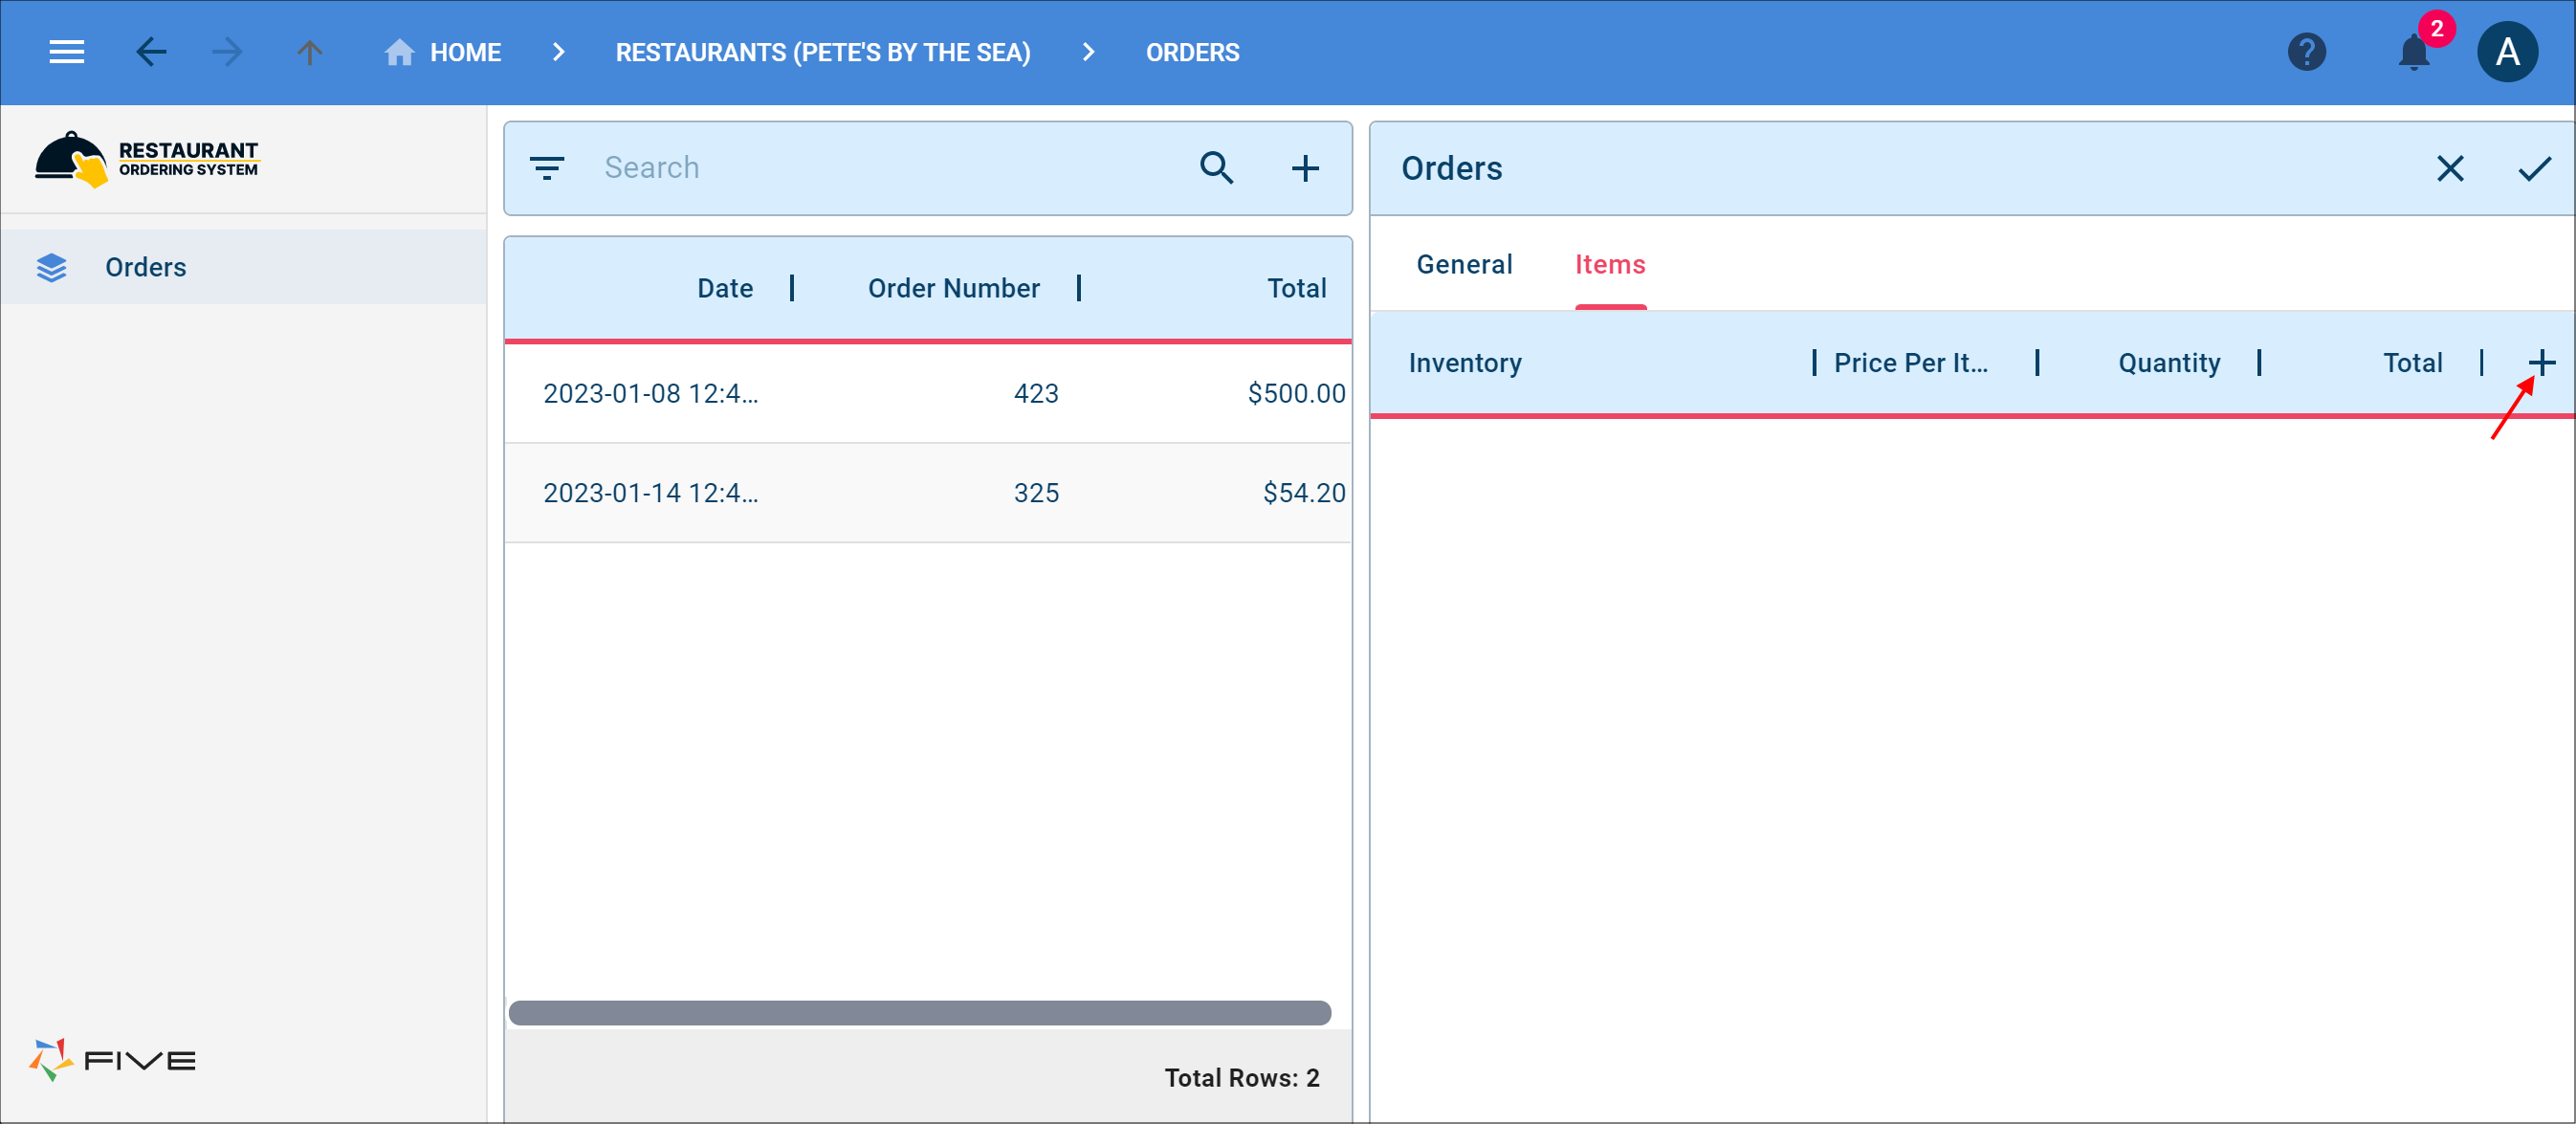
Figure 6 - Add Items button
12. Click the lookup icon in the Category field and select a category.
13. Click the lookup icon in the Inventory field and select an inventory.
14. Type the price in the Price Per Item field.
15. Type the quantity in the Quantity field.
16. Type the total in the Total field.
17. Click both Save buttons in the stacked form app bars.
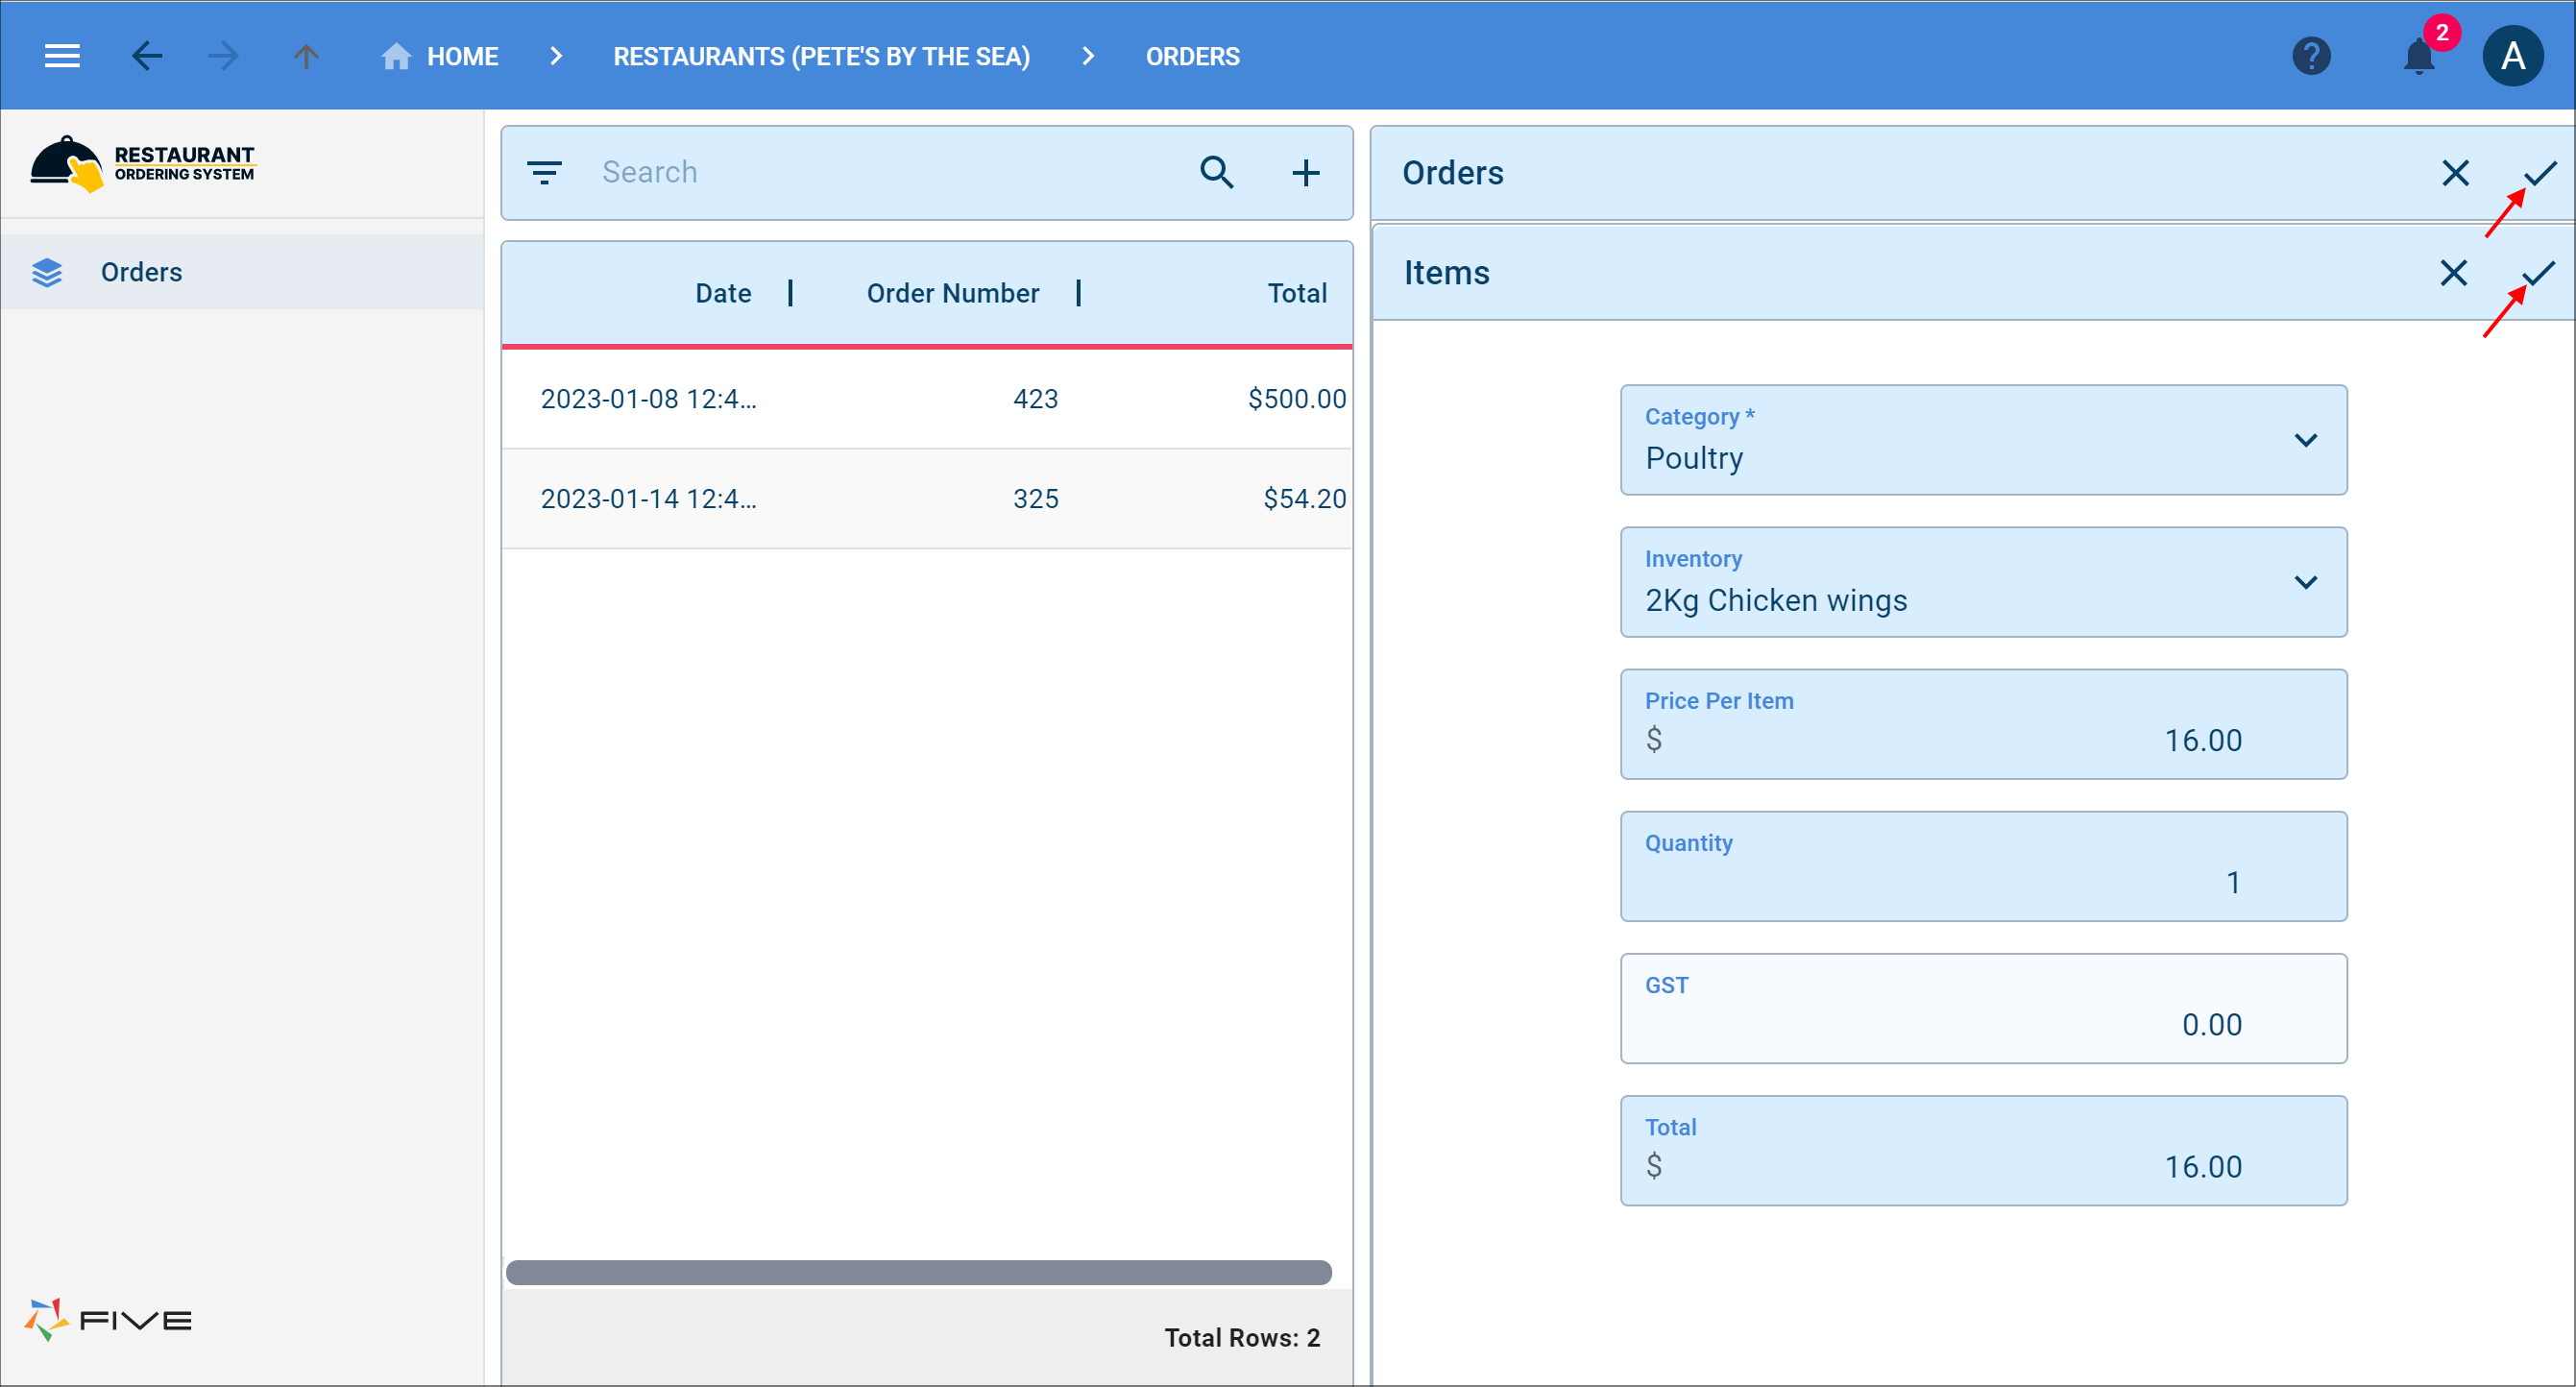
Figure 7 - Add an item and save the Orders form
Add a Category
1. Select Categories in the menu.2. Click the Add Item button in the list app bar.
3. Type a name in the Name field.
4. Click the Save button in the form app bar.

Figure 8 - Add a category
Add an Inventory
1. Select Inventories in the menu.2. Click the Add Item button in the list app bar.
3. Type a product name in the Product field.
4. Click the lookup icon in the Category field and select a category.
5. Type a price in the the Price field.
6. Click the GST Exempt button if required.
7. Click the Save button in the form app bar.
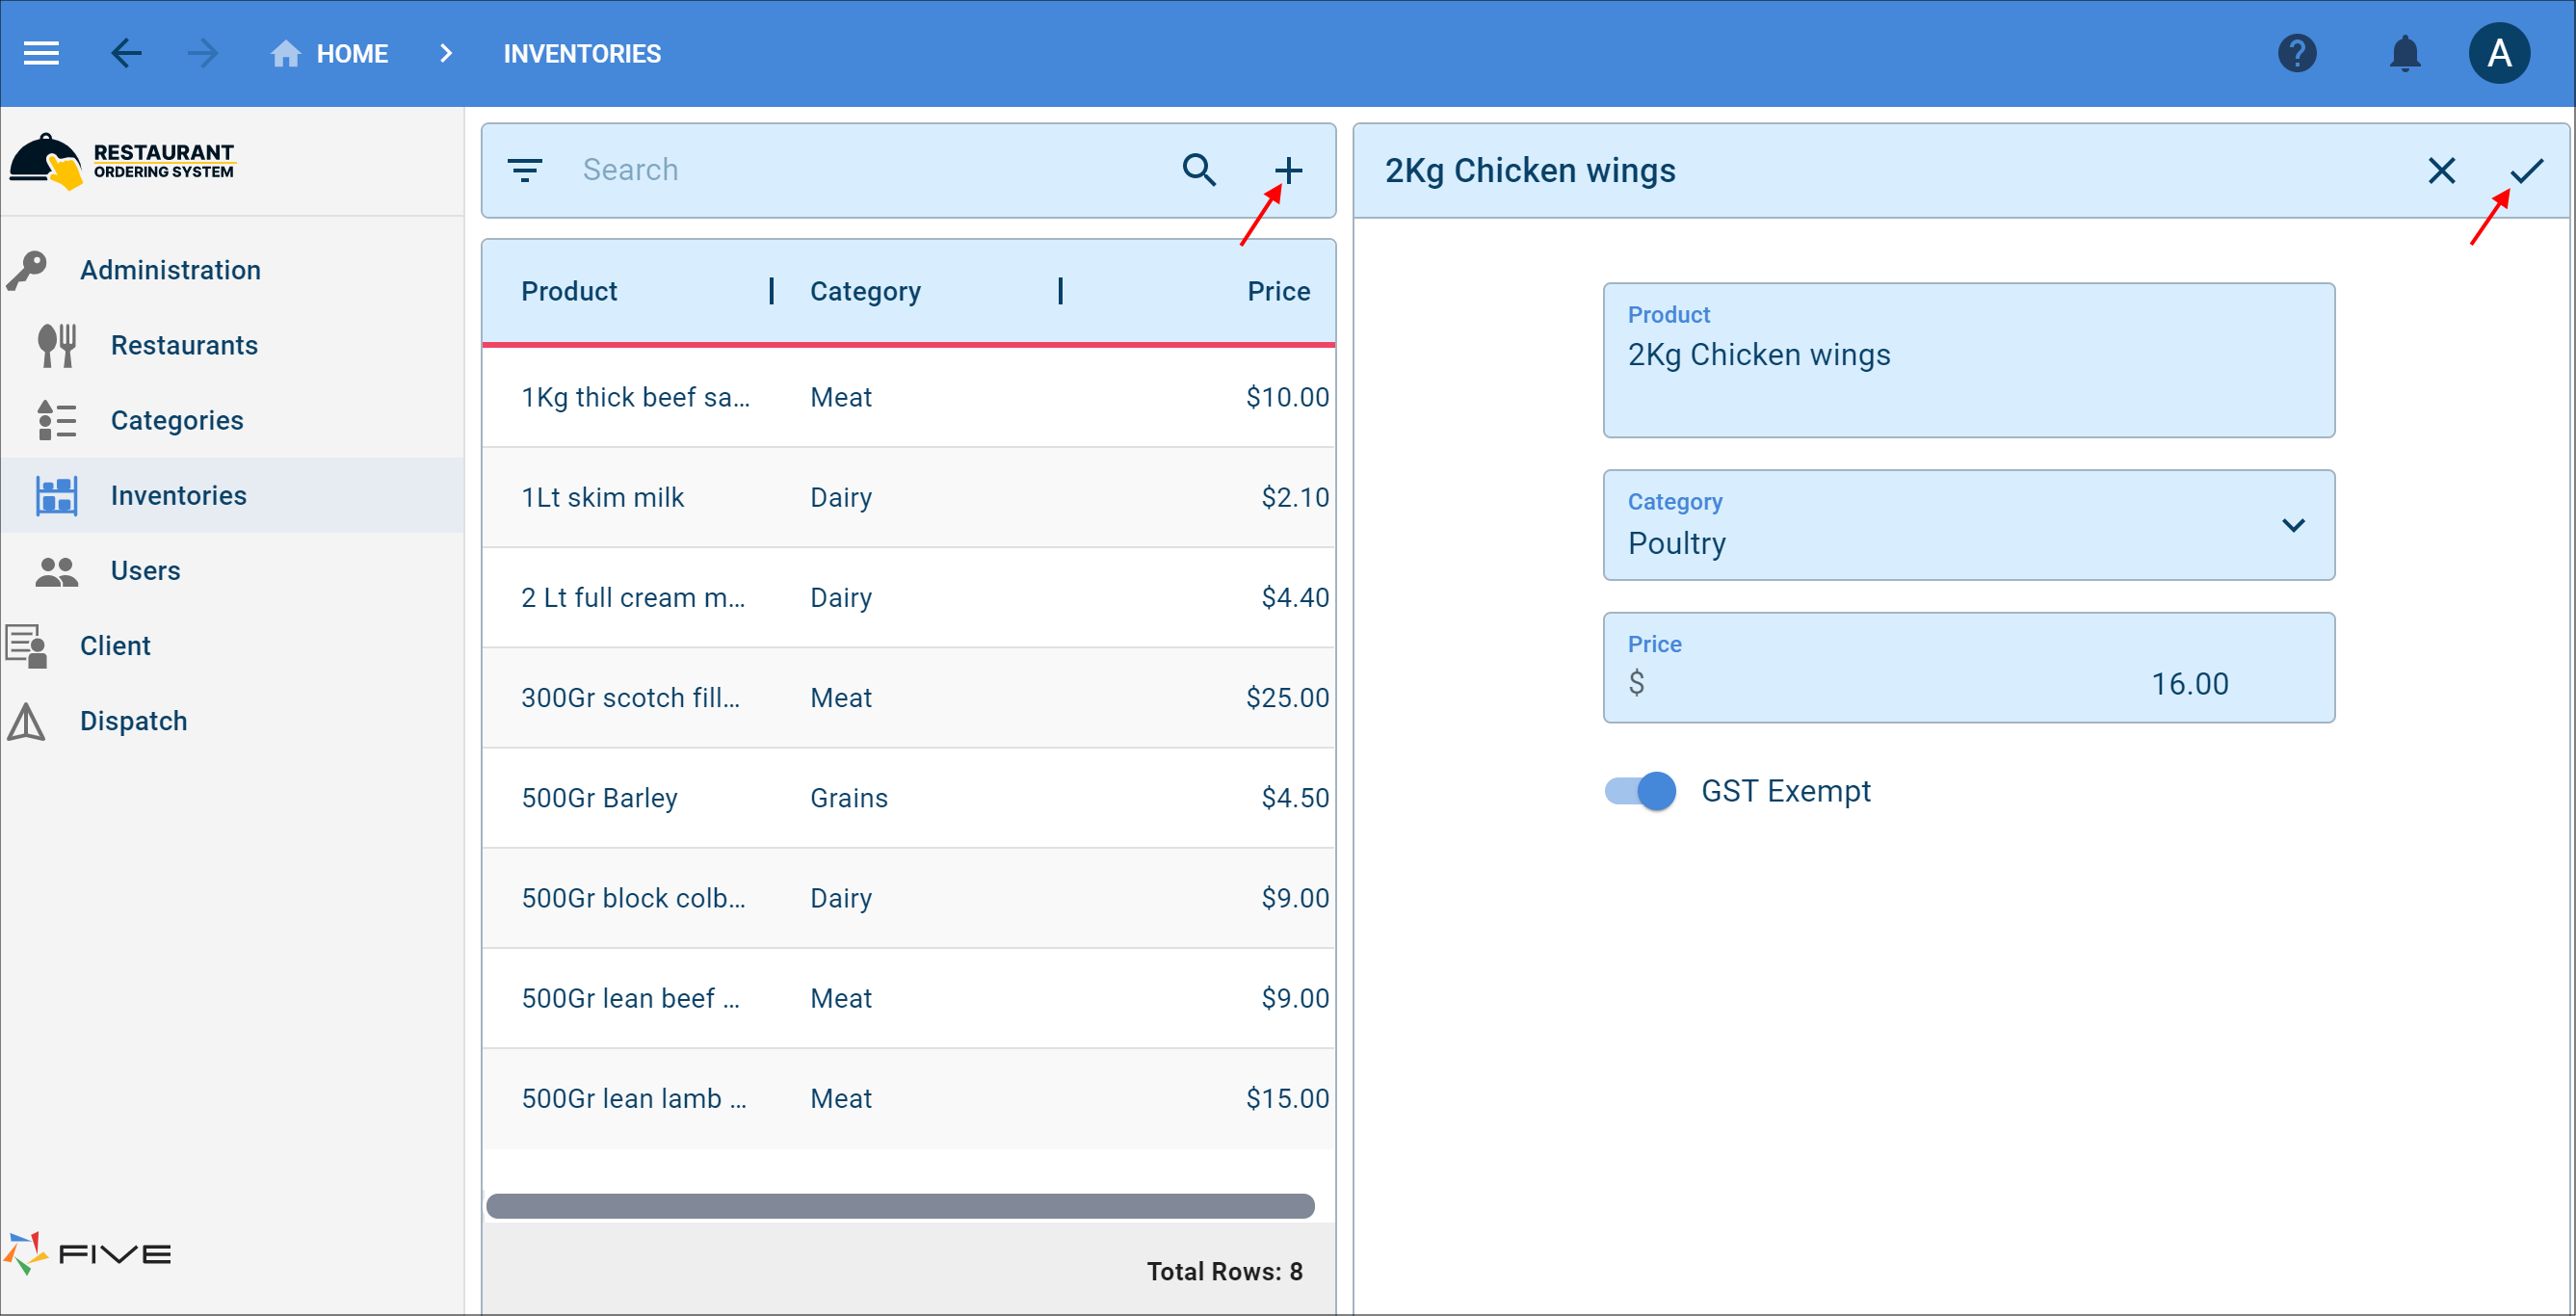
Figure 9 - Add an inventory
Add a Client User
1. Select Users in the menu.2. Click the Add Item button in the list app bar.
3. Type a user ID in the User ID field.
4. Type the user's full name in the Full Name field.
5. Type the user's email in the Email field.
6. Type the user's phone number in the Phone field.
7. Type the user's password in the password field.
8. Click the lookup icon in the Role field and select Client.
9. Click the lookup icon in the User Record field and select the restaurant to link the user to.
10. Click the Save button in the form app bar.
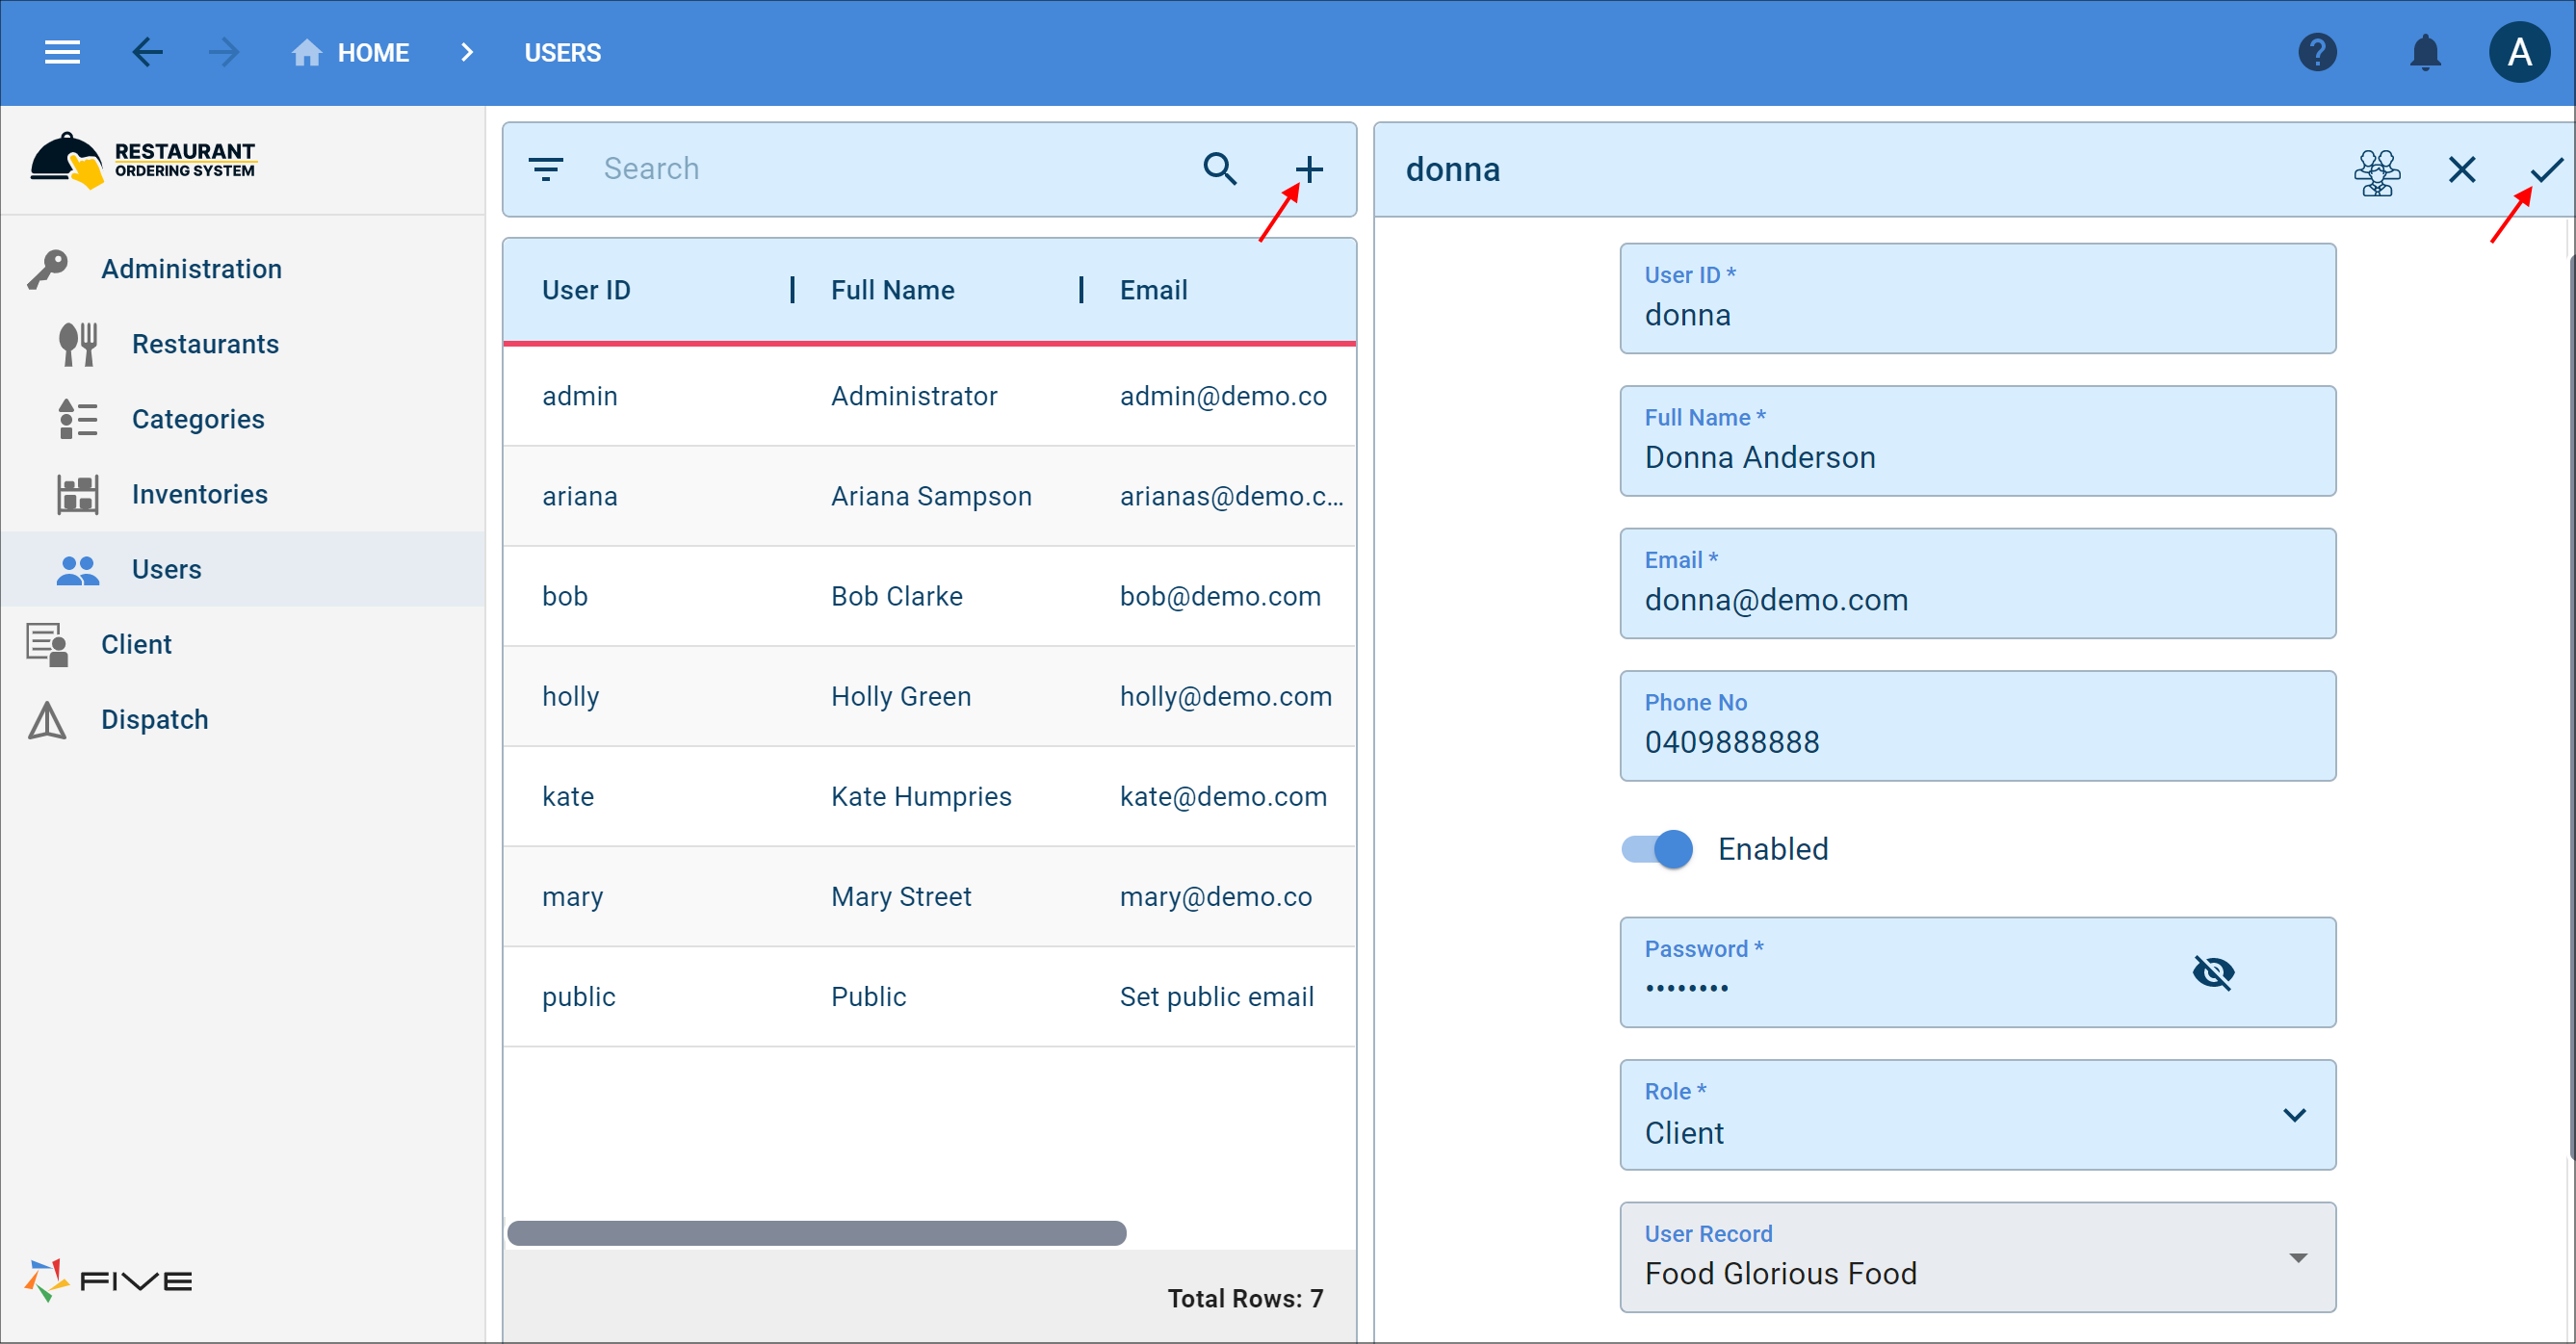
Figure 10 - Add a Client user
Add a Dispatch User
1. Click the Add Item button in the list app bar.2. Type a user ID in the User ID field.
3. Type the user's full name in the Full Name field.
4. Type the user's email in the Email field.
5. Type the user's phone number in the Phone field.
6. Type the user's password in the password field.
7. Click the lookup icon in the Role field and select Dispatch.
8. Click the Save button in the form app bar.
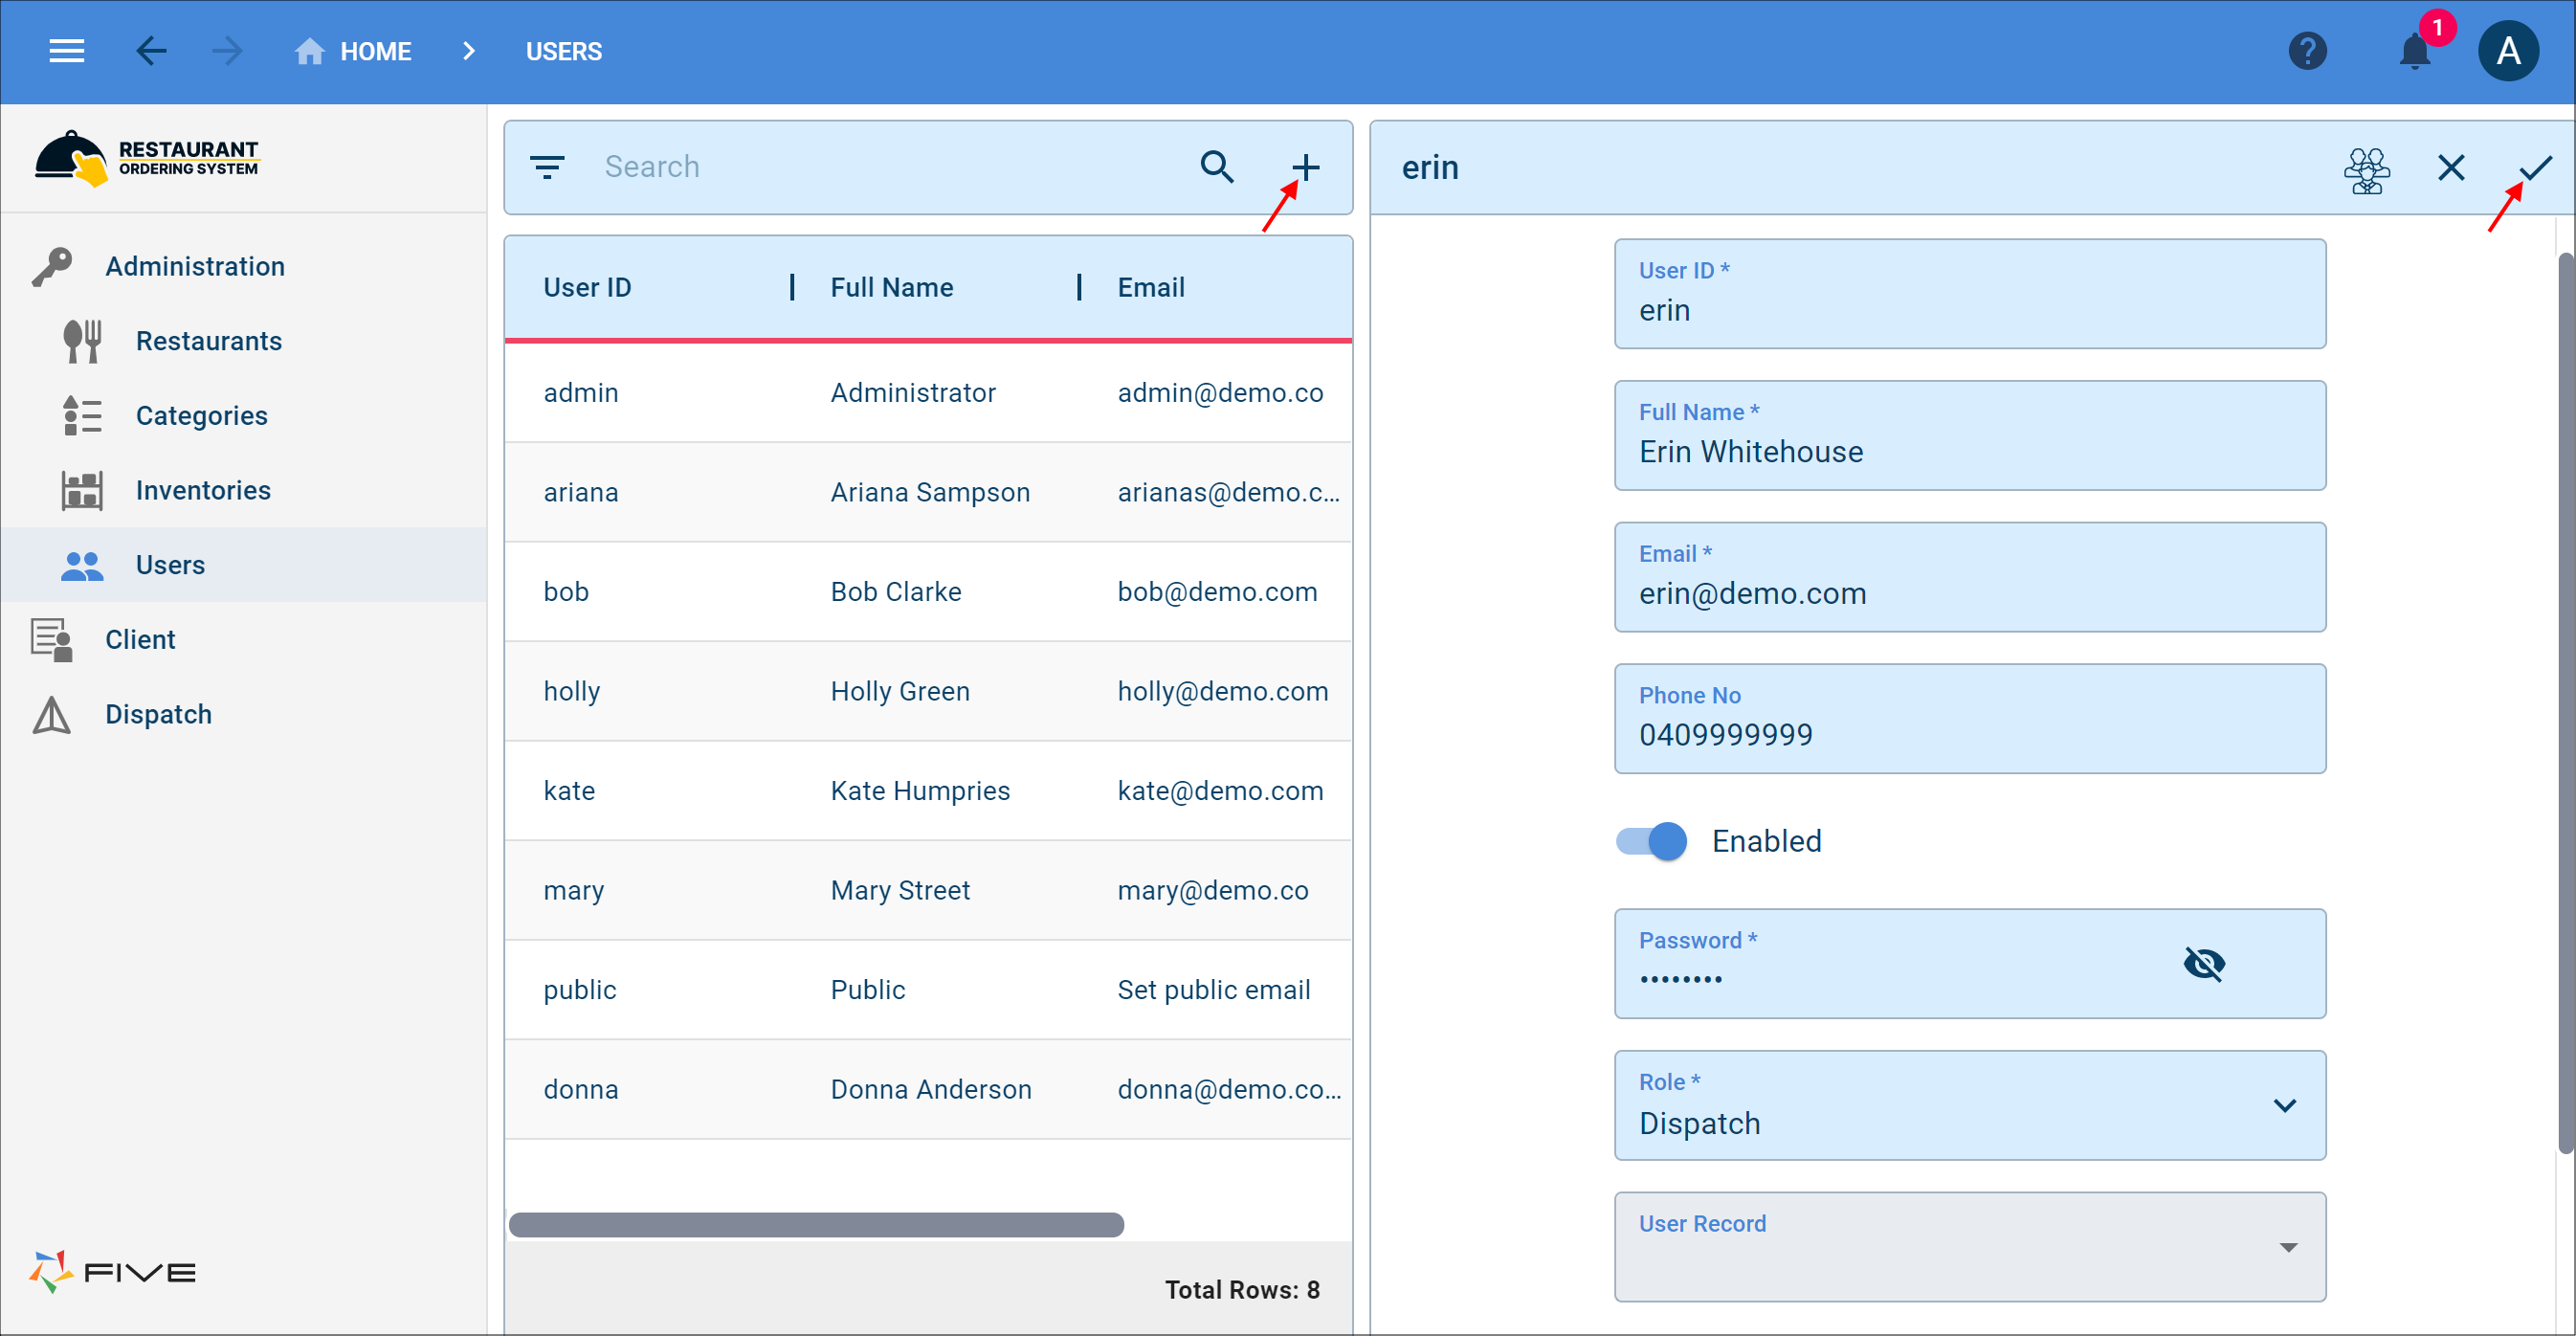
Figure 11 - Add a Dispatch user
info
The Administrator role also has access to the Client and Dispatch menus. These are the menus a client and dispatch will see on their log in. This gives administration the ability to add, edit, or delete orders if required.
Client Login
The following documentation provides the steps required to add records while logged in with the Client role.info
When logging in as a client, the Orders form will be available straight away, unlike when logged in with the Administrator role where a restaurant needs to be selected first to see the orders belonging to the restaurant. Five removes the Restaurant list here as the client is logged in with the restaurant's user account so each restaurant only sees their orders.
Prerequisite - Client login credentials
Add an Order
1. Click the Add Item button in the list app bar.2. Click the lookup icon in the Invoice Address field and select an address.
tip
Only the Billing addresses are available in the lookup due to our Billing Address Query!
3. Click the Calendar icon in the Date field, select the current date and click the OK button.
4. Type a number in the Order Number field.
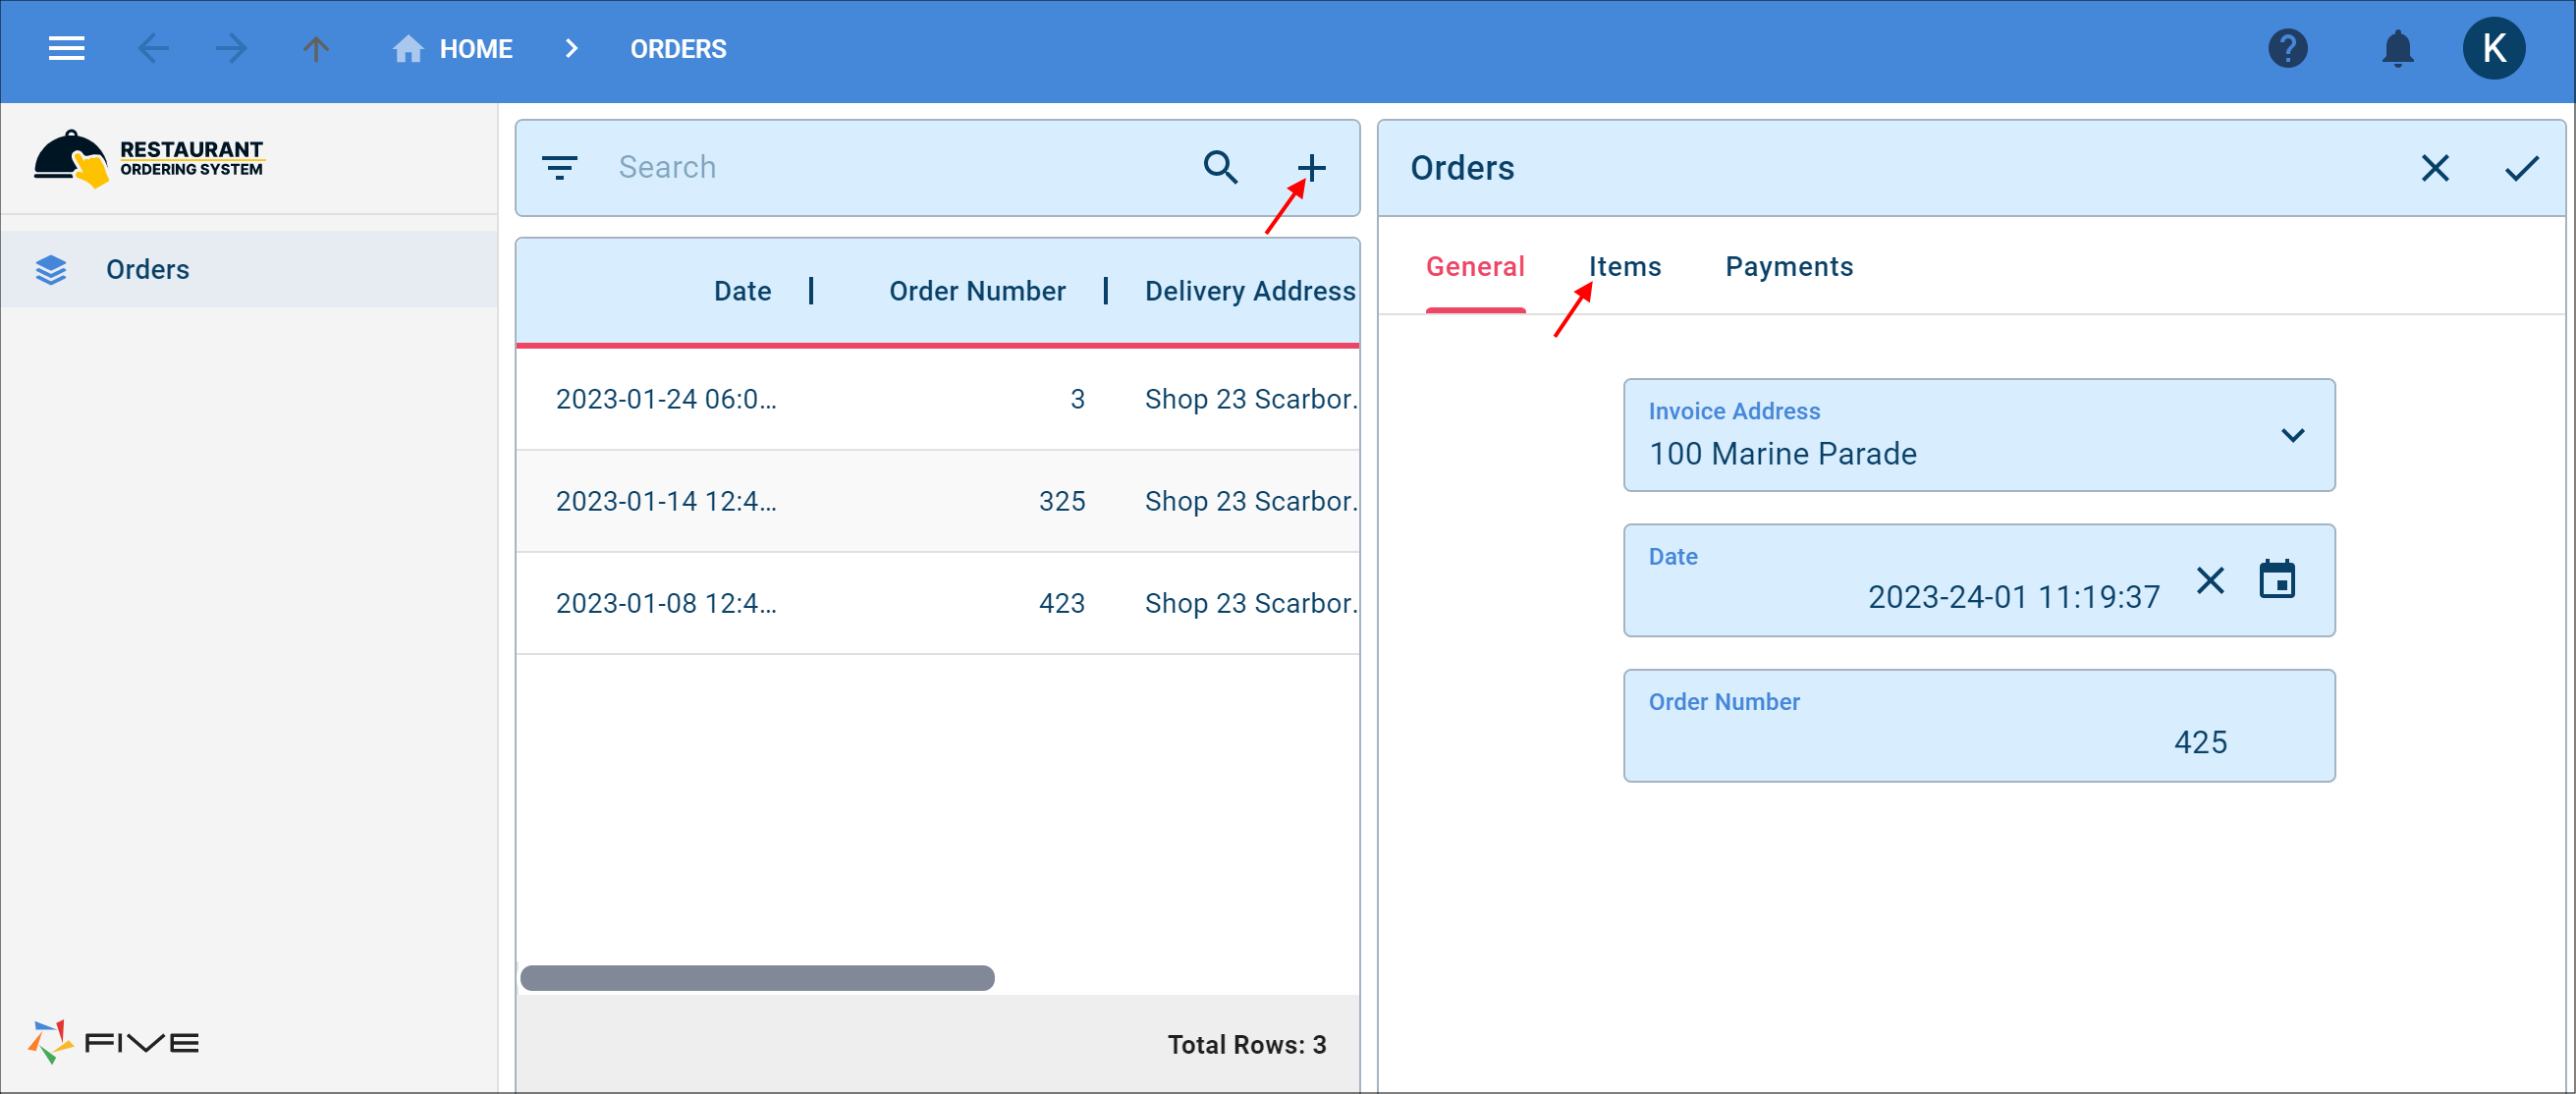
Figure 12 - Add an order
5. Click the Items tab.
6. Click the Add items button.
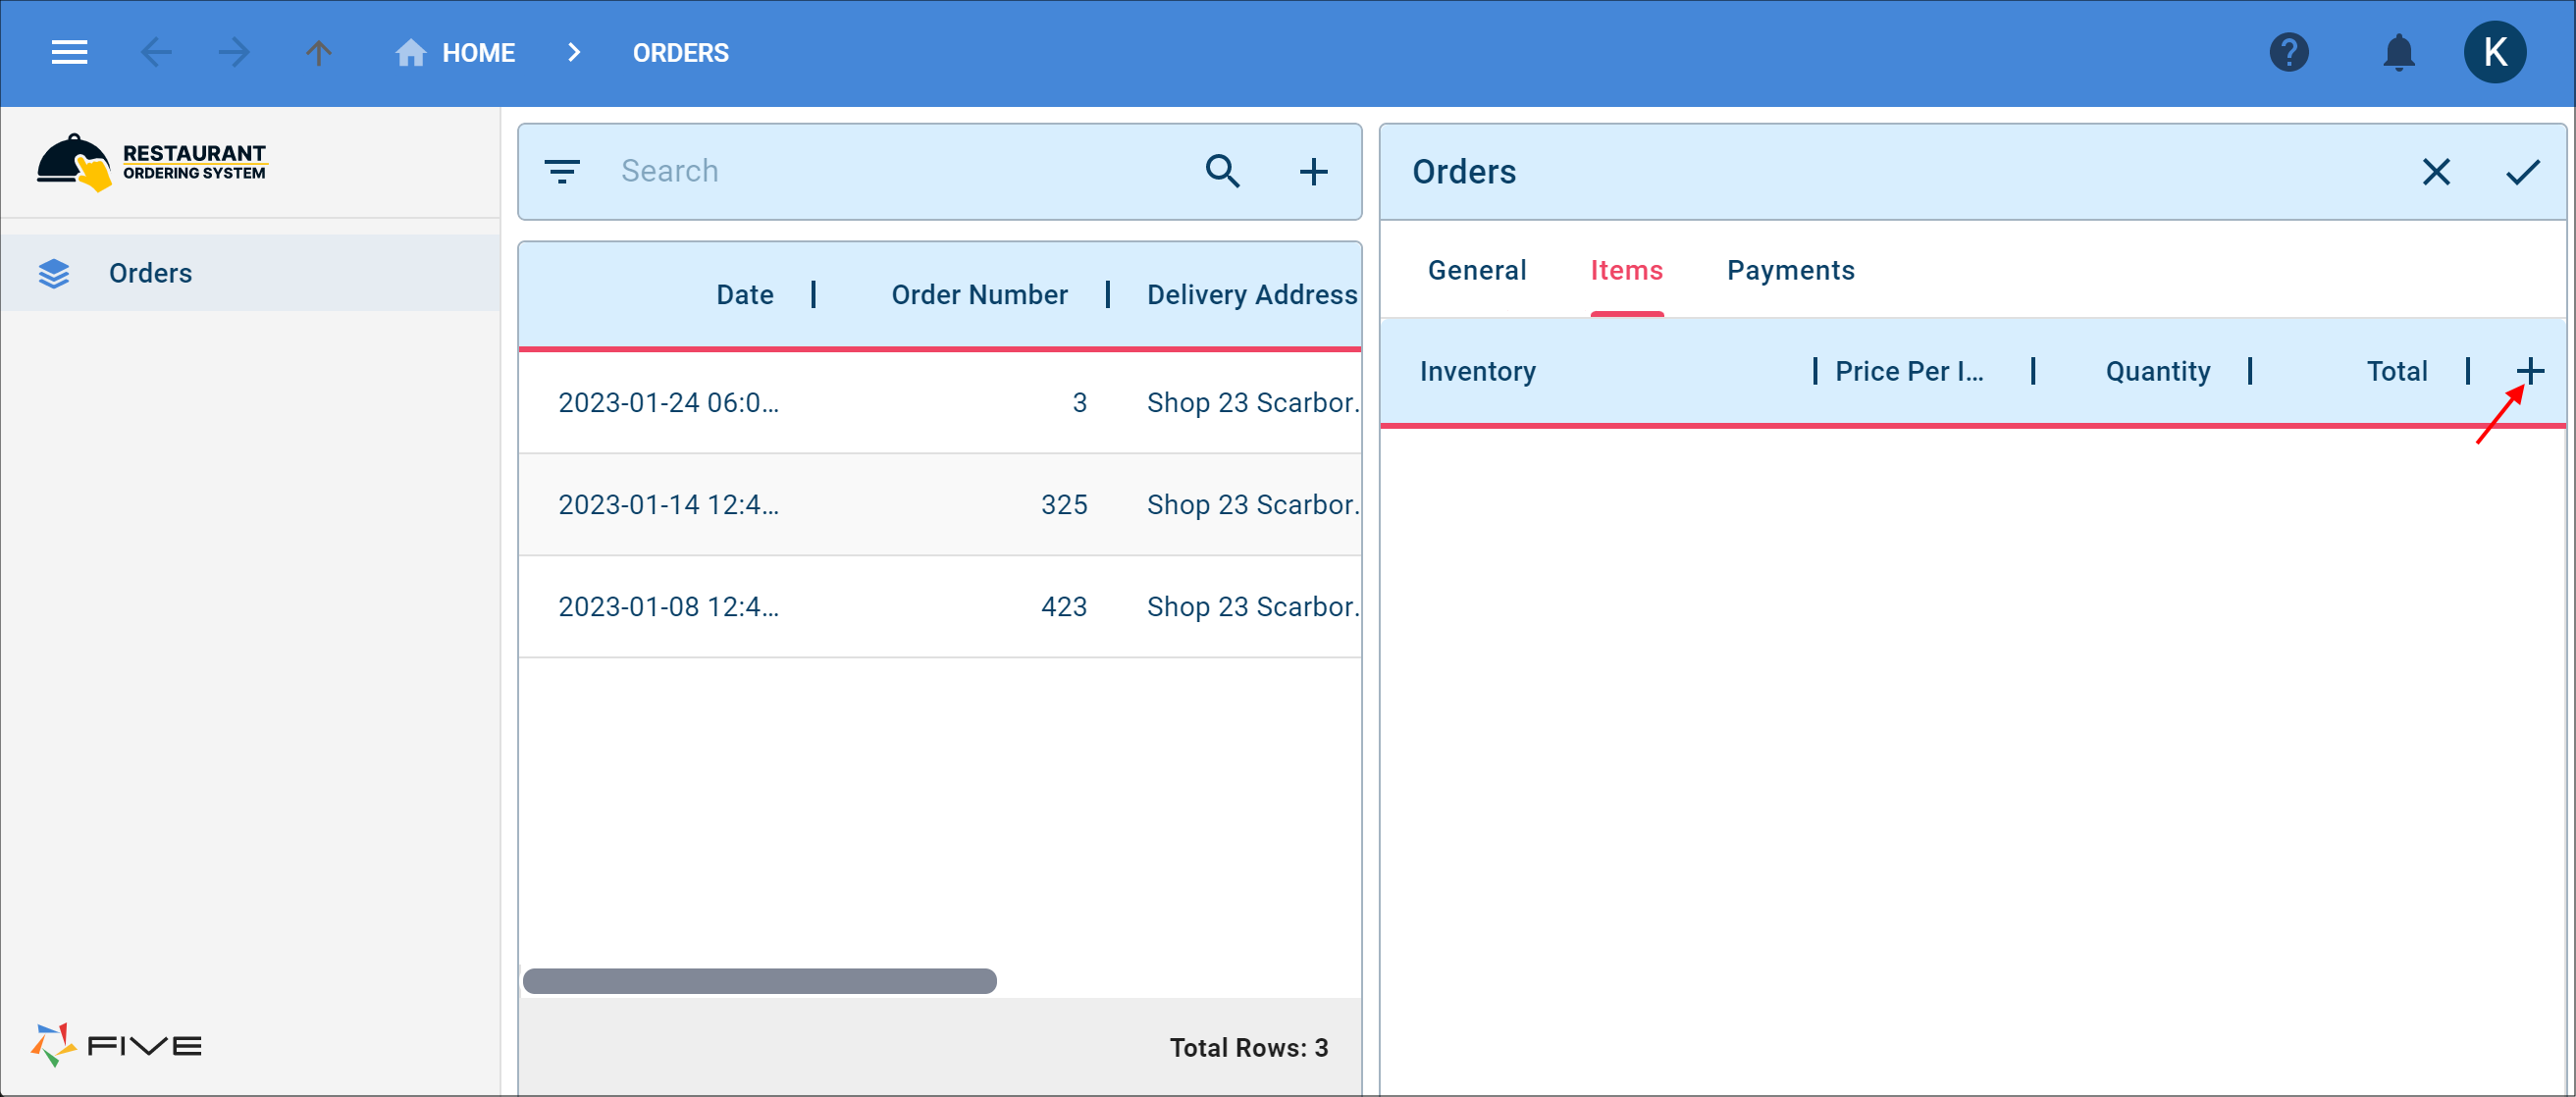
Figure 13 - Add Items button
7. Click the lookup icon in the Category field and select a category.
8. Click the lookup icon in the Inventory field and select an inventory.
9. Type the price in the Price Per Item field.
10. Type a quantity in the Quantity field.
11. Type the total in the Total field.
12. Click the Save button in the form app bar.
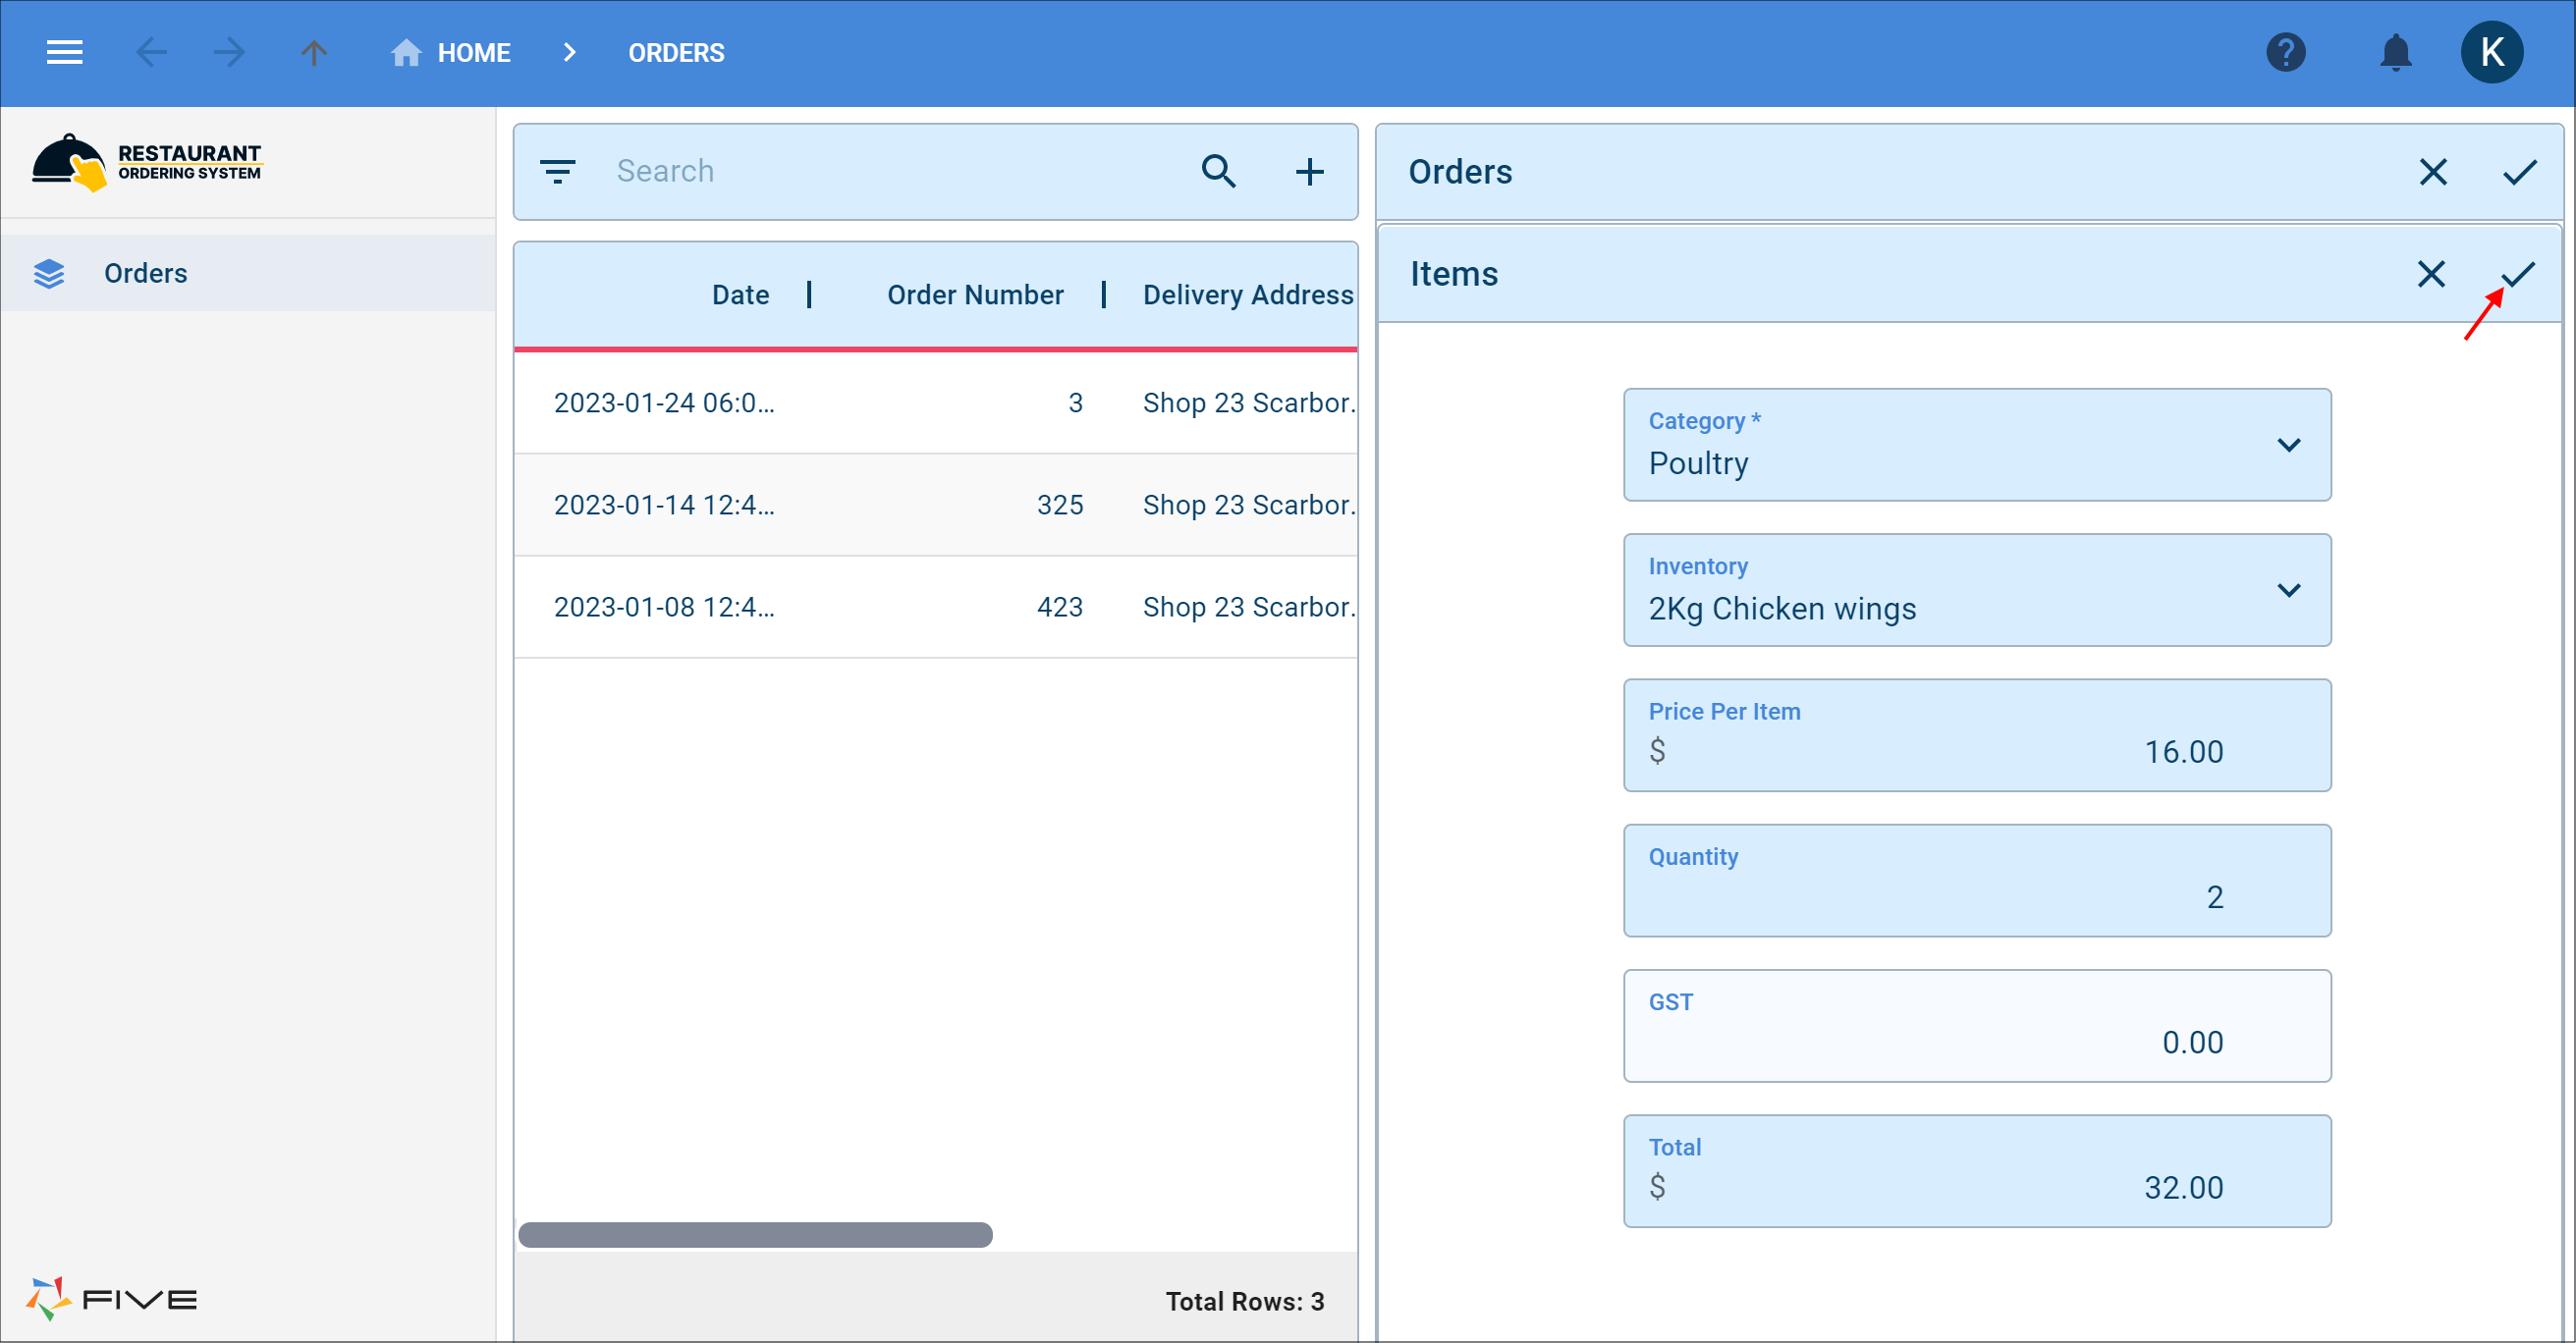
Figure 14 - Add an item
13. Click the Payments tab.
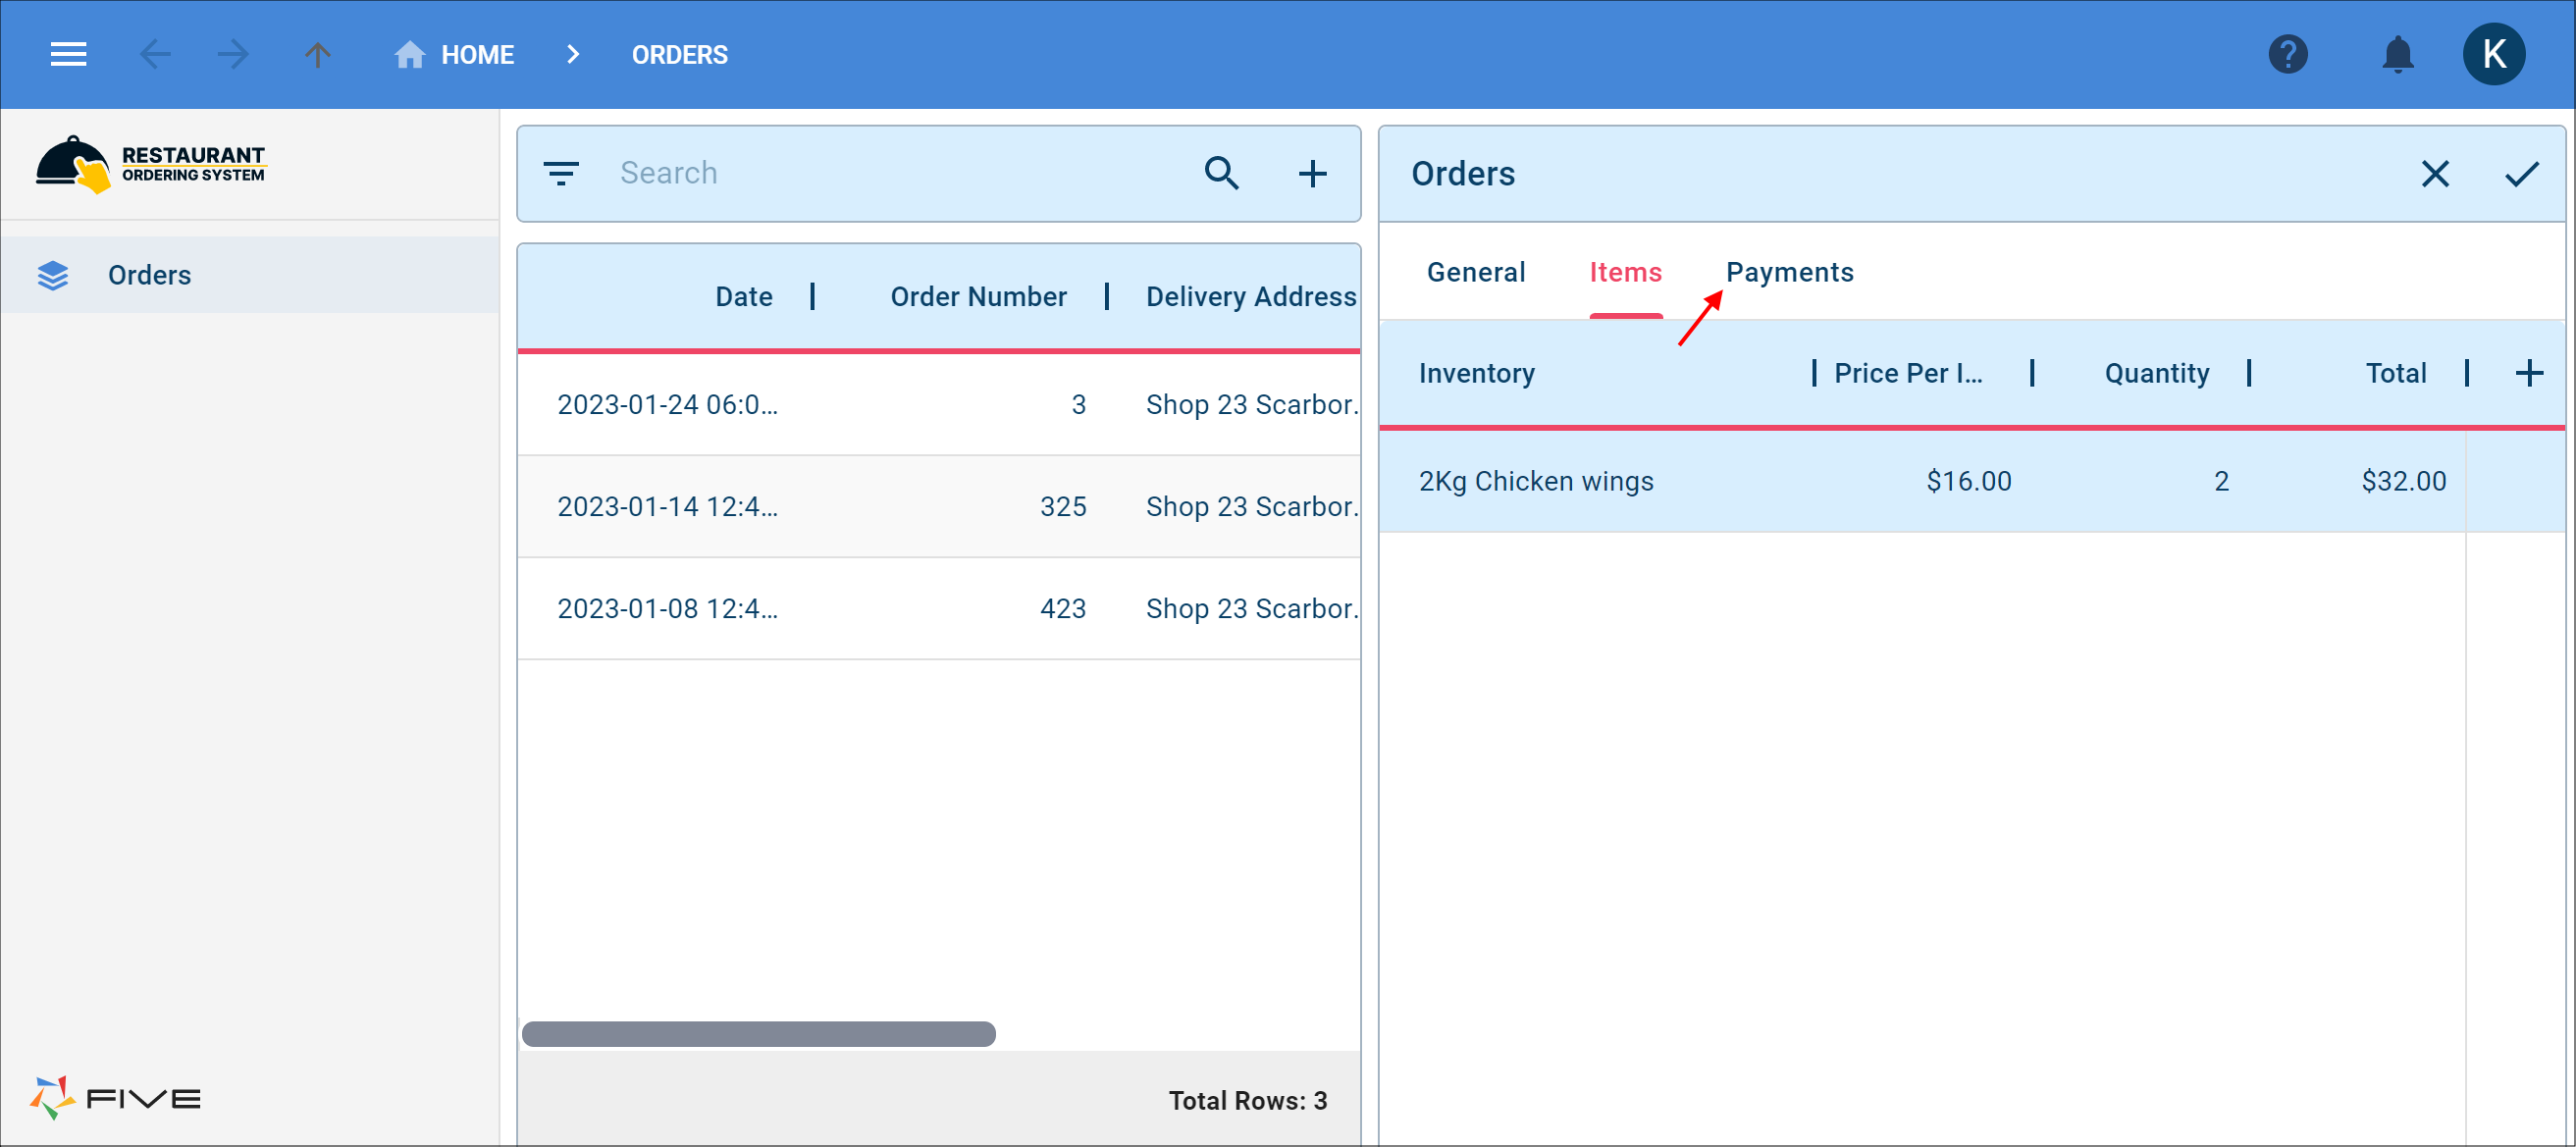
Figure 15 - Payments tab
14. Click the lookup icon in the Delivery Address field and select an address.
tip
Only the Shipping addresses are available in the lookup due to our Shipping Address Query!
15. Type the subtotal in the SubTotal field.
16. Type the total in the Total field.
17. Click the Save button in the form app bar.
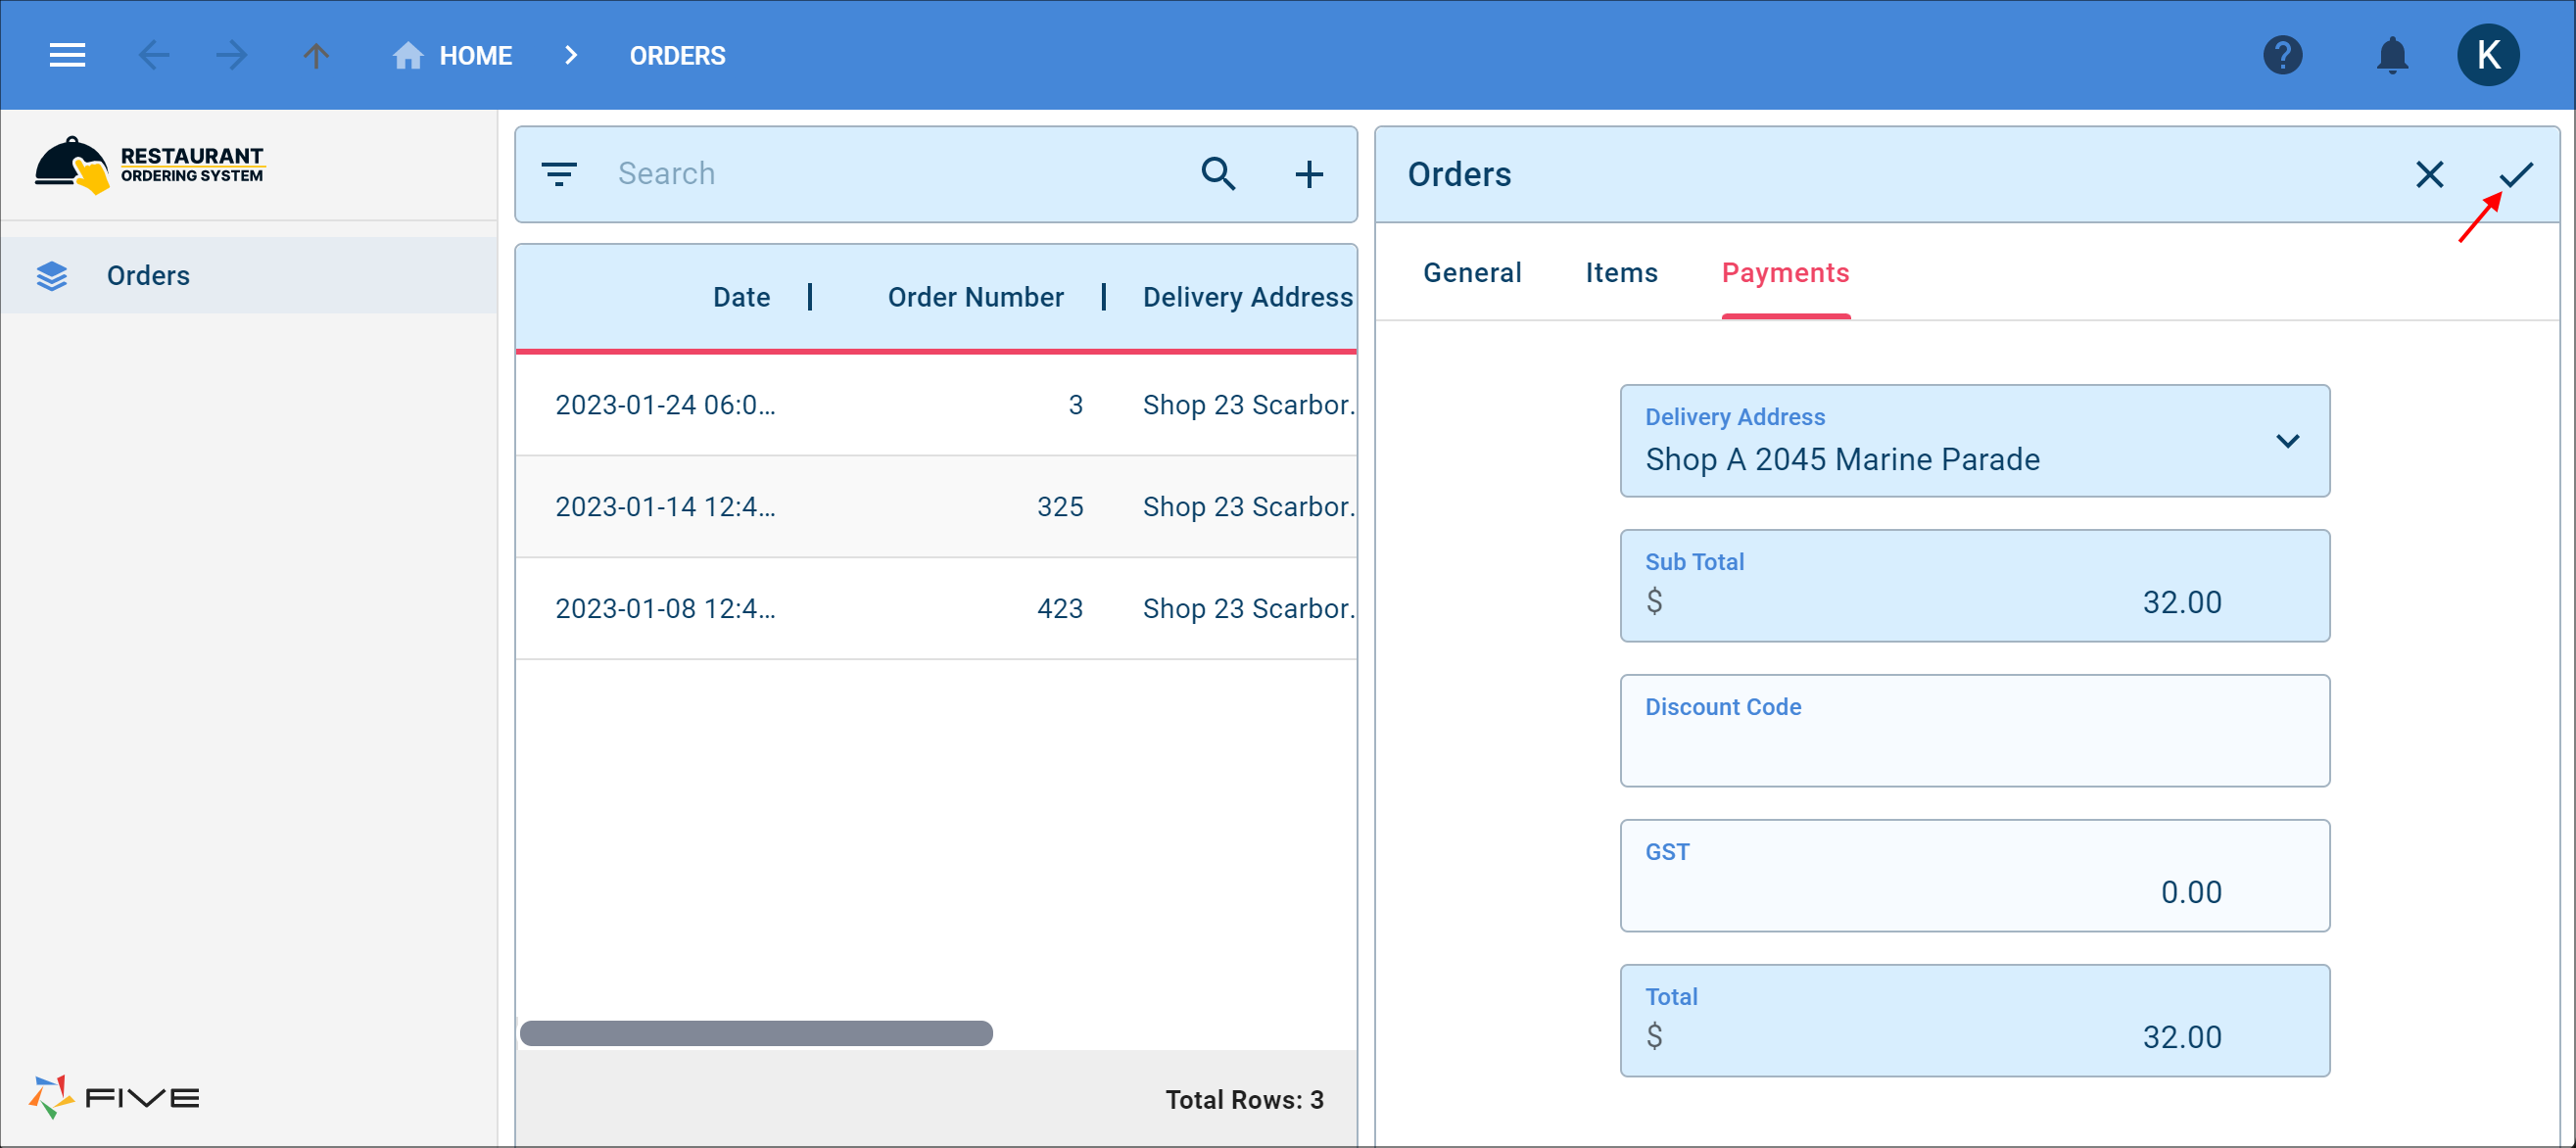
Figure 16 - Add a payment and save the Orders form
Dispatch Login
The following documentation provides the steps required to edit records while logged in with the Dispatch role.Prerequisite - Dispatch login credentials
Edit an Orders Record
1. Select an Orders record in the list.2. Click the Completed switch.
3. Click the Save button in the form app bar.
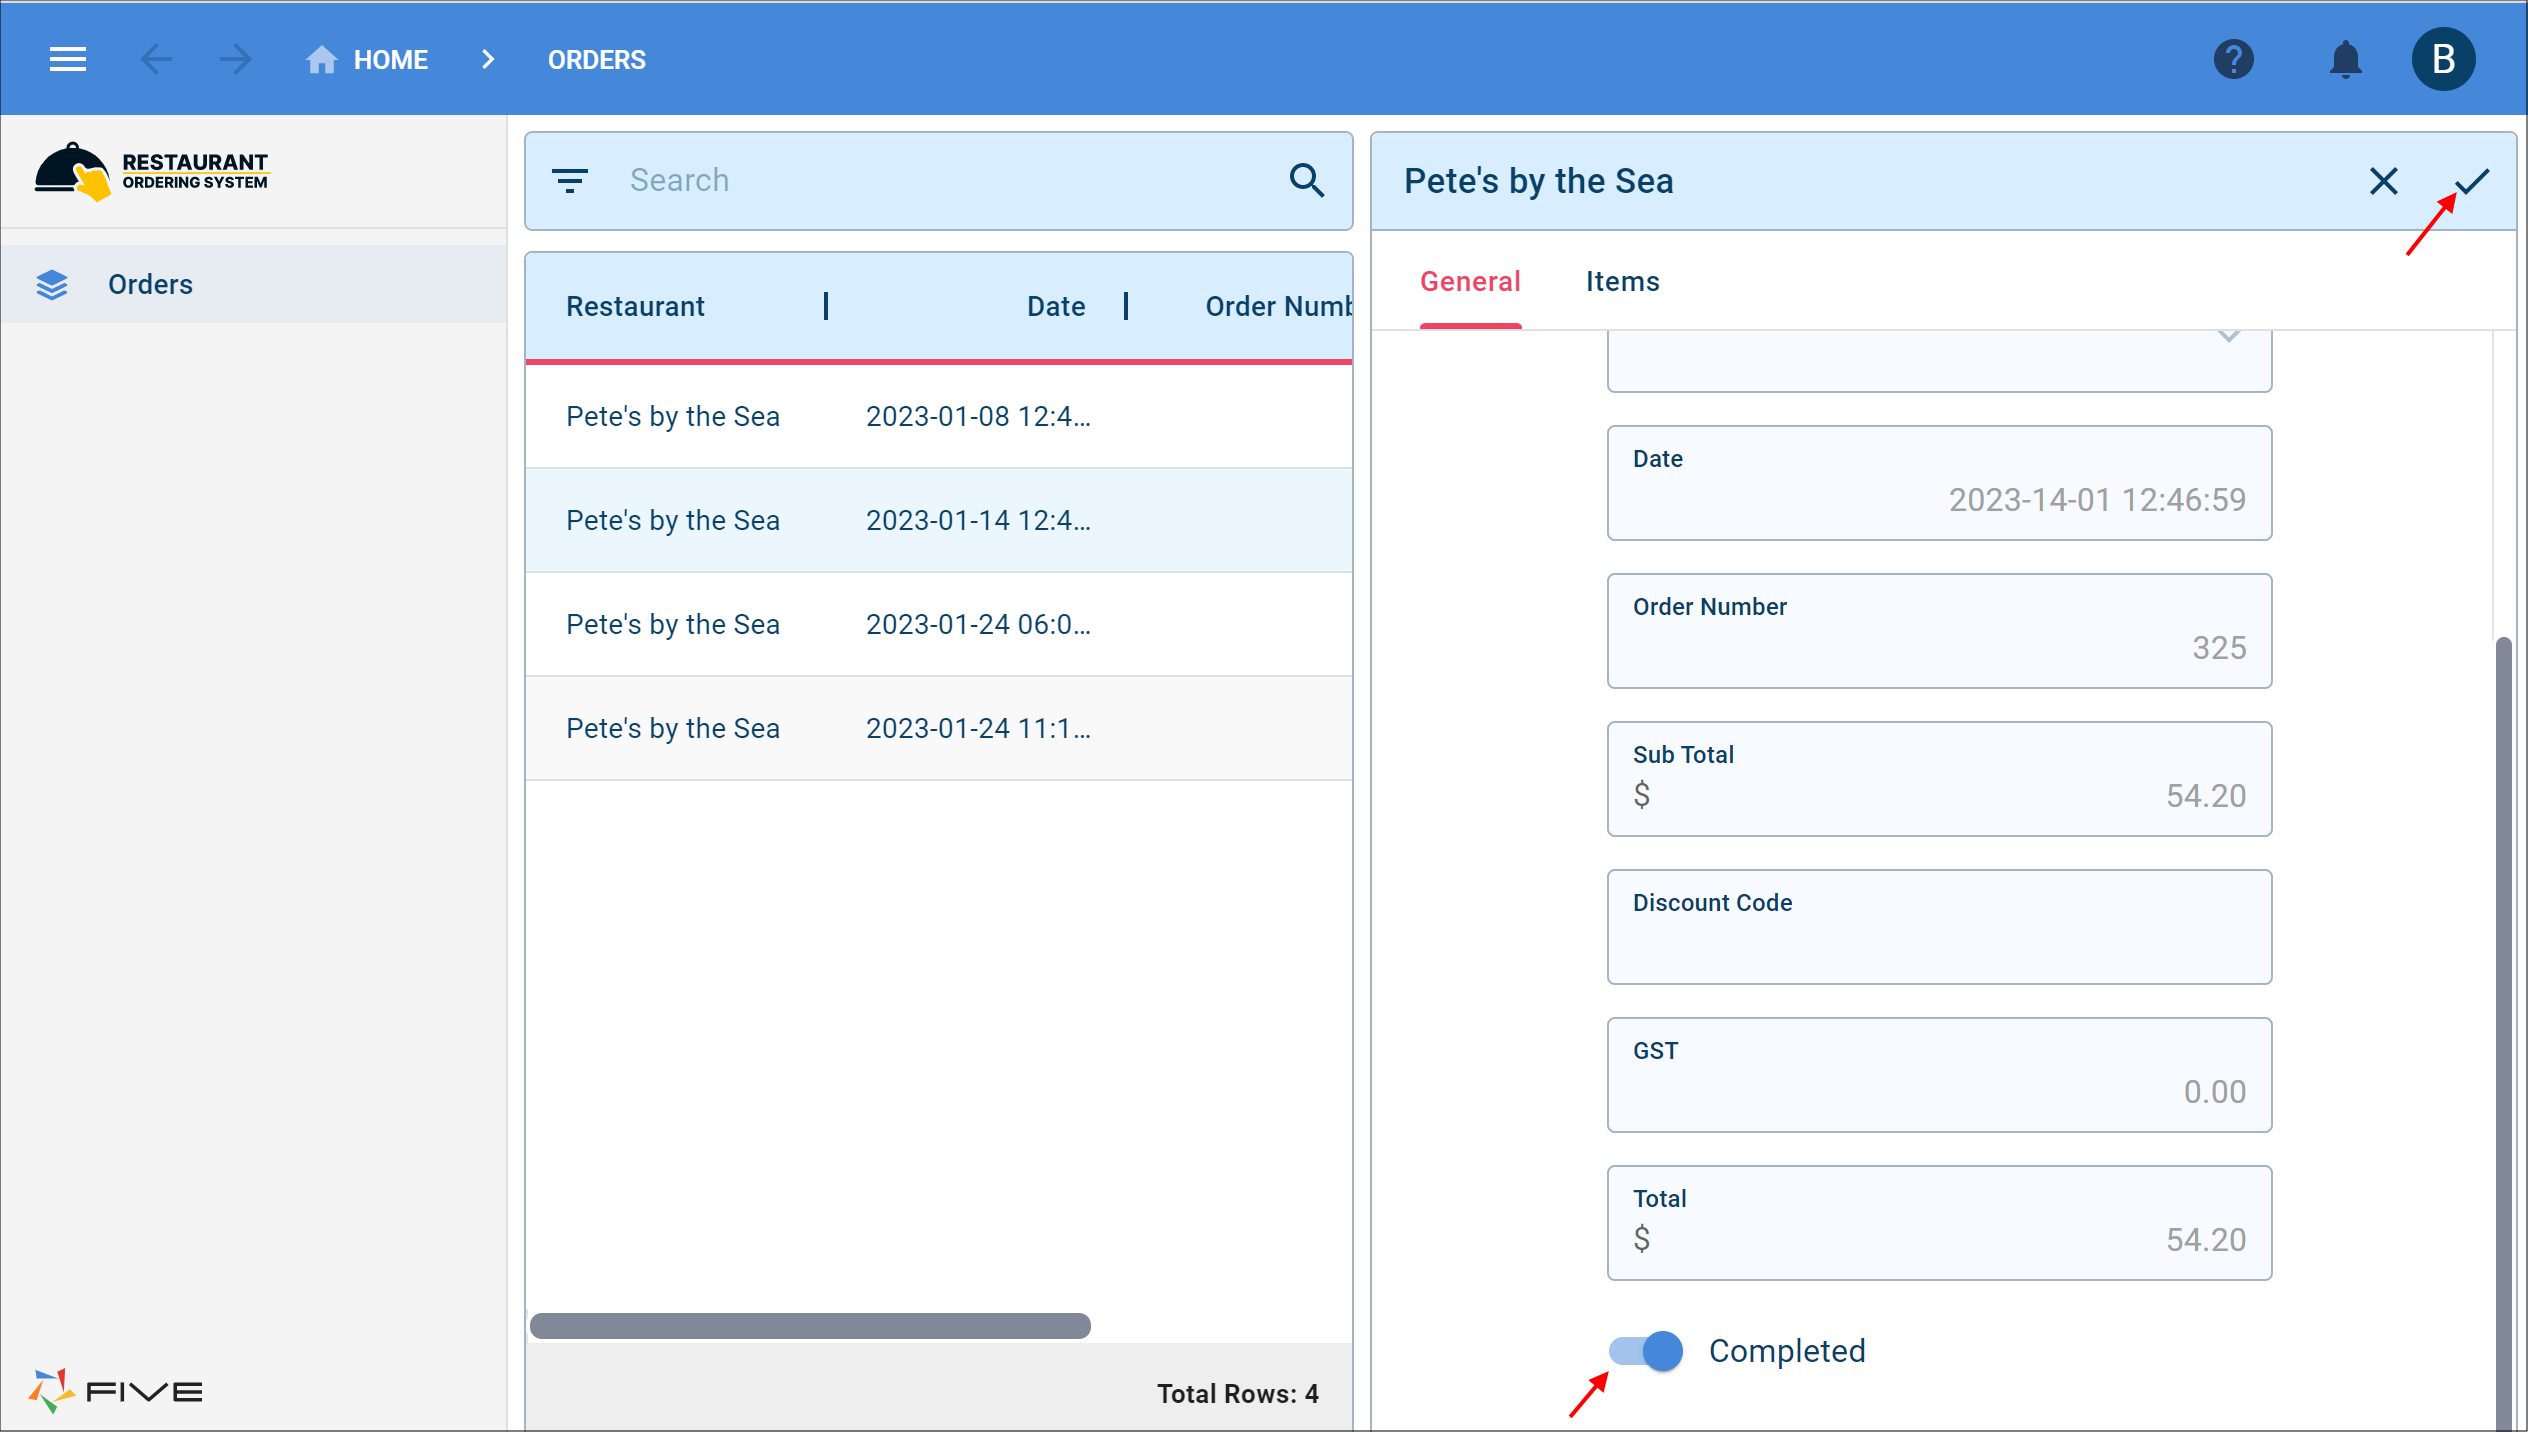
Figure 17 - Complete an order