Create Tables
Last updated 22/12/2022
This chapter will explain how to create the tables for the ROS application. All tables will be created using Five's Table Wizard. Six tables need to be created.tip
At any point throughout your development, you can run the ROS application to check your progress. It will be noted through the documentation when it is a good time to run the ROS app to see the progression. There is also a How the ROS Application Works chapter.
ROS Database Model
Before we begin to build the ROS application, let's see the structure of the database.- The iUser table is injected by Five when you create a multiuser application. This table will be used to store the information of the users in the ROS application. A restaurant can have many users (employees). This allows one or more employees to be assigned to a restaurant to place orders. The relationship between the restaurant and the employee is created by Five through the iUser table.
- A restaurant can place many orders and have many addresses.
- Multiple addresses can be stored and can belong to many orders.
- A category can have many inventories.
- Item is a many-to-many relationship between order and inventory.
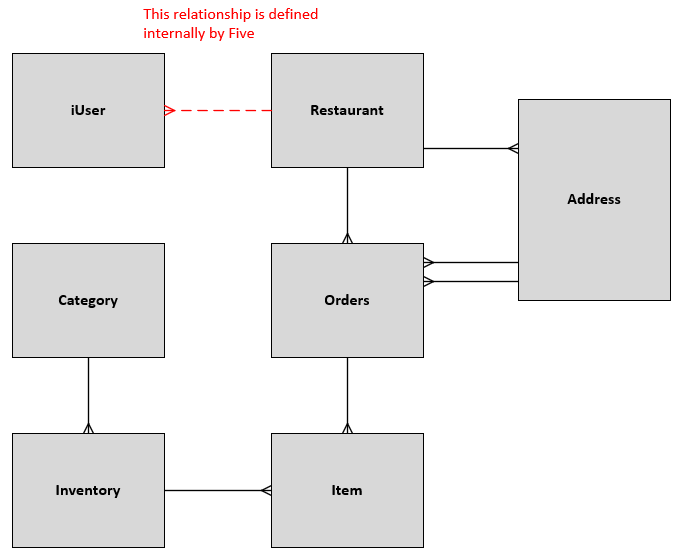
Figure 1 - ROS database model
Navigate to Tables
1. Click the Manage button in the form app bar.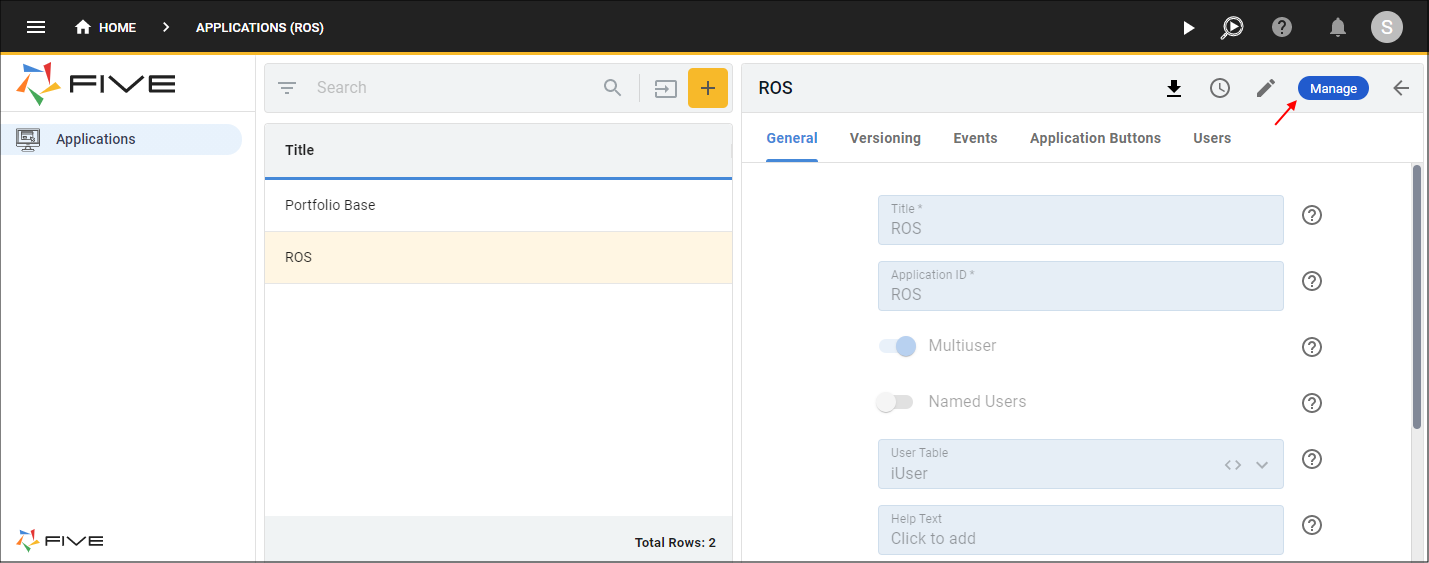
Figure 2 - Manage button
2. Select Tables in the menu.
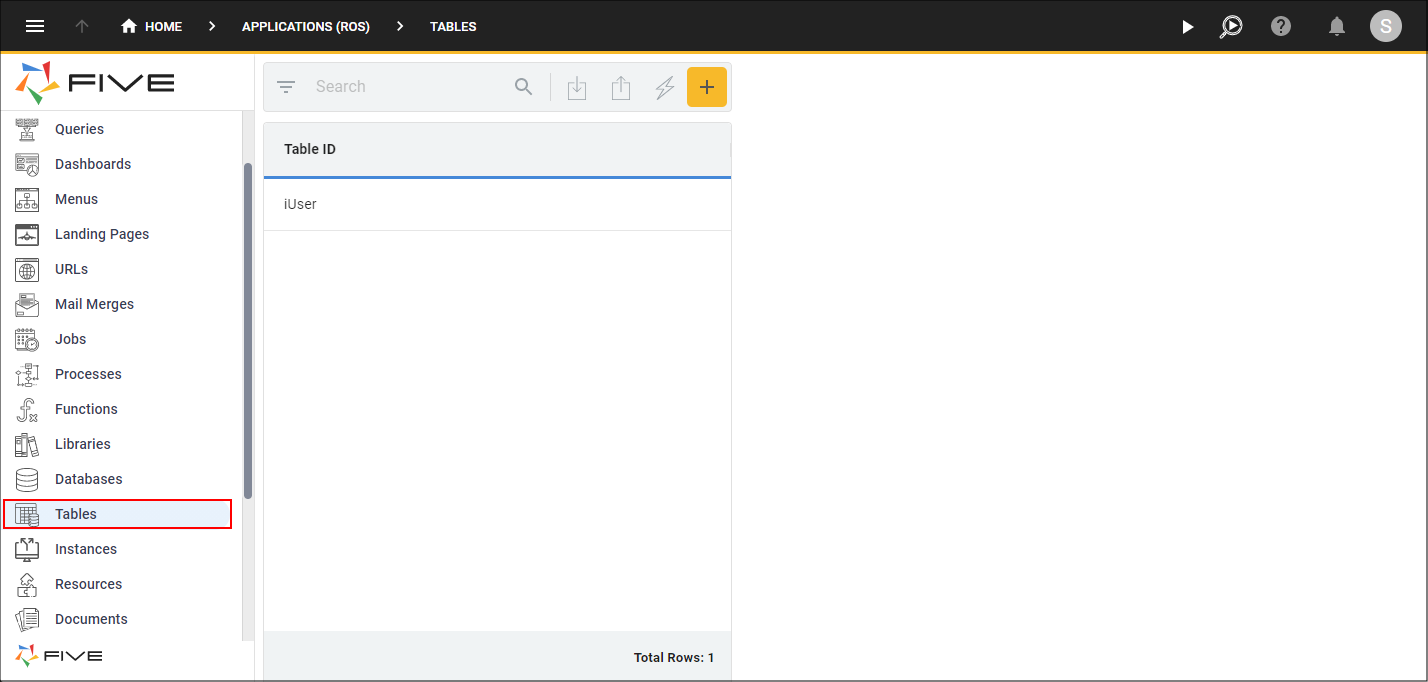
Figure 3 - Tables menu item
Create the Restaurant Table
1. Click the New Table Wizard button in the list app bar.2. Type Restaurant in the Name field.
3. Click the Add Fields button.
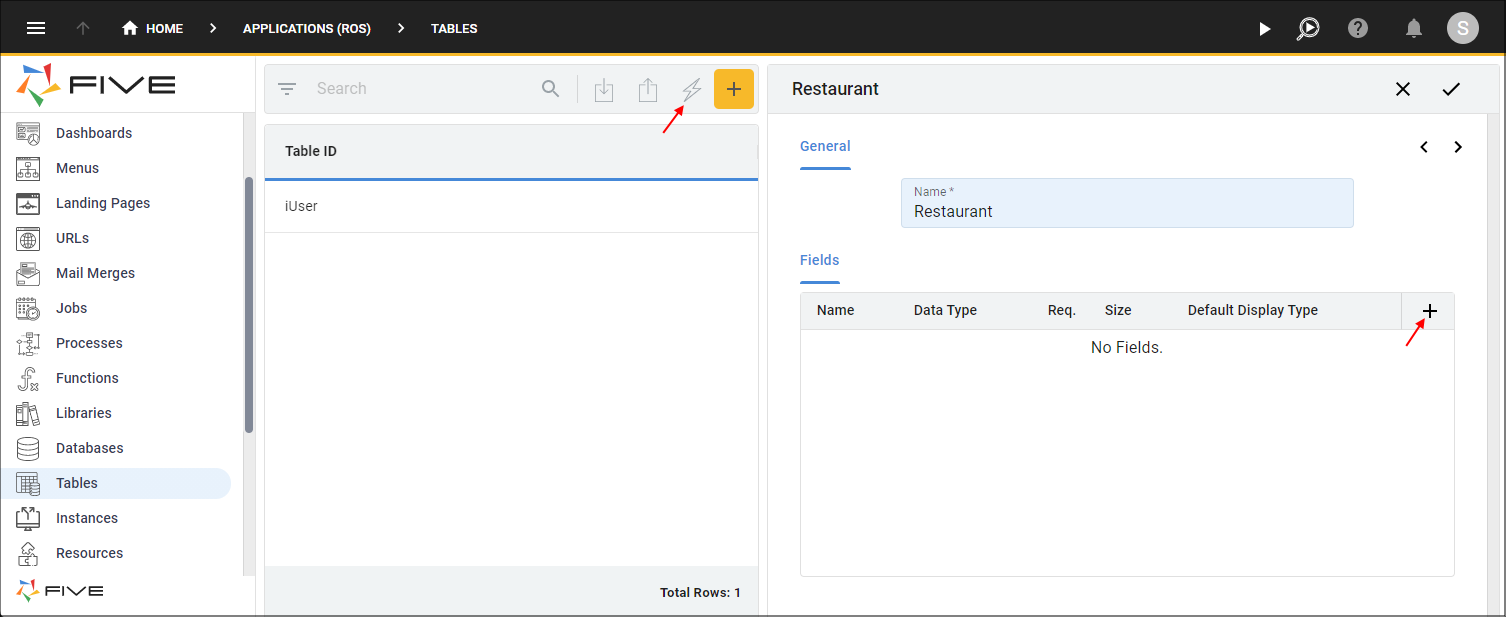
Figure 4 - Add the Restaurant table
4. Type Name in the Name field.
5. Type 100 in the Size field.
6. Click the Add Fields button.
7. Type ABN in the Name field.
8. Click the Req. checkbox.
9. Type 20 in the Size field.
10. Click the Save button in the Table Wizard app bar.

Figure 5 - Add the fields and save the Restaurant table
Create the Address Table
1. Click the New Table Wizard button in the list app bar.2. Type Address in the Name field.
3. Click the Add Fields button.
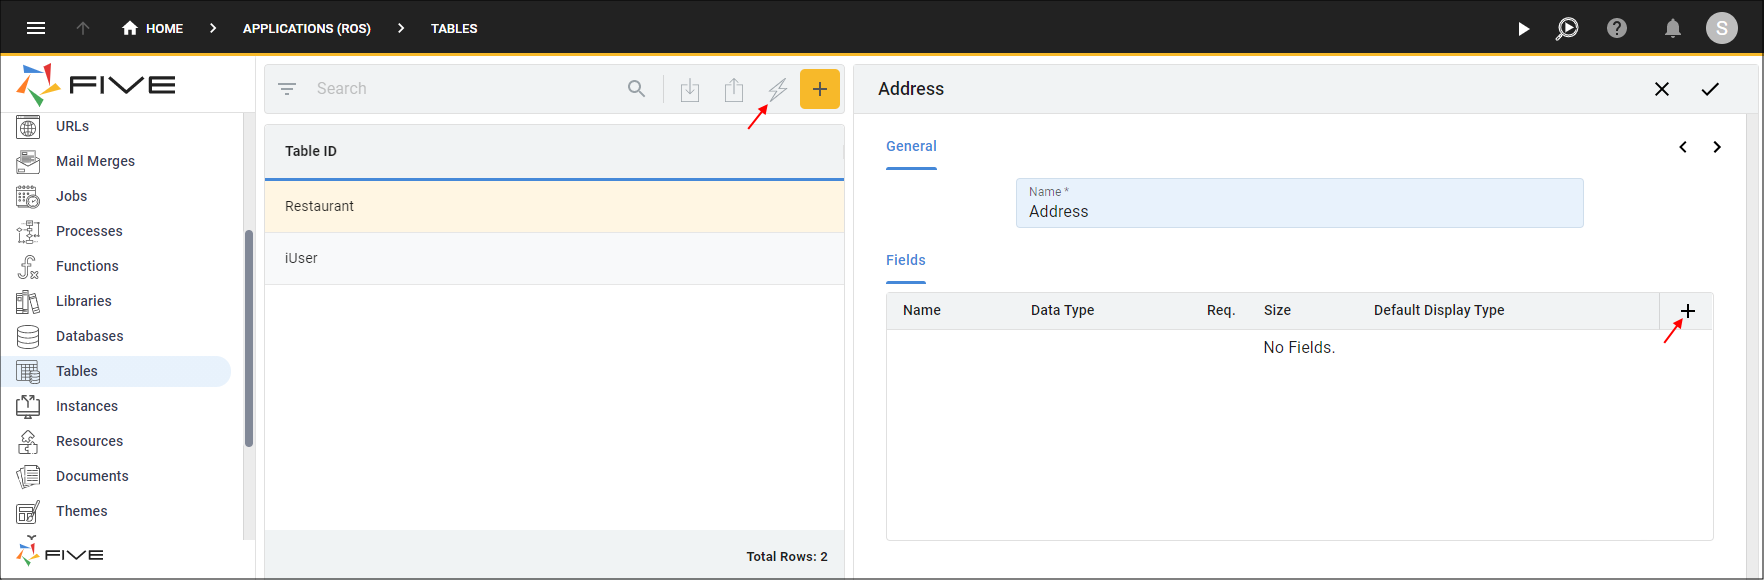
Figure 6 - Add the Address table
4. Type Name in the Name field.
5. Type 100 in the Size field.
6. Click the Add Fields button.
7. Type Type in the Name field.
8. Click the Req. checkbox.
9. Type 50 in the Size field.
10. Click the lookup icon in the Default Display Type field and select _Combo.
11. Click the Add Fields button.
12. Type AddressLine1 in the Name field.
13. Click the Req. checkbox.
14. Type 100 in the Size field.
15. Click the Add Fields button.
16. Type AddressLine2 in the Name field.
17. Type 100 in the Size field.
18. Click the Add Fields button.
19. Type Suburb in the Name field.
20. Click the Req. checkbox.
21. Type 50 in the Size field.
22. Click the Add Fields button.
23. Type State in the Name field.
24. Type 50 in the Size field.
25. Click the Add Fields button.
26. Type PostCode in the Name field.
27. Click the lookup icon in the Data Type field and select Integer.
28. Click the Req. checkbox.
29. Click the Next button.
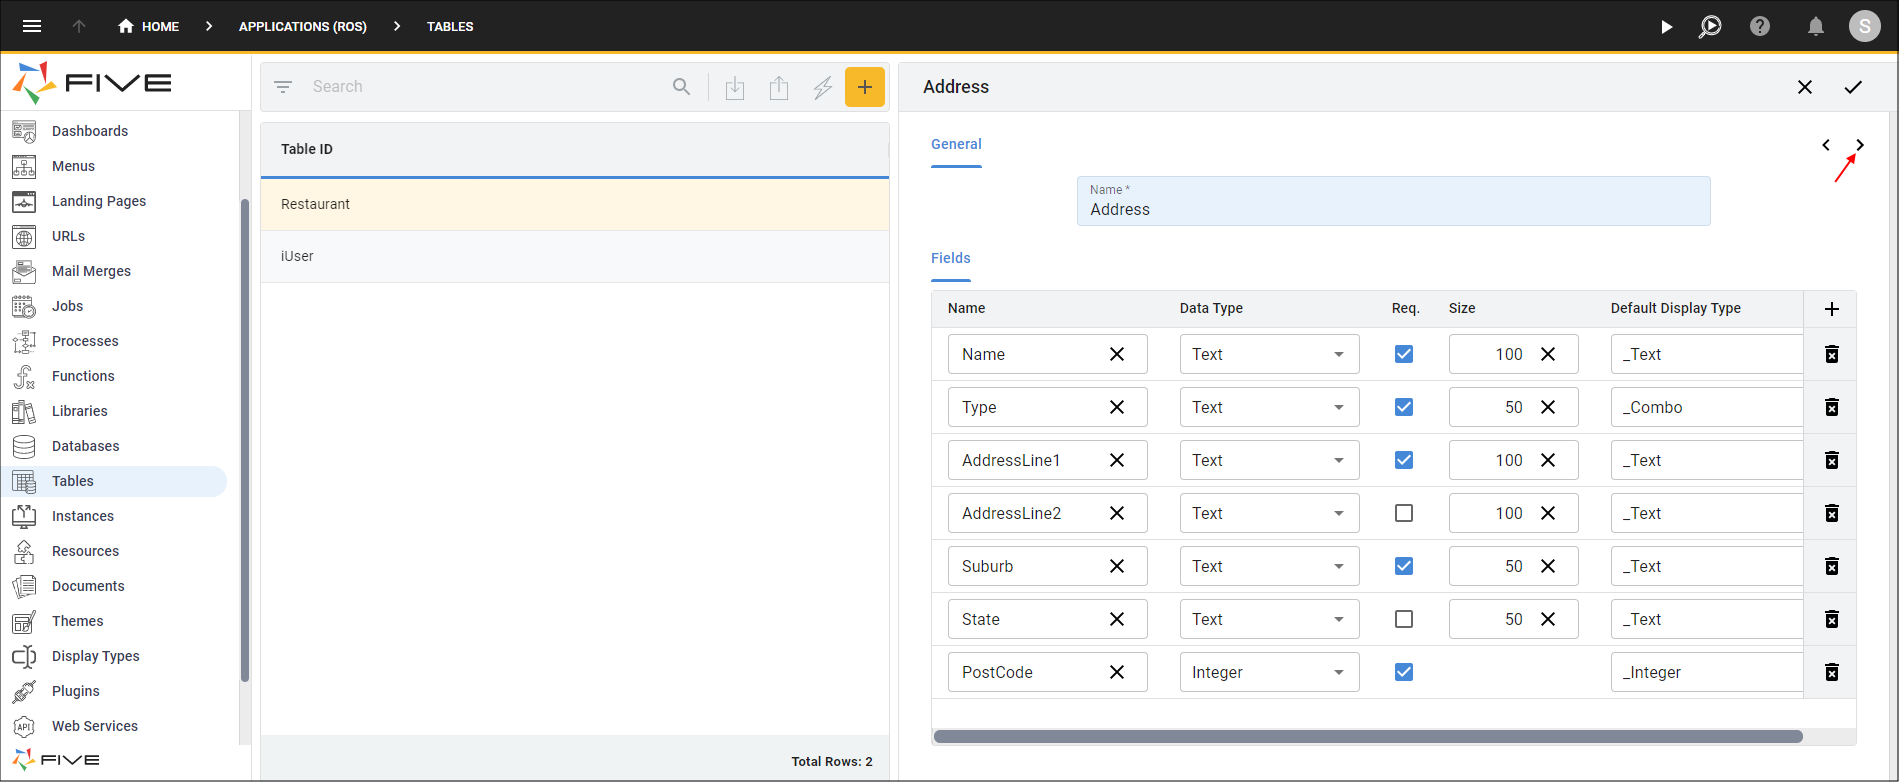
Figure 7 - Add the fields for the Address table
30. Click the Add Relationships button.
31. Click the lookup icon in the Table field and select Restaurant in the list.
32. Click the Required checkbox.
33. Click the Save button in the Table Wizard app bar.
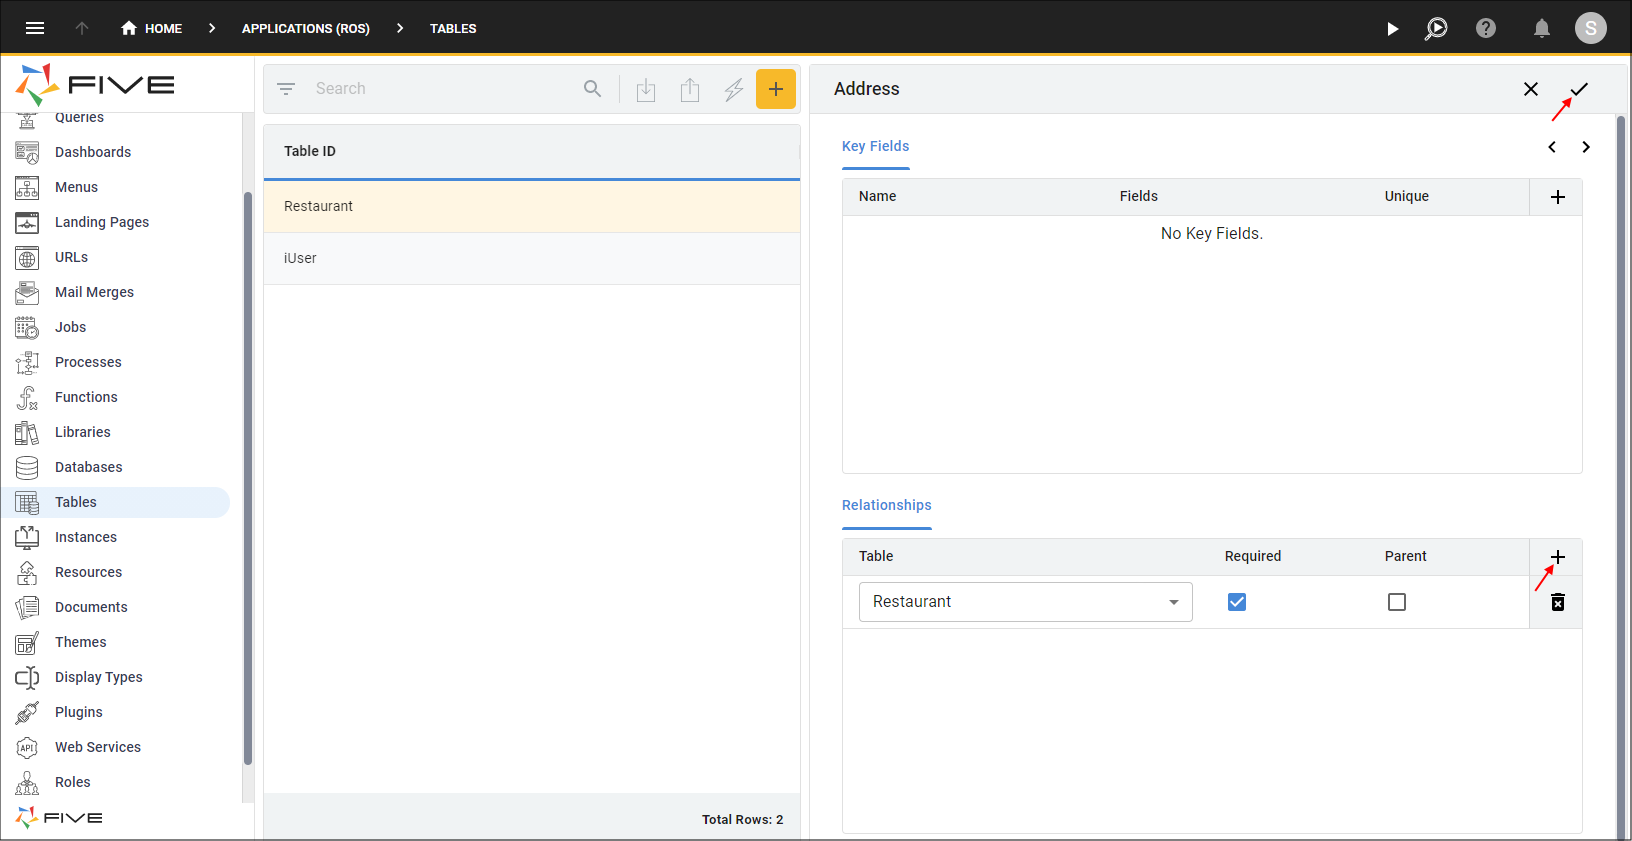
Figure 8 - Add the relationship and save the Address table
Create the Orders Table
1. Click the New Table Wizard button in the list app bar.2. Type Orders in the Name field.
tip
To be able to save the Orders table, it needs to be in a plural form as Order is a reserved word in MySQL.
3. Click the Add Fields button.
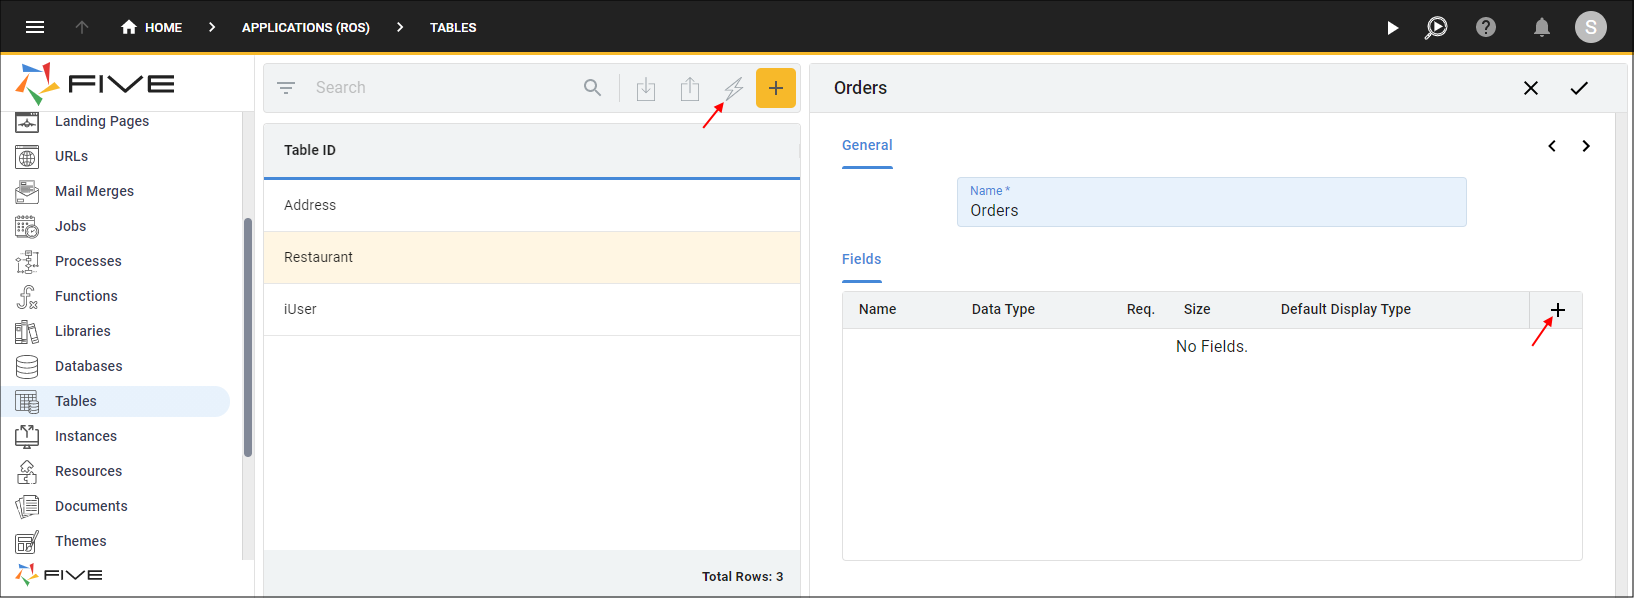
Figure 9 - Add the Orders table
4. Type Date in the Name field.
5. Click the lookup icon in the Data Type field and select TimeStamp.
info
Further in this tutorial, you will see Five's Date and Time functions. With the data type of TimeStamp at the table-level, you will be able to change the display type at form-level and see how each of Five's date and time functions execute.
6. Click the Add Fields button.
7. Type OrderNumber in the Name field.
8. Click the lookup icon in the Data Type field and select Integer.
9. Click the Req. checkbox.
10. Click the Add Fields button.
11. Type SubTotal in the Name field.
12. Click the lookup icon in the Data Type field and select Float.
13. Click the Req. checkbox.
14. Click the lookup icon in the Default Display Type field and select _Currency.
15. Click the Add Fields button.
16. Type DiscountCode in the Name field.
17. Click the lookup icon in the Data Type field and select Text.
18. Type 10 in the Size field.
19. Click the Add Fields button.
20. Type GST in the Name field.
21. Click the lookup icon in the Data Type field and select Float.
22. Click the Add Fields button.
23. Type Total in the Name field.
24. Click the lookup icon in the Data Type field and select Float.
25. Click the Req. checkbox.
26. Click the lookup icon in the Default Display Type field and select _Currency.
27. Click the Add Fields button.
28. Type Completed in the Name field.
29. Click the lookup icon in the Data Type field and select Boolean.
30. Click the Next button.
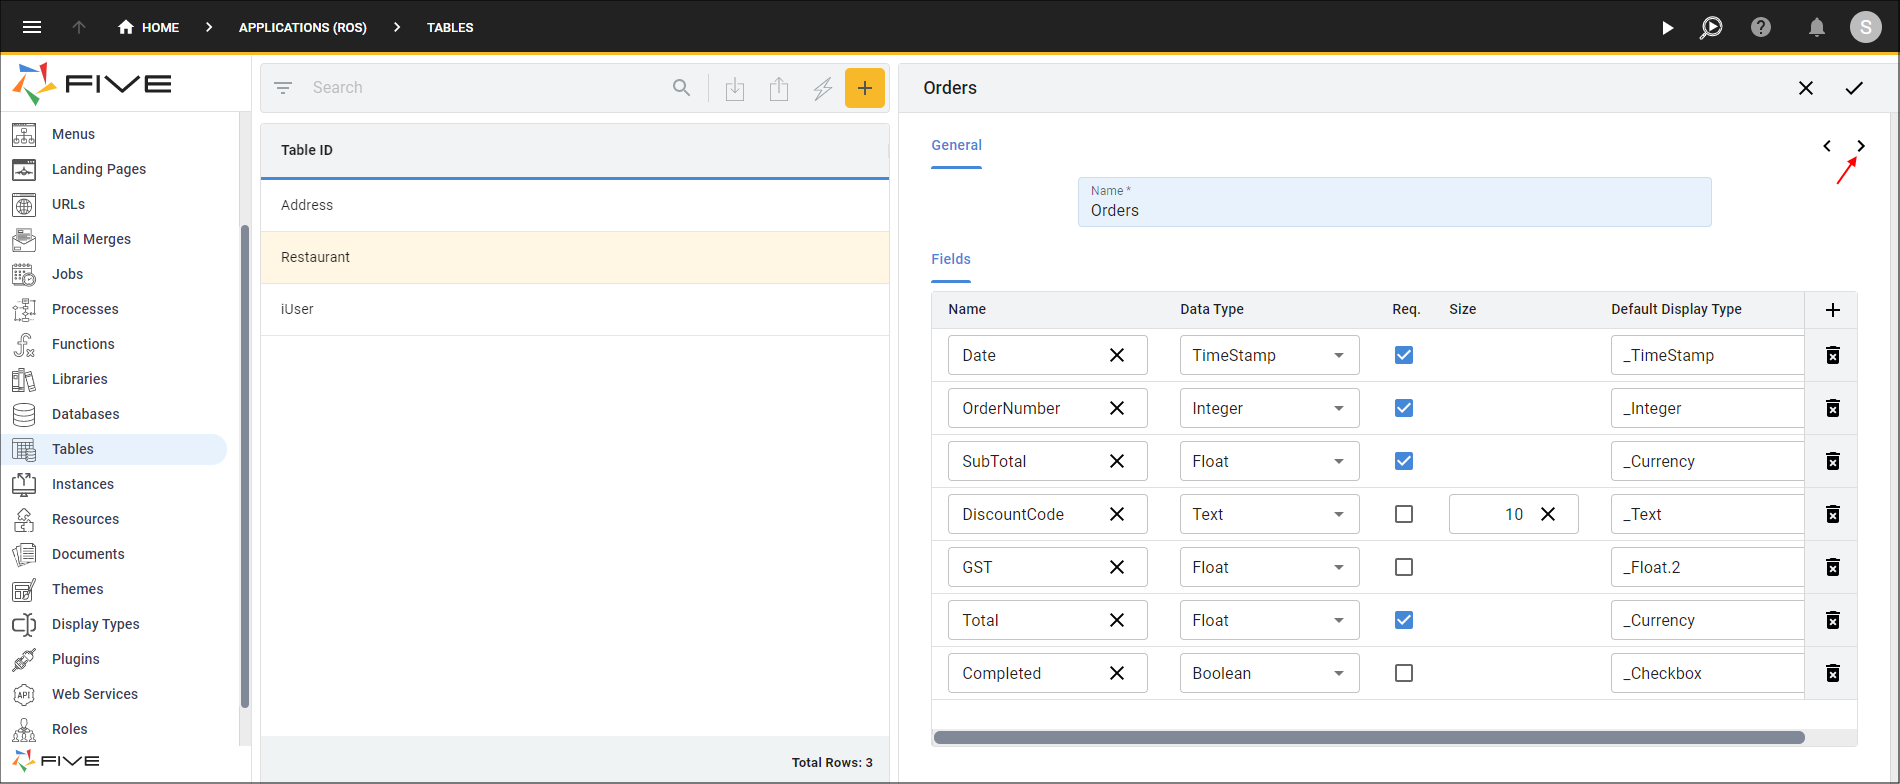
Figure 10 - Add the fields for the Orders table
31. Click the Add Relationships button.
32. Click the lookup icon in the Table field and select Restaurant in the list.
33. Click the Required checkbox.
34. Click the Add Relationships button.
35. Click the lookup icon in the Table field and select Address in the list.
36. Click the Required checkbox.
37. Click the Save button in the Table Wizard app bar.
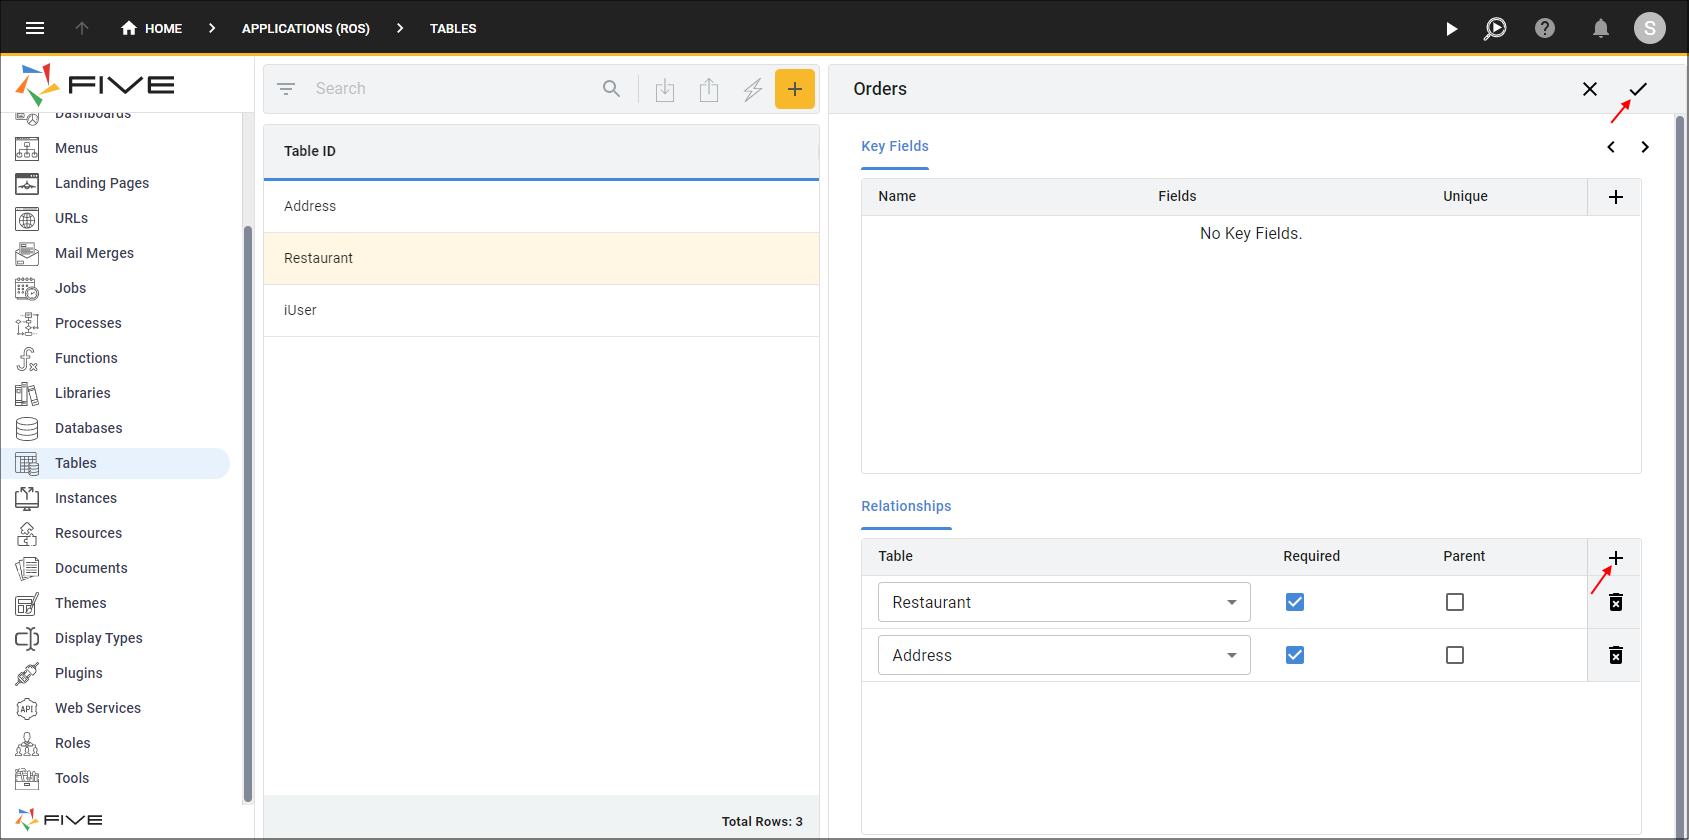
Figure 11 - Add the relationships and save the Orders table
Edit the Orders Record
tip
The Table Wizard does not allow you to save the same relationship twice, so you will need to edit the Orders table and add a second foreign key that references the Address table to allow you to have two Address fields on the Orders table.
1. Select the Orders record in the list.
2. Click the Fields tab.
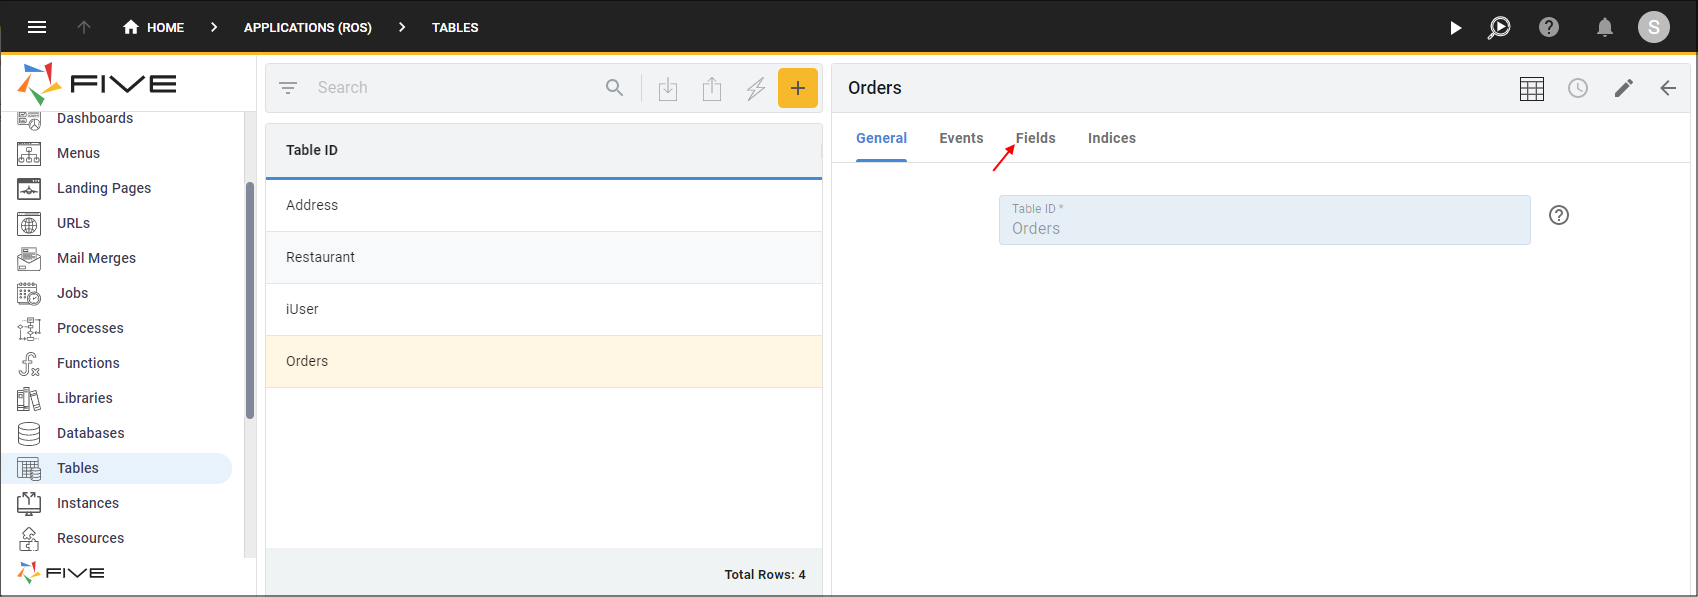
Figure 12 - Edit the Orders record
3. Select the AddressKey record.
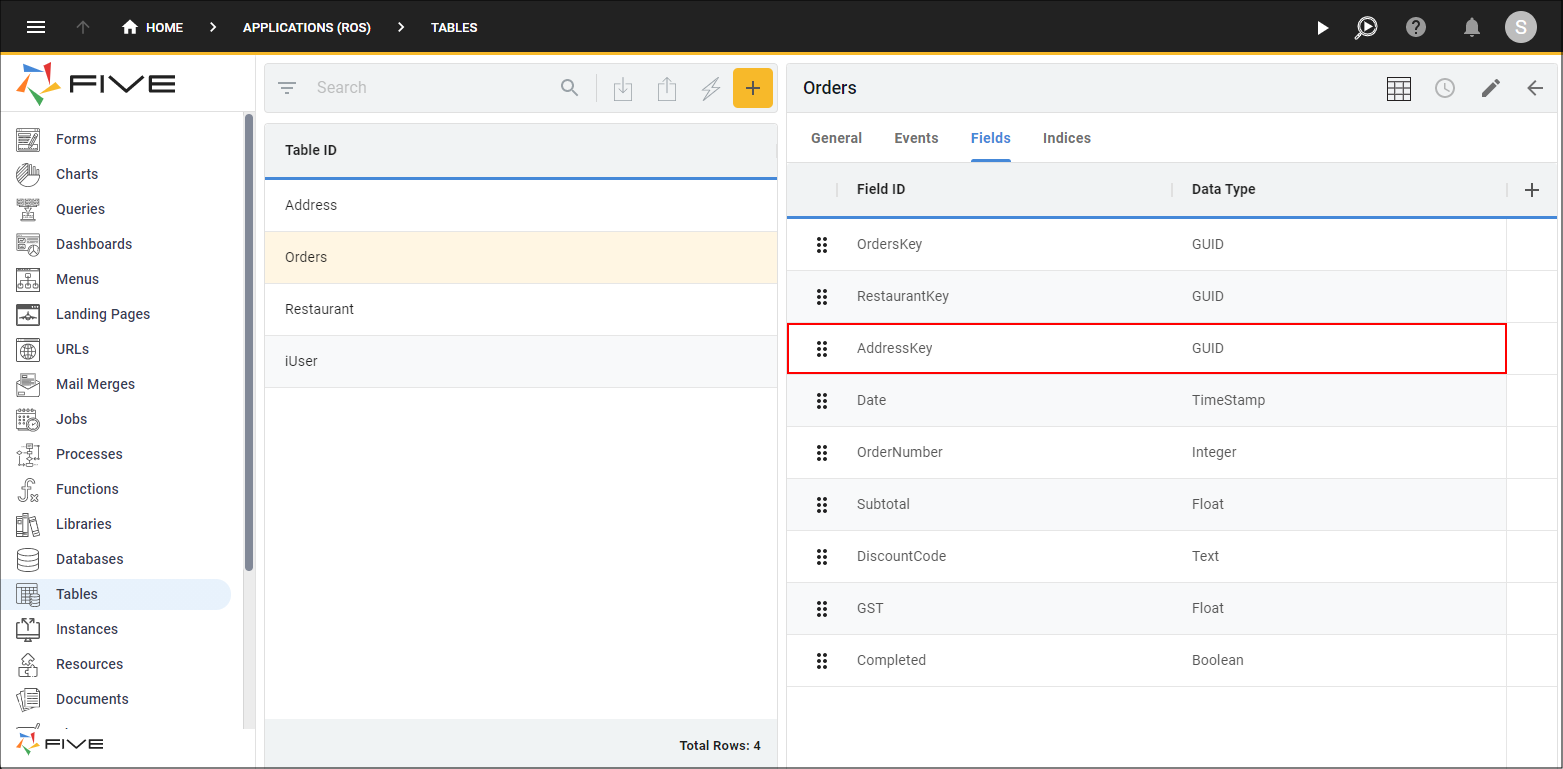
Figure 13 - AddressKey record
4. Either click the Edit button in the form app bar, or click directly in the Field ID field.
5. Click the Cancel button in the Field ID field to remove AddressKey and type DeliveryAddressKey.
6. Click the Save button in the form app bar.

Figure 14 - Edit the AddressKey field
7. Click the Add Fields button.
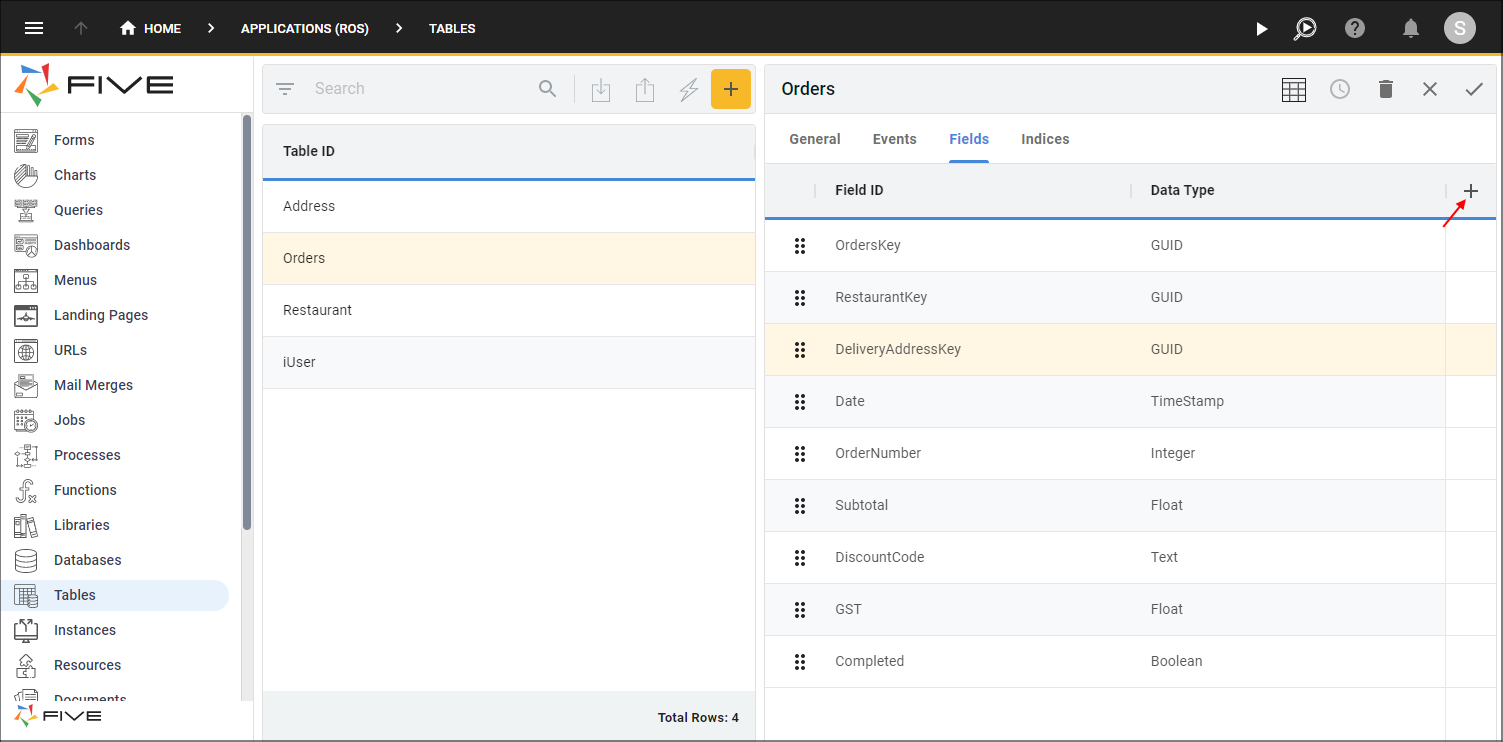
Figure 15 - Add Fields button
8. Type InvoiceAddressKey in the Field ID field.
9. Click the lookup icon in the the Data Type field and select GUID.
10. Click the lookup icon in the Default Display Type field and select _Lookup.
11. Click the Save button in the form app bar.
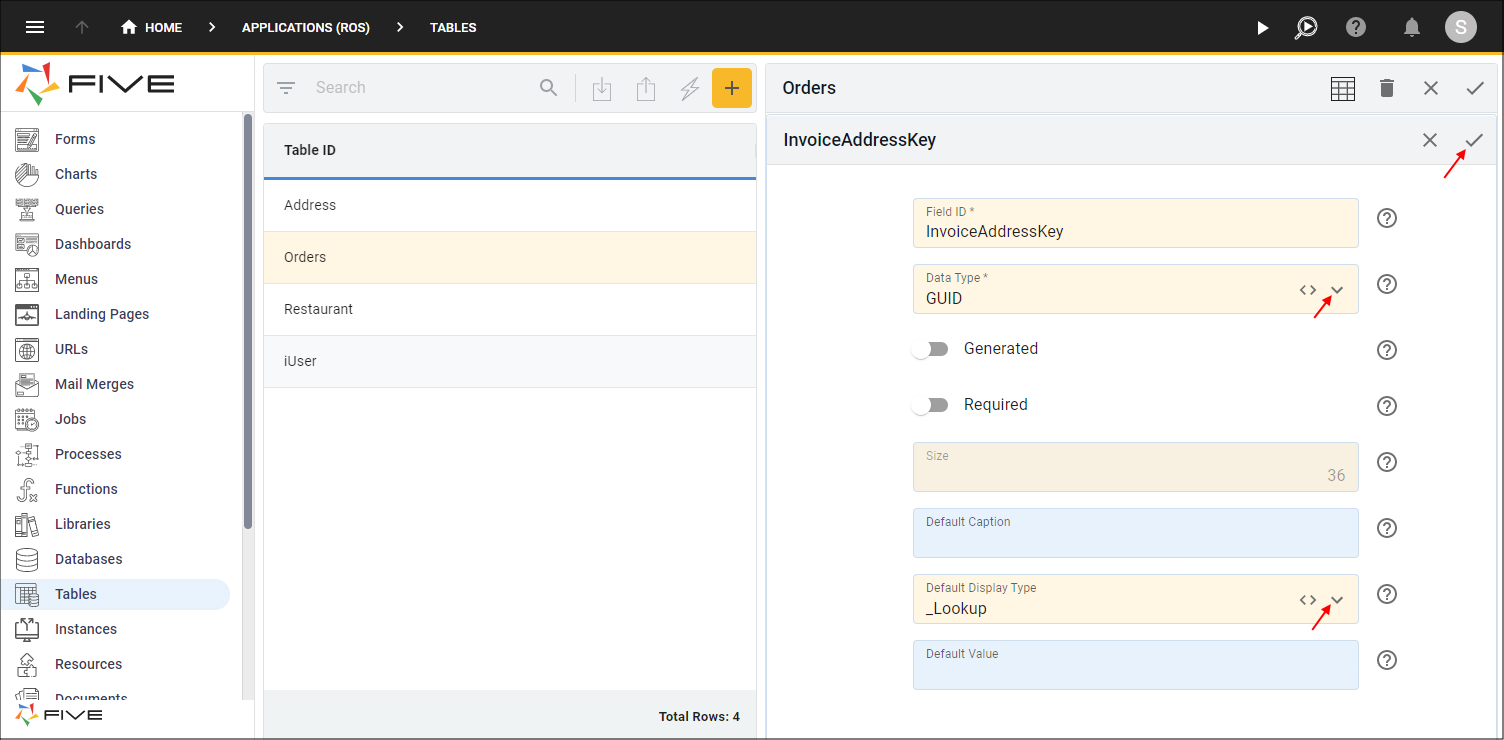
Figure 16 - Add the InvoiceAddressKey field
12. Click, hold, and drag the InvoiceAddressKey record by the drag handle to be positioned under the DeliveryAddressKey record.
Figure 17 - Reorder fields
13. Click the Indices tab.
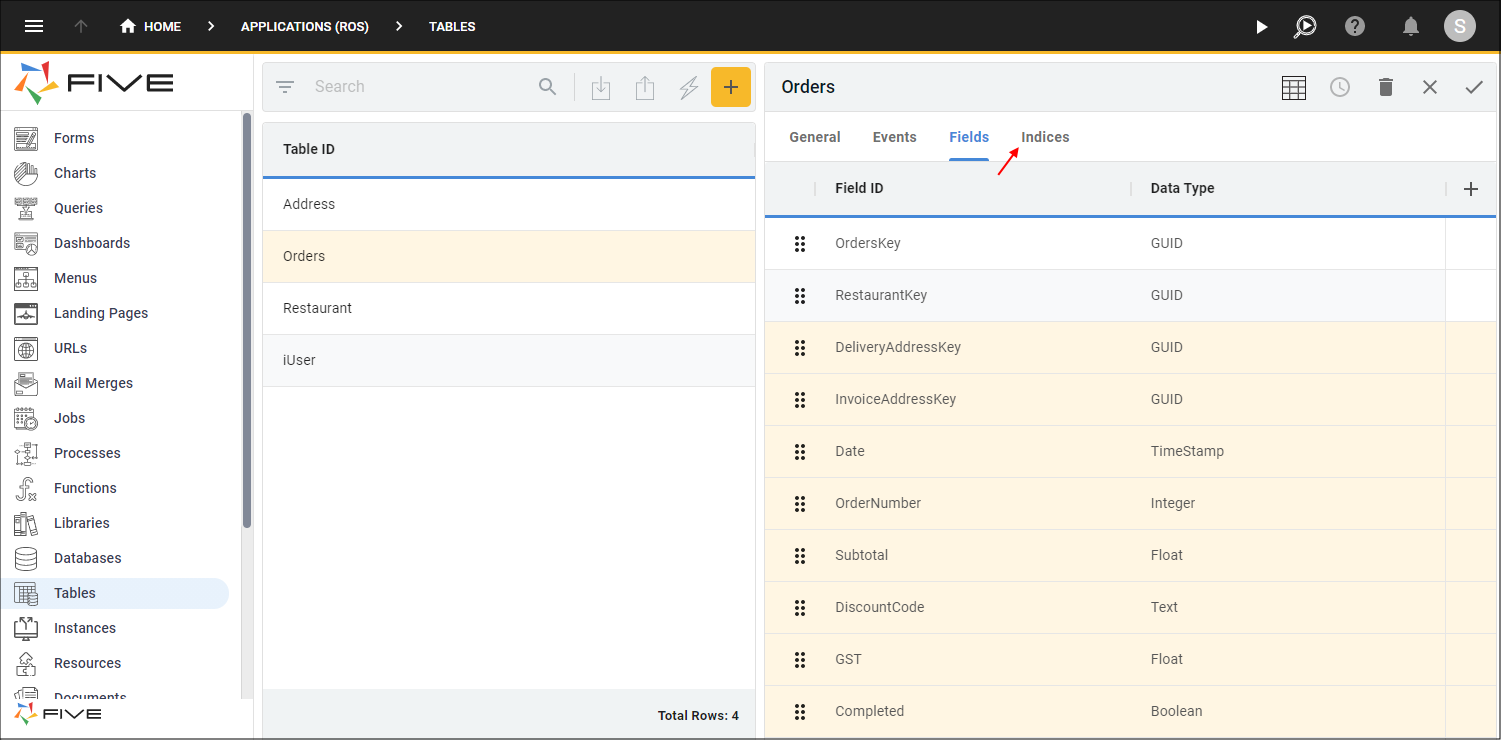
Figure 18 - Indices tab
14. Select the AddressKey record.
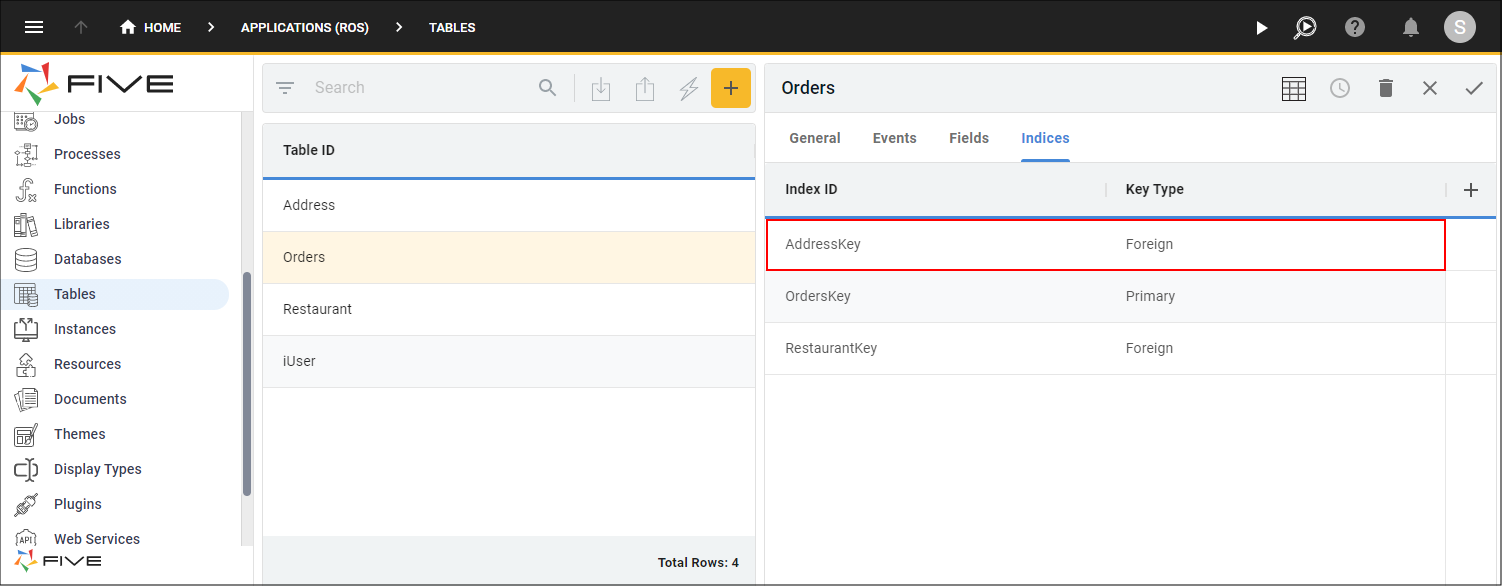
Figure 19 - AddressKey record
15. Either click the Edit button in the form app bar, or click directly in the Index ID field.
16. Click the Cancel button in the Index ID field to remove AddressKey and type DeliveryAddressKey.
17. Click the Save button in the form app bar.
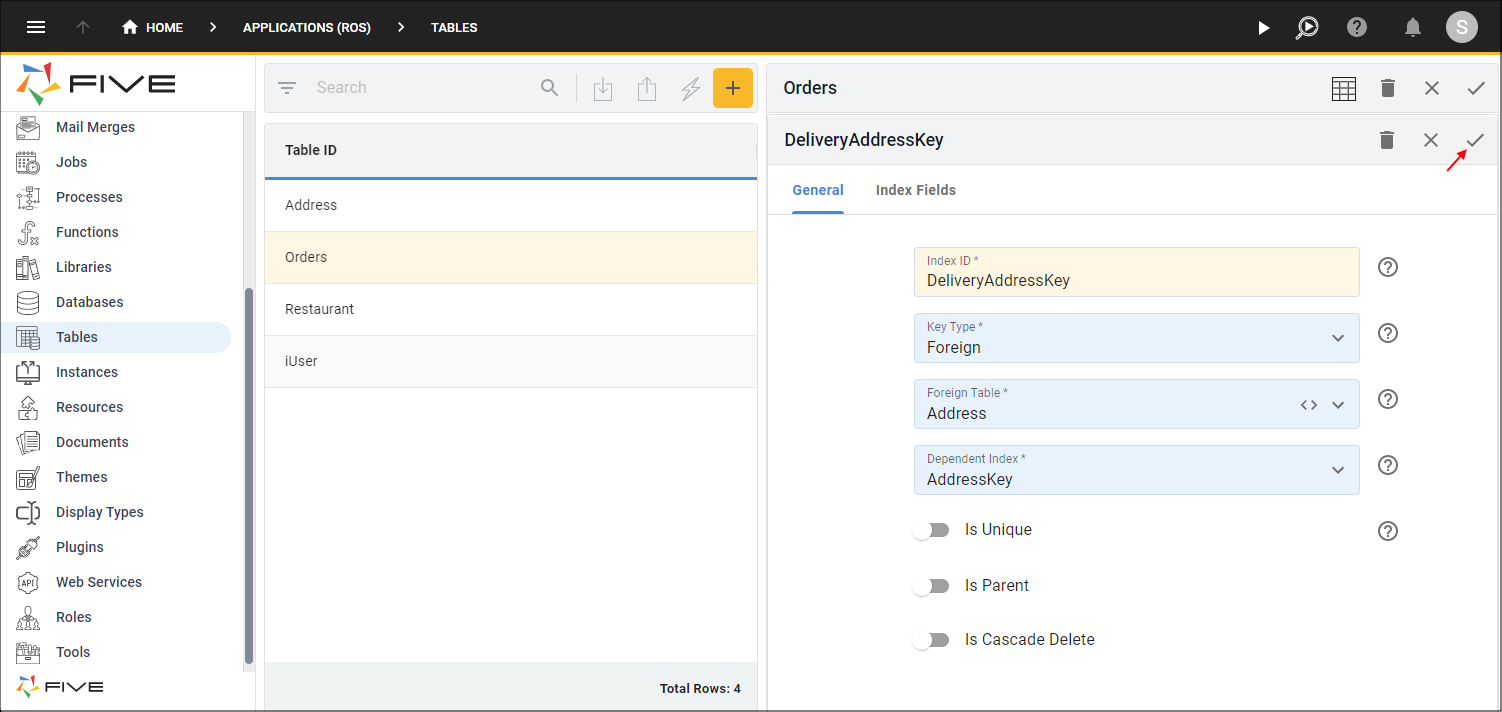
Figure 20 - Edit the AddressKey index
18. Click the Add Indices button.
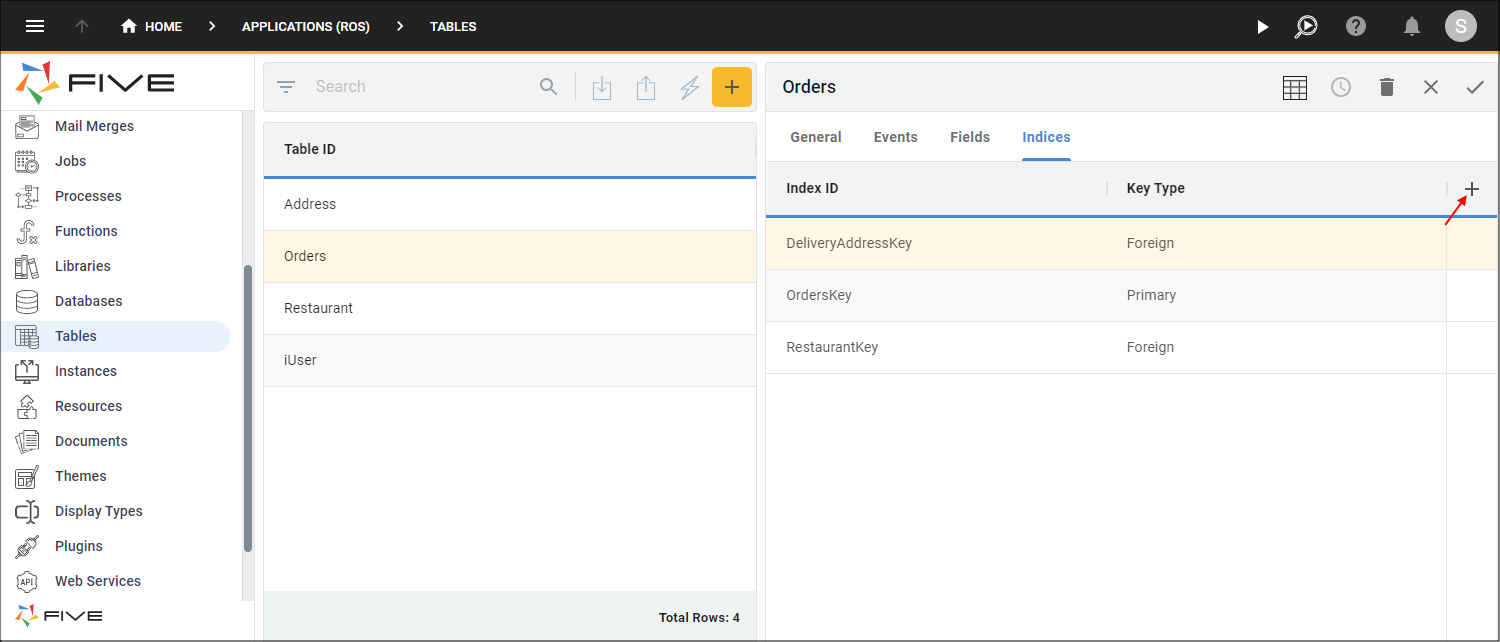
Figure 21 - Add Indices Button
19. Type InvoiceAddressKey in the Index ID field.
20. Click the lookup icon in the Key Type field and select Foreign.
21. Click the lookup icon in the Foreign Table field and select Address.
22. Click the lookup icon in the Dependent Index field and select AddressKey.
23. Click the Index Fields tab.
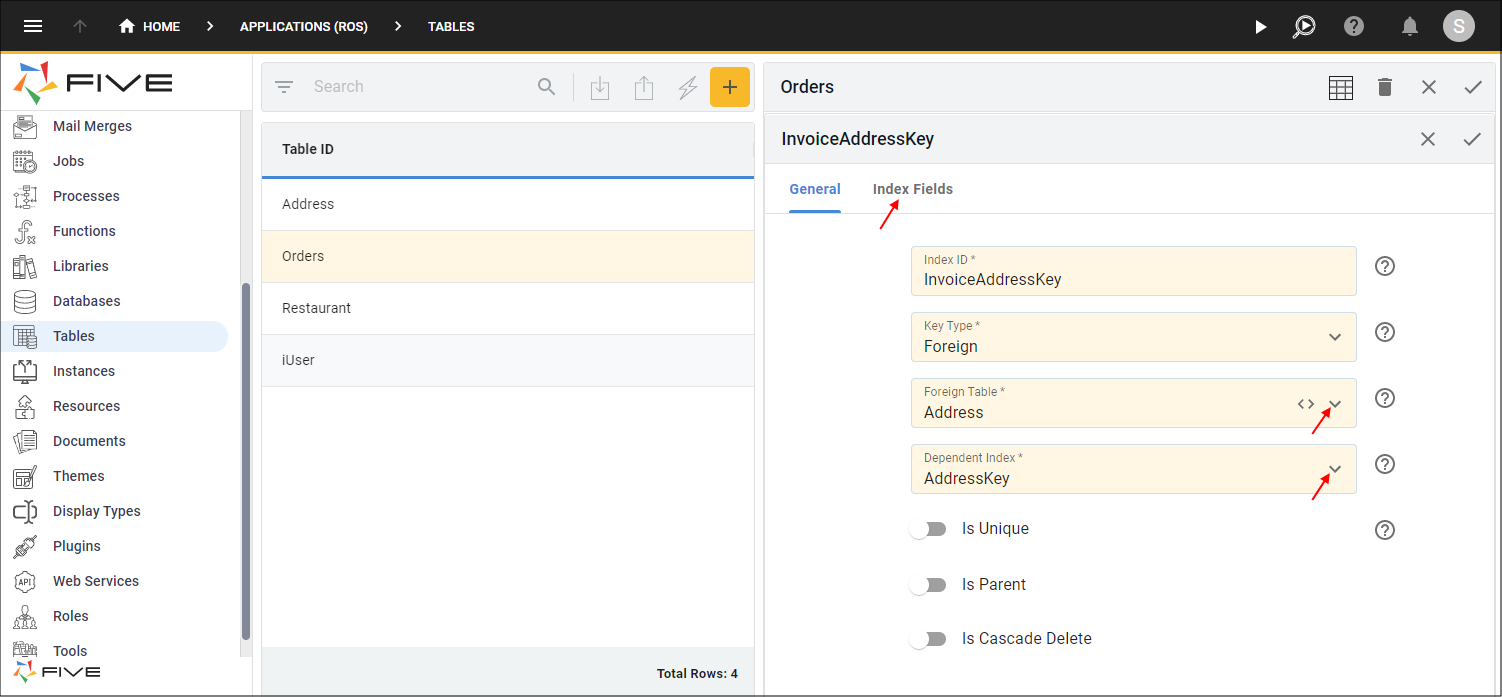
Figure 22 - Add the InvoiceAddressKey index
24. Click the Add Index Fields button.
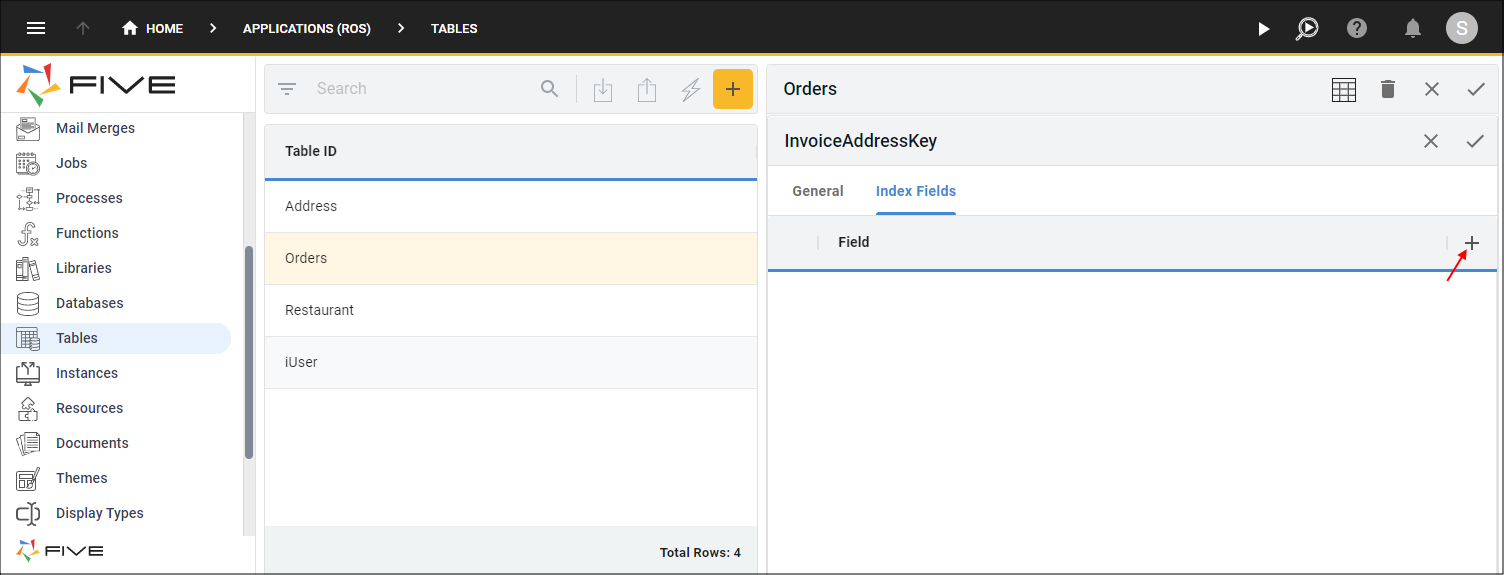
Figure 23 - Add Index Fields button
25. Click the lookup icon in the Field field and select InvoiceAddressKey.
26. Click the Save button in the form app bar.
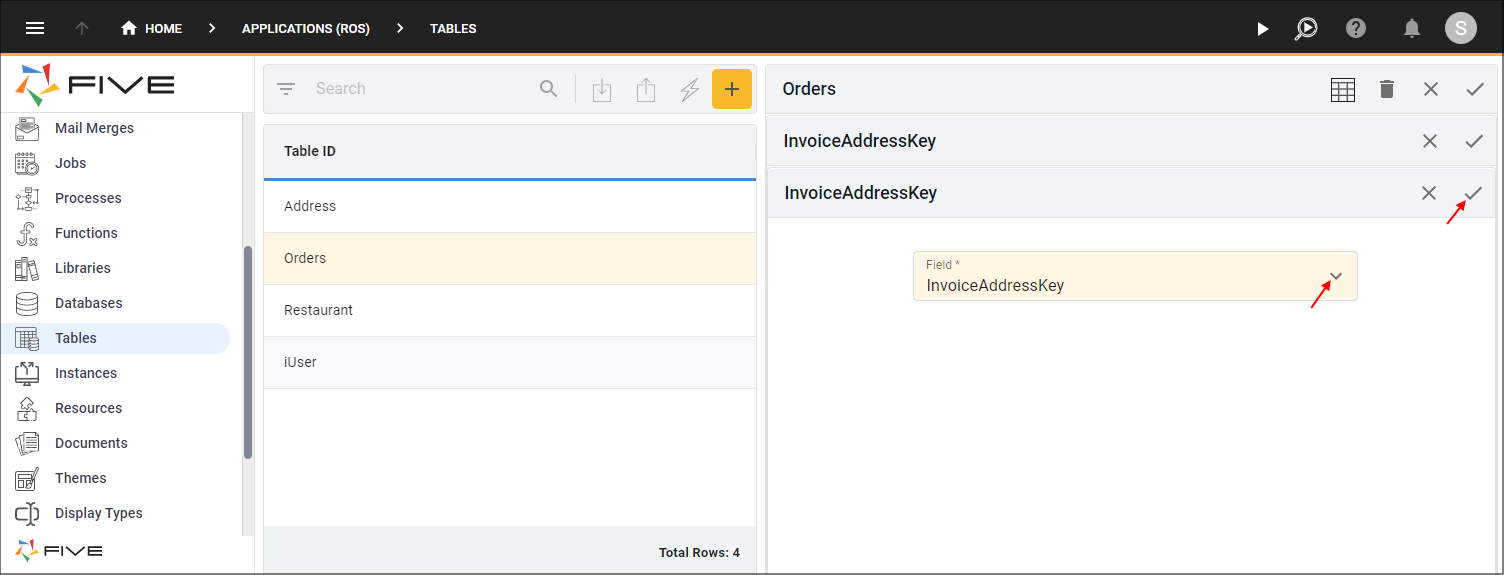
Figure 24 - Add the InvoiceAddressKey index field
27. Click both Save buttons in the stacked form app bars above the list.
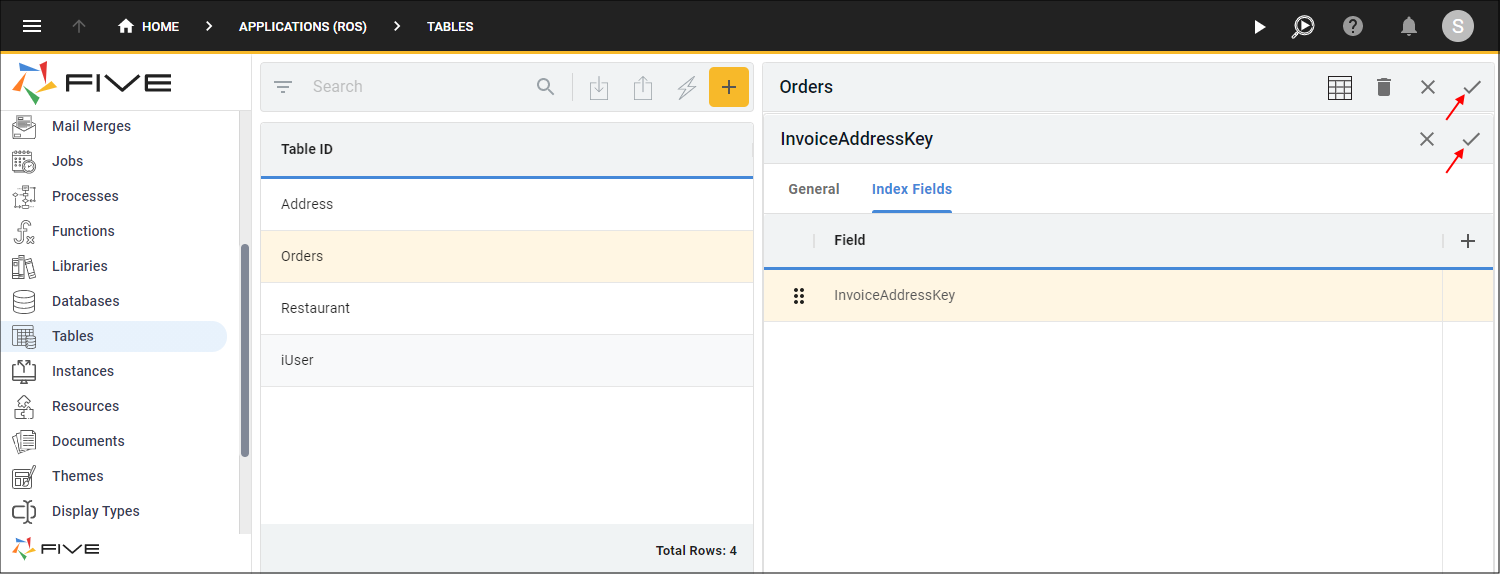
Figure 25 - Save the Orders table
info
The Field Change dialog window needs to be filled out for the InvoiceAddressKey field as Five needs to know what value you would like entered into this field for all previous records saved in the database.
28. Type 0 in the field in the Field Change dialog window.
29. Click the Save button in the Field Change dialog window.
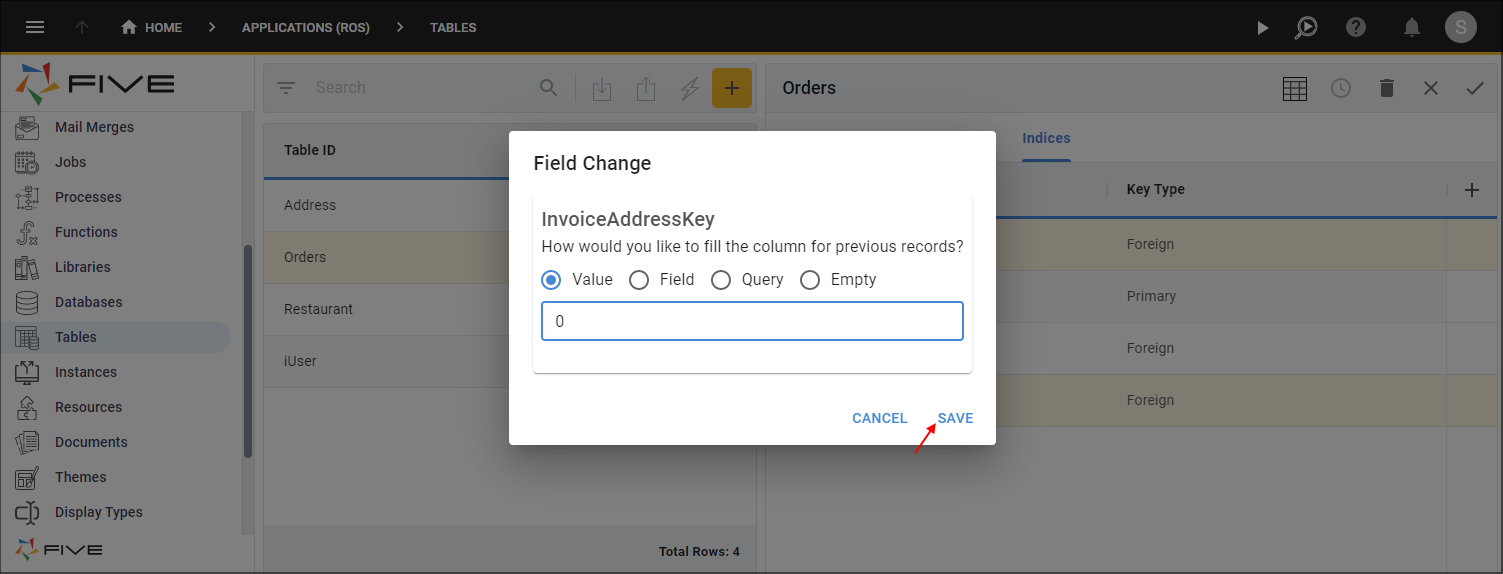
Figure 26 - Field Change dialog window
Create the Category Table
1. Click the New Table Wizard button in the list app bar.2. Type Category in the Name field.
3. Click the Add Fields button.
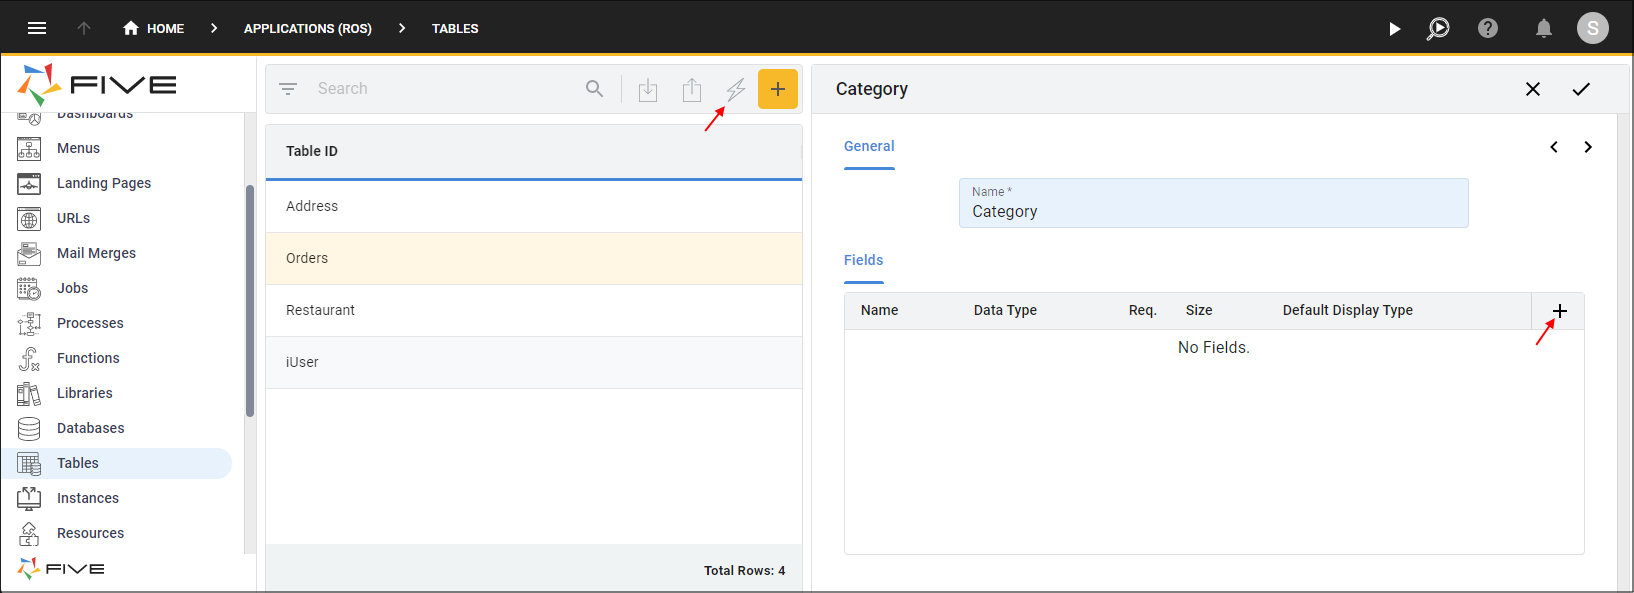
Figure 27 - Add the Category table
4. Type Name in the Name field.
5. Type 100 in the Size field.
6. Click the Save button in the Table Wizard app bar.
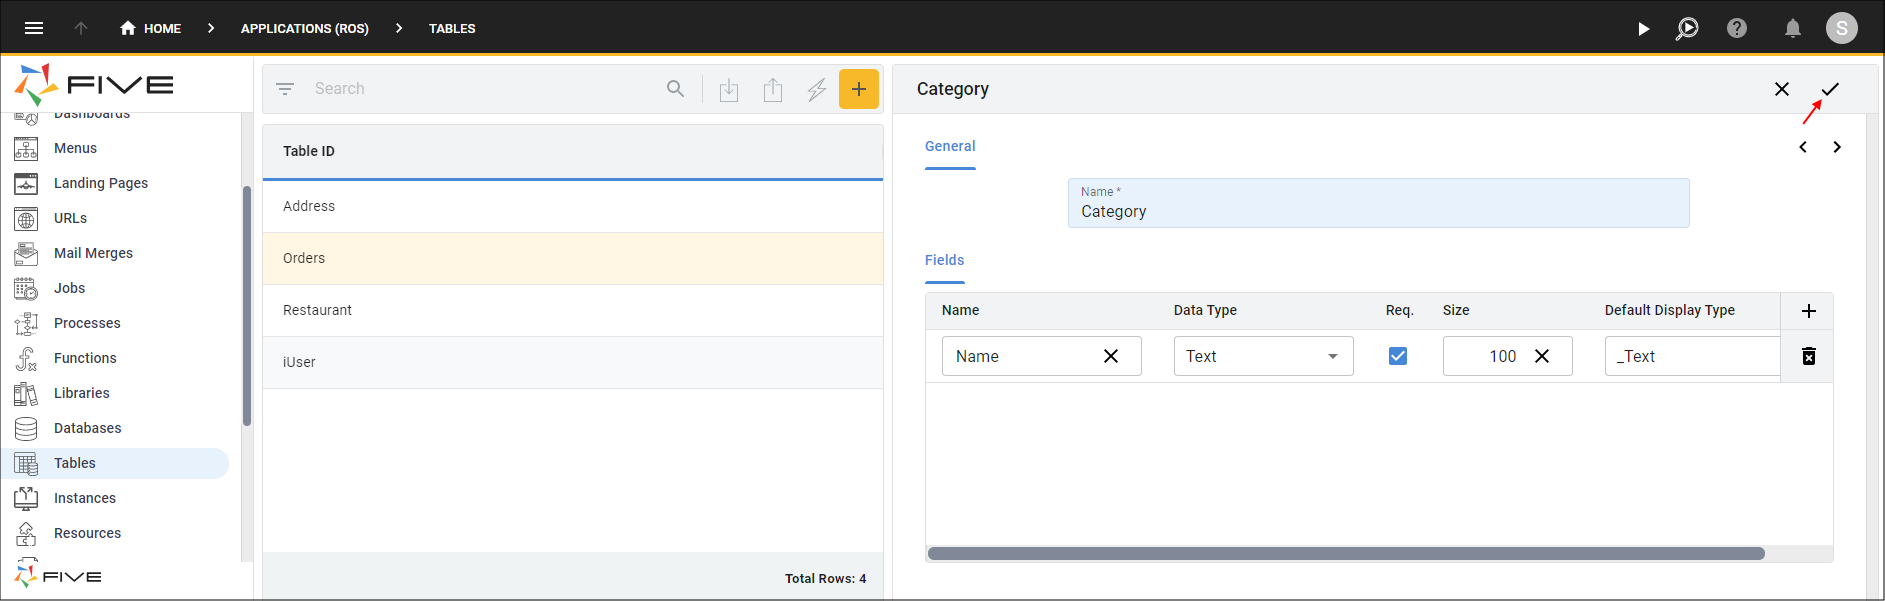
Figure 28 - Add the field and save the Category table
Create the Inventory Table
1. Click the New Table Wizard button in the list app bar.2. Type Inventory in the Name field.
3. Click the Add Fields button.
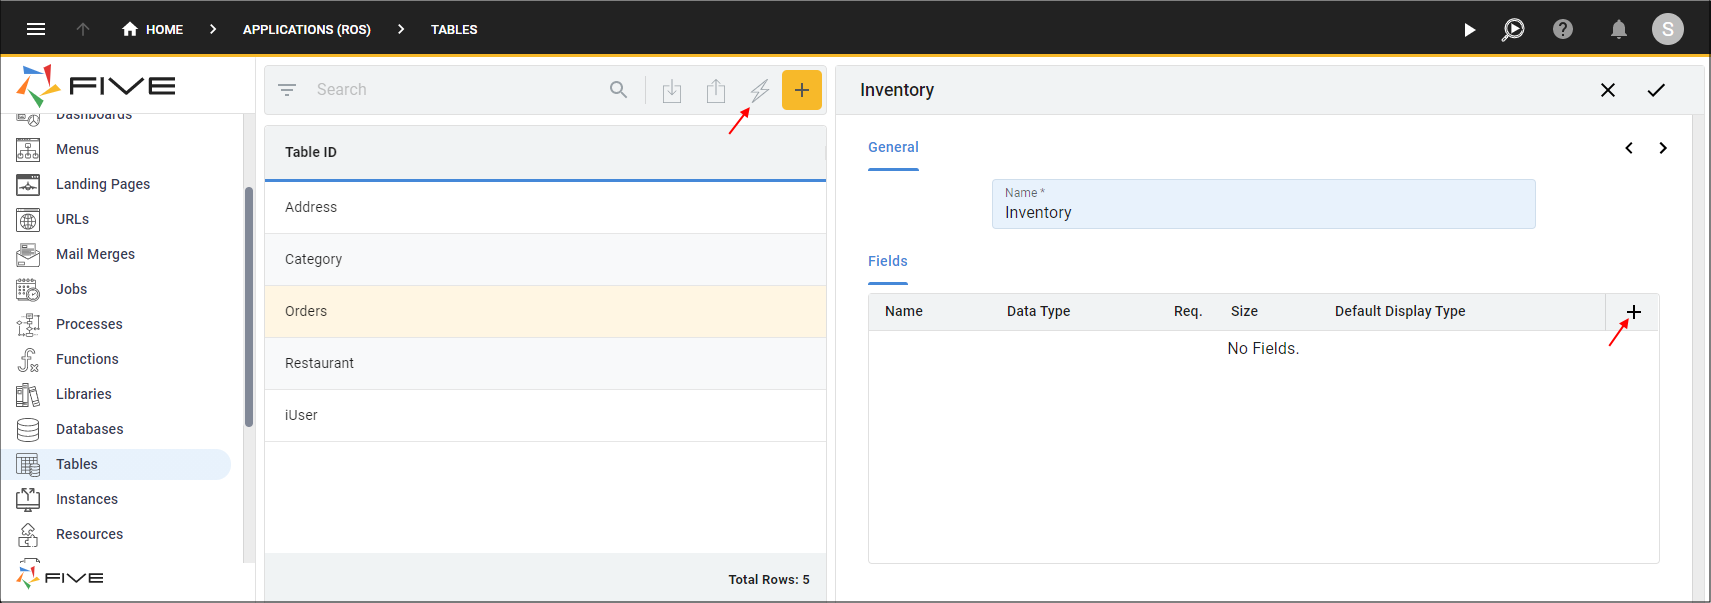
Figure 29 - Add the Inventory table
4. Type Product in the Name field.
5. Type 200 in the Size field.
6. Click the Add Fields button.
7. Type Price in the Name field.
8. Click the lookup icon in the Data Type field and select Float.
9. Click the Req. checkbox.
10. Click the lookup icon in the Default Display Type field and select _Currency.
11. Click the Add Fields button.
12. Type GSTExempt in the Name field.
13. Click the lookup icon in the Data Type field and select Boolean.
14. Click the Next button.
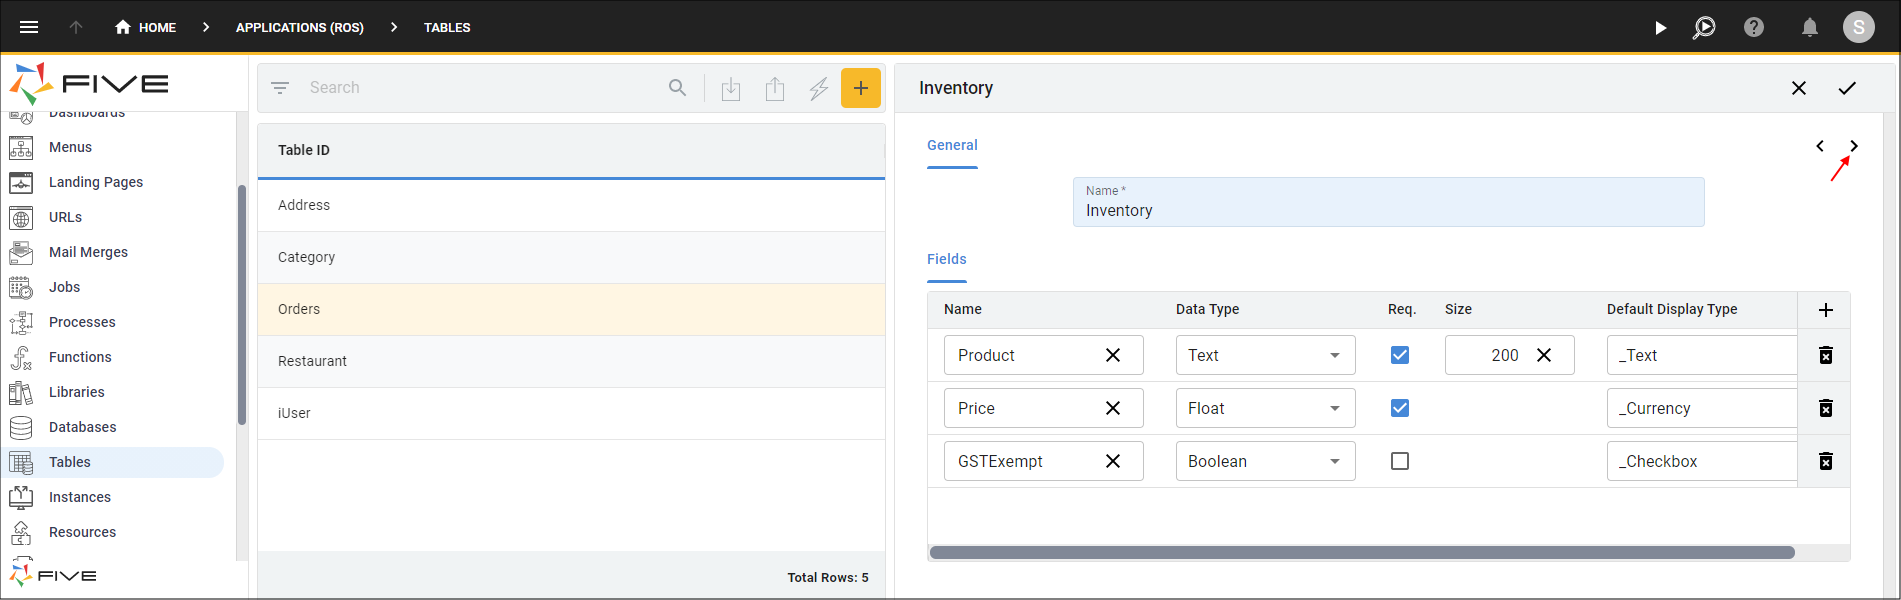
Figure 30 - Add the fields for the Inventory table
15. Click the Add Relationships button.
16. Click the lookup icon in the Table field and select Category in the list.
17. Click the Required checkbox.
18. Click the Save button in the Table Wizard app bar.
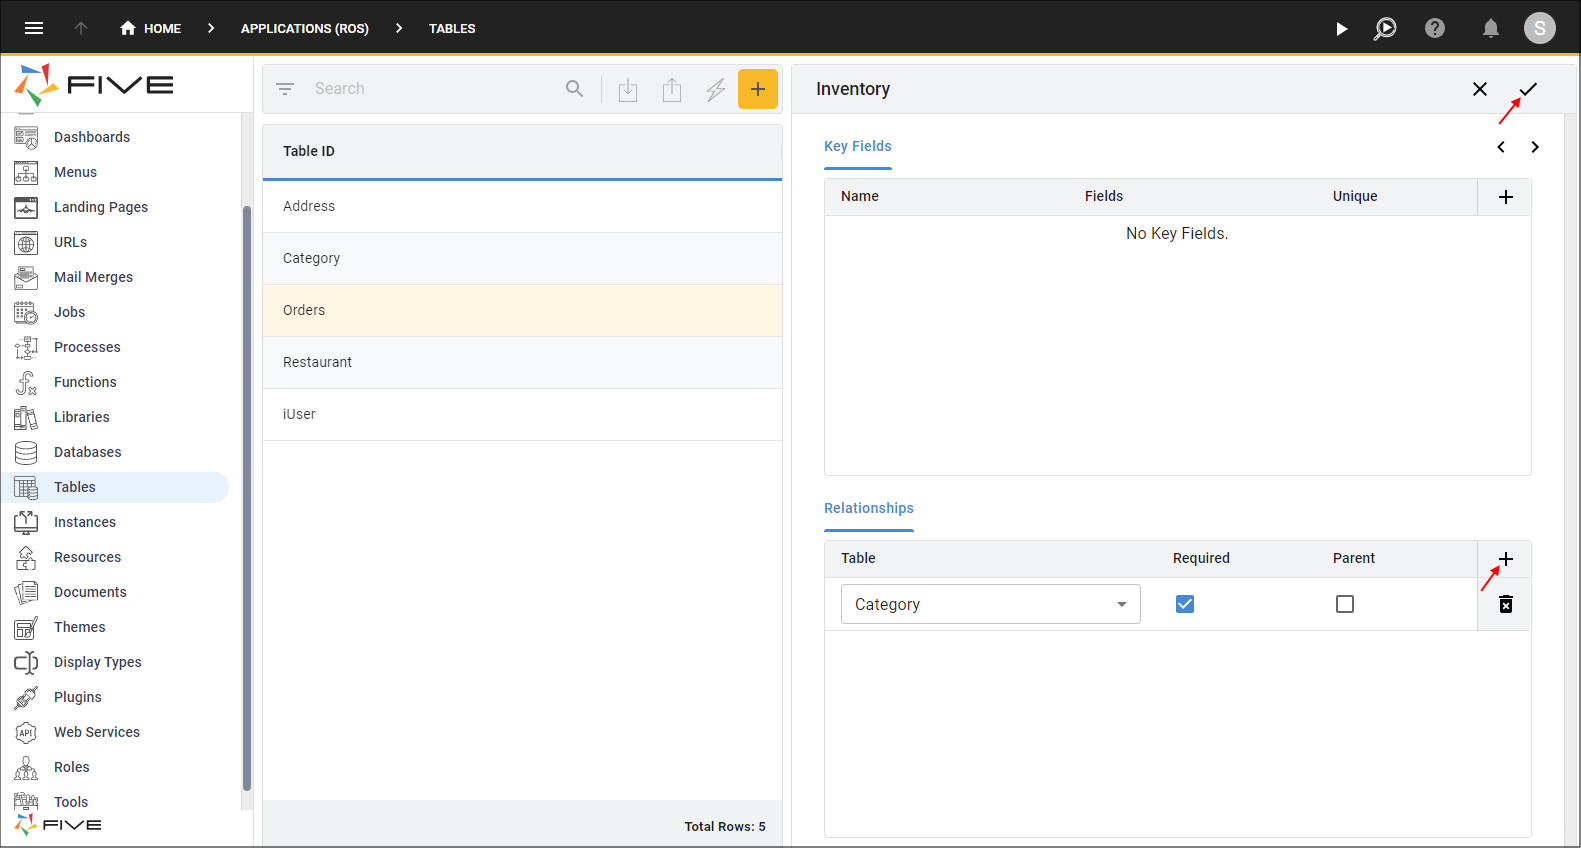
Figure 31 - Add the relationship and save the Inventory table
Create the Item Table
1. Click the New Table Wizard button in the list app bar.2. Type Item in the Name field.
3. Click the Add Fields button.
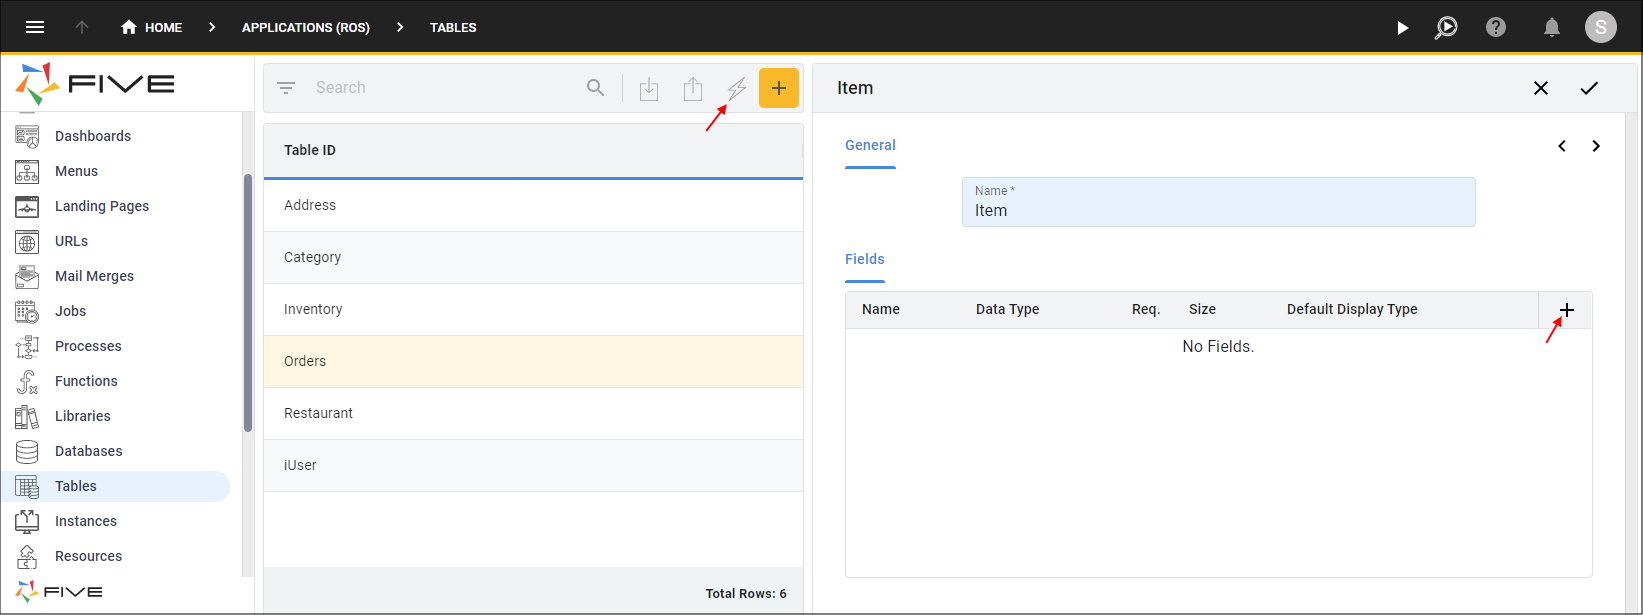
Figure 32 - Add the Item table
4. Type PricePerItem in the Name field.
5. Click the lookup icon in the Data Type field and select Float.
6. Click the lookup icon in the Default Display Type field and select _Currency.
7. Click the Add Fields button.
8. Type Quantity in the Name field.
9. Click the Req. checkbox.
10. Click the Add Fields button.
11. Type GST in the Name field.
12. Click the lookup icon in the Data Type field and select Float.
13. Click the Add Fields button.
14. Type Total in the Name field.
15. Click the lookup icon in the Data Type field and select Float.
16. Click the Req. checkbox.
17. Click the lookup icon in the Default Display Type field and select _Currency.
18. Click the Next button.
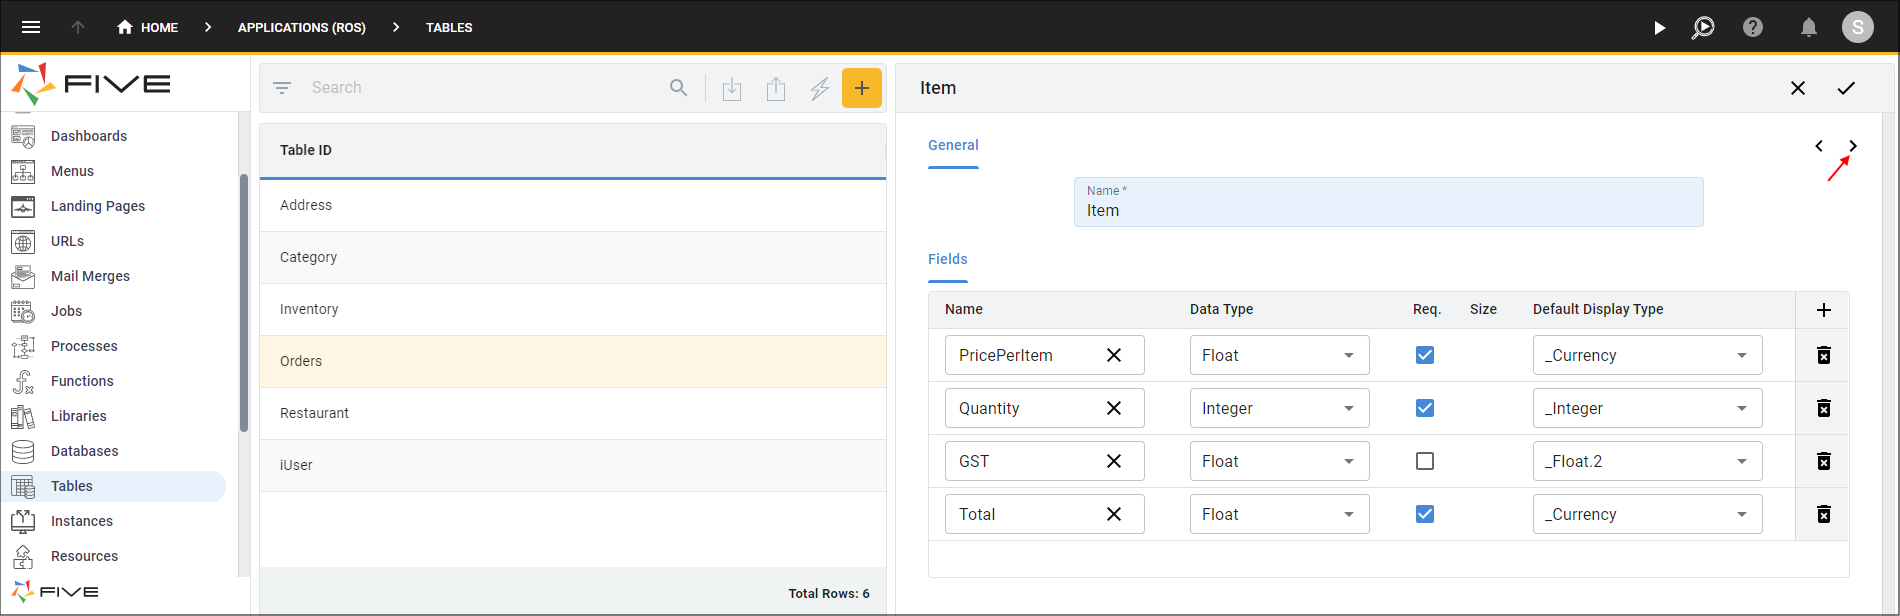
Figure 33 - Add the fields for the Item table
19. Click the Add Relationships button.
20. Click the lookup icon in the Table field and select Orders in the list.
21. Click the Required checkbox.
22. Click the Add Relationships button.
23. Click the lookup icon in the Table field and select Inventory in the list.
24. Click the Required checkbox.
25. Click the Save button in the Table Wizard app bar.
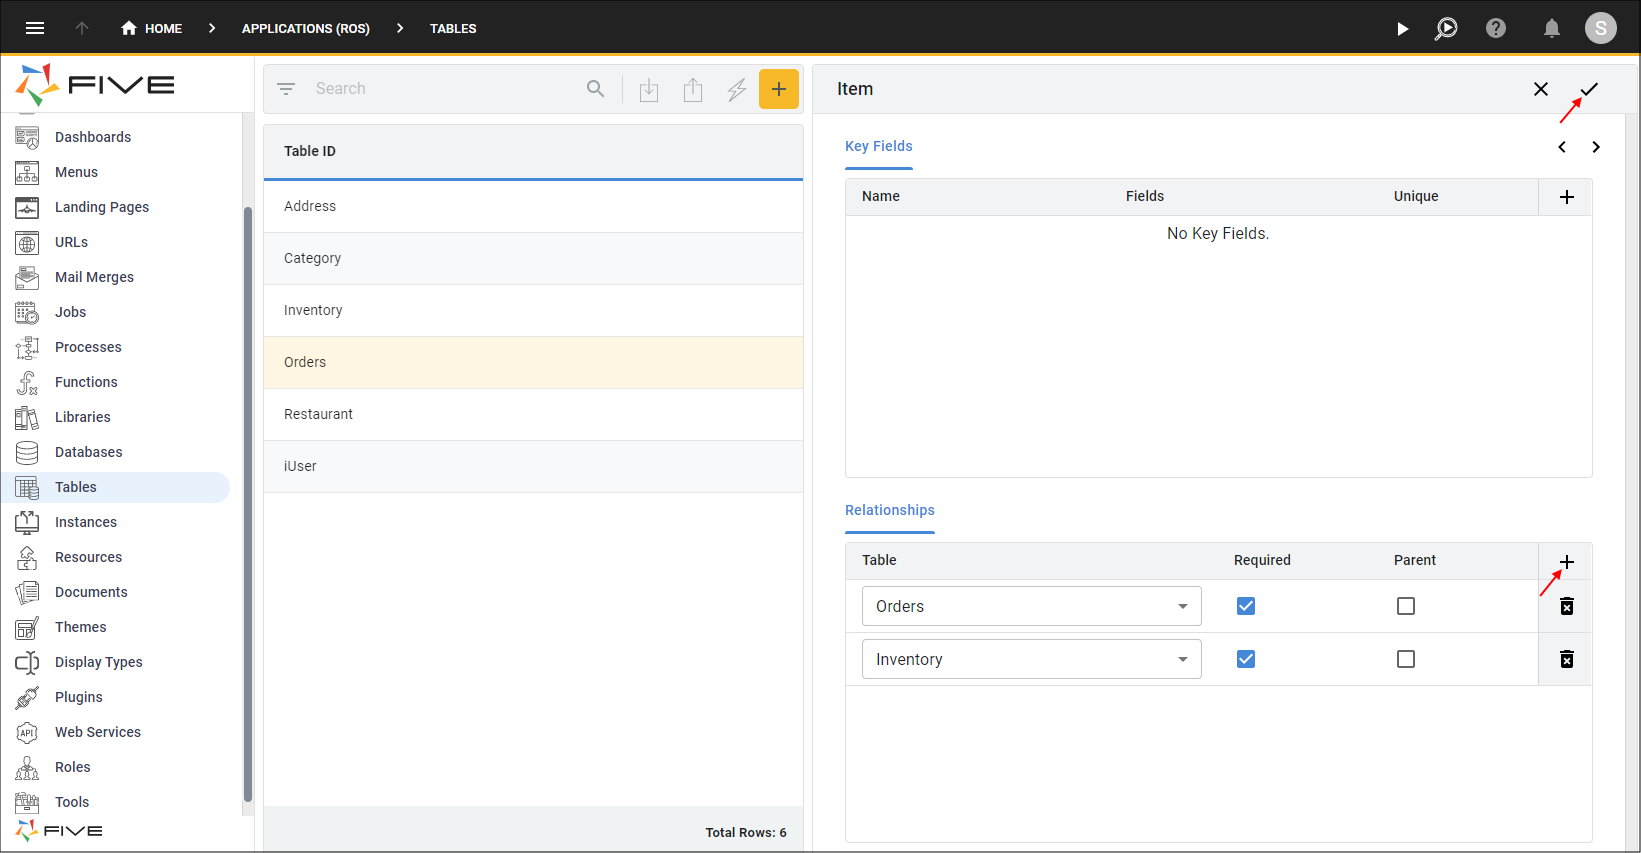
Figure 34 - Add the relationships and save the Item table