Create the Forms and Menus for the Administration Login
Last updated 10/01/2023
This chapter will explain how to create the forms and menus for the Administration login.Create the Categories Form
1. Select Forms in the menu.2. Click the New Form Wizard button in the list app bar.
3. Click the lookup icon in the Main Table field and select Category.
4. Click the lookup icon in the Parent Menu field and select 10000Administration.
5. Click the Save button in the Form Wizard app bar.
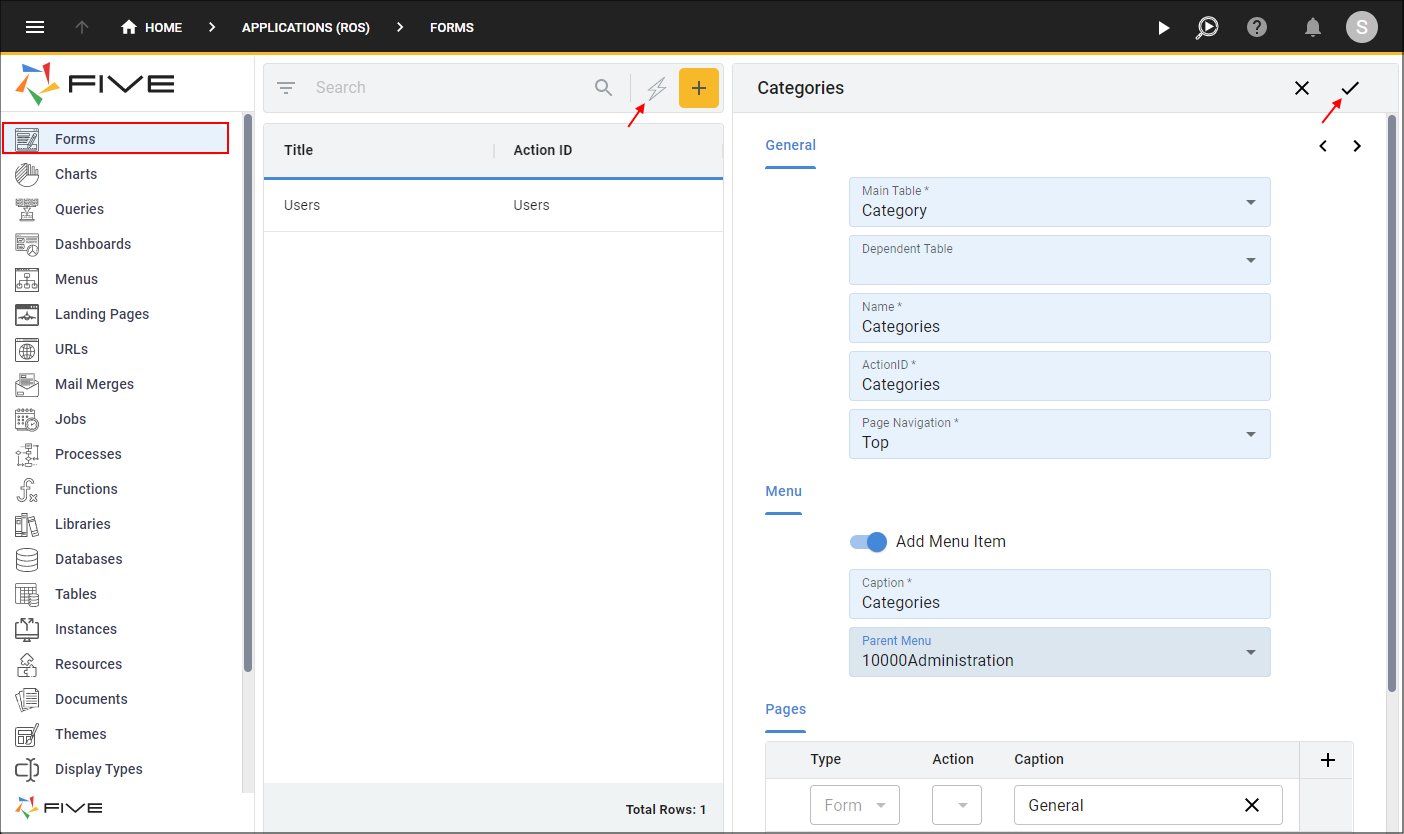
Figure 1 - Add the Categories form
Create the Inventories Form
1. Click the New Form Wizard button in the list app bar.2. Click the lookup icon in the Main Table field and select Inventory.
3. Click the lookup icon in the Parent Menu field and select 10000Administration.
4. Click the Next button.
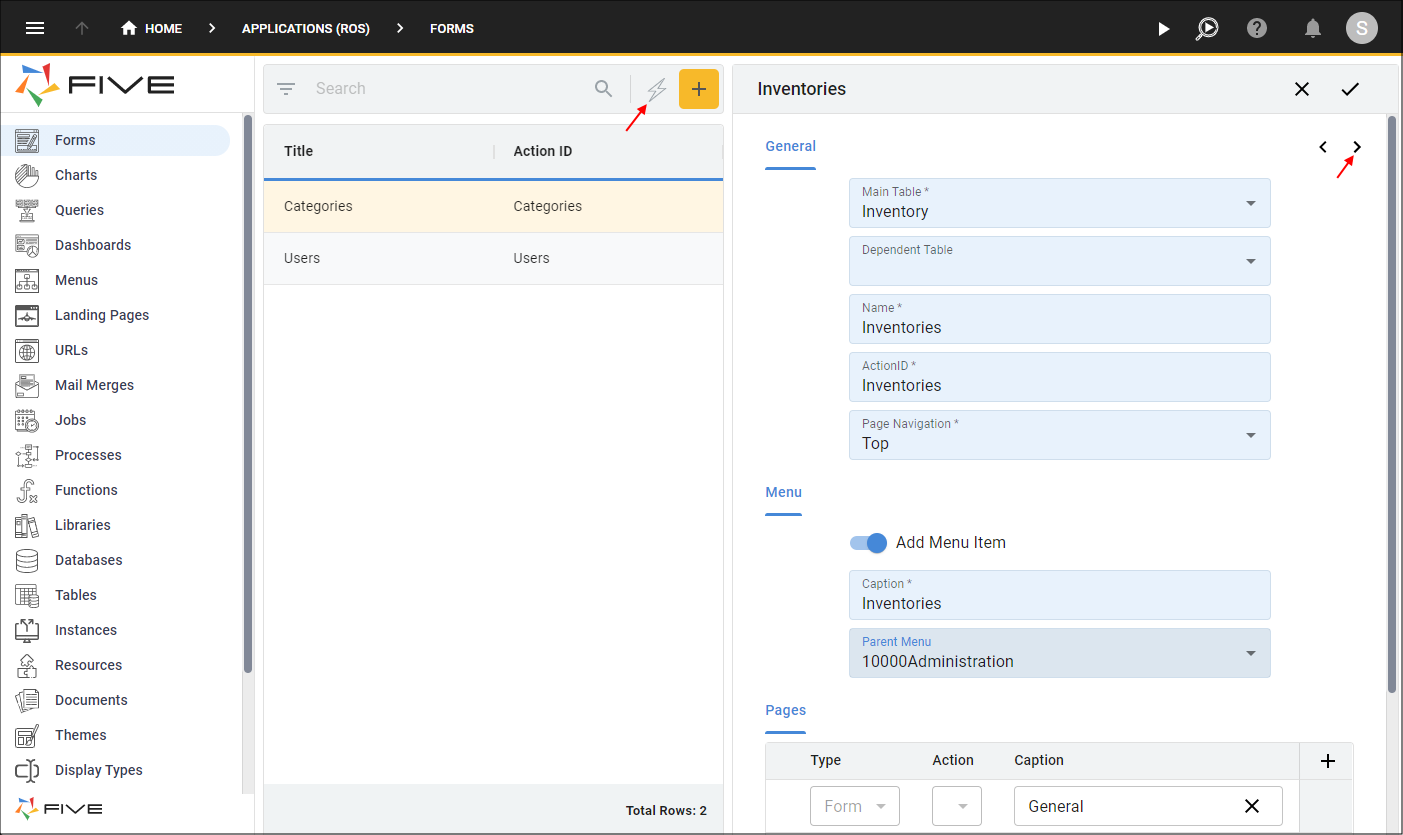
Figure 2 - Add the Inventories form
5. Click, hold, and drag the CategoryKey record by the drag handle to be positioned under the Product record.
Figure 3 - Reorder the CategoryKey record
6. Click the lookup icon in the Display Type field for the Product record and select ExpandText4.
7. Click the Req. checkbox for the Product record.
8. Click the List checkbox for the Product record.
9. Click the Req. checkbox for the Price record.
10. Click the List checkbox for the Price record.
11. Click the Save button in the Form Wizard app bar.
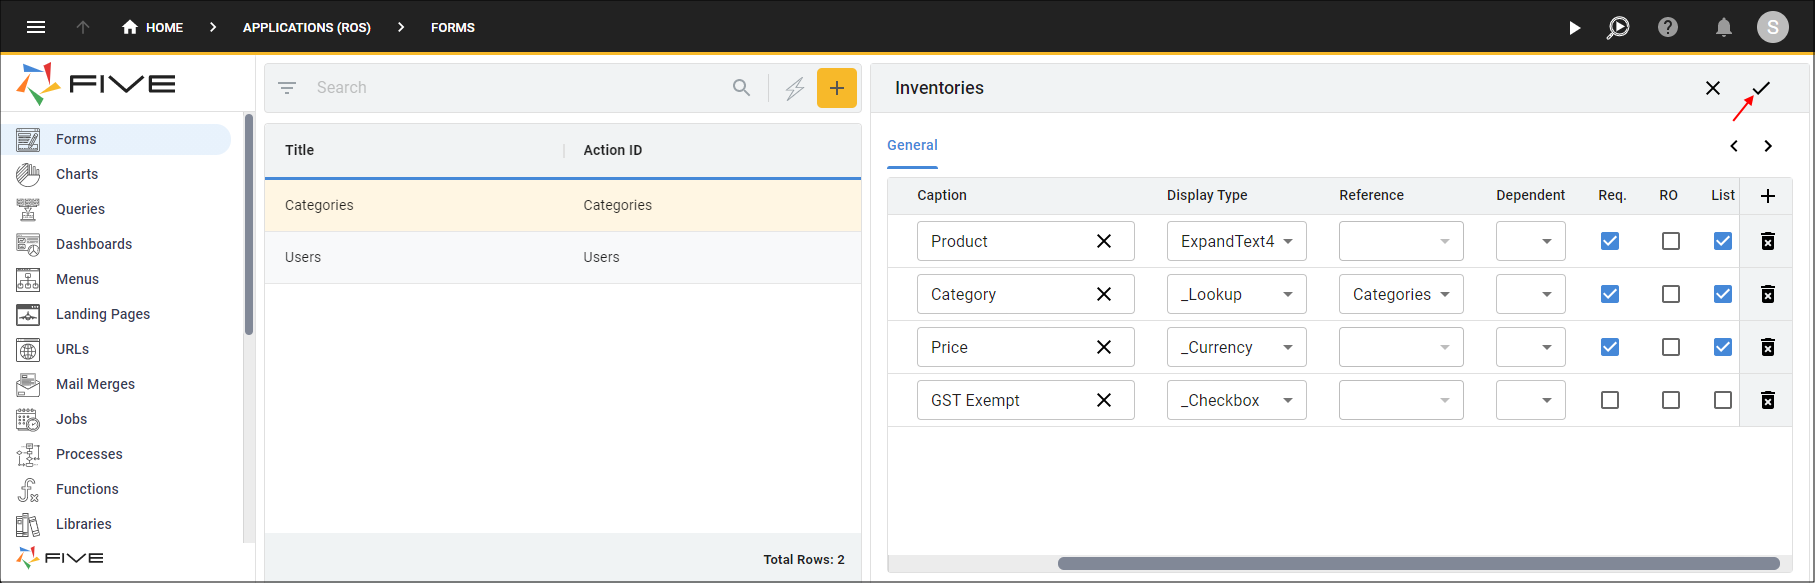
Figure 4 - Configure the fields and save the Inventories form
Create the Restaurants Form
1. Click the New Form Wizard button in the list app bar.2. Click the lookup icon in the Main Table field and select Restaurant.
3. Click the Cancel button in the Action ID field and type RestaurantsAdmin.
info
Although the Action ID is RestaurantsAdmin, the form's name is Restaurants. This enables you to have several forms called Restaurants for various user log in scenarios while keeping the Action ID unique.
4. Click the lookup icon in the Parent Menu field and select 10000Administration.
5. Click the Next button.
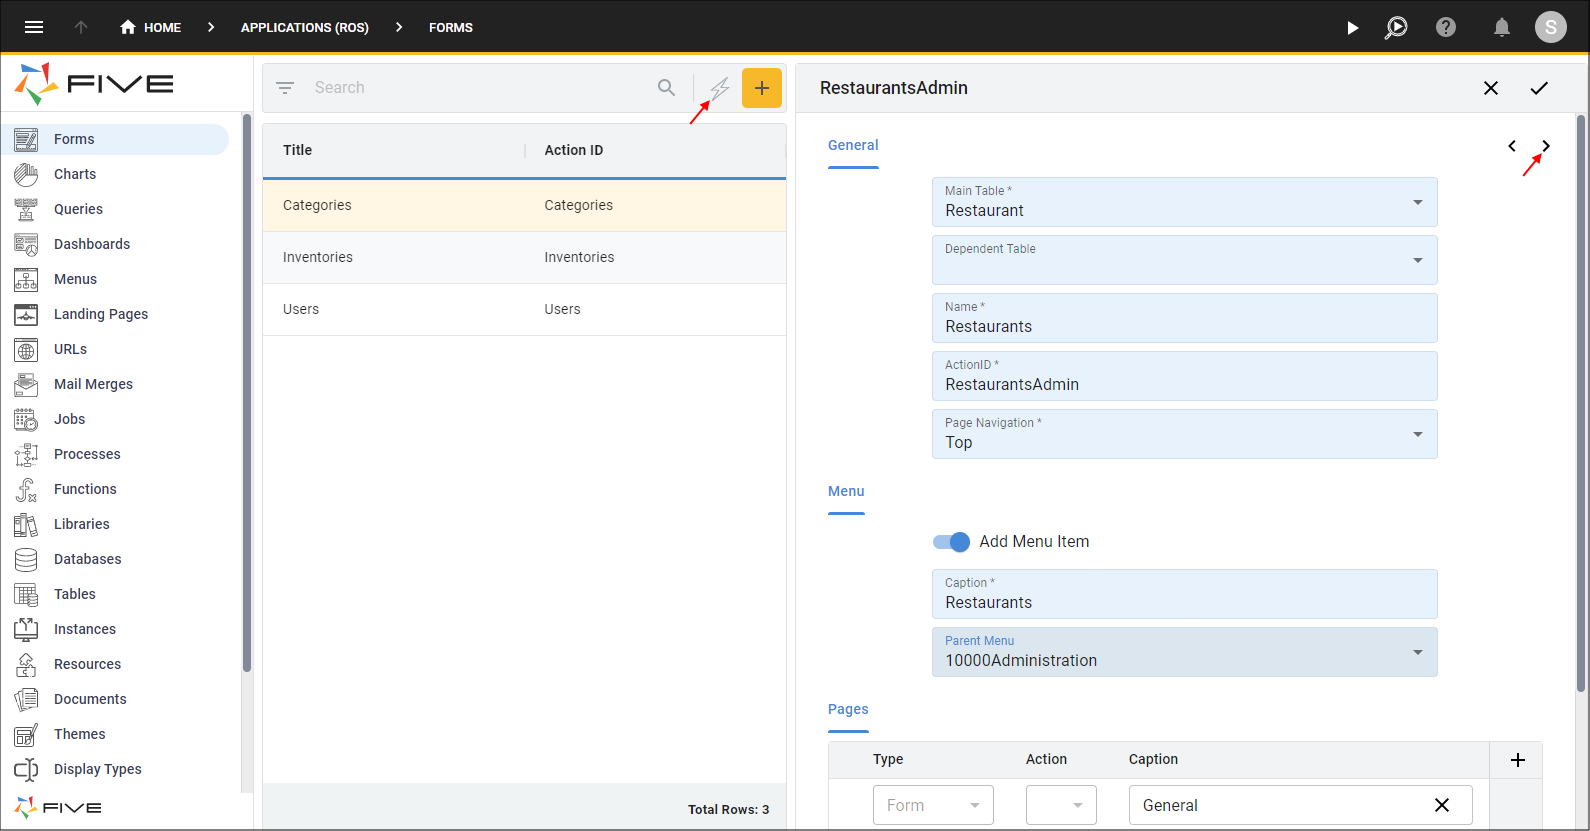
Figure 5- Add the Restaurants form
6. Click the Req. checkbox for the ABN record.
7. Click the List checkbox for the ABN record.
8. Click the Save button in the Form Wizard app bar.
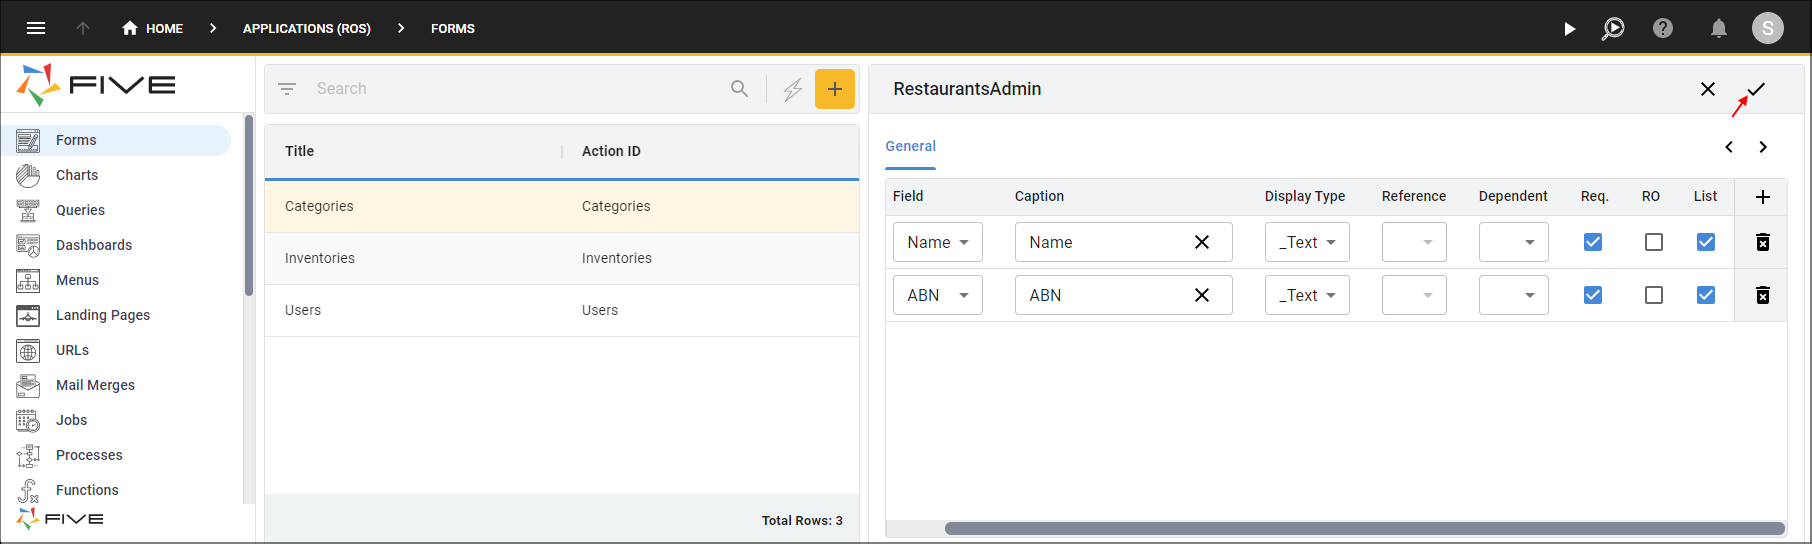
Figure 6 - Configure the fields and save the Restaurants form
Create the Address Form
1. Click the New Form Wizard button in the list app bar.2. Click the lookup icon in the Main Table field and select Address.
3. Click the Add Menu Item switch.
4. Click the Next button.
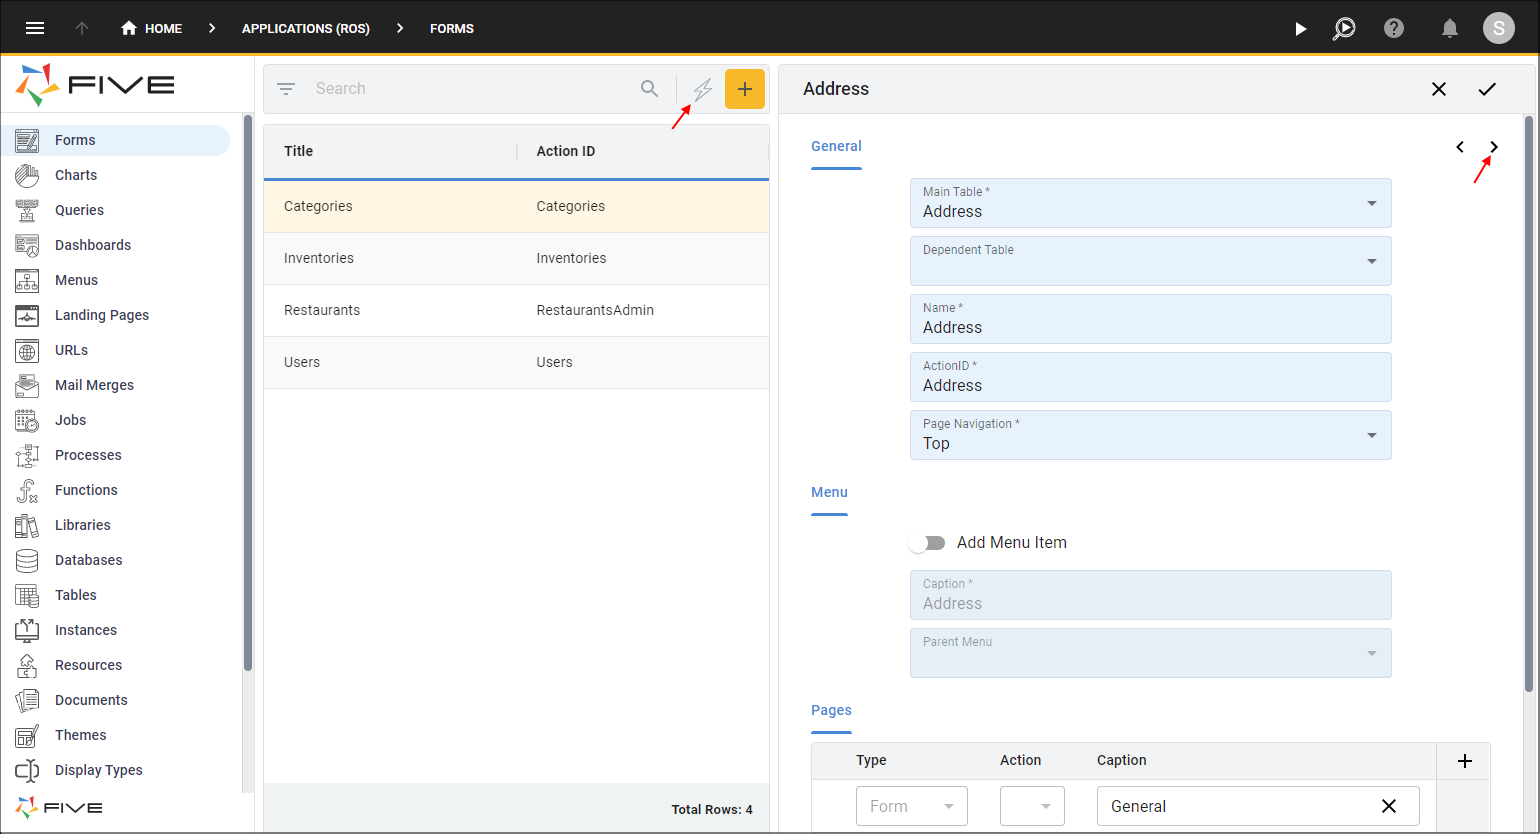
Figure 7 - Add the Address form
5. Click the Req. checkbox for the Name record.
6. Click the List checkbox for the Name record.
7. Click the lookup icon in the Display Type field for the Type record and select AddressType.
8. Click the Req. checkbox for the Type record.
9. Click the List checkbox for the Type record.
10. Click the Req. checkbox for the AddressLine1 record.
11. Click the Req. checkbox for the Suburb record.
12. Click the lookup icon in the Display Type field for the PostCode record and select ValidPostCode.
13. Click the Req. checkbox for the PostCode record.
14. Click the List checkbox for the PostCode record.
15. Click the Save button in the Form Wizard app bar.
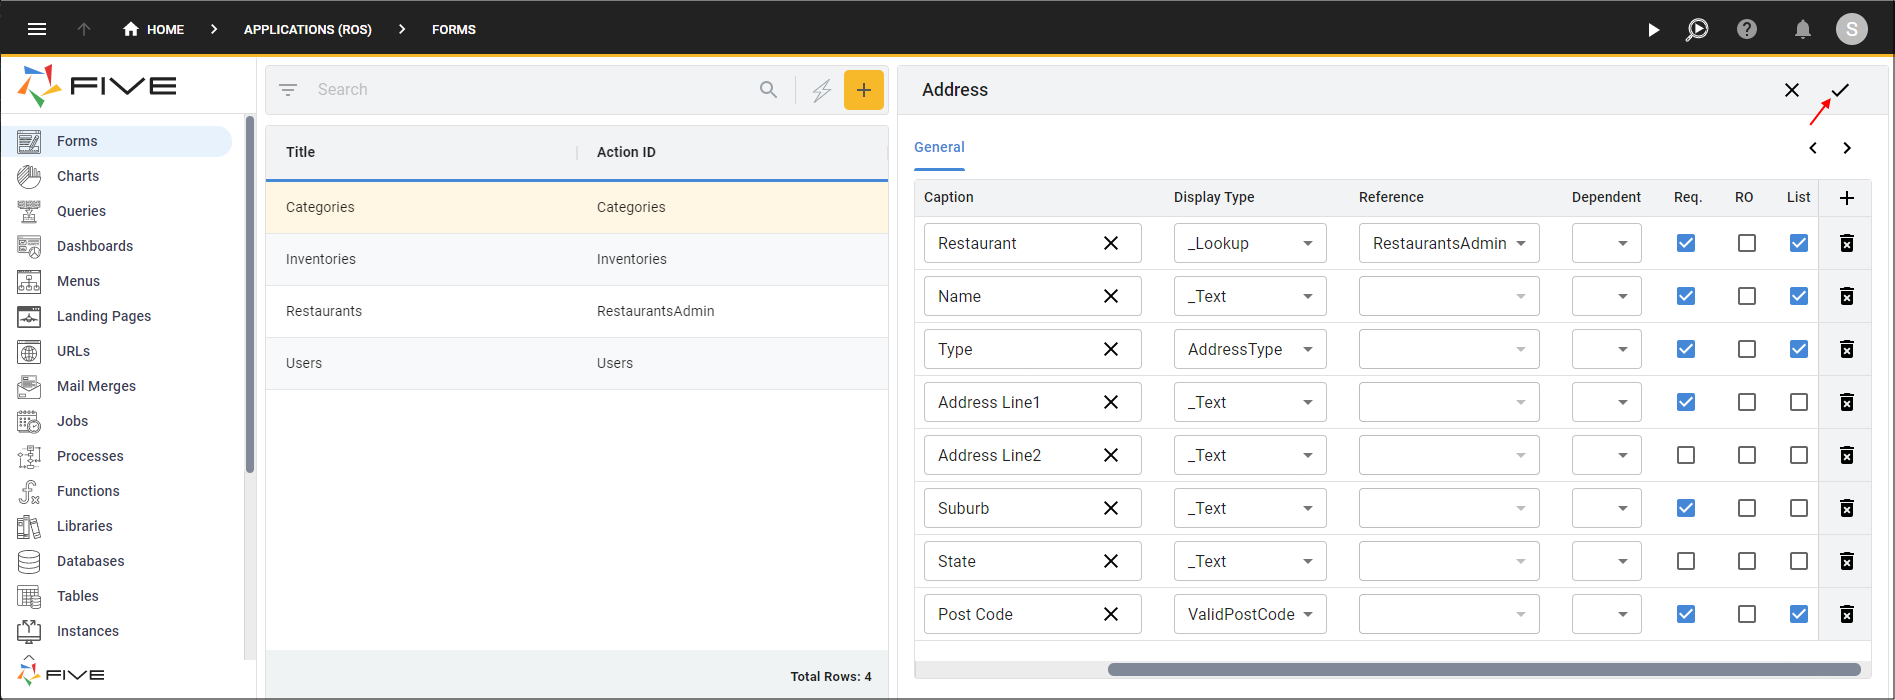
Figure 8 - Configure the fields and save the Address form
Create the Orders Form
1. Click the New Form Wizard button in the list app bar.2. Click the lookup icon in the Main Table field and select Orders.
3. Click the lookup icon in the Parent Menu field and select Restaurants.
4. Click the Next button.
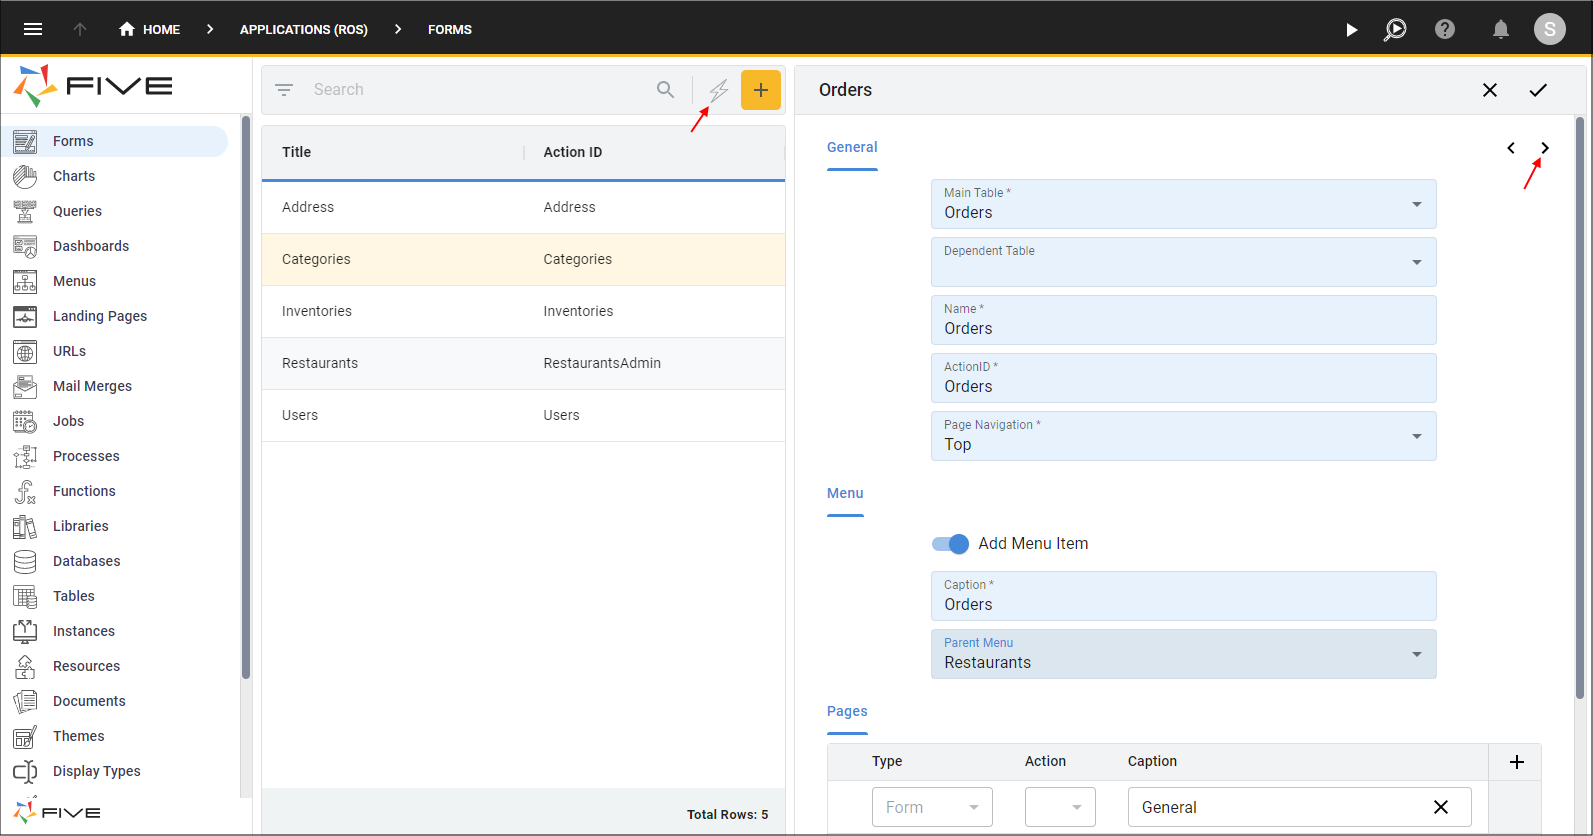
Figure 9 - Add the Orders form
5. Click the Req. checkbox for the Delivery Address record.
6. Click the Req. checkbox for the Date record.
7. Click the List checkbox for the Date record.
8. Click the Req. checkbox for the Order Number record.
9. Click the List checkbox for the Order Number record.
10. Click the Req. checkbox for the Sub Total record.
11. Click the Req. checkbox for the Total record.
12. Click the List checkbox for the Total record.
13. Click the Save button in the Form Wizard app bar.
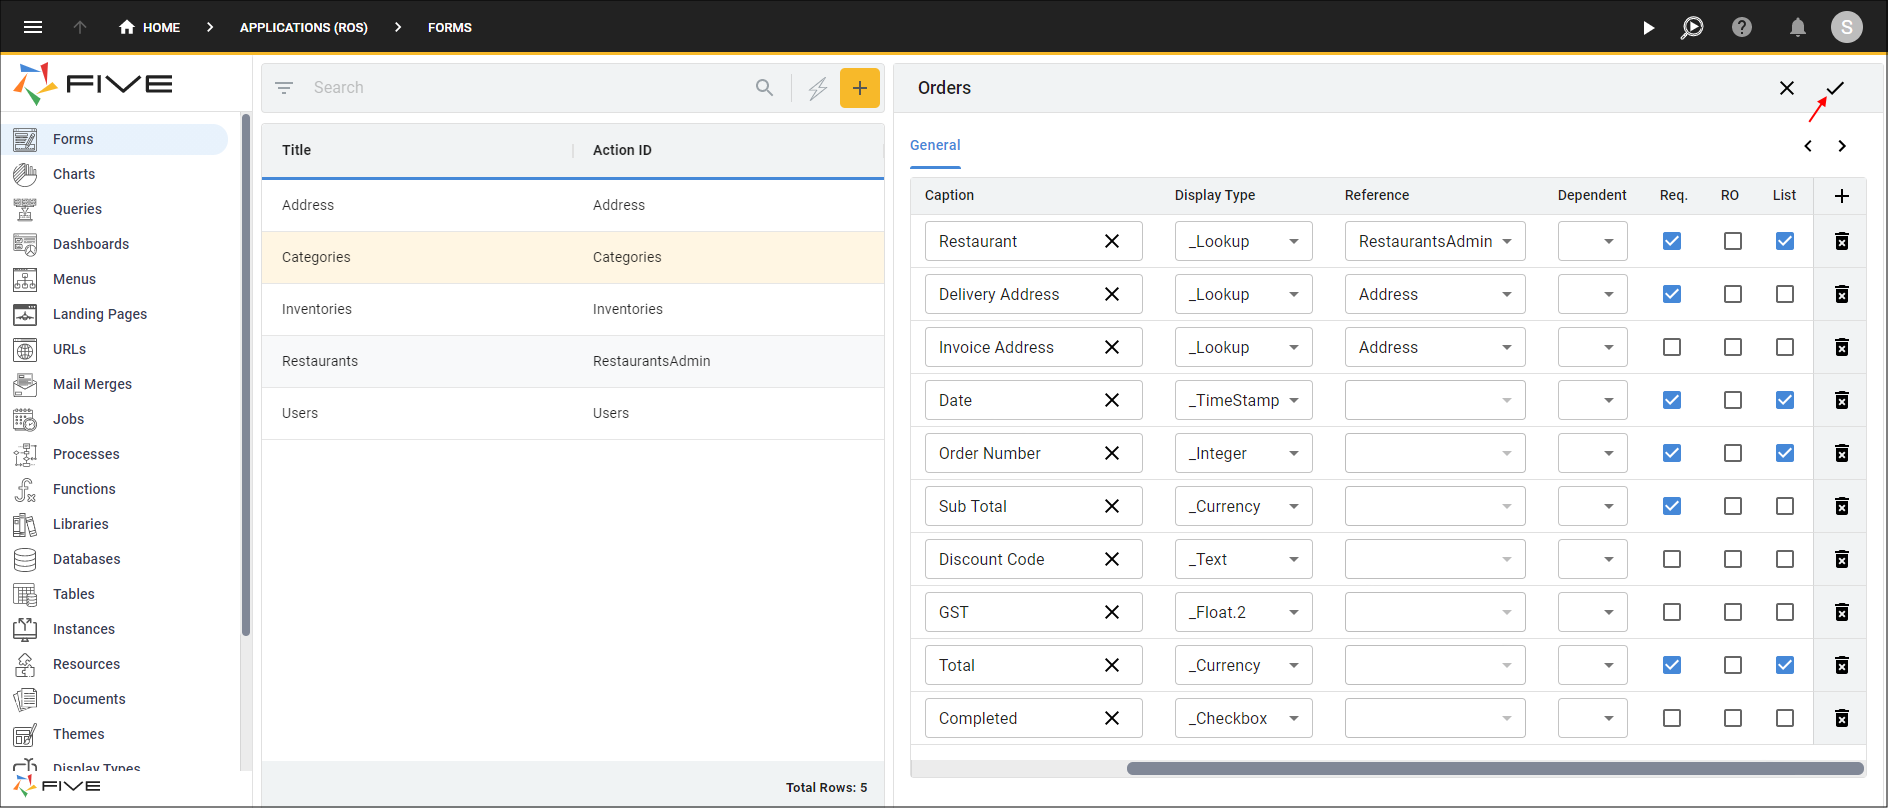
Figure 10 - Configure the fields and save the Orders form
Create the Items Form
1. Click the New Form Wizard button in the list app bar.2. Click the lookup icon in the Main Table field and select Item.
3. Click the Add Menu Item switch.
4. Click the Next button.
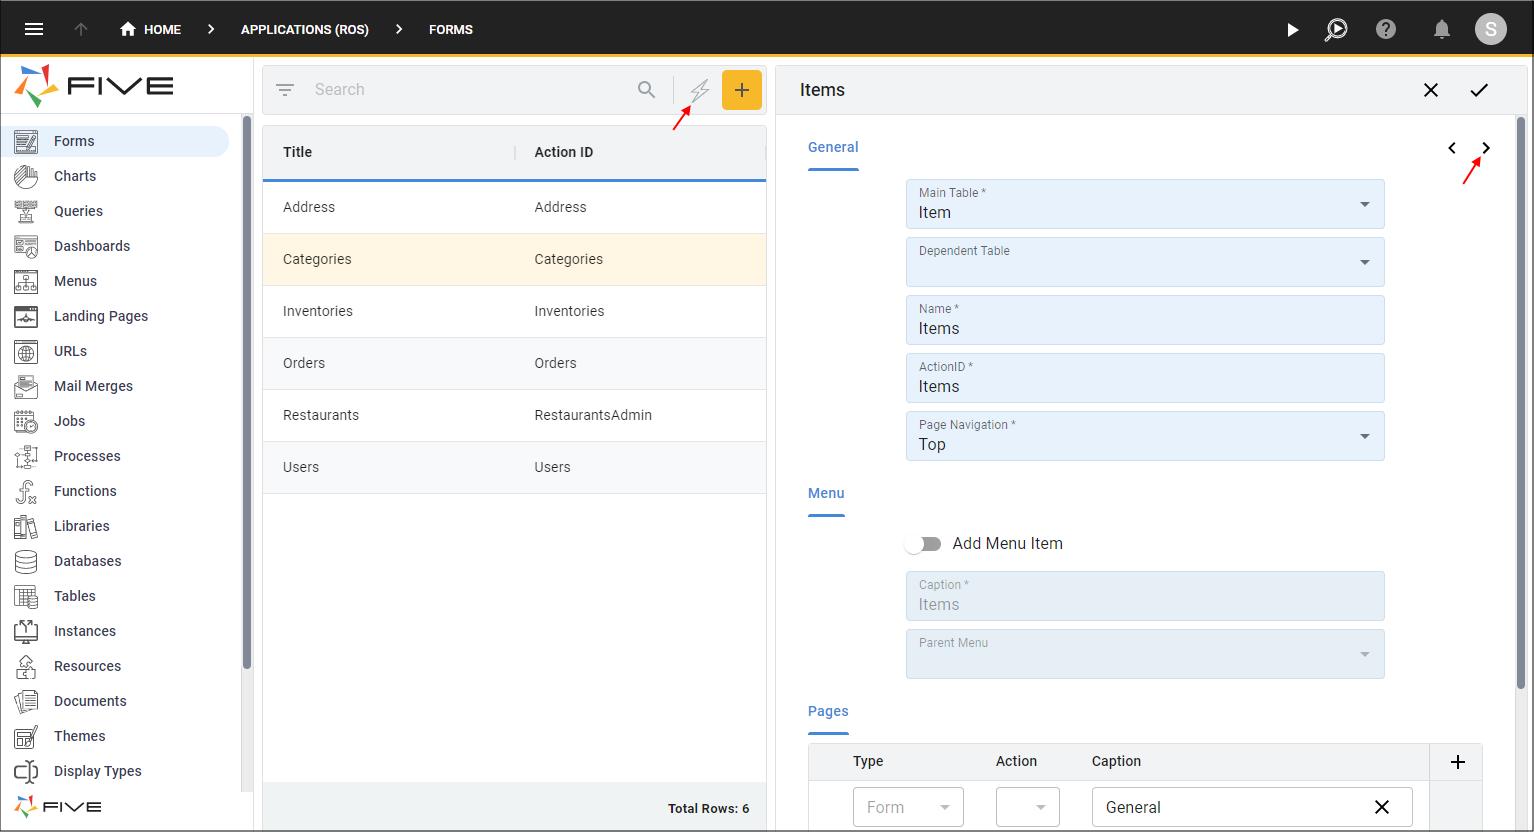
Figure 11 - Add the Items form
5. Click the Req. checkbox for the Inventory record.
6. Click the List checkbox for the Inventory record.
7. Click the Req. checkbox for the Price Per Item record.
8. Click the List checkbox for the Price Per Item record.
9. Click the Req. checkbox for the Quantity record.
10. Click the List checkbox for the Quantity record.
11. Click the Req. checkbox for the Total record.
12. Click the List checkbox for the Total record.
13. Click the Save button in the Form Wizard app bar.
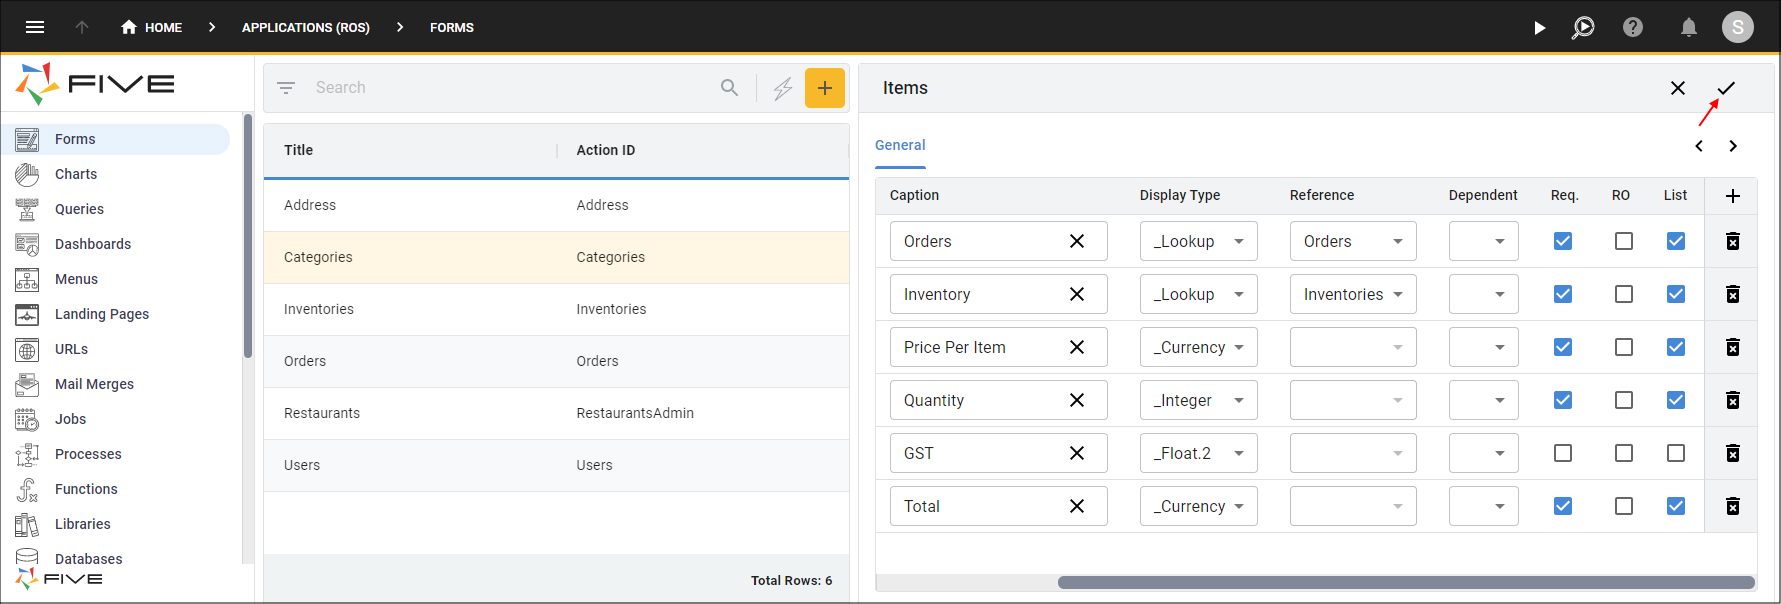
Figure 12 - Configure the fields and save the Items form
Edit the Items Form
info
When working with the Form Wizard not all features are available and you may find you need to edit a form to add extra functionality. We are going to add a Category field to the Items form that is not attached to the database, this will enable us to reference the Category form without having to store the selected values in the database. We can then make the Inventory field dependent on the Category field and have the inventories filtered to the selected category.
1. Select the Items record in the list.
2. Click the Pages tab.
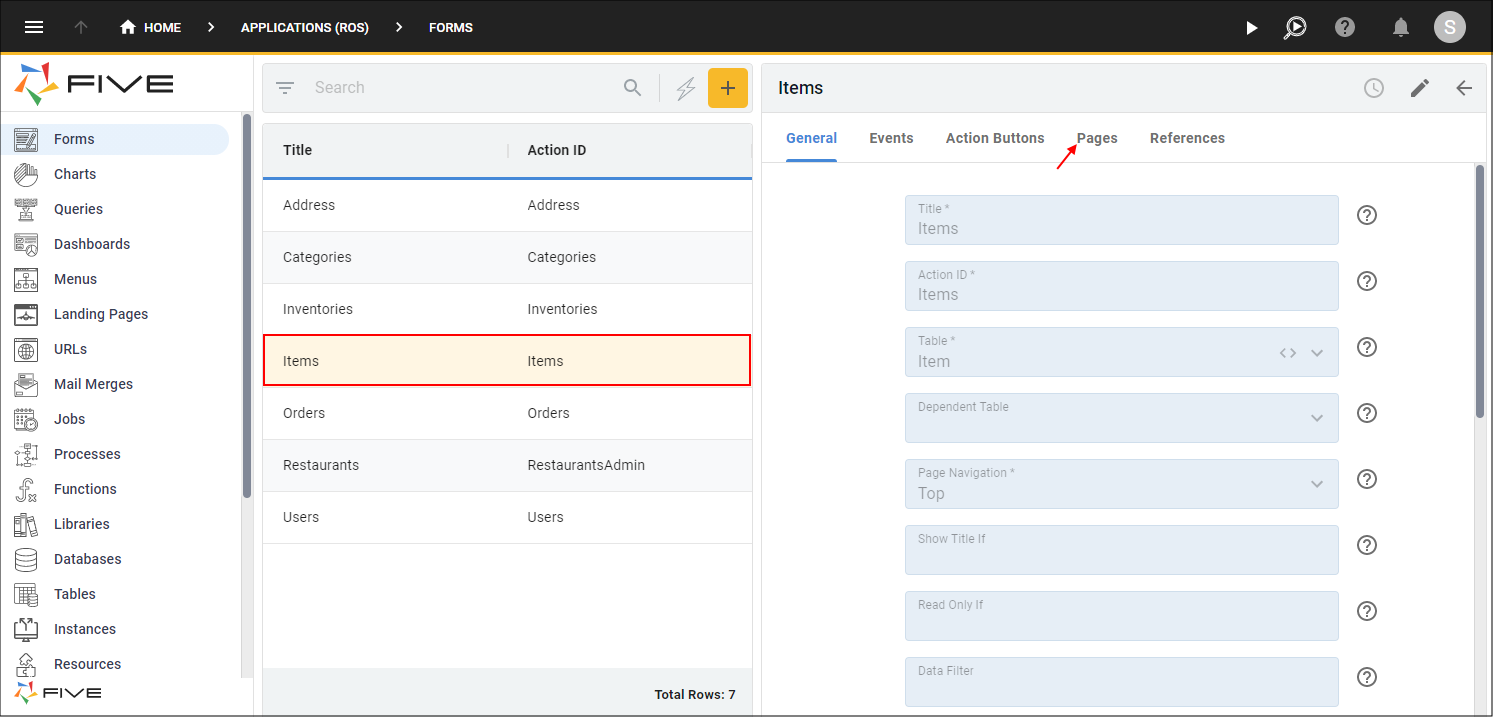
Figure 13 - Edit the Items form
3. Select the General record.
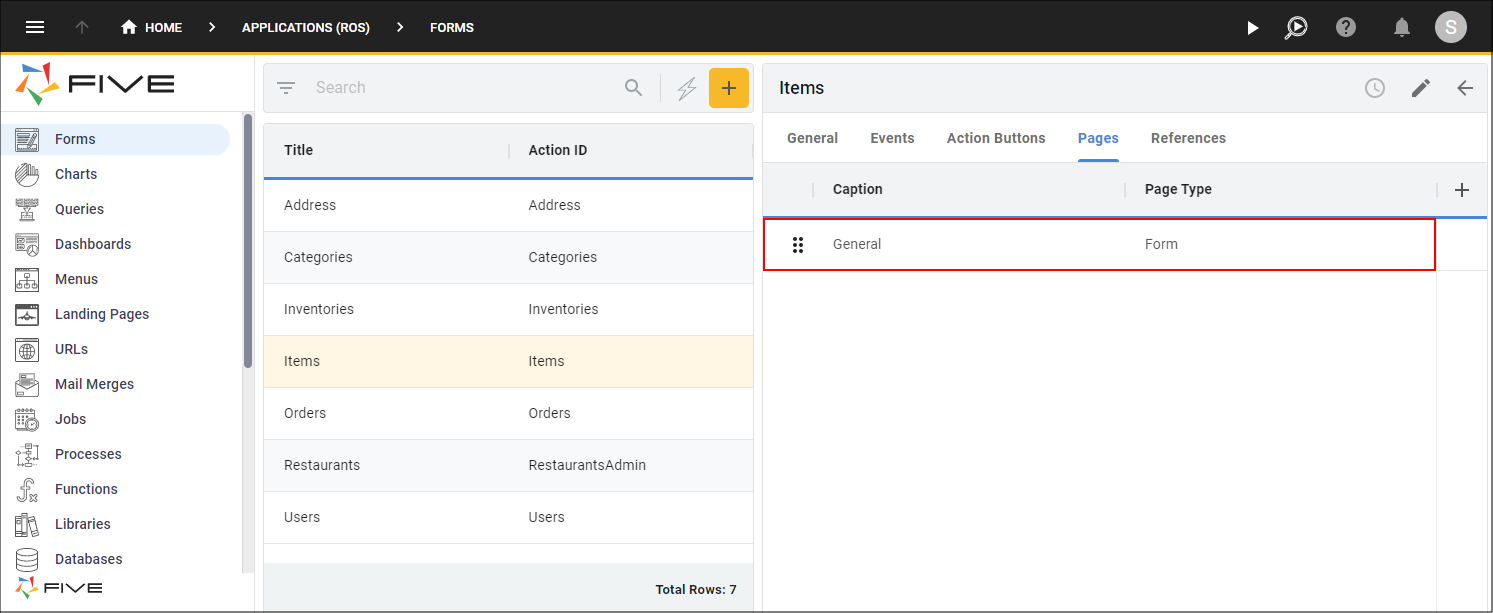
Figure 14 - General record
4. Click the Fields tab.
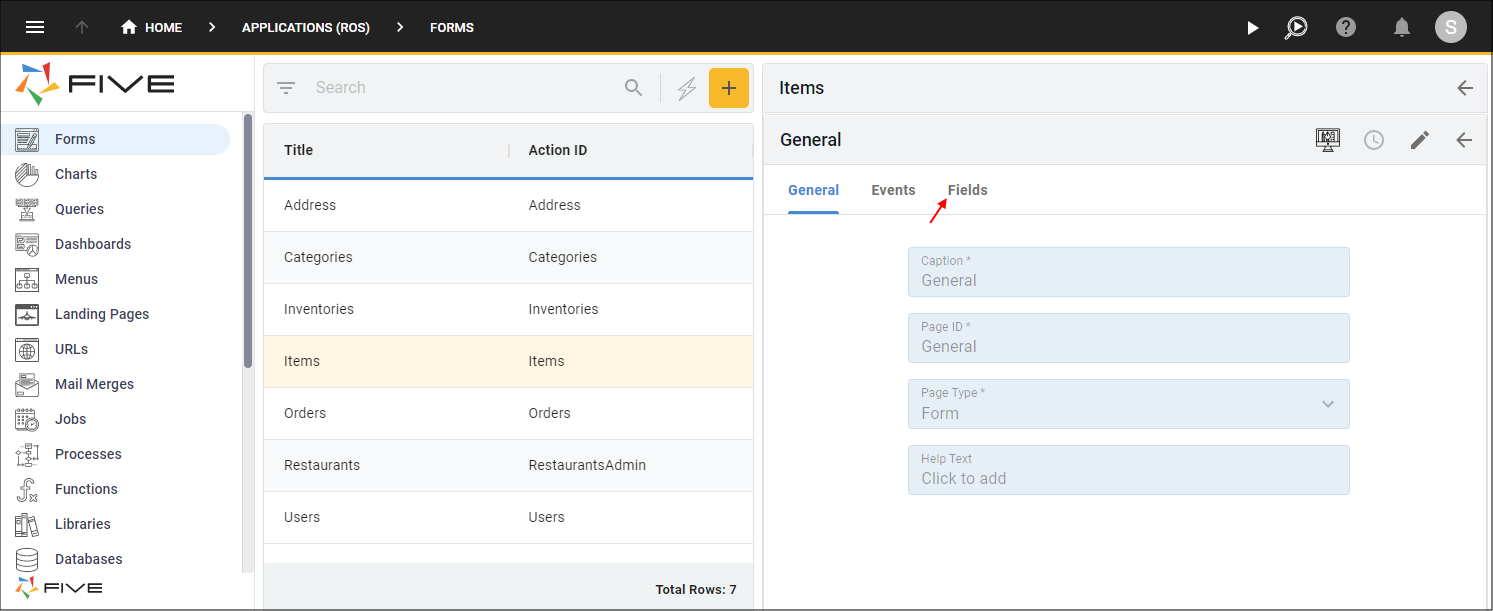
Figure 15 - Fields tab
5. Click the Add Fields button.
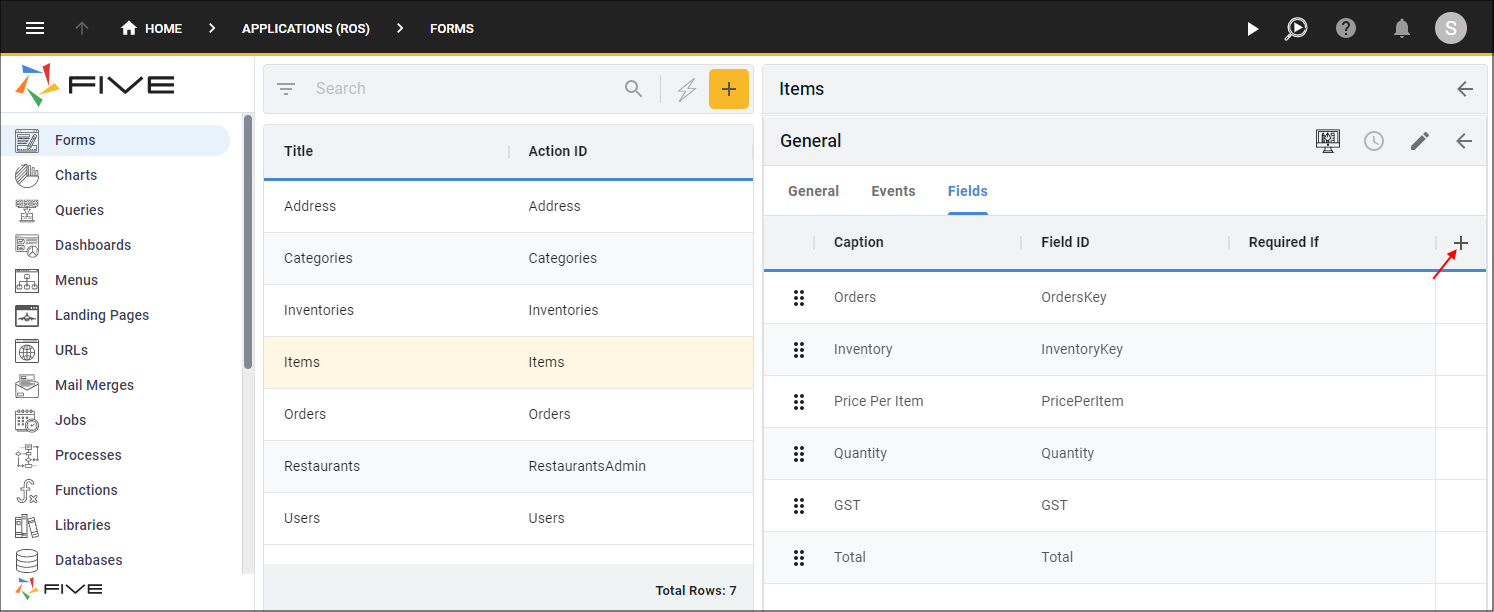
Figure 16 - Add Fields button
6. Type Category in the Caption field.
7. Click the lookup icon in the Display Type field and select _Lookup.
8. Click the lookup icon in the Reference Form field and select Categories.
9. Click the Display tab.
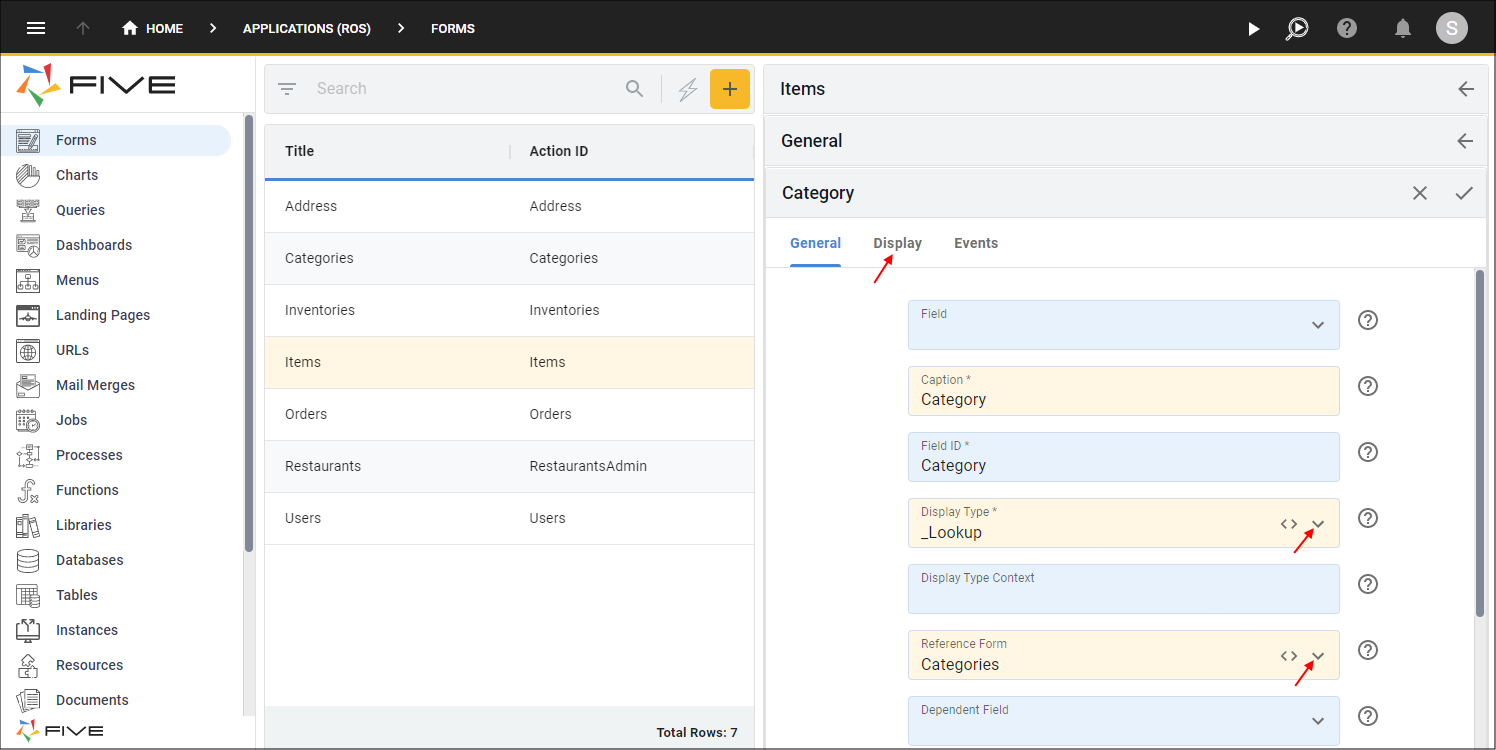
Figure 17 - Add the Category field
10. Click the Cancel button in the Required If field and type true.
11. Click the Save button in the form app bar.
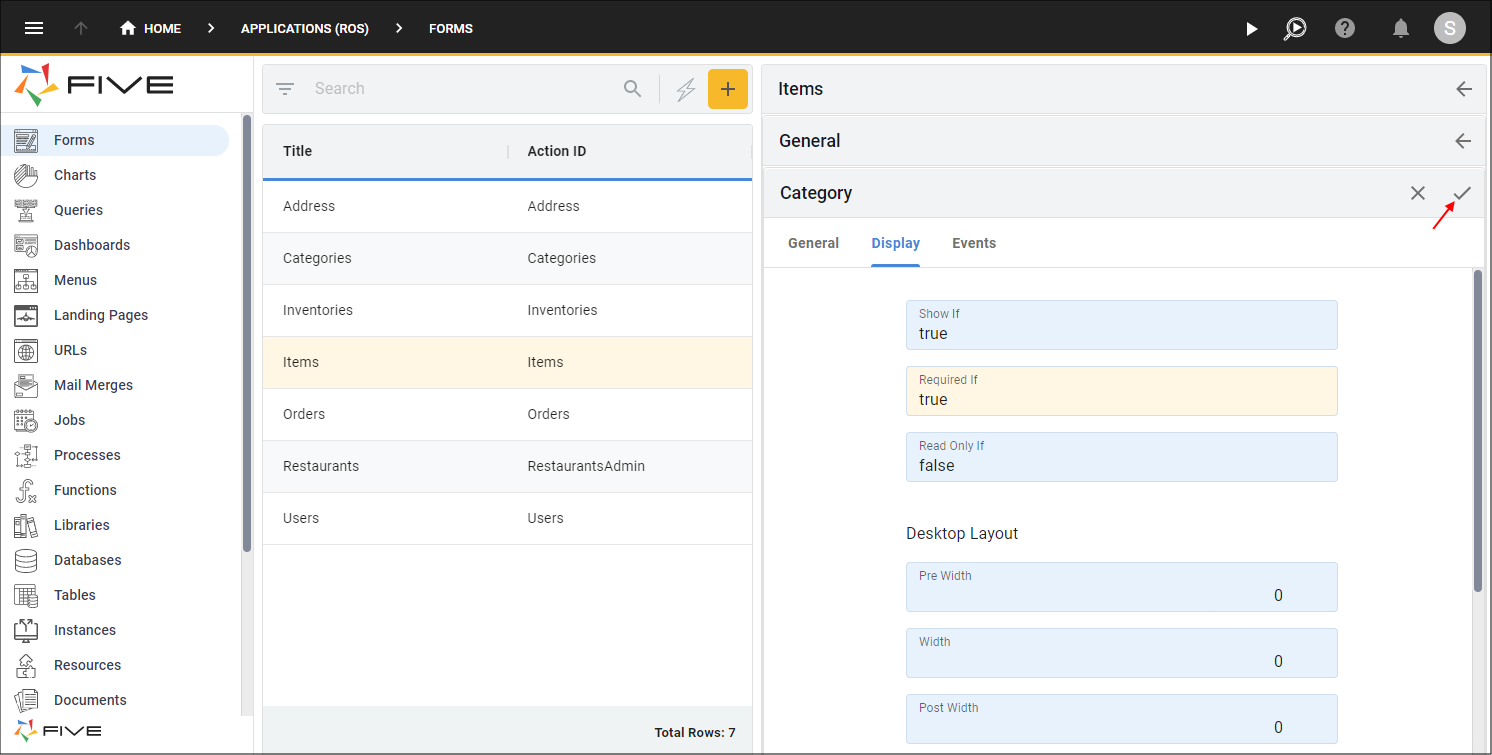
Figure 18 - Make the Category field required and save the field
12. Click, hold, and drag the Category record by the drag handle to be positioned under the Orders record.
13. Select the Inventory record.
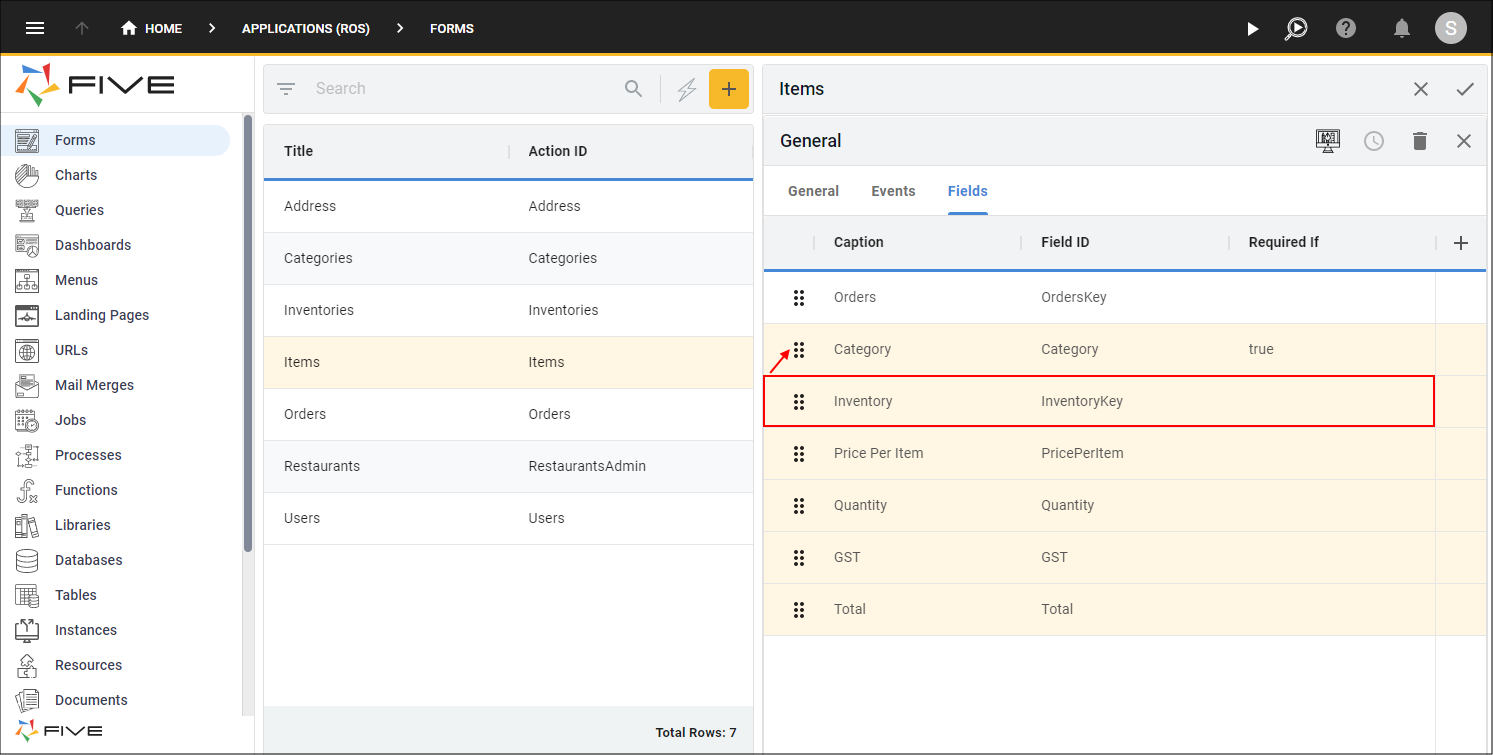
Figure 19 - Reorder the Category field and select the Inventory record
14. Click the lookup icon in the Dependent Field field and select Category.
15. Click the Save button in the form app bar.
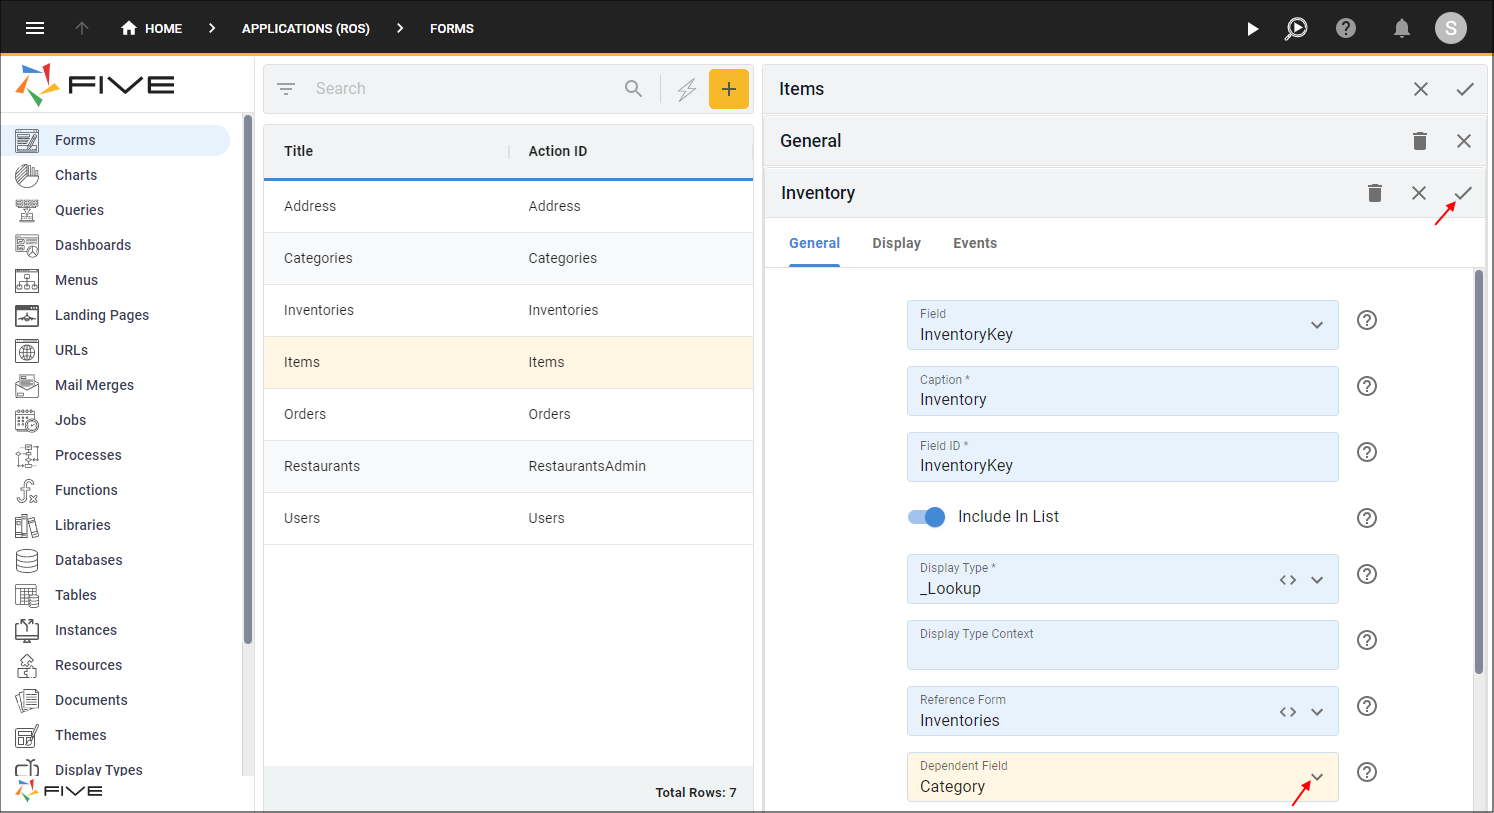
Figure 20 - Edit the Inventory field
16. Click the Save button in the form app bar above the list.
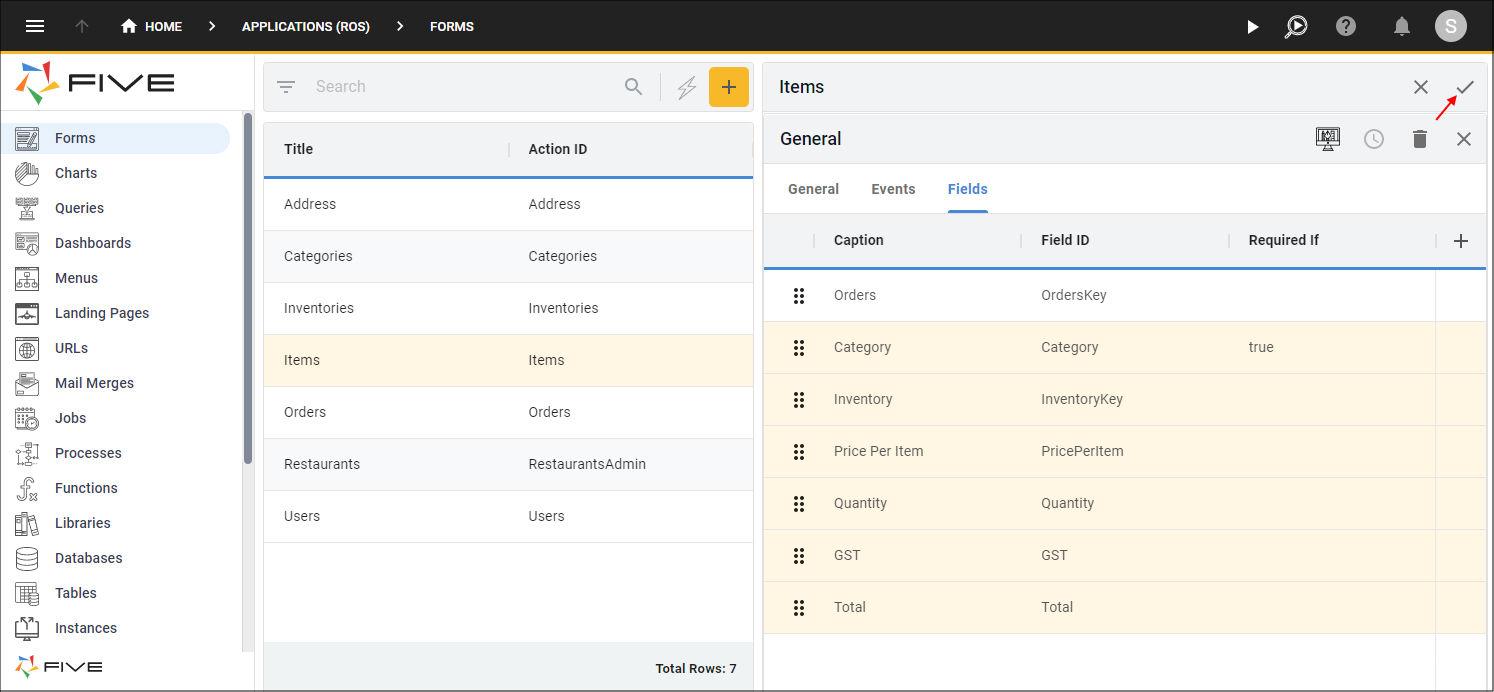
Figure 21 - Save the Items form
Edit the Restaurants Form
info
The Address form does not have a menu item because it will be accessed on the Restaurants (RestaurantsAdmin) form. The Restaurants form needs to be edited to add a List page type called Addresses.
1. Select the RestaurantsAdmin record in the list.
2. Click the Pages tab.
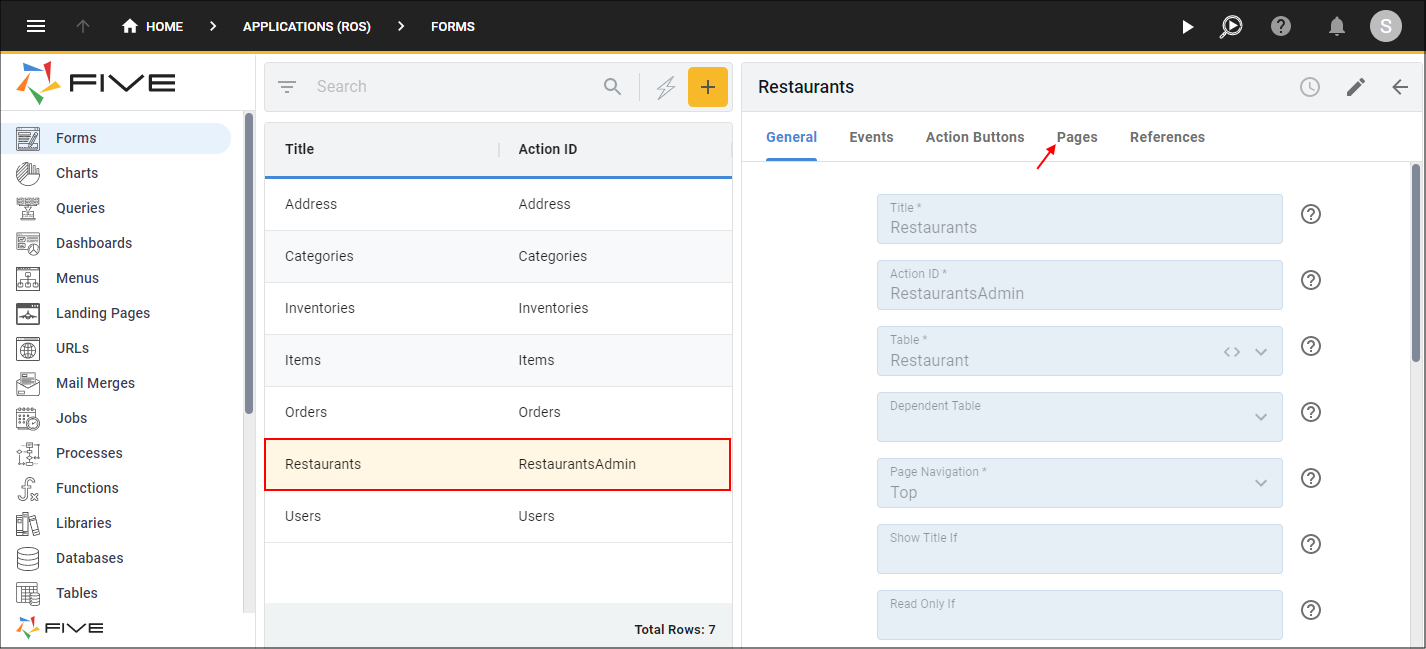
Figure 22 - Edit the RestaurantsAdmin record
3. Click the Add Pages button.
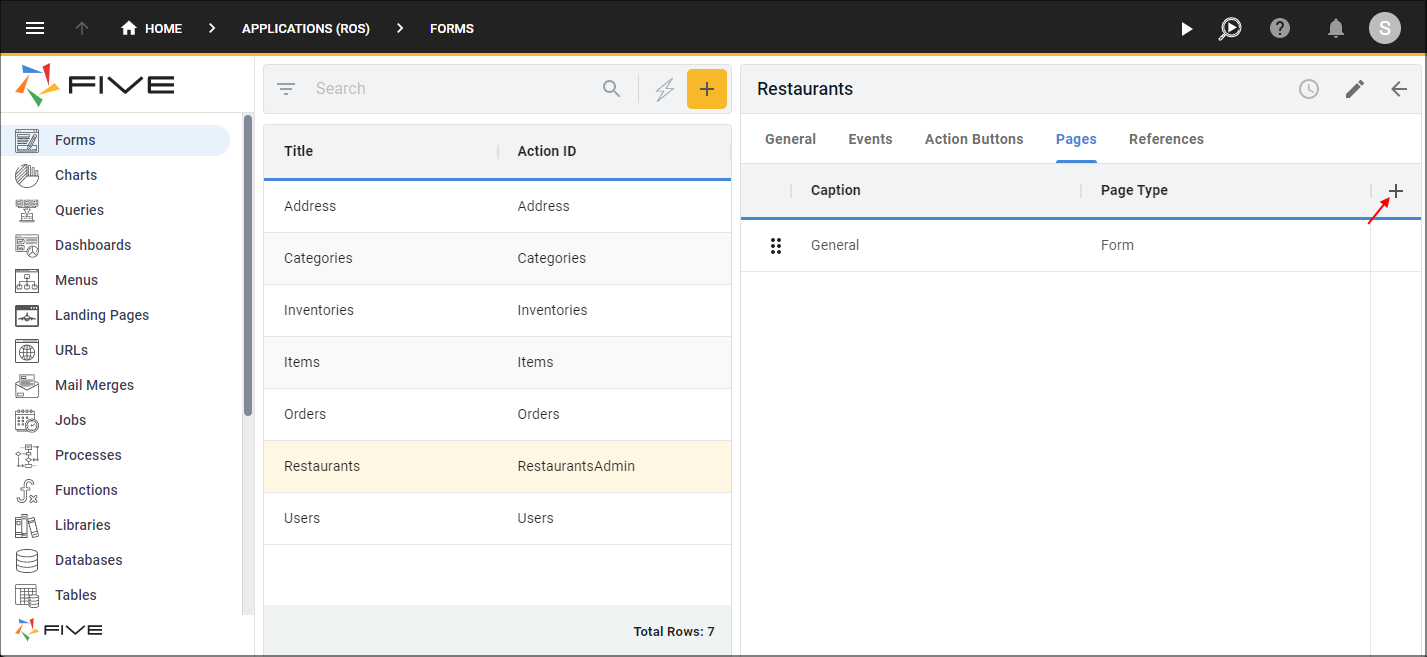
Figure 23 - Add Pages button
4. Type Addresses in the Caption field.
5. Click the lookup icon in the Page Type field and select List.
6. Click the lookup icon in the Action field and select Address (Form).
7. Click the Save button in the form app bar.
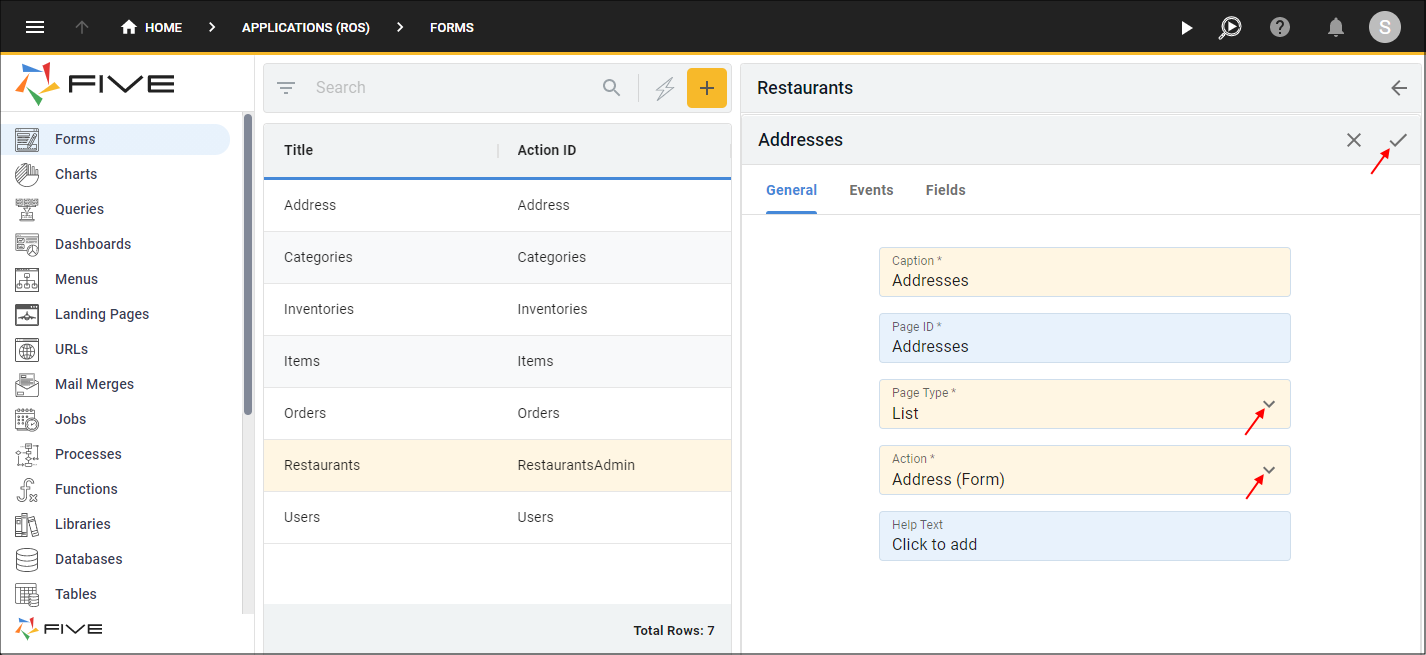
Figure 24 - Add the Addresses page
8. Click the Save button in the form app bar above the list.
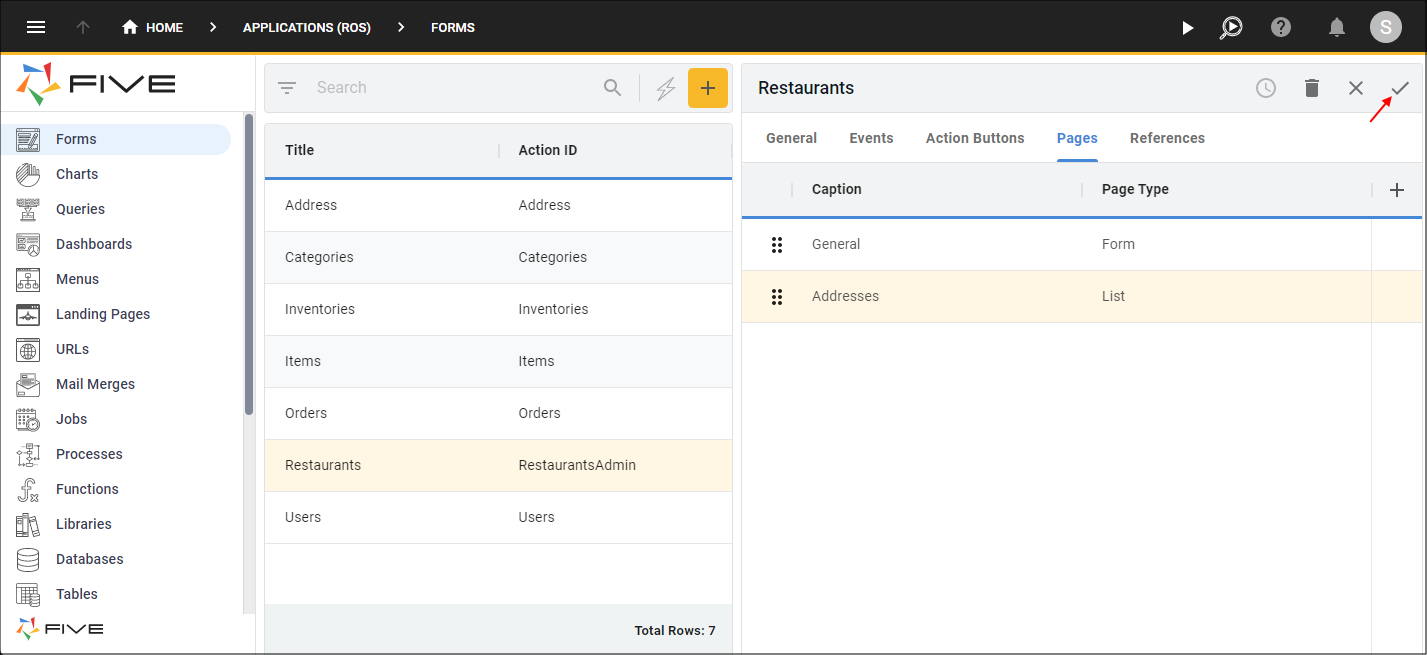
Figure 25 - Save the RestaurantsAdmin form
Edit the Orders Form
info
The Items form does not have a menu item because it will be accessed on the Orders form. The Orders form needs to be edited to add a List page type called Items and to attach the Billing Address and Shipping Address lookup queries.
1. Select the Orders record in the list.
2. Click the Pages tab.
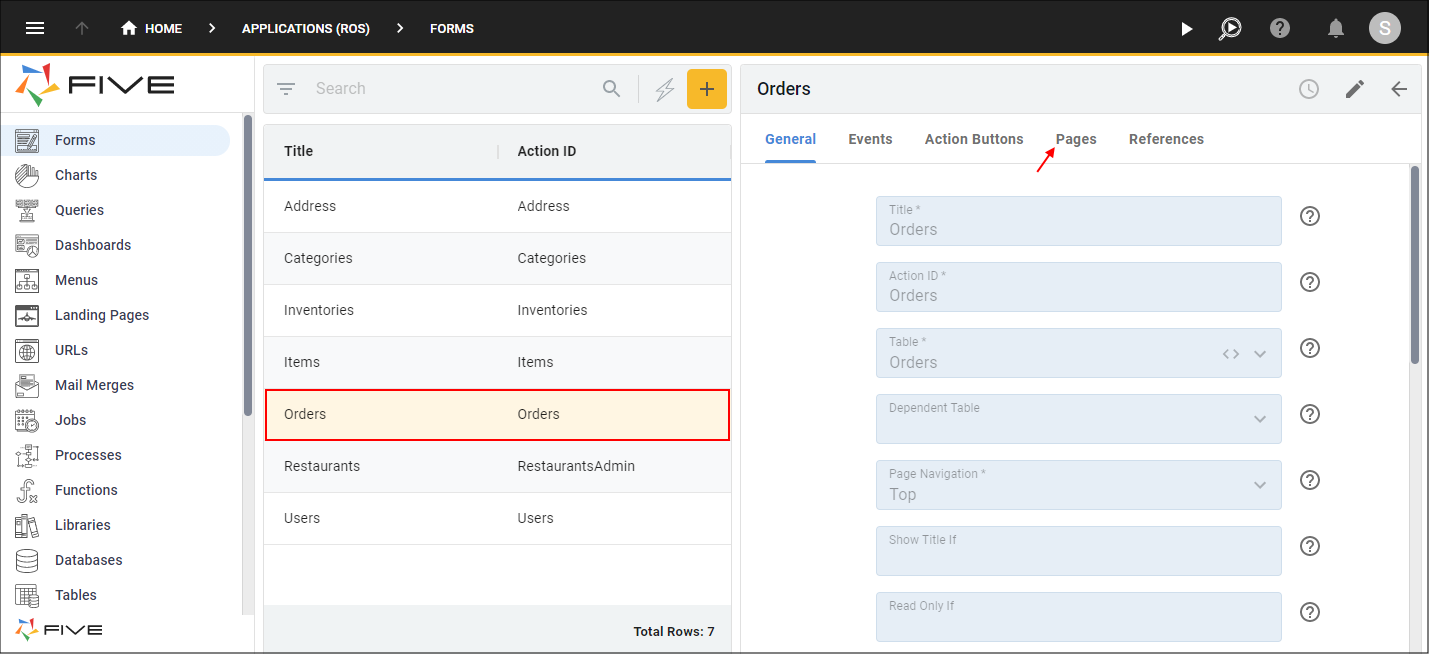
Figure 26 - Edit the Orders record
3. Click the Add Pages button.
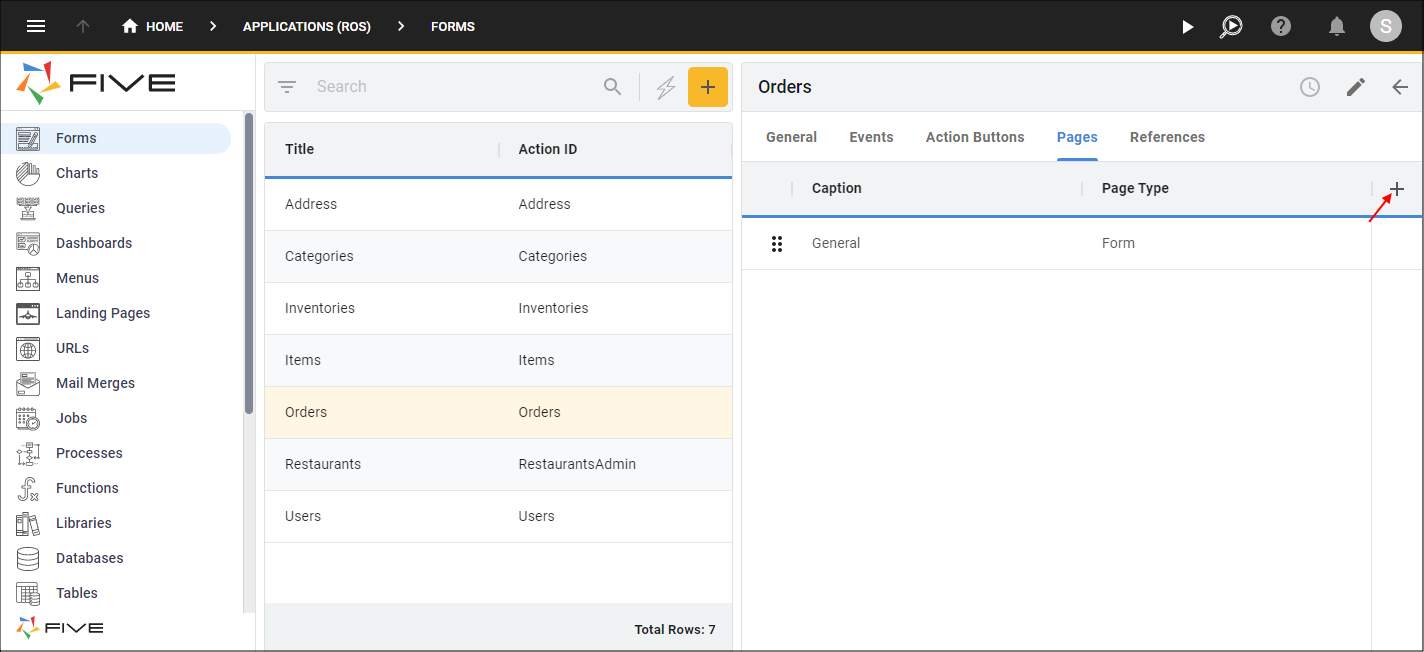
Figure 27 - Add Pages button
4. Type Items in the Caption field.
5. Click the lookup icon in the Page Type field and select List.
6. Click the lookup icon in the Action field and select Items (Form).
7. Click the Save button in the form app bar.
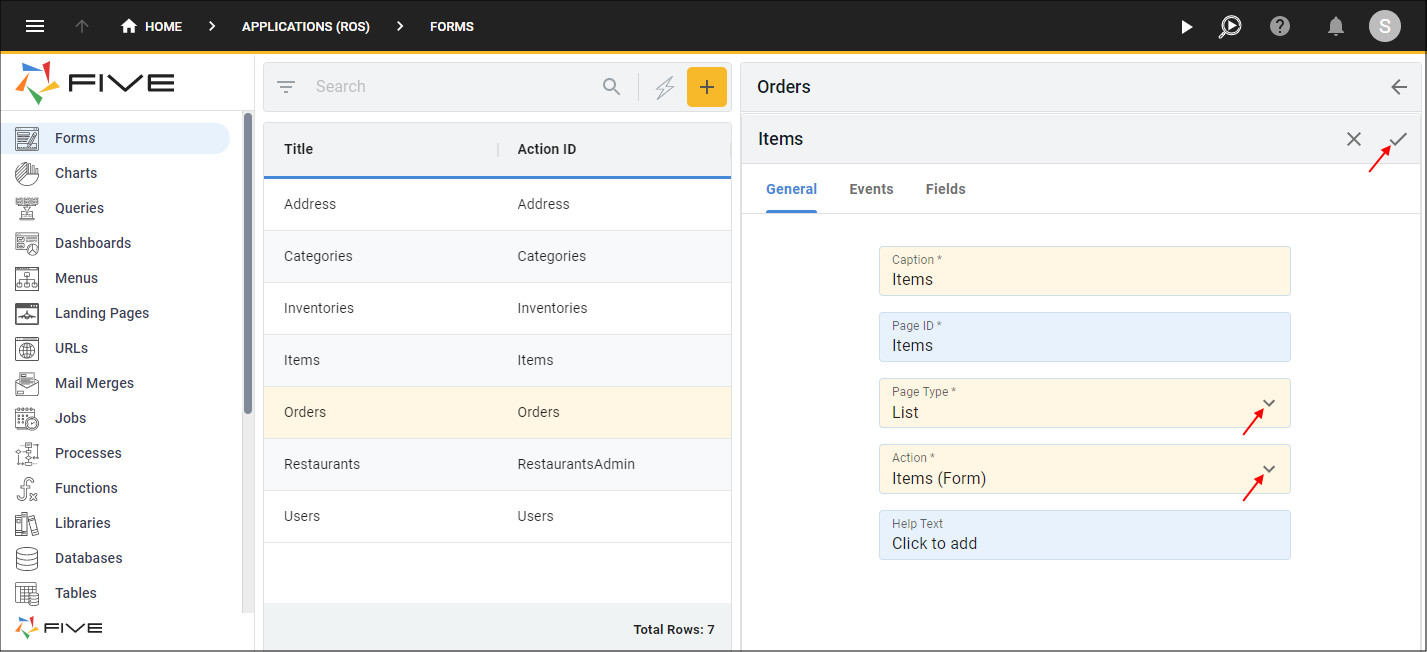
Figure 28 - Add the Items page
8. Select the General record.
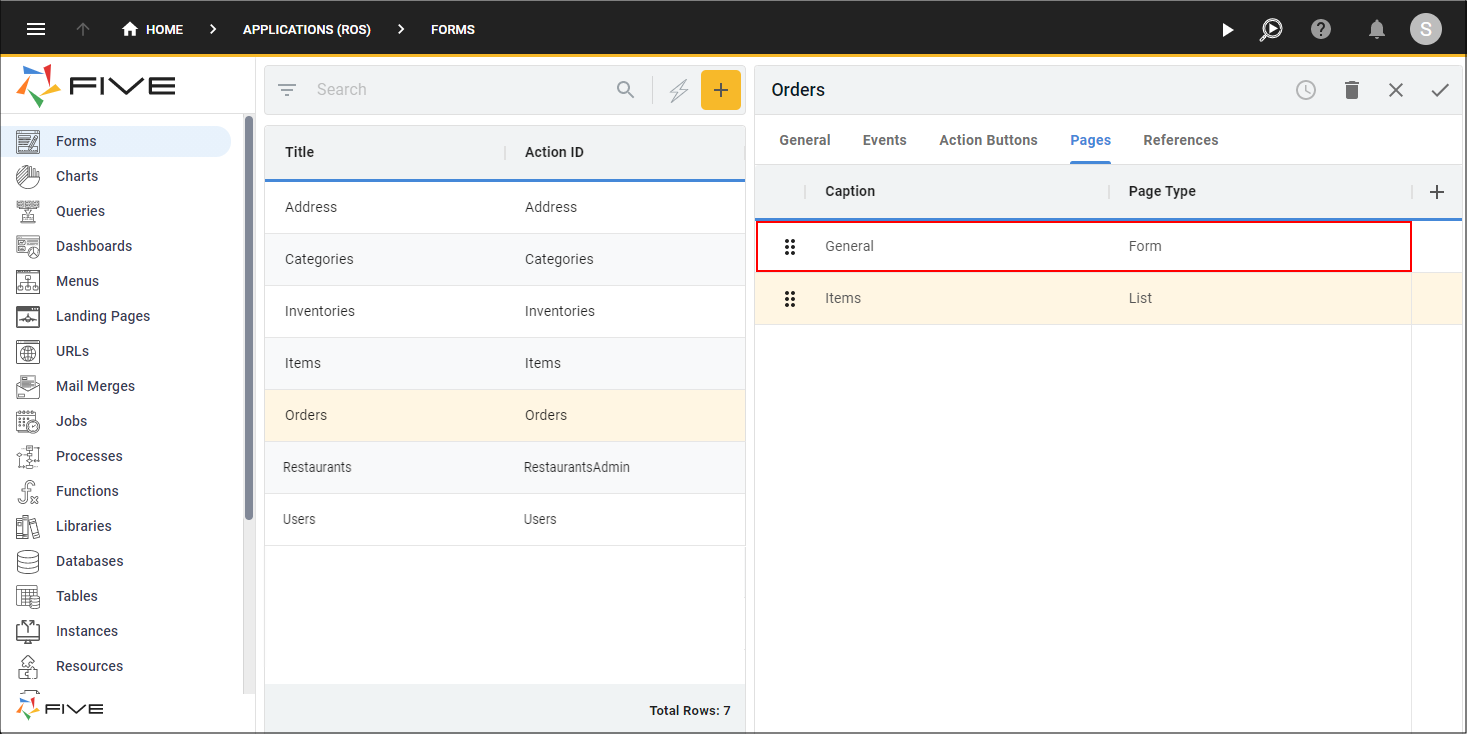
Figure 29 - General record
9. Click the Fields tab.
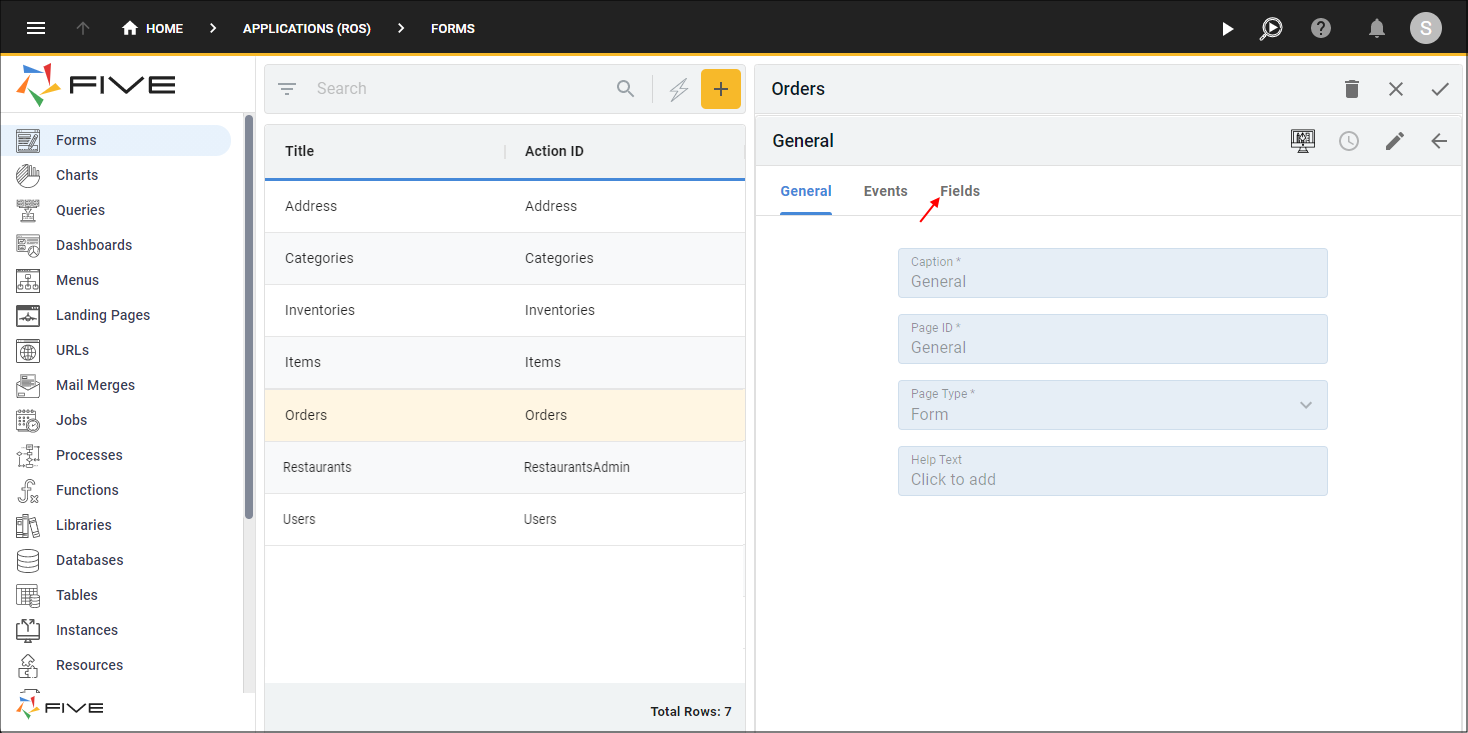
Figure 30 - Fields tab
10. Select the Delivery Address record.
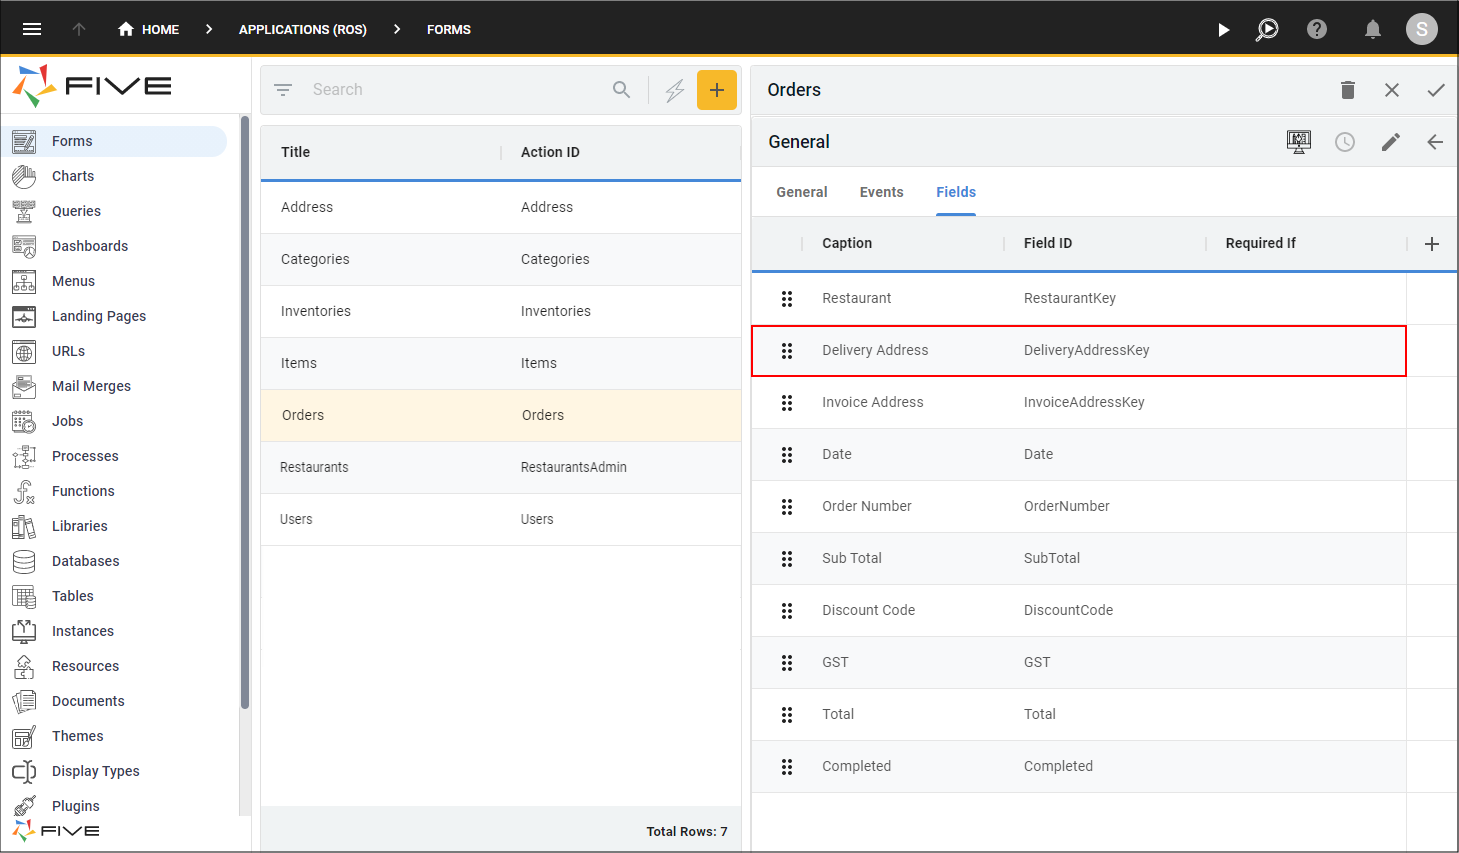
Figure 31 - Delivery Address record
11. Either click the Edit button in the form app bar, or click directly in the Reference Form field.
12. Click the Cancel button in the Reference Form field.
13. Click the lookup icon in the Display Type field and select _LookupQuery.
14. Click the lookup icon in the Lookup Query field and select ShippingAddress.
15. Click the Save button in the form app bar.
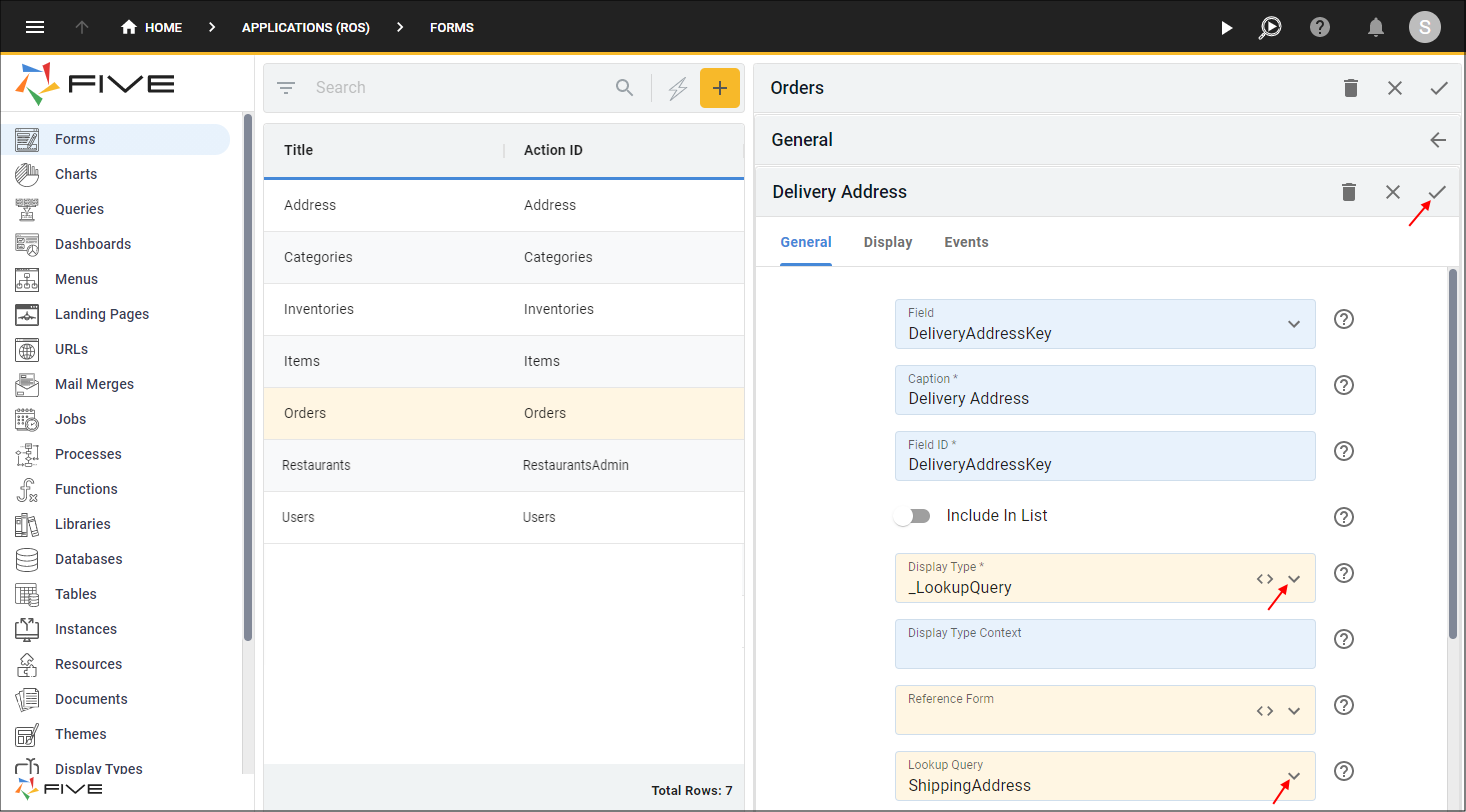
Figure 32 - Edit the Delivery Address record
16. Select the Invoice Address record.
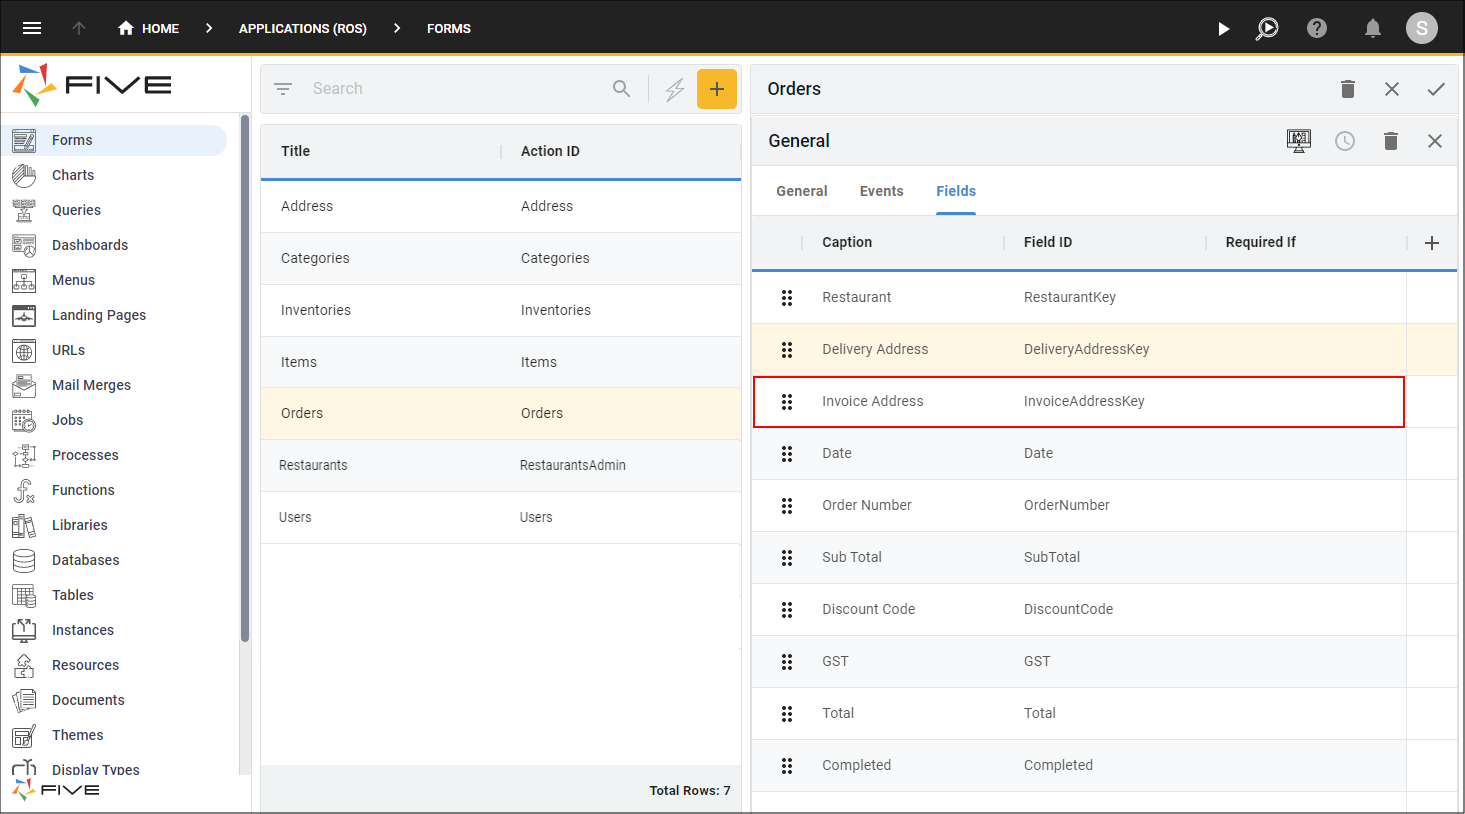
Figure 33 - Invoice Address record
17. Either click the Edit button in the form app bar, or click directly in the Reference Form field.
18. Click the Cancel button in the Reference Form field.
19. Click the lookup icon in the Display Type field and select _LookupQuery.
20. Click the lookup icon in the Lookup Query field and select BillingAddress.
21. Click the Save button in the form app bar.
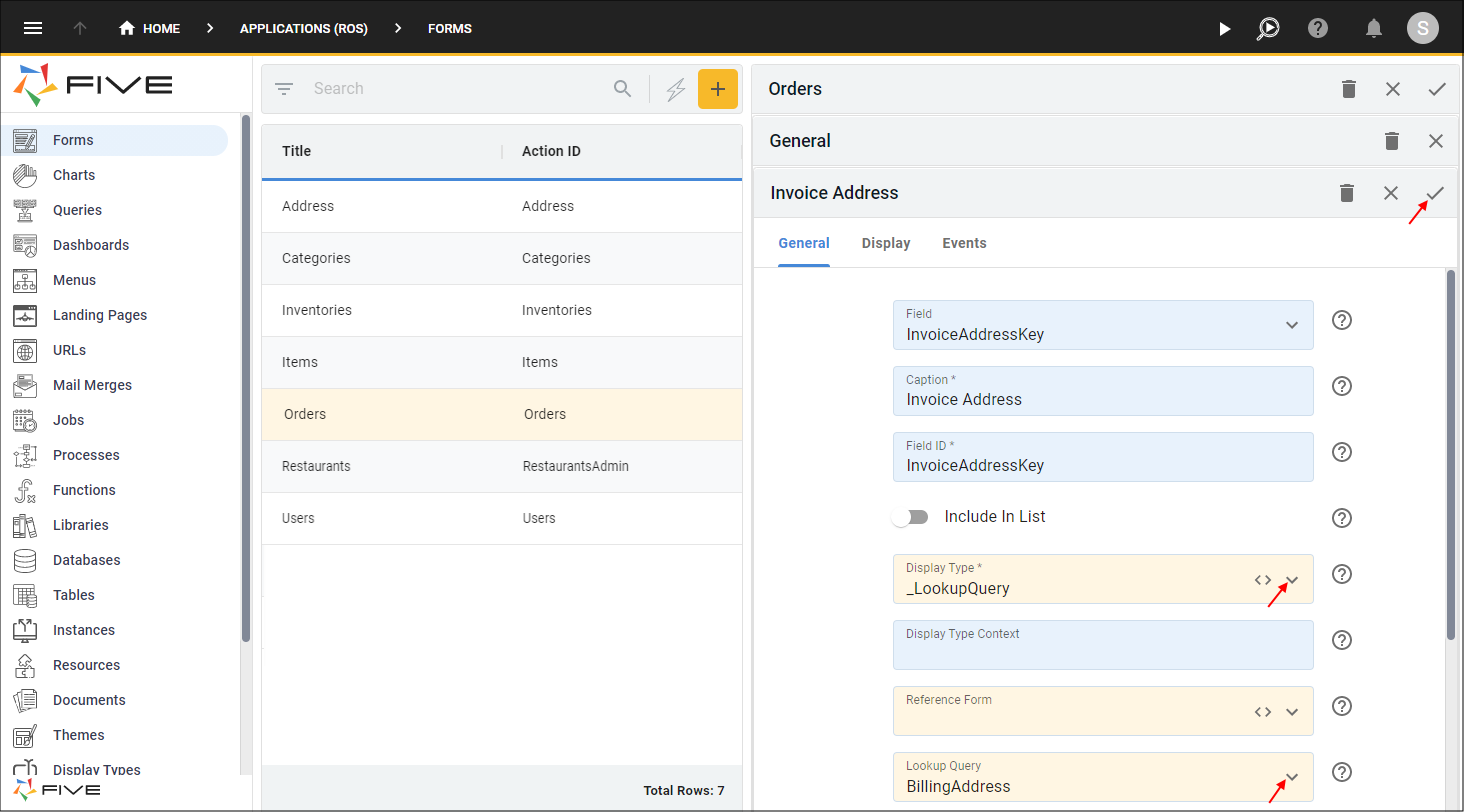
Figure 34 - Edit the Invoice Address record
22. Click the Save button in the form app bar above the list.
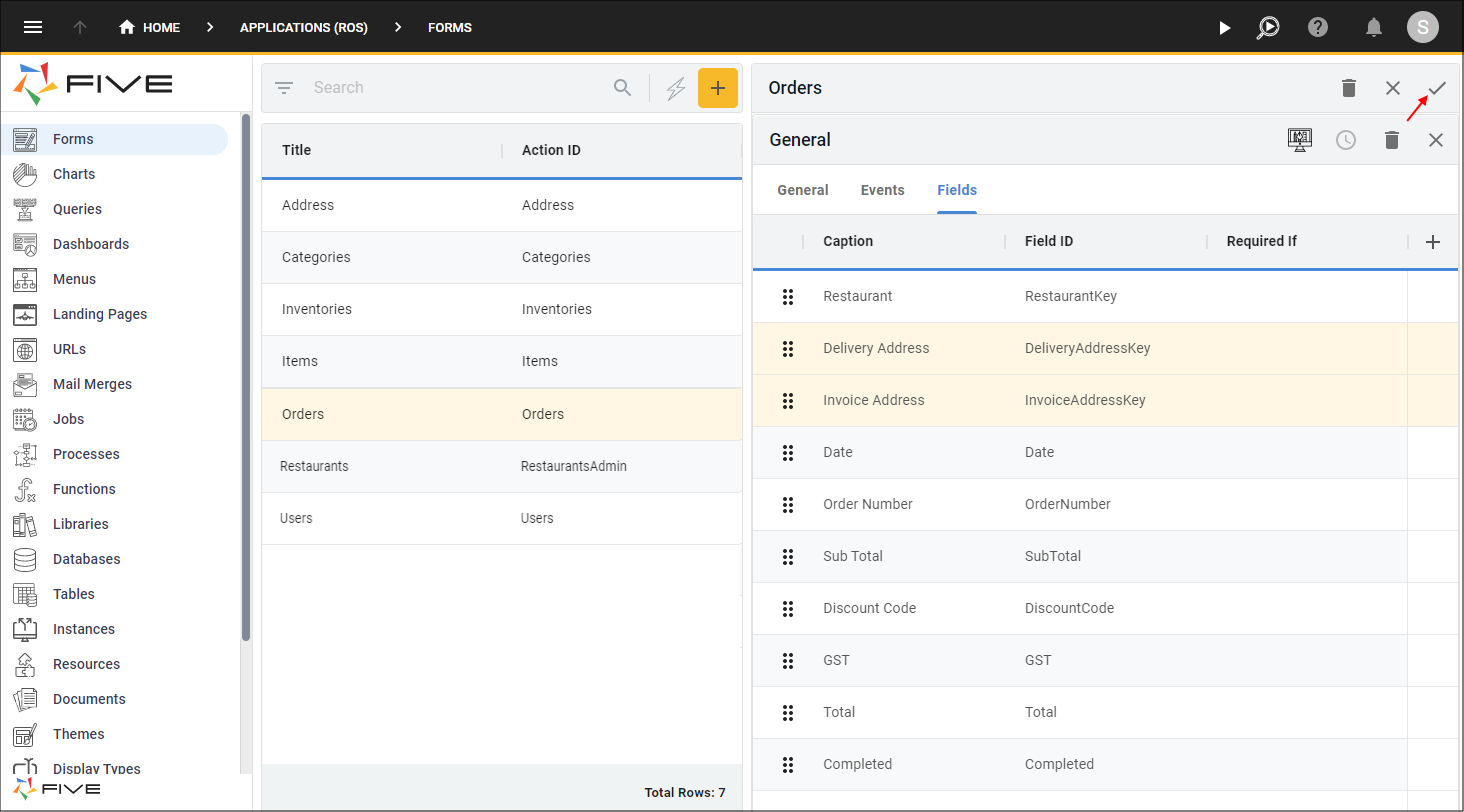
Figure 35 - Save the Orders form
Reorder Menu Items for the Administration Menu
info
By default, the Form Wizard creates a menu item for each form you create. These menu items can be edited to reorder the items, or add icons and extra definitions.
Edit the Restaurants Menu Item
1. Select Menus in the menu.2. Select the Restaurants record in the list.
3. Either click the Edit button in the form app bar, or click directly in the Menu ID field and type 10100 before Restaurants.
4. Click the Cancel button in the Menu Order field and type 10100.
5. Click the Save button in the form app bar.
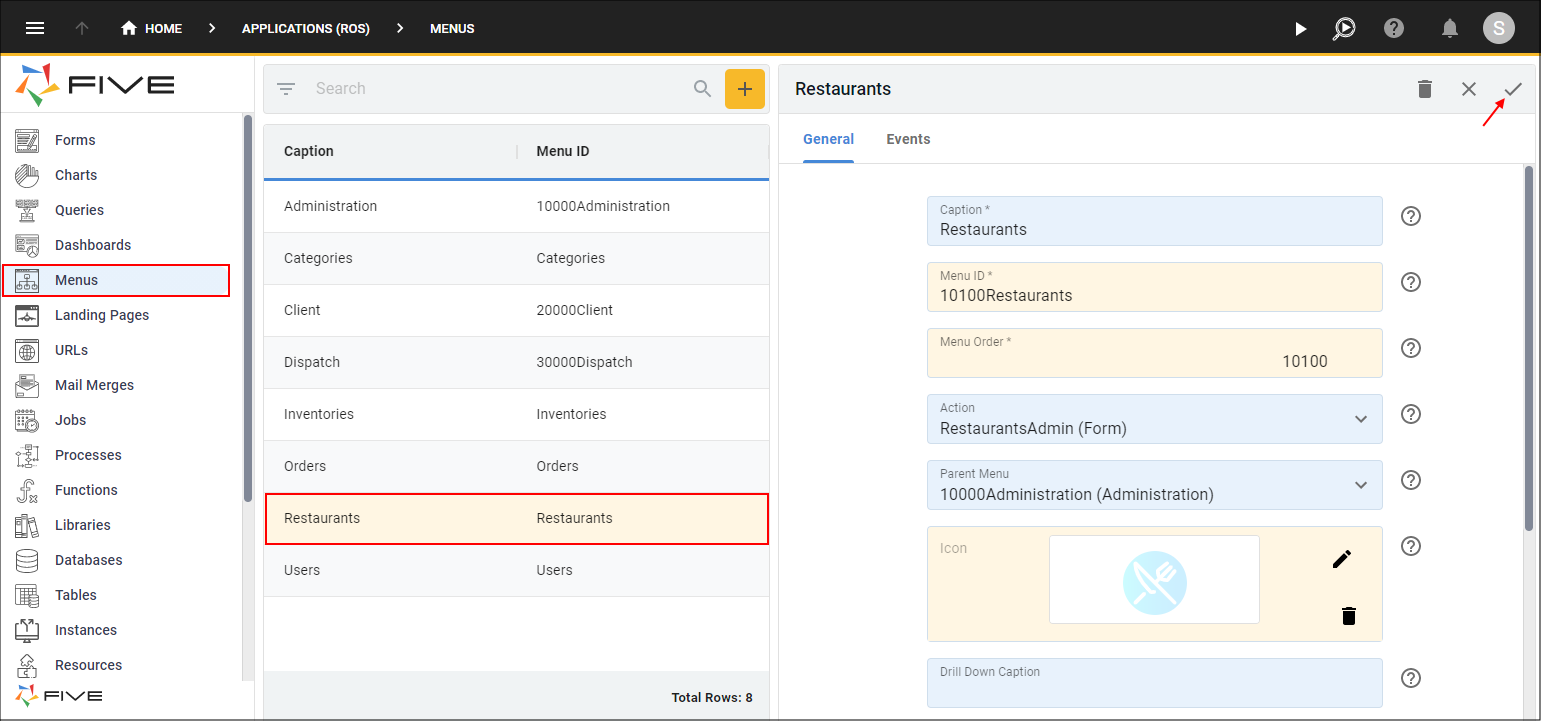
Figure 36 - Edit the Restaurants record
Edit the Categories Menu Item
1. Select the Categories record in the list.2. Either click the Edit button in the form app bar, or click directly in the Menu ID field and type 10200 before Categories.
3. Click the Cancel button in the Menu Order field and type 10200.
4. Click the Save button in the form app bar.
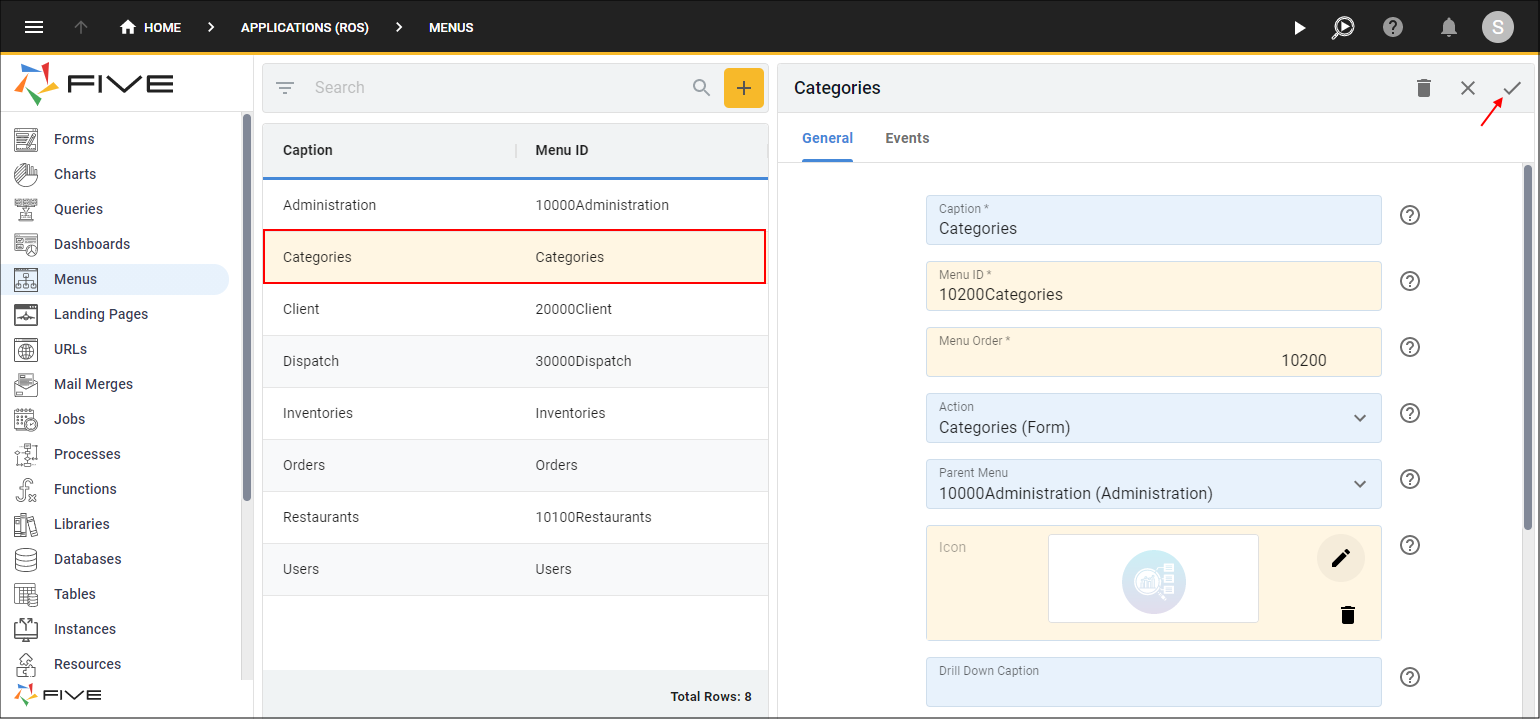
Figure 37 - Edit the Categories record
Edit the Inventories Menu Item
1. Select the Inventories record in the list.2. Either click the Edit button in the form app bar, or click directly in the Menu ID field and type 10300 before Inventories.
3. Click the Cancel button in the Menu Order field and type 10300.
4. Click the Save button in the form app bar.
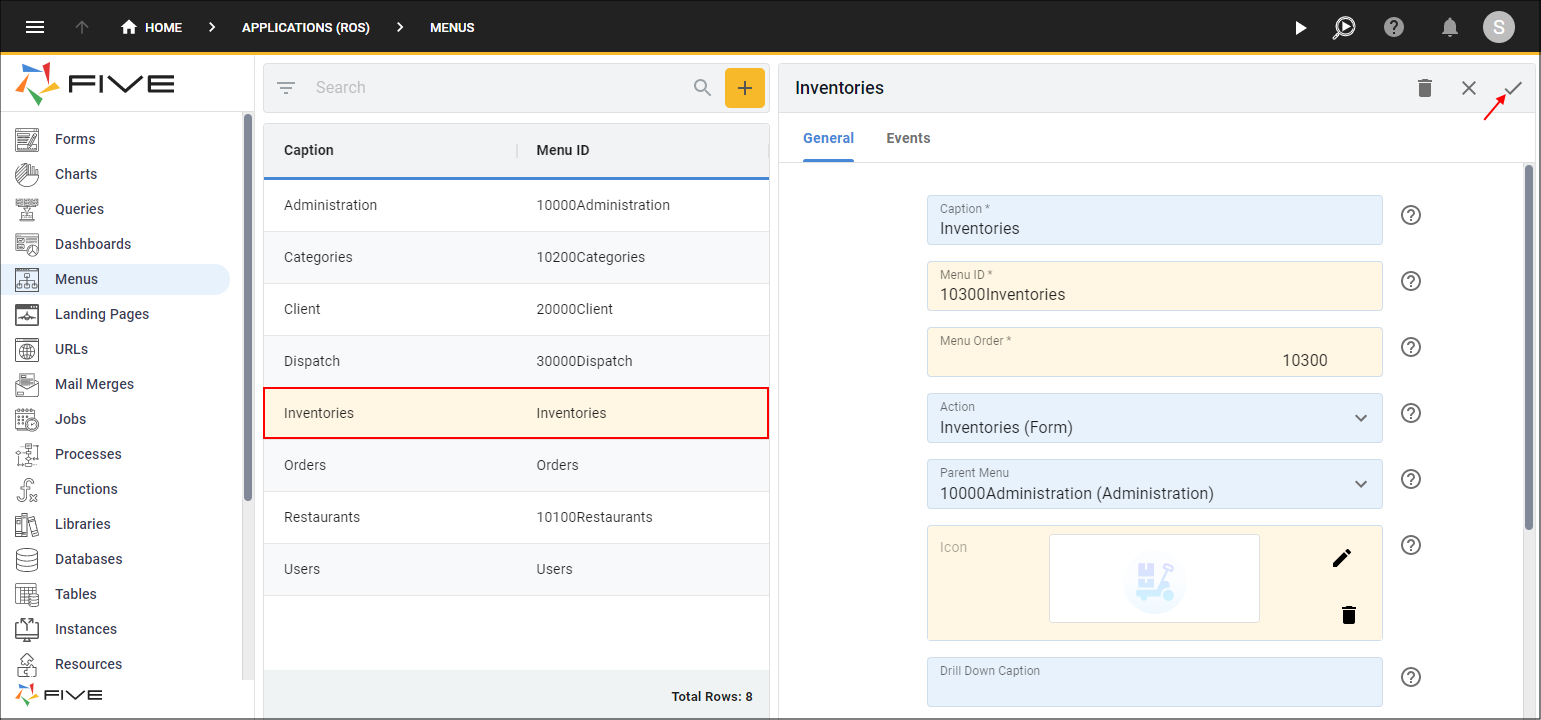
Figure 38 - Edit the Inventories record
Edit the Users Menu Item
1. Select the Users record in the list.2. Either click the Edit button in the form app bar, or click directly in the Menu ID field and type 10400 before Users.
3. Click the Cancel button in the Menu Order field and type 10400.
4. Click the lookup icon in the Parent menu field and select 10000Administration (Administration).
5. Click the Save button in the form app bar.
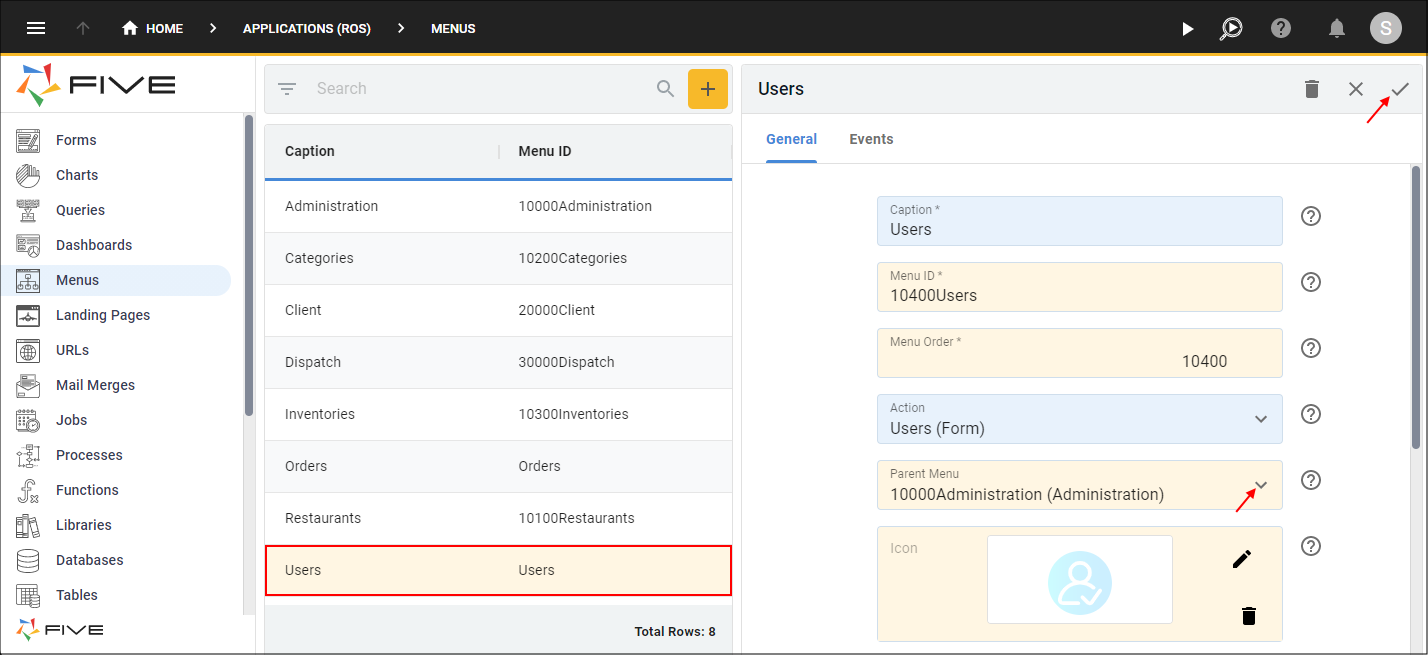
Figure 39 - Edit the Users record
Edit the Orders Menu Item
1. Select the Orders record in the list.2. Either click the Edit button in the form app bar, or click directly in the Menu ID field and type 10500 before Orders.
3. Click the Cancel button in the Menu Order field and type 10500.
4. Click the Save button in the form app bar.
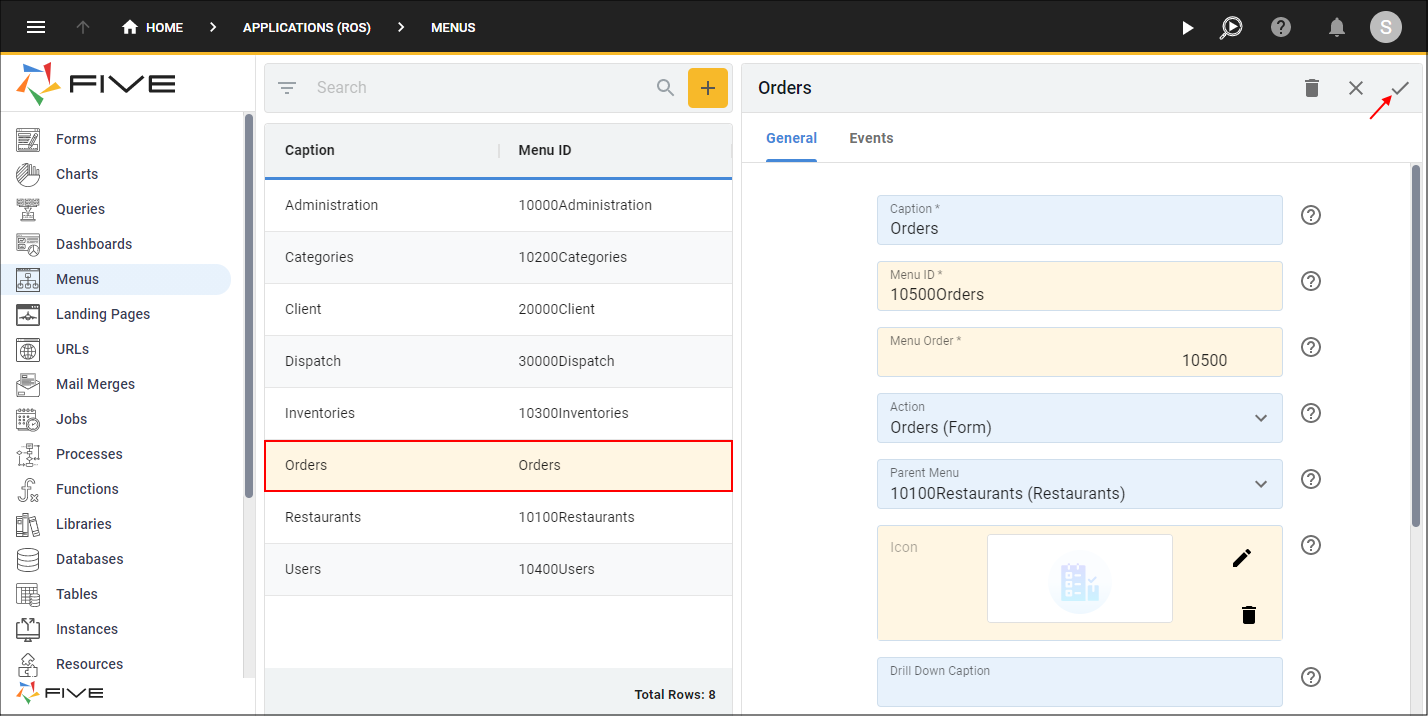
Figure 40 - Edit the Orders record