Create Roles in Five
Last updated 18/01/2022
This chapter will explain how to create the roles for the ROS application.Roles Form in Five and Users Form in an Application
We need to create a role for a client and for dispatch. There is no need to create the Administrator role as we will use the default Administrator role provided by Five. This will give a user who is assigned the Administrator role full access to the system.To create the Client and Dispatch roles, we determine which tables they will have access to and grant them permissions to these tables through the CRUD operations.
- C - Create
- R - Read
- U - Update
- D - Delete
| Field | Definition |
|---|---|
| Security Table | Five will filter the data for the restaurant logging in, so the restaurant will only see their orders and no one elses. |
| User Table | The table will hold the details about the restaurant attached to the User Record field on the Users form in the ROS application. |
| User Table Key Field | Select the name of the associated Primary Key column to have the record of the restaurant associated to the user. |
| User Table Name Field | Select the name of the associated column for the name of the restaurant. |
When in the ROS application you will select a role and the User Record field will link an employee to a restaurant. The following table explains how Five uses these fields to associate a restaurant with their employees.
| Field | Definition |
|---|---|
| Role | By selecting the role of 'Client' defined in Five, Five can now dynamically use the values set in the fields User Table, User Table Key Field, and User Table Name Field to populate the restaurant names in the User Record field on the Users form in the ROS application. |
| UserRecord | With the 'Client' role selected Five can dynamically populate the User Record list with all the restaurants held in the Restaurant Table. |
Create the Client Role
1. Select Roles in the menu.2. Click the Add Item button in the list app bar.
3. Type Client in the Name field.
4. Click the lookup icon in the Menu field and select 20000Client (Client).
info
Selecting a menu will make this role only have access to the selected menu.
5. Click the lookup icon in the Security Table field and select Restaurant.
6. Click the lookup icon in the User Table field and select Restaurant.
7. Click the lookup icon in the User Table Key field and select Restaurant.RestaurantKey.
8. Click the lookup icon in the User Table Name field and select Restaurant.Name.
9. Click the Permissions tab.
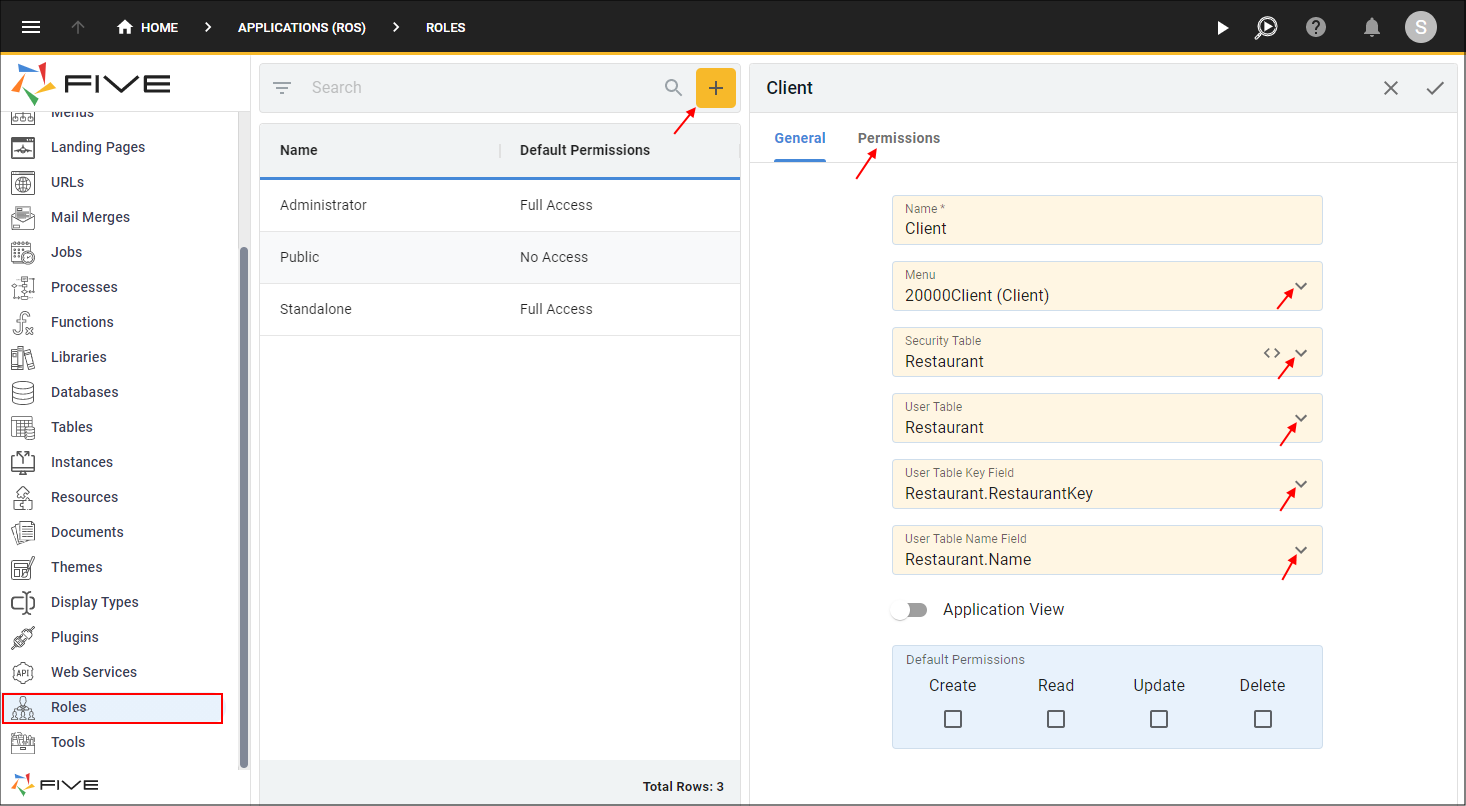
Figure 1 - Add the Client role
10. Click the Add Permissions button.

Figure 2 - Add Permissions button
11. Click the lookup icon in the Table field and select Address.
12. Click the Read checkbox in the Permissions field.
13. Click the Save button in the form app bar.
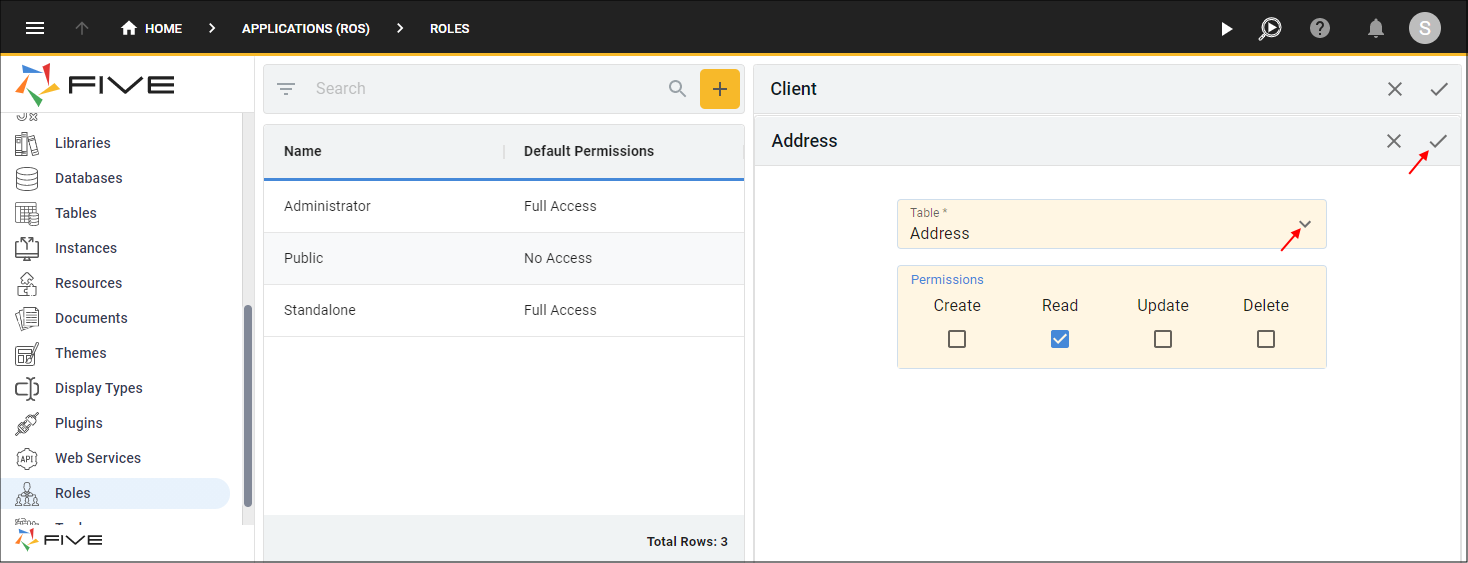
Figure 3 - Add the Address permission
14. Click the Add Permissions button.
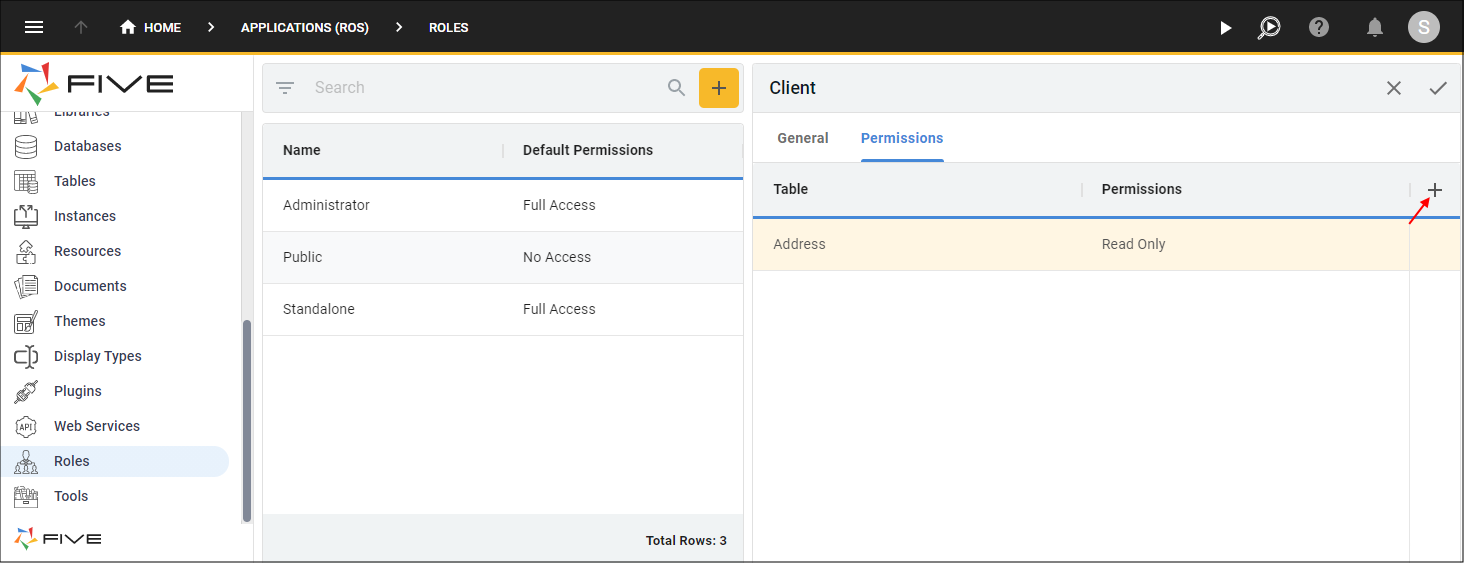
Figure 4 - Add Permissions button
15. Click the lookup icon in the Table field and select Inventory.
16. Click the Read checkbox in the Permissions field.
17. Click the Save button in the form app bar.

Figure 5 - Add the Inventory permission
18. Click the Add Permissions button.
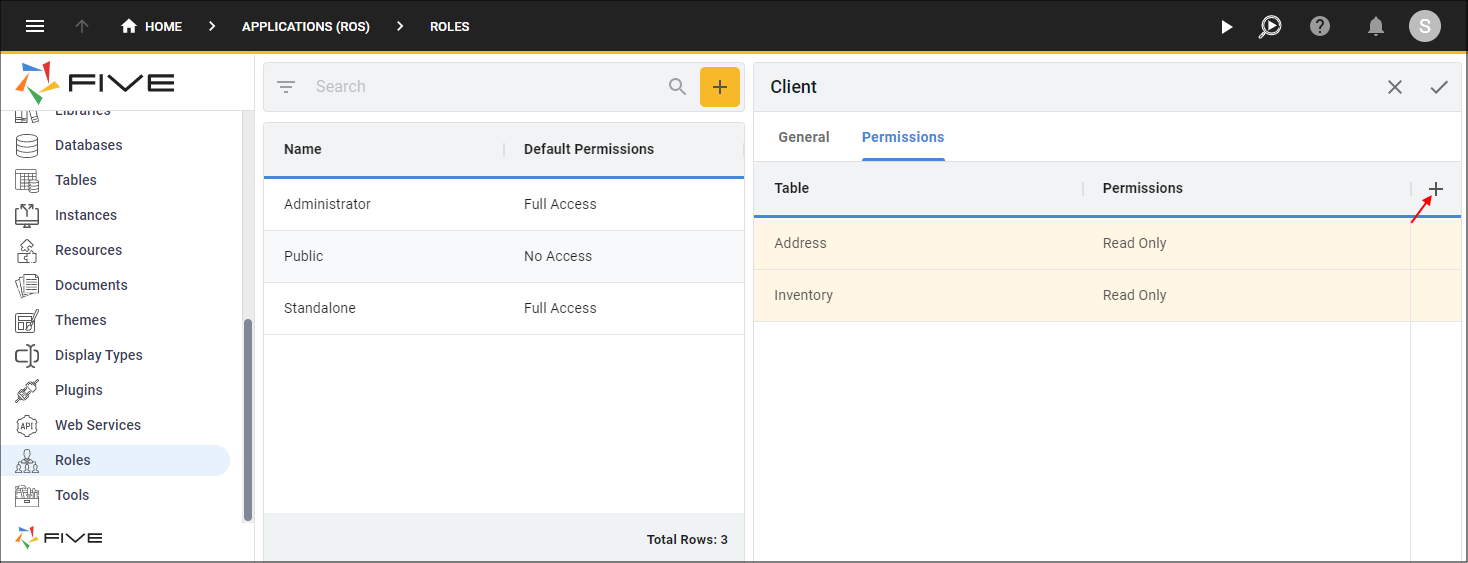
Figure 6 - Add Permissions button
19. Click the lookup icon in the Table field and select Item.
20. Click the Create and the Read checkboxes in the Permissions field.
21. Click the Save button in the form app bar.
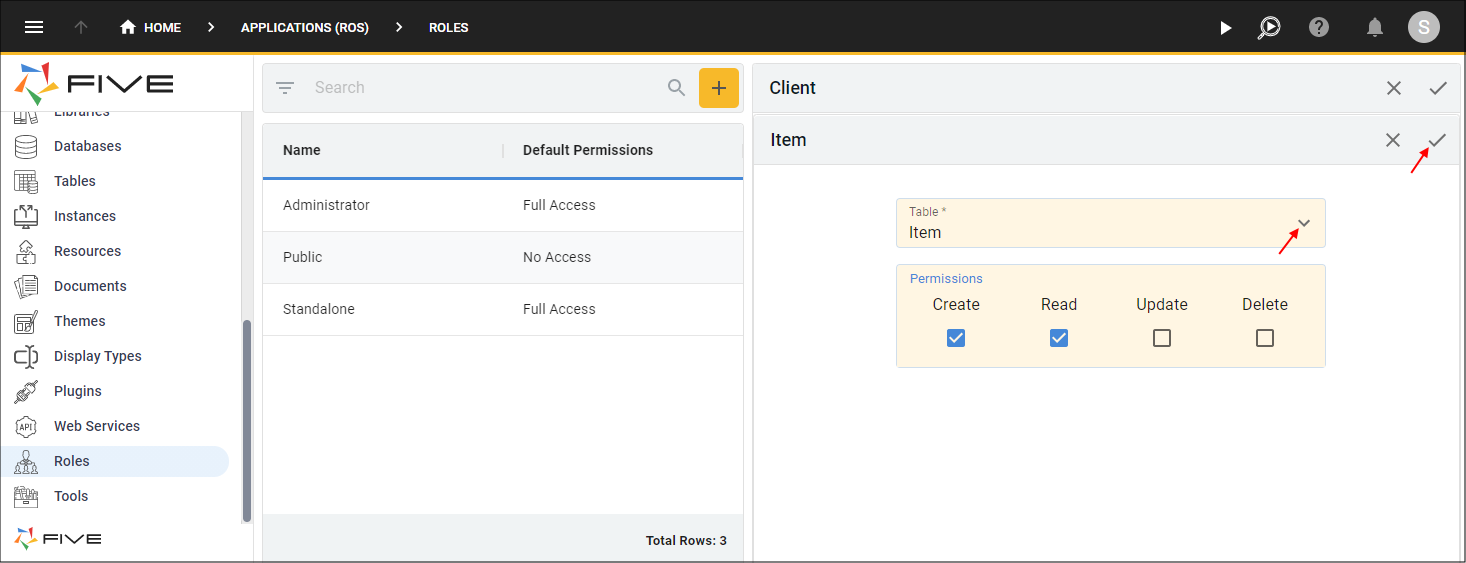
Figure 7 - Add the Item permissions
22. Click the Add Permissions button.
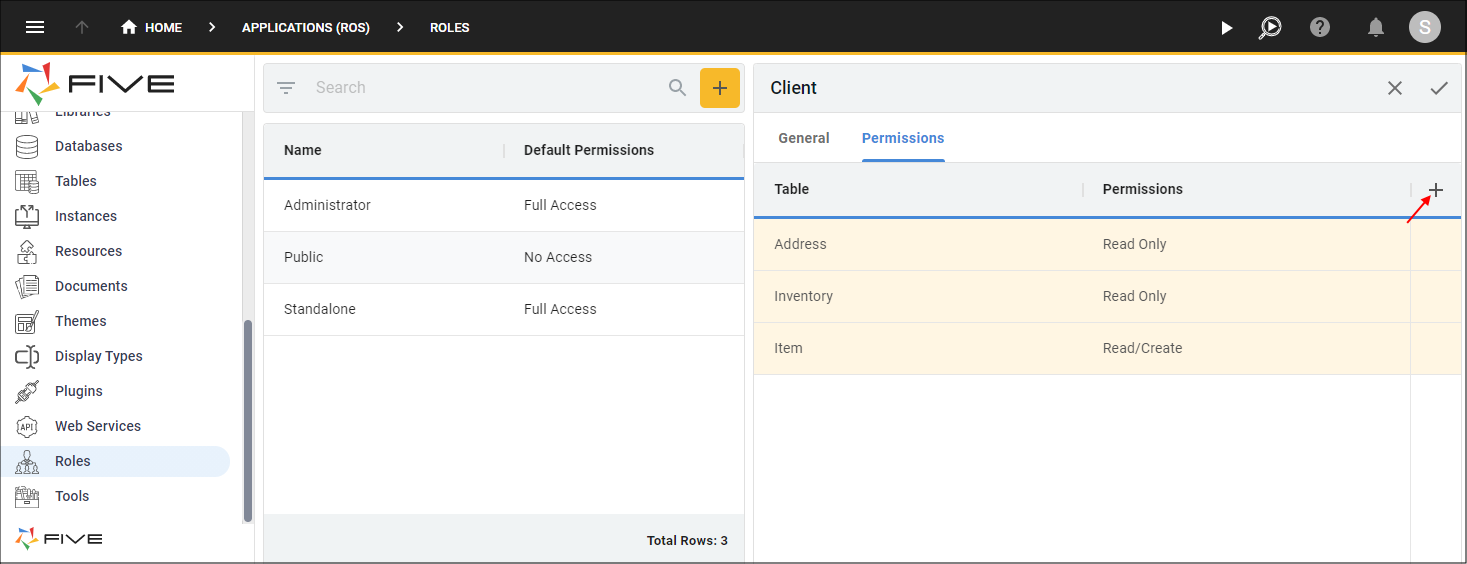
Figure 8 - Add Permissions button
23. Click the lookup icon in the Table field and select Orders.
24. Click the Create and the Read checkboxes in the Permissions field.
25. Click the Save button in the form app bar.
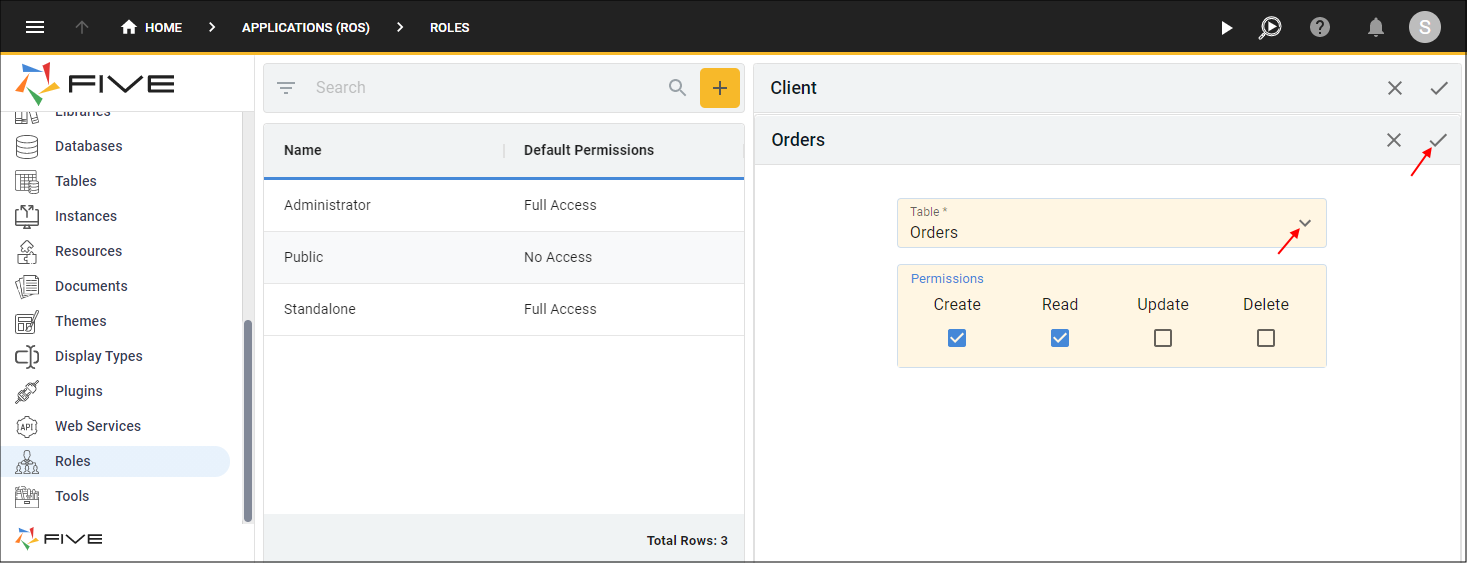
Figure 9 - Add the Orders permissions
26. Click the Add Permissions button.
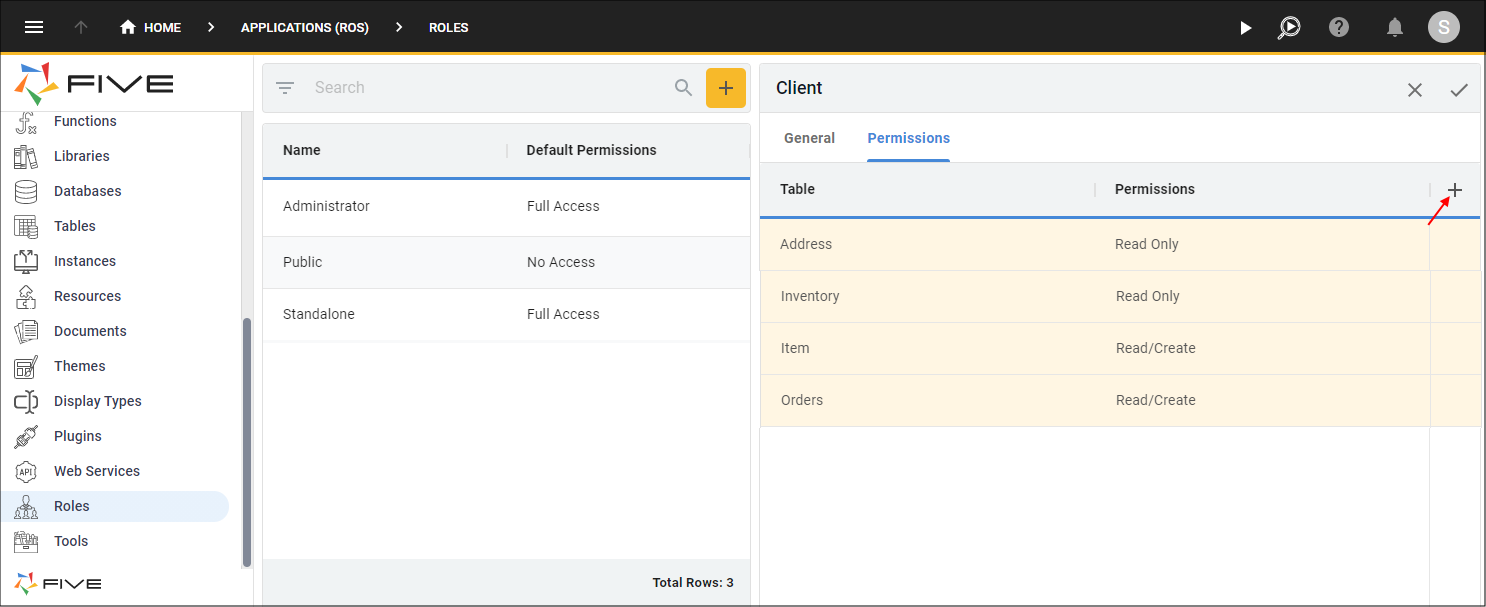
Figure 10 - Add Permissions button
27. Click the lookup icon in the Table field and select Category.
28. Click the Read checkbox in the Permissions field.
29. Click the Save button in the form app bar.

Figure 11 - Add the Category permissions
30. Click the Add Permissions button.
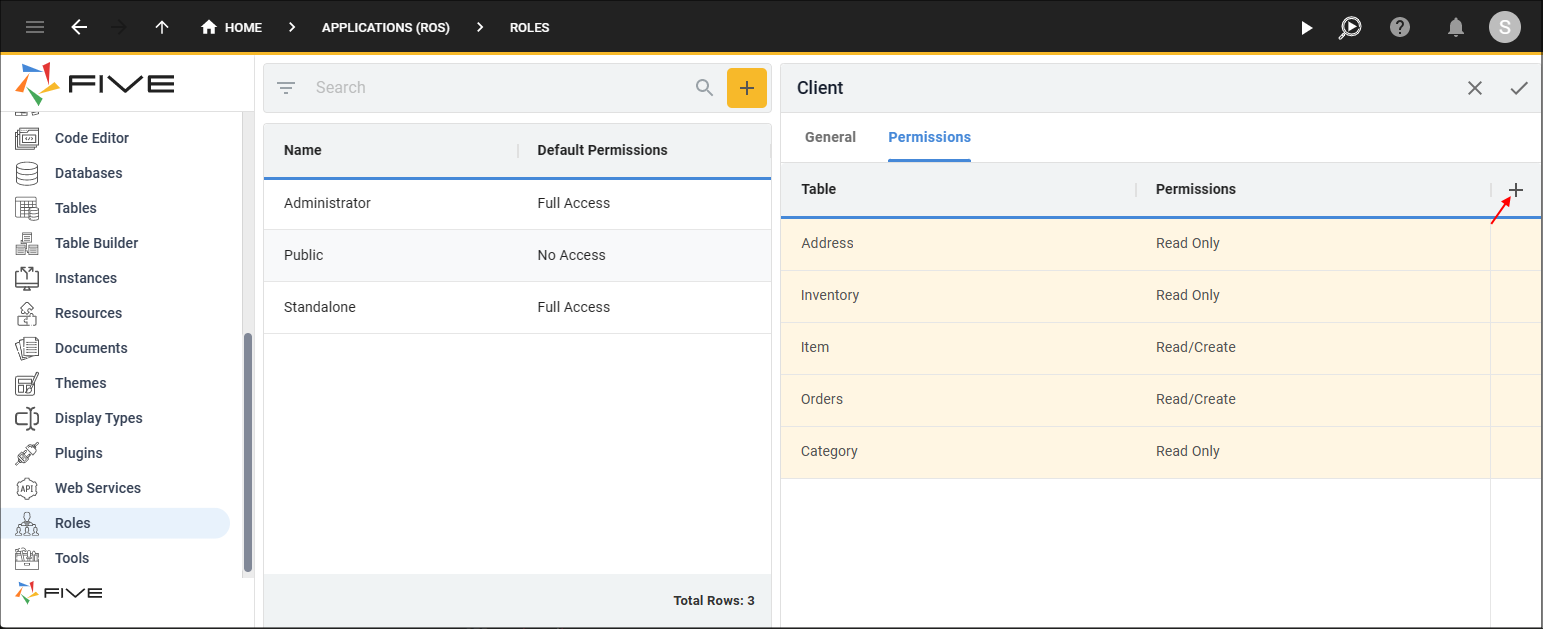
Figure 12 - Add Permissions button
31. Click the lookup icon in the Table field and select iUser.
32. Click the Read checkbox in the Permissions field.
33. Click the Save button in the form app bar.
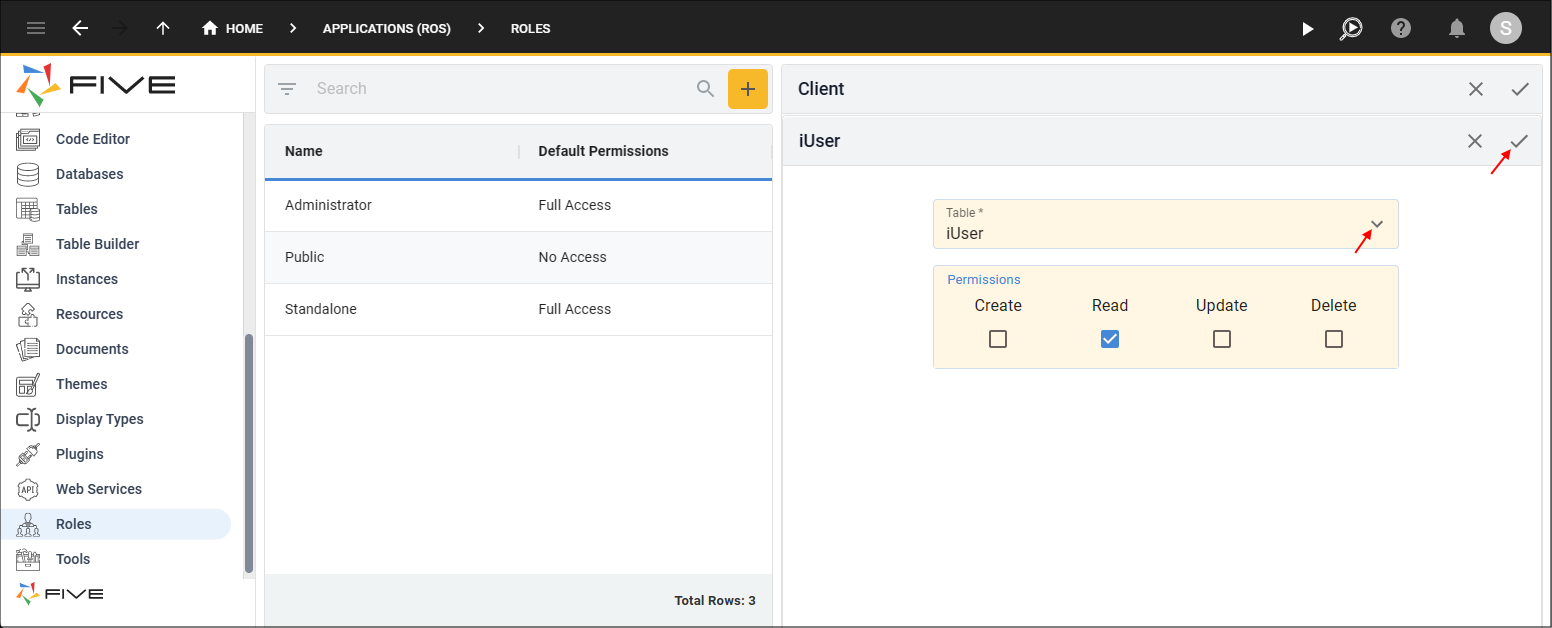
Figure 13 - Add the iUser permissions
34. Click the Save button in the form app bar above the list.
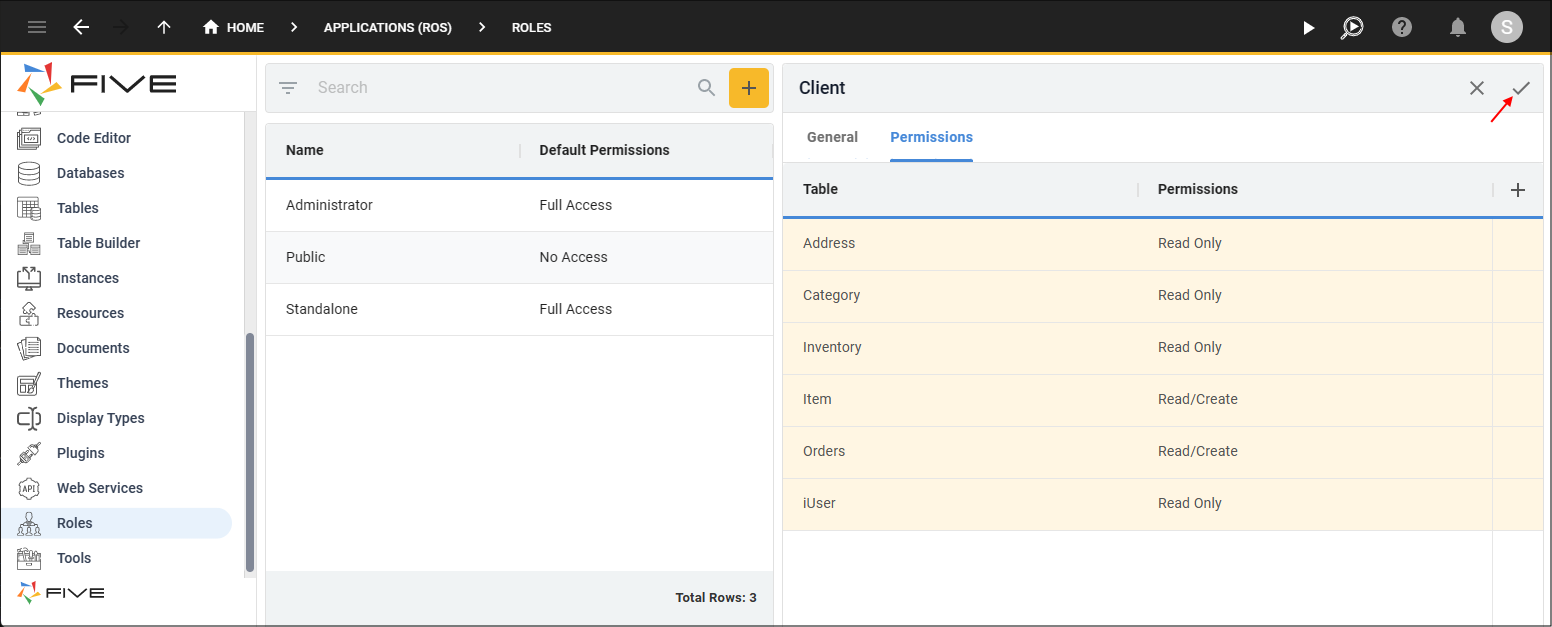
Figure 14 - Save the Client Role
Create the Dispatch Role
1. Click the Add Item button in the list app bar.2. Type Dispatch in the Name field.
3. Click the lookup icon in the Menu field and select 30000Dispatch (Dispatch).
info
No security table is required as dispatch will log in, view the order and mark it as completed once the order has been dispatched.
4. Click the Permissions tab.
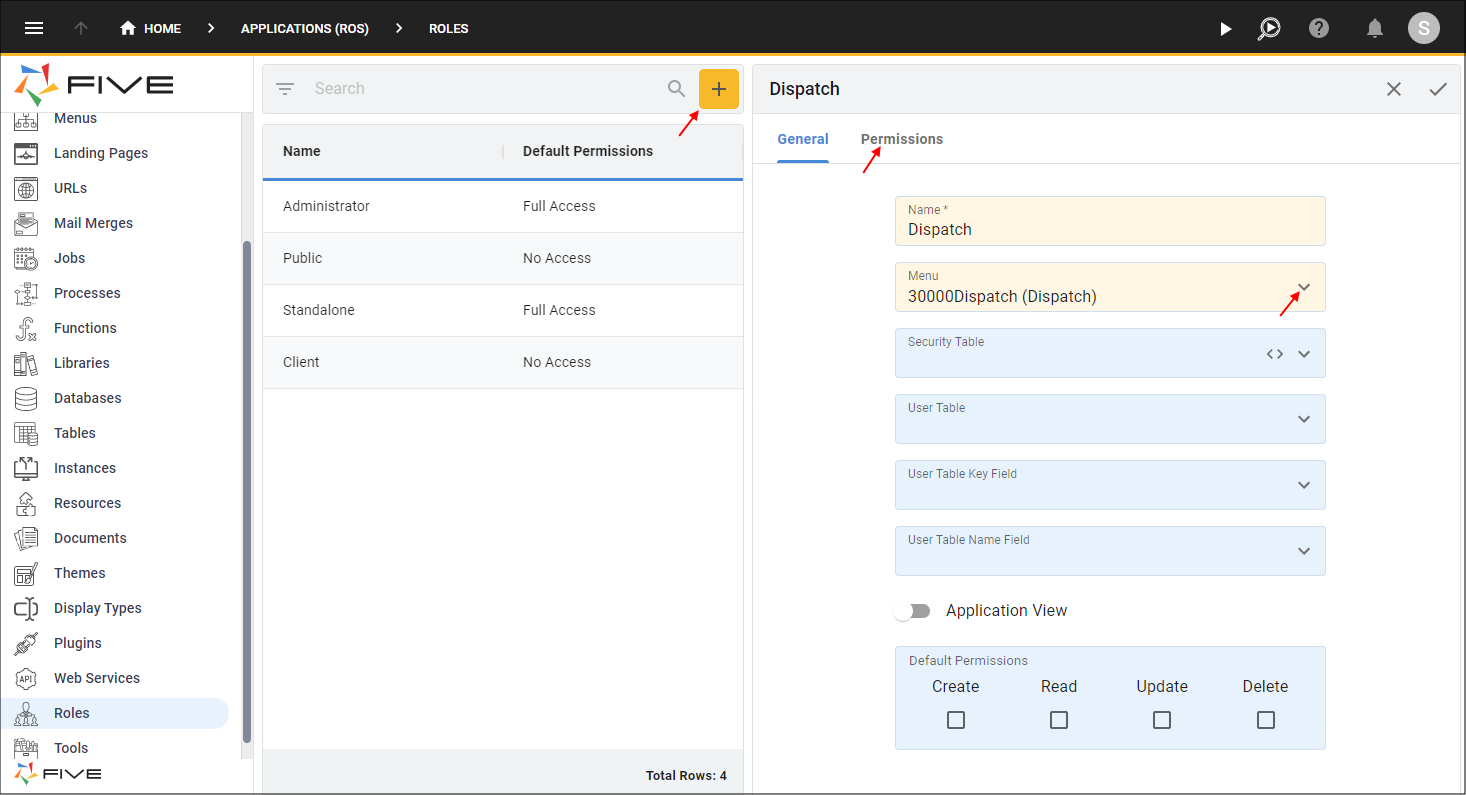
Figure 15 - Add the Dispatch role
5. Click the Add Permissions button.
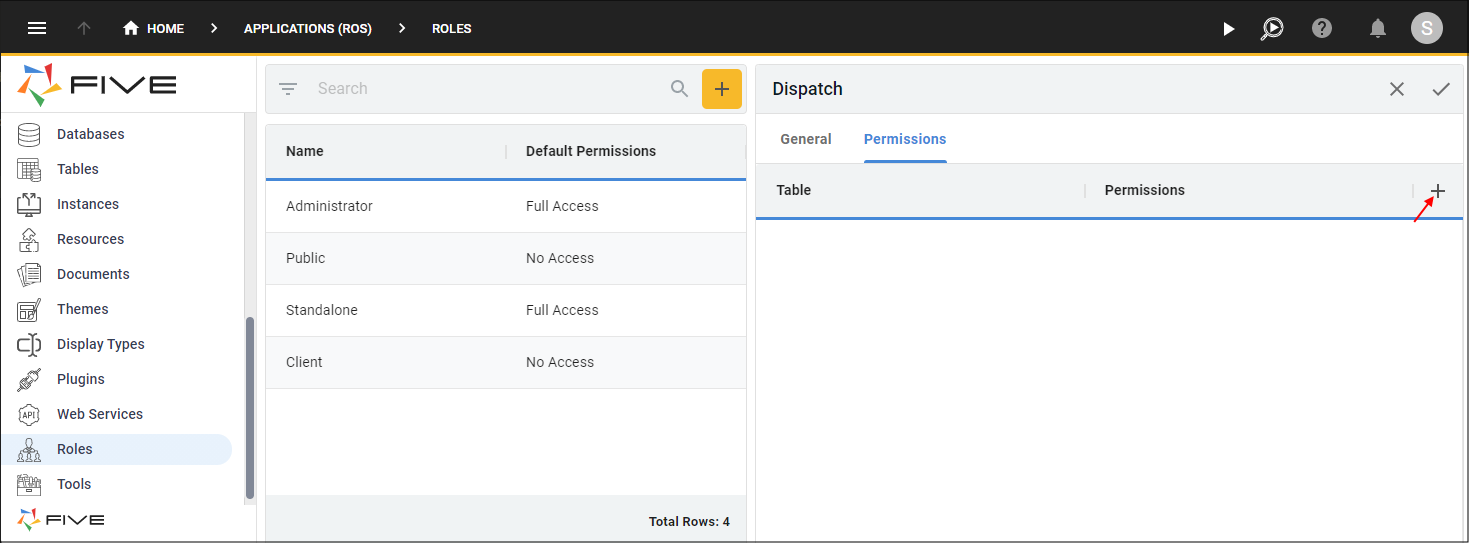
Figure 16 - Add Permissions button
6. Click the lookup icon in the Table field and select Orders.
7. Click the Read checkbox in the Permissions field.
8. Click the Update checkbox in the Permissions field.
9. Click the Save button in the form app bar.
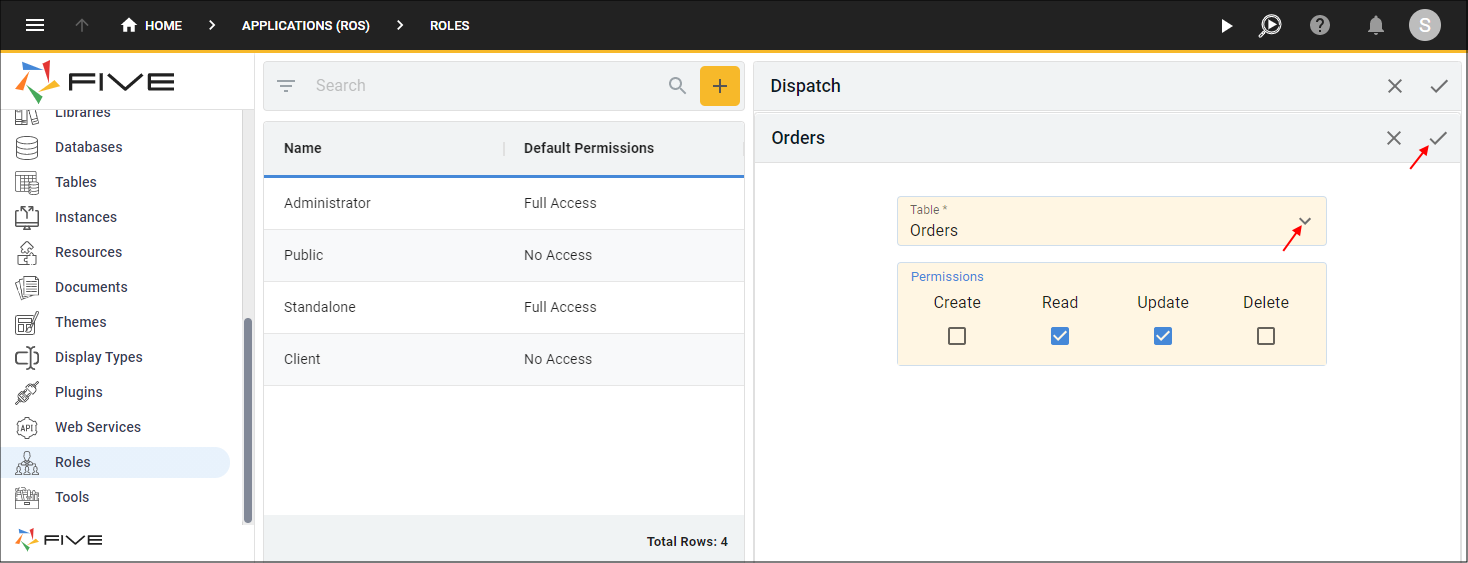
Figure 17 - Add the Orders permissions
10. Click the Add Permissions button.
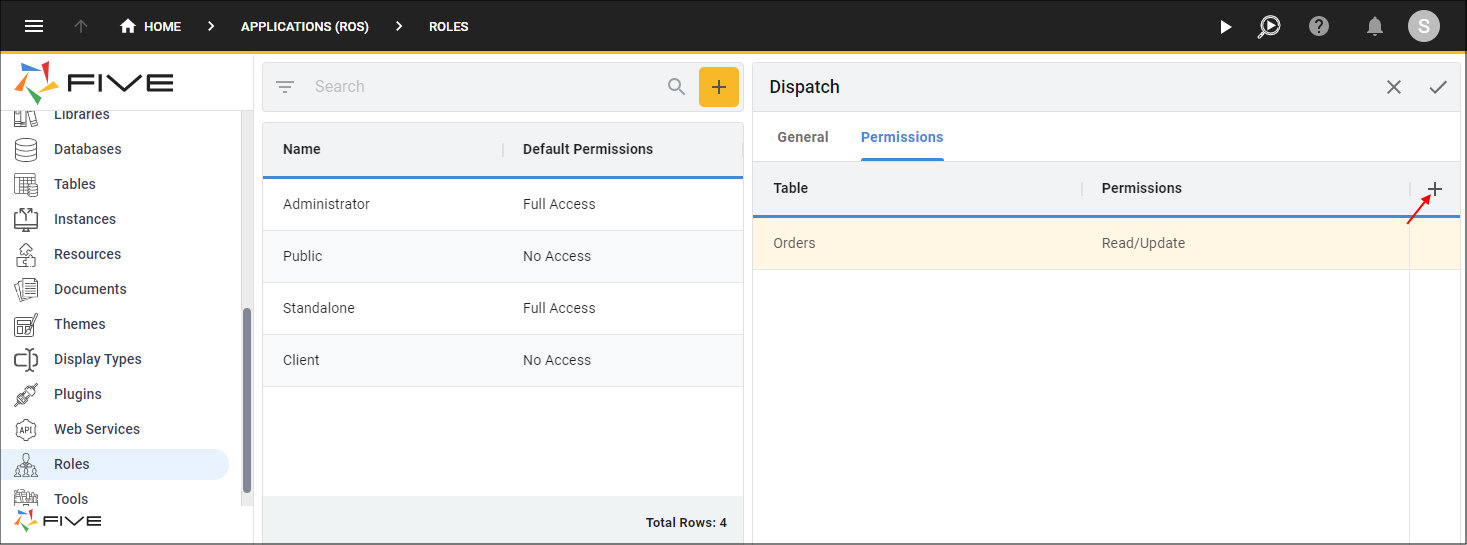
Figure 18 - Add Permissions button
11. Click the lookup icon in the Table field and select Address.
12. Click the Read checkbox in the Permissions field.
13. Click the Save button in the form app bar.
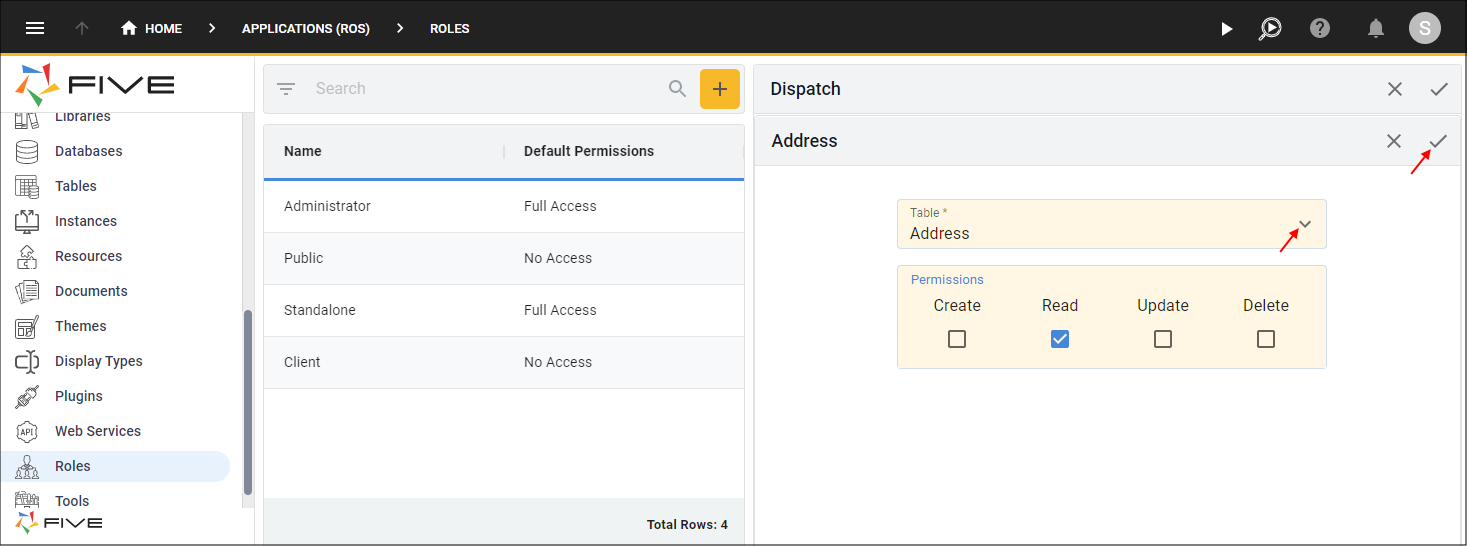
Figure 19 - Add the Address permission
14. Click the Add Permissions button.
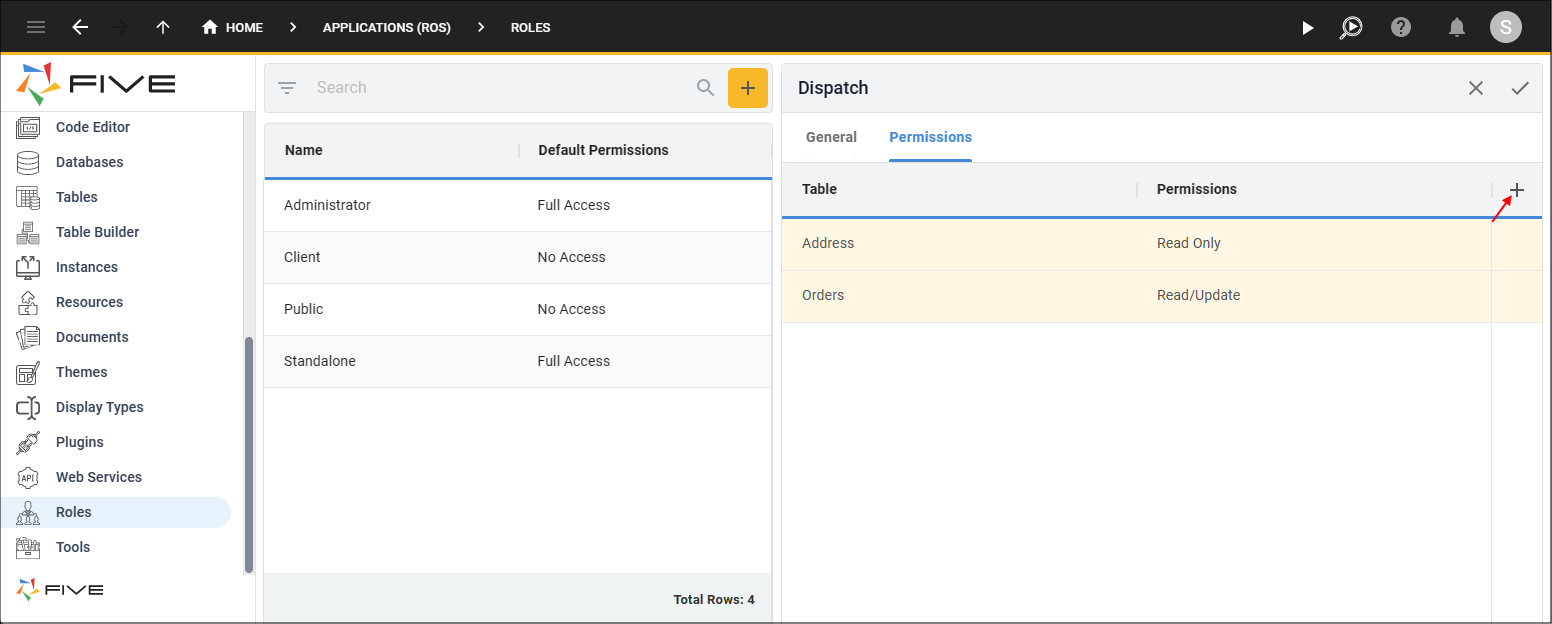
Figure 20 - Add Permissions button
15. Click the lookup icon in the Table field and select Restaurant.
16. Click the Read checkbox in the Permissions field.
17. Click the Save button in the form app bar.
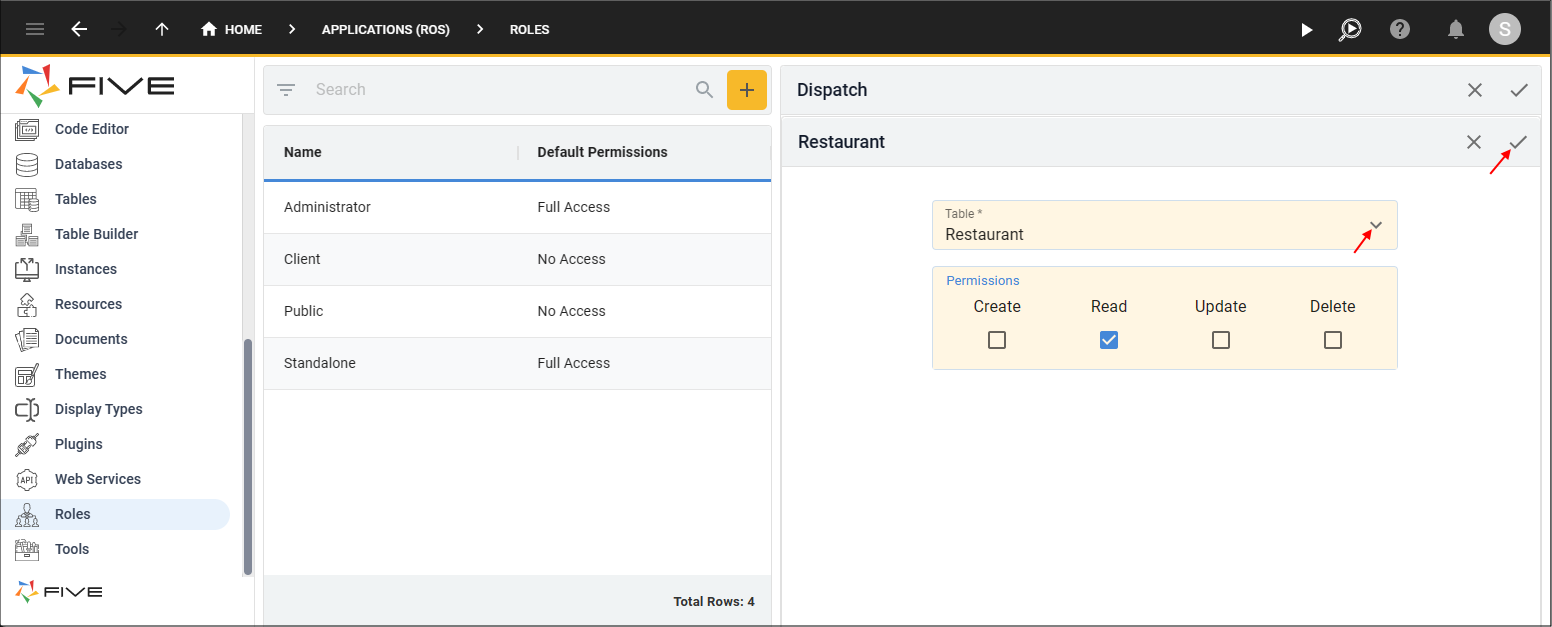
Figure 21 - Add the Restaurant permission
18. Click the Add Permissions button.
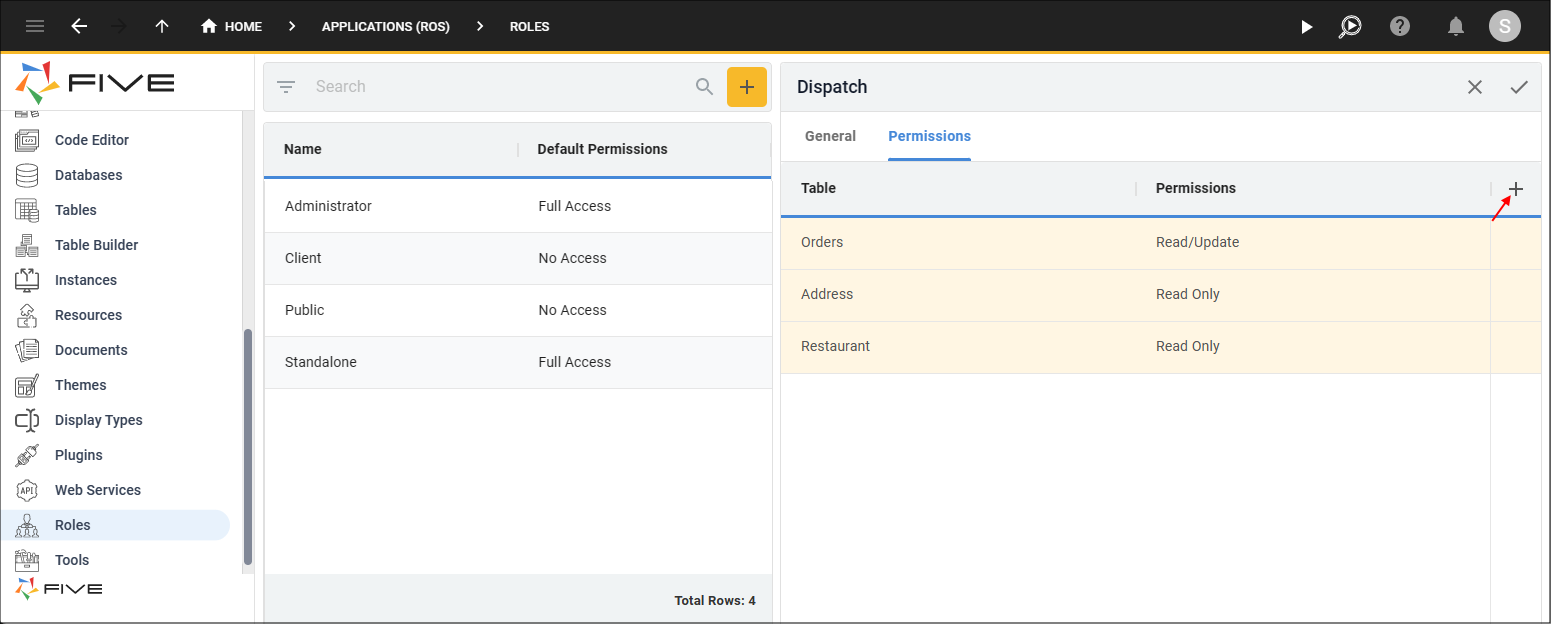
Figure 22 - Add Permissions button
19. Click the lookup icon in the Table field and select Category.
20. Click the Read checkbox in the Permissions field.
21. Click the Save button in the form app bar.
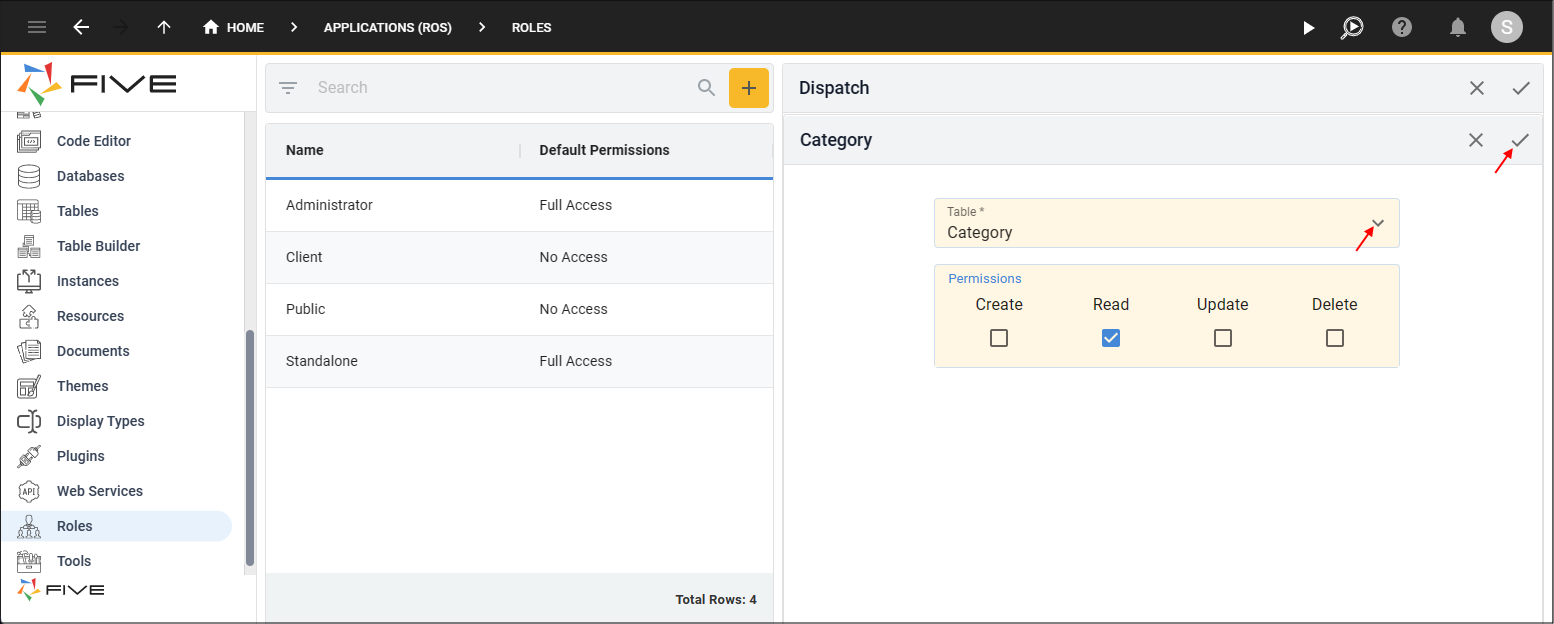
Figure 23 - Add the Category permission
22. Click the Add Permissions button.
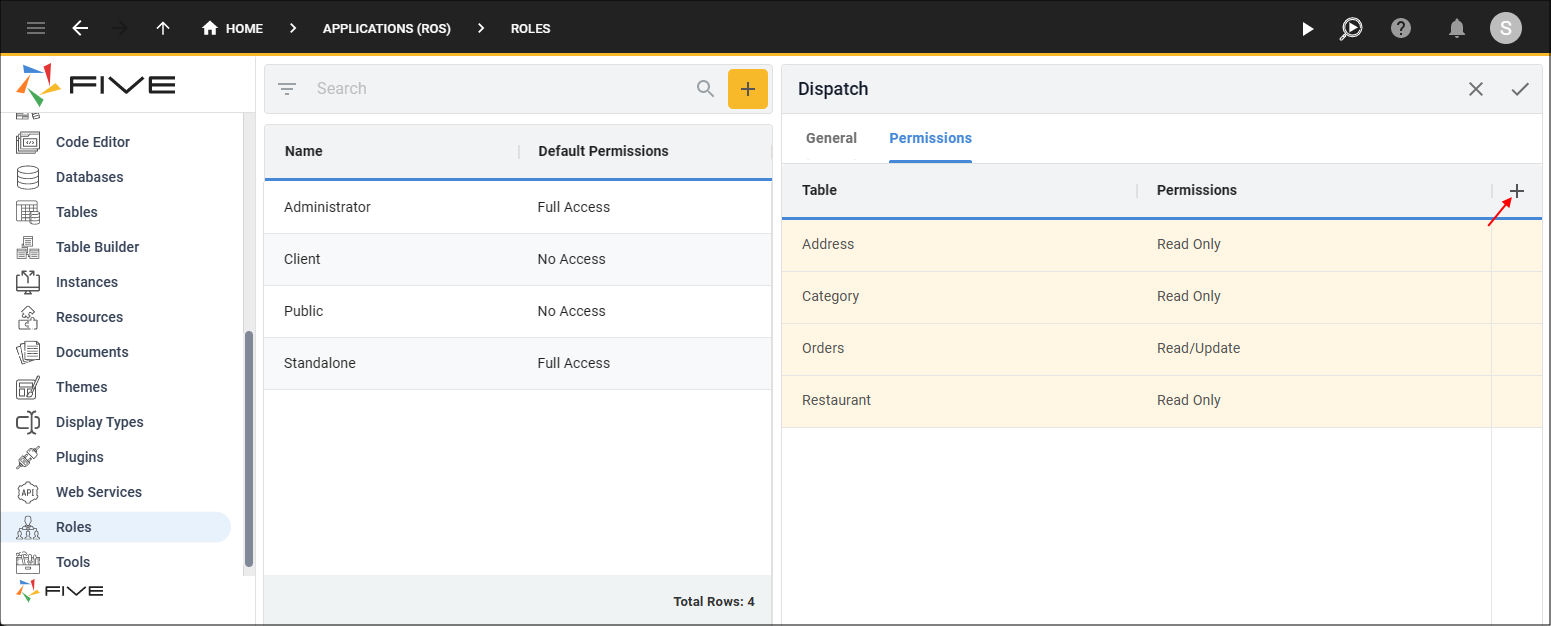
Figure 24 - Add Permissions button
23. Click the lookup icon in the Table field and select Inventory.
24. Click the Read checkbox in the Permissions field.
25. Click the Save button in the form app bar.

Figure 25 - Add the Restaurant permission
26. Click the Add Permissions button.
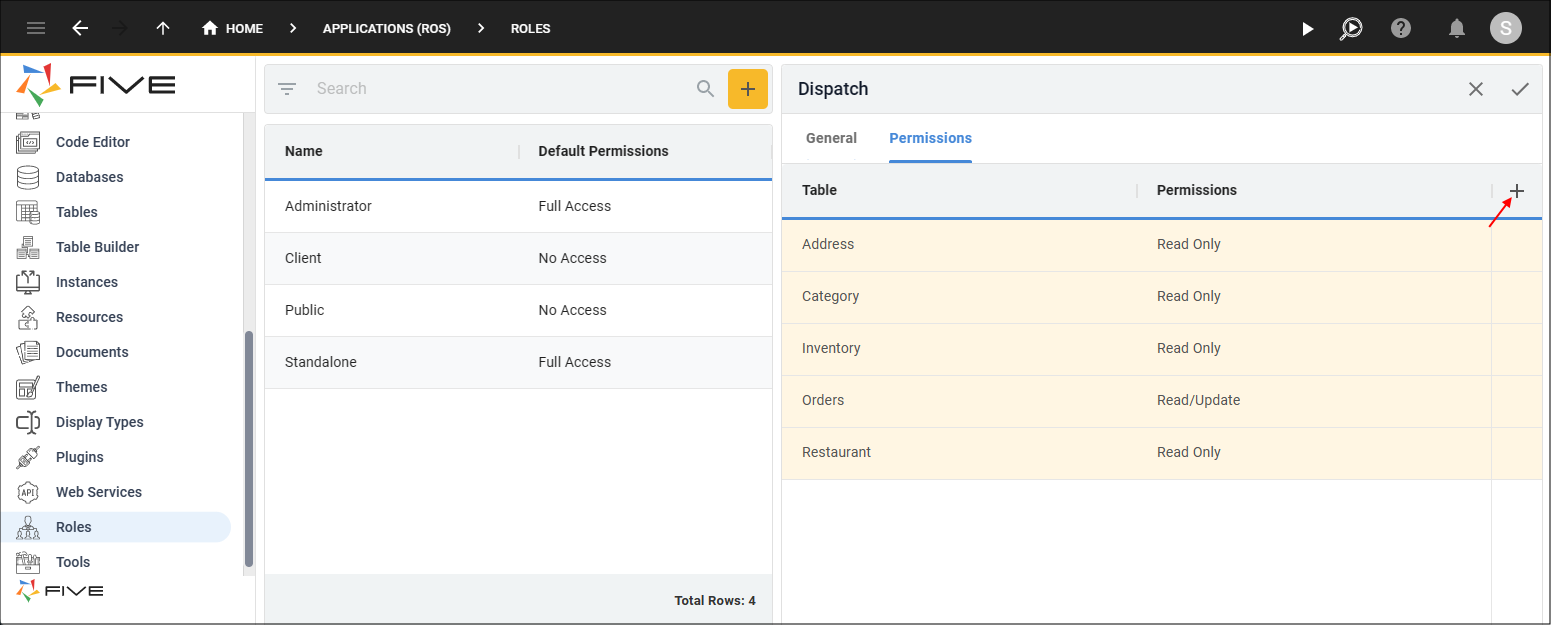
Figure 26 - Add Permissions button
27. Click the lookup icon in the Table field and select Item.
28. Click the Read checkbox in the Permissions field.
29. Click the Save button in the form app bar.
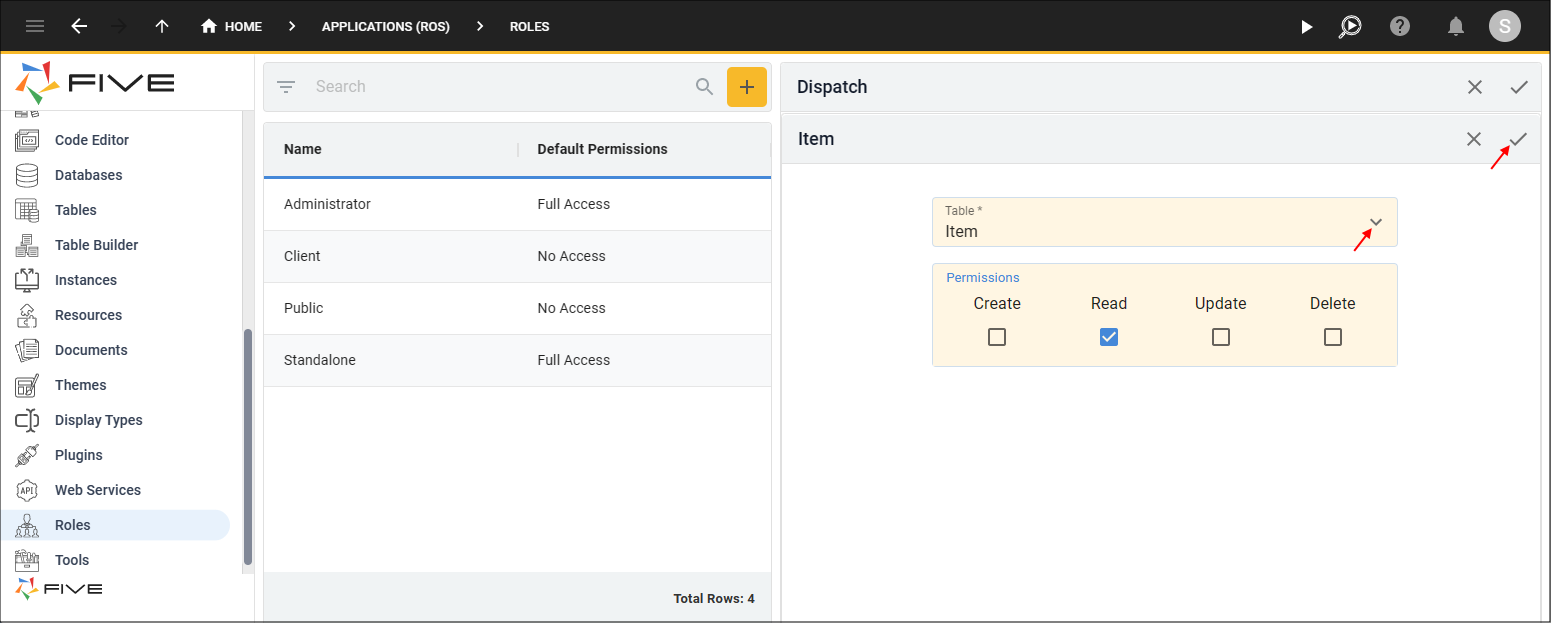
Figure 27 - Add the Item permission
30. Click the Add Permissions button.
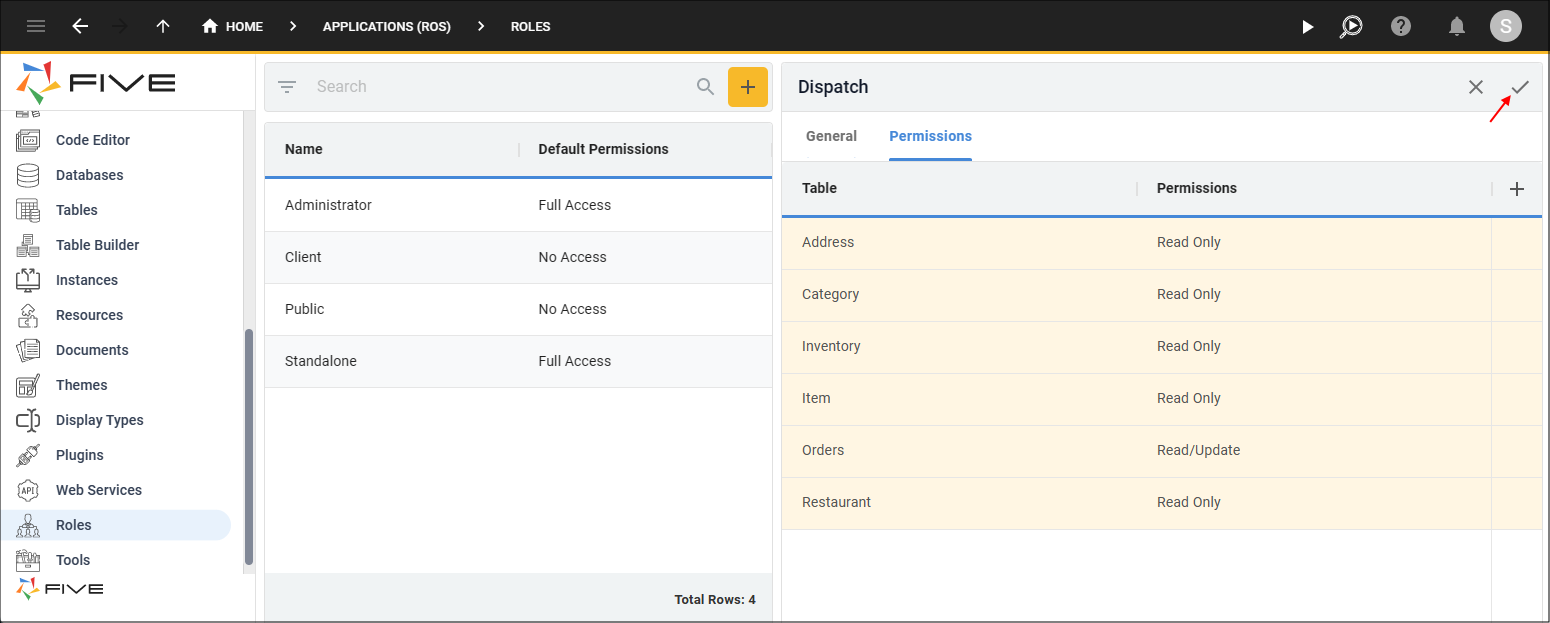
Figure 28 - Add Permissions button
31. Click the lookup icon in the Table field and select iUser.
32. Click the Read checkbox in the Permissions field.
33. Click the Save button in the form app bar.

Figure 29 - Add the iUser permission
34. Click the Save button in the form app bar above the list.
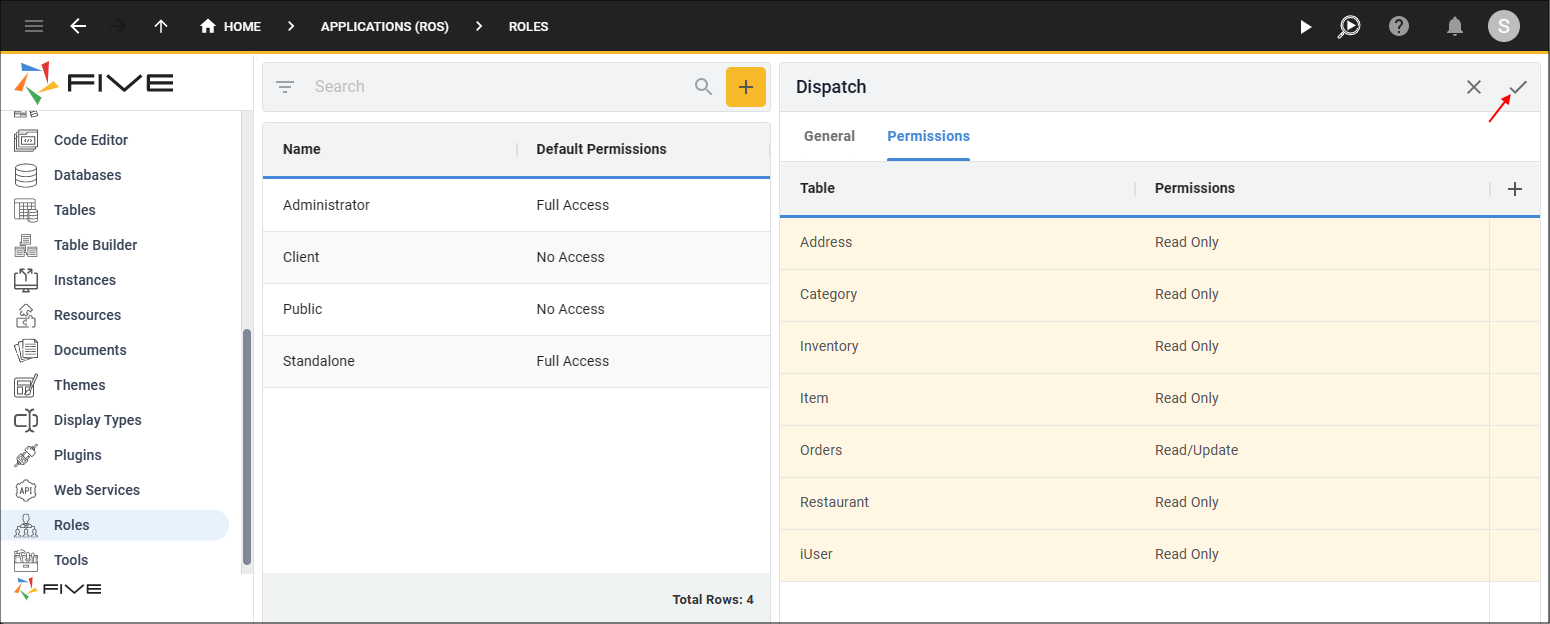
Figure 30 - Save the Dispatch role