Create the Forms and Menus for the Client Login
Last updated 10/01/2023
This chapter will explain how to create the forms and menus for the Client login.Create the Restaurants Form
1. Select Forms in the menu.2. Click the New Form Wizard button in the list app bar.
3. Click the lookup icon in the Main Table field and select Restaurant.
info
Another Restaurant form is being created, as this will be used when a client logs into the system.
4. Click the Cancel button in the Action ID field and type RestaurantsClient.
5. Click the lookup icon in the Parent Menu field and select 20000Client.
6. Click the Save button in the Form Wizard app bar.
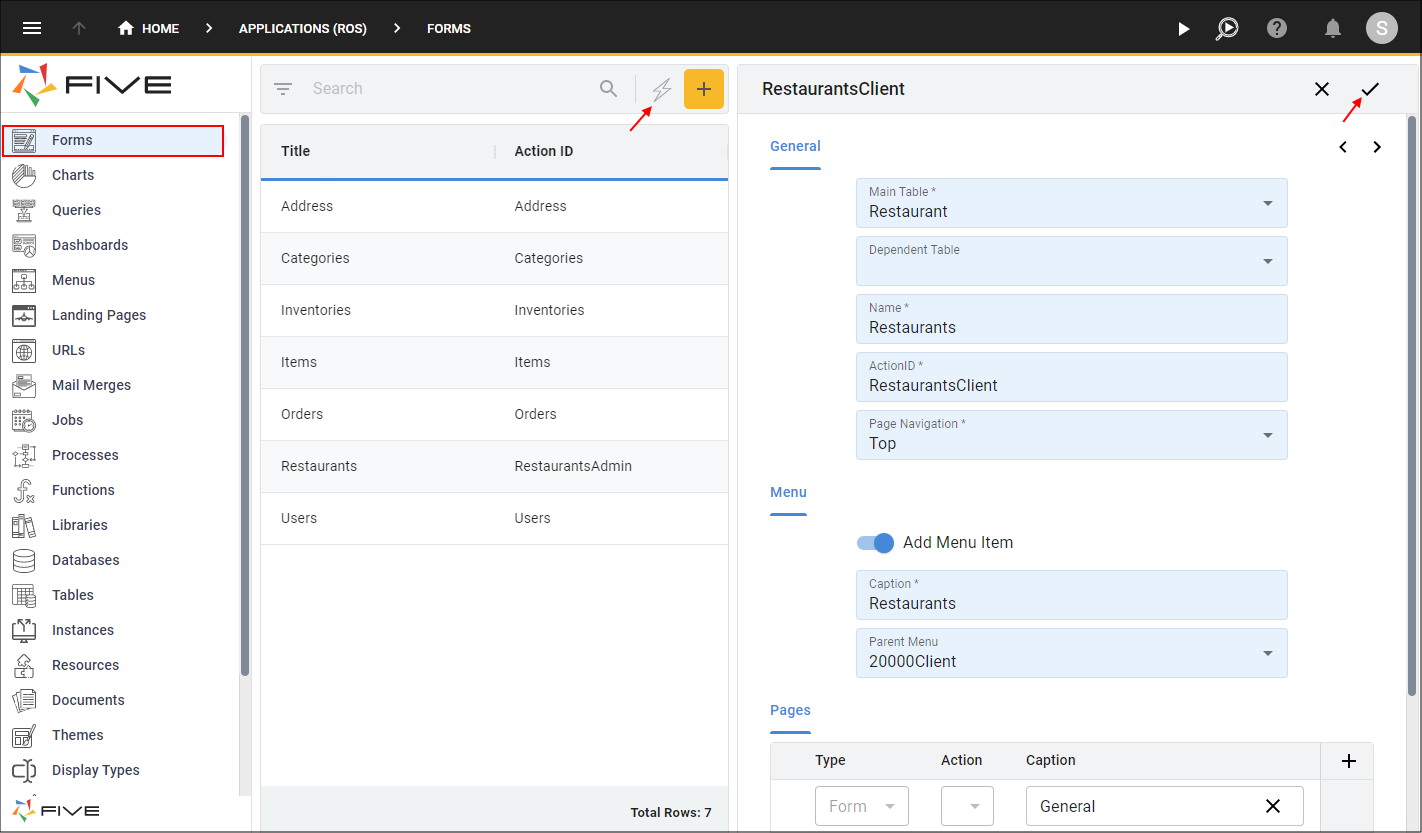
Figure 1 - Add the Restaurants form
Create the Orders Form
1. Click the New Form Wizard button in the list app bar.2. Click the lookup icon in the Main Table field and select Orders.
3. Click the Cancel button in the Action ID field and type OrdersClient.
4. Click the lookup icon in the Parent Menu field and select Restaurants.
5. Click the Add Pages button.
6. Click the lookup icon in the Type field and select List.
7. Click the lookup icon in the Action field and select Items.
8. Type Items in the Caption field.
9. Click the Add Pages button.
10. Type Payments in the Caption field.
11. Click the Next button.
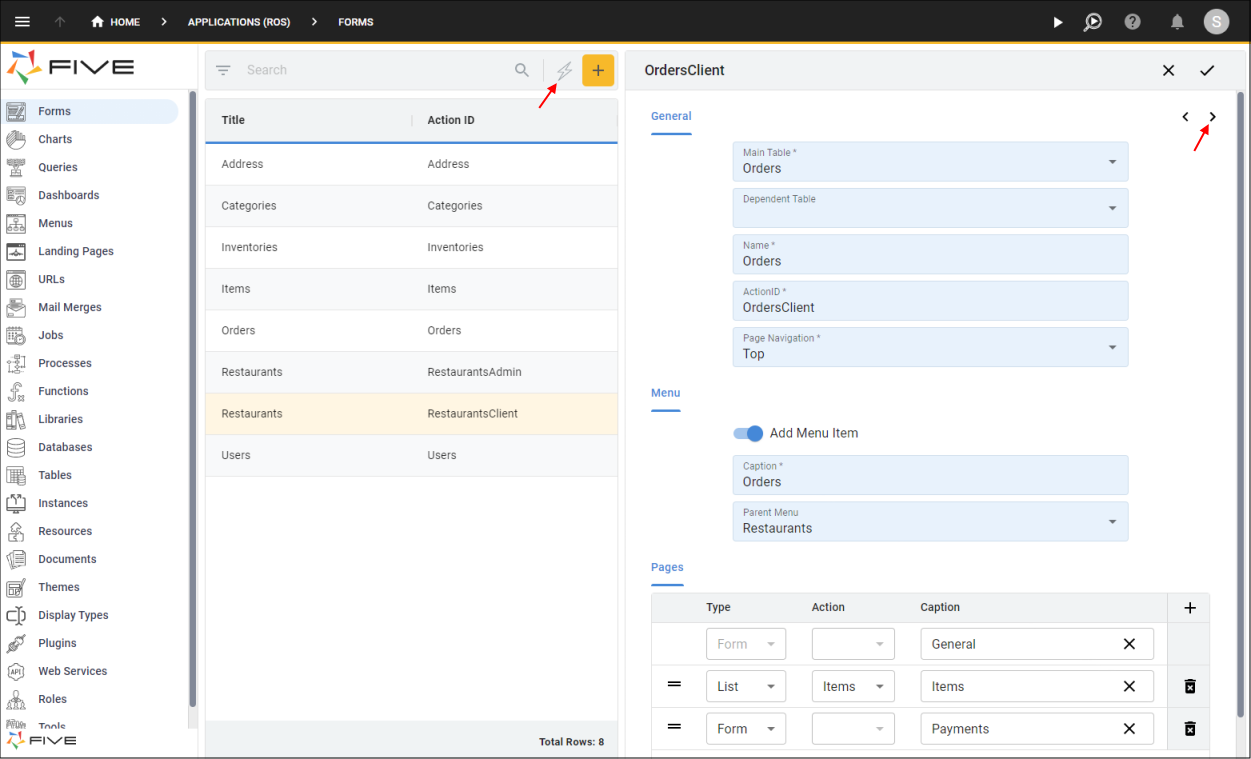
Figure 2 - Add the Orders form
12. Click the Remove Form Field button for the Delivery Address, Sub Total, Discount Code, GST, Total, and Completed records.
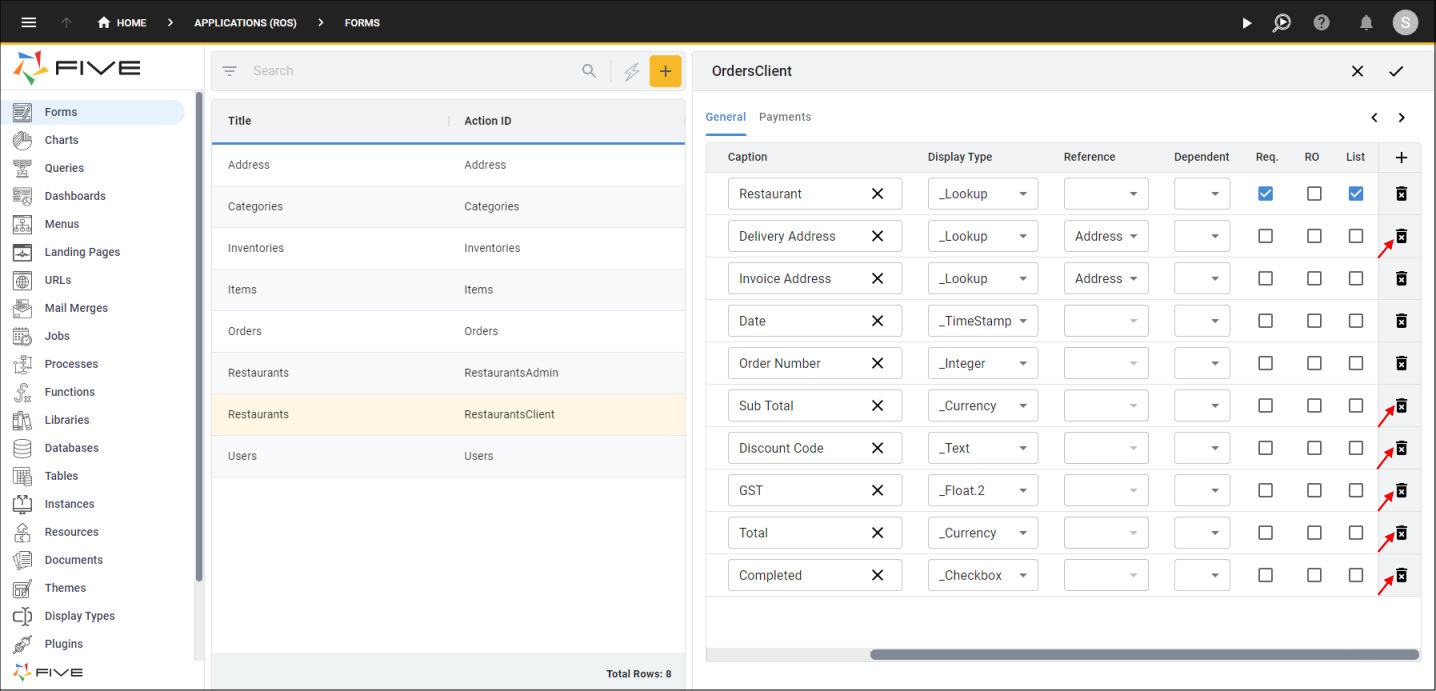
Figure 3 - Remove Form Field buttons
13. Click the Required checkbox for the Invoice Address field.
14. Click the Required checkbox for the Date record.
15. Click the List checkbox for the Date record.
16. Click the Required checkbox for the OrderNumber record.
17. Click the List checkbox for the OrderNumber record.
18. Click the Payments tab.
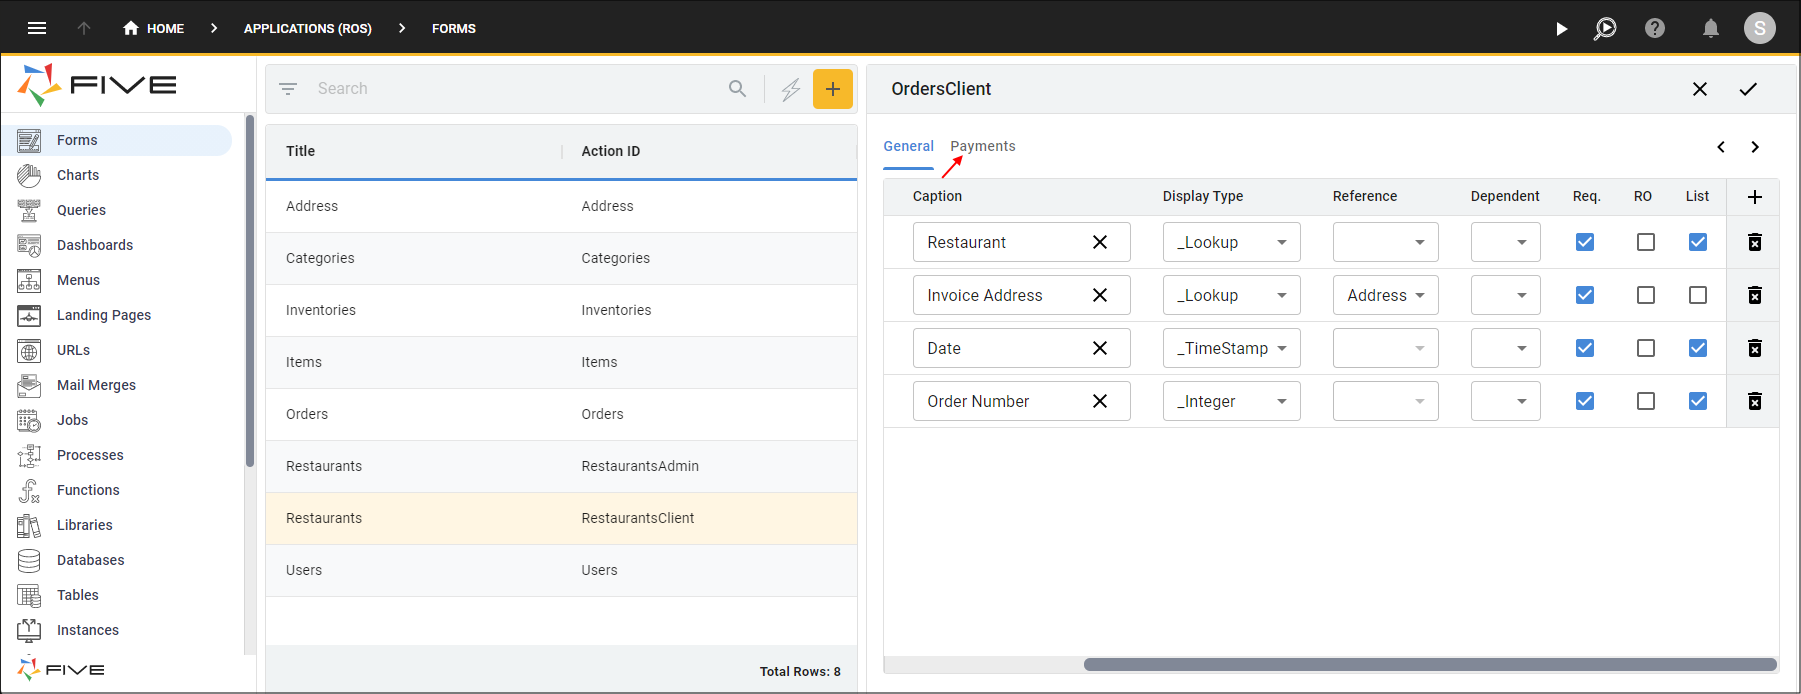
Figure 4 - Configure the fields and select the Payments tab
19. Click the Remove Form Field button for the Restaurant, Invoice Address, Date, Order Number, and Completed records.
20. Click the Required checkbox for the Delivery Address record.
21. Click the List checkbox for the Delivery Address record.
22. Click the Required checkbox for Sub Total record.
23. Click the List checkbox for the Sub Total record.
24. Click the Required checkbox for the Total record.
25. Click the List checkbox for the Total record.
26. Click the Save button in the Form Wizard App bar.
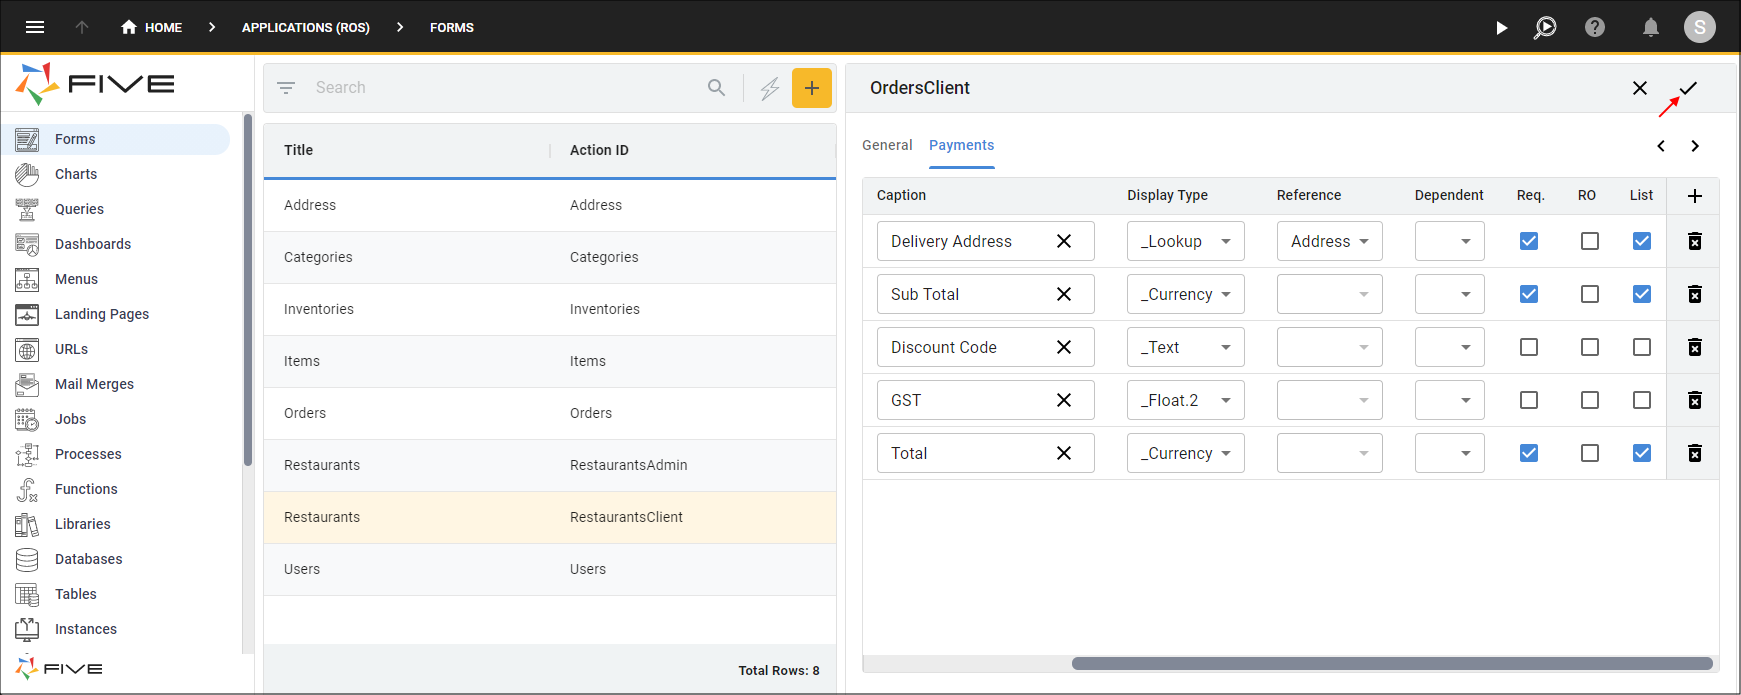
Figure 5 - Configure the fields and save the Orders form
Edit the Orders Form
info
The OrdersClient form needs to be edited to attach the Billing Address and Shipping Address lookup queries.
1. Select the OrdersClient record in the list.
2. Click the Pages tab.
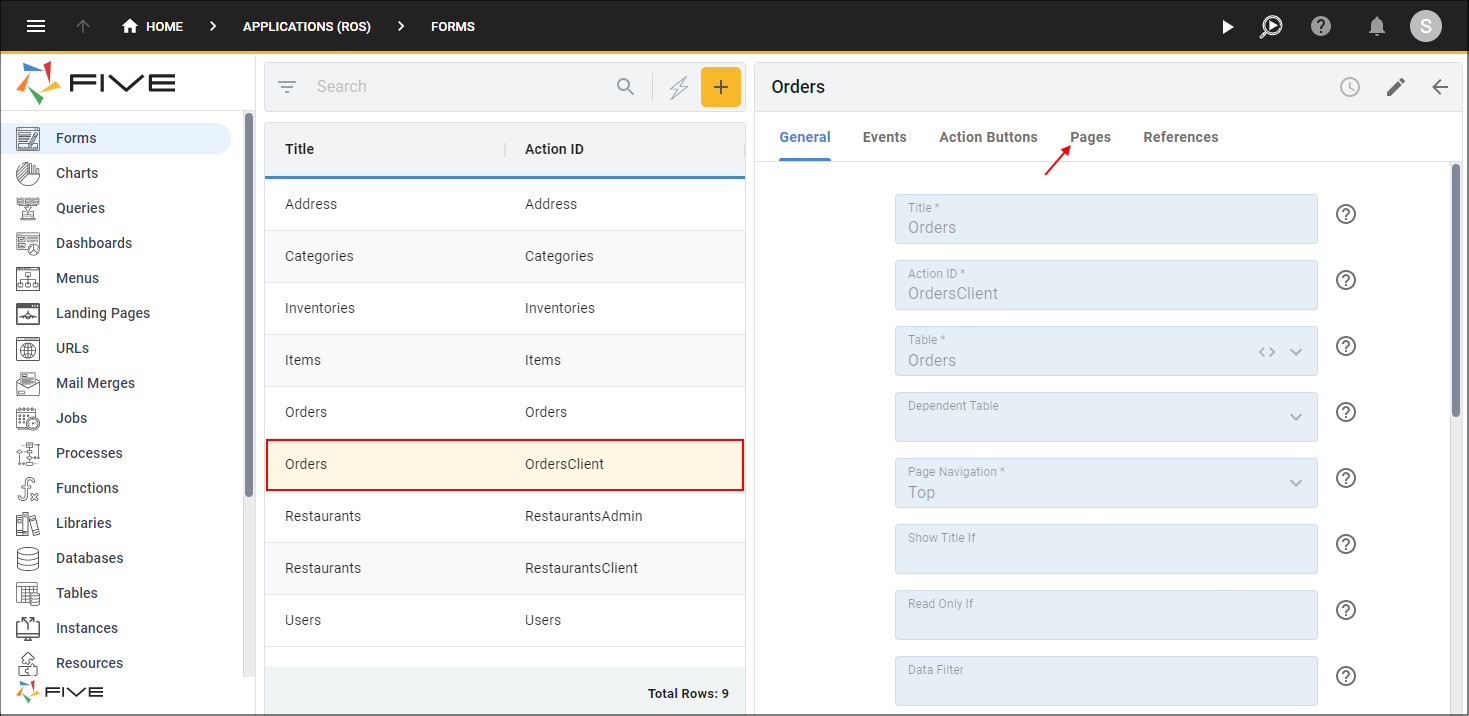
Figure 6 - Edit the OrdersClient record
3. Select the General record.
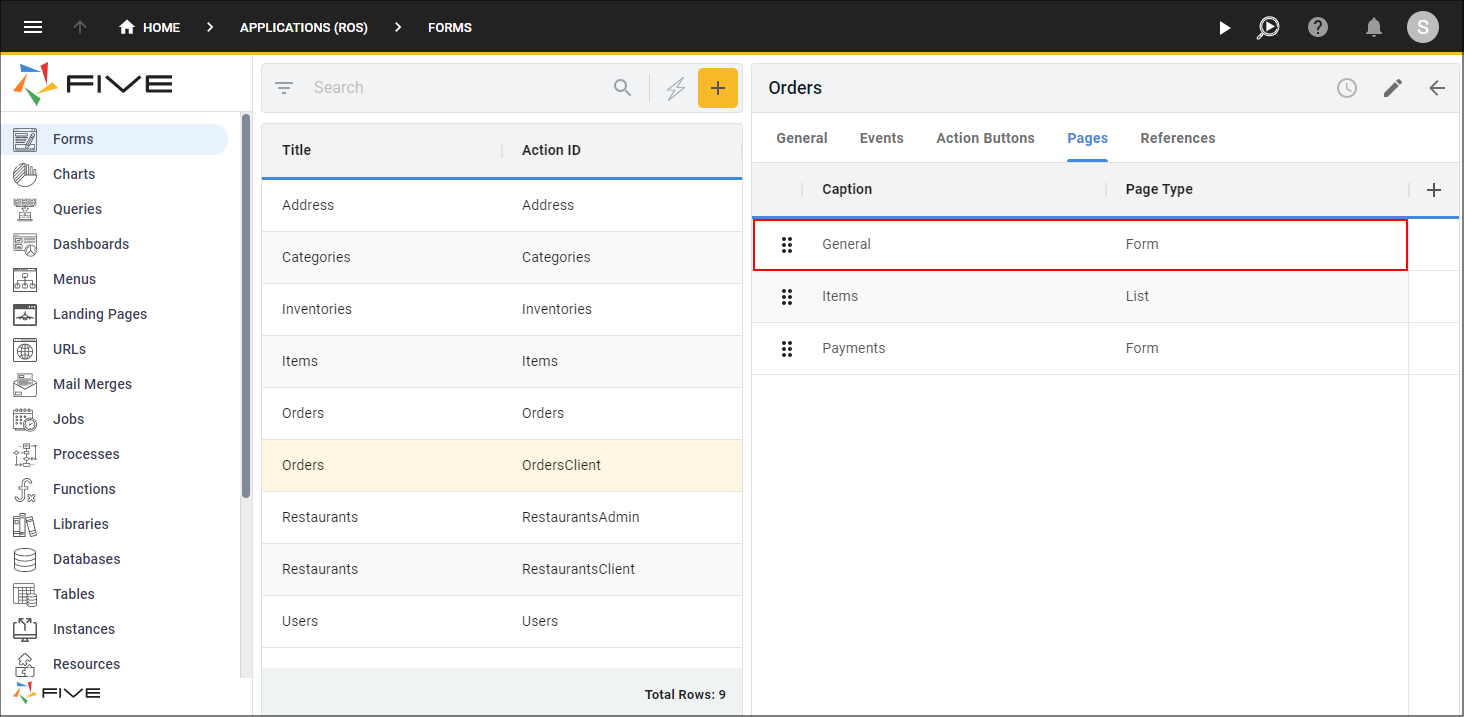
Figure 7 - General record
4. Click the Fields tab.
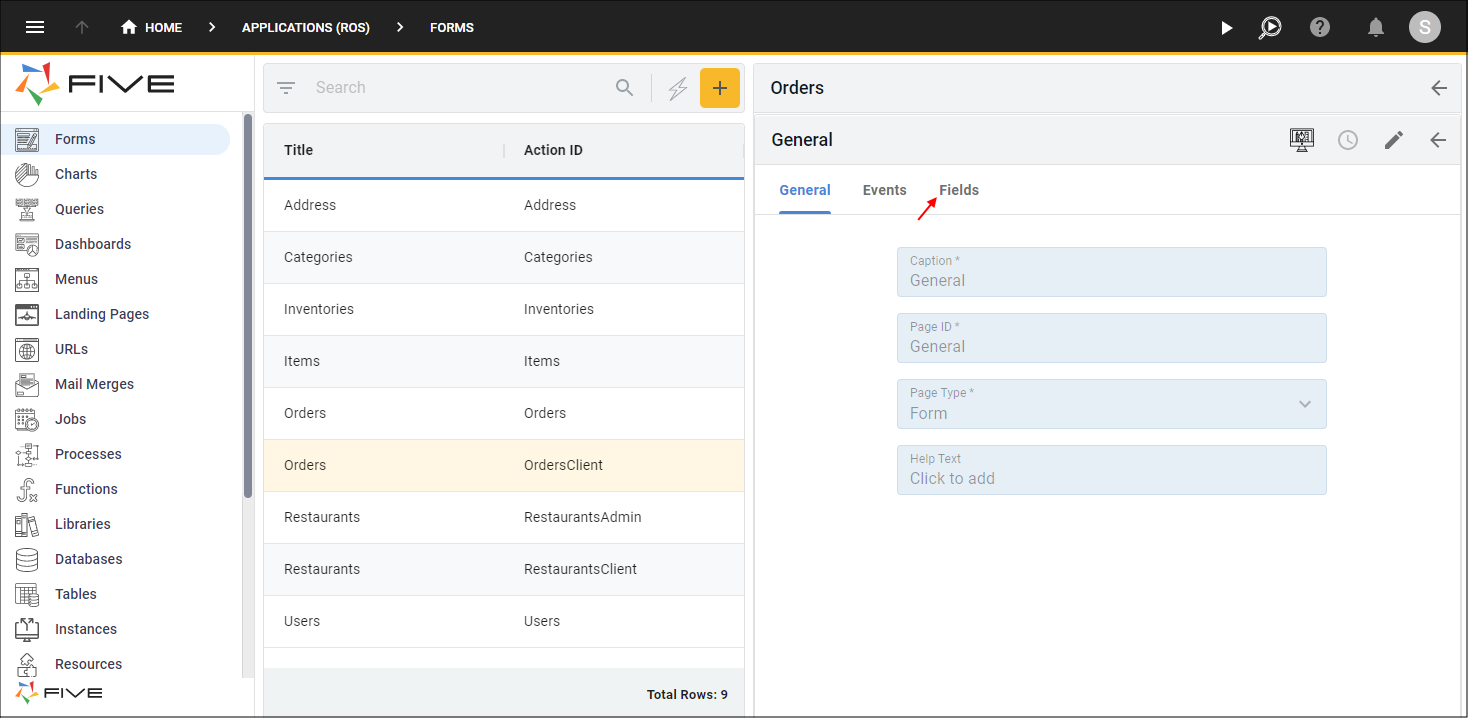
Figure 8 - Fields tab
5. Select the Invoice Address record.
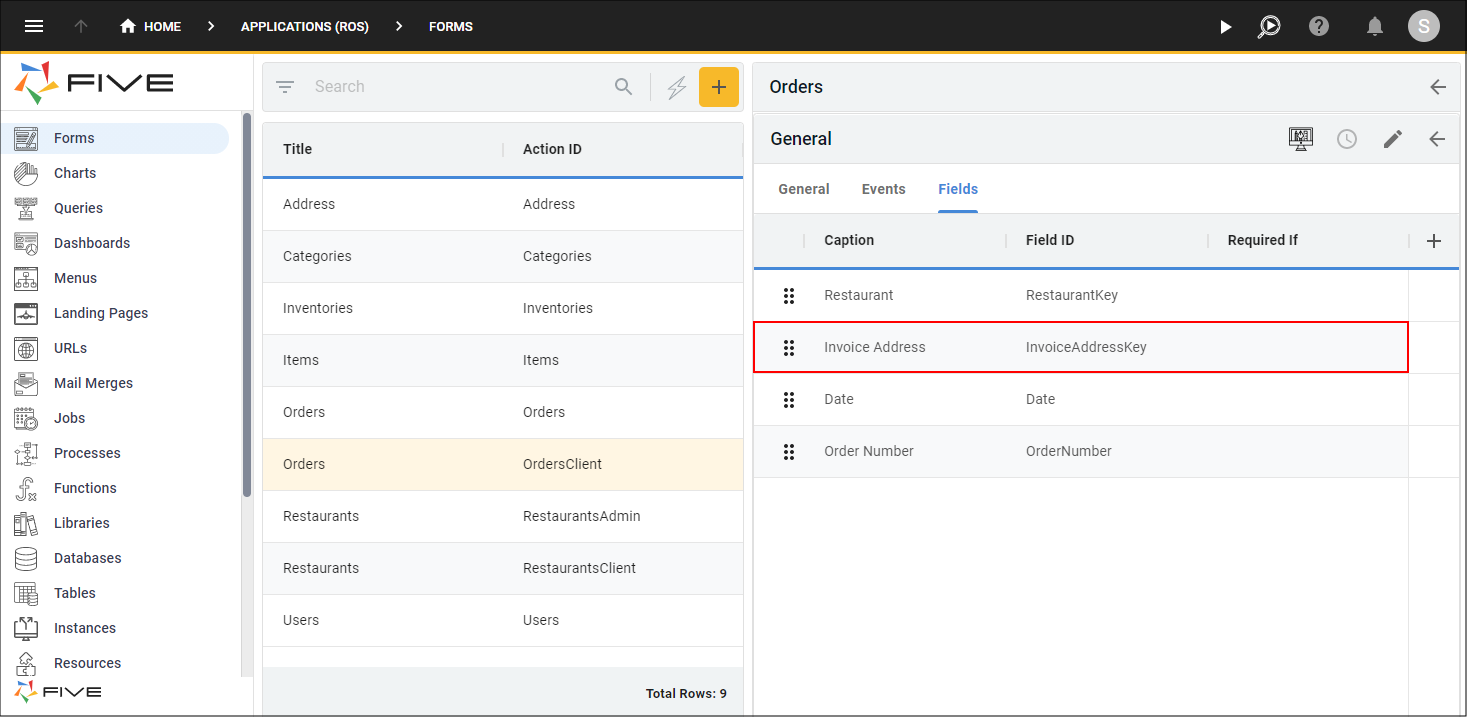
Figure 9 - Invoice Address record
6. Either click the Edit button in the form app bar, or click directly in the Reference Form field.
7. Click the Cancel button in the Reference Form field.
8. Click the lookup icon in the Display Type field and select _LookupQuery.
9. Click the lookup icon in the Lookup Query field and select BillingAddress.
10. Click the Save button in the form app bar.
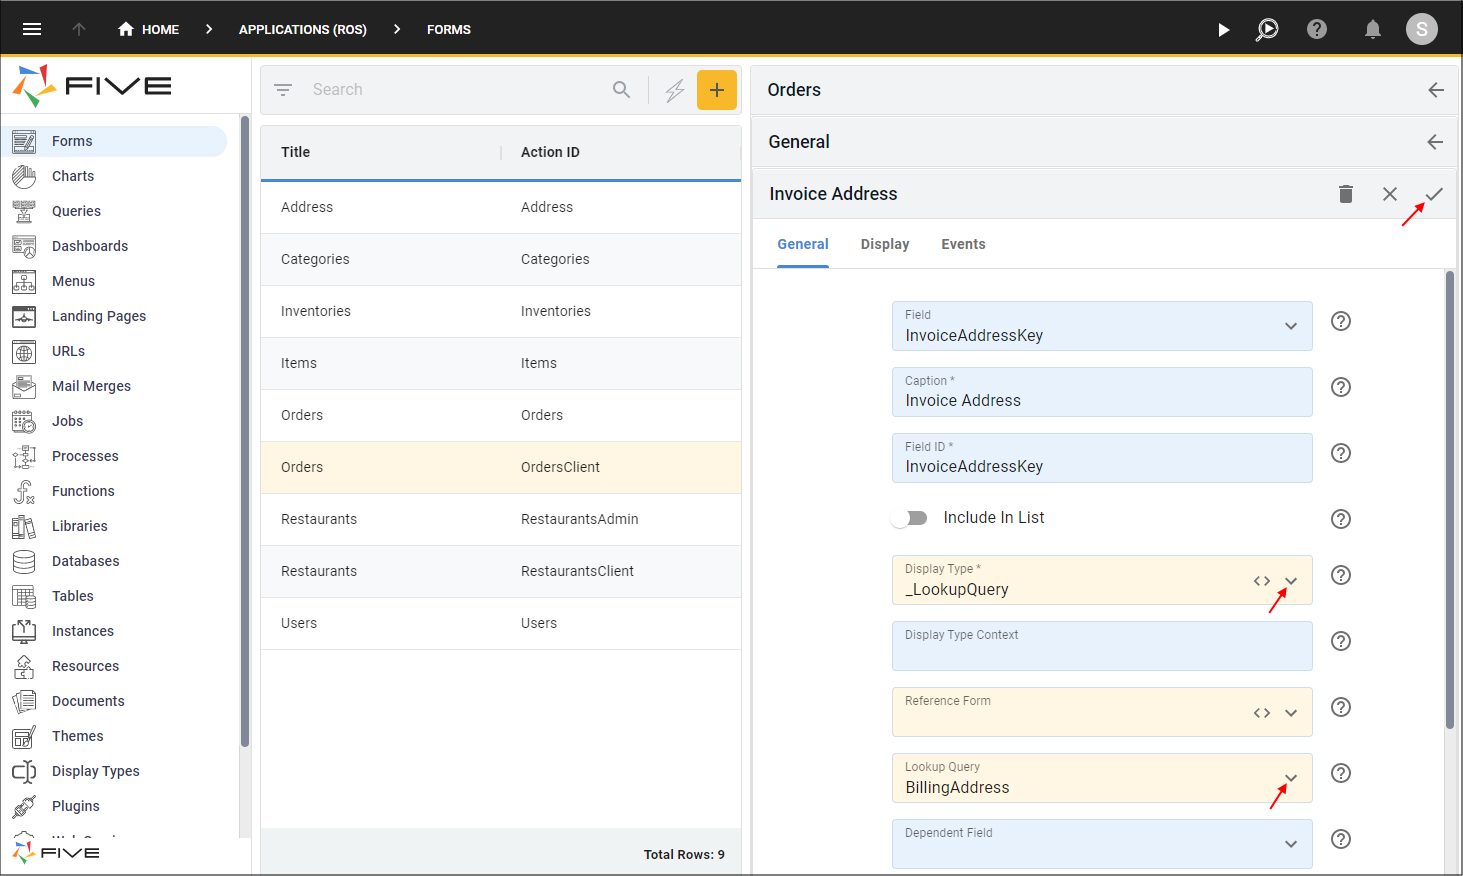
Figure 10 - Edit the Invoice Address record
11. Click the Cancel button in the form app bar above the list.
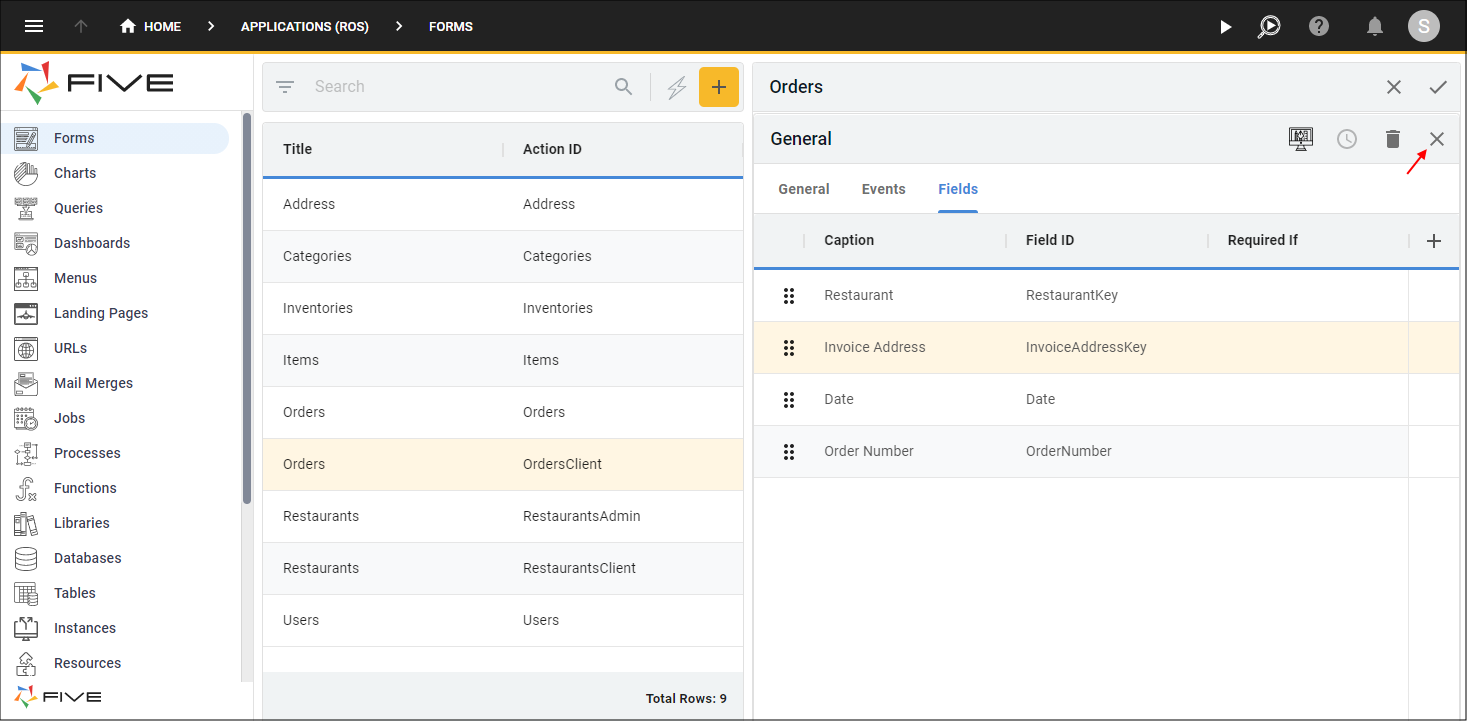
Figure 11 - Cancel button
12. Select the Payments record.
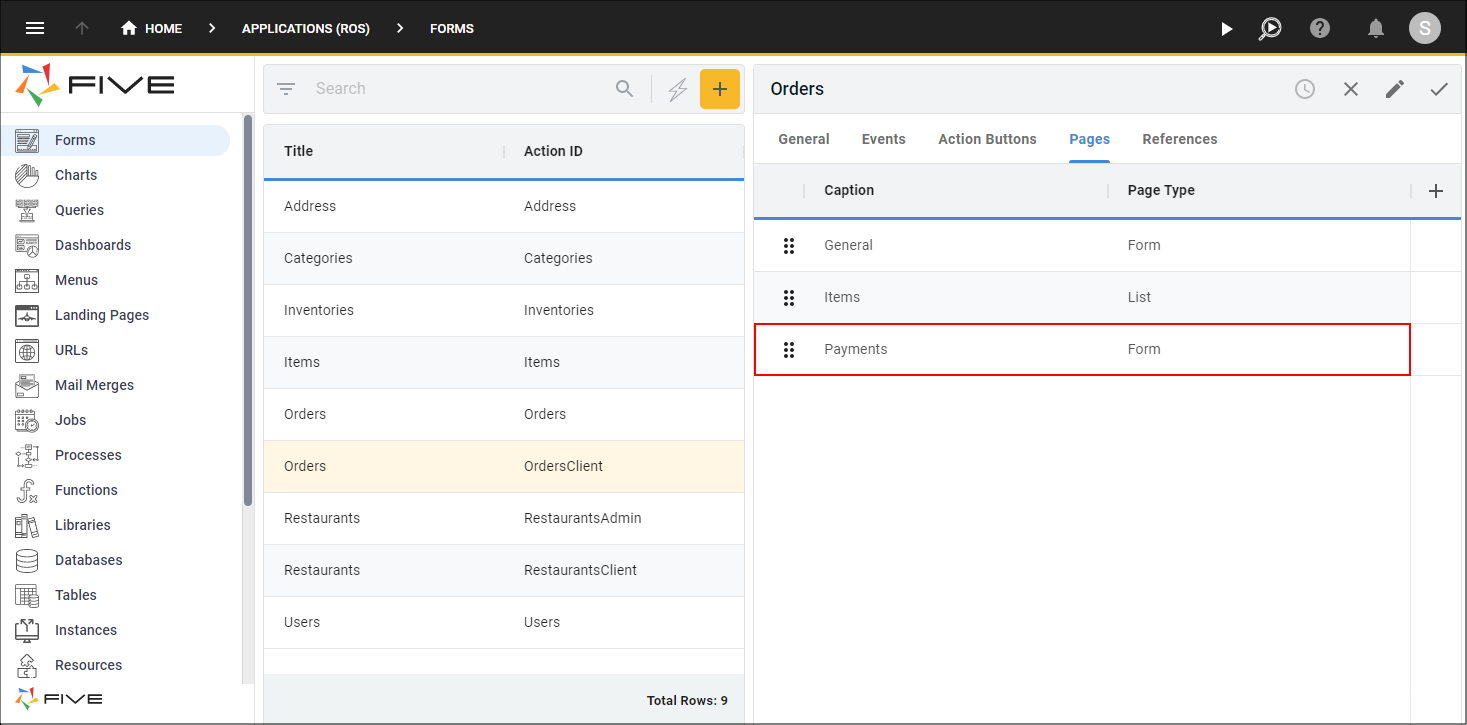
Figure 12 - Payments record
13. Click the Fields tab.

Figure 13 - Fields tab
14. Select the Delivery Address record.
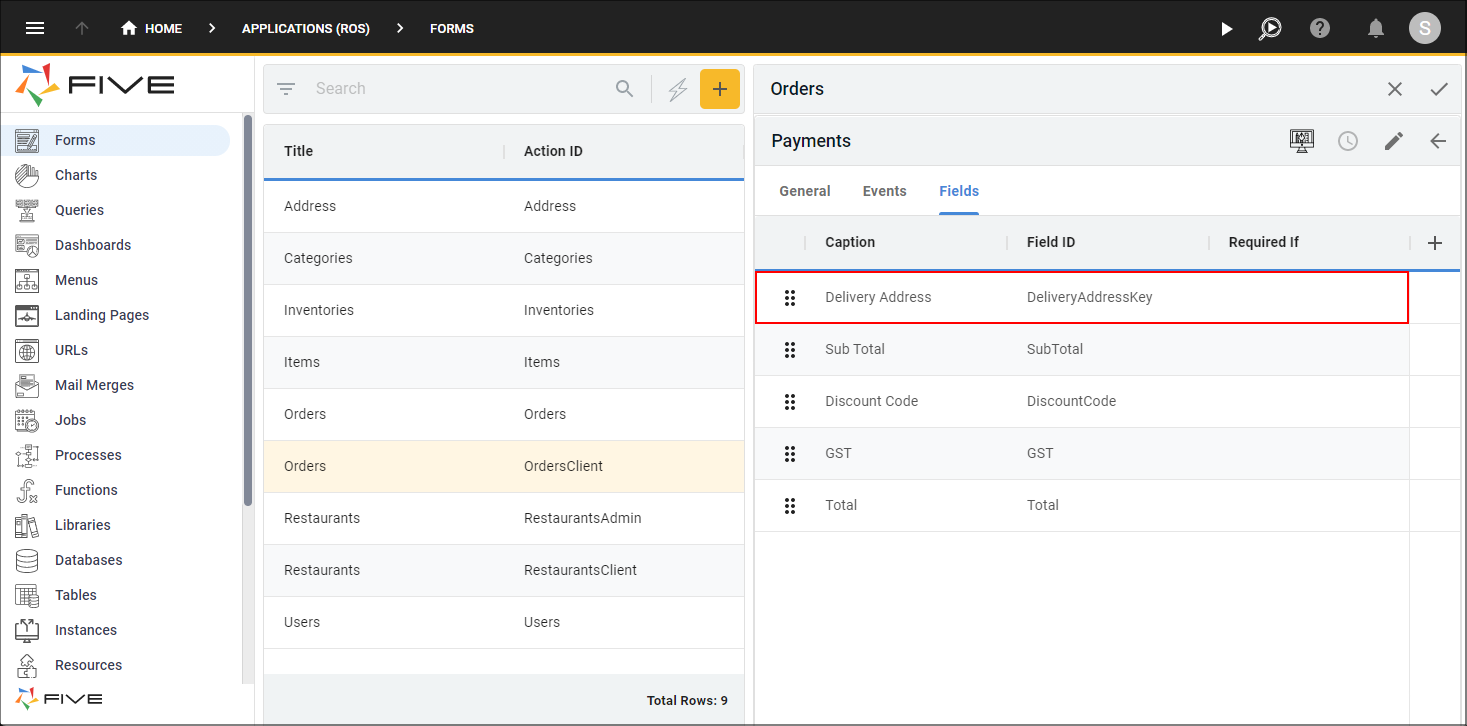
Figure 14 - Delivery Address record
15. Either click the Edit button in the form app bar, or click directly in the Reference Form field.
16. Click the Cancel button in the Reference Form field.
17. Click the lookup icon in the Display Type field and select _LookupQuery.
18. Click the lookup icon in the Lookup Query field and select ShippingAddress.
19. Click the Save button in the form app bar.
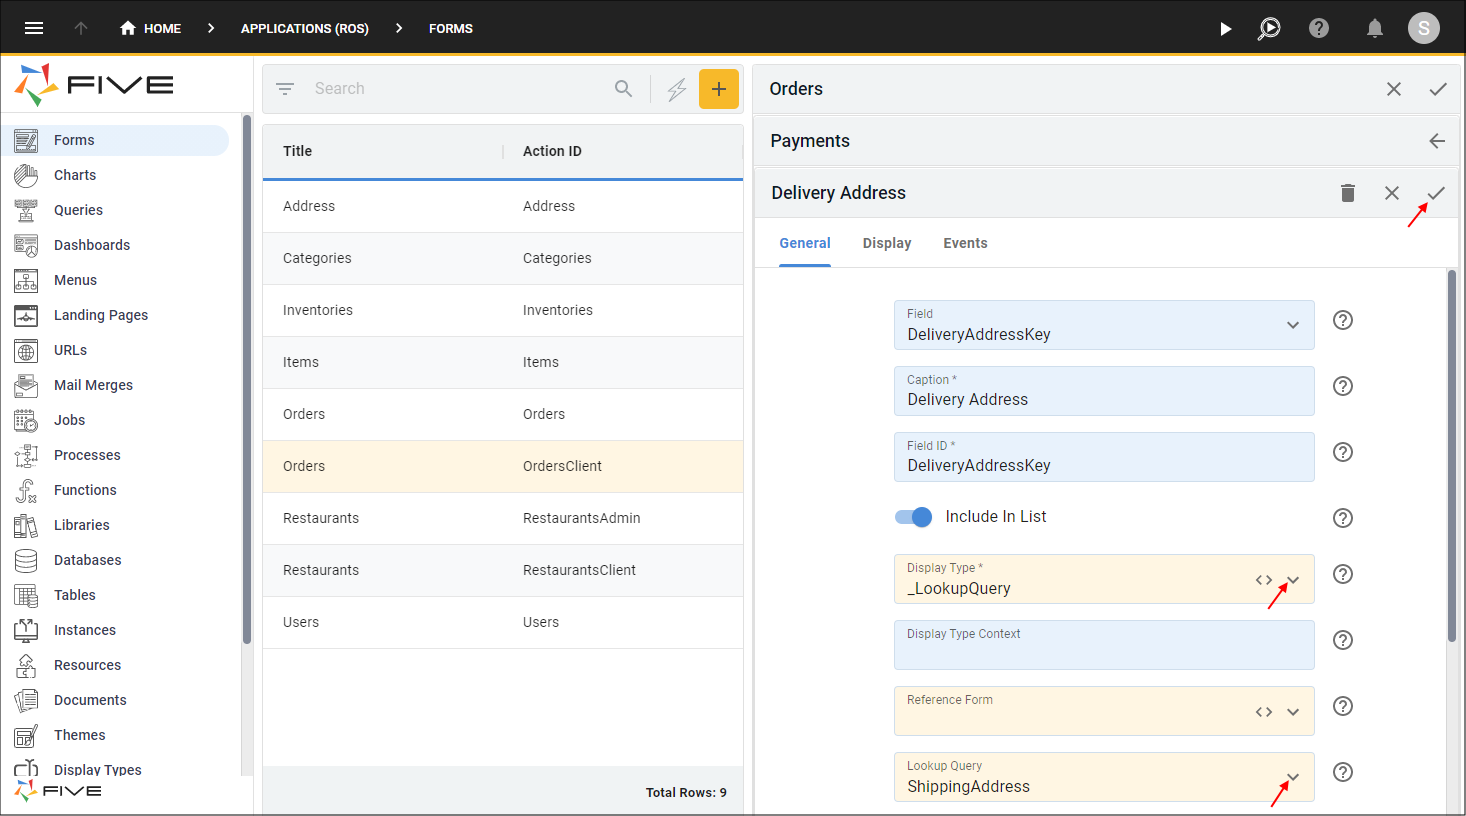
Figure 15 - Edit the Delivery Address record
20. Click the Save button in the form app bar above the list.
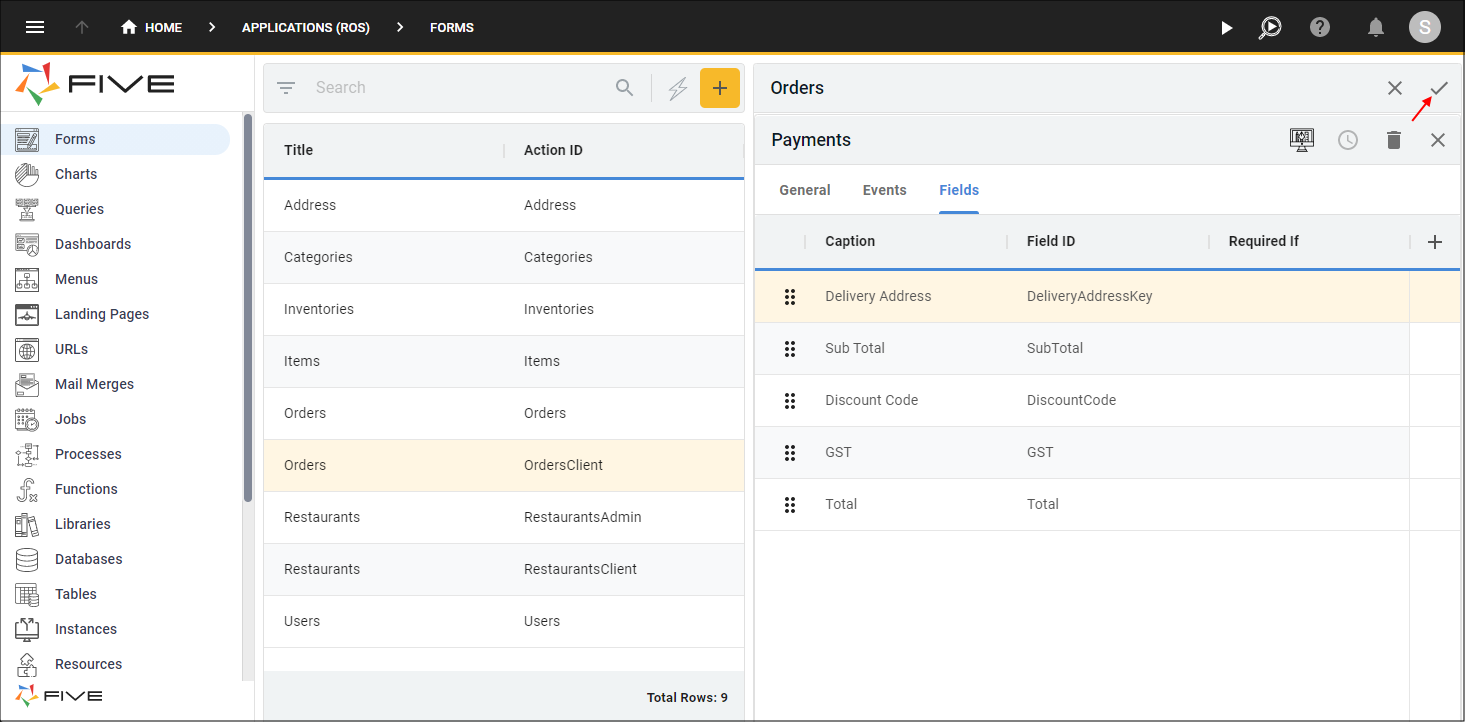
Figure 16 - Save the OrdersClient form
Reorder Menu Items for the Client Menu
info
The Client menu has an ordering system starting with 20000.
Edit the Restaurants Menu Item
1. Select Menus in the menu.2. Select the Restaurants record in the list.
3. Either click the Edit button in the form app bar, or click directly in the Menu ID field and type 20100 before Restaurants.
4. Click the Cancel button in the Menu Order field and type 20100.
5. Click the Save button in the form app bar.
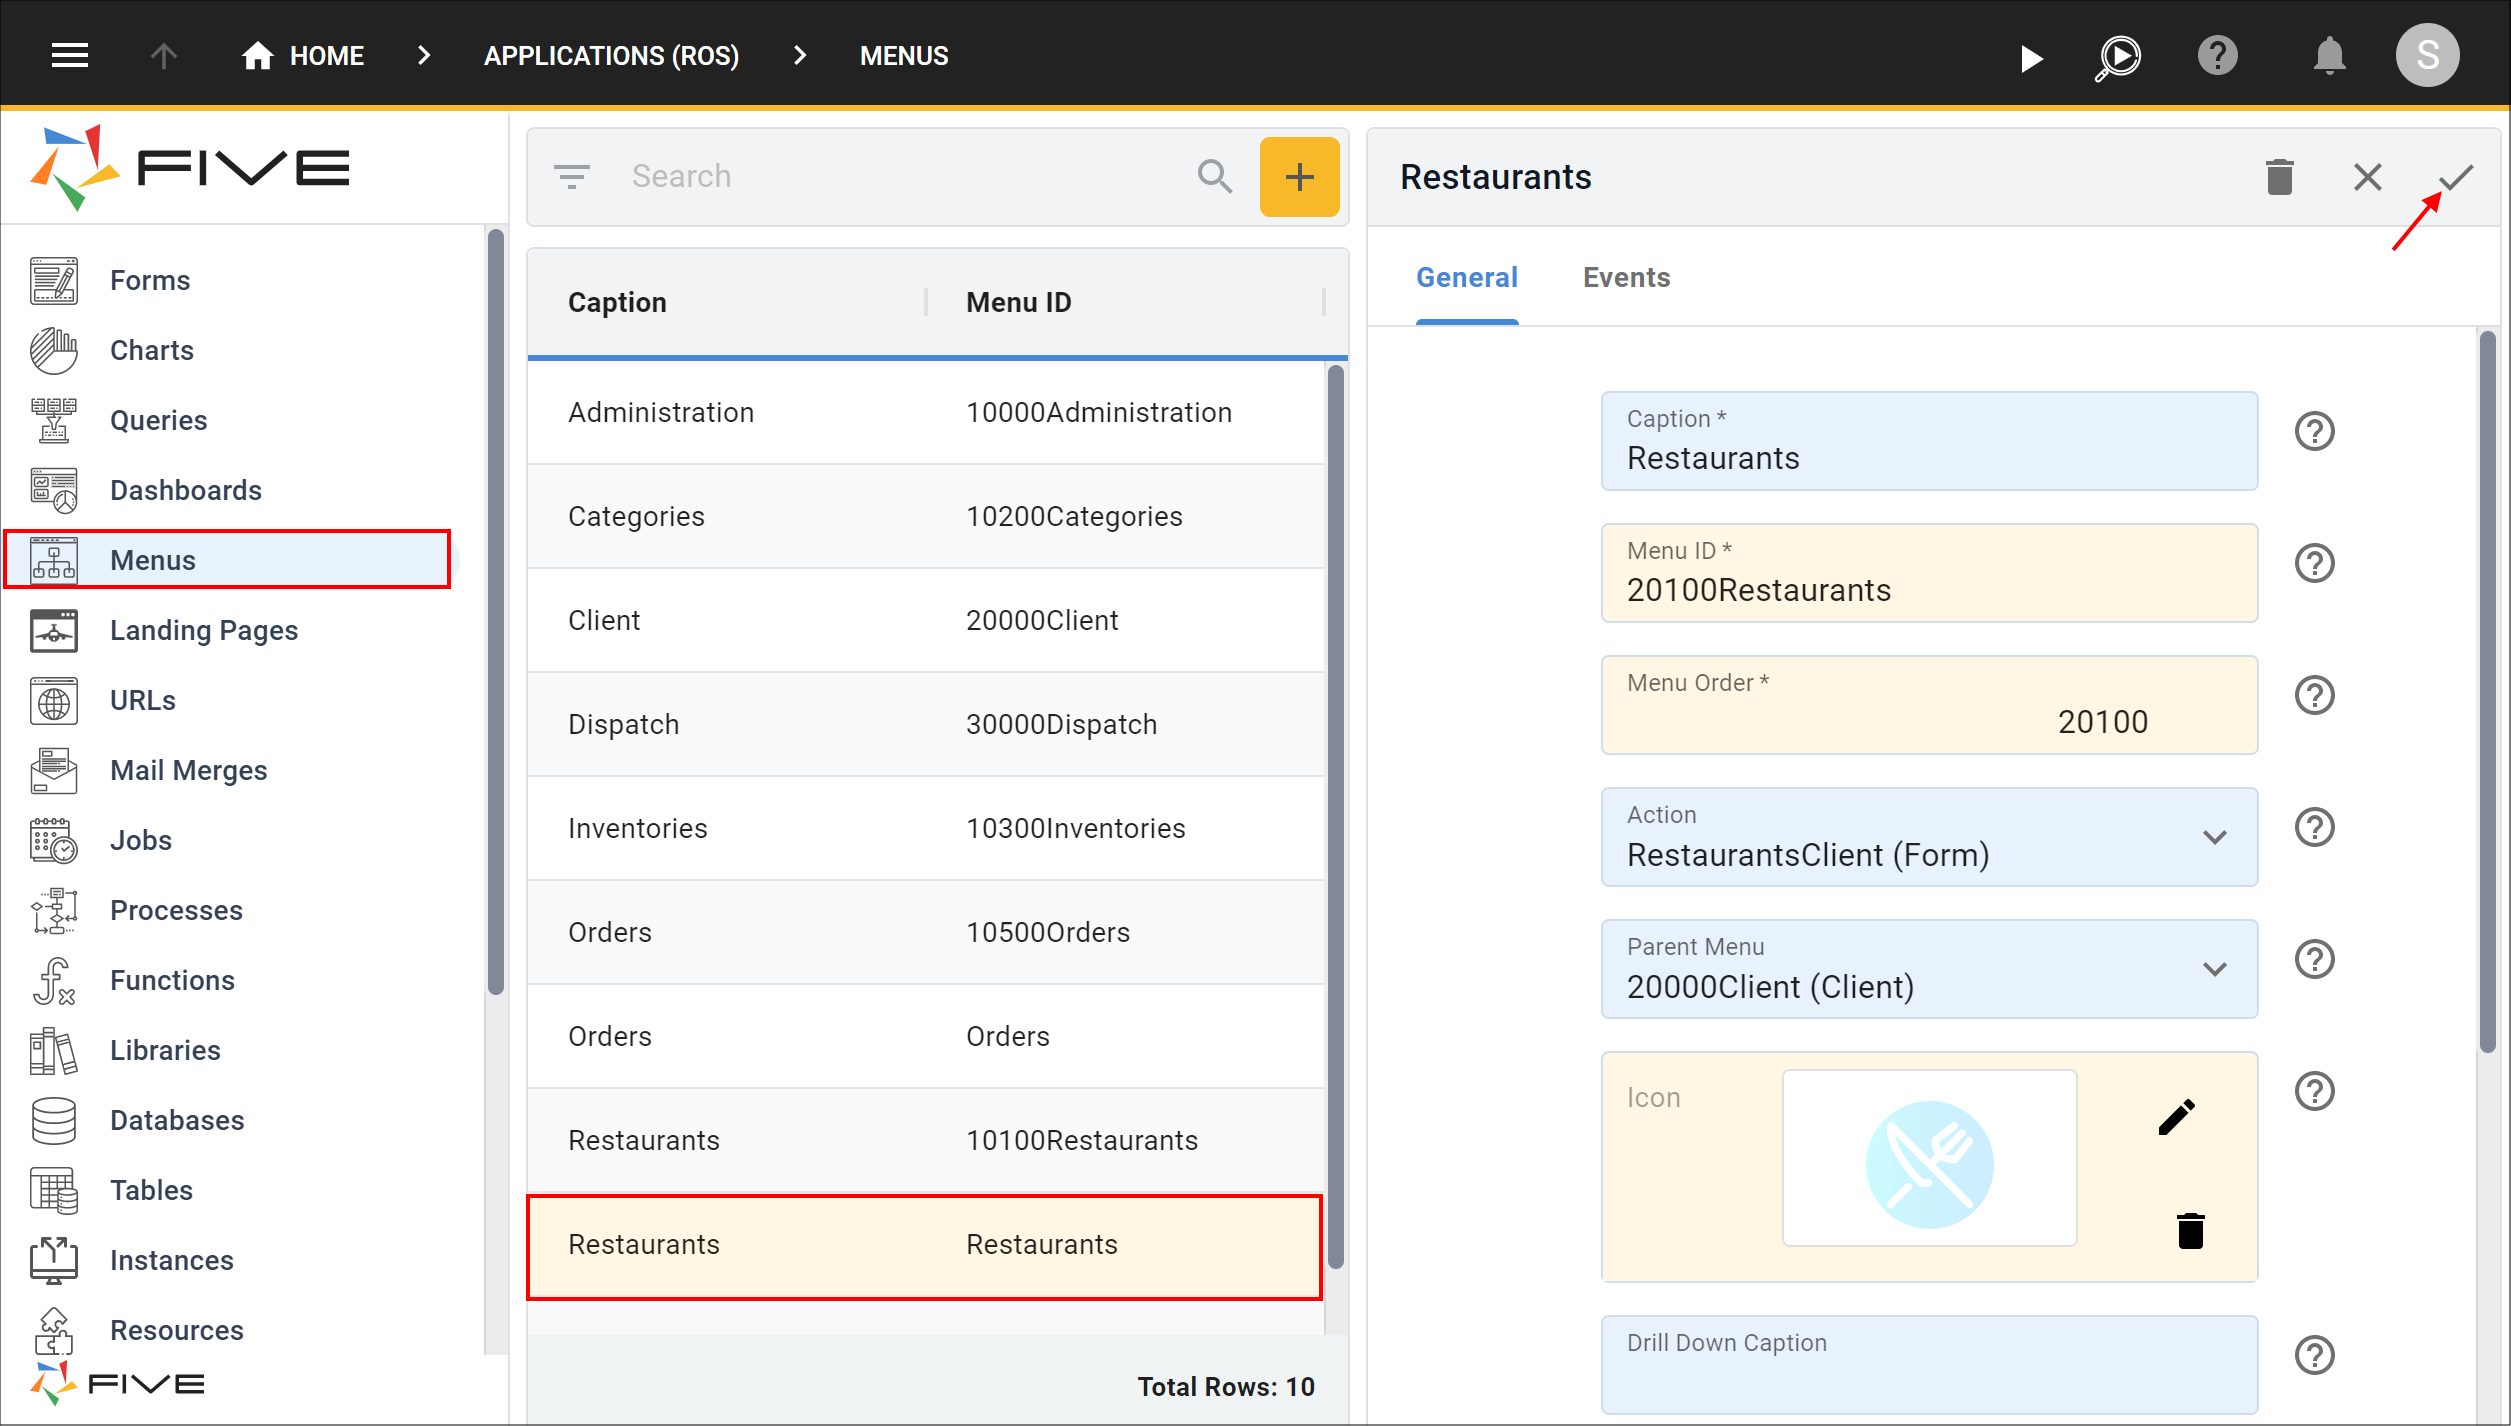
Figure 17 - Edit the Restaurants menu item
Edit the Orders Menu Item
1. Select the Orders record in the list.2. Either click the Edit button in the form app bar, or click directly in the Menu ID field and type 20110 before Orders.
3. Click the Cancel button in the Menu Order field and type 20110.
4. Click the Save button in the form app bar.
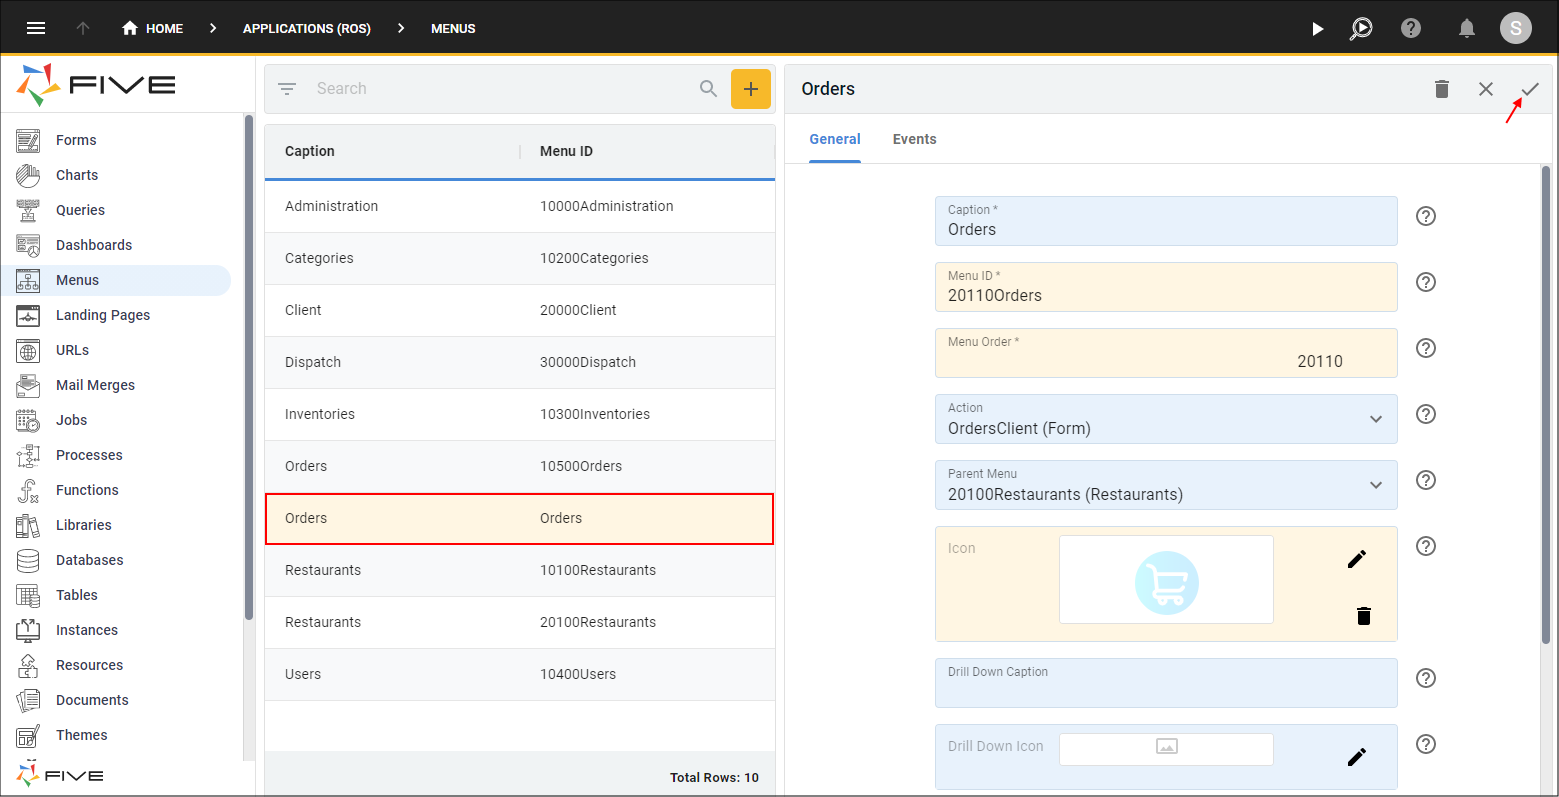
Figure 18 - Edit the Orders menu item