1 - Build Database Tables
Last updated 13/12/2023
To take your knowledge of Five further, you will need to create three more tables for the Portfolio application. To reflect these changes, the Portfolio database model has been updated. The Buy, Sell, and Allocation tables are now required so a user can make transactions and allocate stock for a sale.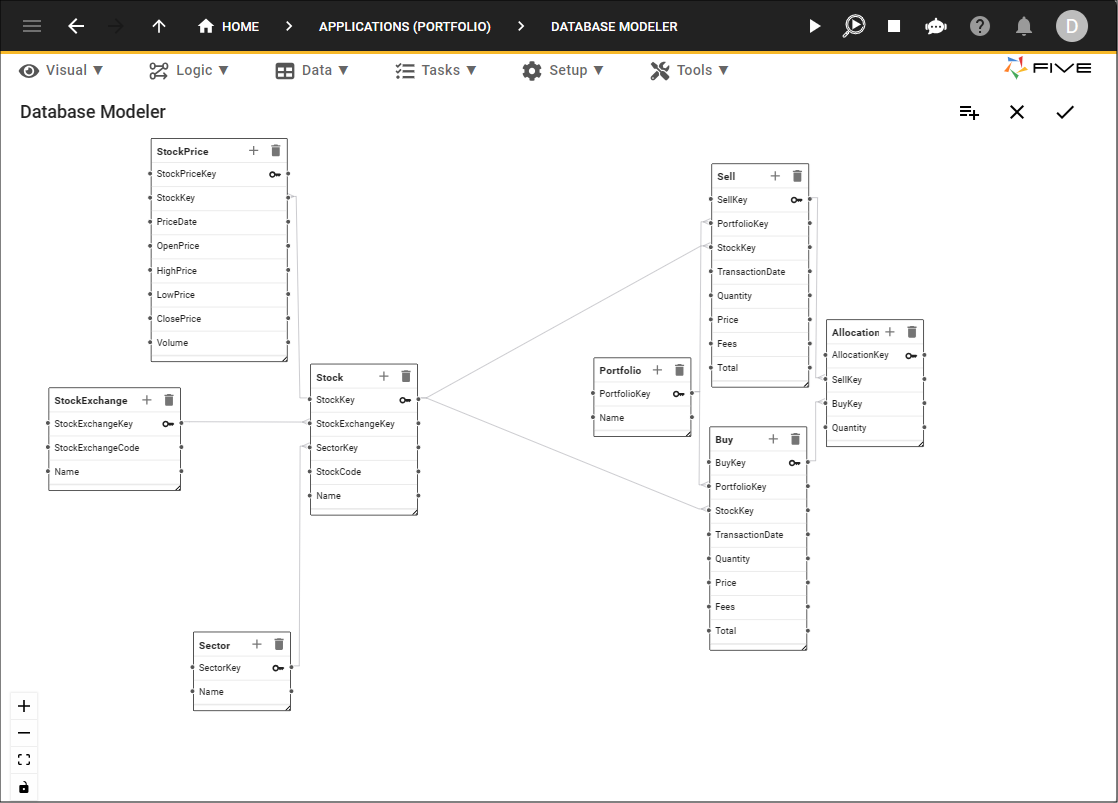
Figure 1 - Portfolio stage two model
Navigate to the Table Wizard
info
When working in the Cloud, you need to be logged in with a Developer or Control account to continue creating the Portfolio application.
1. Click the Manage button in the form app bar.
info
You may need to select the Portfolio record first if you have more than one application, or are working in Local.
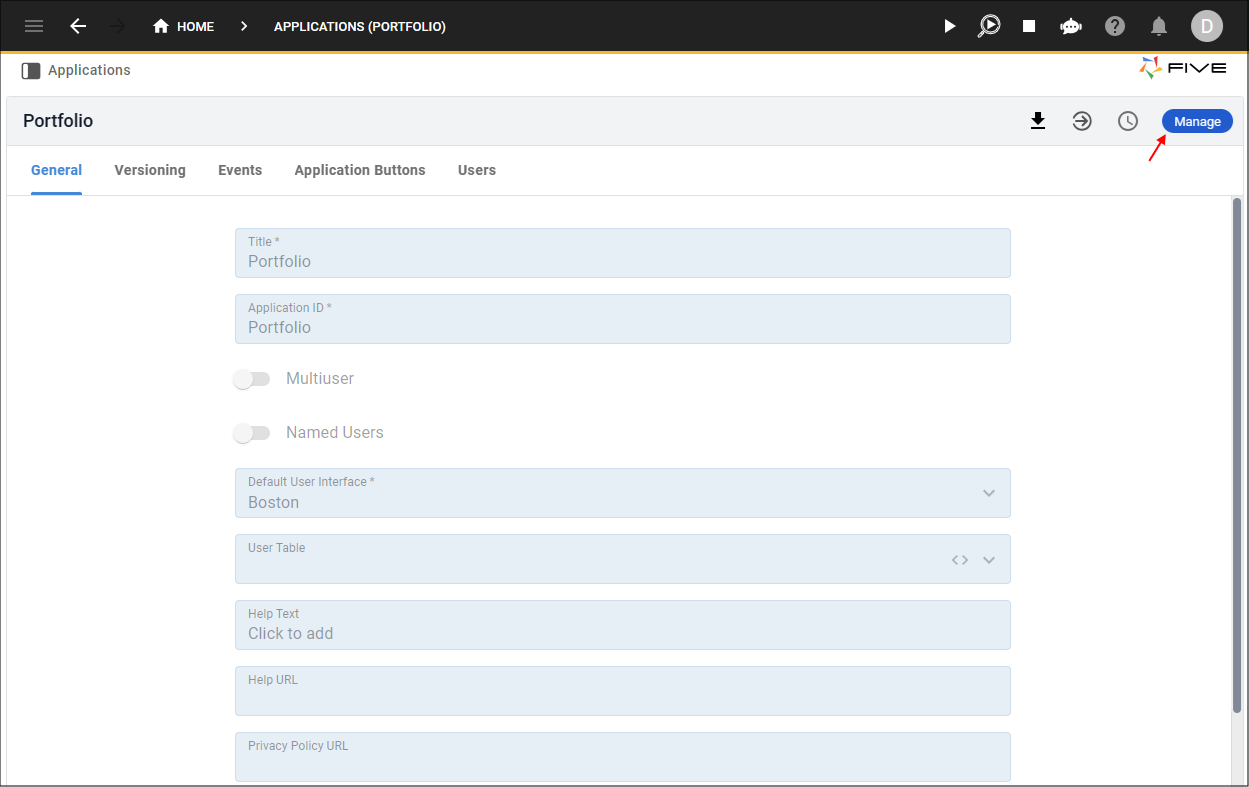
Figure 2 - Manage button
2. Click Data in the menu.
3. Click Table Wizard in the sub-menu.
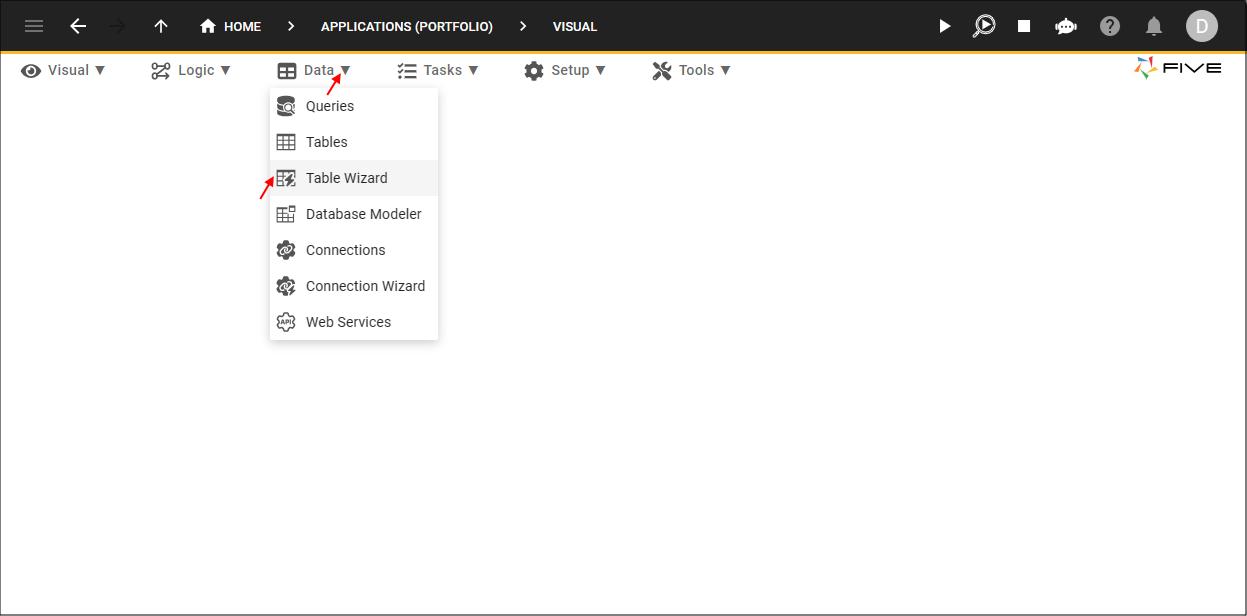
Figure 3 - Table Wizard menu item
Add the Buy Table
1. Type Buy in the Name field.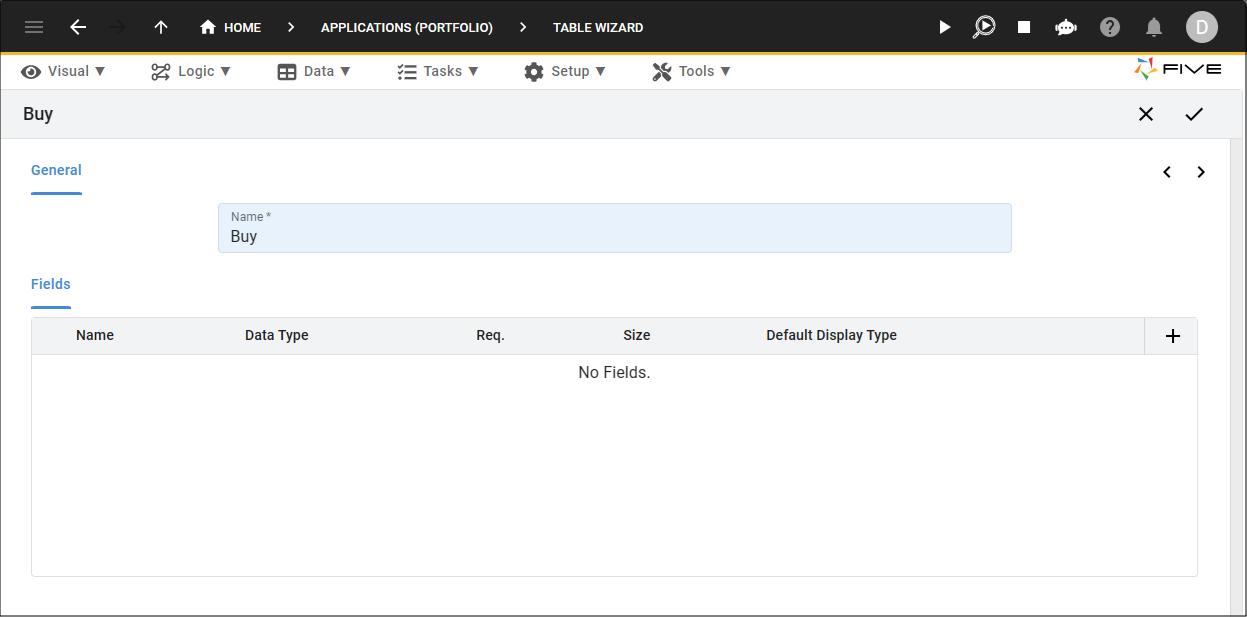
Figure 4 - Add the Buy table
2. Click the Add Fields button.
3. Type TransactionDate in the Name field.
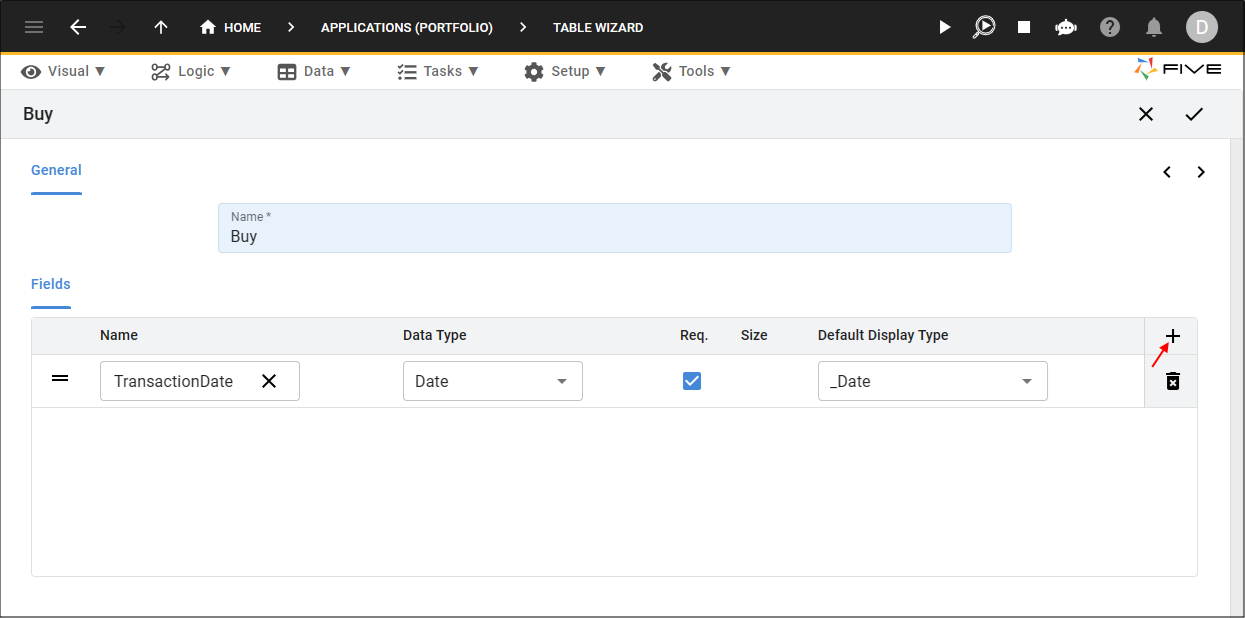
Figure 5 - Add the TransactionDate field
4. Click the Add Fields button.
5. Type Quantity in the Name field.
6. Click the Req. checkbox.
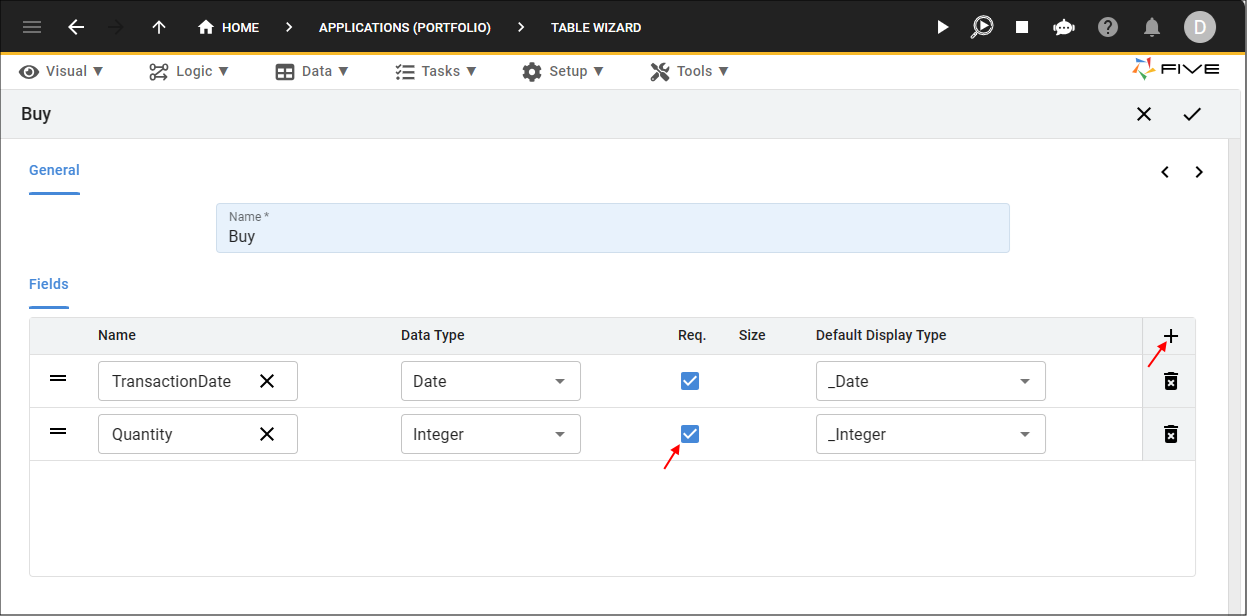
Figure 6 - Add the Quantity field
7. Click the Add Fields button.
8. Type Price in the Name field.
9. Click the lookup icon in the Data Type field and select Float.
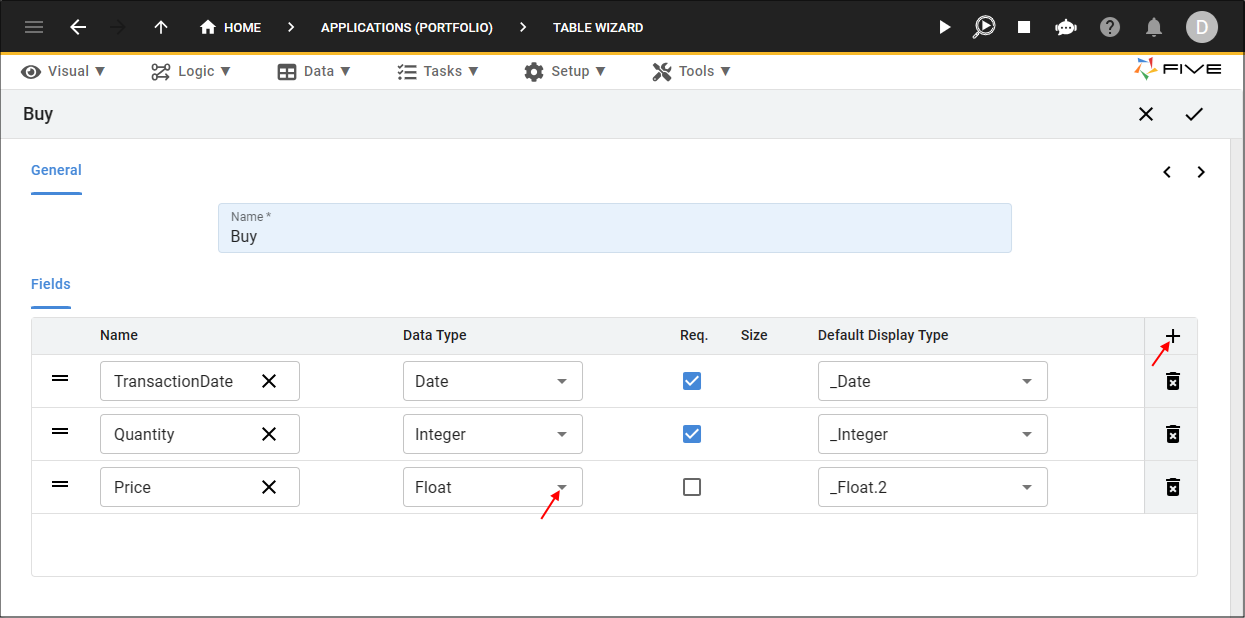
Figure 7 - Add the Price field
10. Click the Add Fields button.
11. Type Fees in the Name field.
12. Click the lookup icon in the Data Type field and select Float.
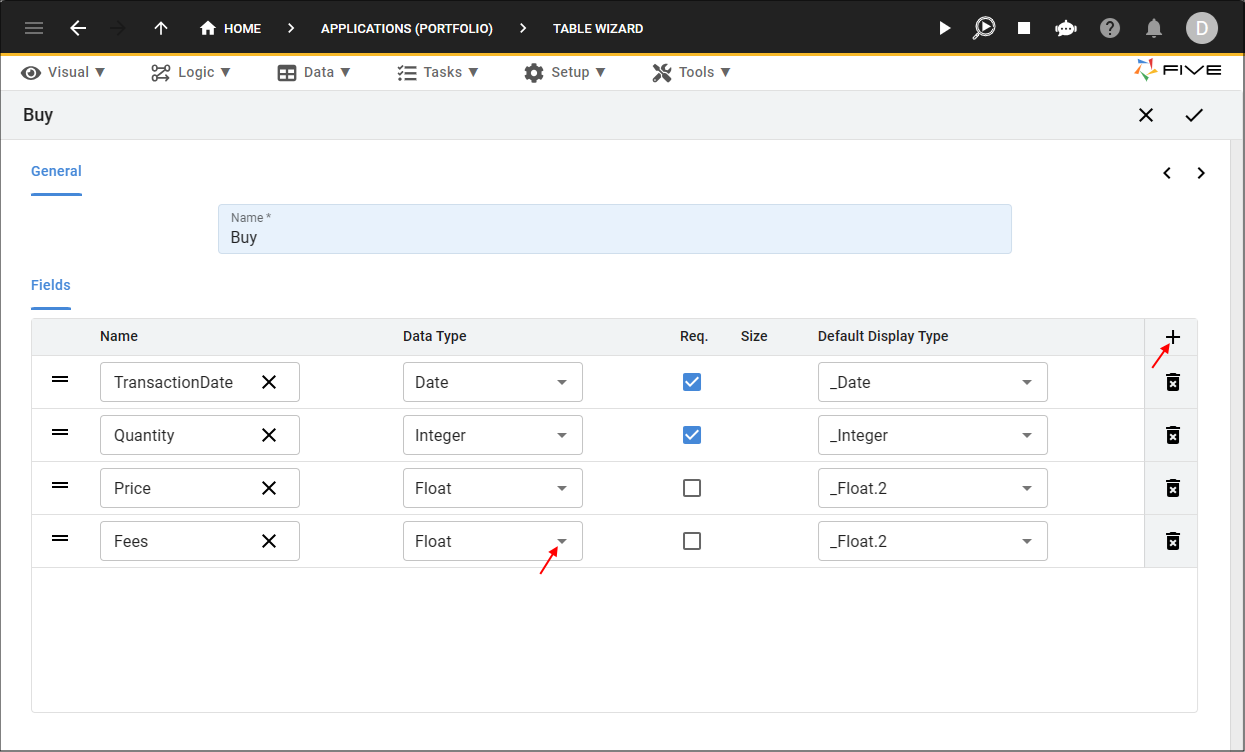
Figure 8 - Add the Fees field
13. Click the Add Fields button.
14. Type Total in the Name field.
15. Click the lookup icon in the Data Type field and select Float.
16. Click the Req. checkbox.
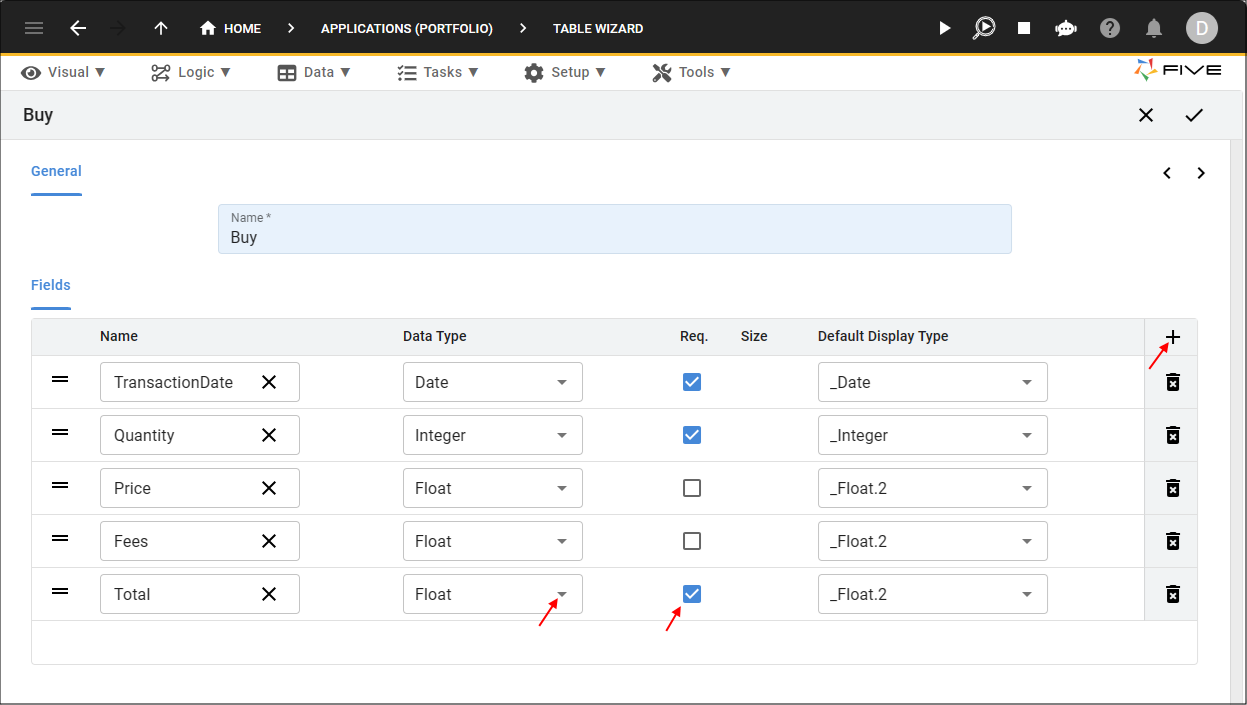
Figure 9 - Add the Total field
17. Click the Next button.

Figure 10 - Next button
18. Click the Add Relationships button.
19. Click the lookup icon in the Table field and select Portfolio.
20. Click the Required checkbox.
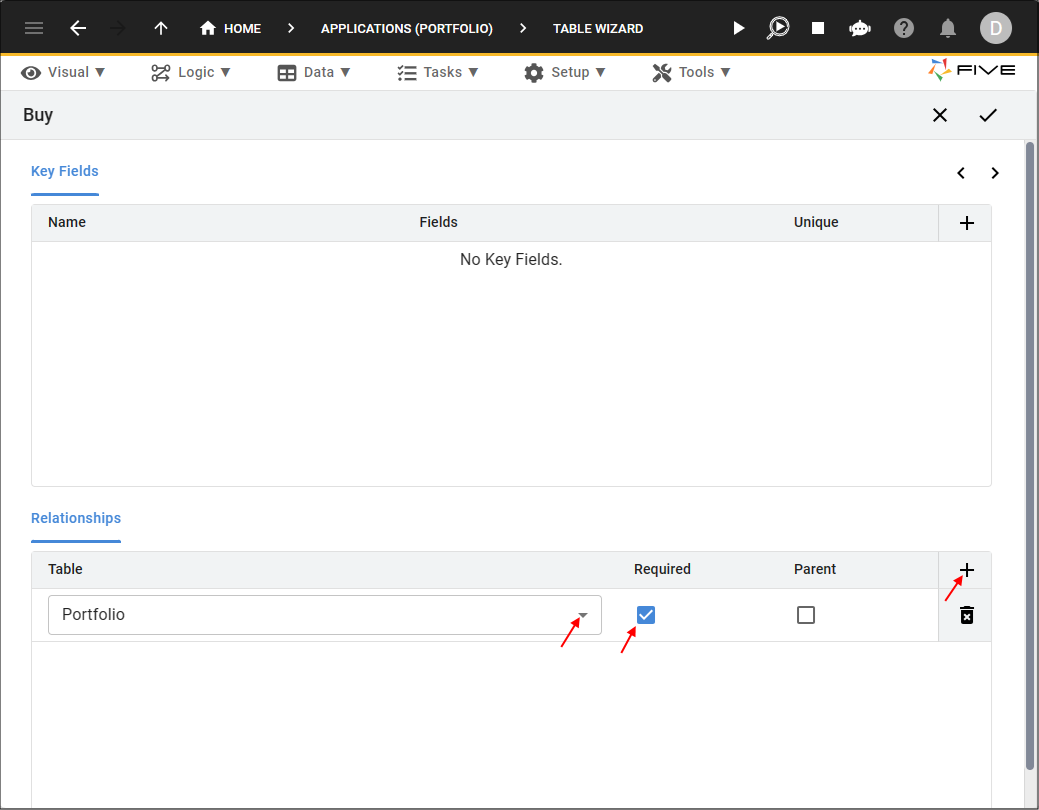
Figure 11 - Add the Portfolio relationship
21. Click the Add Relationships button.
22. Click the lookup icon in the Table field and select Stock.
23. Click the Required checkbox.

Figure 12 - Add the Stock relationship
24. Click the Save button in the Table Wizard app bar.
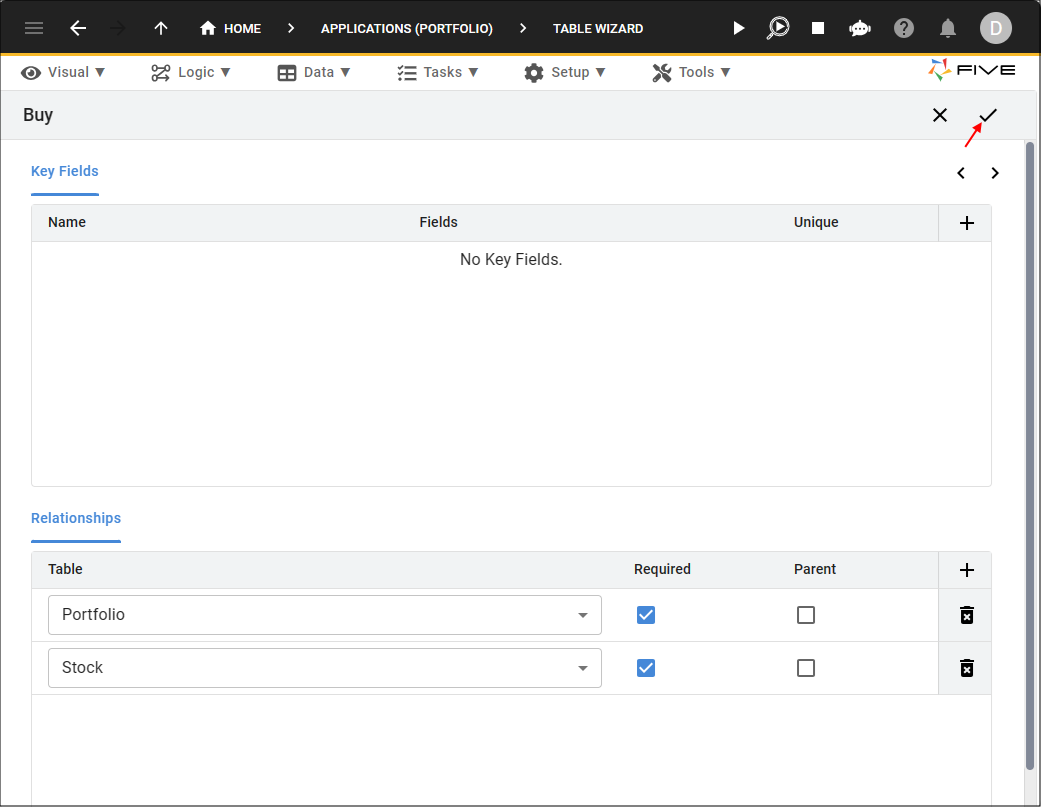
Figure 13 - Save button
25. Click the Save button in the Table Upgrade window.
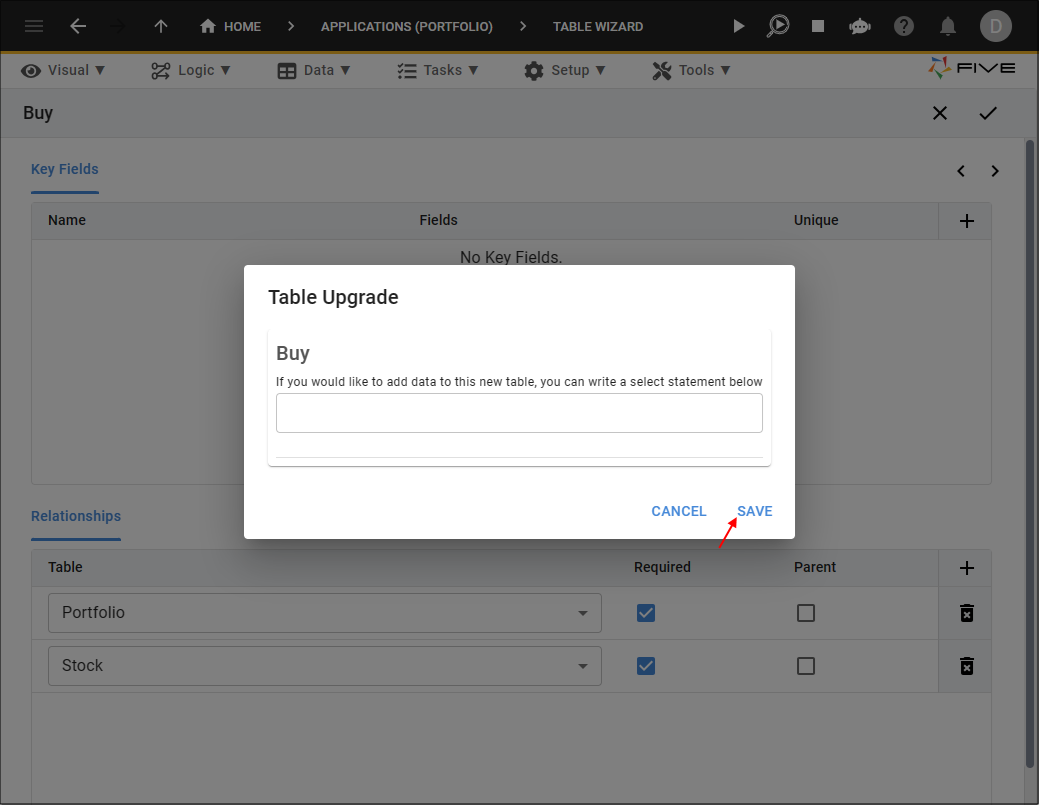
Figure 14 - Save button
Navigate to the Tables View
info
The Sell table has the same fields and table relationships as the Buy table. This is a good time to introduce Five's copy feature to
duplicate the Buy table record. To do this we need to go to the Tables view.
1. Click Data in the menu.
2. Click Tables in the sub-menu.
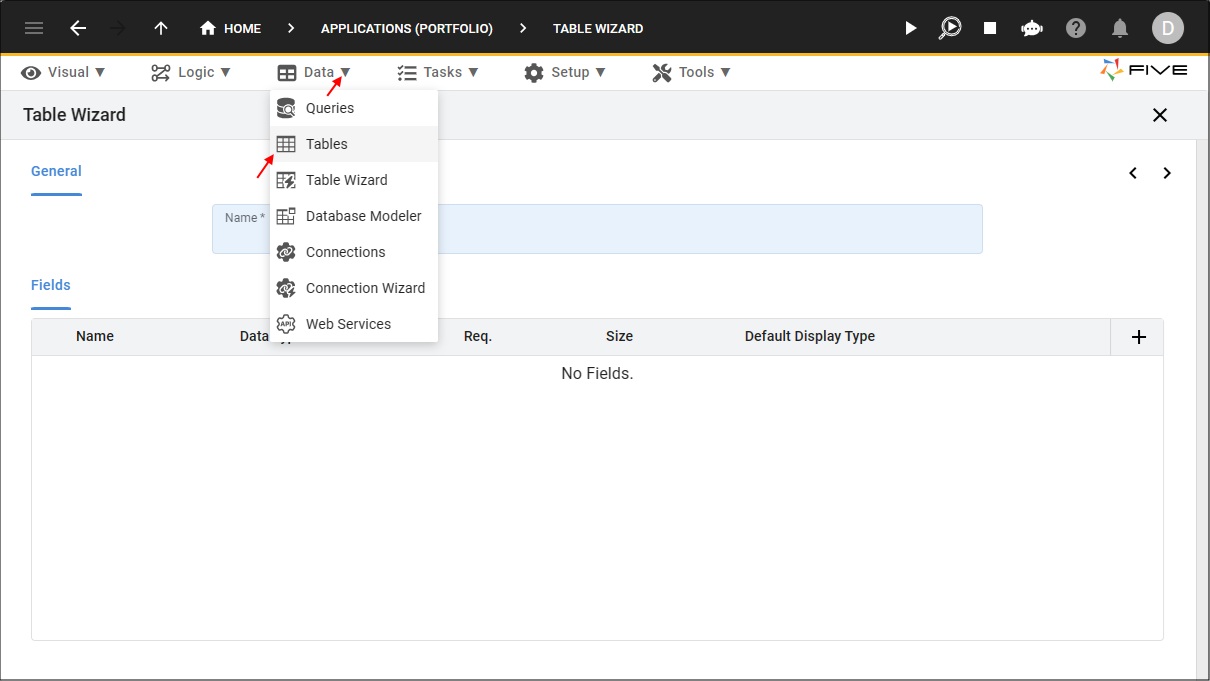
Figure 15 - Tables menu item
Add the Sell Table
1. Select the Buy record in the list.2. Click the Copy button in the form app bar.

Figure 16 - Copy button
3. Click the Cancel button in the Data Source ID field and type Sell.
4. Click the Cancel button in the Table Name field and type Sell.

Figure 17 - Add the Sell table
info
When using the copy feature, Five exactly copies the record, so we will need to edit the primary field and index to reflect the Sell table.
5. Click the Fields tab.
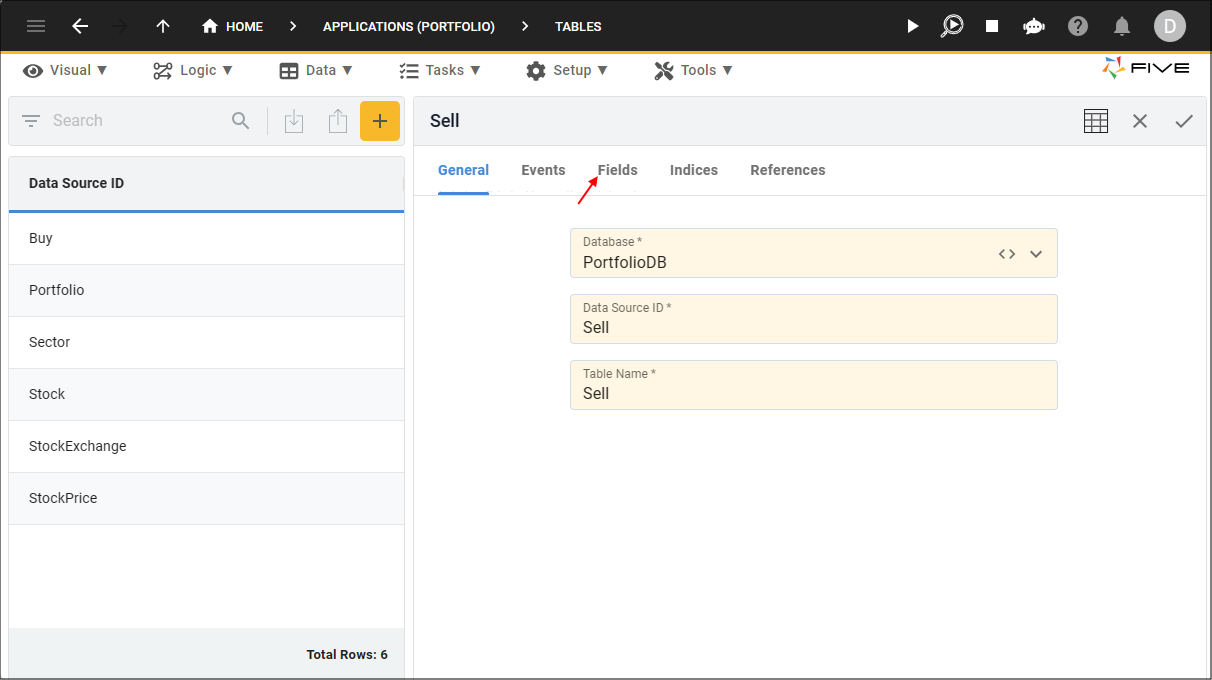
Figure 18 - Fields tab
6. Select the BuyKey record.
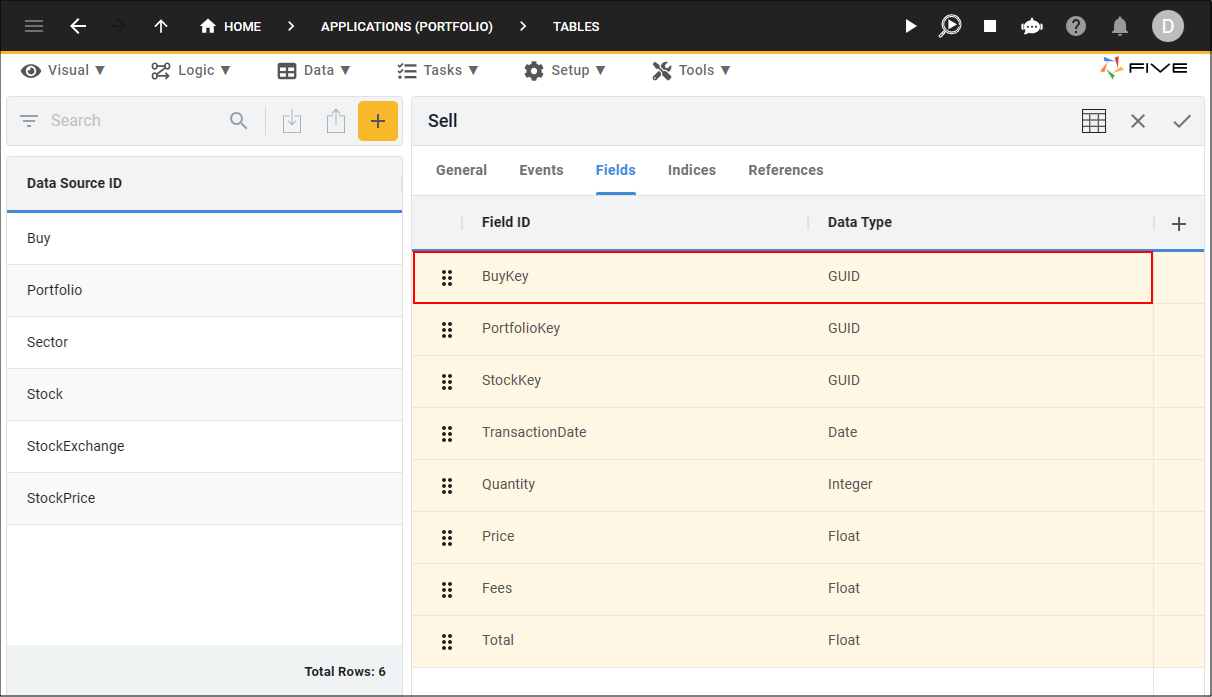
Figure 19 - BuyKey field record
7. Either click the Edit button in the form app bar, or click directly in the Field ID field.
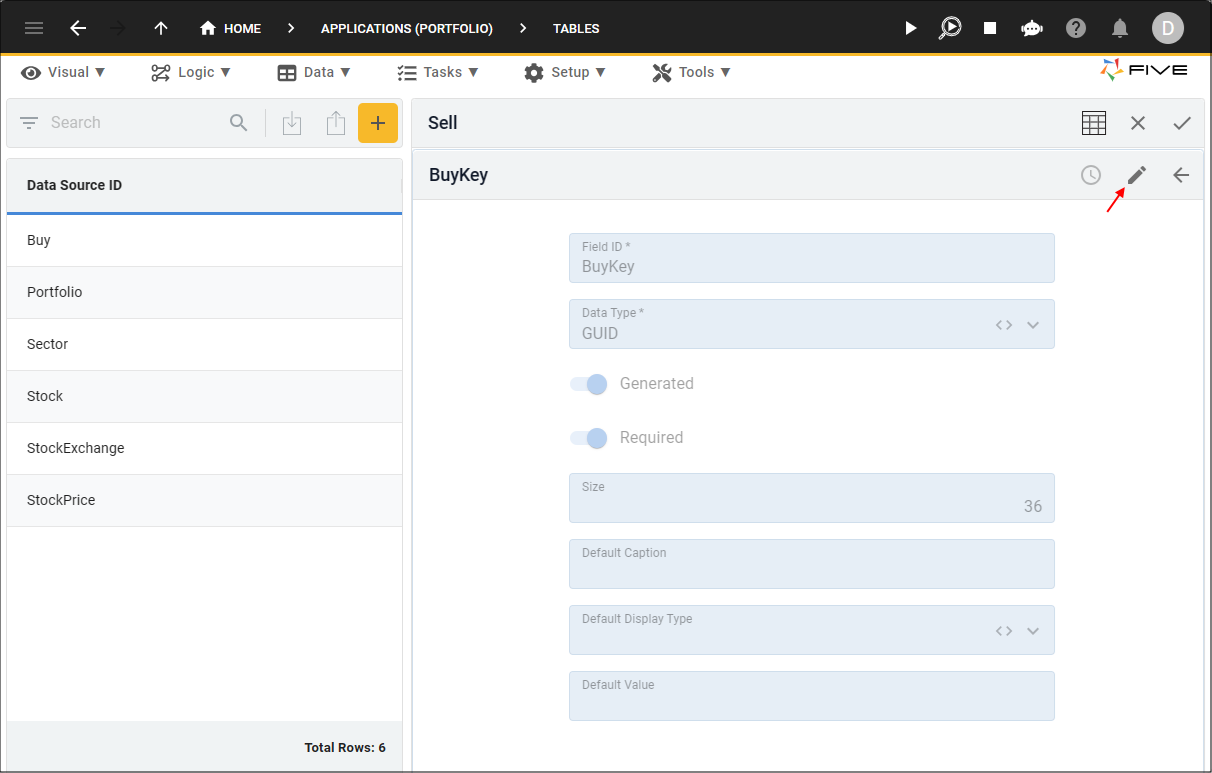
Figure 20 - Edit button
8. Click the Cancel button in the Field ID field and type SellKey.
9. Click the Save button in the form app bar.
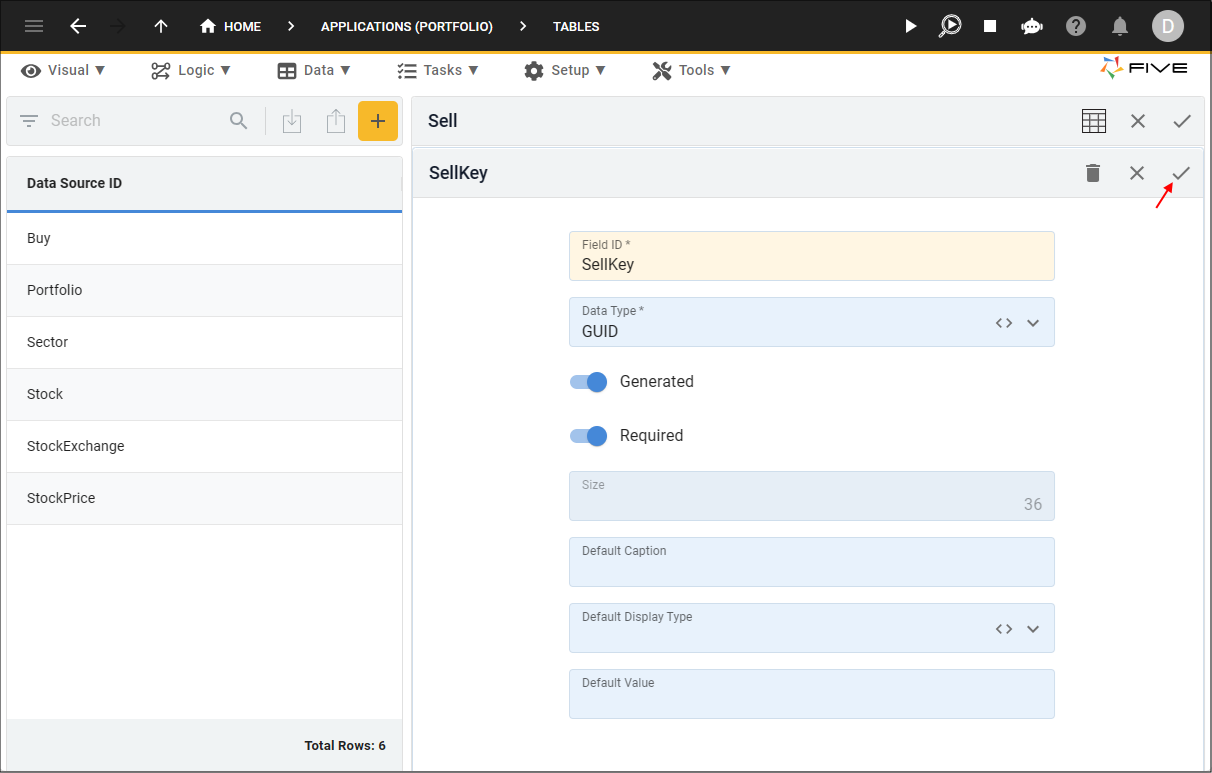
Figure 21 - Save button
10. Click the Indices tab.

Figure 22 - Indices tab
11. Select the BuyKey record.
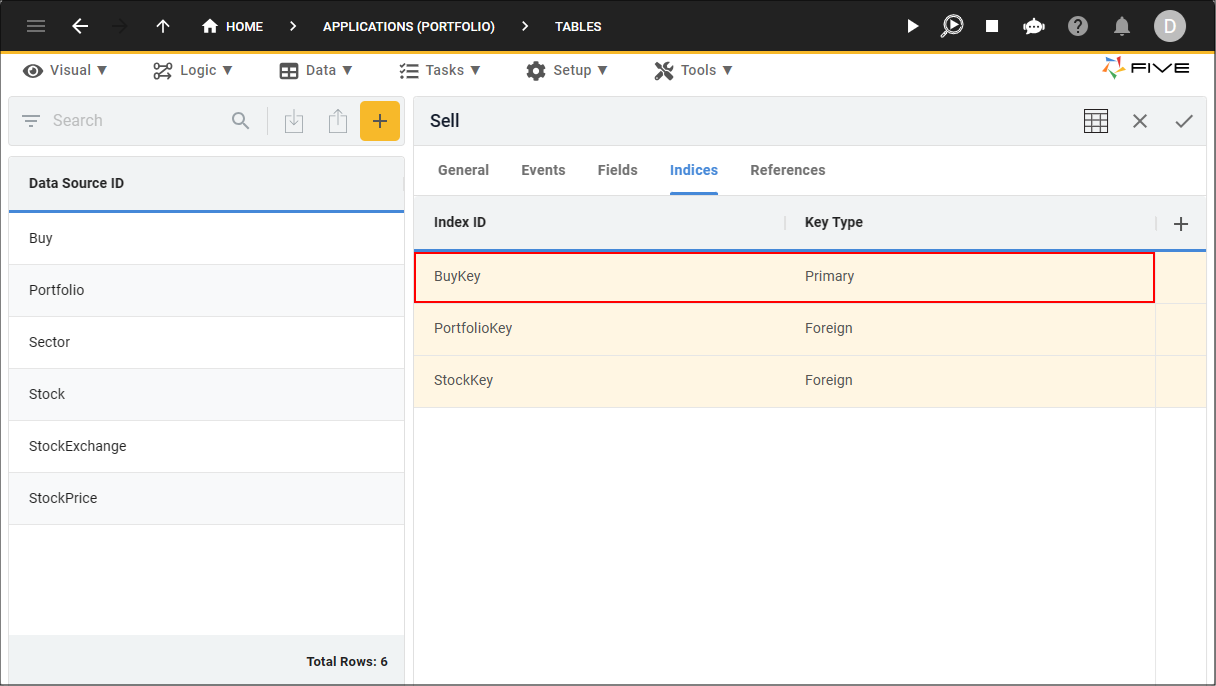
Figure 23 - BuyKey index record
12. Either click the Edit button in the form app bar, or click directly in the Index ID field.

Figure 24 - Edit button
13. Click the Cancel button in the Index ID field and type SellKey.
14. Click the Save button in the form app bar.
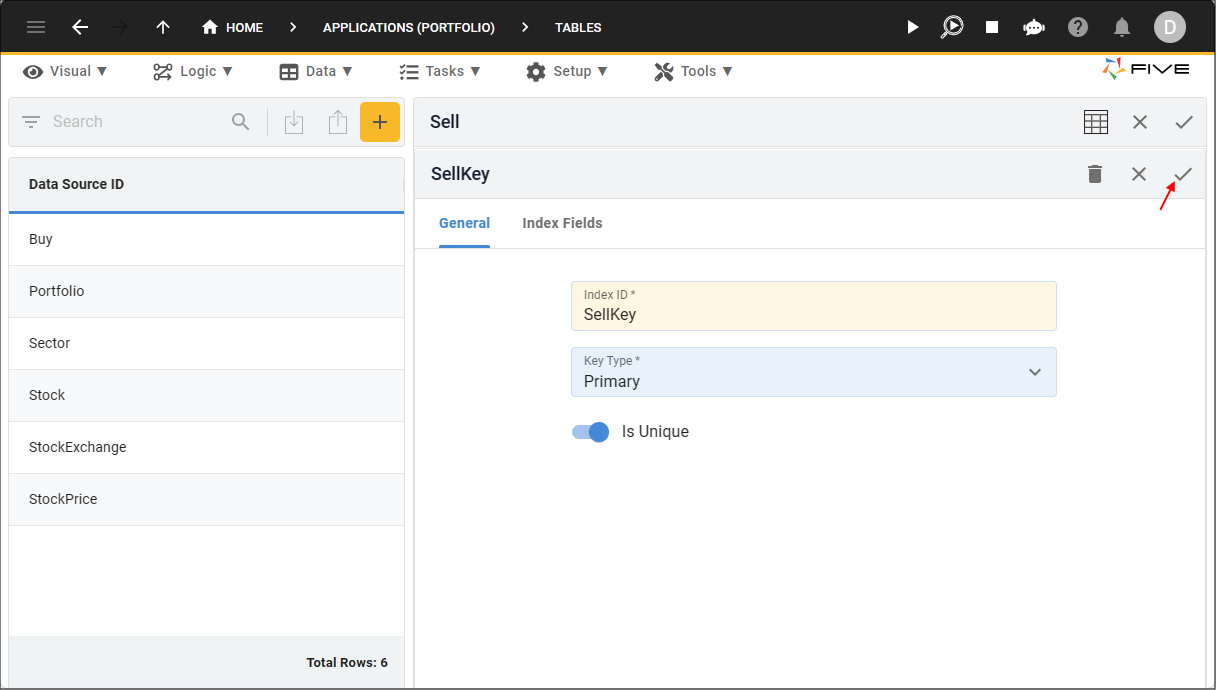
Figure 25 - Save button
15. Click the Save button in the form app bar above the list.
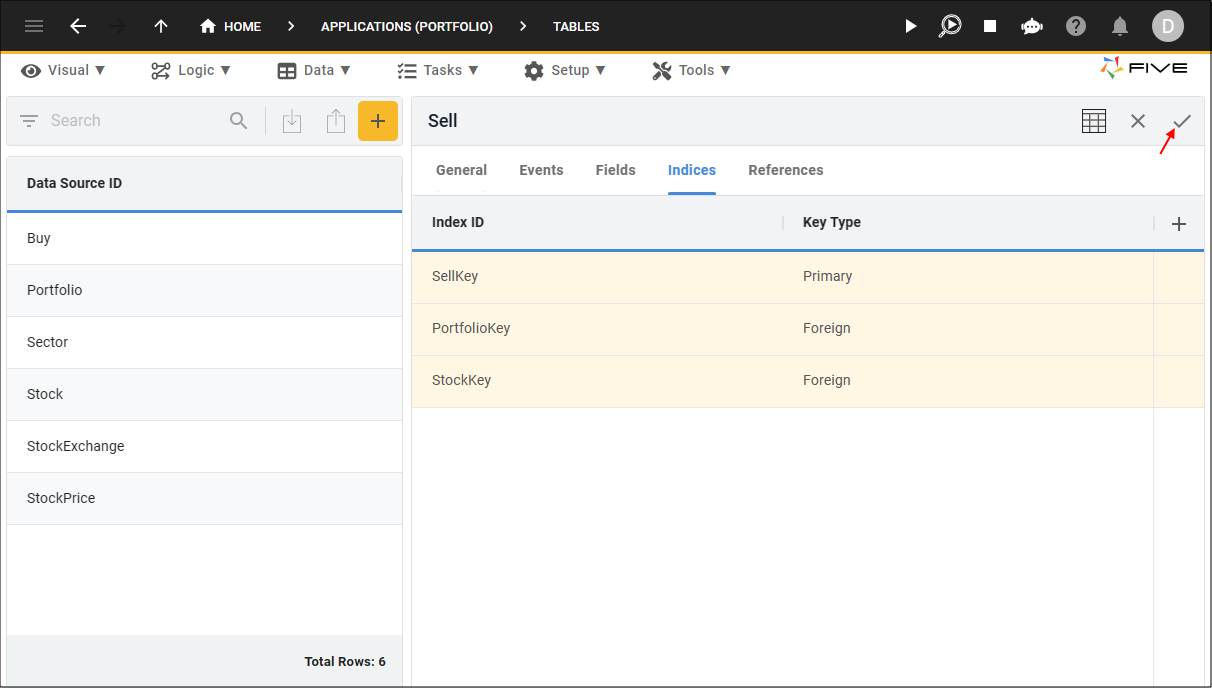
Figure 26 - Save button
16. Click the Save button in the Table Upgrade window.
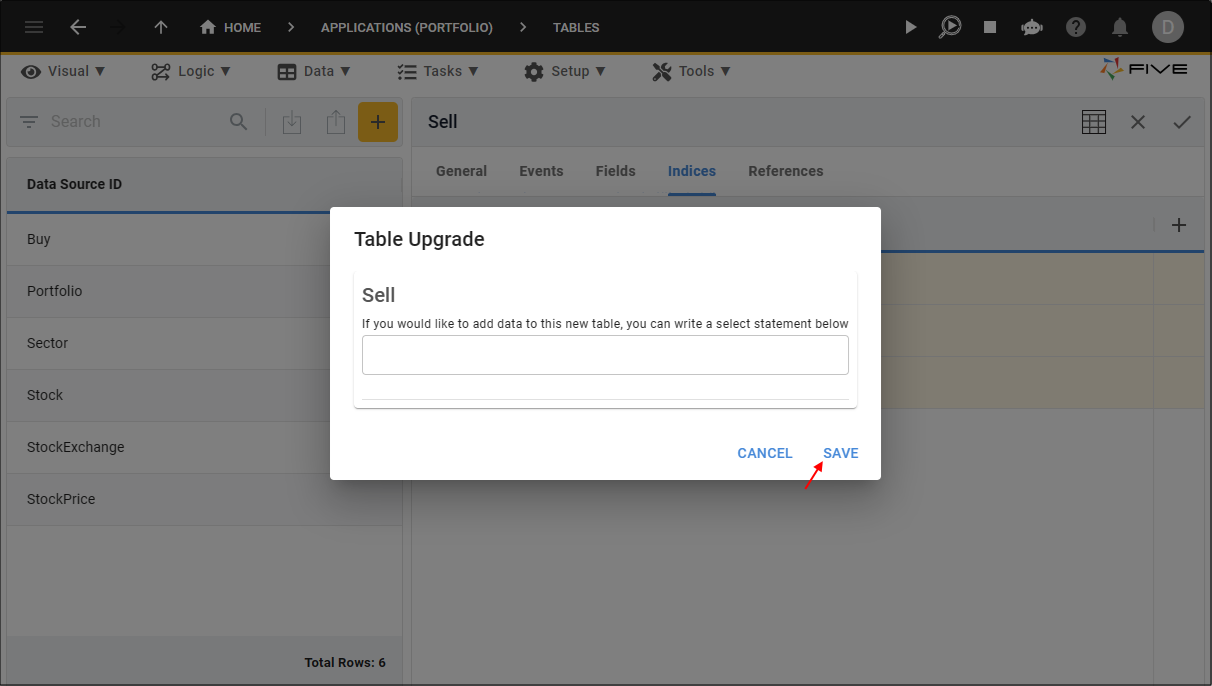
Figure 27 - Save button
Navigate to the Table Wizard
info
One last table needs to be added into the Portfolio application, we'll go back to the Table Wizard to do this.
1. Click Data in the menu.
2. Click Table Wizard in the sub-menu.
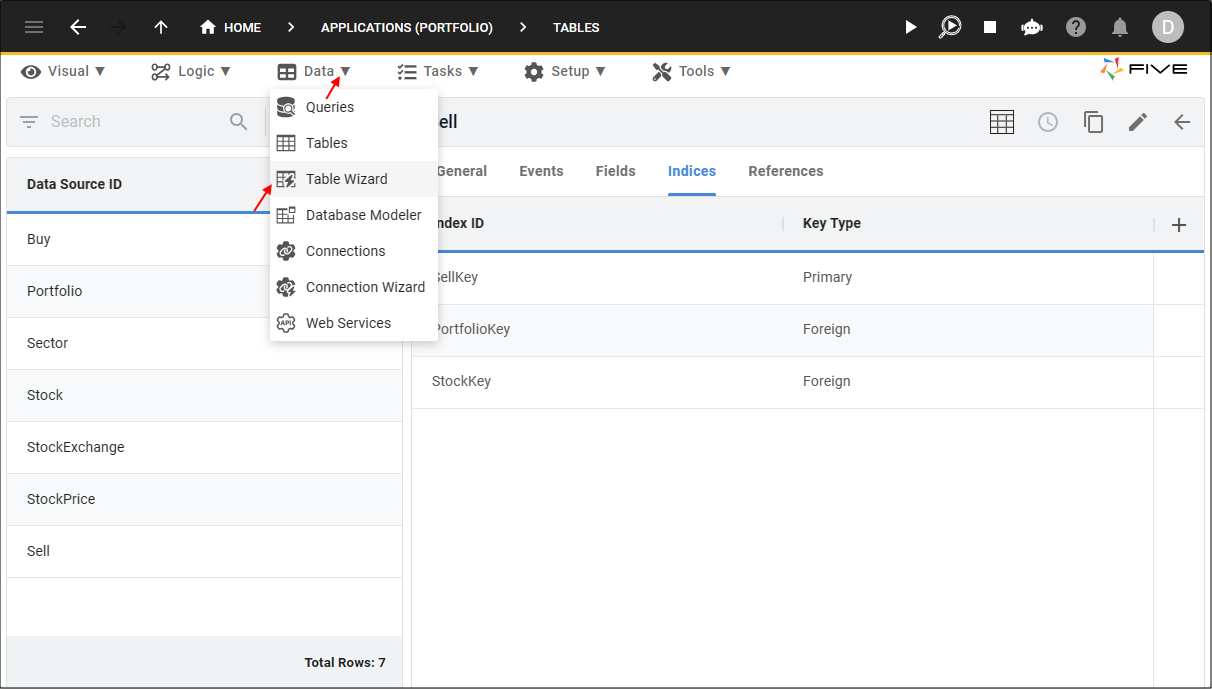
Figure 28 - Table Wizard menu item
Add the Allocation Table
1. Type Allocation in the Name field.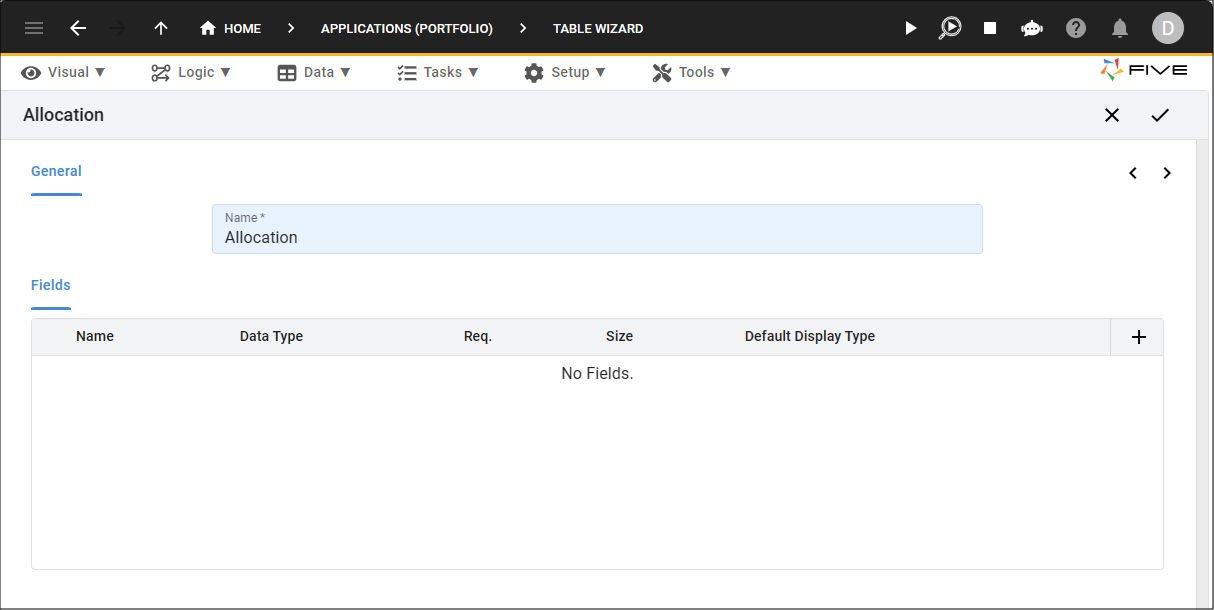
Figure 29 - Add the Allocation table
2. Click the Add Fields button.
3. Type Quantity in the Name field.
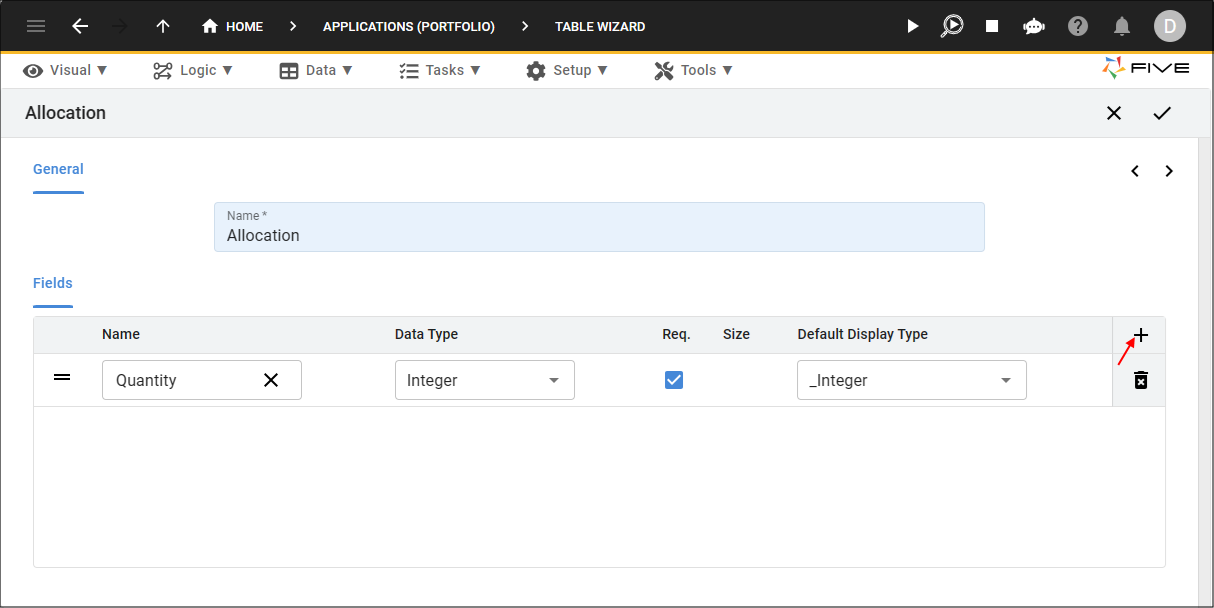
Figure 30 - Add the Quantity field
4. Click the Next button.

Figure 31 - Next button
5. Click the Add Relationships button.
6. Click the lookup icon in the Table field and select Sell.
7. Click the Required checkbox.
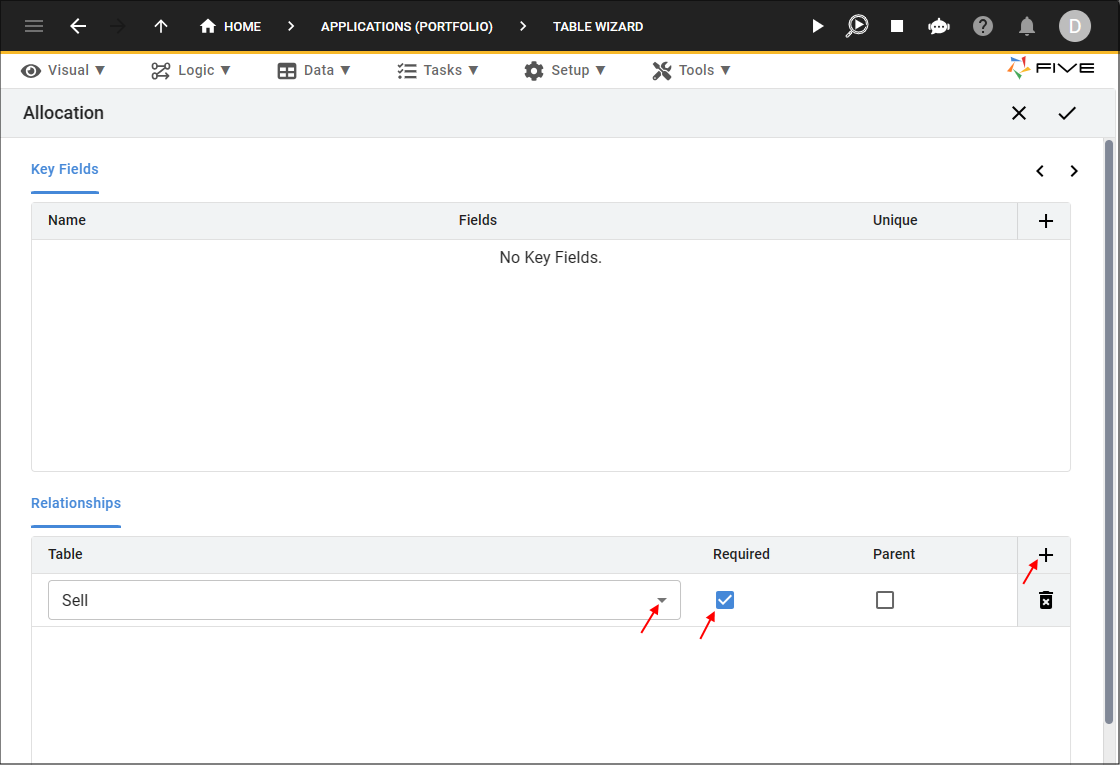
Figure 32 - Add the Sell relationship
8. Click the Add Relationships button.
9. Click the lookup icon in the Table field and select Buy.
10. Click the Required checkbox.
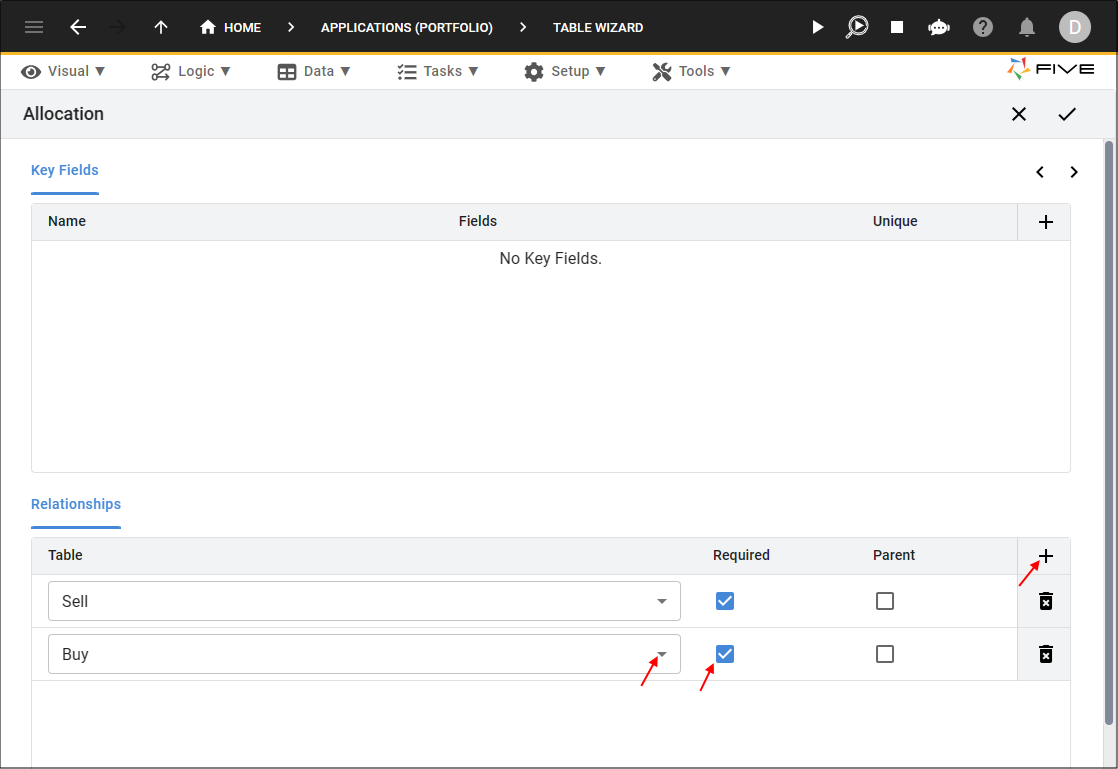
Figure 33 - Add the Buy relationship
11. Click the Save button in the Table Wizard app bar.
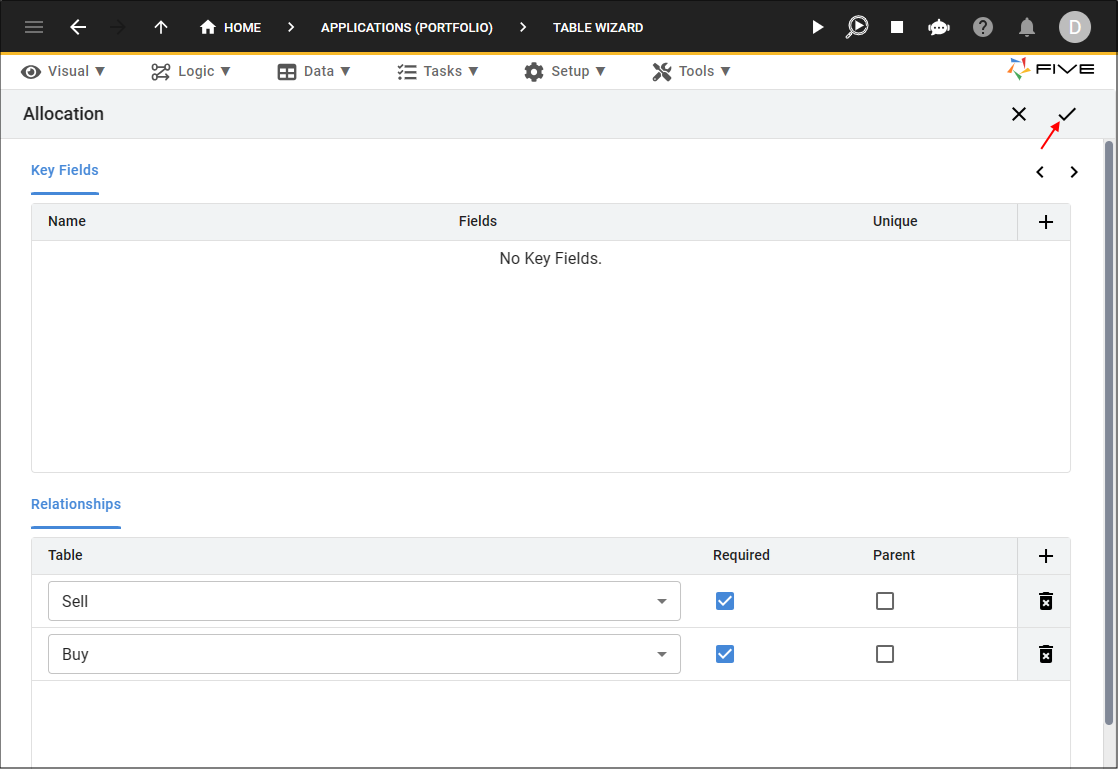
Figure 34 - Save button
12. Click the Save button in the Table Upgrade window.
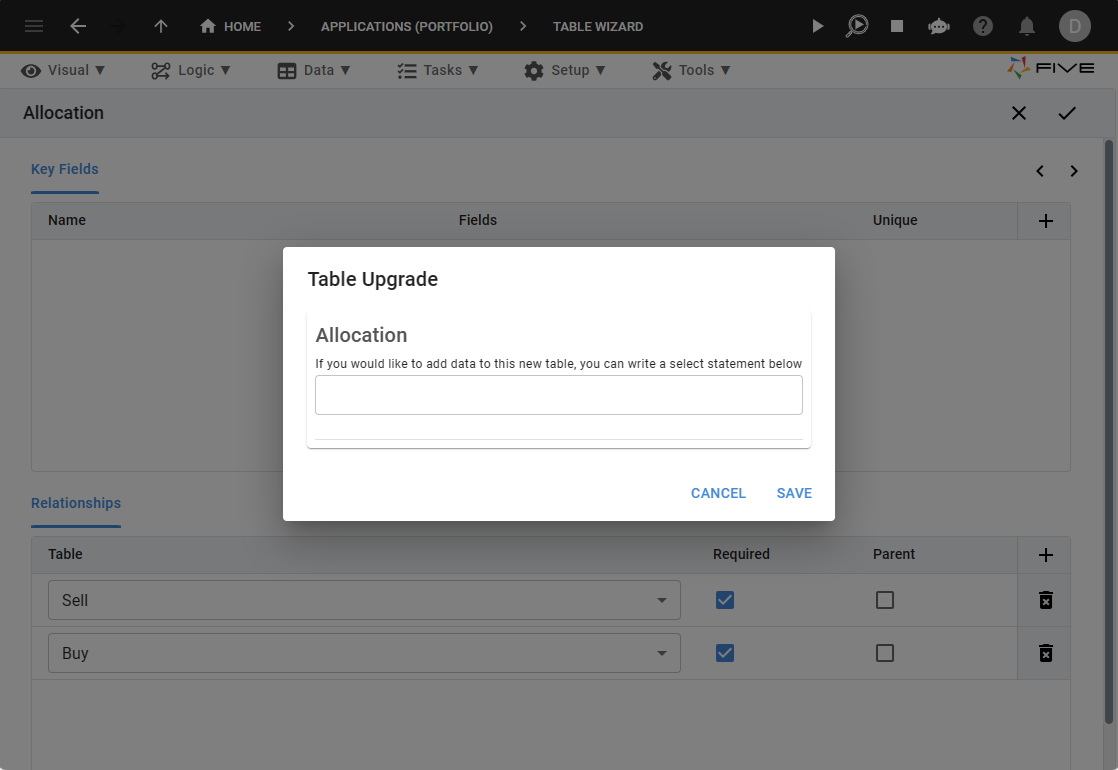
Figure 35 - Save button