Add a Table
Last updated 19/03/2024
There are several ways to add a table in Five, this documentation will explain how to add a table using the Table form. To save a table, you will need at least one field and a primary key. The Table form gives you more extensibility and control when you are adding your tables into Five.tip
Five's Table Wizard is a quick way to add your tables into Five and is our recommended table-building experience. You can
add extra features and functionality into your table by going to the Tables view and selecting the record.
Add a Table
1. Click the Add Item button.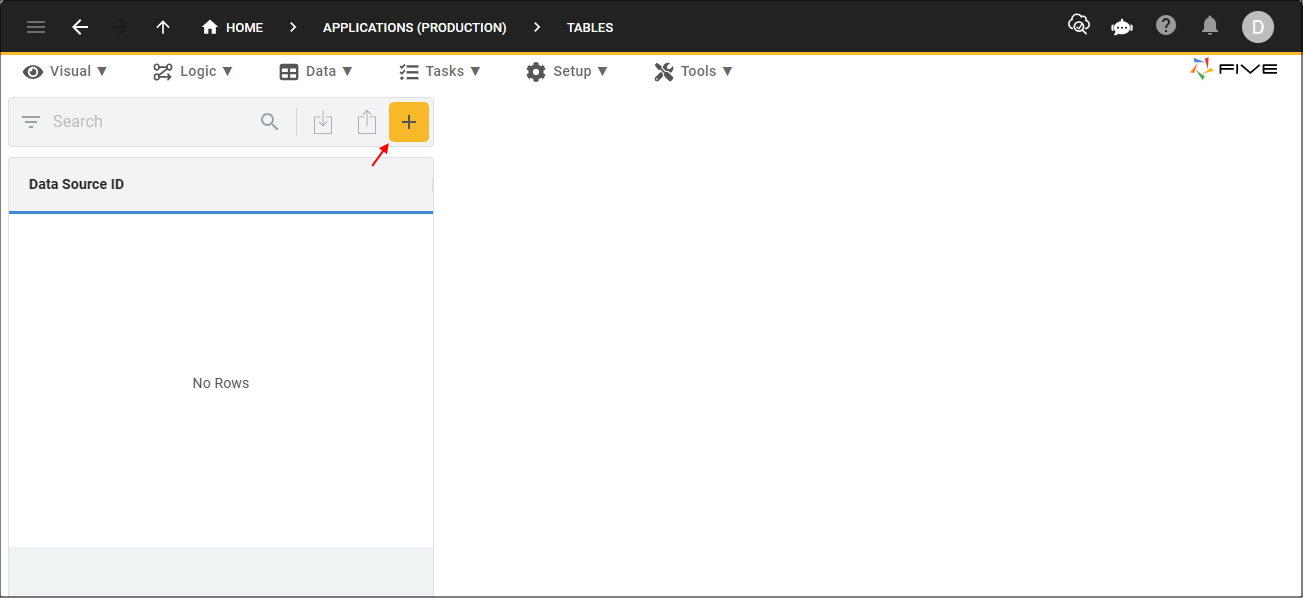
Figure 1 - Add Item button
2. Click the lookup icon in the Database field and select a database.
info
If you only have one database in your application, Five will automatically populate it in the Database field. If you are working in Local, you cannot have
multiple databases in one application, so you will not see the Database field.
3. Type an ID in the Data Source ID field.
4. Type a name in the Table Name field.

Figure 2 - Add a table
Add Fields
5. Click the Fields tab.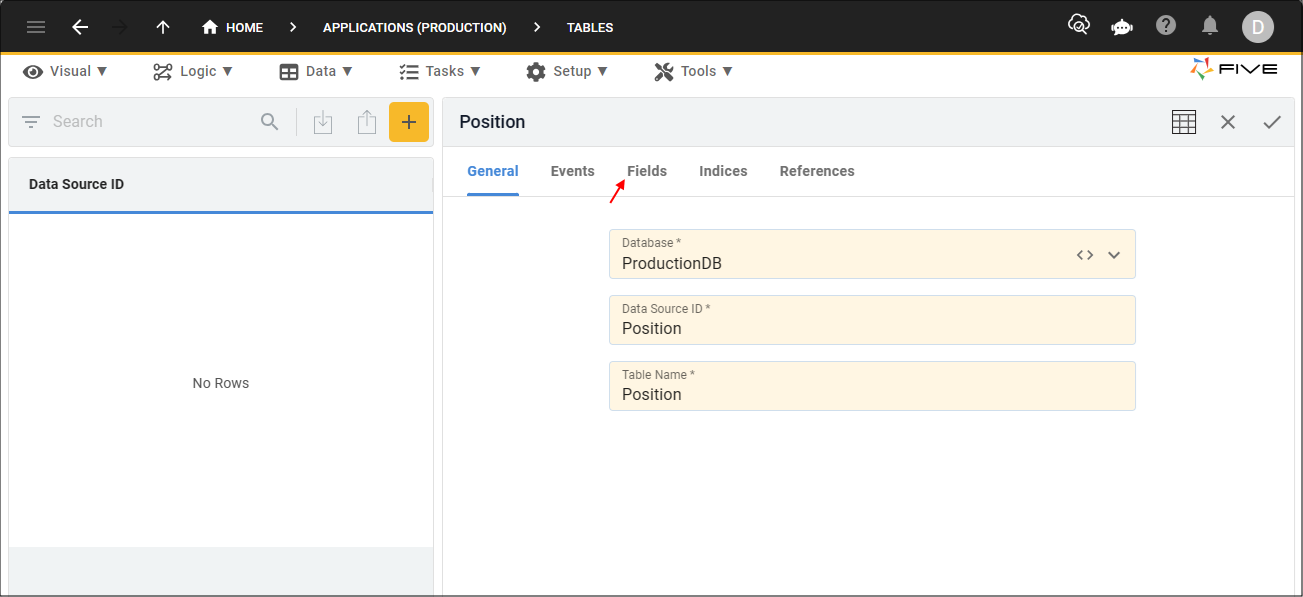
Figure 3 - Fields tab
6. Click the Add Fields button.
tip
Normally, the first field you add is your primary key field!
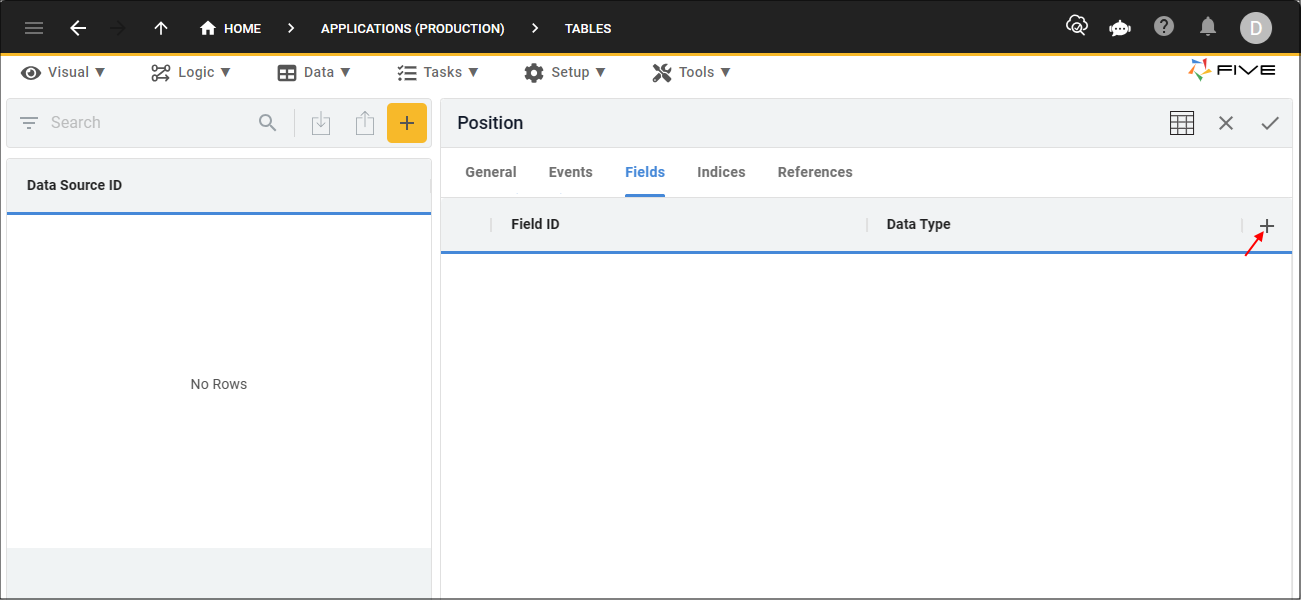
Figure 4 - Add Fields button
7. Type an ID in the Field ID field.
8. Click the lookup icon in the Data Type field and select GUID.
info
A GUID is a globally unique identifier and is a 128-bit text string that represents an identification (ID).
9. Click the Generated switch.
caution
If you do not have the Generated switch on for the primary key field and it is using a GUID, you may run into issues in your application, because Five needs the Generated
switch on to generate a GUID for each new record.
10. Click the Required switch.
info
With the Required switch on, it will be mandatory for your field to have a value before it can be saved.
Tips
- Five will automatically default the Size and Default Caption fields.
- Data is defined by the number of bytes to hold the value.
11. Click the lookup icon in the Default Display Type field and select _Lookup.
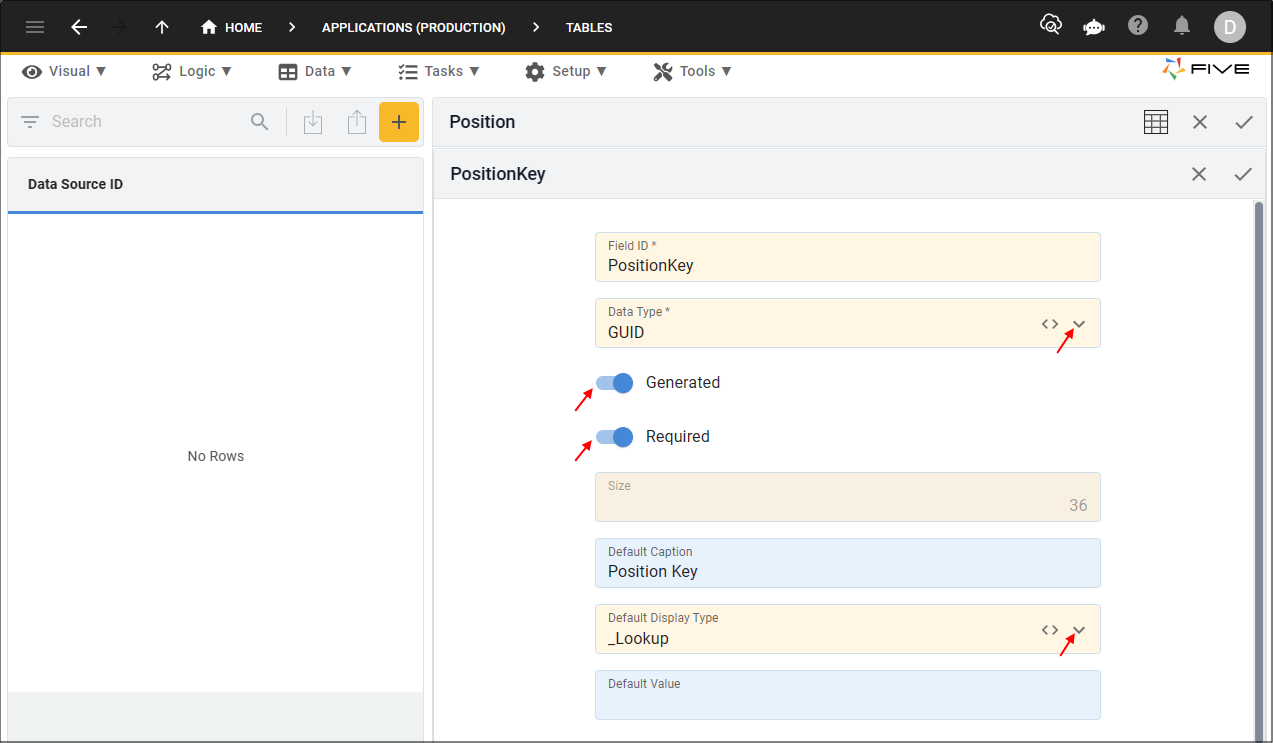
Figure 5 - Add the primary key field
12. Click the Save button in the form app bar.

Figure 6 - Save the field
13. Click the Add Fields button.
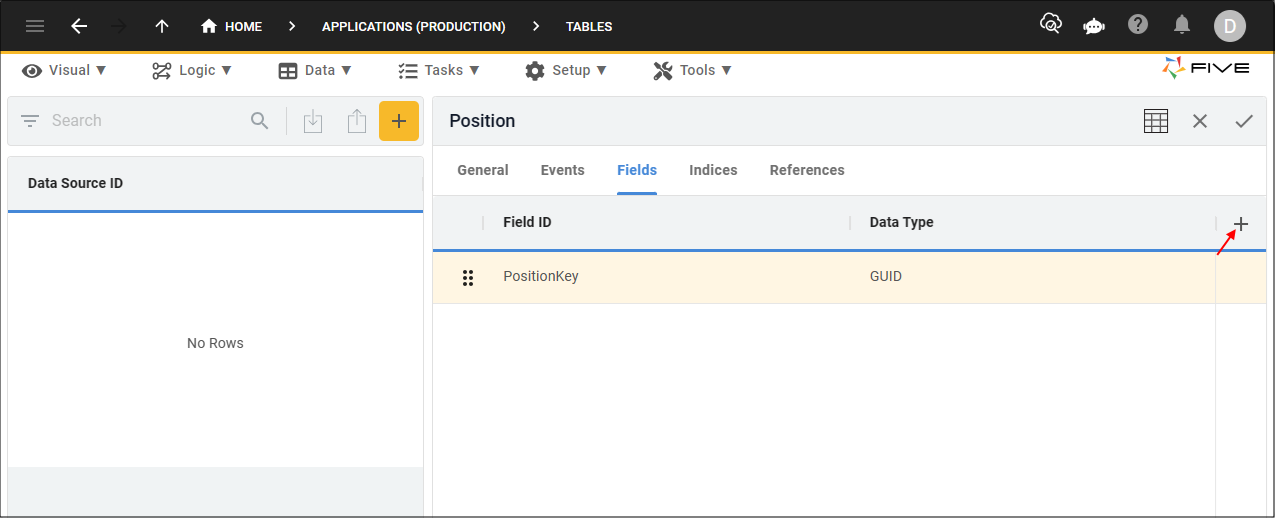
Figure 7 - Add Fields button
14. Continue to add the rest of the fields to your table.
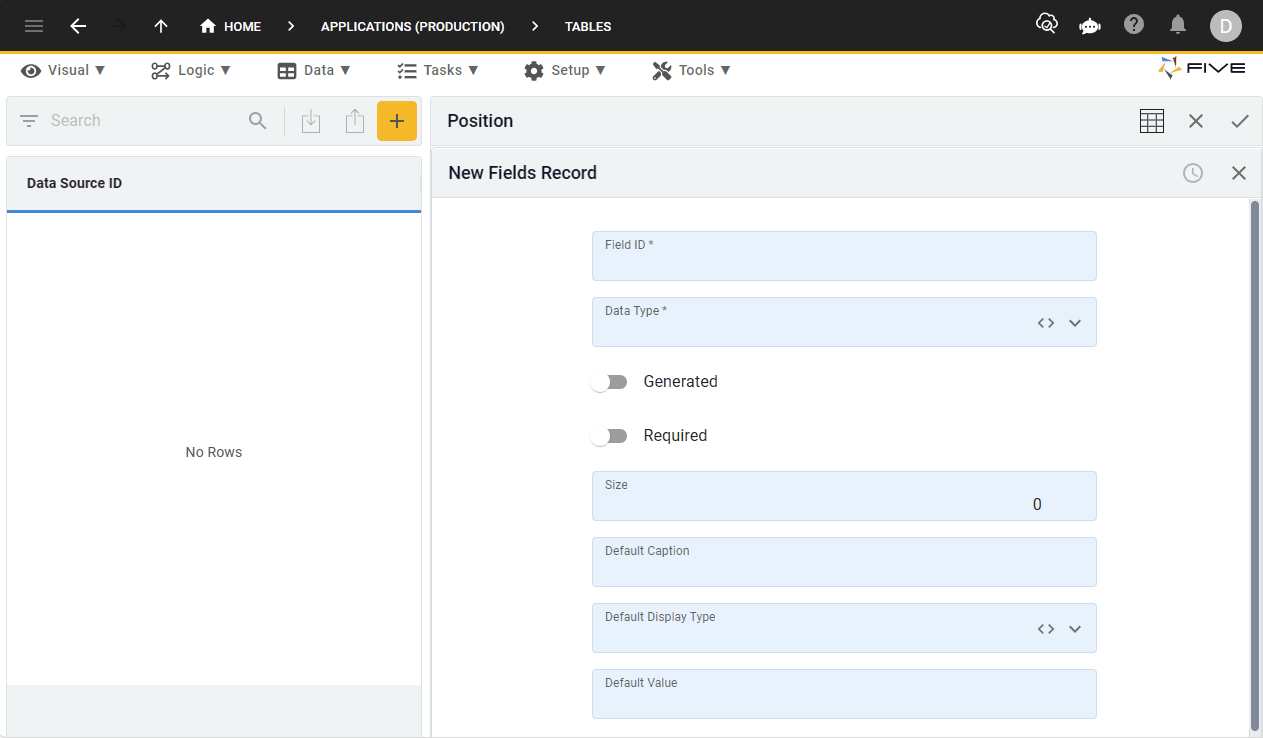
Figure 8 - Add multiple fields
Add an Index
15. Click the Indices tab.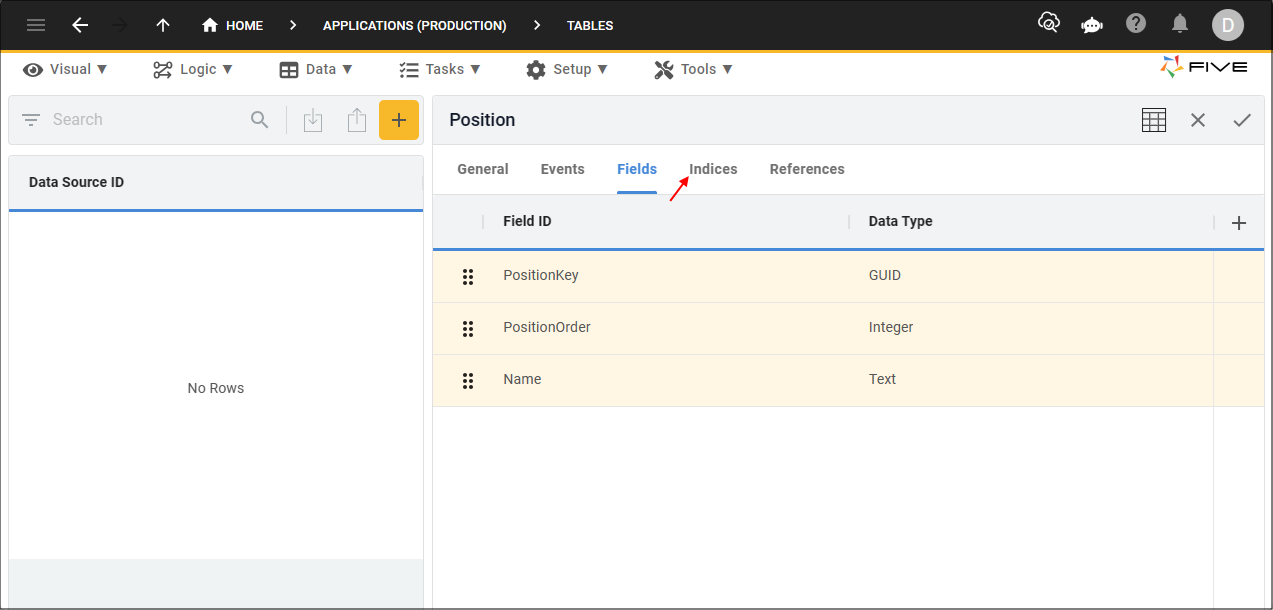
Figure 9 - Indices tab
16. Click the Add Indices button.
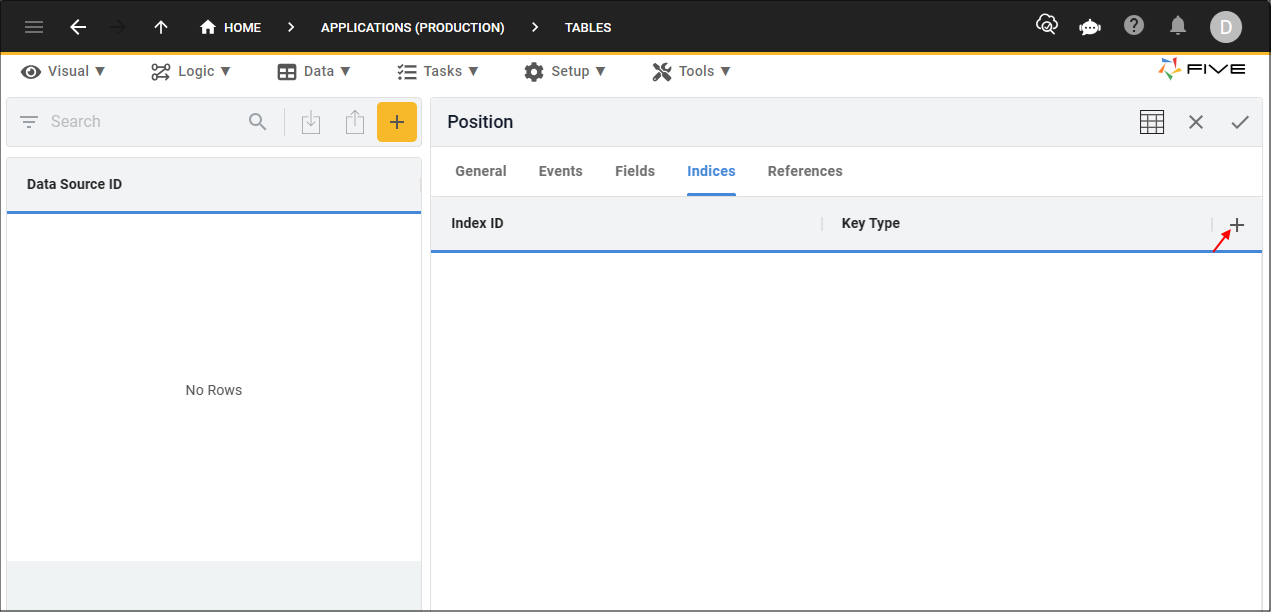
Figure 10 - Add Indices button
17. Type an ID in the Index ID field.
18. Click the lookup icon in the Key Type field and select Primary.
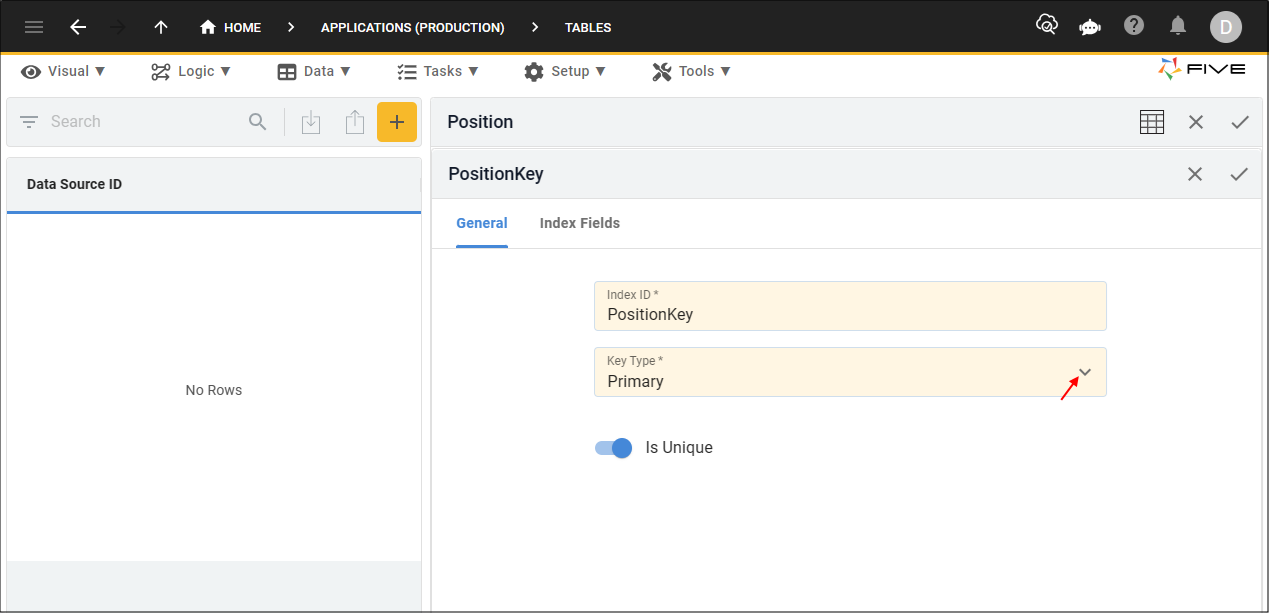
Figure 11 - Add the primary key index
Add an Index Field
info
The Index Fields page is for you to select the field/s in the current table that will be used for the index.
19. Click the Index Fields tab.
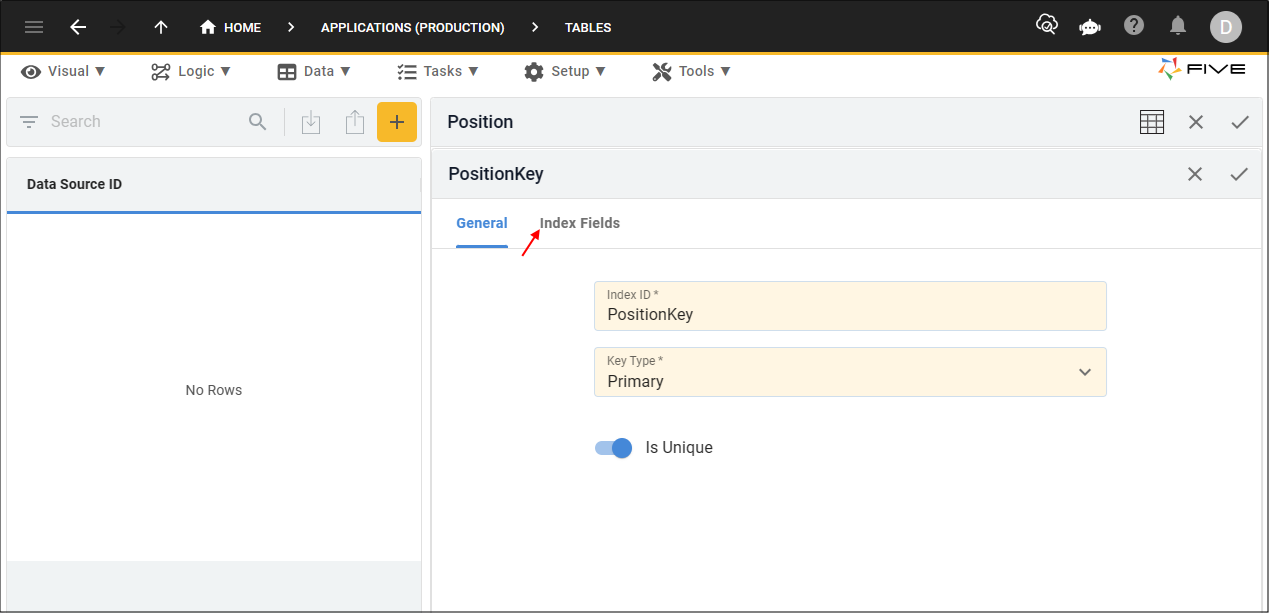
Figure 12 - Index Fields tab
20. Click the Add Index Fields button.
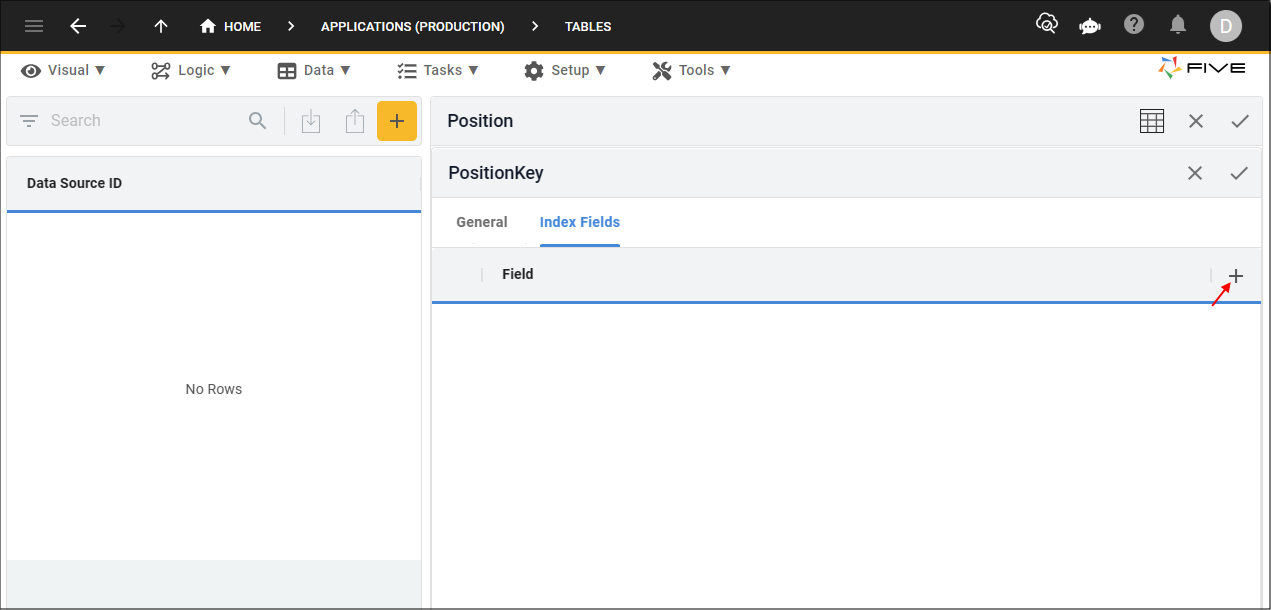
Figure 13 - Add Index Fields button
21. Click the lookup icon in the Field field and select a field from the current table.
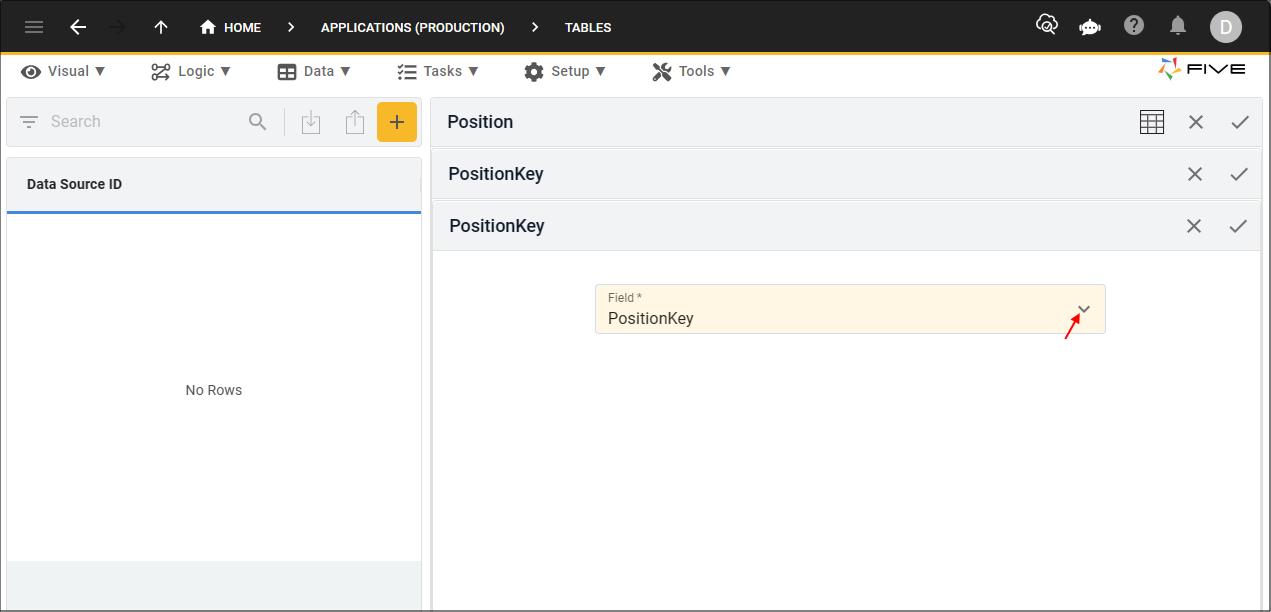
Figure 14 - Add an index field
22. Click all three Save buttons in the stacked form app bars.
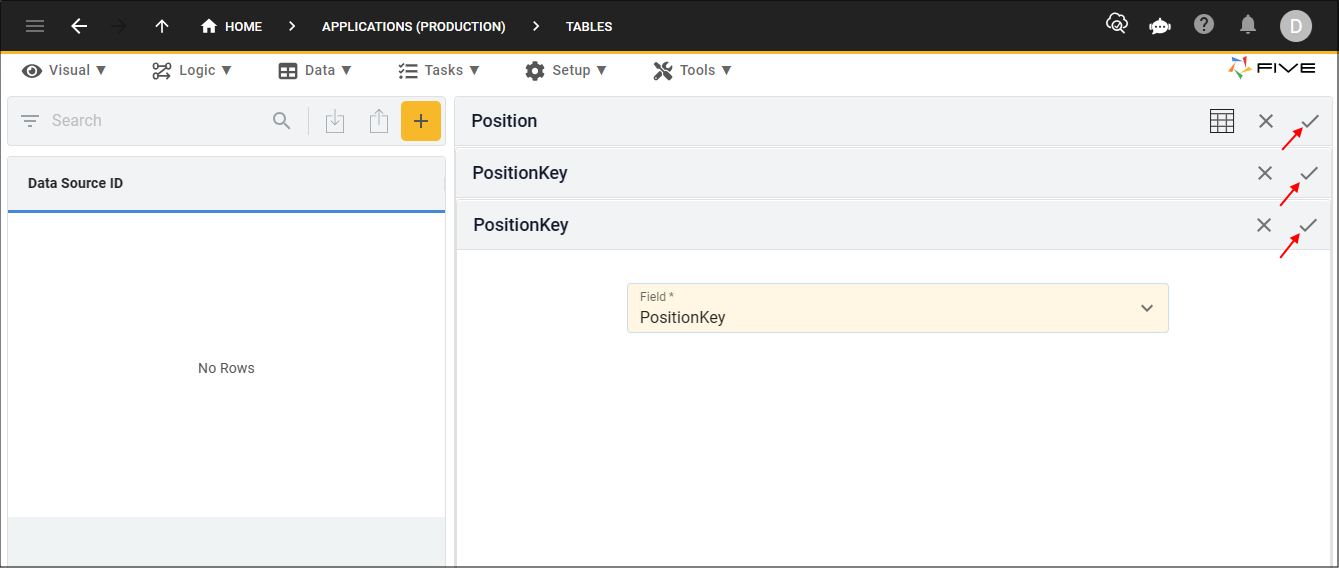
Figure 15 - Save buttons
23. Click the Save button in the Table Upgrade window.
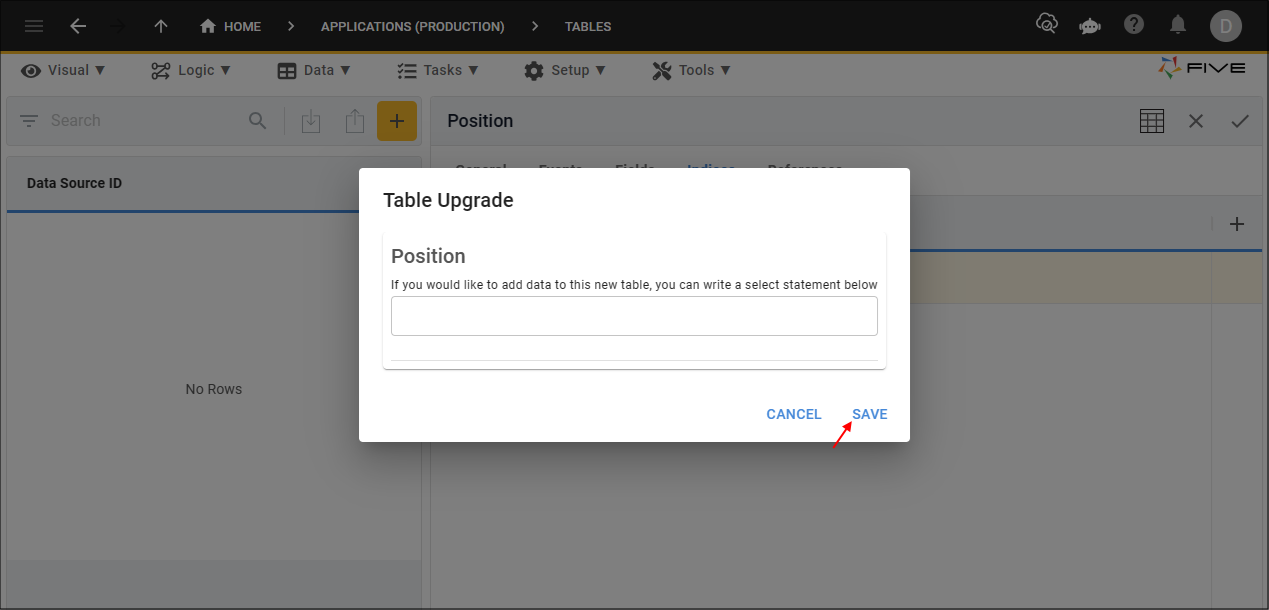
Figure 16 - Save the table upgrade