Create A Sub-Menu
Last updated 14/03/2024
A sub-menu is nested under a menu item that makes no reference to an action. When the top-level menu item is selected in the menu, the menu will expand and display the nested sub-menu items beneath it.Navigate to Menus
1. Select Visual in the menu.2. Select Menus in the sub-menu.
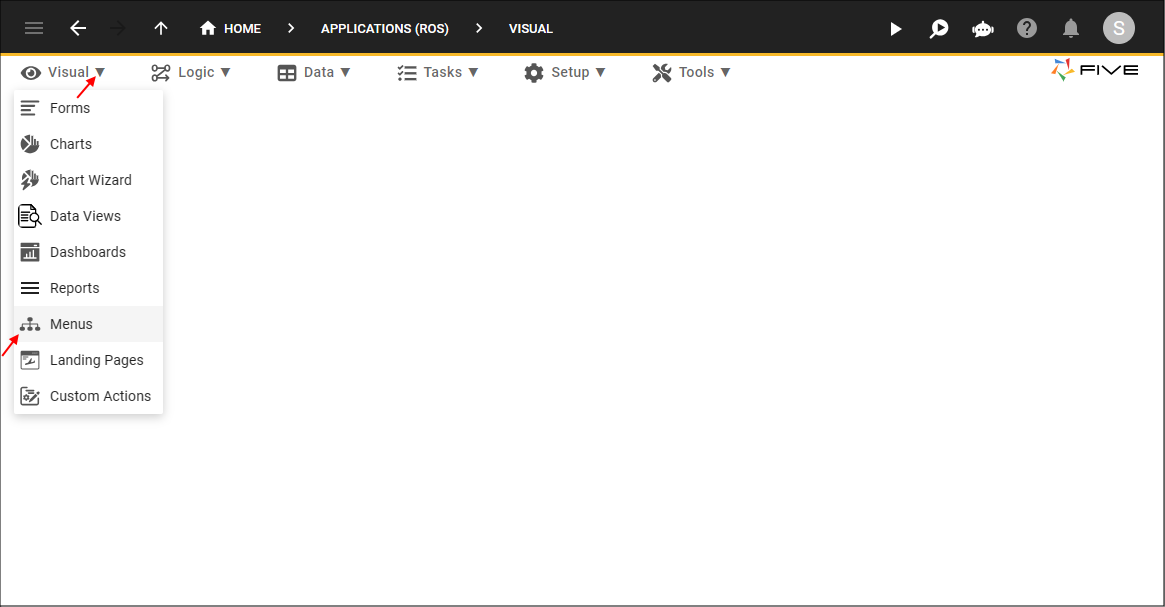
Figure 1 - Menus menu item
Add a Menu Item
info
The first menu we are creating will hold the sub-menu items so it cannot reference an action.
1. Click the Add Item button.
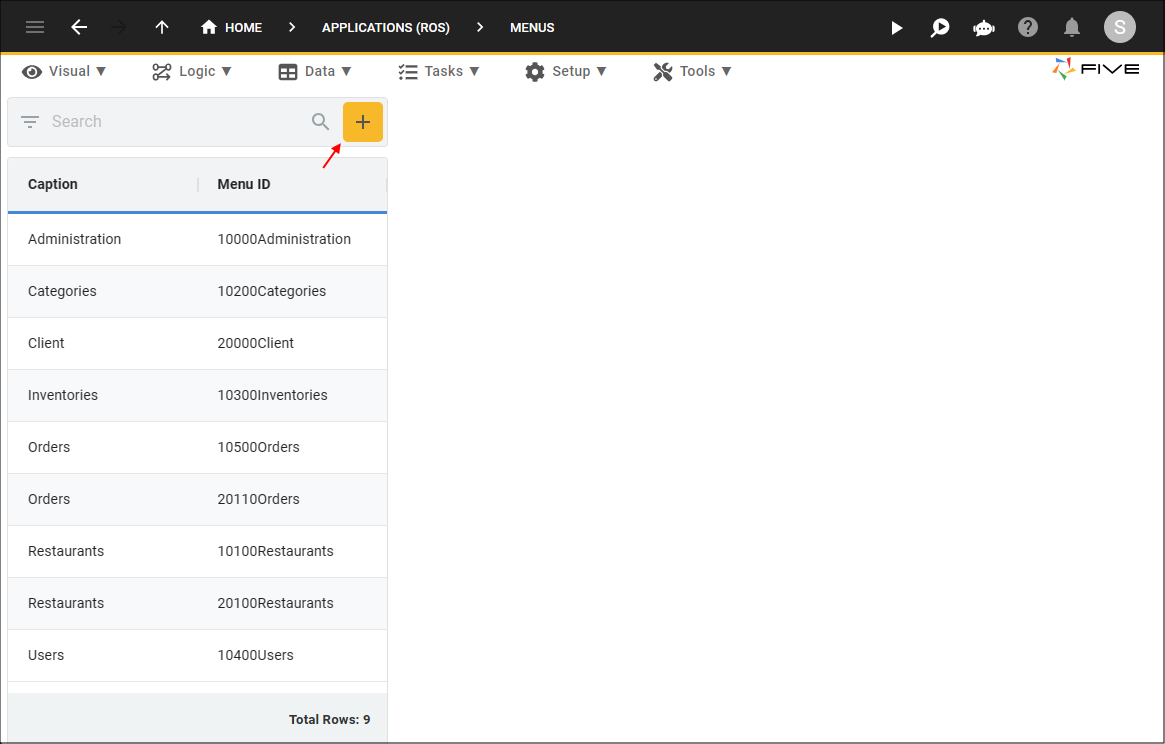
Figure 2 - Add Item button
2. Type a caption in the Caption field.
3. Type a number in the Menu Order field.
4. Optional: Click the Edit button in the Icon field and open an image file.
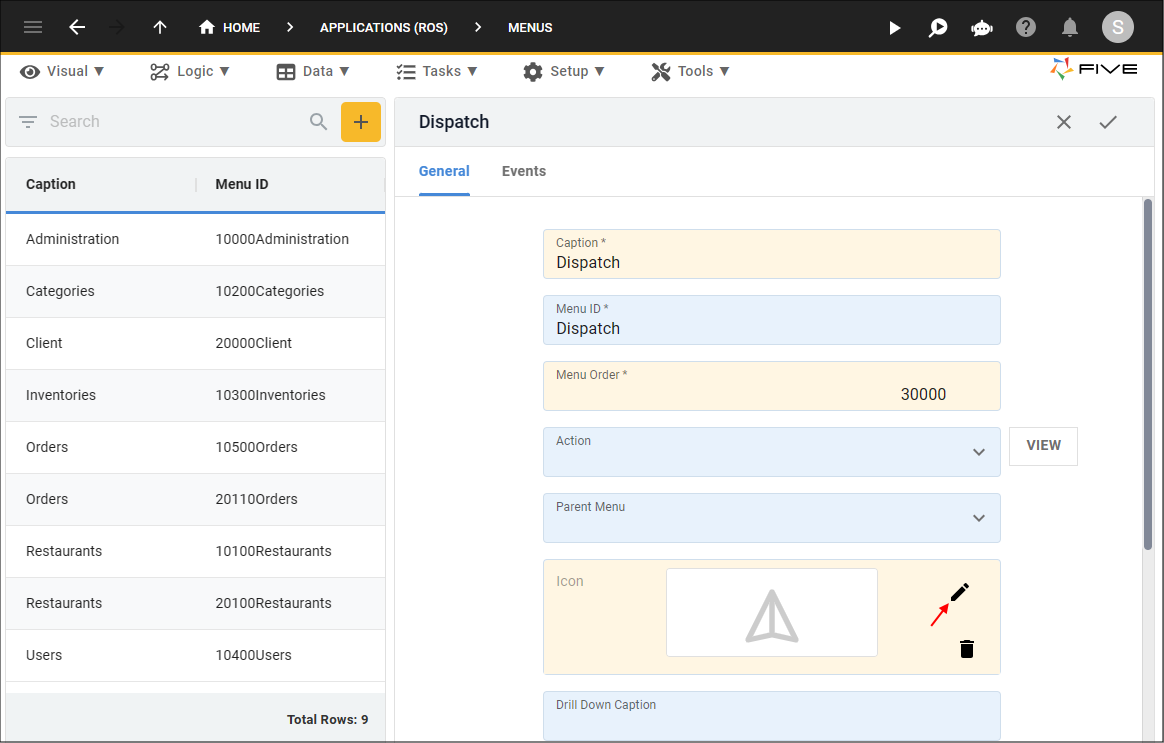
Figure 3 - Add a menu item
5. Click the Save button in the form app bar.
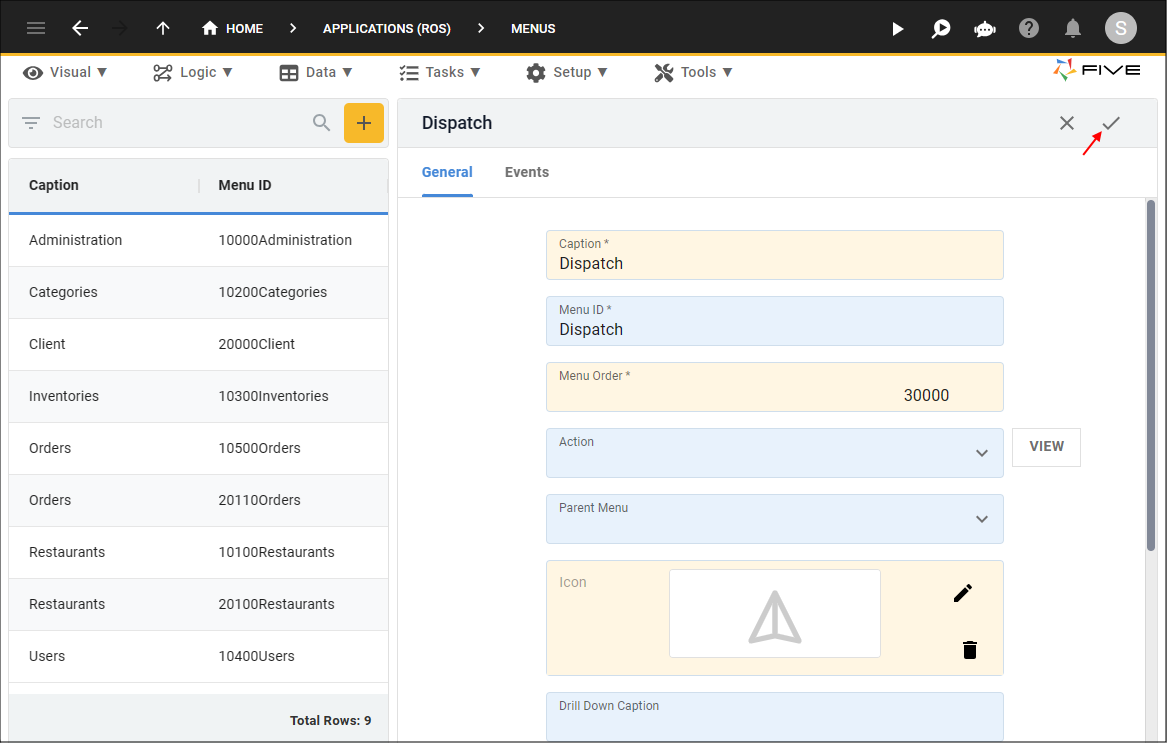
Figure 4 - Save a menu item
Add a Sub-Menu Item
1. Click the Add Item button.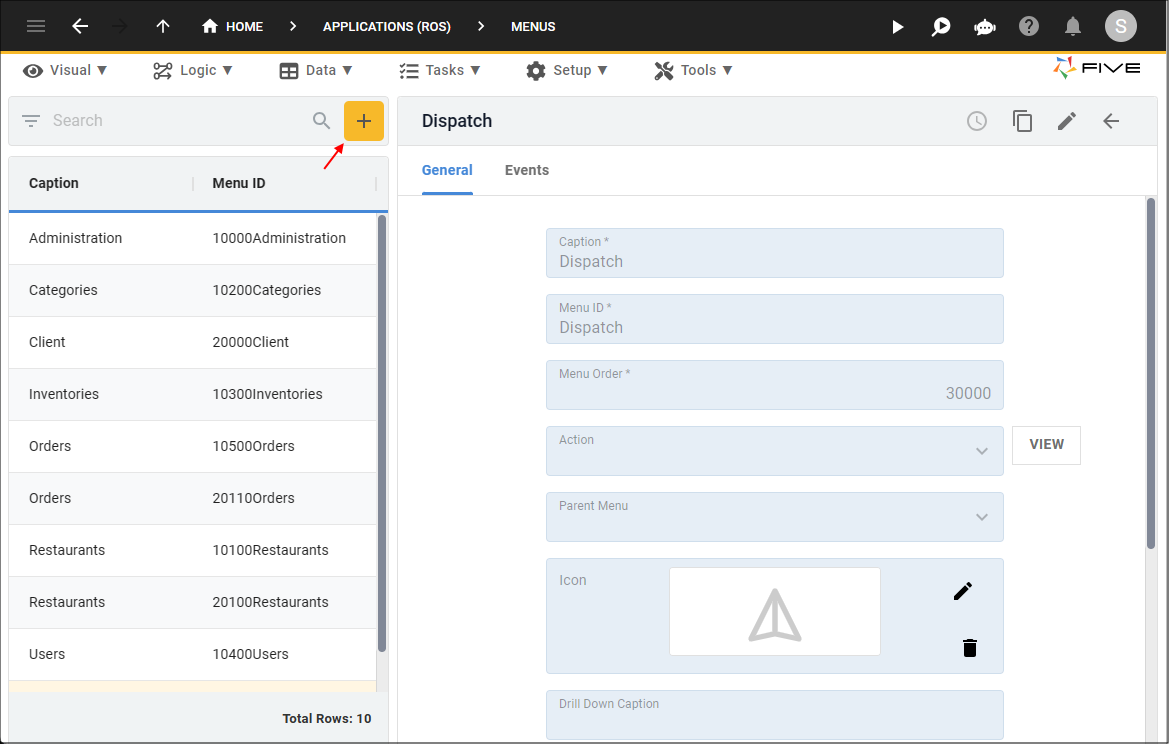
Figure 5 - Add Item button
2. Type a caption in the Caption field.
3. Type a number in the Menu Order field.
4. Click the lookup icon in the Action field and select an action to reference.
5. Click the lookup icon in the Parent Menu field and select the previous menu item you added.
6. Optional: Click the Edit button in the Icon field and open an image file.
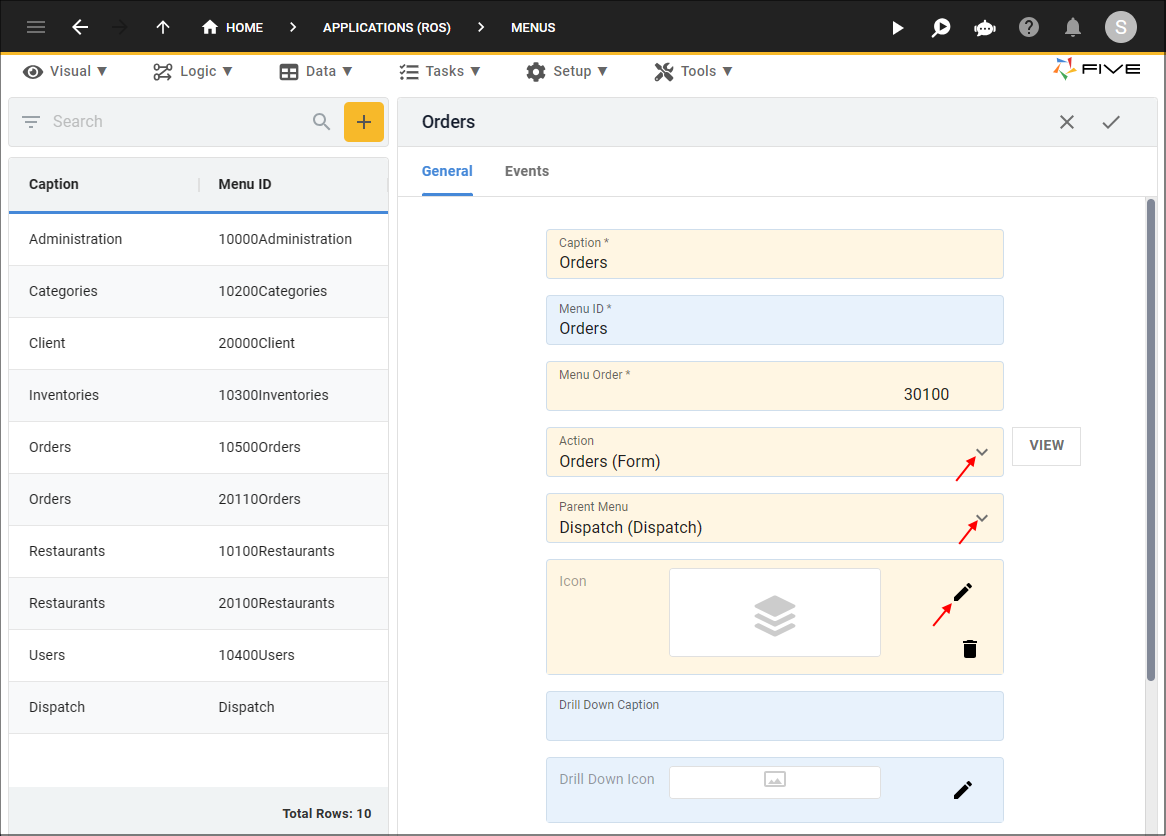
Figure 6 - Add a Sub-menu item
7. Click the Save button in the form app bar.

Figure 7 - Save a sub-menu item
In an End-User Application
1. Select the top-level menu item in the menu.info
The sub-menu items will be available.
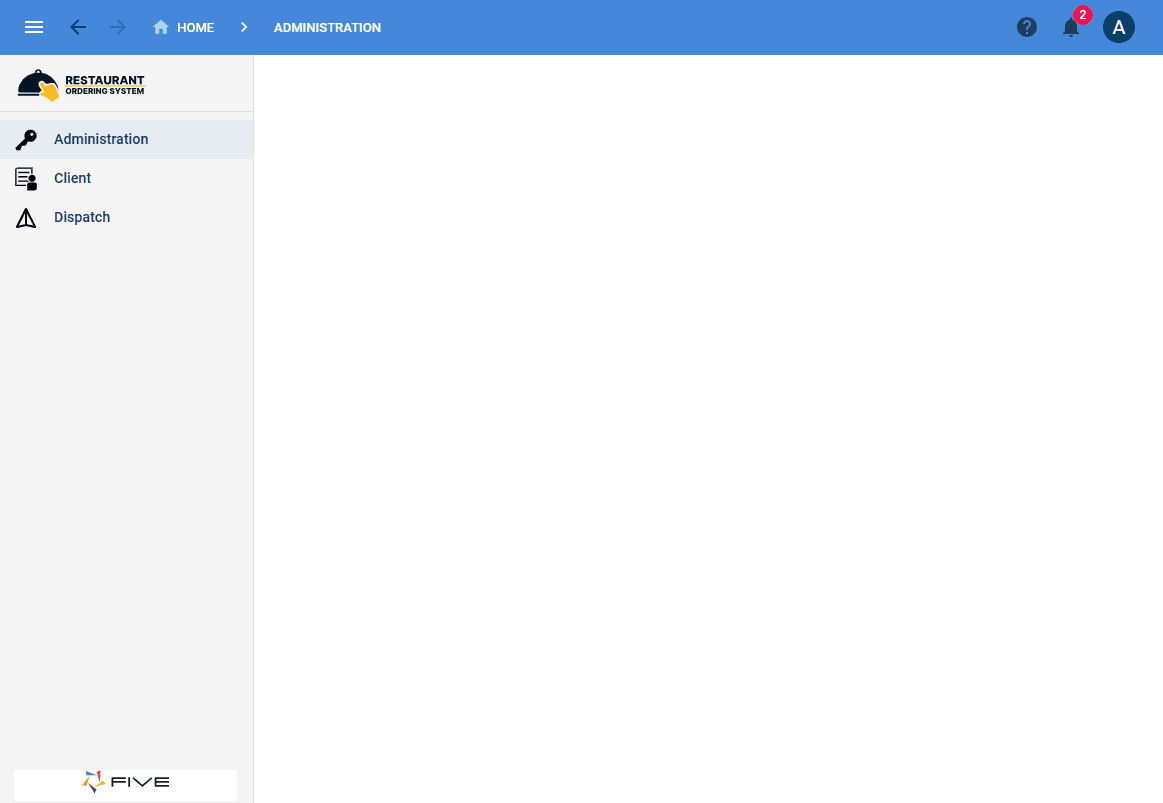
Figure 8 - Sub-menu