2 - Build Database Tables
Last updated 5/06/2023
Once you have created an application in Five, the next thing to do is build your table structure for your application. This documentation will teach you how to add the tables for the Book Club application. There are only three tables that you need to add to the database. The Book Club database model below shows the tables and the relationships between the tables. It is good practice when creating your table structure for your database to always have a database model.tip
The iUser table was automatically created when you turned the Book Club application into a multi-user application!
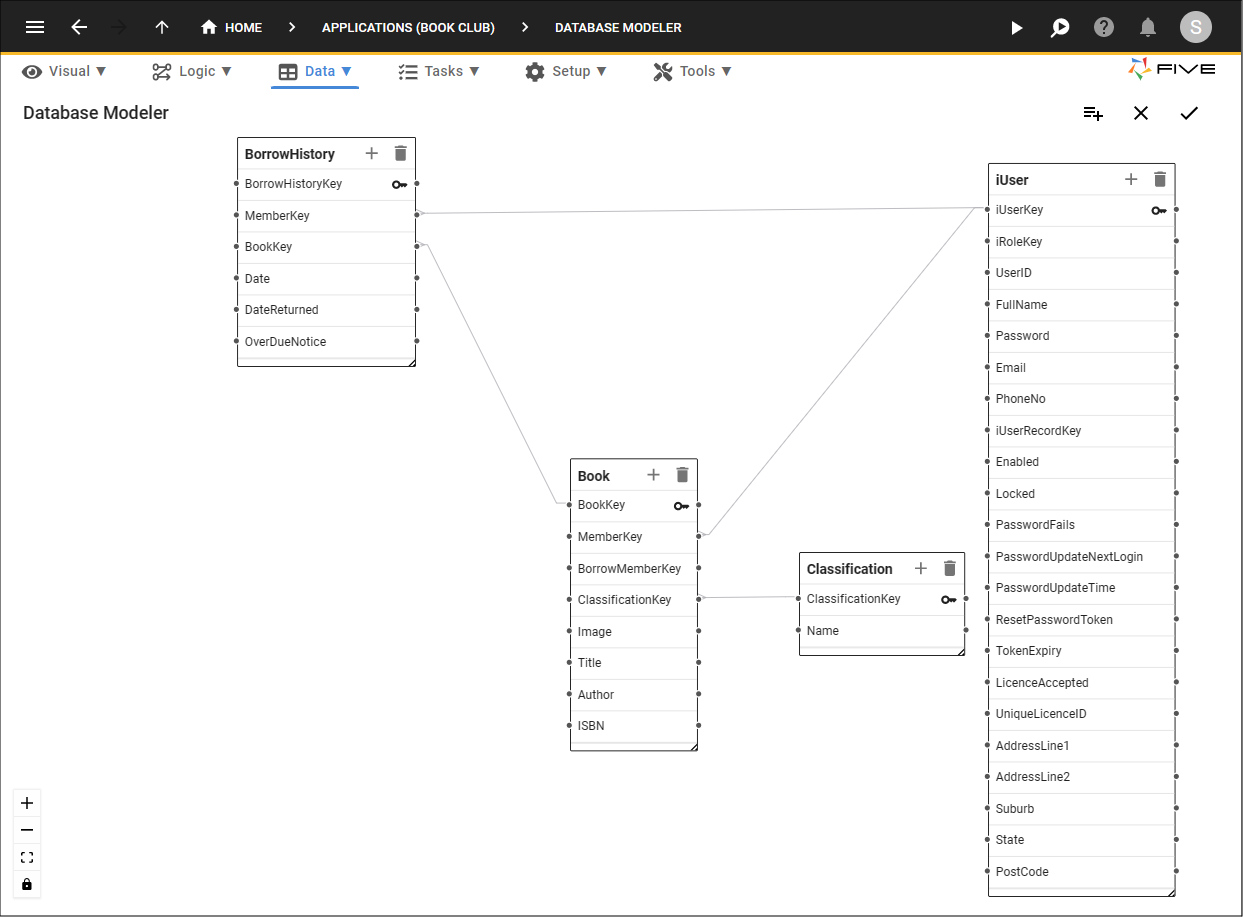
Figure 1 - Book Club database model
While building the tables for the Book Club application, you will learn the following:
- How to add tables with Five's Table Wizard;
- How to edit tables using Five's Table Forms;
- How to use Five's Database Modeler;
- How to use the iUser table automatically created by Five; and
- How to upgrade a table using Five's Update Table functionality.
Navigate to Tables
1. Click the Manage button.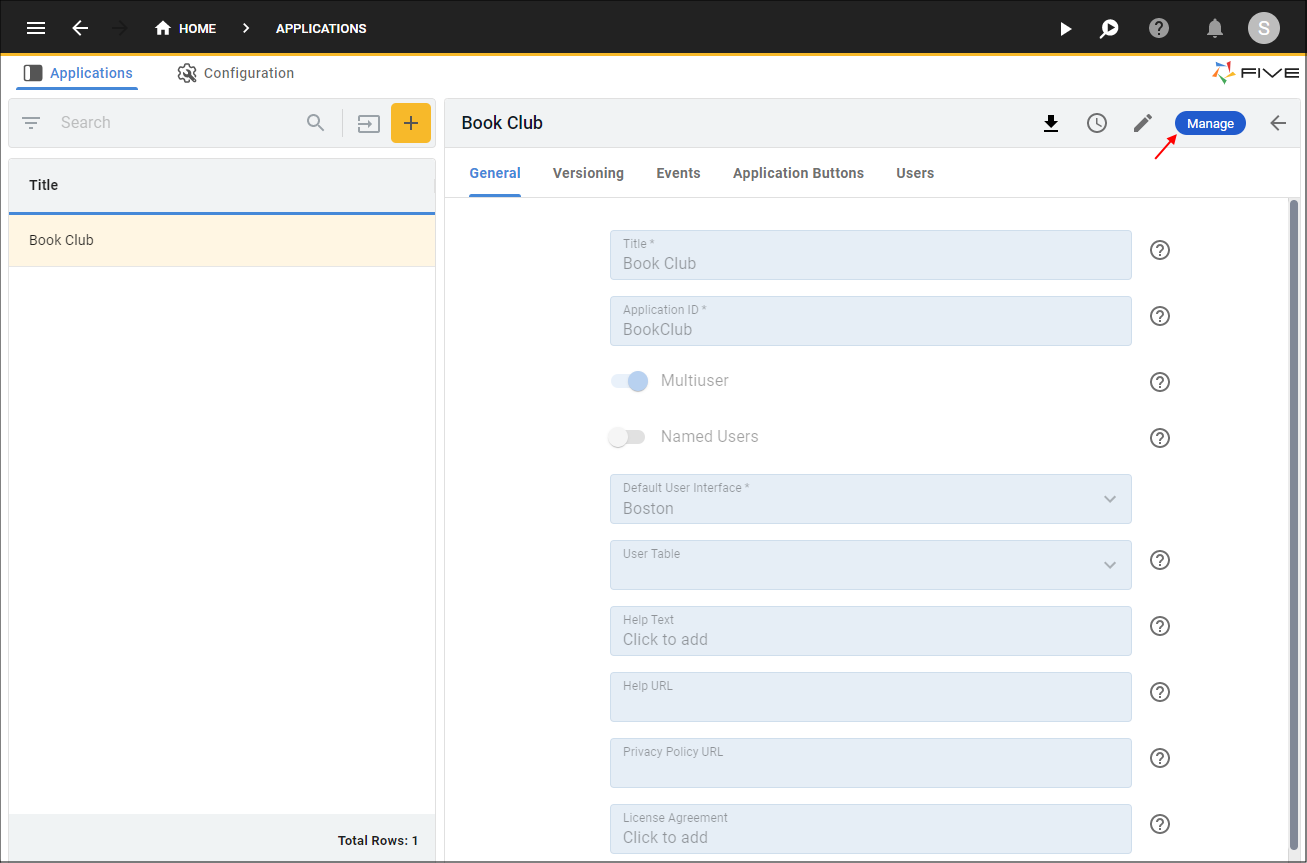
Figure 2 - Manage button
2. Select Data in the menu.
3. Select Tables in the sub-menu.
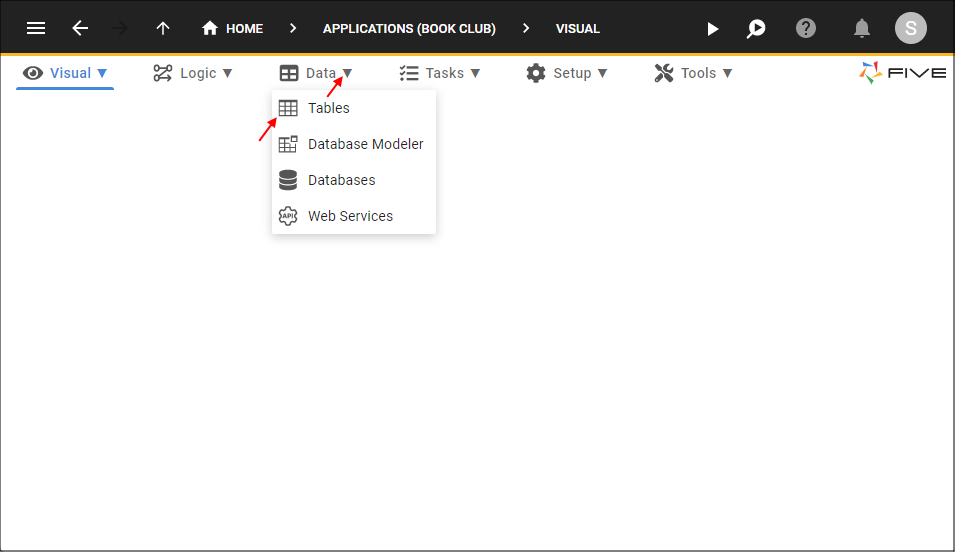
Figure 3 - Tables menu item
Add the Classification Table
tip
You do not need to create a primary key field and index when you create a table via Five's Table Wizard, Five does this automatically for you!
1. Click the New Table Wizard button.
2. Type Classification in the Name field.
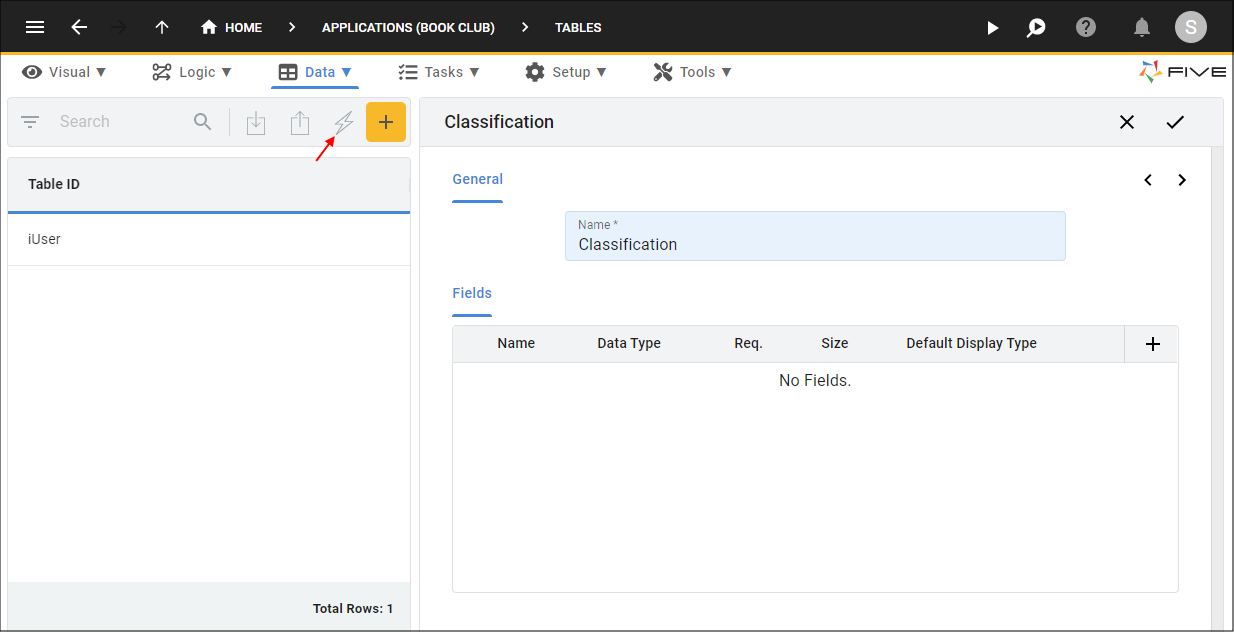
Figure 4 - Add the Classification table
3. Click the Add Fields button.
4. Type Name in the Name field.
5. Type 100 in the Size field.
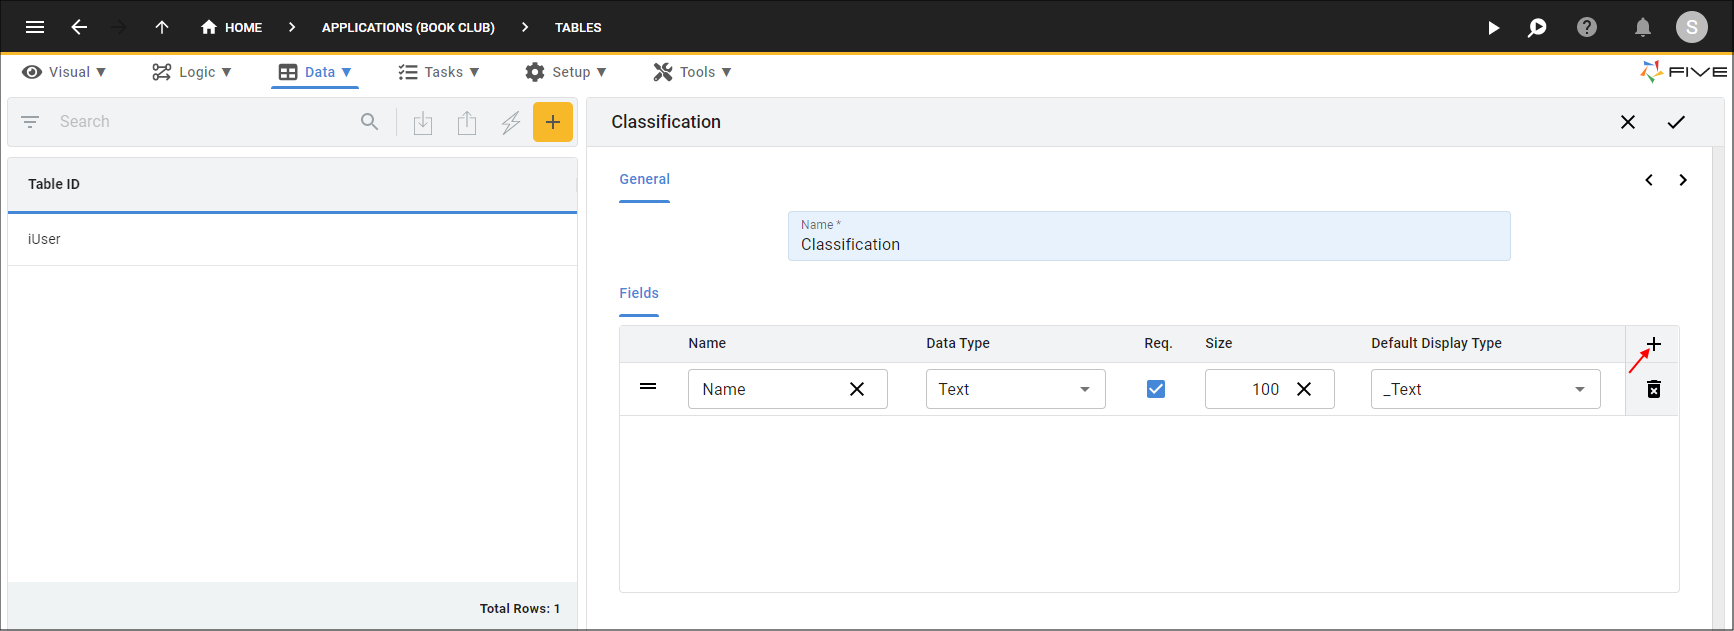
Figure 5 - Add the Name field
6. Click the Save button in the Table Wizard app bar.
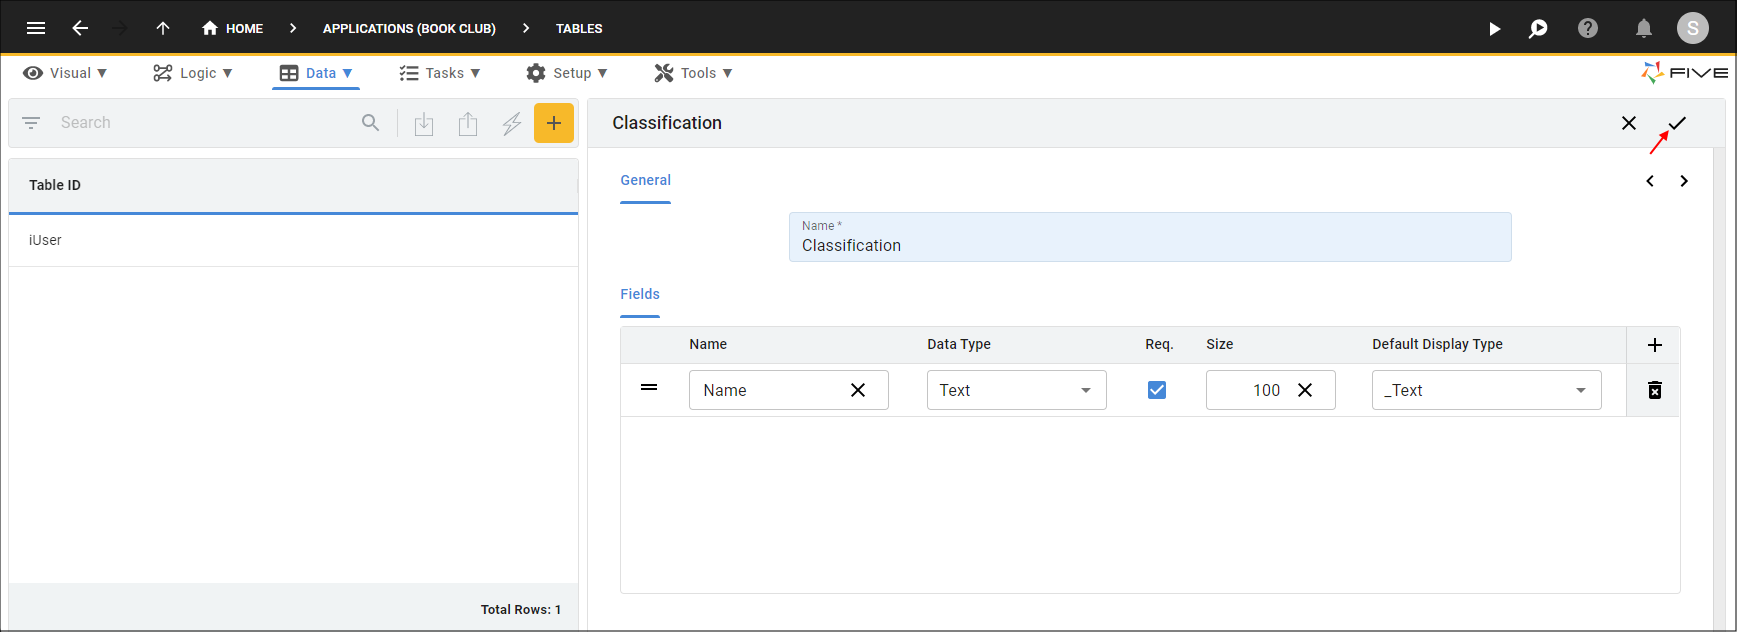
Figure 6 - Save the Classification table
Add the Book Table
1. Click the New Table Wizard button.2. Type Book in the Name field.
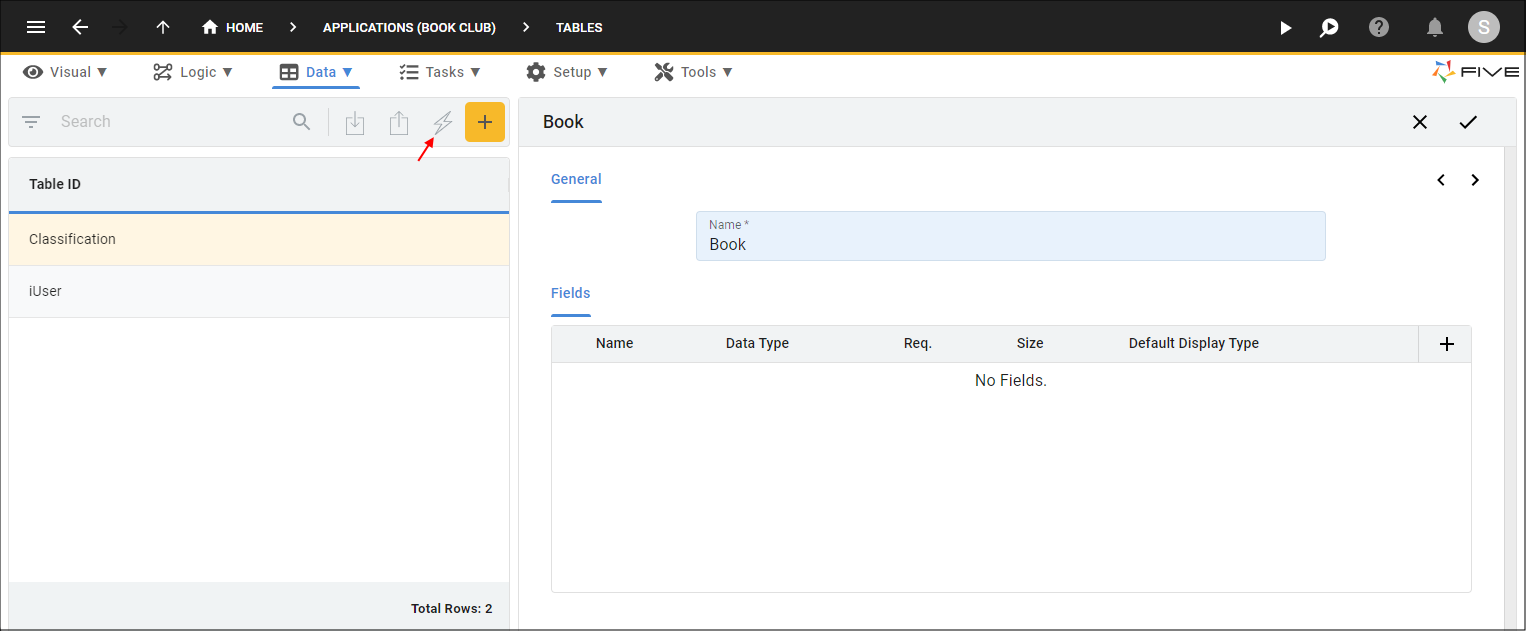
Figure 7 - Add the Book table
3. Click the Add Fields button.
4. Type BorrowMemberKey in the Name field.
5. Click the Req. checkbox.
tip
Five will automatically configure some field definitions dependent on the name of the field!
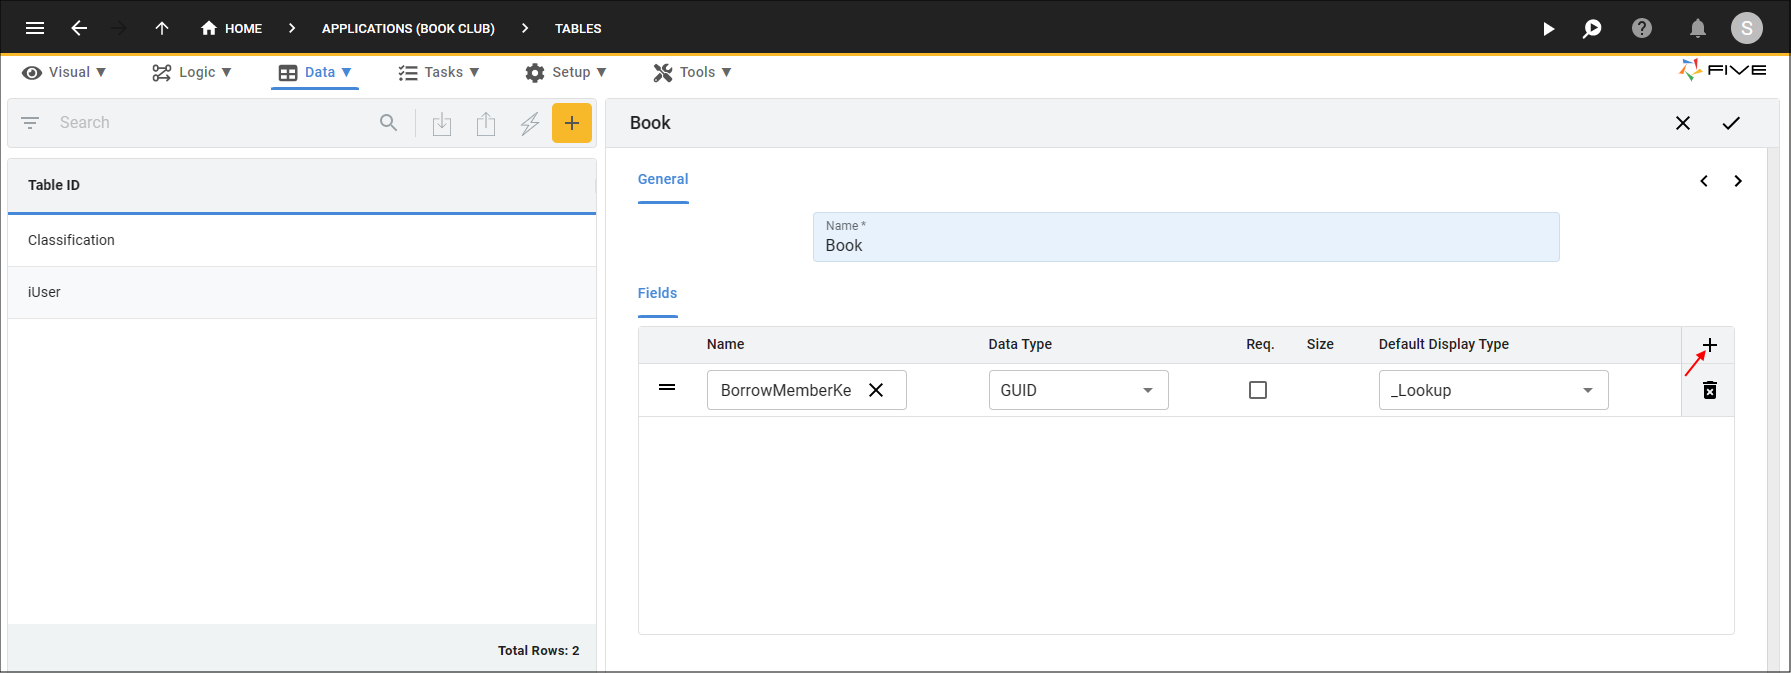
Figure 8 - Add the BorrowMemberKey field
6. Click the Add Fields button.
7. Type Image in the Name field.
8. Click the lookup icon in the Data Type field and select Binary.
9. Type 16777215 in the Size field.
10. Click the lookup icon in the Default Display Type field and select _Picture.
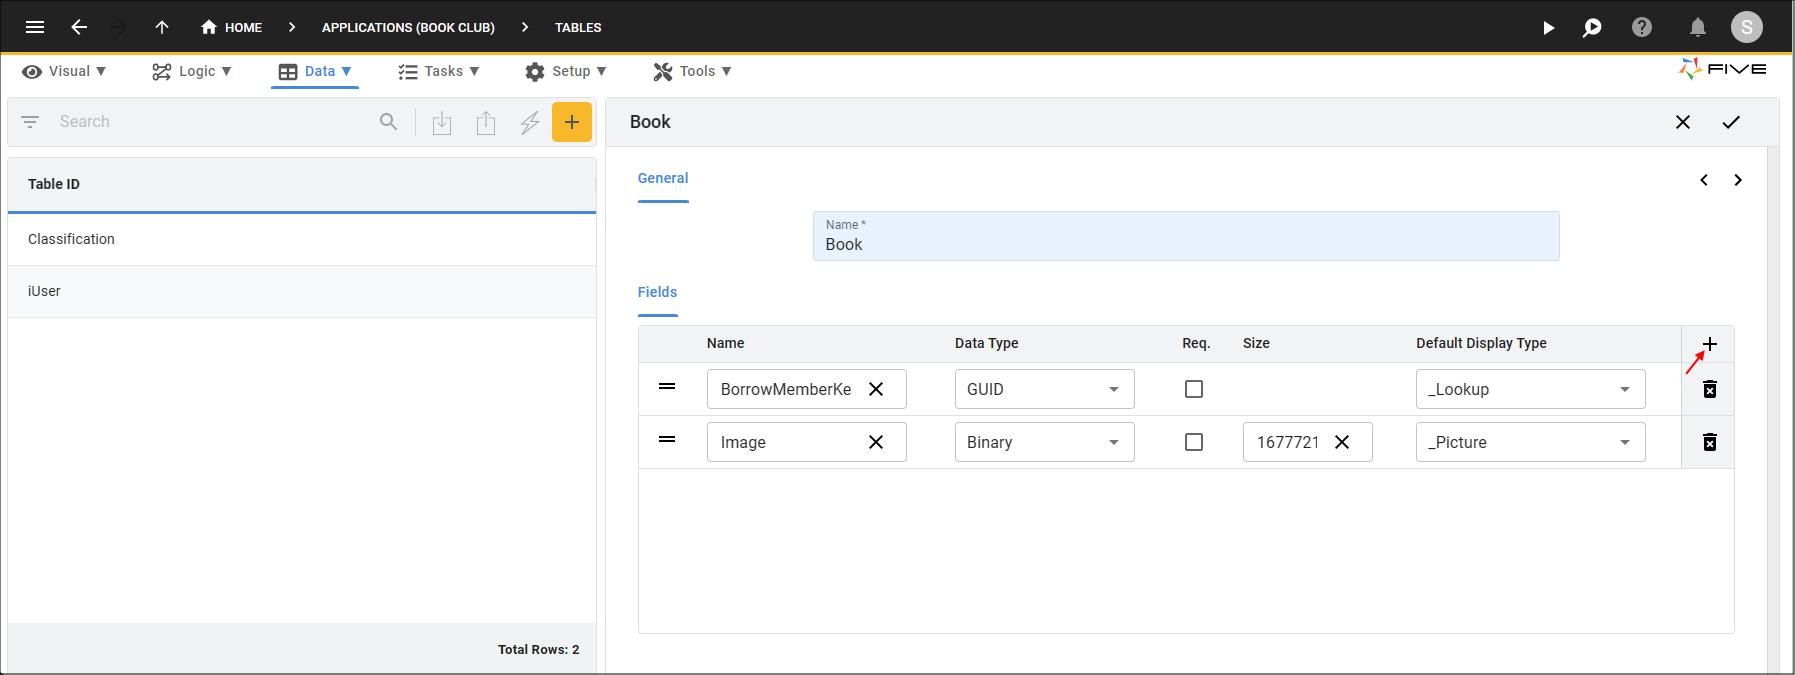
Figure 9 - Add the Image field
11. Click the Add Fields button.
12. Type Title in the Name field.
13. Click the Req. checkbox.
14. Type 100 in the Size field.
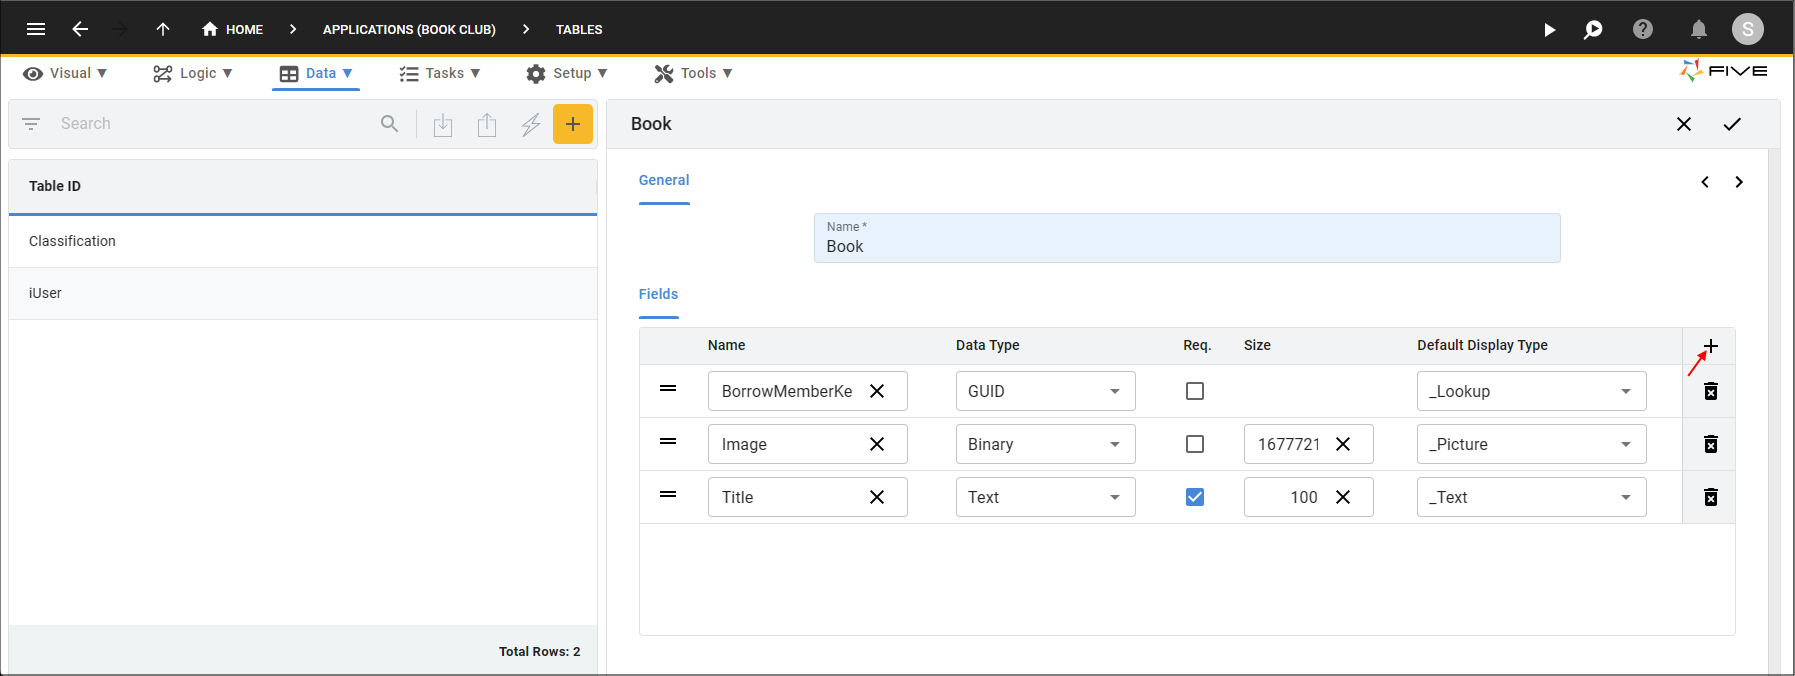
Figure 10 - Add the Title field
15. Click the Add Fields button.
16. Type Author in the Name field.
17. Click the Req. Checkbox.
18. Type 100 in the Size field.
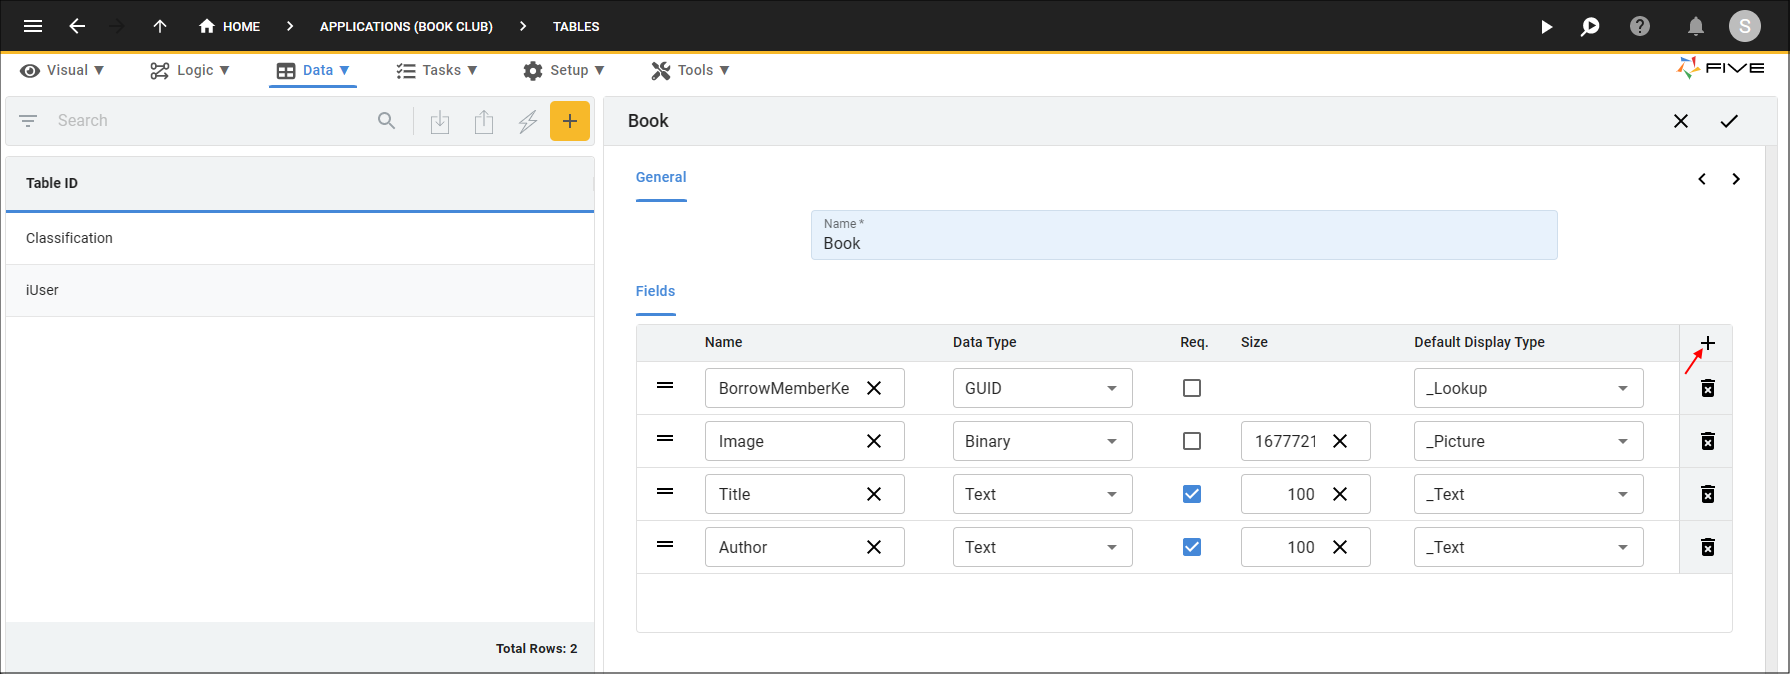
Figure 11 - Add the Author field
19. Click the Add Fields button.
20. Type ISBN in the Name field.
21. Click the Req. checkbox.
22. Type 15 in the Size field.
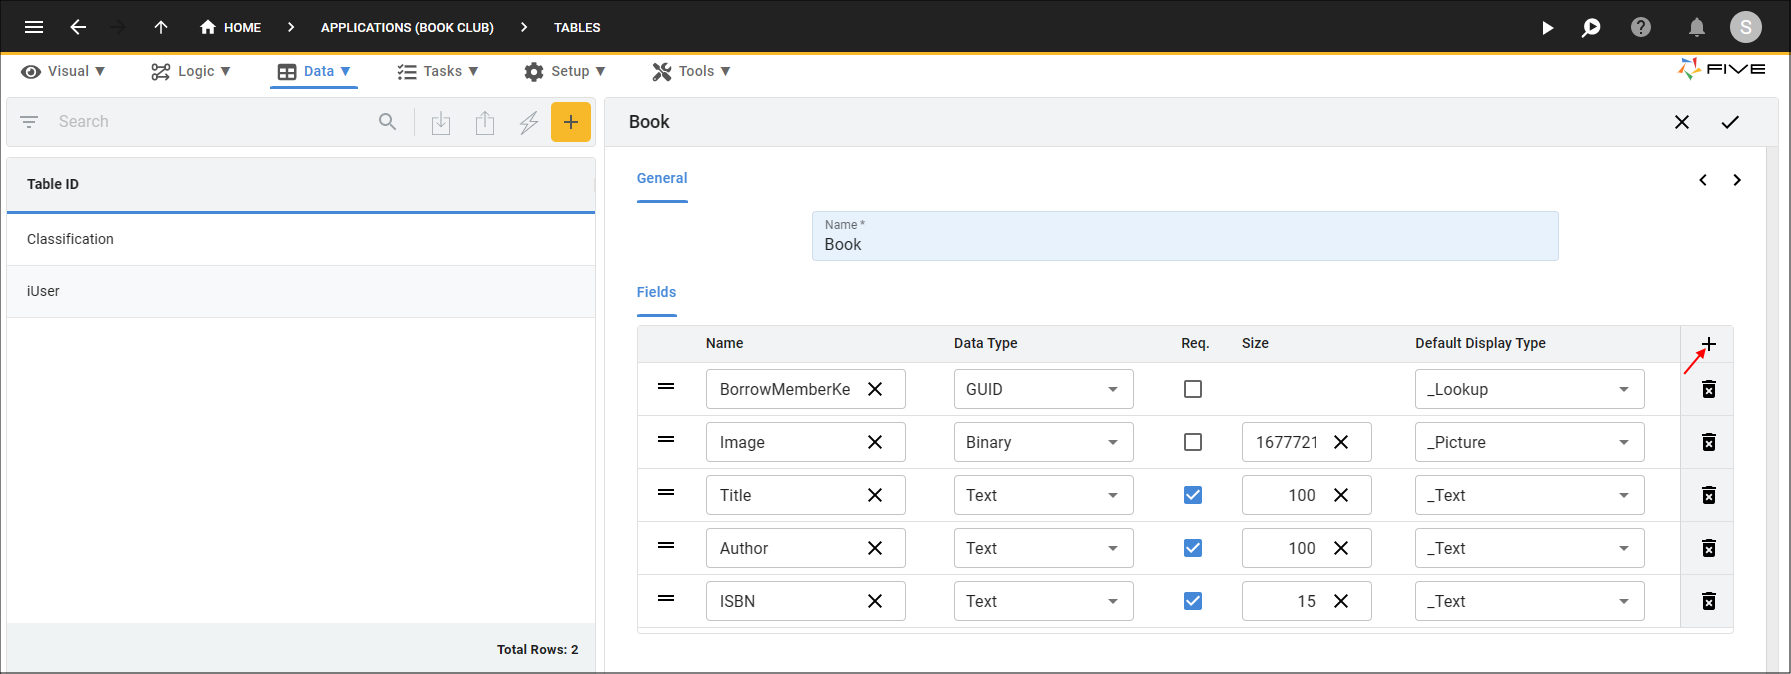
Figure 12 - Add the ISBN field
23. Click the Next button.
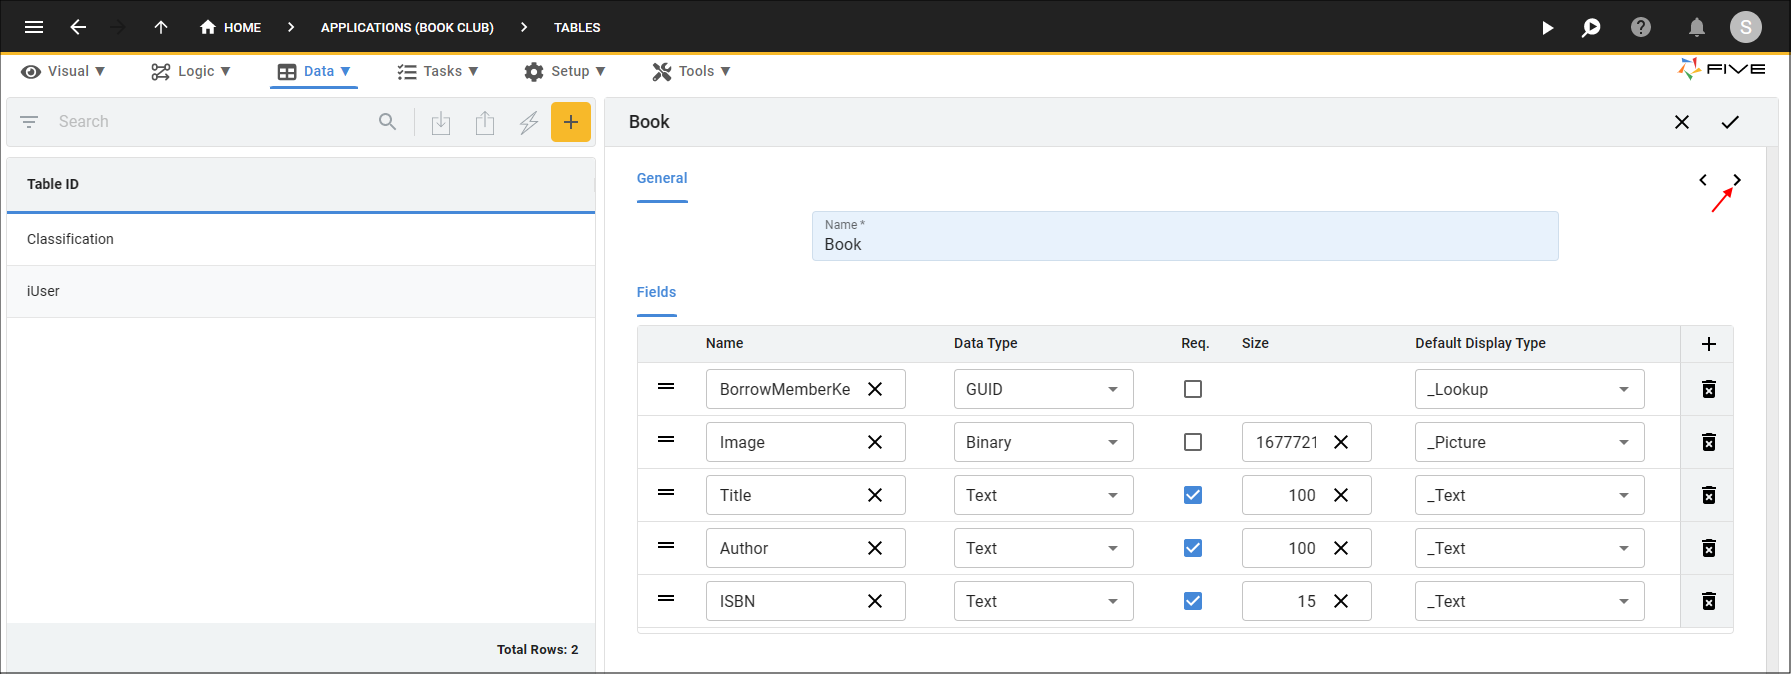
Figure 13 - Next button
24. Click the Add Relationships button.
25. Click the lookup icon in the Table field and select Classification.
26. Click the Required checkbox.
tip
When you create a relationship with another table, Five will automatically create the foreign key field and index!
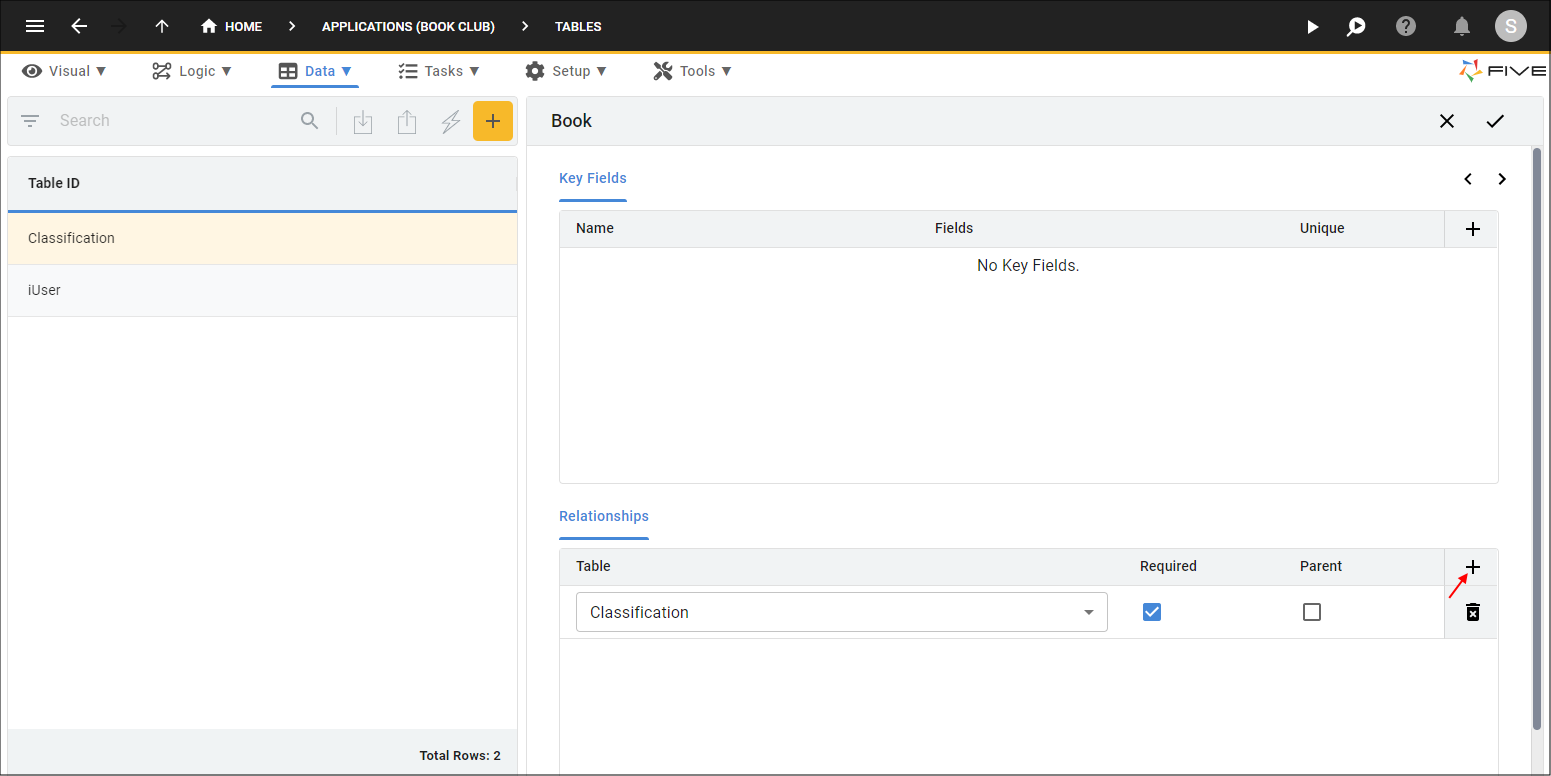
Figure 14 - Add the Classification relationship
27. Click the Add Relationships button.
28. Click the lookup icon in the Table field and select iUser.
29. Click the Required checkbox.
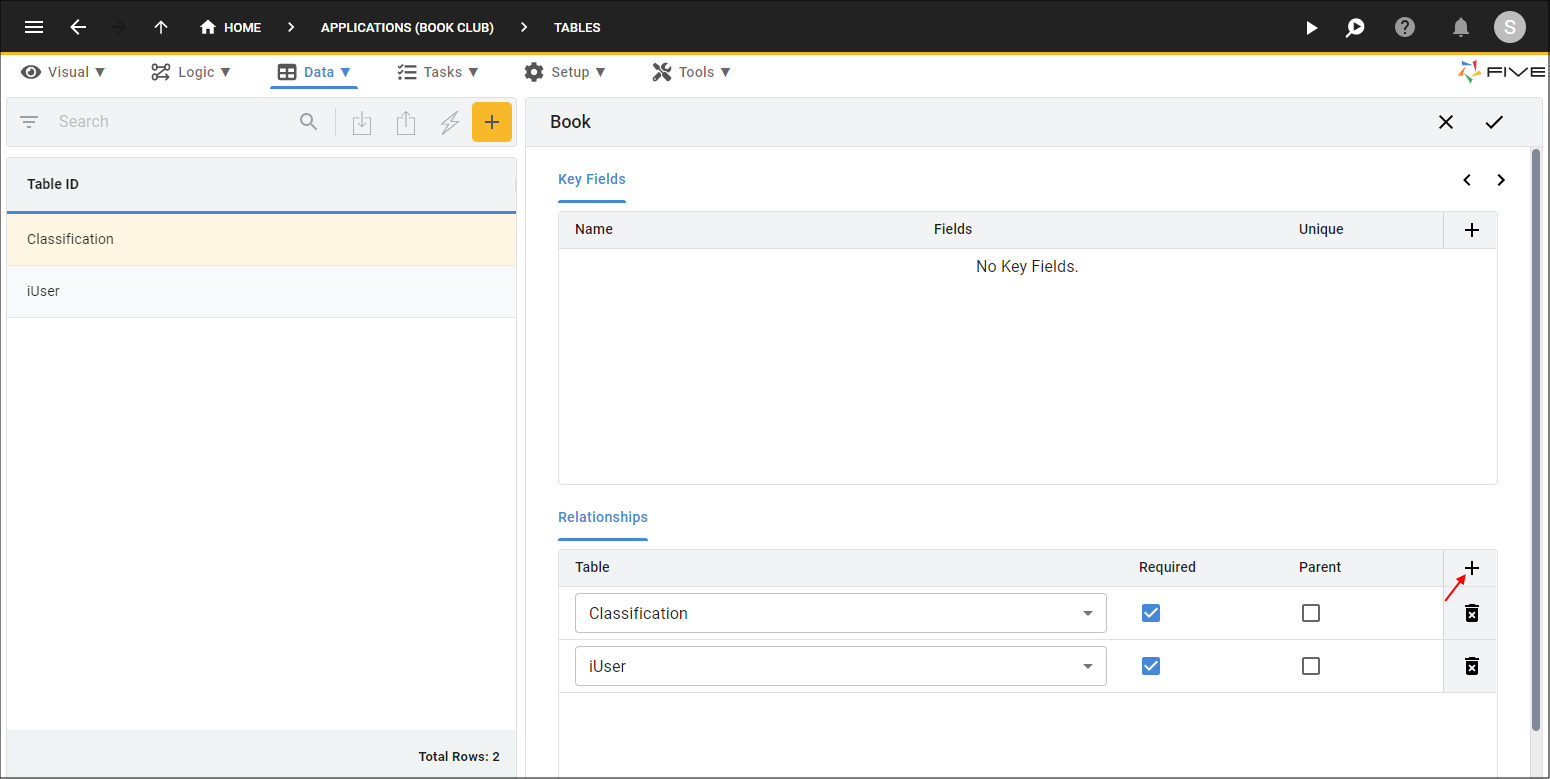
Figure 15 - Add the iUser relationship
30. Click the Save button in the Table Wizard app bar.
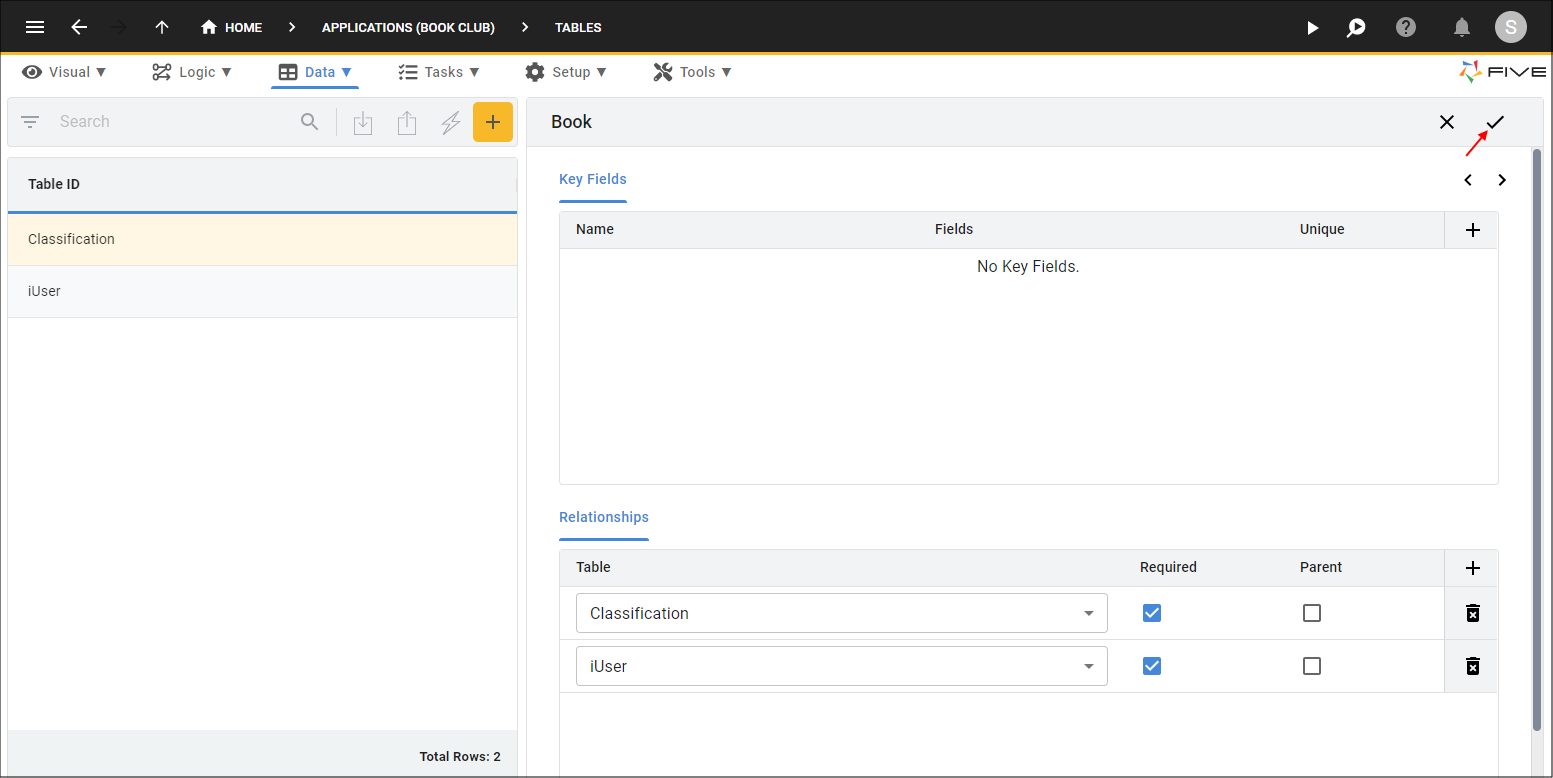
Figure 16 - Save the Book table
Edit the Book Table
After saving a table created in the Table Wizard, you will see the record for the table available in the list.When a relationship is created in the Table Wizard, Five automatically creates the foreign field and index with the same name as the primary key in the foreign table. For example, when we established the relationship with the iUser table in the Book table, Five created the iUserKey field and index in the Book table.
Anything created in the Table Wizard can be edited simply by selecting the record in the list and navigating through the pages on the Table form. We are going to edit the Book table so the iUserKey field and index are called MemberKey, this way we can easily see who is a member that owns a book and who is a member who is borrowing a book.
The documentation below will guide you through the steps to edit a field and an index record after saving a table. You will also get to see the Key fields and indices the Table Wizard automatically created for us.
tip
You can also create a table using the Table form by clicking the yellow Add Item button in the list app bar! The Table Wizard is the fast way to enter your tables in Five, however, the Table form gives you more control and extensibility.
Steps
1. Select the Book record in the list.2. Click the Fields tab.
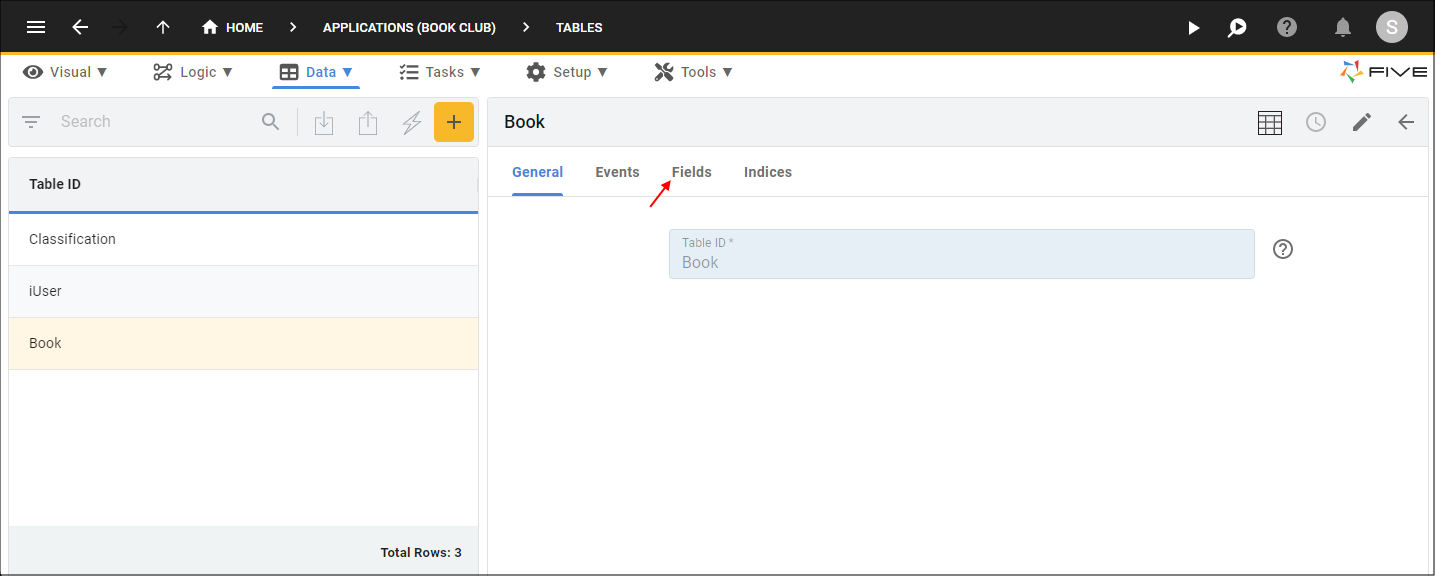
Figure 17 - Fields tab
info
You can see here all the key field records the Table Wizard created including the primary key field - BookKey.
3. Select the iUserKey record.
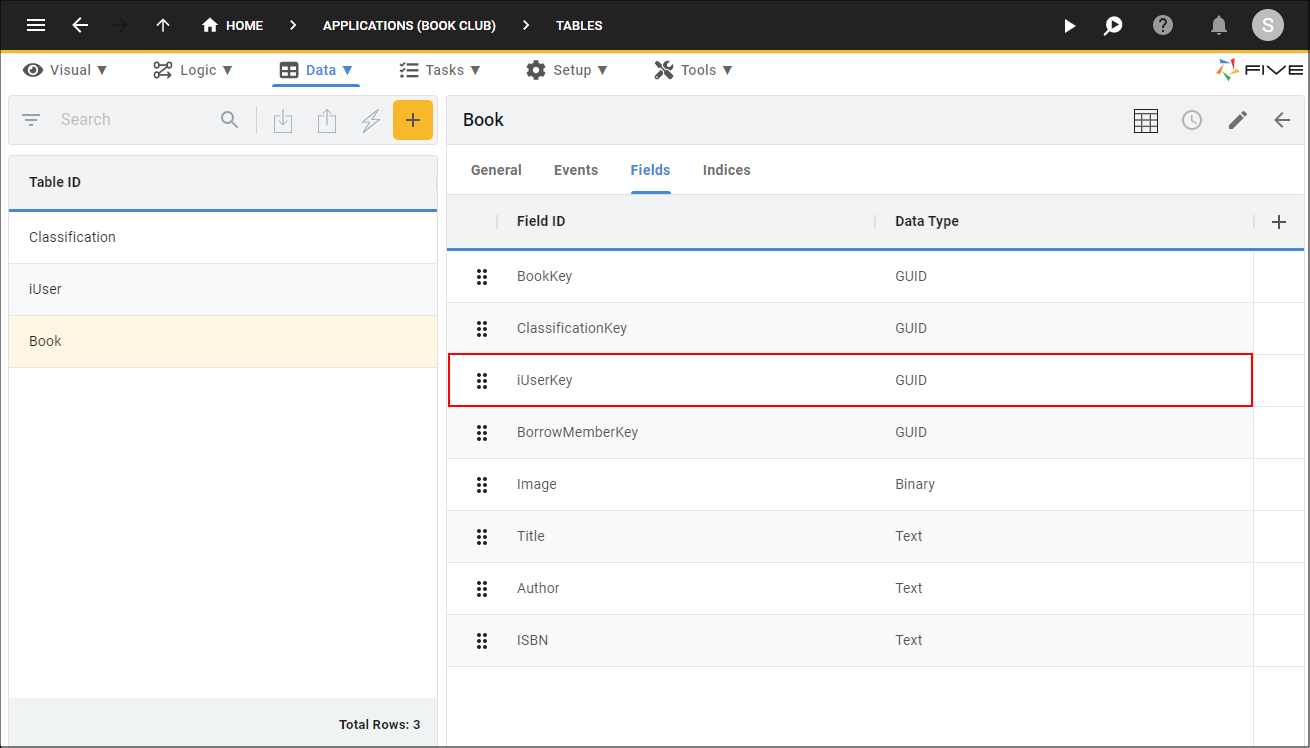
Figure 18 - iUserKey field record
4. Either click the Edit button in the form app bar, or click directly in the Field ID field.
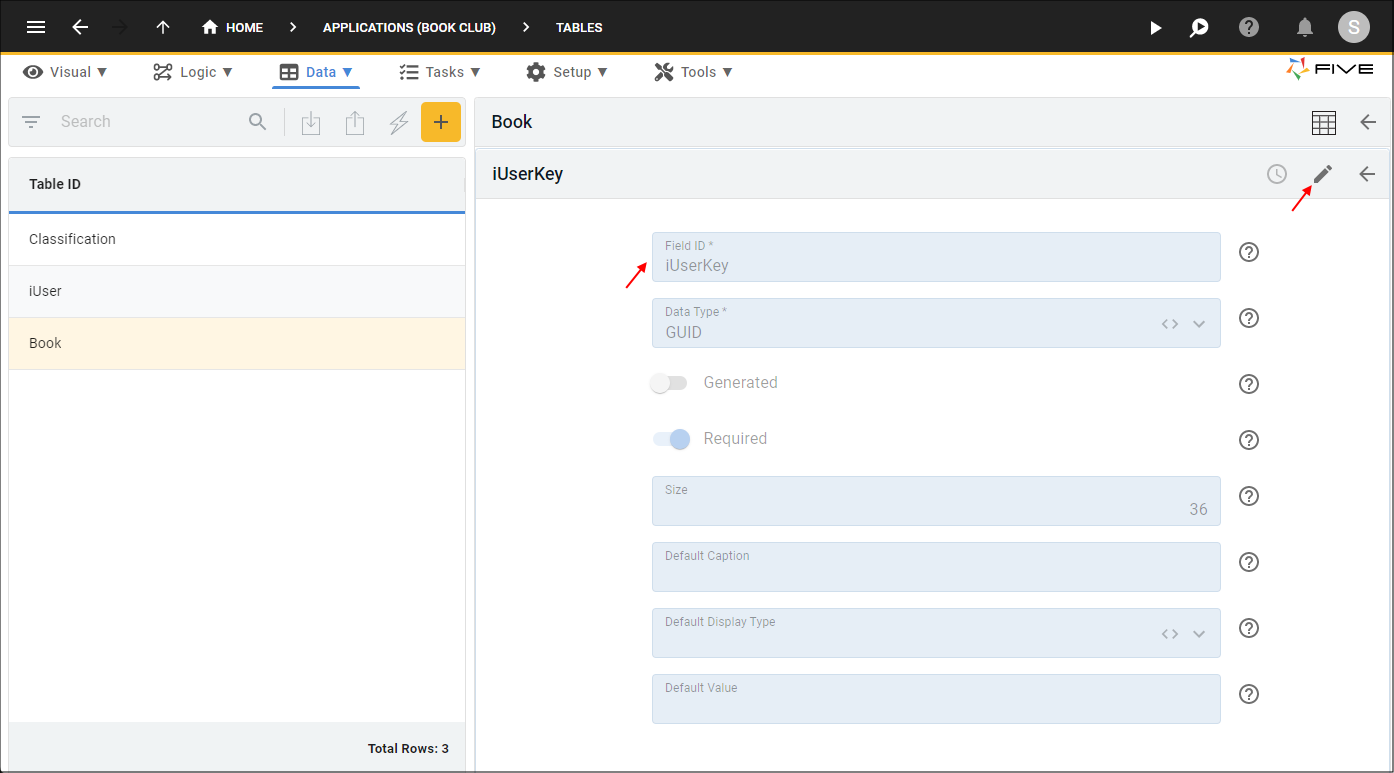
Figure 19 - Edit the iUserKey field record
5. Click the Cancel button in the Field ID field and type MemberKey.
6. Click the Save button in the form app bar.
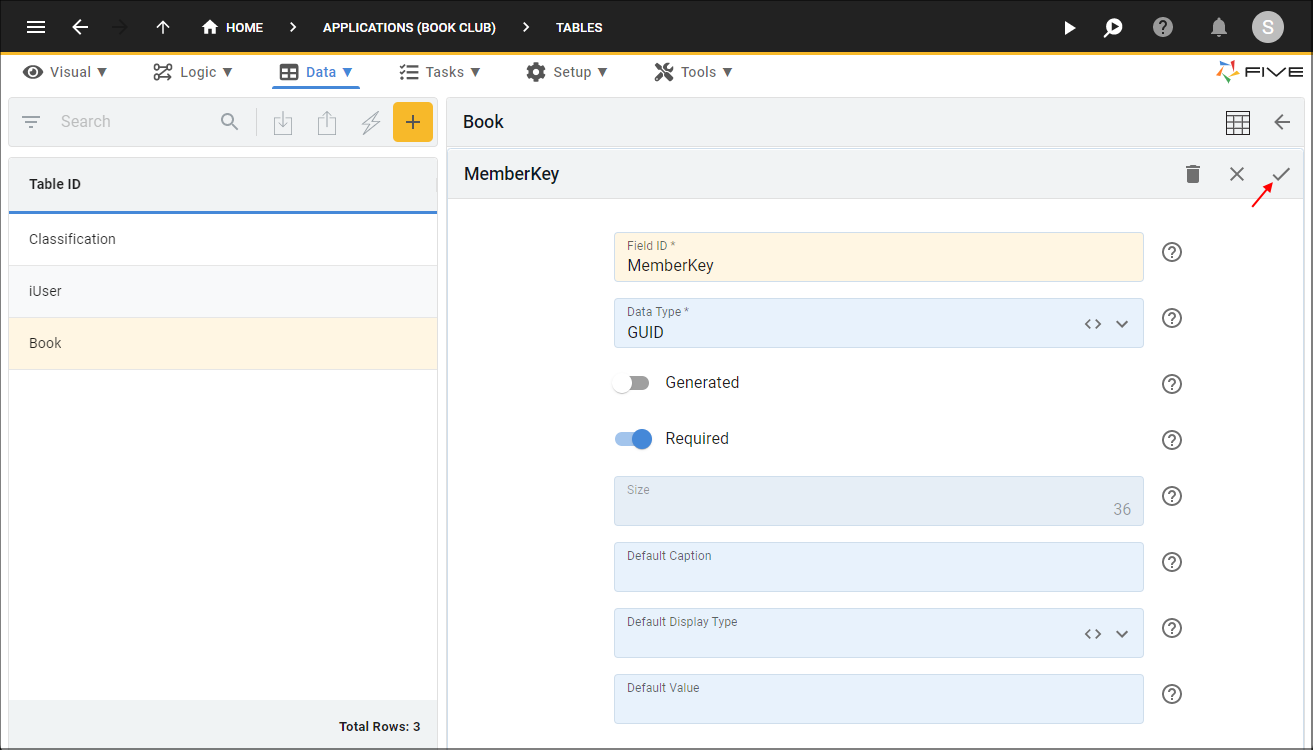
Figure 20 - Save the MemberKey field record
7. Click the Indices tab.
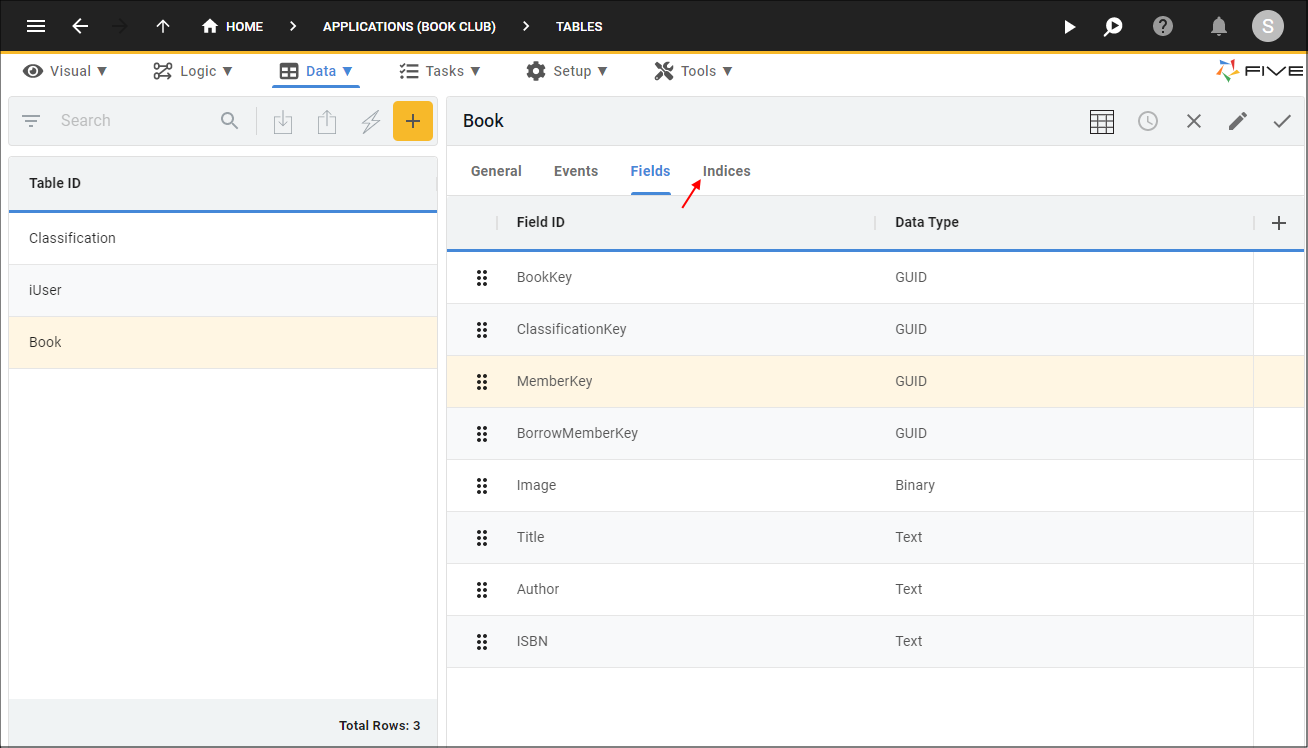
Figure 21 - Indices tab
info
You can see here all the index records the Table Wizard created including the primary key index - BookKey.
8. Select the iUserKey record.
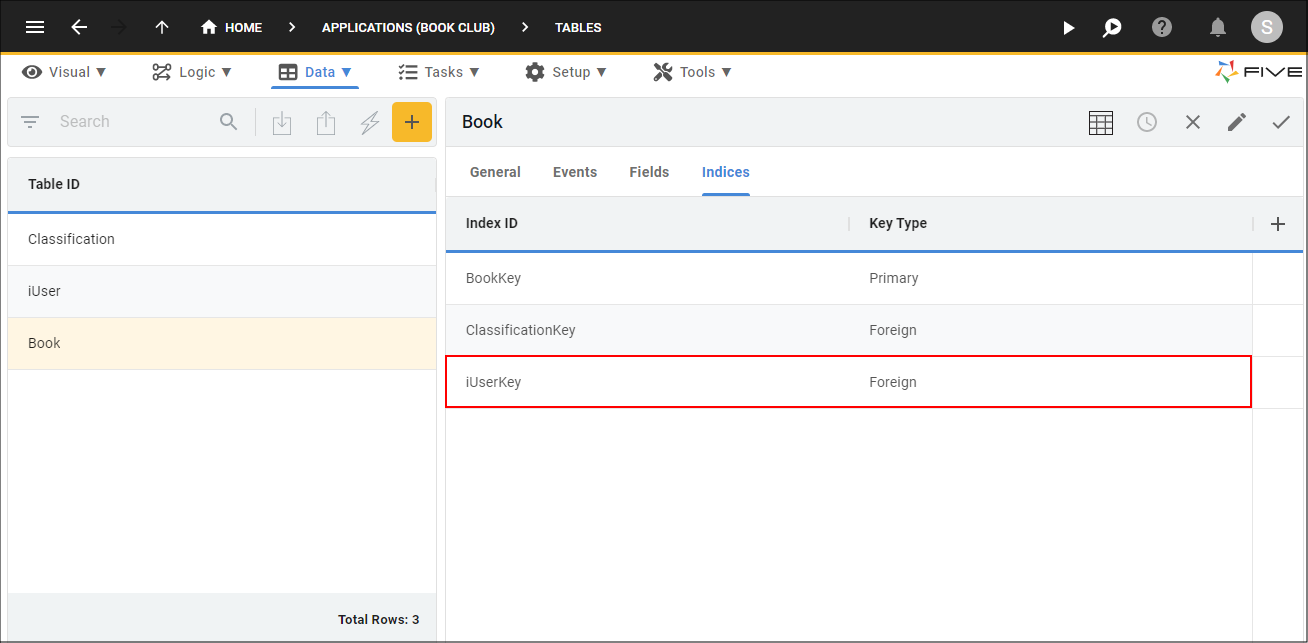
Figure 22 - iUserKey index record
9. Either click the Edit button in the form app bar, or click directly in the Index ID field.

Figure 23 - Edit the iUserKey index record
10. Click the Cancel button in the Index ID field and type MemberKey.
11. Click the Save button in the form app bar.
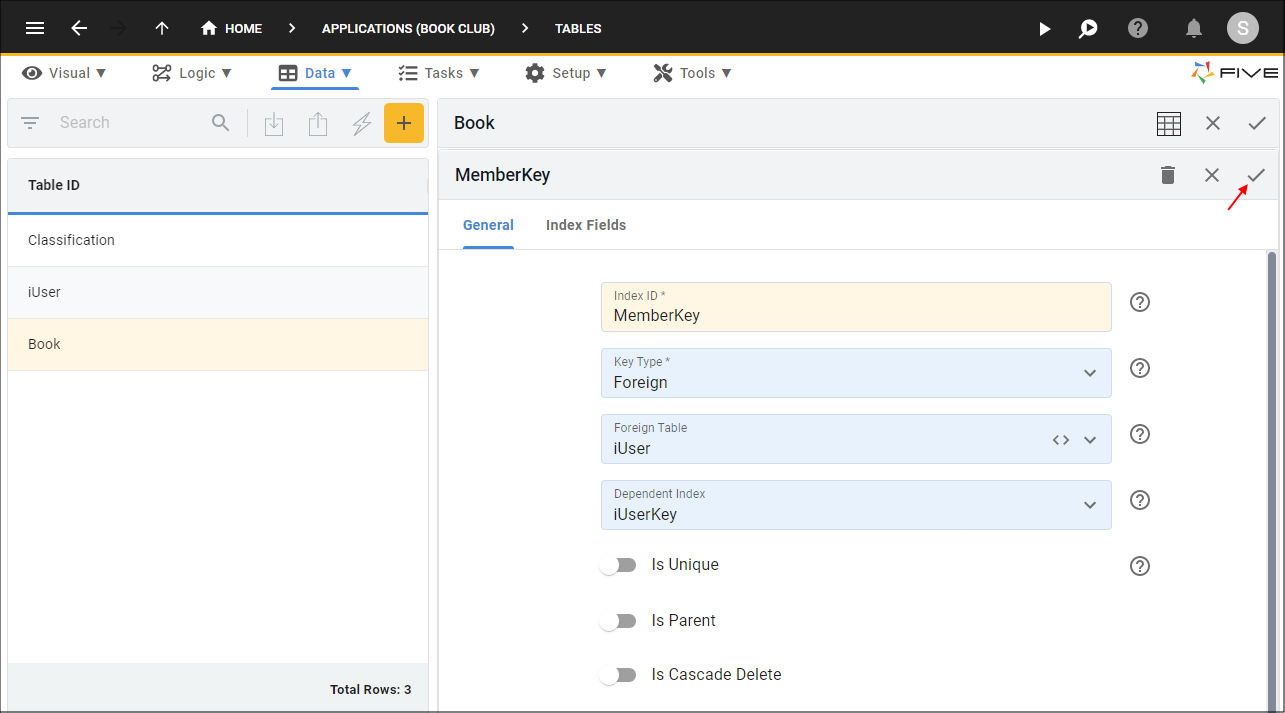
Figure 24 - Save the MemberKey index record
12. Click the Save button in the form app bar.
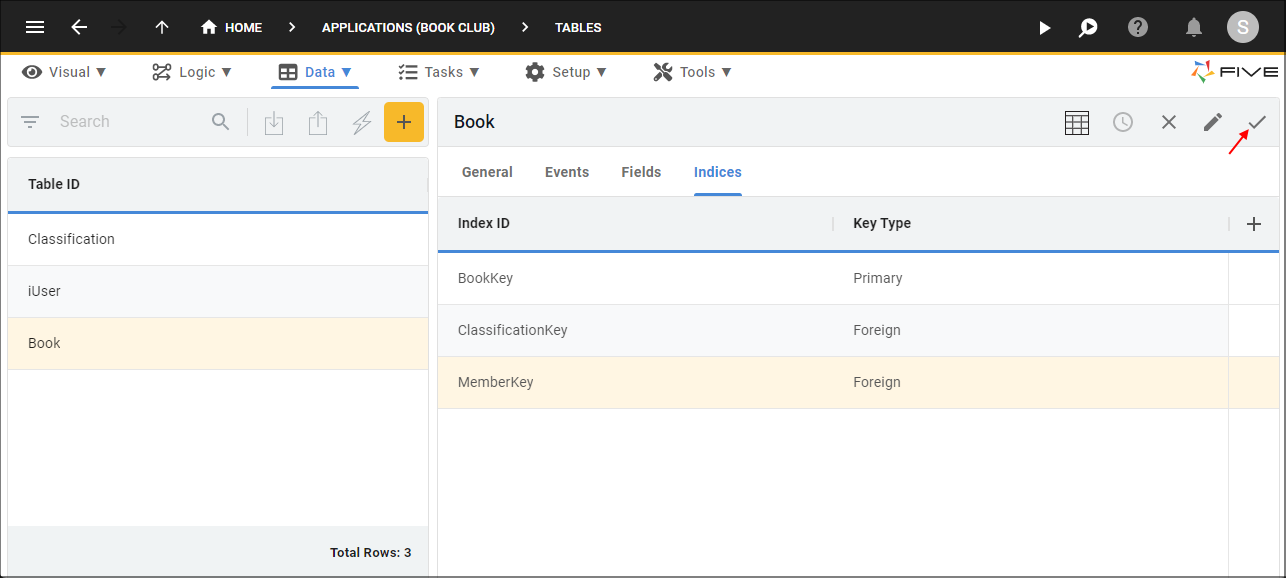
Figure 25 - Save the Book table
Add the BorrowHistory Table
info
For future reference, we will be using the BorrowHistory table to keep an audit of all borrowed books.
1. Click the New Table Wizard button.
2. Type BorrowHistory in the Name field.
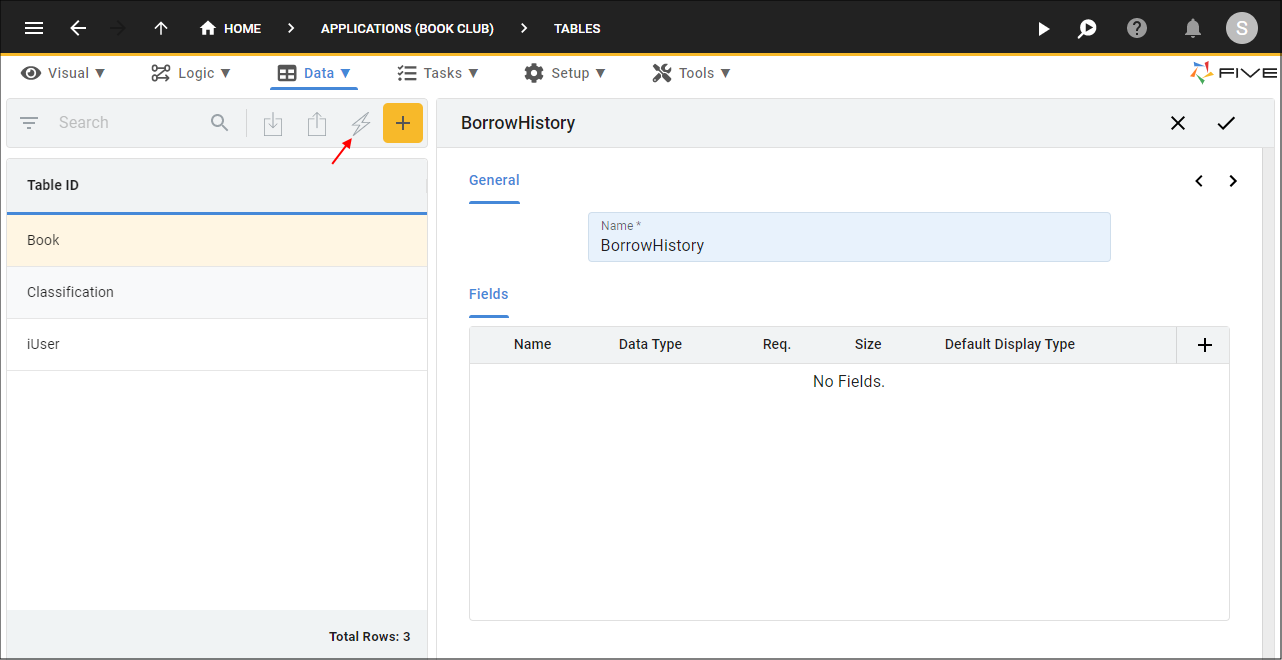
Figure 26 - Add the BorrowHistory table
3. Click the Add Fields button.
4. Type Date in the Name field.
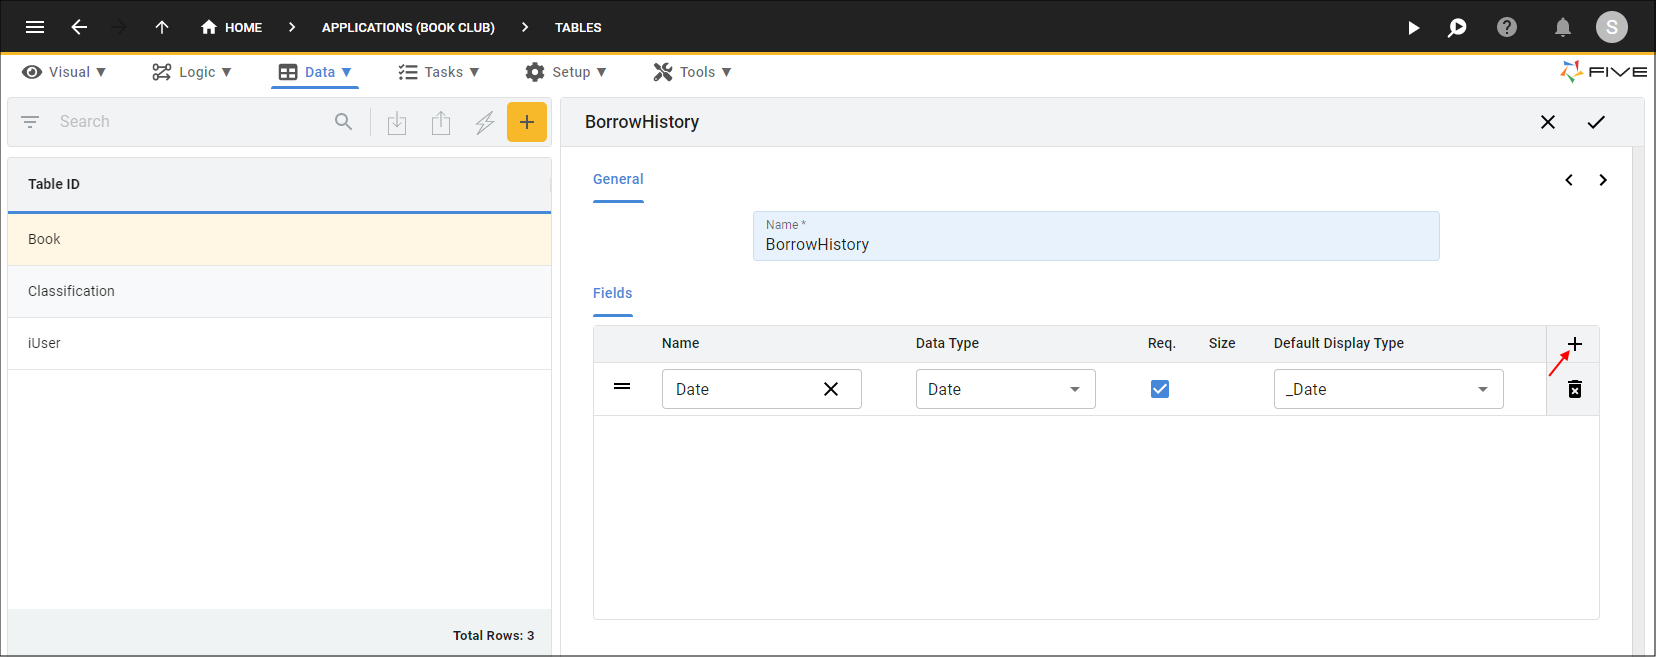
Figure 27 - Add the Date field
5. Click the Add Fields button.
6. Type DateReturned in the Name field.
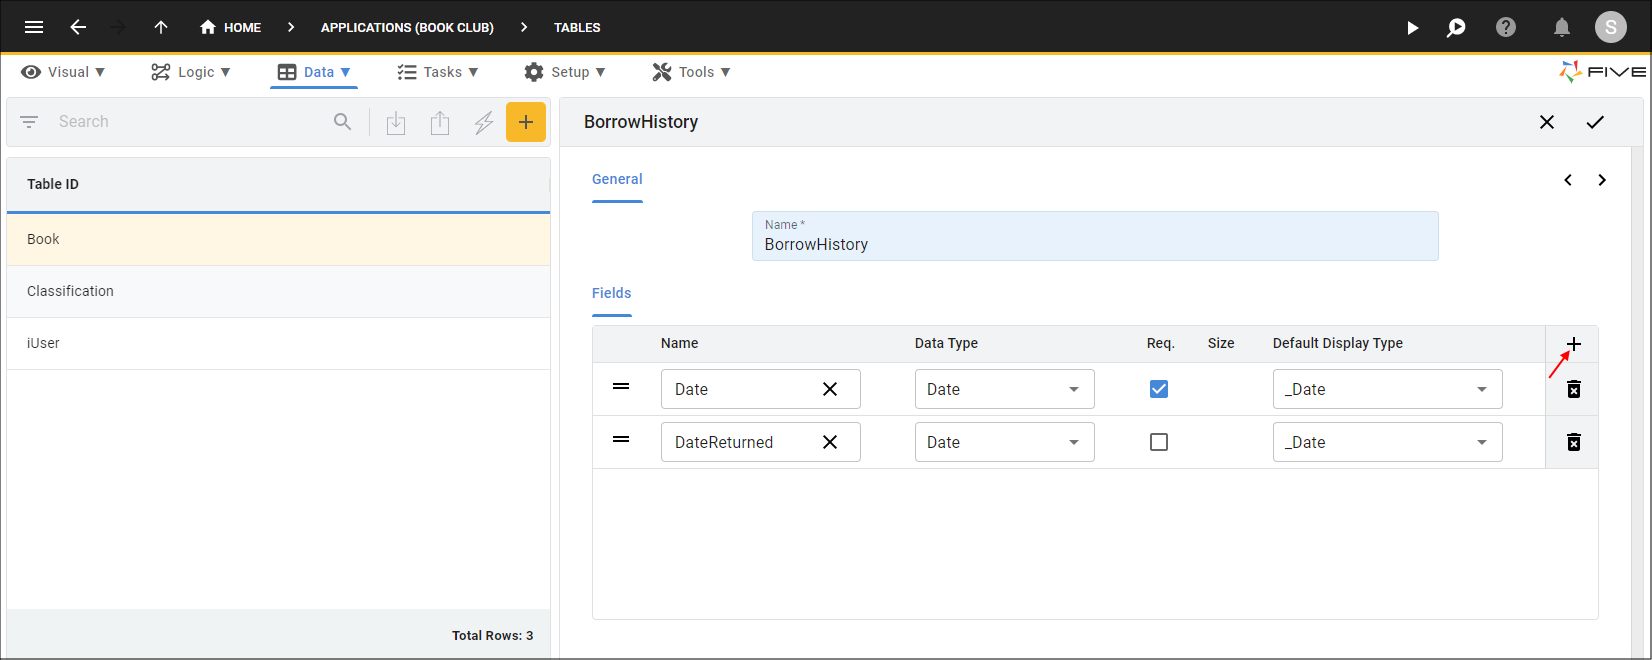
Figure 28 - Add the DateReturned field
7. Click the Add Fields button.
8. Type OverDueNotice in the Name field.
9. Click the lookup icon in the Data Type field and select TimeStamp.
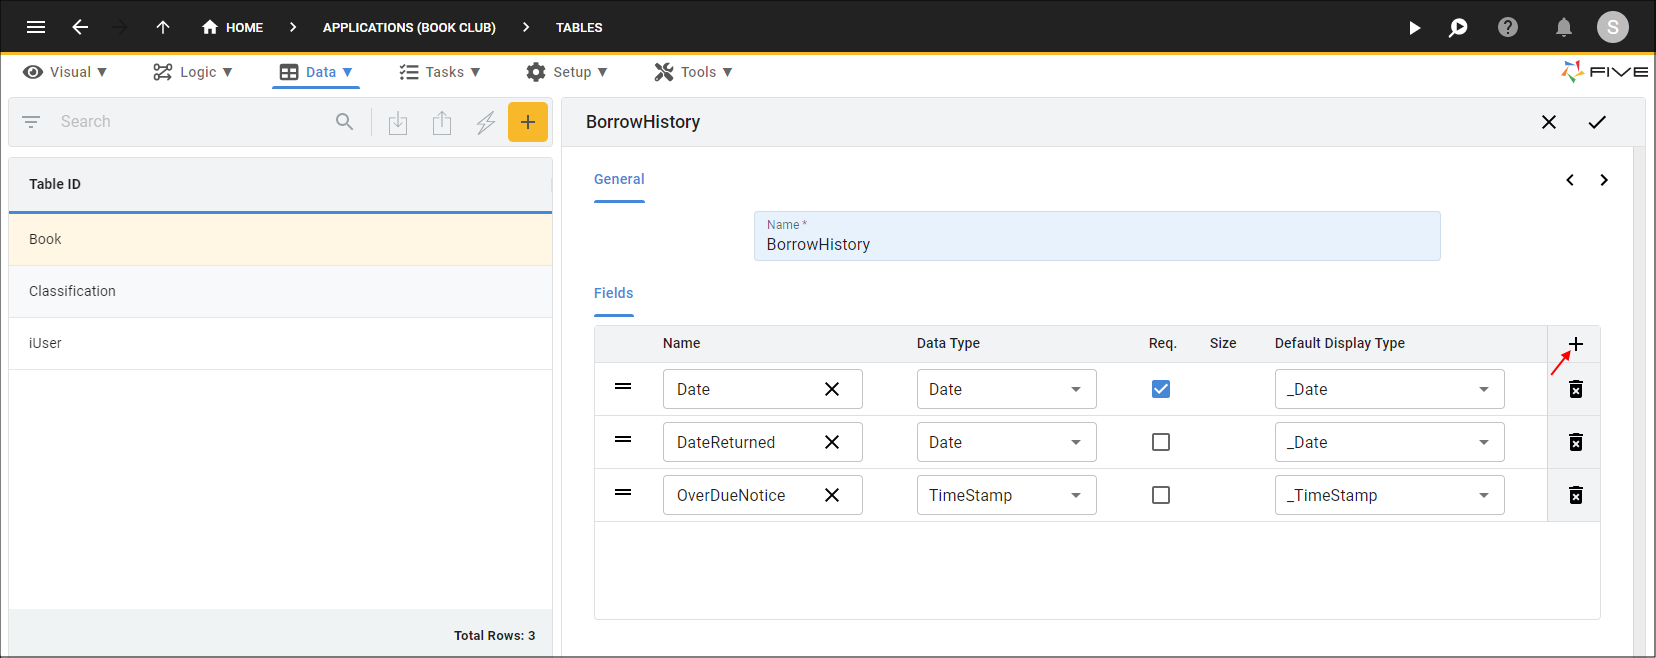
Figure 29 - Add the OverDueNotice field
10. Click the Next button.
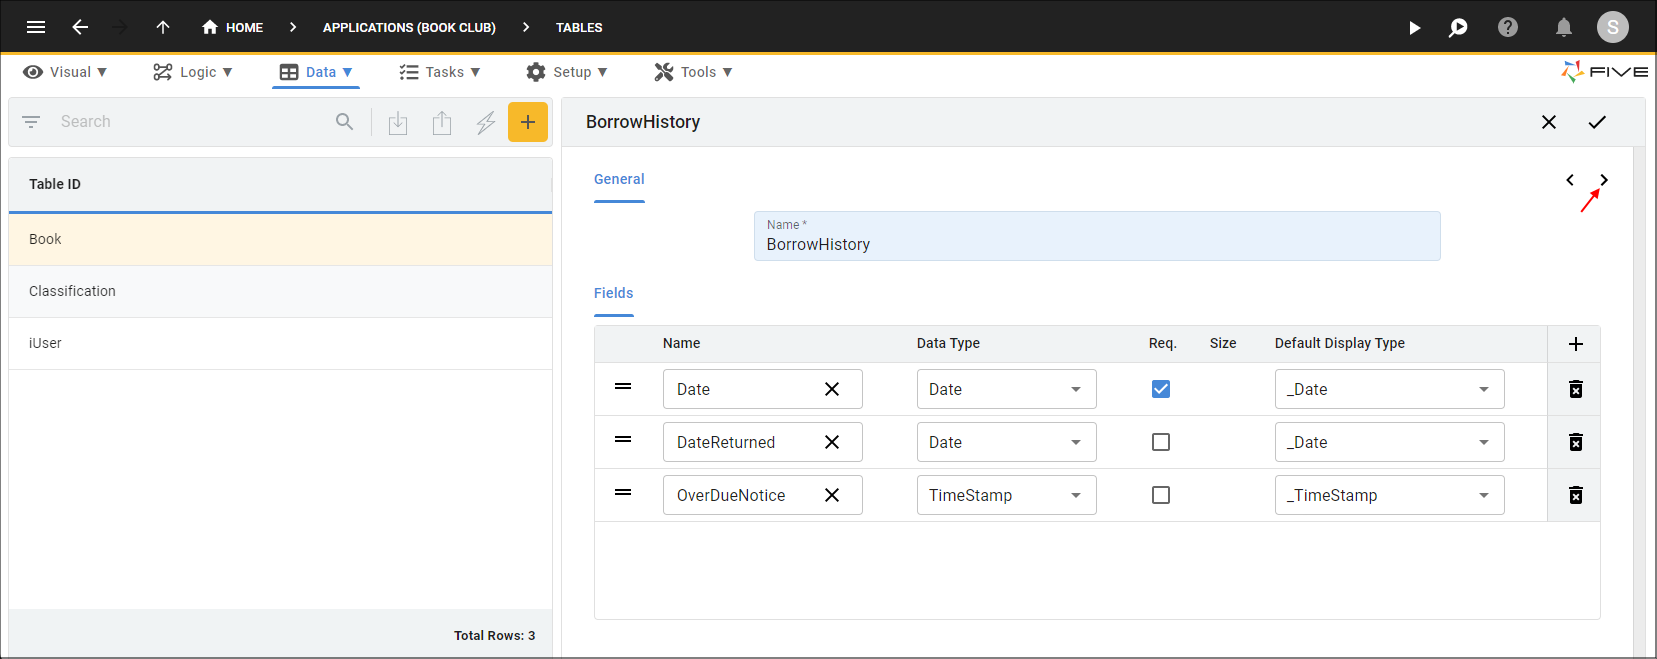
Figure 30 - Next button
11. Click the Add Relationships button.
12. Click the lookup icon in the Table field and select iUser.
13. Click the Required checkbox.
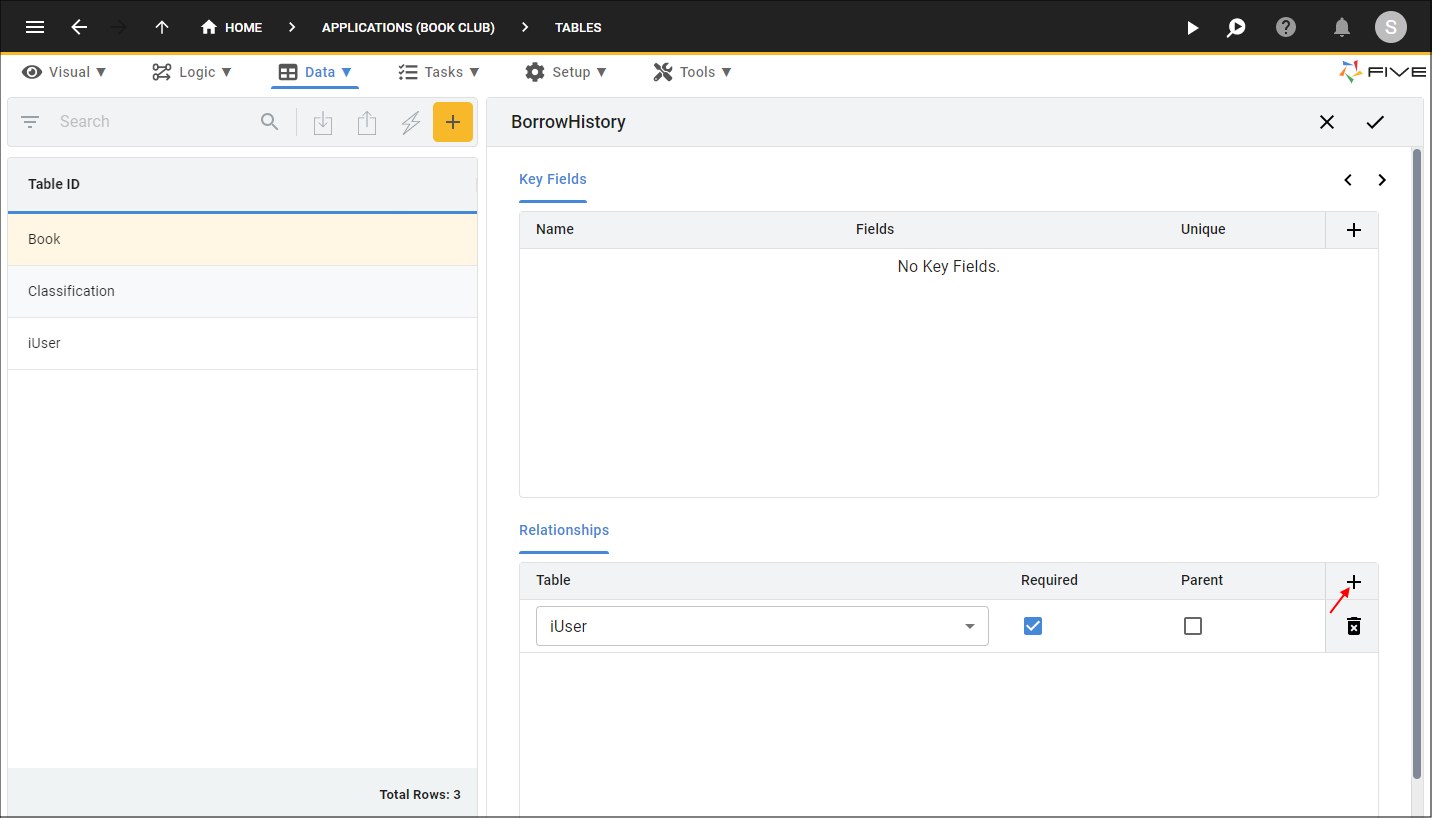
Figure 31 - Add the iUser relationship
14. Click the Add Relationships button.
15. Click the lookup icon in the Table field and select Book.
16. Click the Required checkbox.
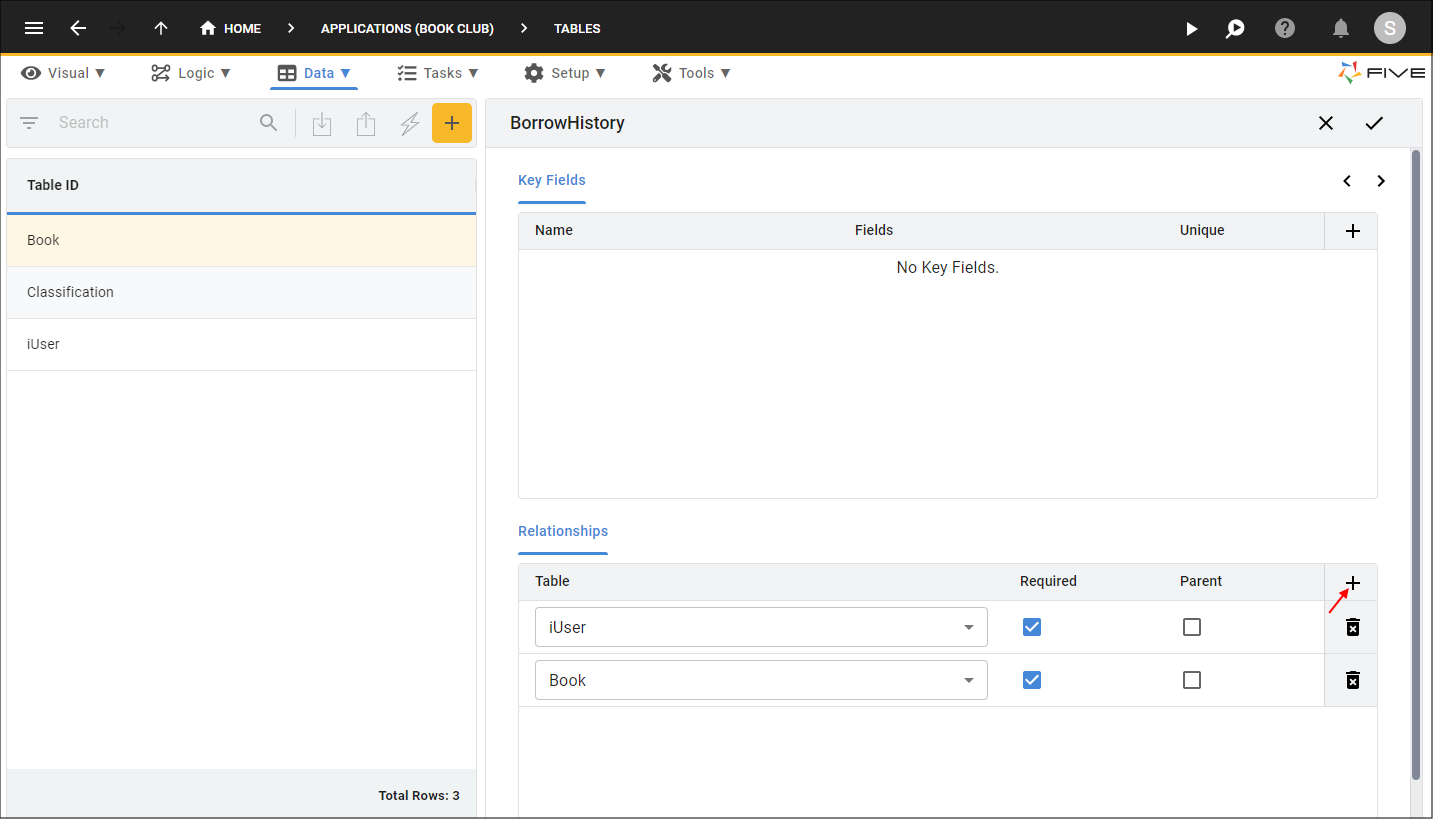
Figure 32 - Add the Book relationship
17. Click the Save button in the Table Wizard app bar.
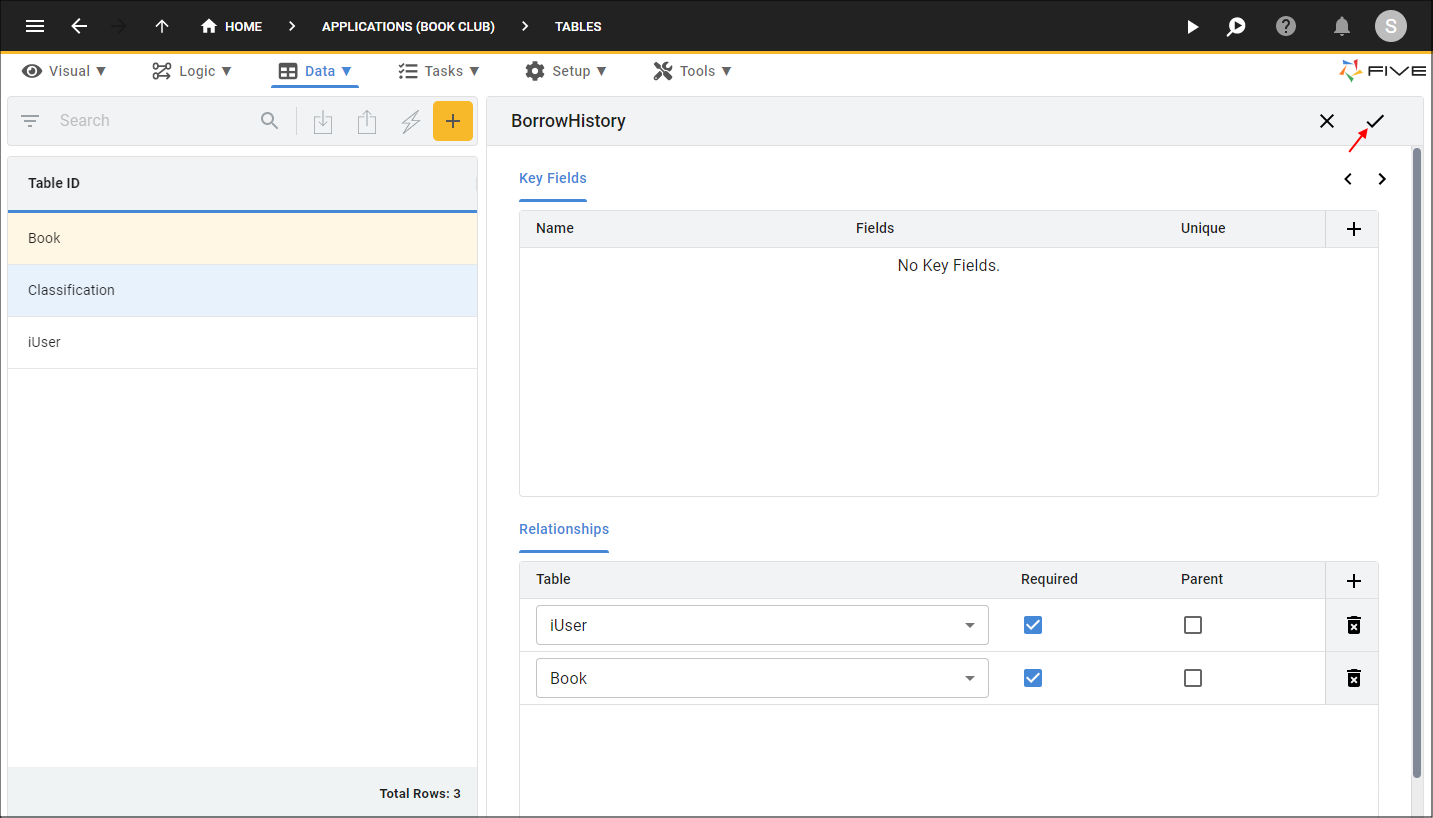
Figure 33 - Save the BorrowHistory table
Edit the BorrowHistory Table
info
We are going to update the BorrowHistory table to change the name of the iUserKey field and index to keep with the same naming conventions we have been using in the Book table.
1. Select the BorrowHistory record in the list.
2. Click the Fields tab.
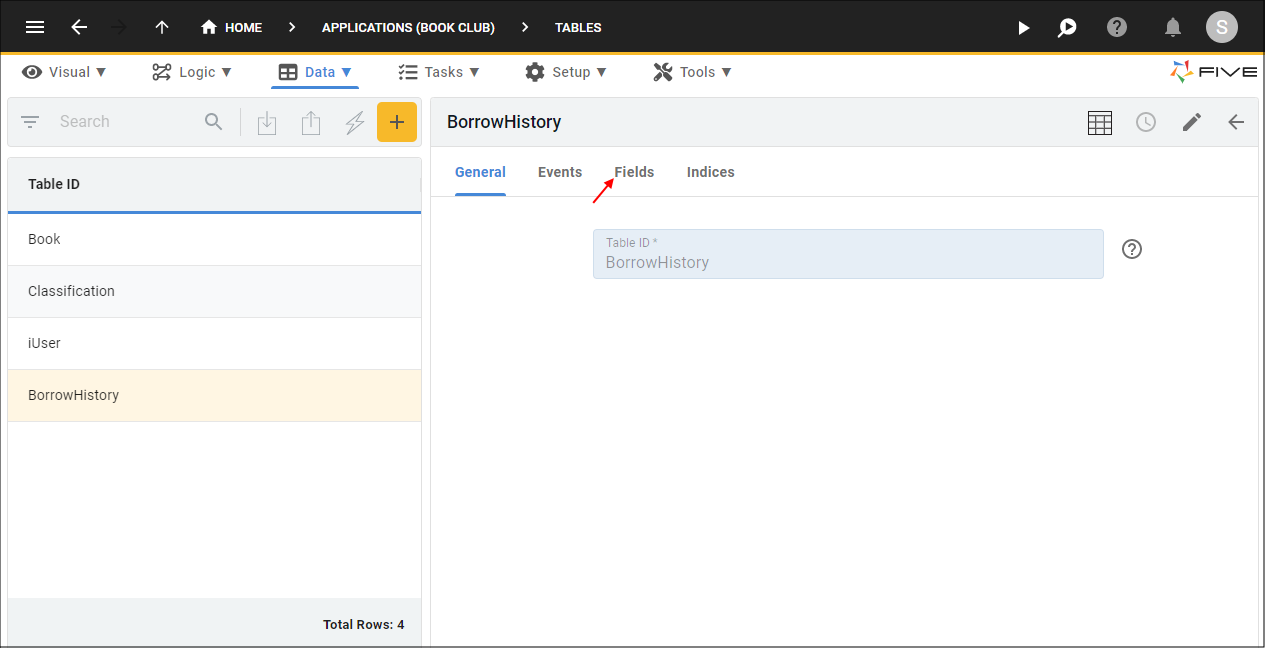
Figure 34 - Fields tab
3. Select the iUserKey record.

Figure 35 - iUserKey field record
4. Either click the Edit button in the form app bar, or click directly in the Field ID field.
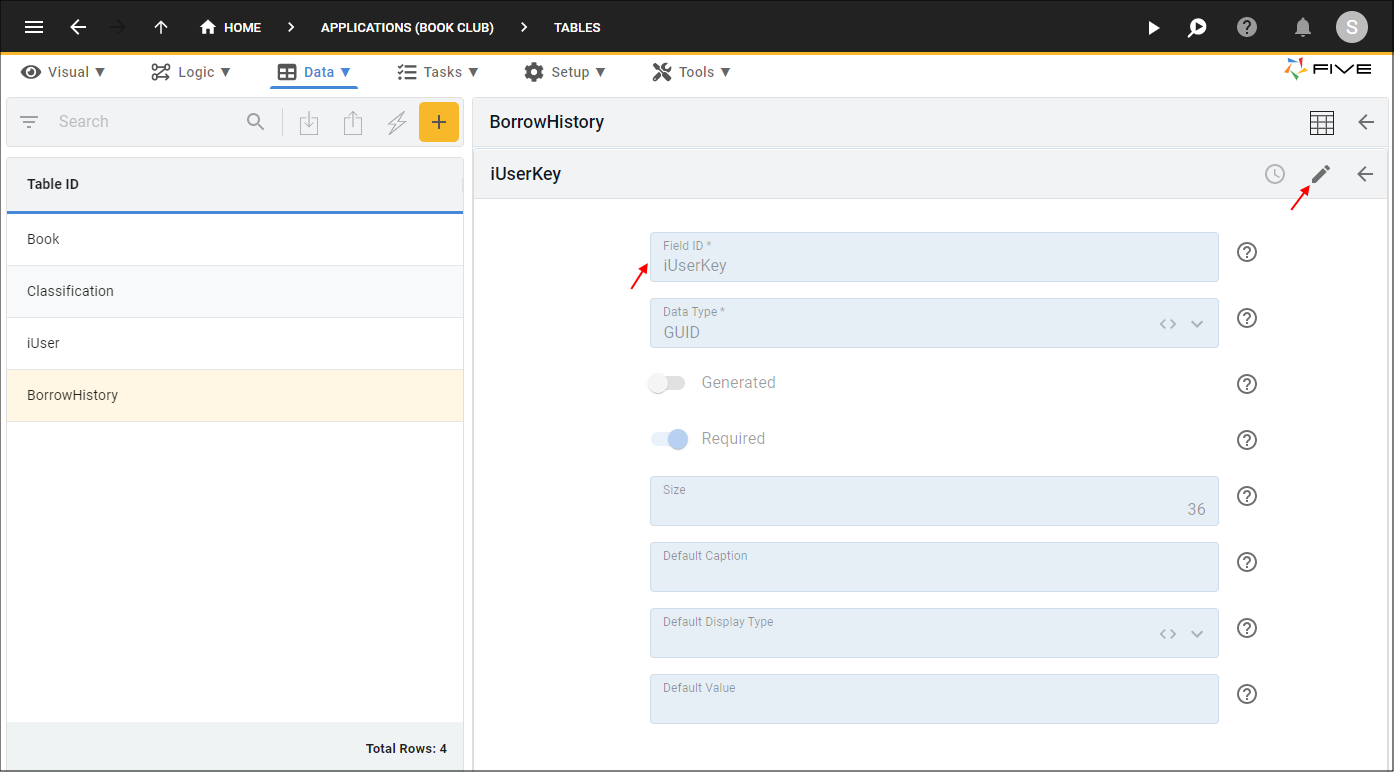
Figure 36 - iUserKey field record
5. Click the Cancel button in the Field ID field and type MemberKey.
6. Click the Save button in the form app bar.
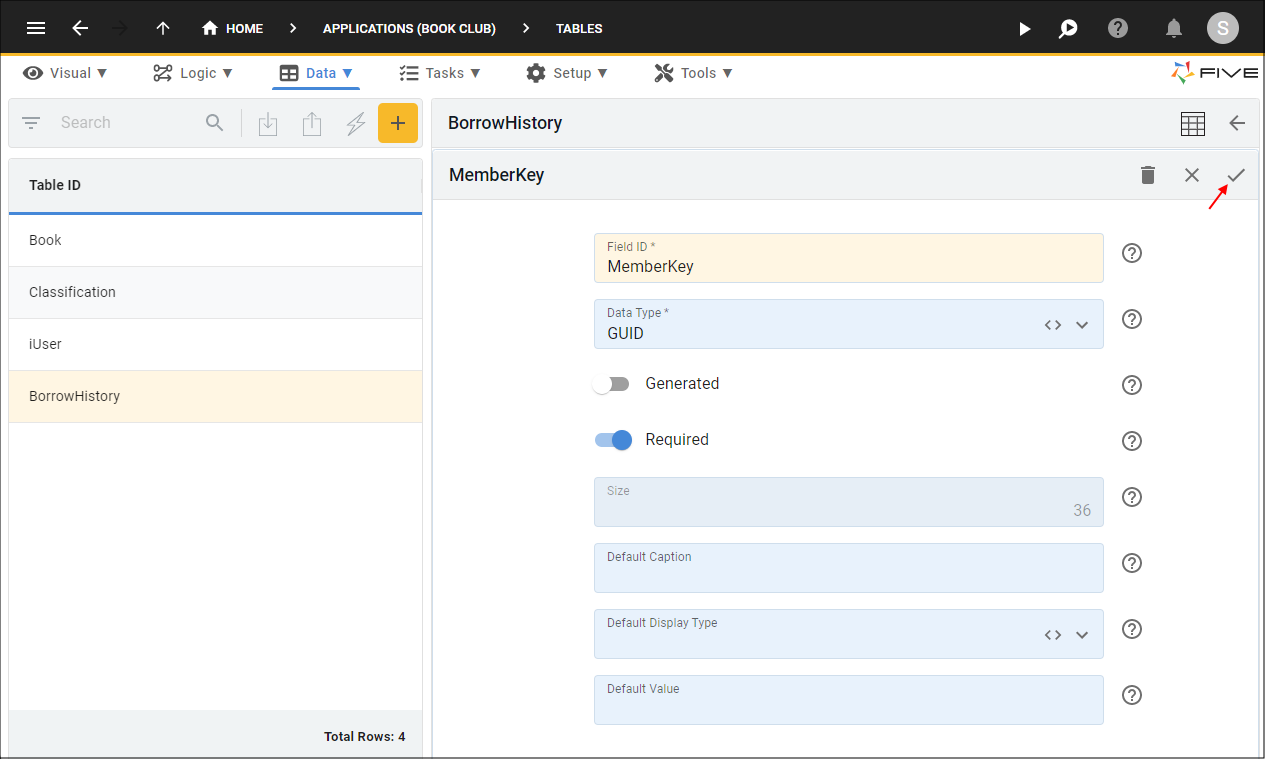
Figure 37 - Edit the field record
7. Click the Indices tab.
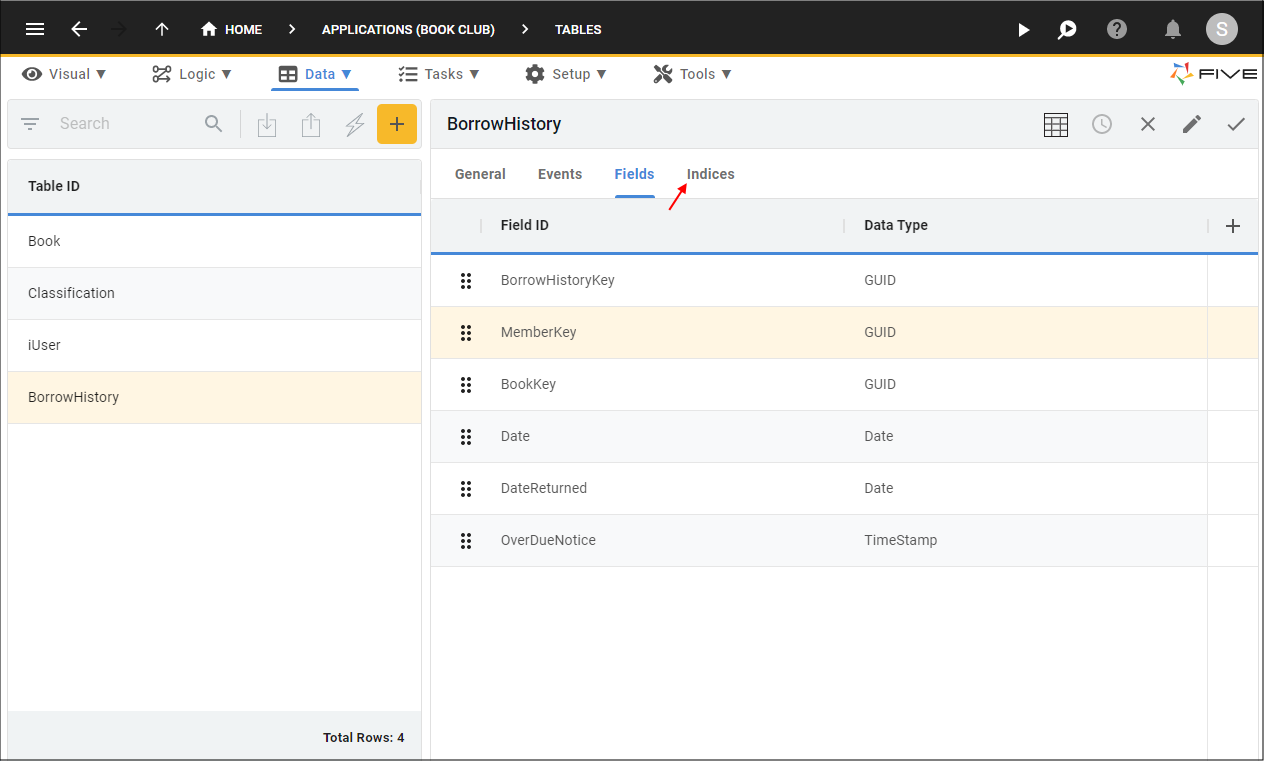
Figure 38 - Indices tab
8. Select the iUserKey record in the list.
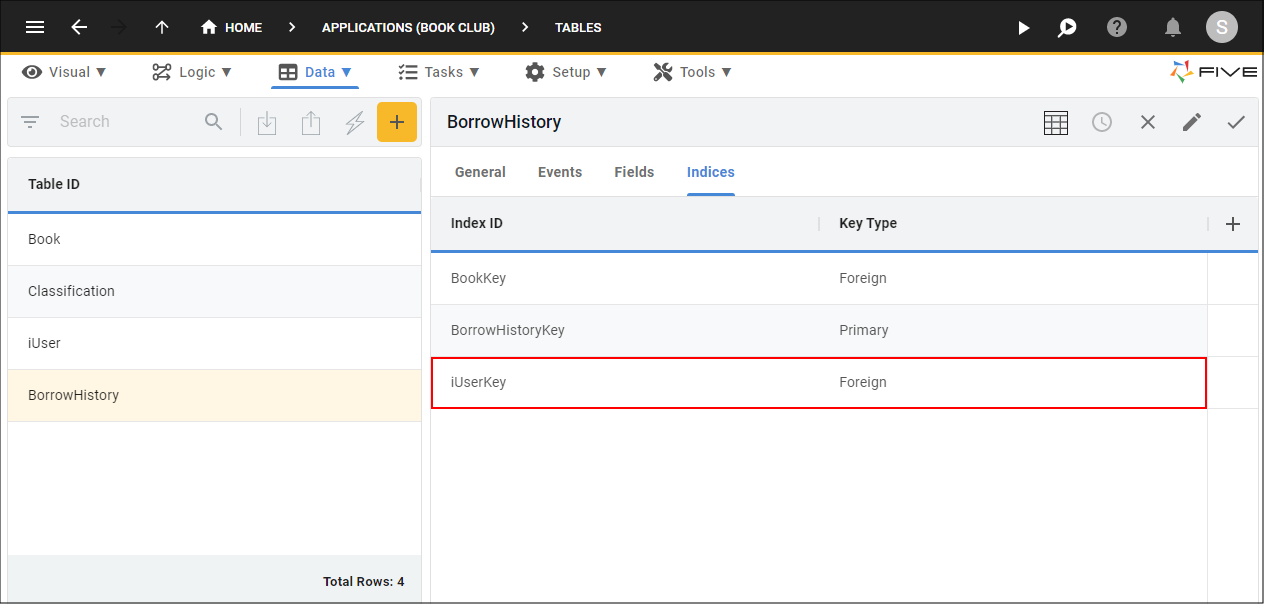
Figure 39 - iUserKey index record
9. Either click the Edit button in the form app bar, or click directly in the Index ID field.
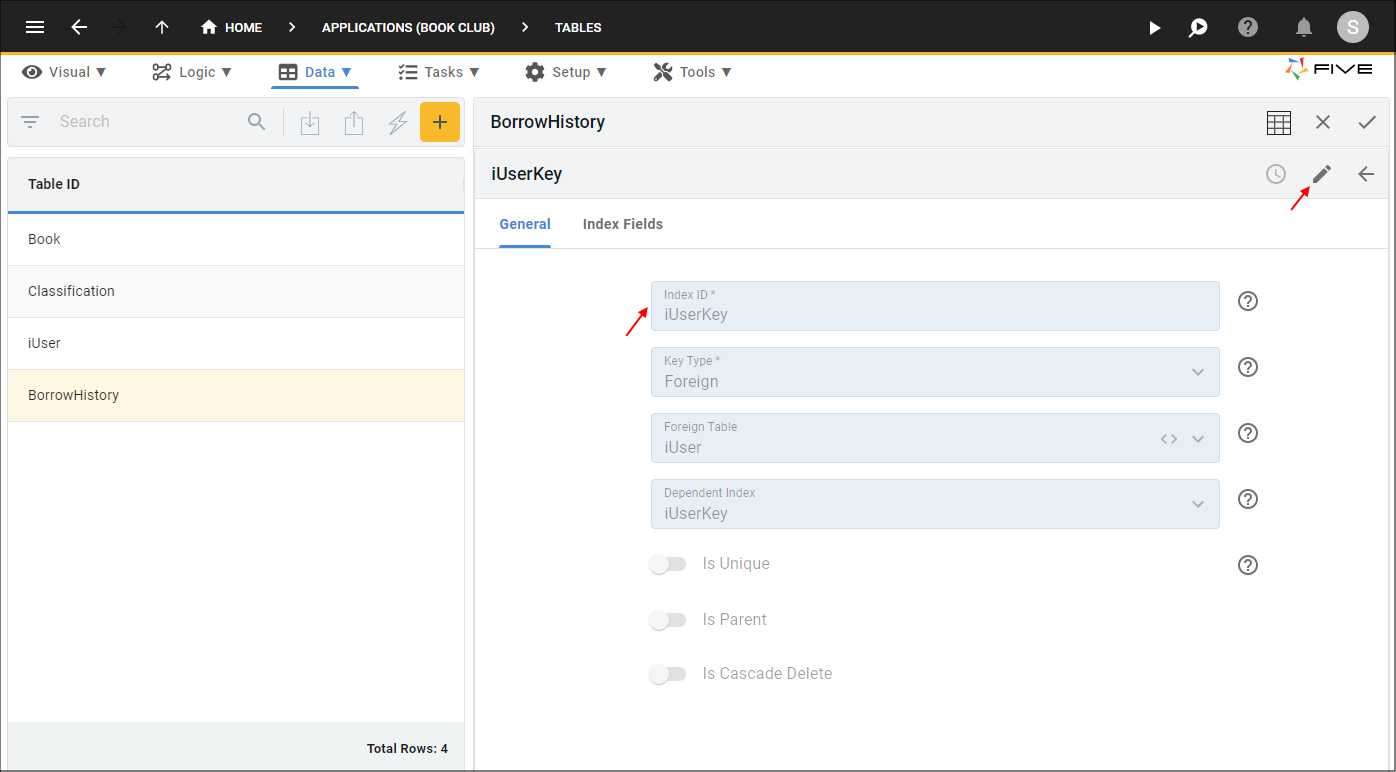
Figure 40 - Edit the iUserKey index record
10. Click the Cancel button in the Index ID field and type MemberKey.
11. Click the Save button in the form app bar.
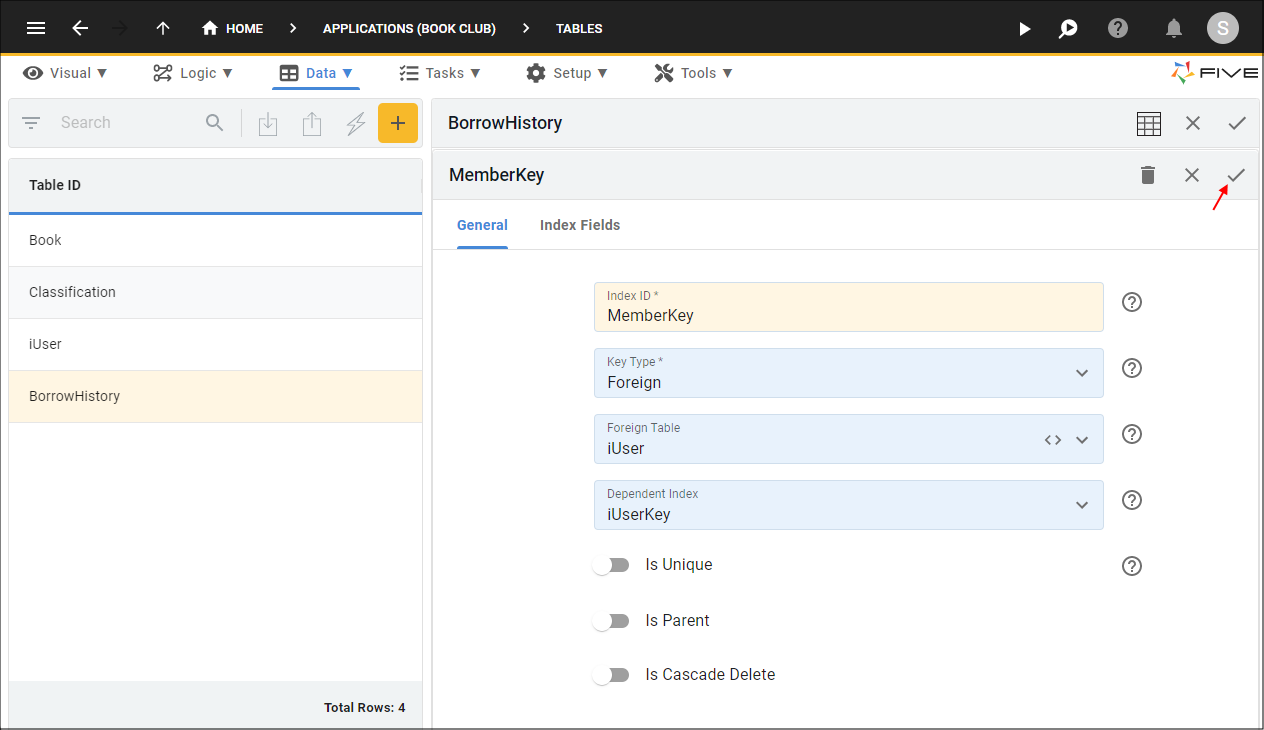
Figure 41 - Save the MemberKey index record
12. Click the Save button in the form app bar above the list.
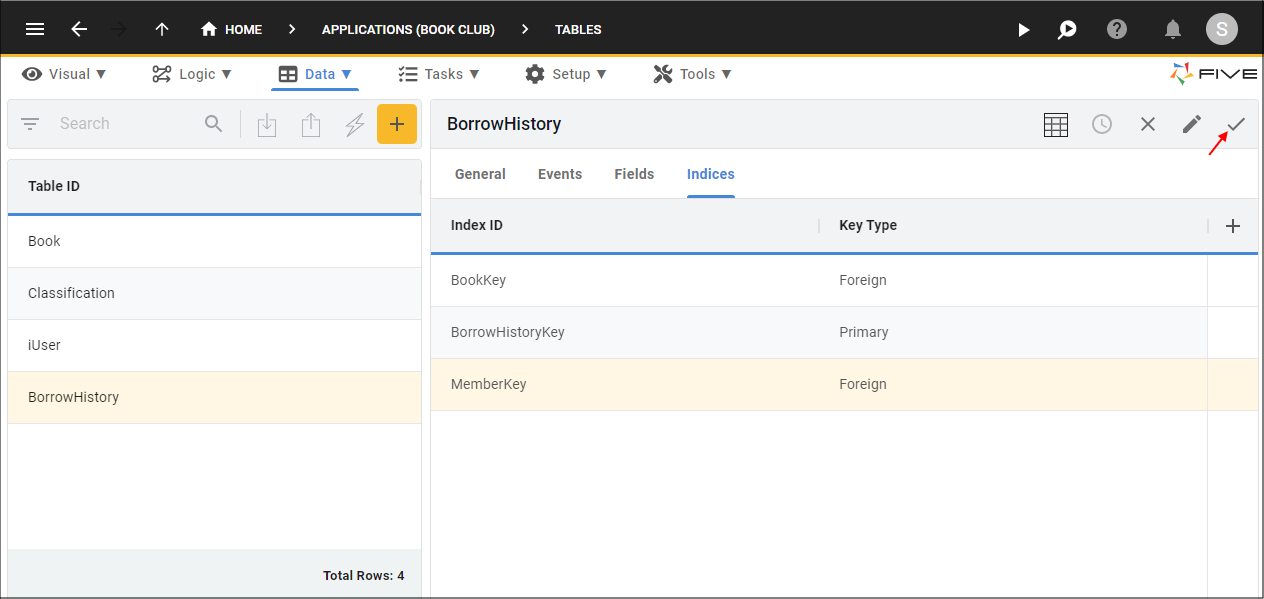
Figure 42 - Save the BorrowHistory table
Working with Five's iUser Table
The iUser table that Five injects into your multi-user application can be edited to suit your requirements.warning
It is strongly recommended not to delete any fields in the iUser table as the table has been configured so you can easily connect a user record to a role to filter what a user will see in your application.
At the form-level you can select to hide fields, this would be the recommended way to not show any fields that you do not want to display.
At the form-level you can select to hide fields, this would be the recommended way to not show any fields that you do not want to display.
We are going to add some fields to the iUser table so we can get the details of the Parcel Locker locations that a book will be available to pick up. We will edit the iUser table in Five's Database Modeler so you can see how tables work in the Database Modeler.
Navigate to the Database Modeler
1. Select Data in the menu.2. Select Database Modeler in the sub-menu.
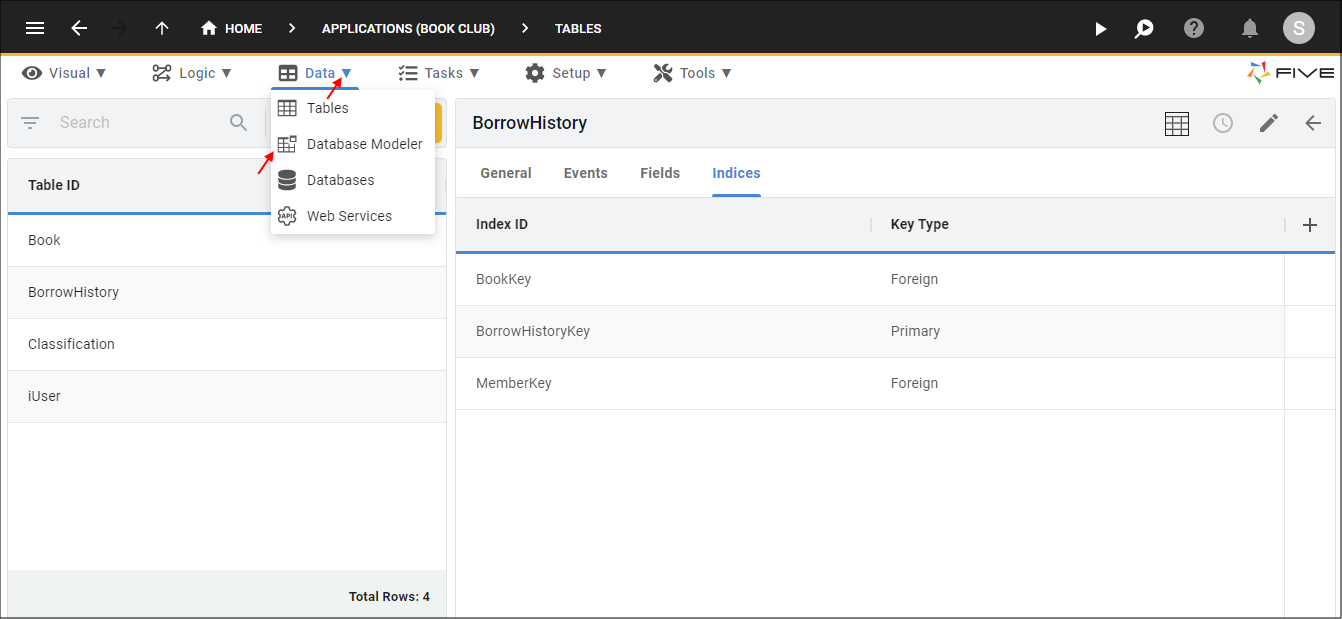
Figure 43 - Database Modeler menu item
info
All the tables that we have already saved in Five are here in the Database Modeler and you can visually see the relationships between the tables. Using your mouse, the tables can be repositioned and resized. New tables can be added and existing tables can be edited or deleted.
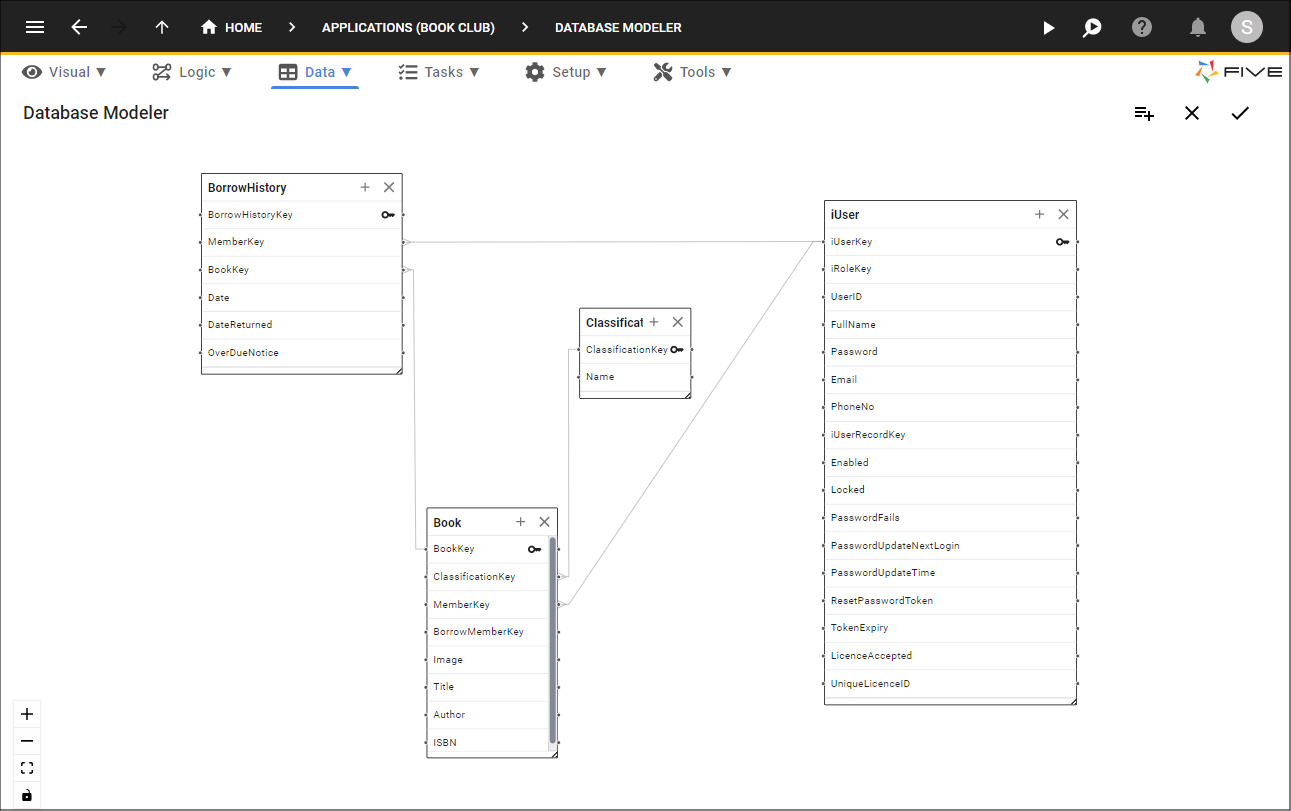
Figure 44 - Database Modeler
Edit the iUser Table
1. Click the Add Fields button for the iUser table.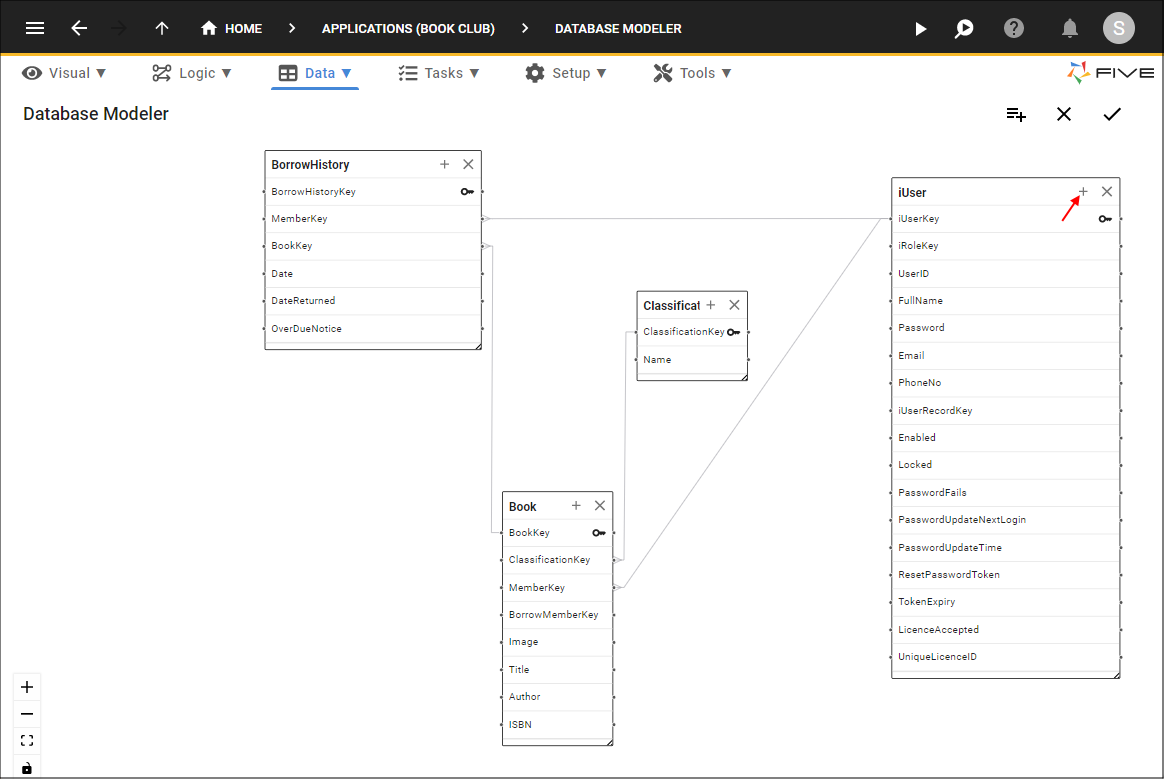
Figure 45 - Add Fields button
2. Type AddressLine1 in the Field ID field.
3. Click the lookup icon in the Data Type field and select Text.
4. Click the Required switch.
5. Click the Cancel button in the Size field and type 100.
6. Click the lookup icon in the Default Display Type field and select _Text.
7. Click the Done button.
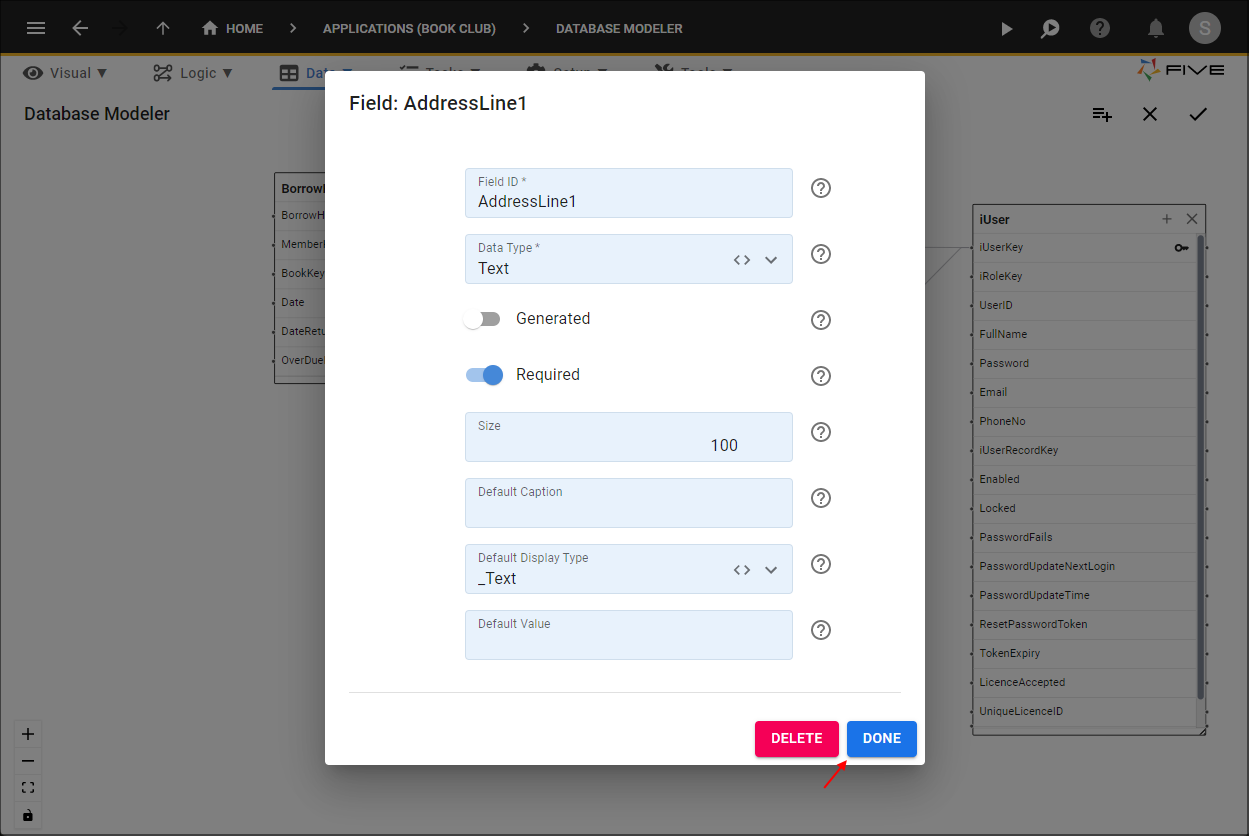
Figure 46 - Add the AddressLine1 field
info
Each time you add a new field you will see it listed in the table.
8. Click the Add Fields button.
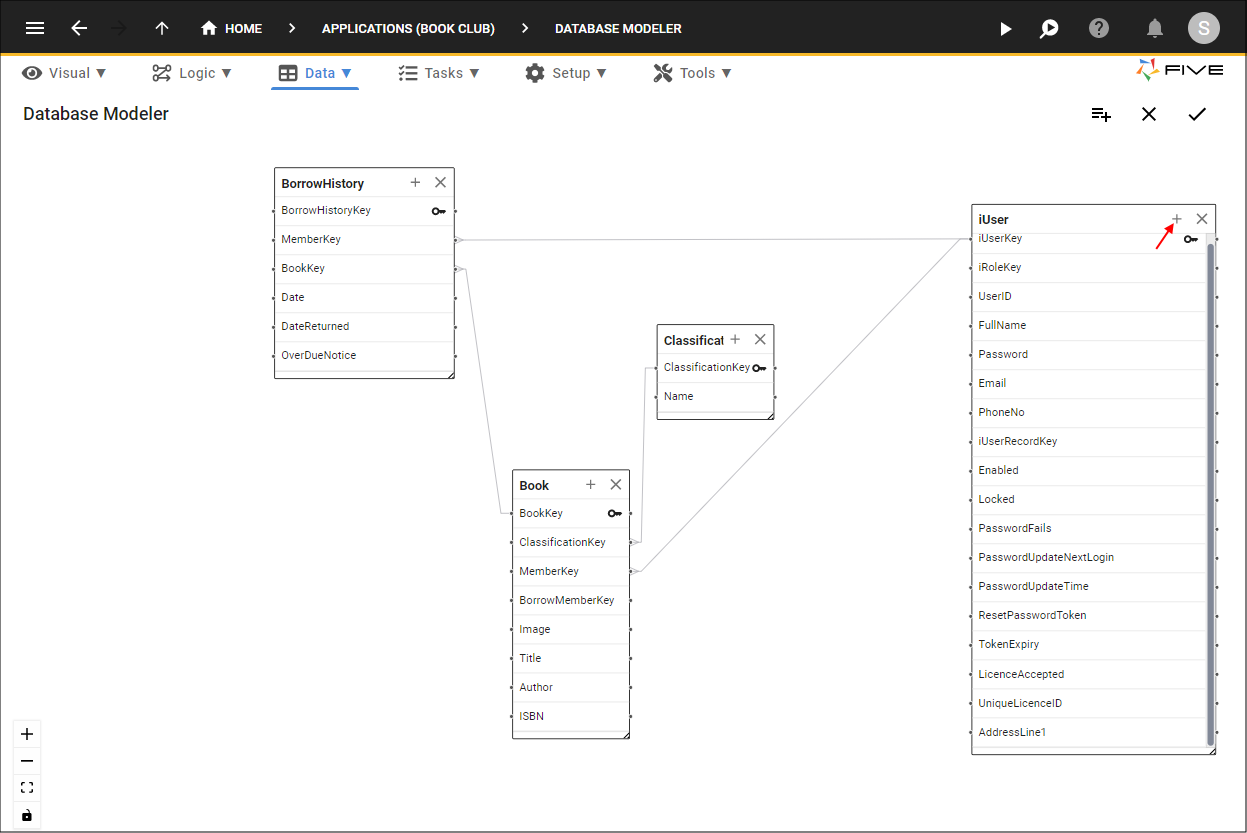
Figure 47 - Add Fields button
9. Type AddressLine2 in the Field ID field.
10. Click the lookup icon in the Data Type field and select Text.
11. Click the Cancel button in the Size field and type 100.
12. Click the lookup icon in the Default Display Type field and select _Text.
13. Click the Done button.
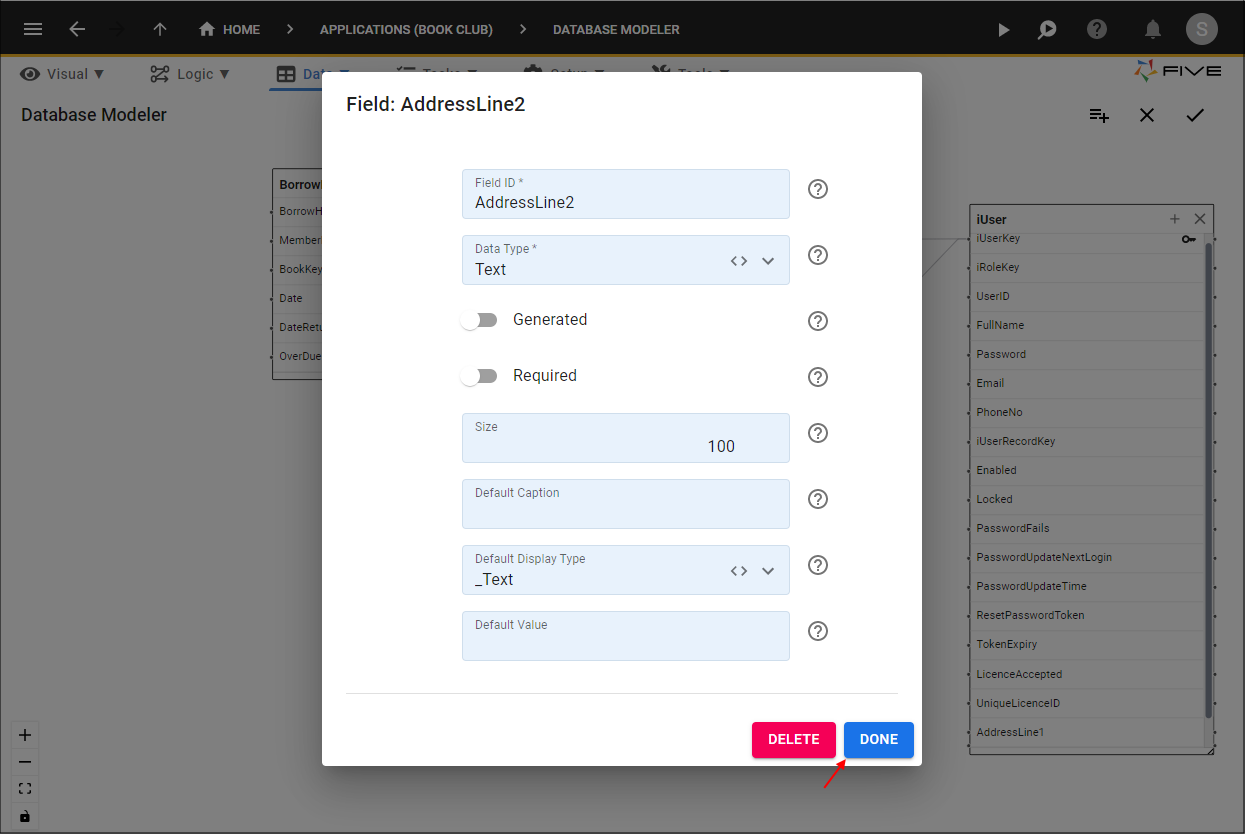
Figure 48 - Add the AddressLine2 field
14. Click the Add Fields button.
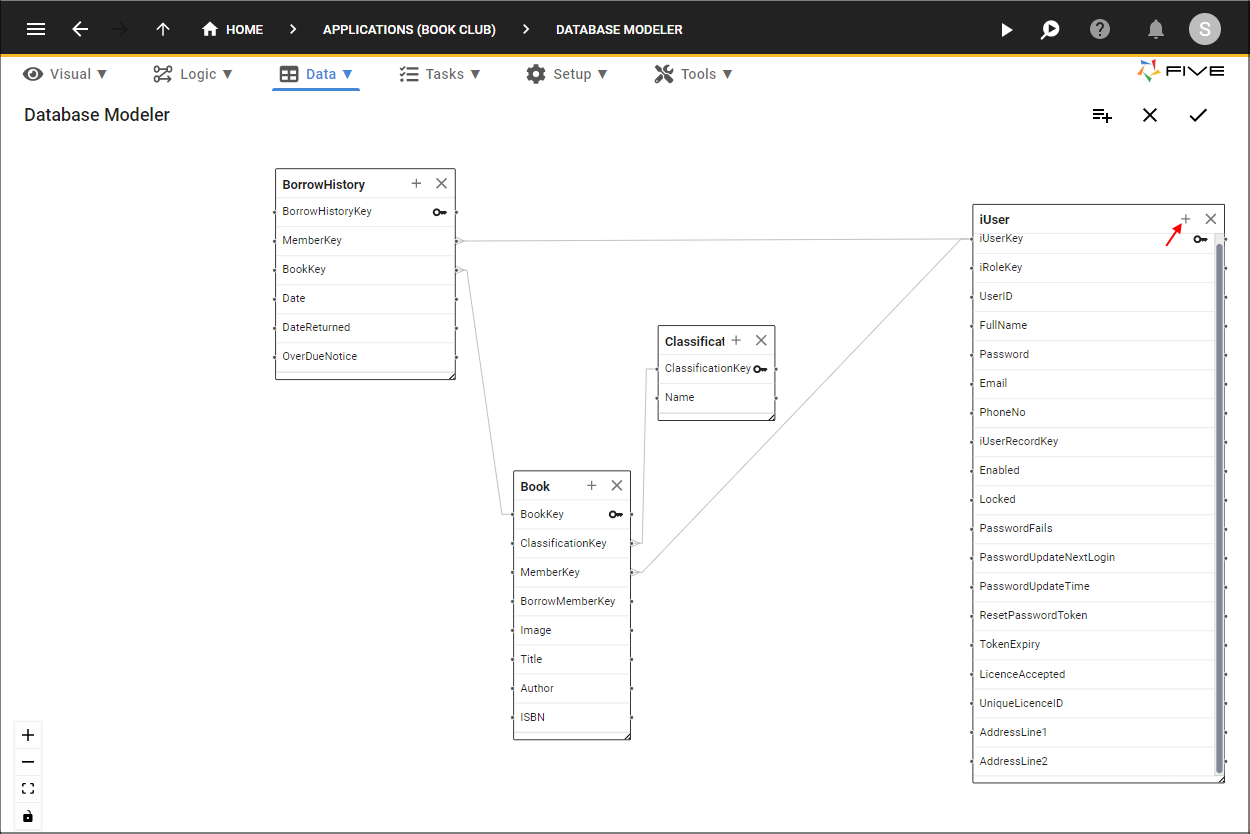
Figure 49 - Add Fields button
15. Type Suburb in the Field ID field.
16. Click the lookup icon in the Data Type field and select Text.
17. Click the Required switch.
18. Click the Cancel button in the Size field and type 50.
19. Click the lookup icon in the Default Display Type field and select _Text.
20. Click the Done button.
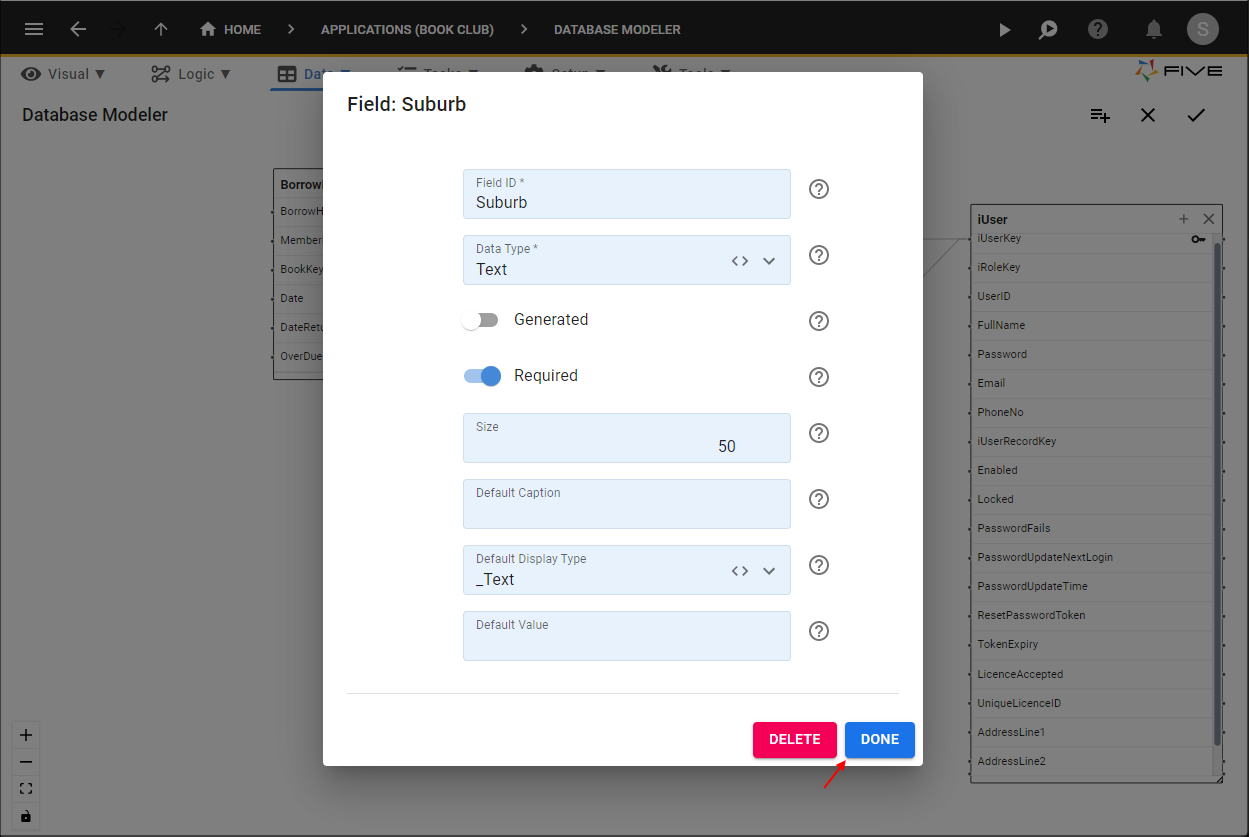
Figure 50 - Add the Suburb field
21. Click the Add Fields button.
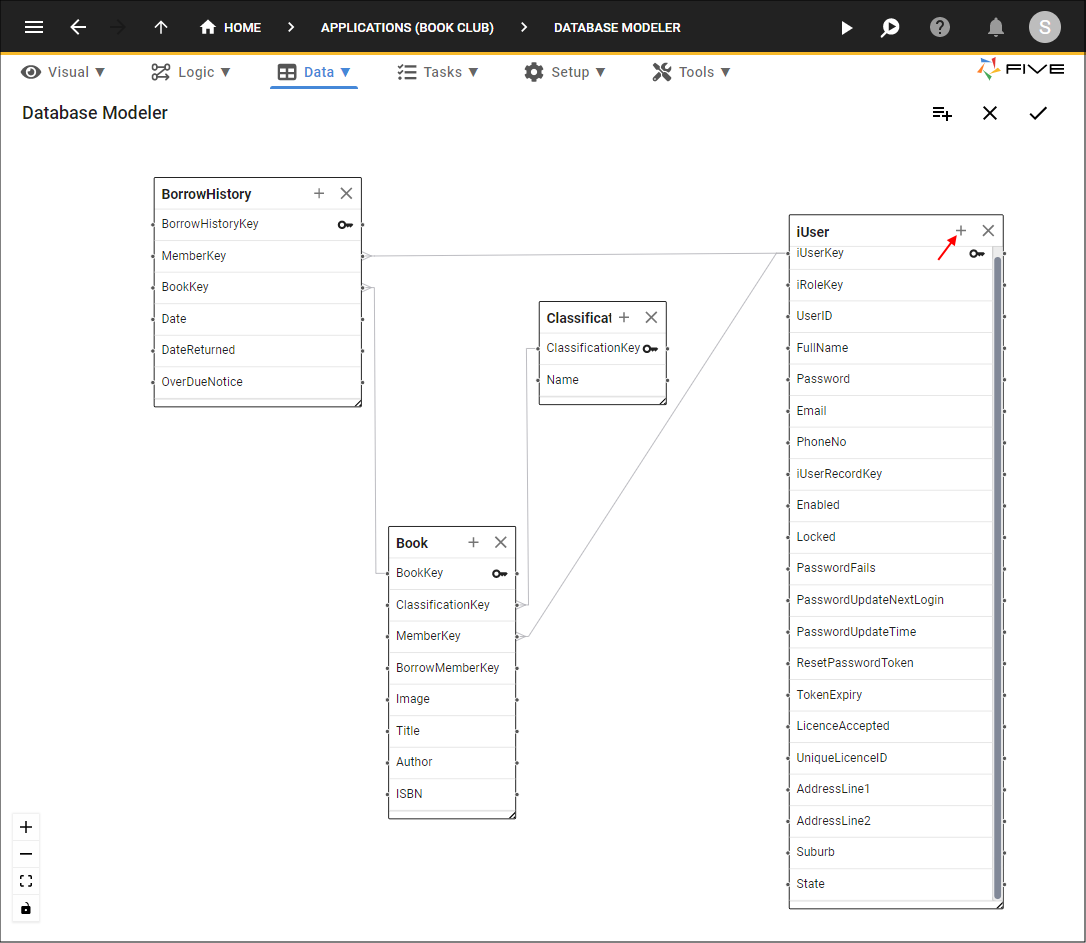
Figure 51 - Add Fields button
22. Type State in the Field ID field.
23. Click the lookup icon in the Data Type field and select Text.
24. Click the Required switch.
25. Click the Cancel button in the Size field and type 50.
26. Click the lookup icon in the Default Display Type field and select _Text
27. Click the Done button.

Figure 52 - Add the State field
28. Click the Add Fields button.
Figure 53 - Add Fields button
29. Type PostCode in the Field ID field.
30. Click the lookup icon in the Data Type field and select Integer.
31. Click the Required switch.
32. Click the lookup icon in the Default Display Type field and select _Integer
33. Click the Done button.
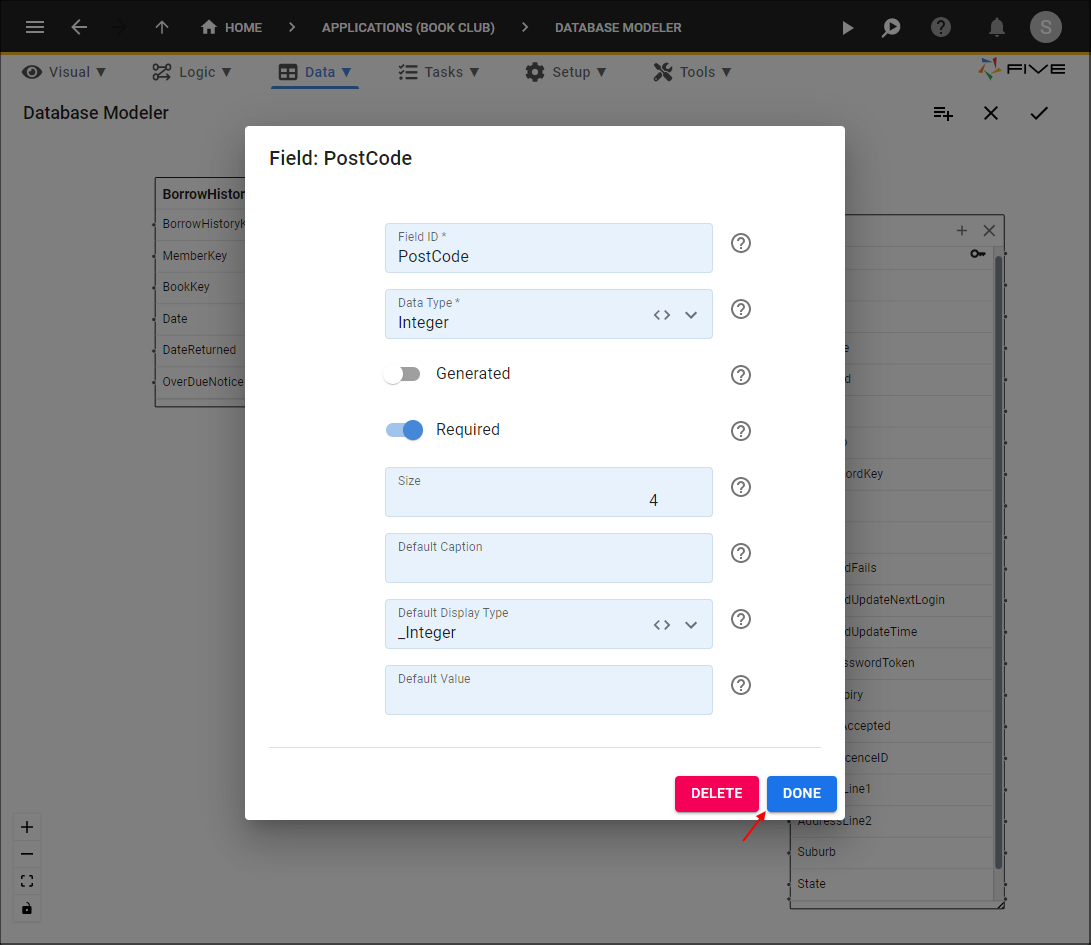
Figure 54 - Add the PostCode field
34. Click the Save button in the Database Modeler.
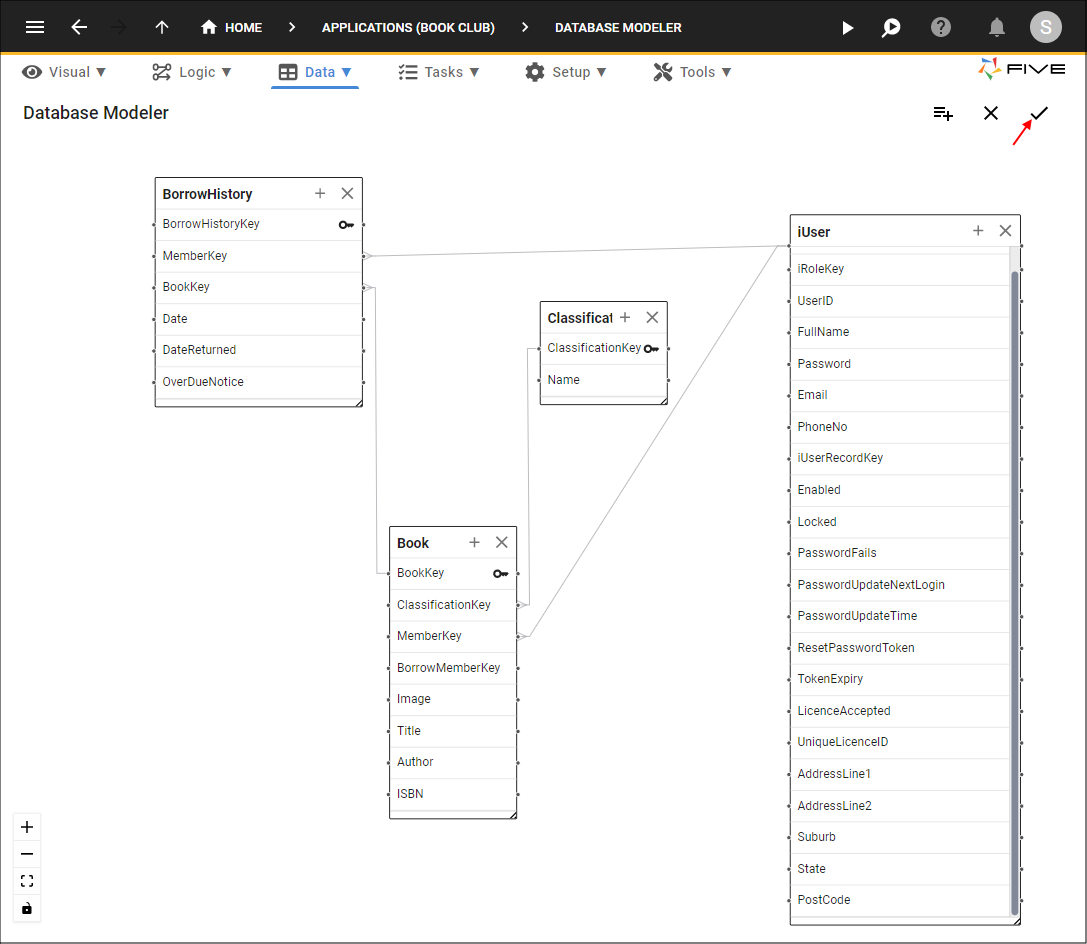
Figure 55 - Save all changes in the Database Modeler
info
At this point, you will receive the Table Upgrade dialog window. This is to let Five know how to fill the new fields for any records already saved in the database. You have four options:
- Value - Enter a value in the field.
- Field - Select a field on the current table.
- Query - Write a query to populate the field.
- Empty - No value.
Upgrade the iUser Table
1. Type 0 in the field for the fields: AddressLine1, AddressLine2, Suburb, State, and PostCode.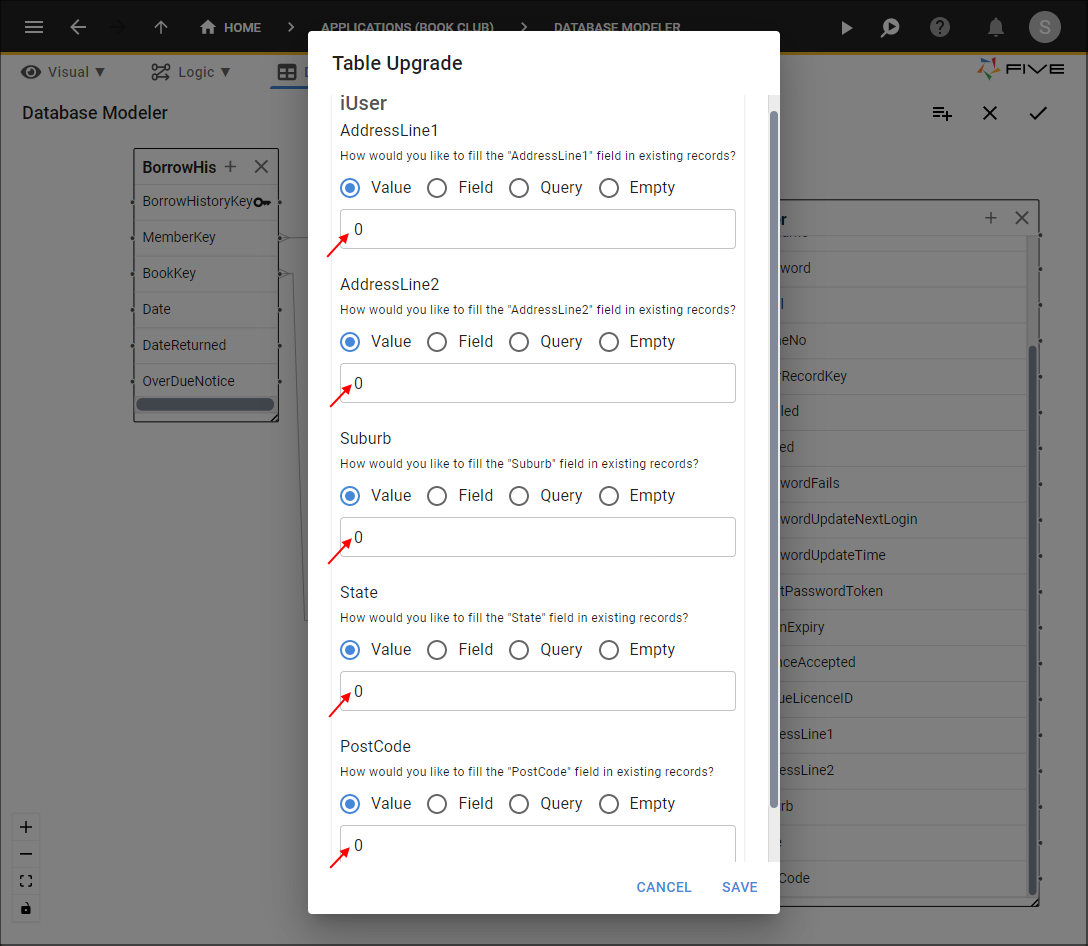
Figure 56 - Table Upgrade dialog window
2. Click the Save button.
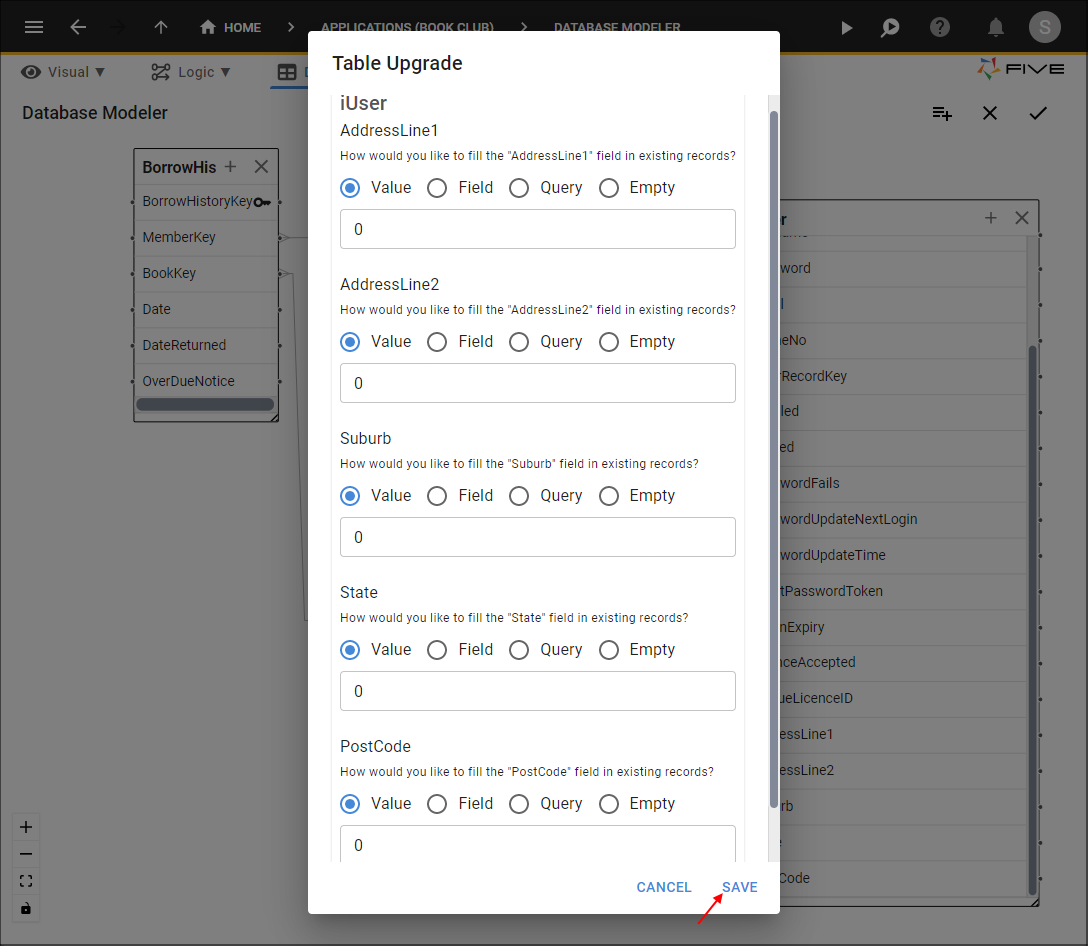
Figure 57 - Save the table upgrade changes.
tip
If you add a new table in the Database Modeler, ensure to click the Save button for the entire Database Modeler!