Add a Query
Last updated 13/03/2026
Adding a Query Using the Query Builder
This chapter introduces the basic fundamentals of creating a query using the Query Builder. The steps demonstrate the core elements involved in building a query, including adding tables, selecting fields to return in the result set, and organizing the query structure within the editor.
Understanding these basic concepts will help you quickly build queries using the visual editor, while also providing a starting point for refining the generated SQL in the SQL editor when more advanced logic is required.
Step 1: Add the Query
Click the Add Item button and give your query an ID in the Data Source ID field.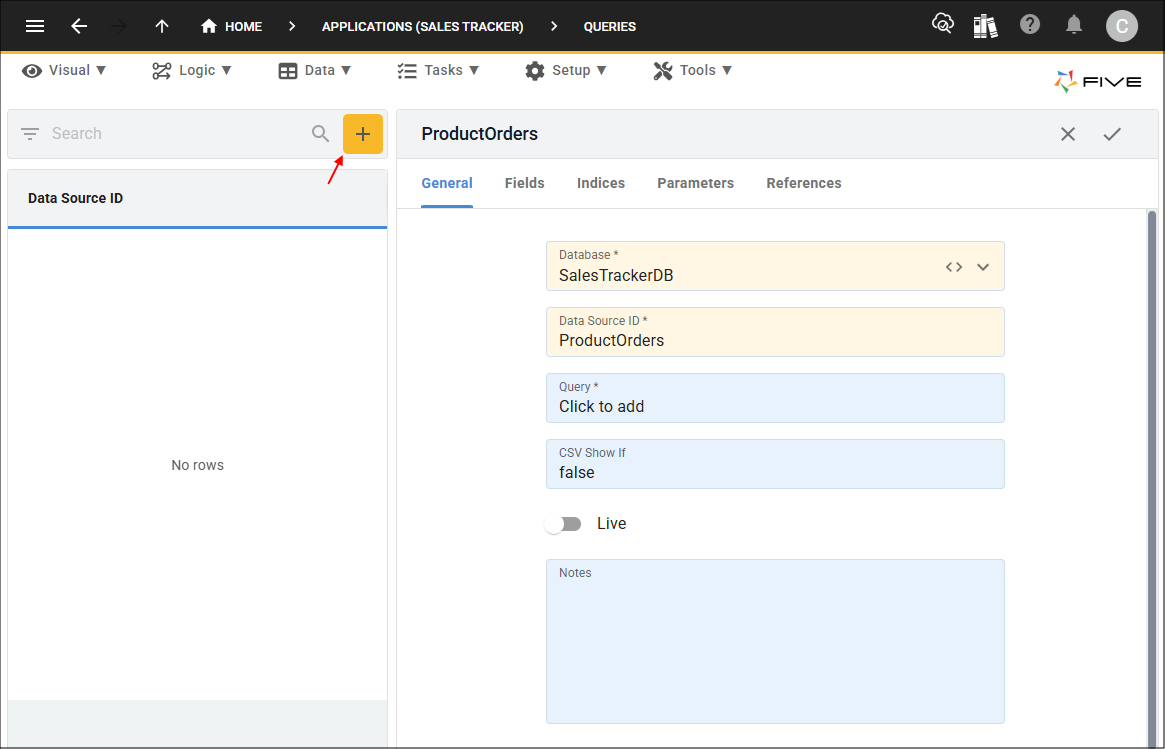
Figure 1 - Add query
Step 2: Open the Query Builder
Click in the Query field to open the editor.- This will open the two-way editor and by default you will be on the Query Builder side
- The SQL tab in the Query Builder will take you to the SQL editor
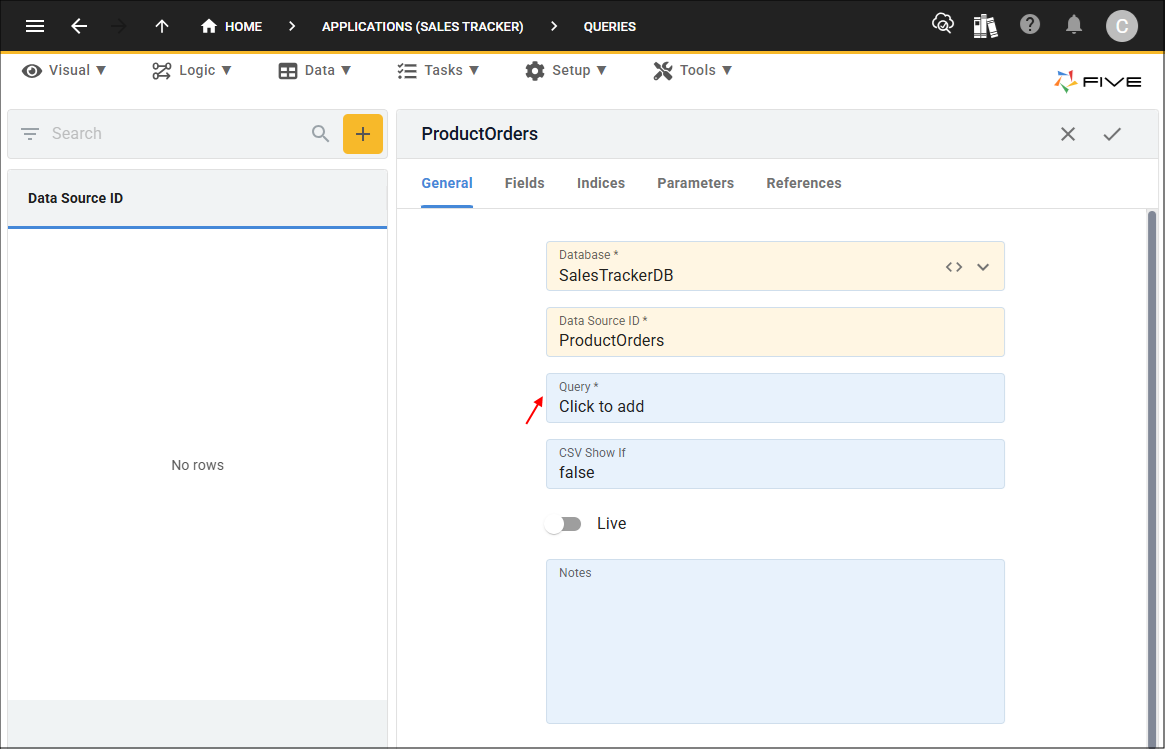
Figure 2 - Query field
Step 3: Add Tables
Click the Add Table button and select a table.- Continue to select the tables you need
- Tables will appear as draggable boxes in the editor
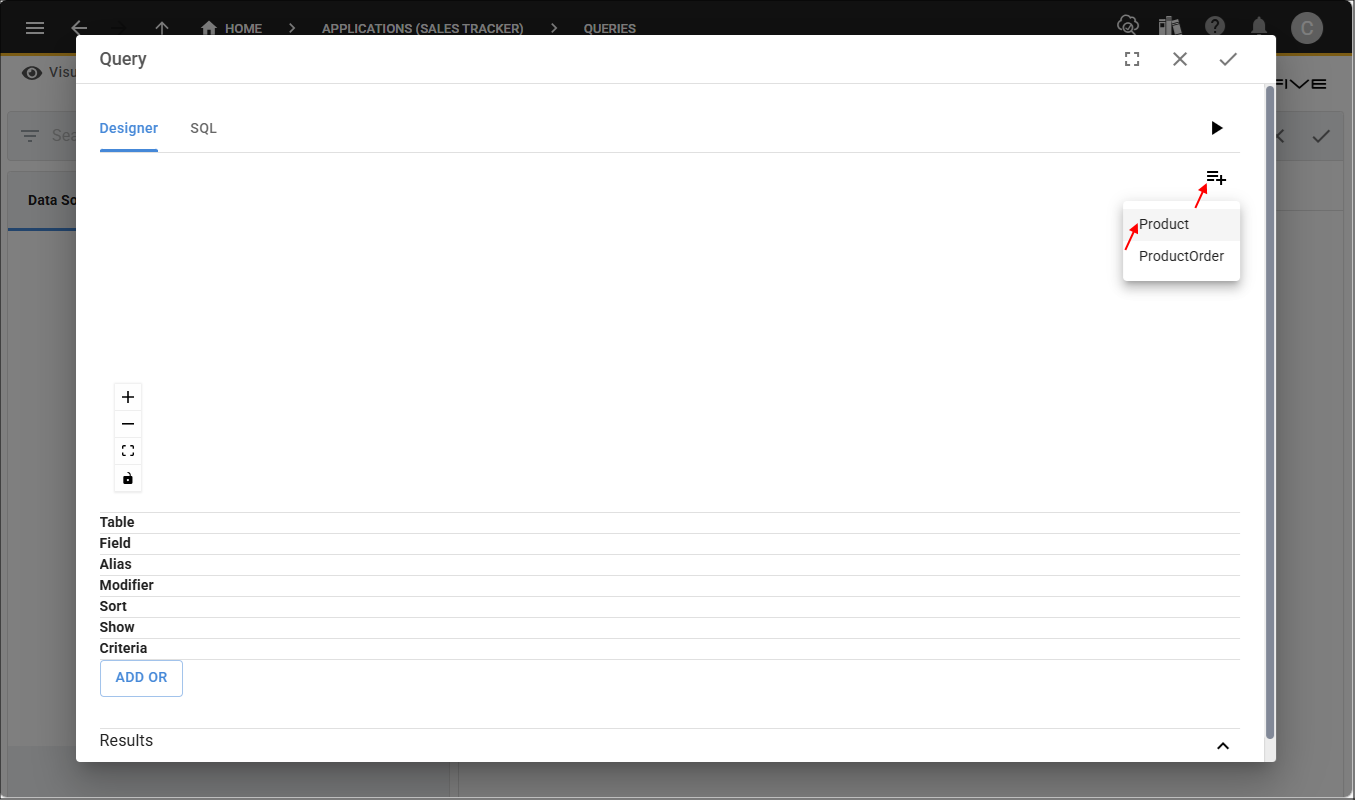
Figure 3 - Select table
Step 4: Arrange Tables
- Drag and reposition tables to organize them logically
- Zoom in/out to get a better view of multiple tables
- Resize tables by dragging the bottom-right corner
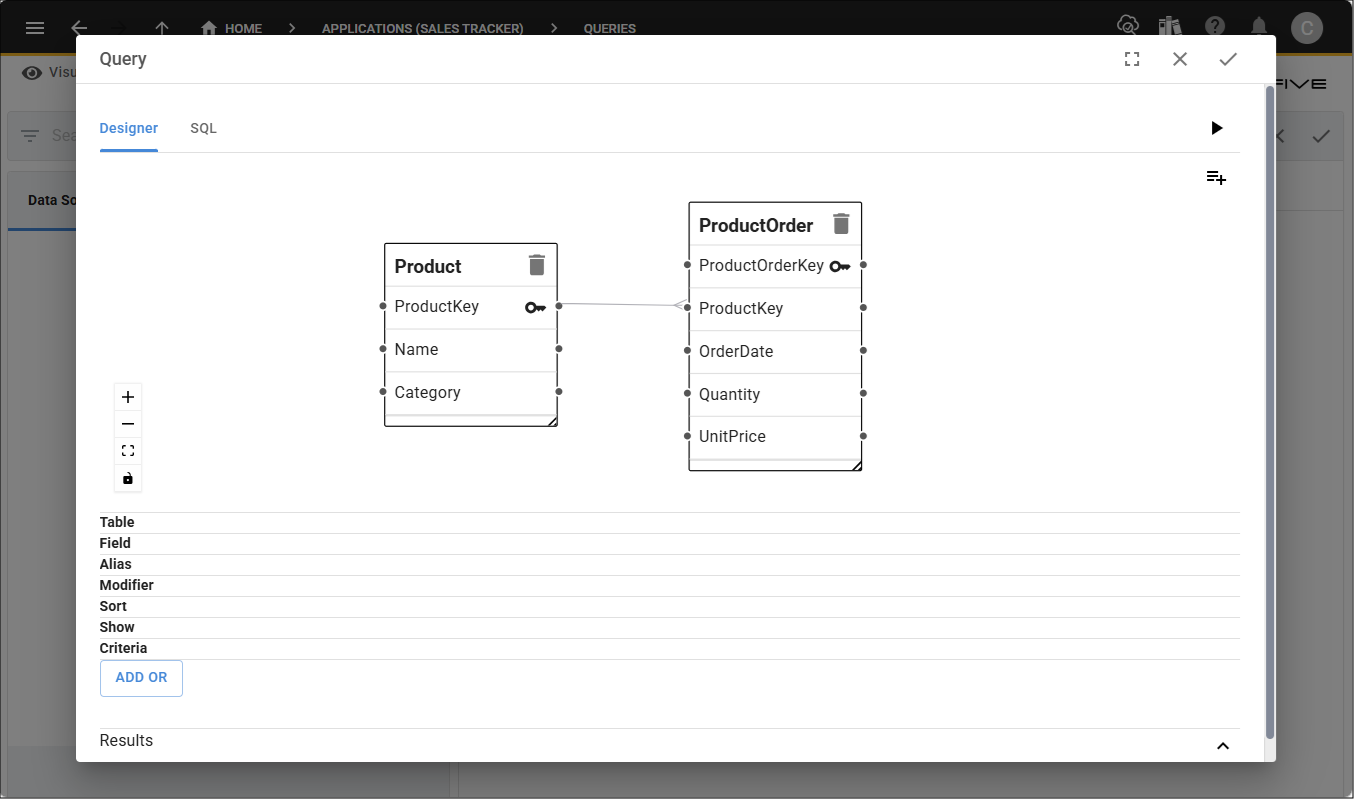
Figure 4 - Arrange tables
Step 5: Select Fields
Double click on the fields you want from each table.- Selected fields will appear in the editor
- Repeat for all the fields you need from your tables
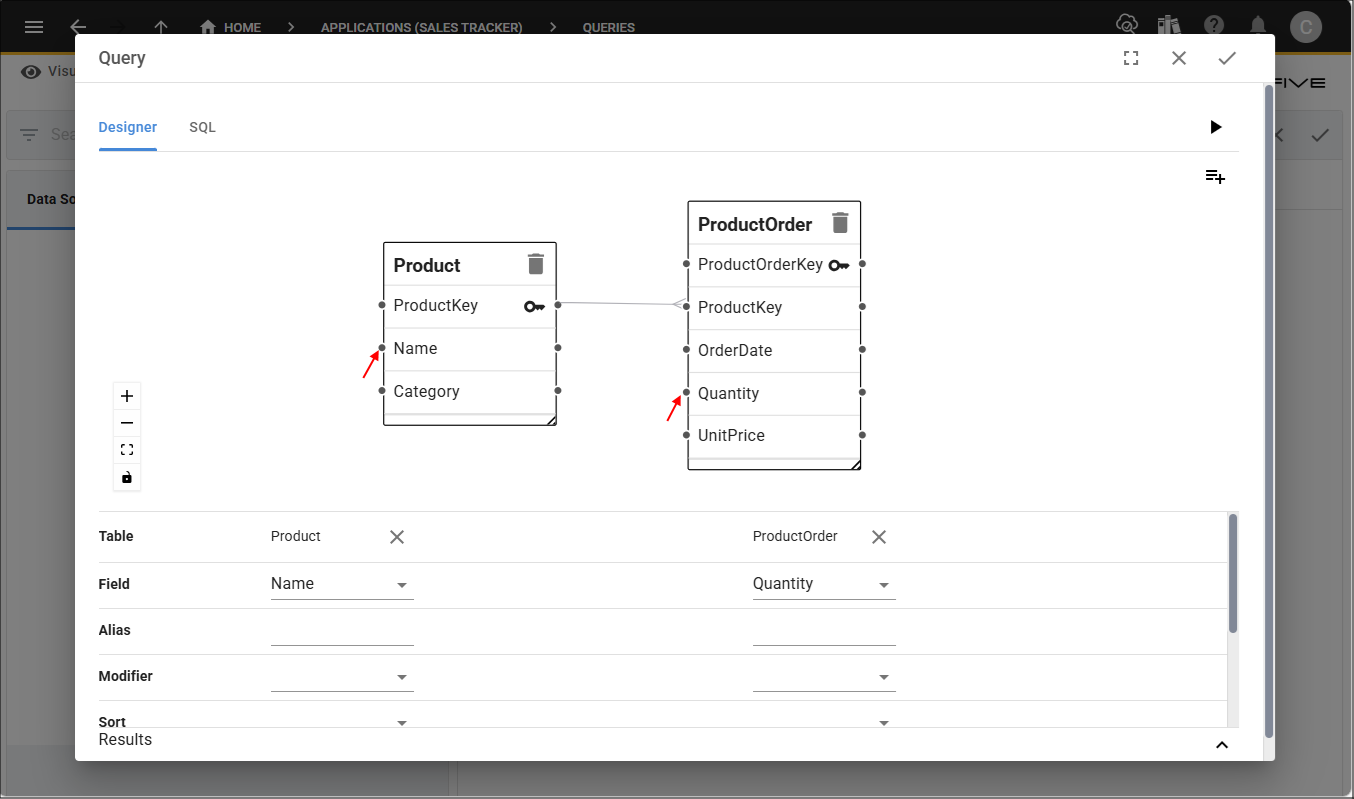
Figure 5 - Select fields
Step 6: Add Aliases (Optional)
Type an alias in the Alias field.- Adding aliases will remove the defaulted table name at the front of the field name
- For example, instead of Product.Name as the field name, with the alias, Name will be the field name
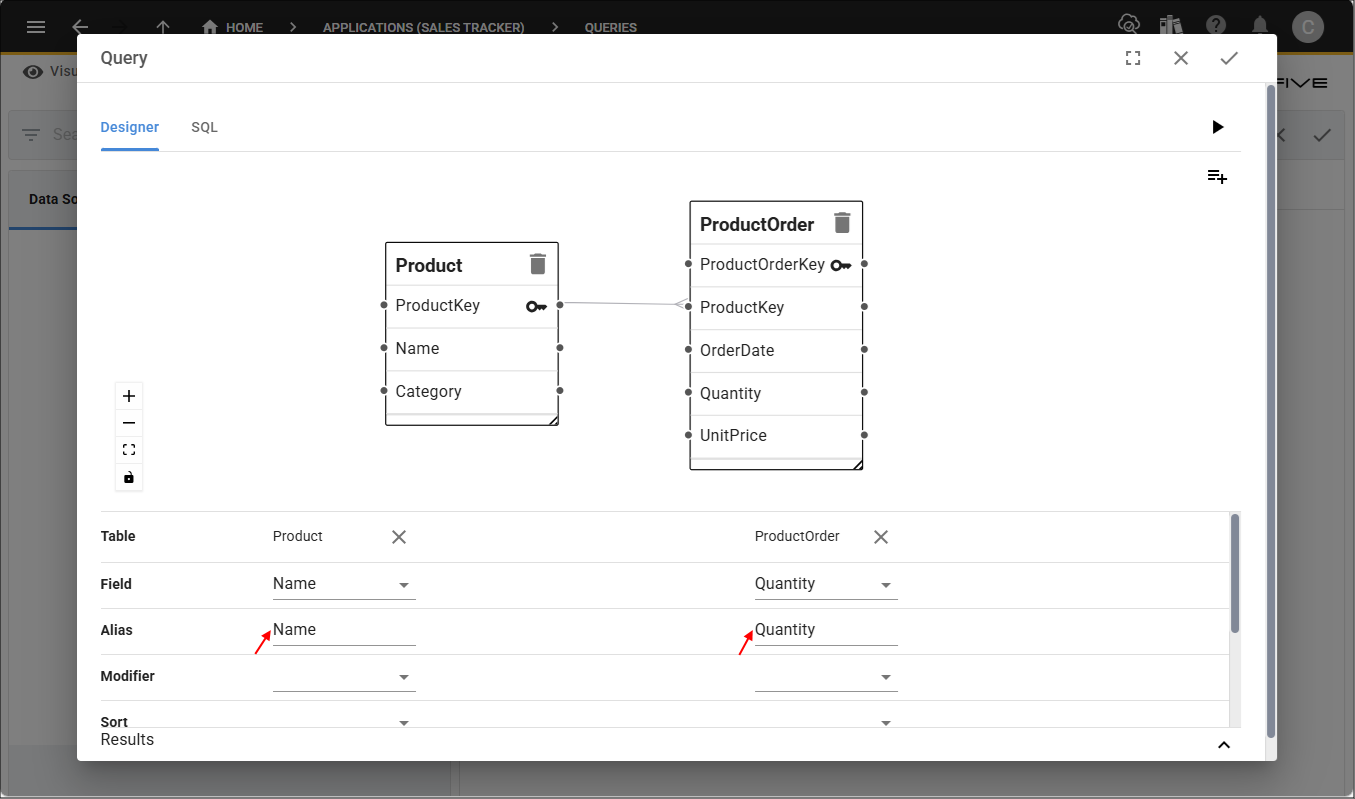
Figure 6 - Add aliases
Step 7: Apply Modifiers (Optional)
Select an inbuilt modifier for a field in the Modifier field.- These are optional tools you can apply to fields like SUM,COUNTetc
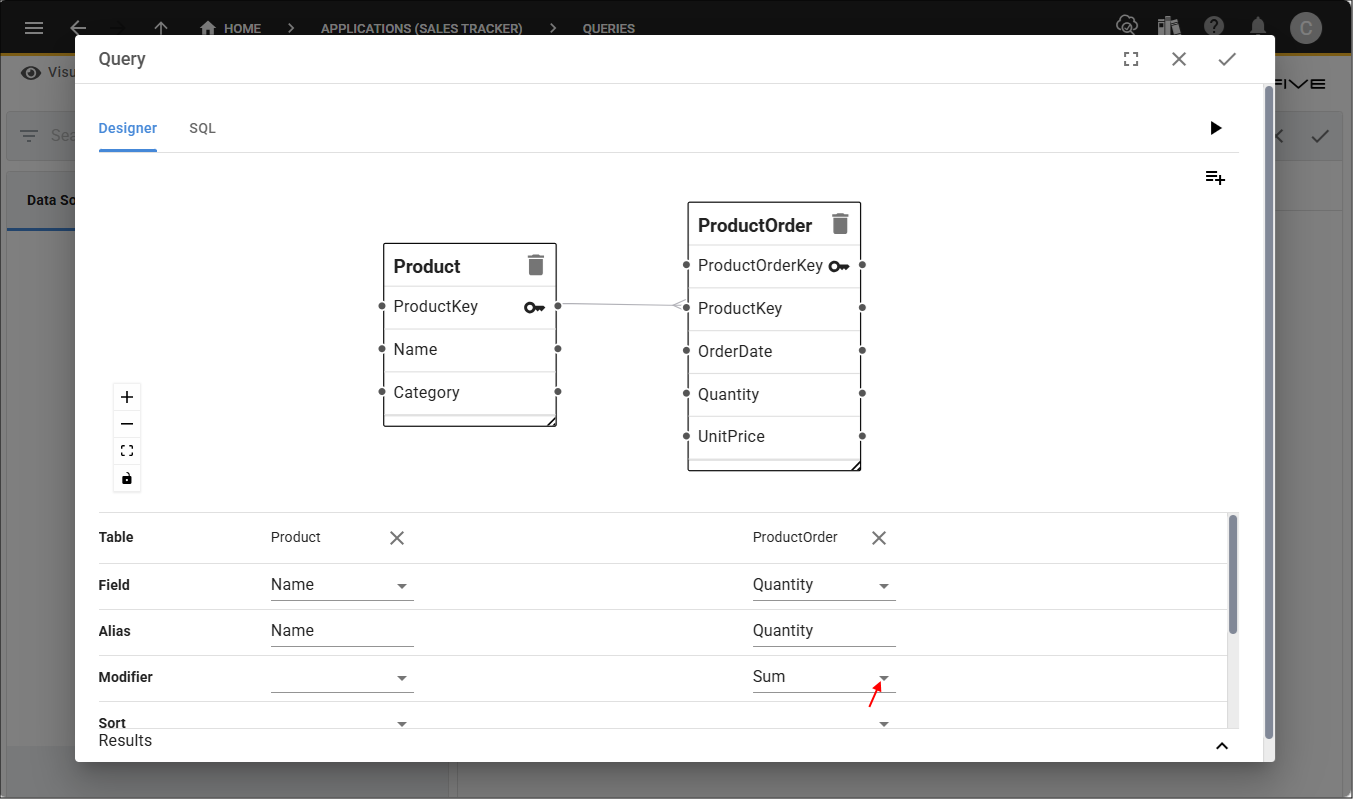
Figure 7 - Add modifier
Step 8: Apply Criteria (Optional)
This example is showing a constant parameter. The wildcard
?
can be used as a placeholder for a value,
when the =
operator is used before it. For example =?
, indicates that the expression expects a parameter rather than a fixed value. This type of parameter needs a unique ID, a type (default is Expression), and the parameter value. When you reference
a query parameter inside the Query Builder, you wrap the parameter name in double curly braces {{ }}
. This tells Five to replace the placeholder with the value
entered by the user at runtime. For the placeholder to work, the parameter must be defined on the Parameters page using Five's API.
tip
Refer to the properties on the Five object to help you define your parameters.
Type a condition in the Criteria field.
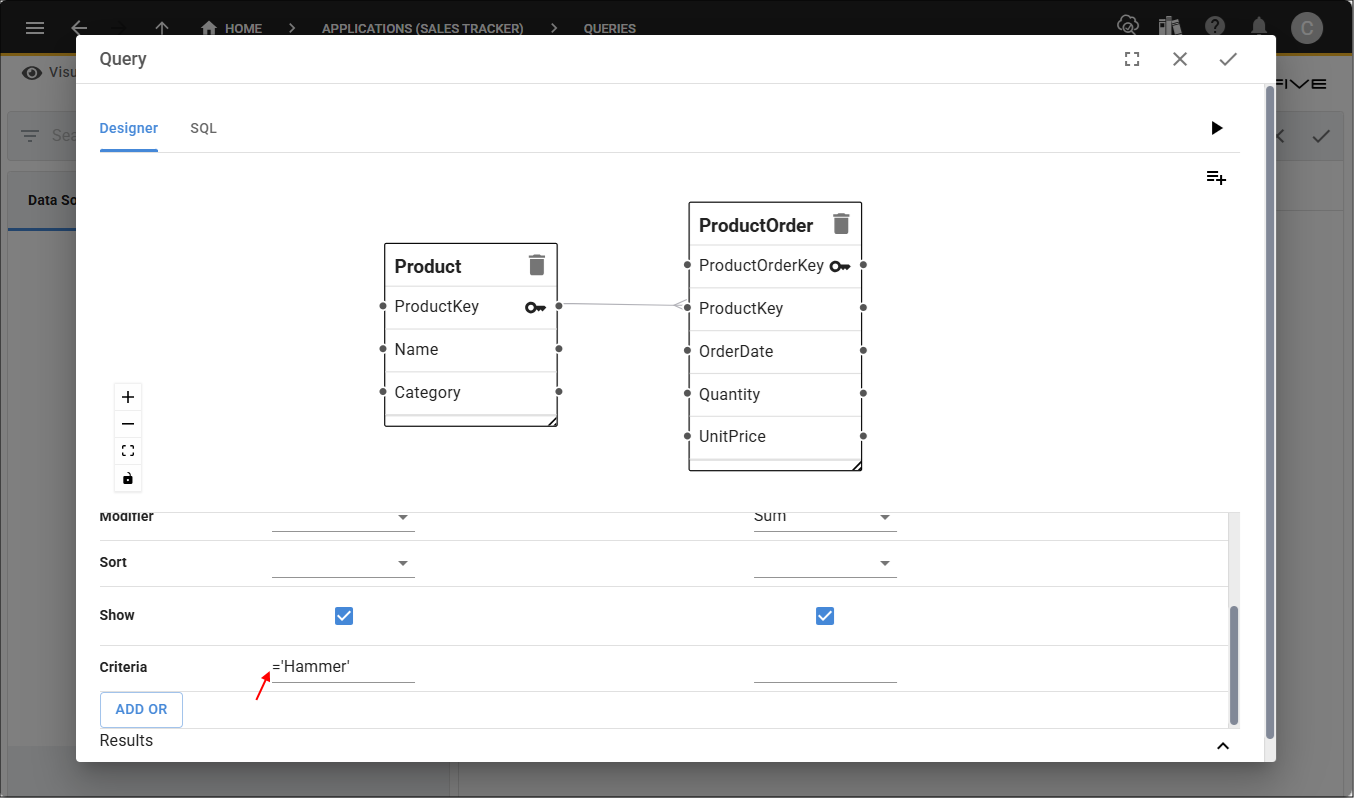
Figure 8 - Add criteria
Step 9: Run and Review
Click the Run button in the editor and review your results.- Results will be displayed in the editor
- Click the Hide Results button in the top right corner of your results to return back to your fields
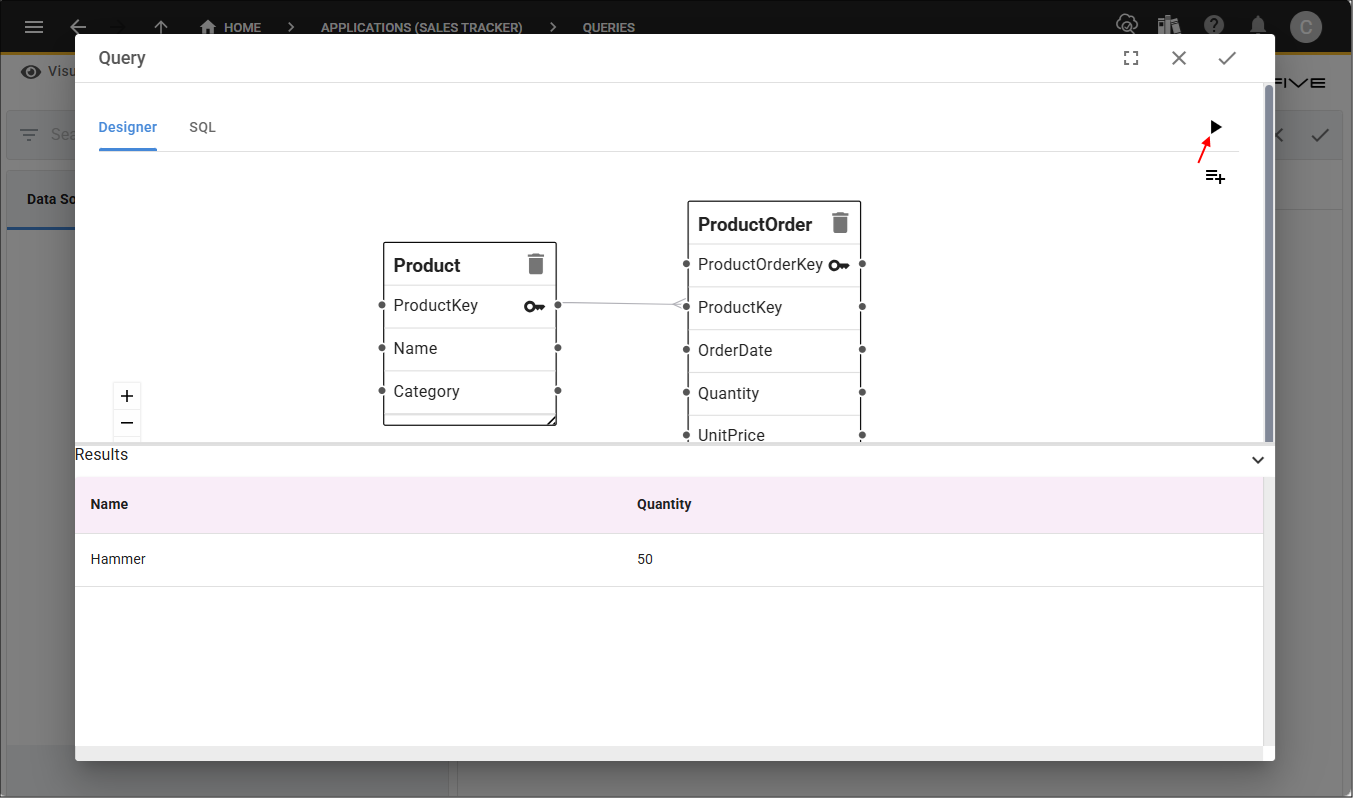
Figure 9 - Run button
Step 10: Save Your Query
Click the Save button in the editor app bar.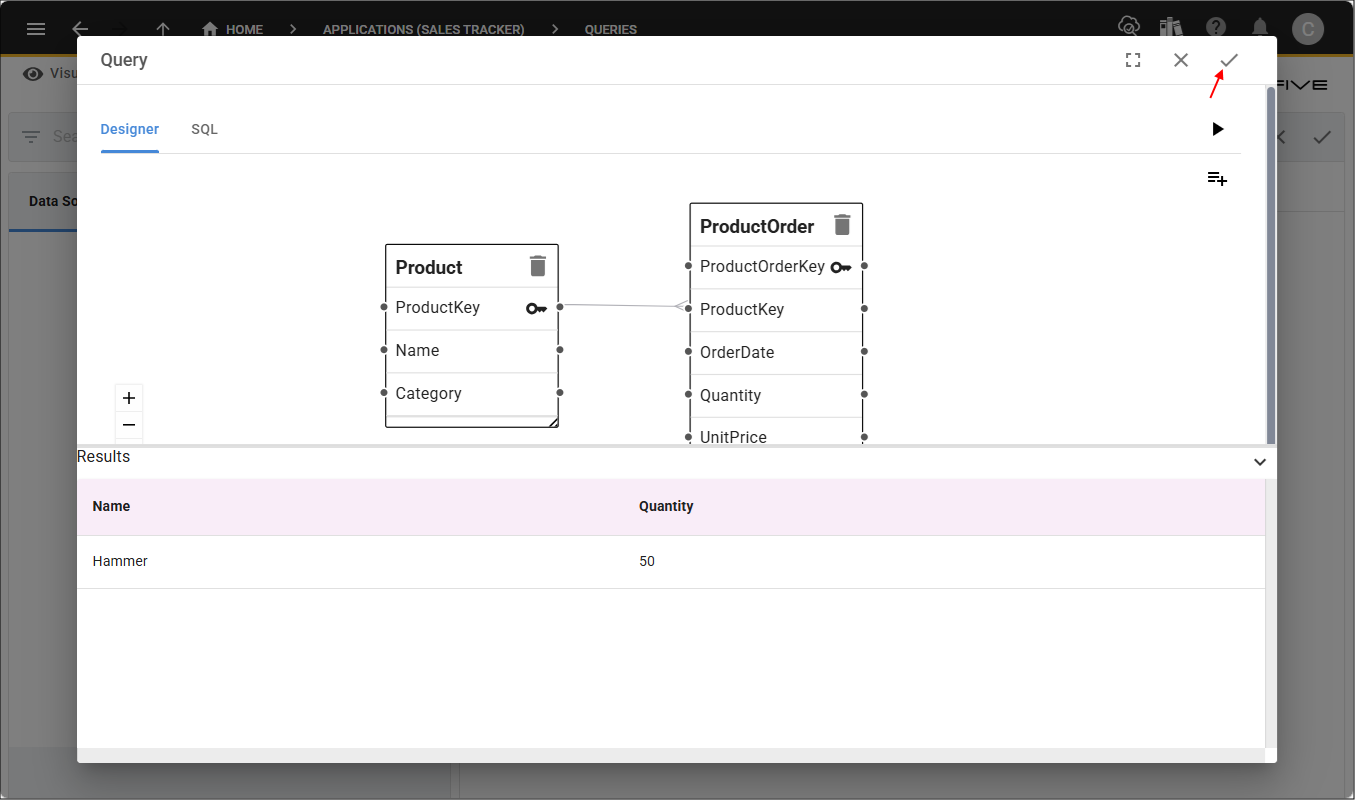
Figure 10 - Save button
Step 11: Configure the Fields
- After saving your query, Five generates all your query field records, which are available when you click the Fields tab
- These records can be selected and you can edit the default values applied by Five
- The field definitions will be carried over when selecting the data source in another view of Five
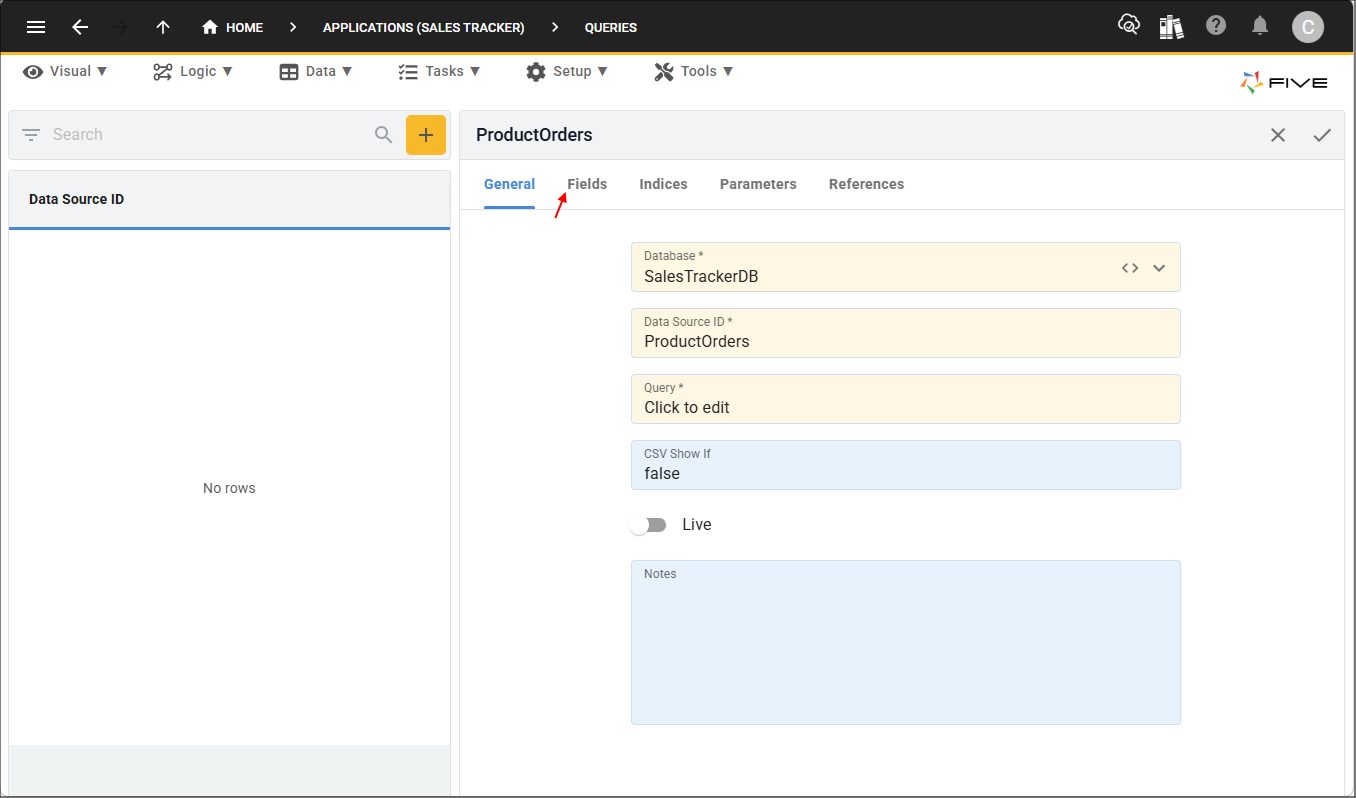
Figure 11 - Fields tab
2. Select a field record in the list.

Figure 12 - Field list
3. Either click the Edit button in the form app bar or click directly in a field.
4. Edit the required fields.
5. Click the Save button in the form app bar.
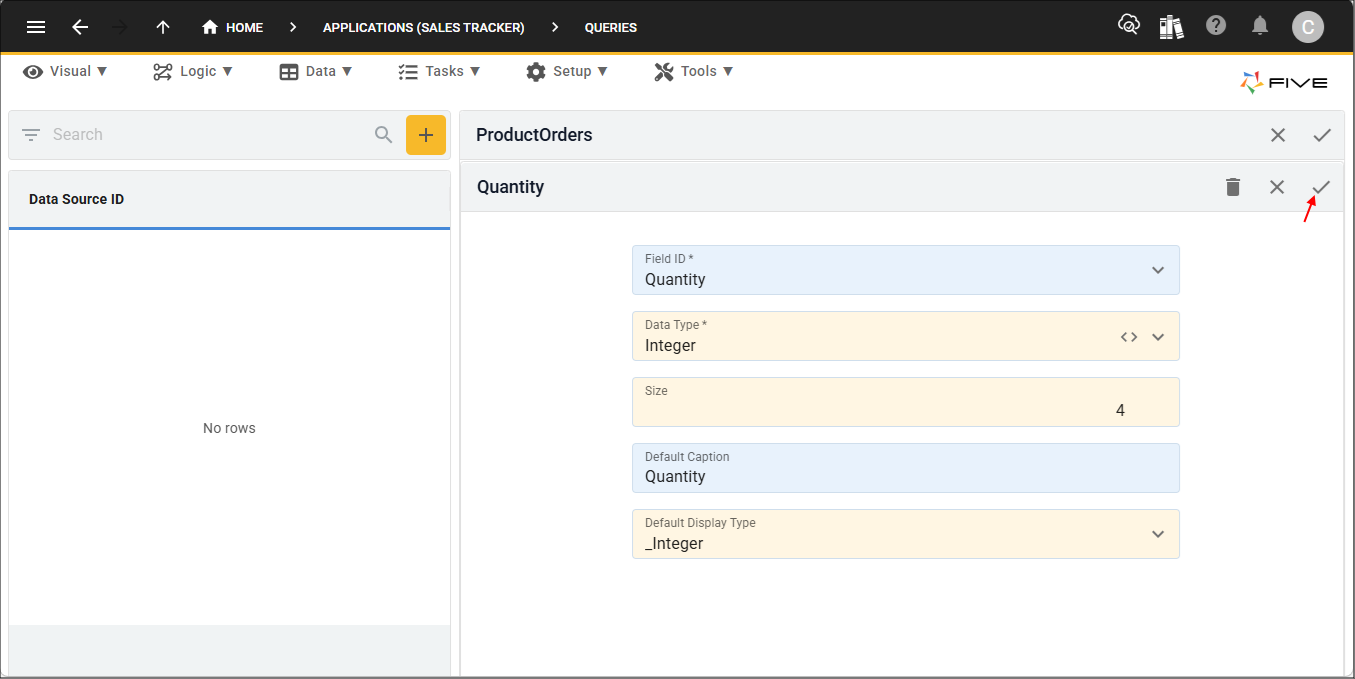
Figure 13 - Edit field record
Step 12: Save Your Query Record
Click the Save button in the form app bar above the list.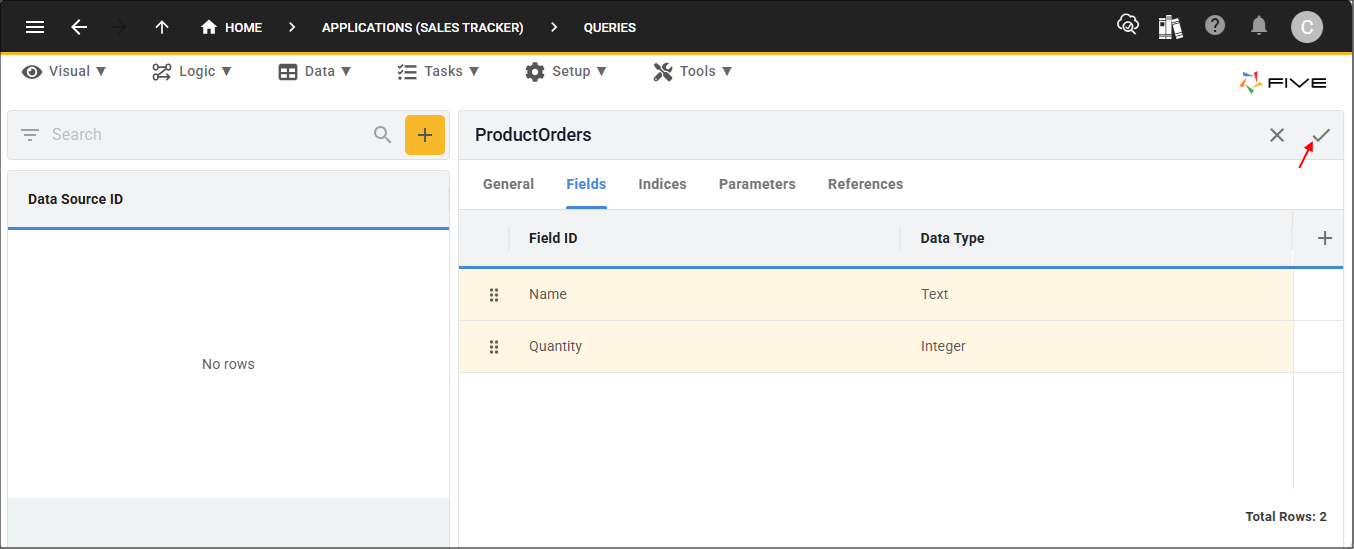
Figure 14 - Save button