Add Read-Only Fields
Last updated 16/12/2021
How to Add Read-Only Fields to a Form
This documentation will explain how to add fields to a form that a user can only read.
By writing a condition in JavaScript® you can choose to make the field read-only when it suits your requirements. The condition can be as simple as:
trueto make the field read-only, orfalseto make the field editable
Default
false
Reasons to Make a Field Read-Only
- To only read the data after creation, not allowing a user to edit the field.
- Auto-populate fields, such as a date or time.
- To display the value of a calculated field, not allowing a user to edit the field.
- Role permissions may allow one user to add values but another user can only read the data.
Only Read the Data After Creation
You can write a condition using Five's API and specify that on creation a user can enter data, however, after saving the form the field becomes read-only and disables the ability to edit or delete the field.
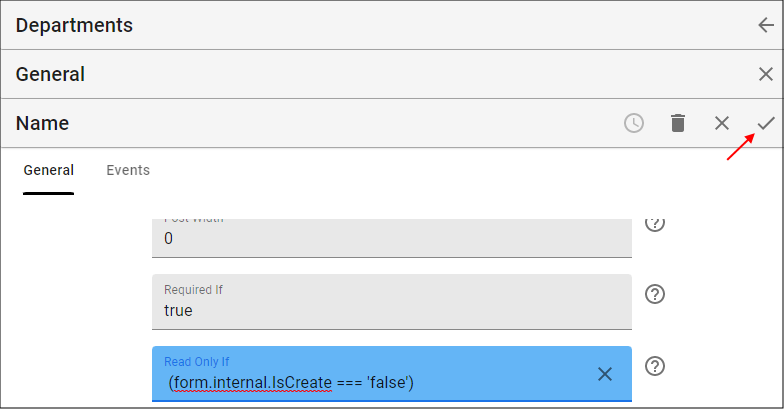
By writing the condition, (Form.internal.IsCreate === 'false'), in the Name field, the result will be
that while the internal state of the form is create the Name field will not be read-only.
Steps
- Select Forms in the menu.
- Select the form record in the list.
- Click the Pages tab.

- Select the required page record.

- Click the Fields tab.
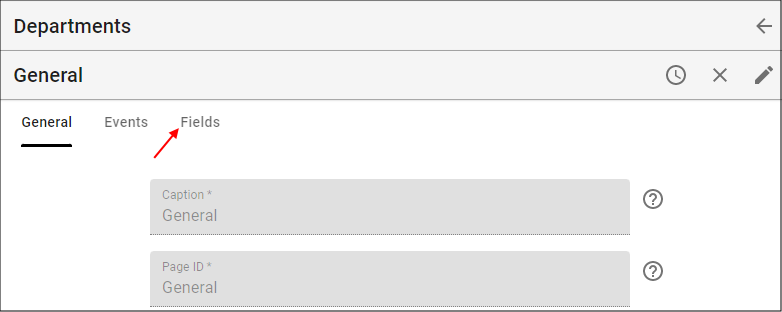
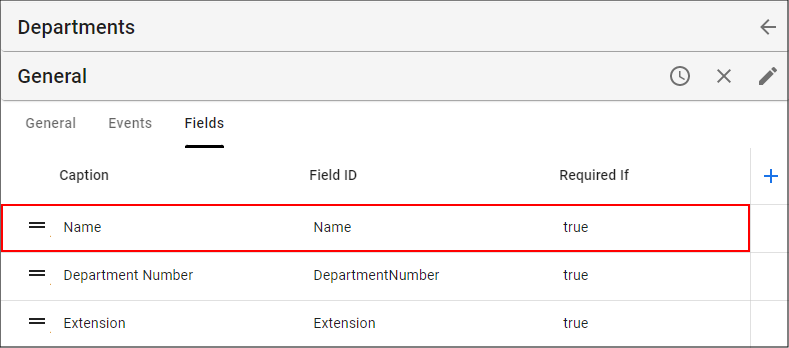
- Select the required field record.
- Either click the Edit button in the form app bar or click in the Read Only If field.
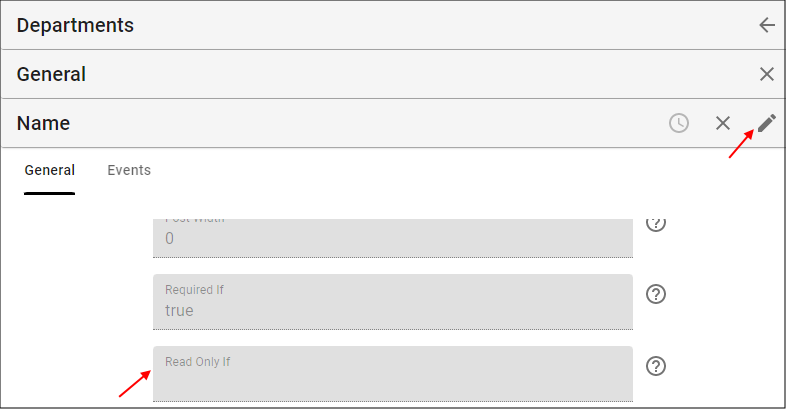
- Type your condition,
(Form.internal.IsCreate === 'false'), in the Read Only If field. - Click the Save button in the form app bar.
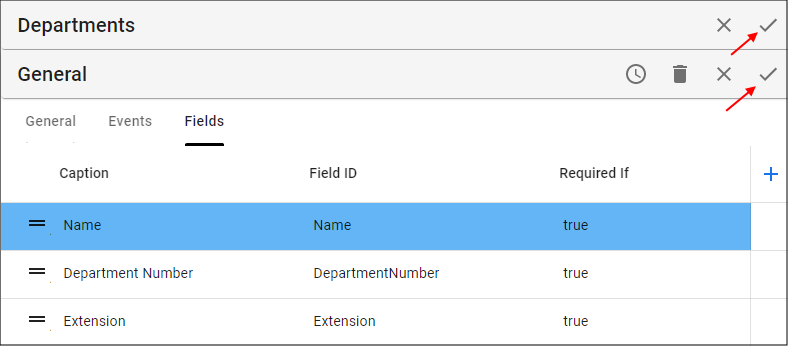
- Click both Save buttons in the stacked form app bars above the list.
info
A condition can be added to the Read Only If field on the creation of the form.
How This Will Look in Your End-User Application
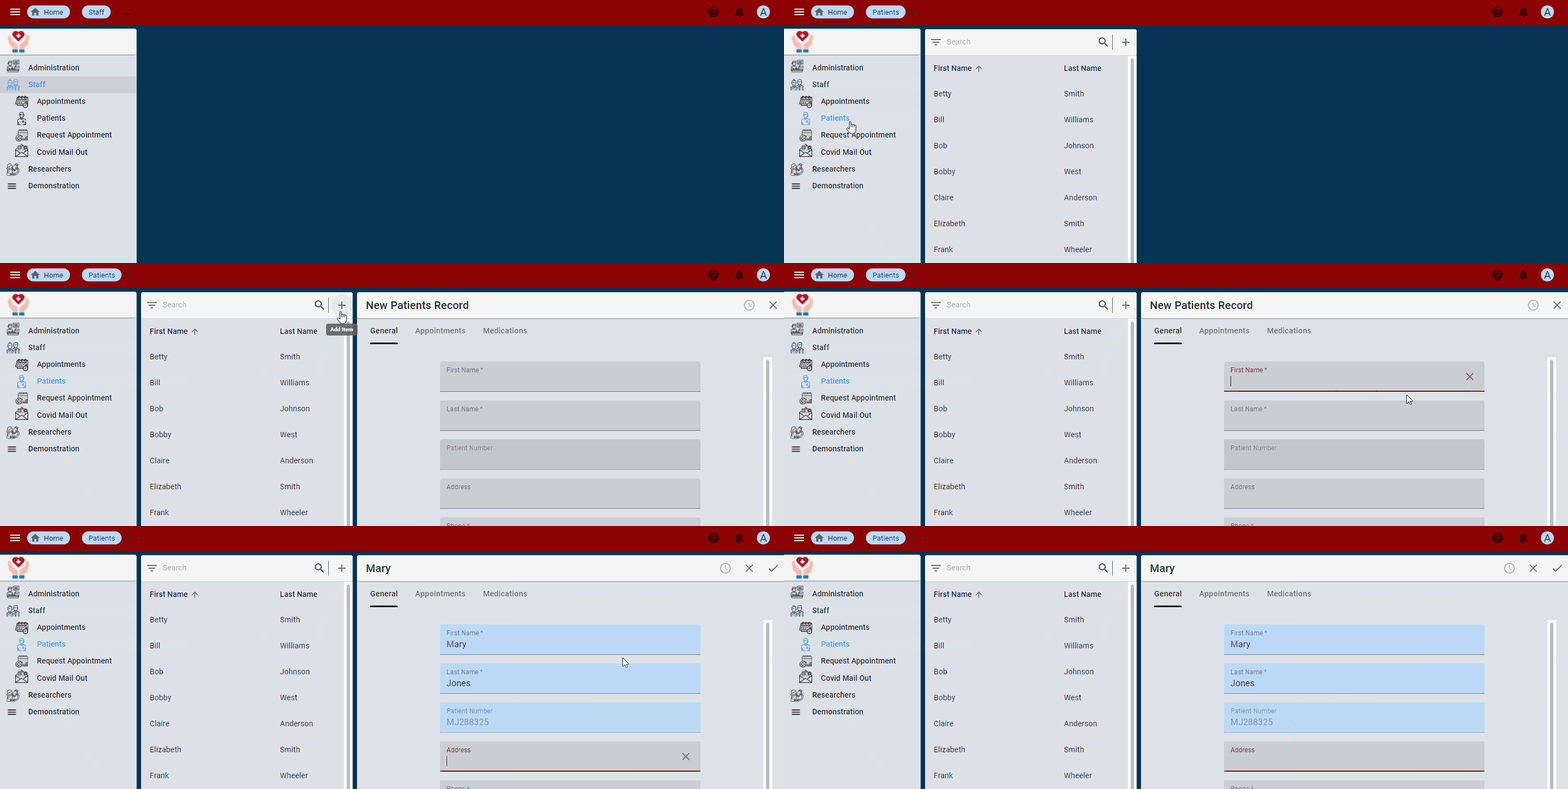
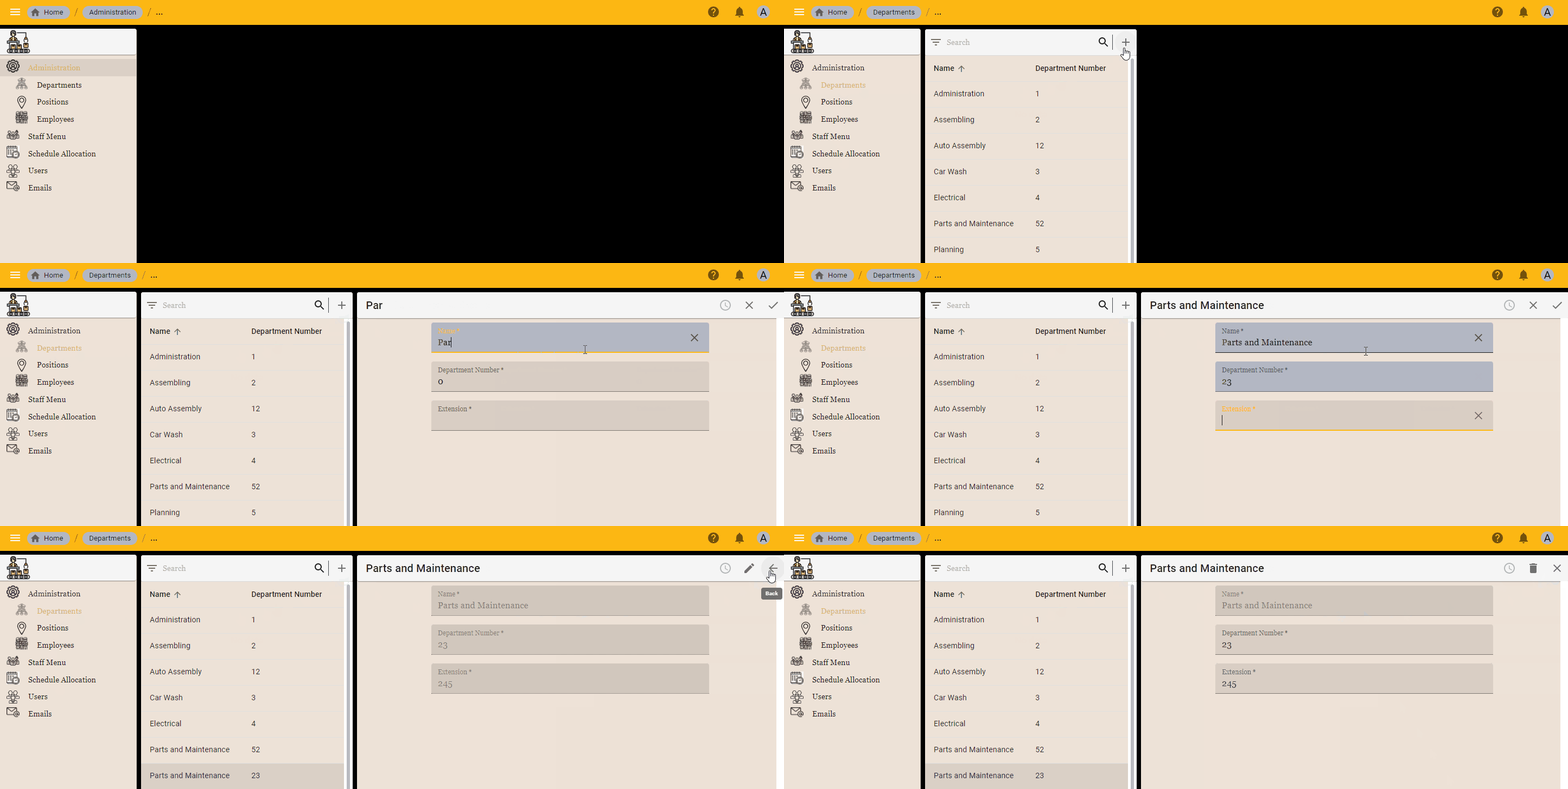
On creation, the field will be active. If the form is then edited, the condition applied to the field will make the field read-only.
Make an Auto-Generated Field Read-Only
A function that populates another field can be attached to a form field event. Let's say we have a Patient form, and when a new patient is entered into the system, their patient number is generated when you exit the Last Name field. We don't want anyone to be able to edit this patient number, therefore we'll set the field to read-only as soon as it's auto-populated.
Prerequisites
- The function must be saved in the Functions view.
- For this scenario, the function must be attached to the On Exit event for the Last Name field.
Steps
- Select Forms in the menu.
- Select the form record in the list.
- Click the Pages tab.

- Select the required page record.
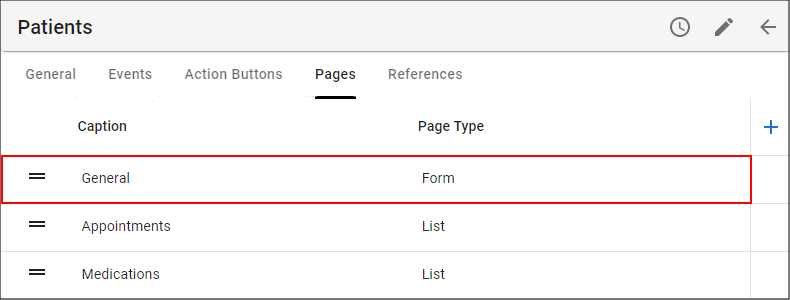
- Click the Fields tab.
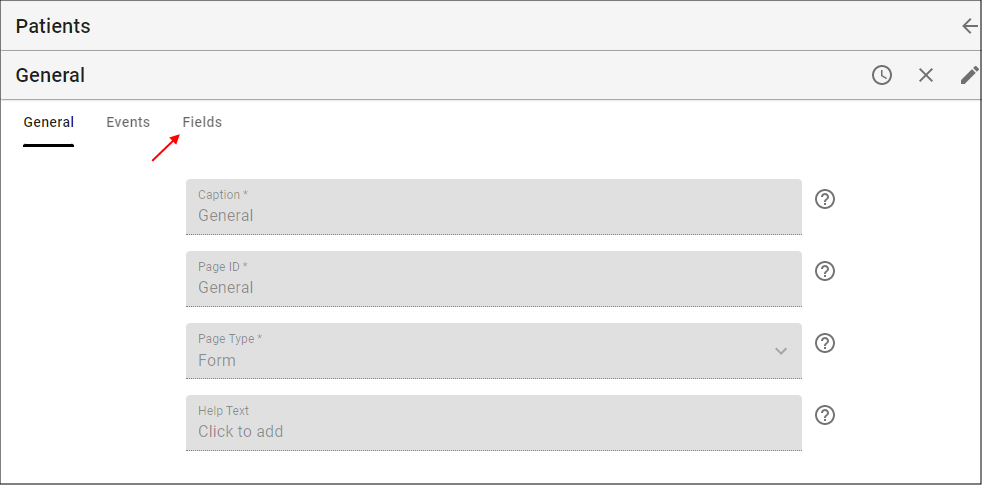
- Select the required field record.
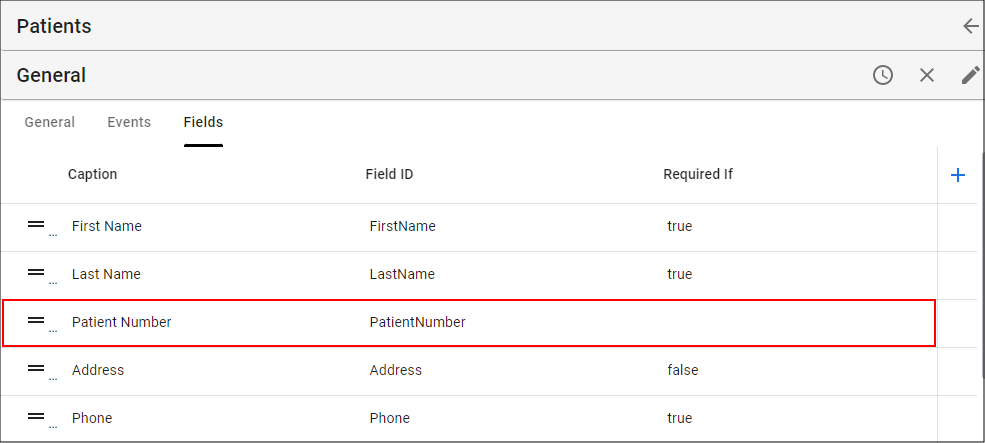
- Either click the Edit button in the form app bar or click in the Read-Only If field.

- Type
truein the Read Only If field. - Click the Save button in the form app bar.
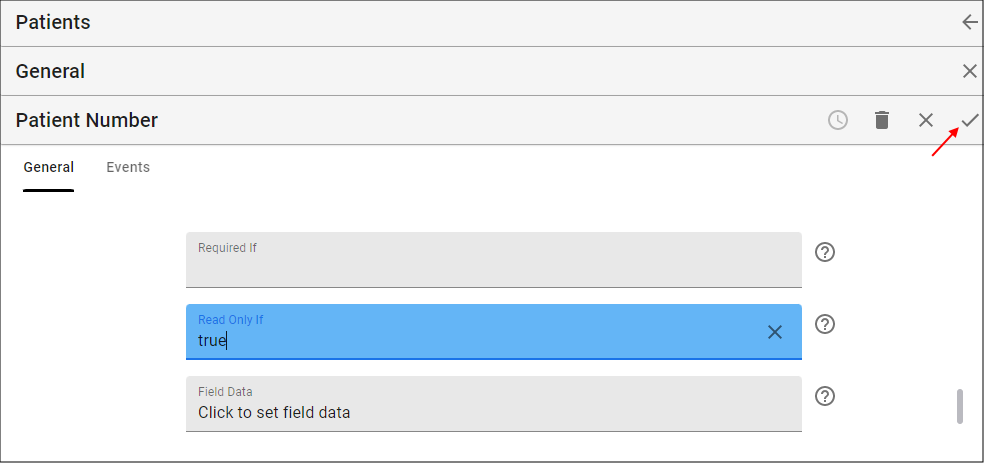
- Click both Save buttons in the stacked form app bars above the list.
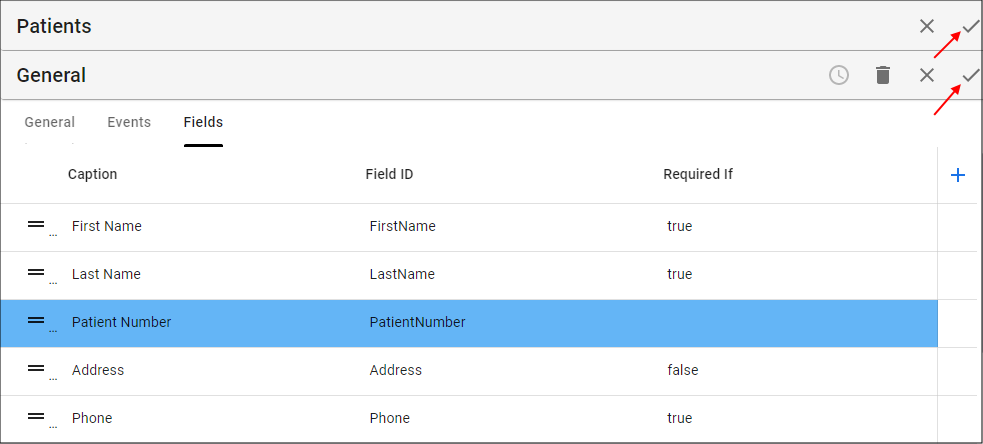
How This Will Look in Your End-User Application
The field auto-generated by the function will be in a read-only state as soon as the field is populated ensuring the data can not be edited.
