Create Your First API REST Connection
Last updated 31/08/2023
Five enables you to create and send API requests. You can send a request to an endpoint, retrieve data from a data source, or test an API's functionality.An endpoint is a specific URL that serves as the entry point for interacting with a particular resource, for example, one specific product, or a set of resources, for example, a list of products. Endpoints are typically defined for each resource that the API exposes meaning each resource will have its own unique identifiable address.
In Five, all you need to do is simply create a new request and click the SEND button, the API response then becomes available in the lower panel of the Connection Wizard.
A request includes the URL of the API endpoint and a HTTP/S request method, the method indicates the action you want the API to perform. This brief introduction to Five's Connection Wizard will give you a basic overview on how to use the following methods.
| Method | Description |
|---|---|
GET | Retrieves data from an API. |
POST | Sends new data to an API. |
PUT | Updates existing data. |
DELETE | Removes existing data. |
Navigate to Web Services
1. Click Data in the menu.2. Click Connection Wizard in the sub-menu.
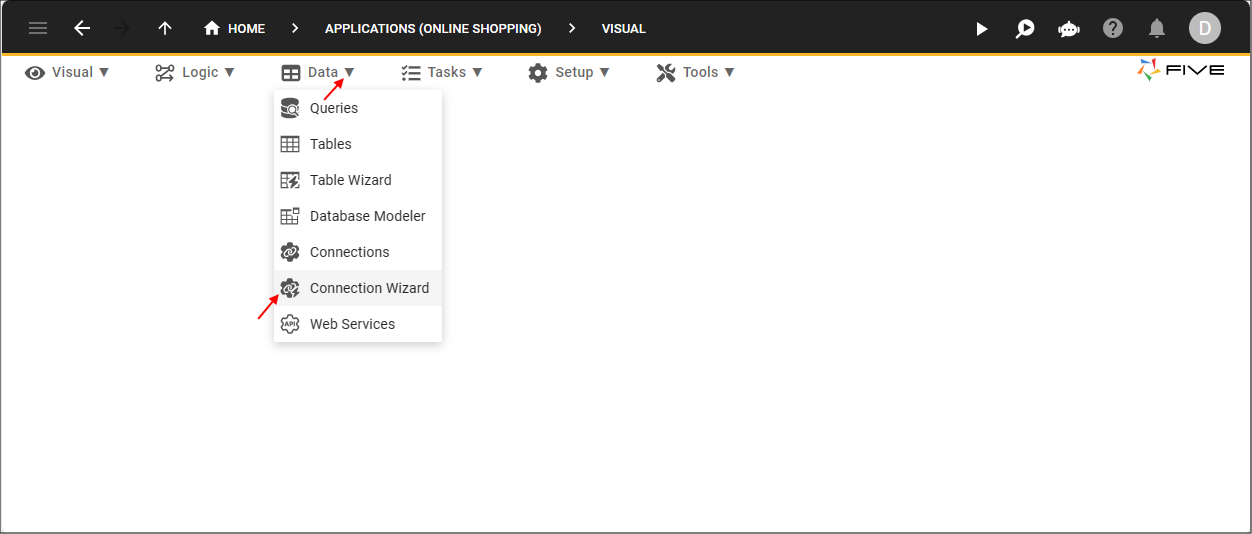
Figure 1 - Connection Wizard menu item
Add a Connection
1. Click the lookup icon in the Web Service field and select New.2. Type an ID in the WebService ID field.
3. Type a name in the Name field.
info
The name will become the connection ID.
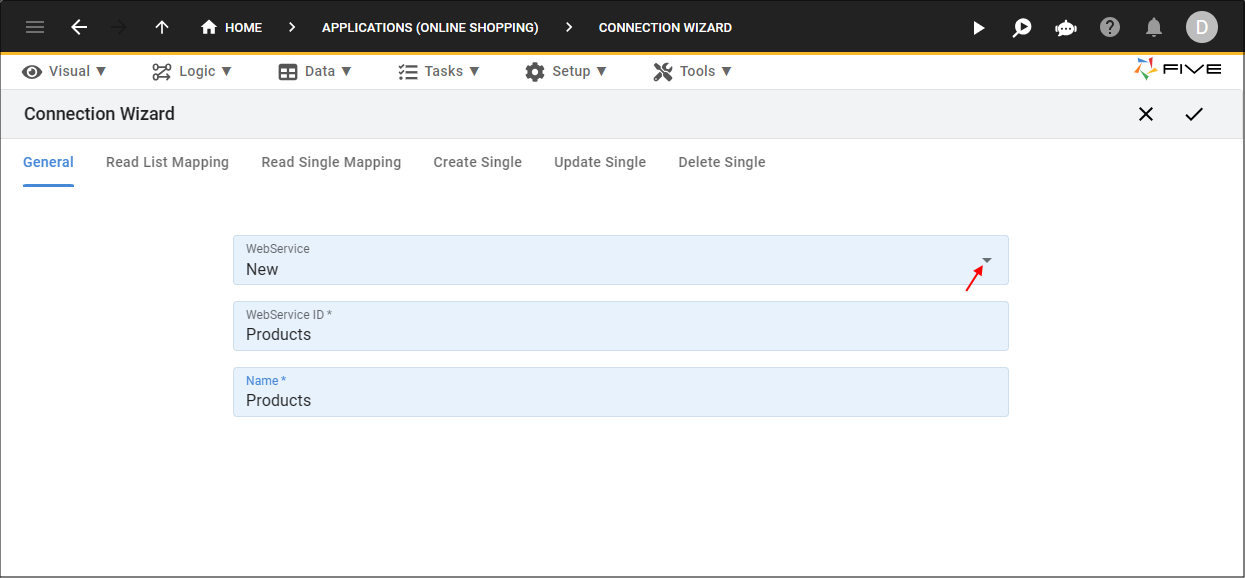
Figure 2 - Add a connection
Create a GET Request
4. Click the Read List Mapping tab.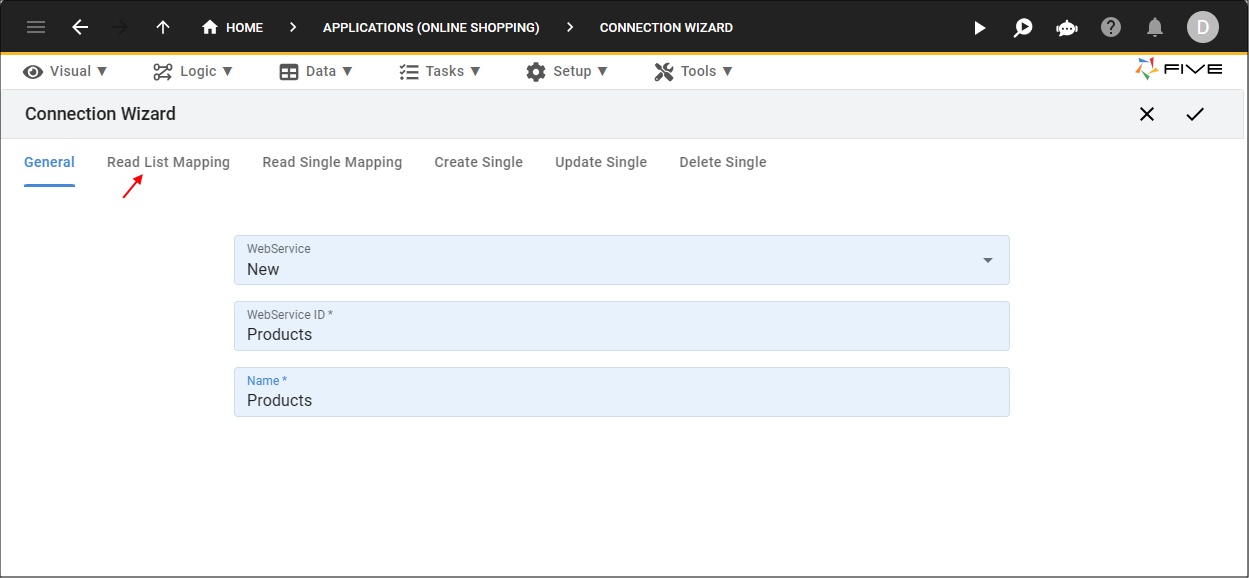
Figure 3 - Read List Mapping tab
5. Paste your endpoint URL in the Get endpoint field.
Example
tip
It is recommended to copy and paste your URL to avoid simple errors such as a 404 error due to your REST endpoint not being found!
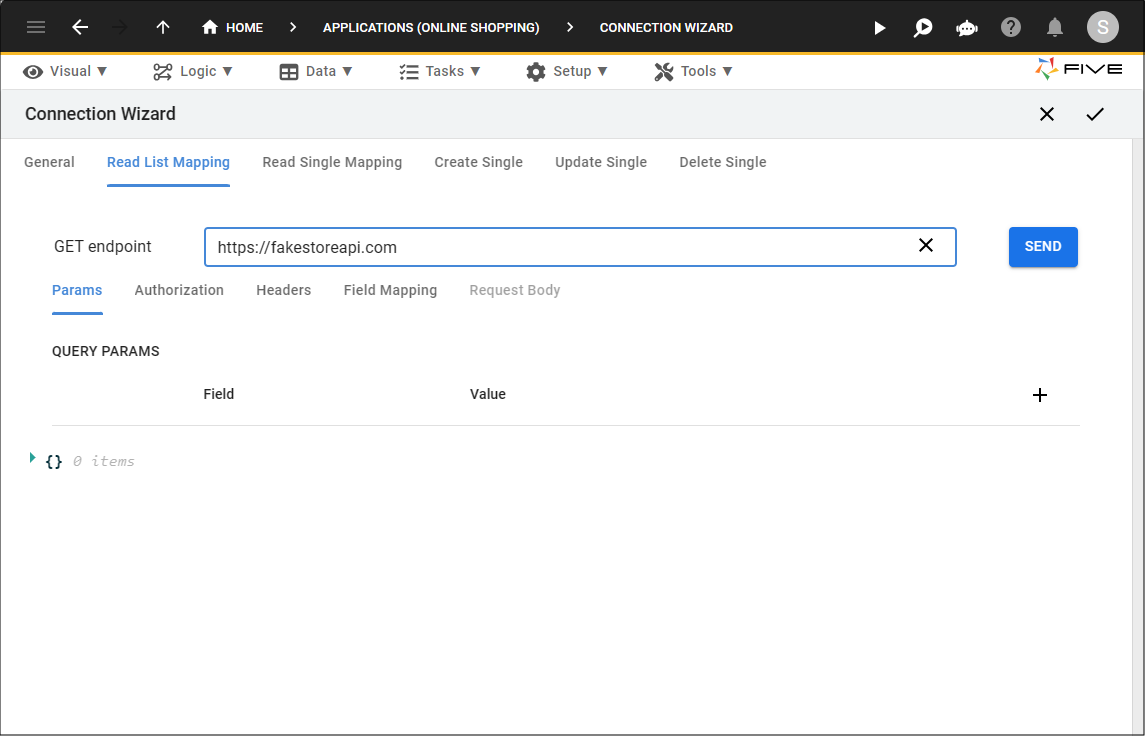
Figure 4 - Add URL endpoint
6. After the URL address type
/
followed by the [ resource ]
.Example
https://fakestoreapi.com/products
Figure 5 - Example resources
7. Click the SEND button.
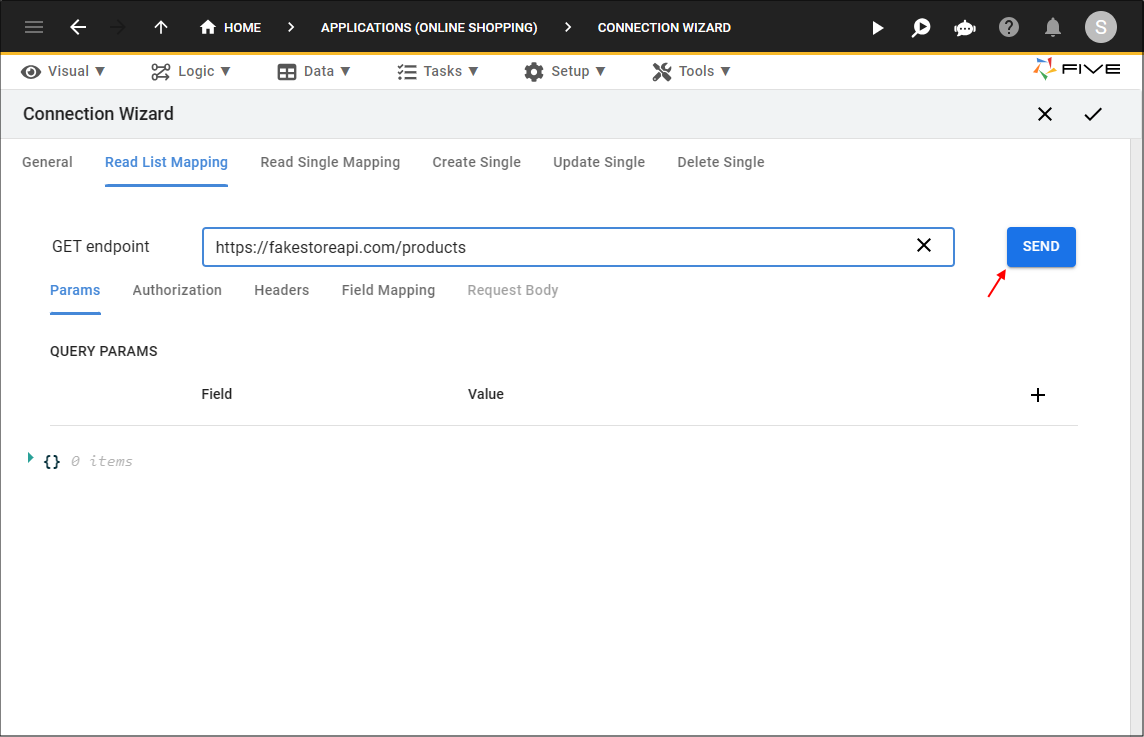
Figure 6 - Send the GET request
info
The response data sent from the server will be displayed in the lower panel of the REST Wizard.
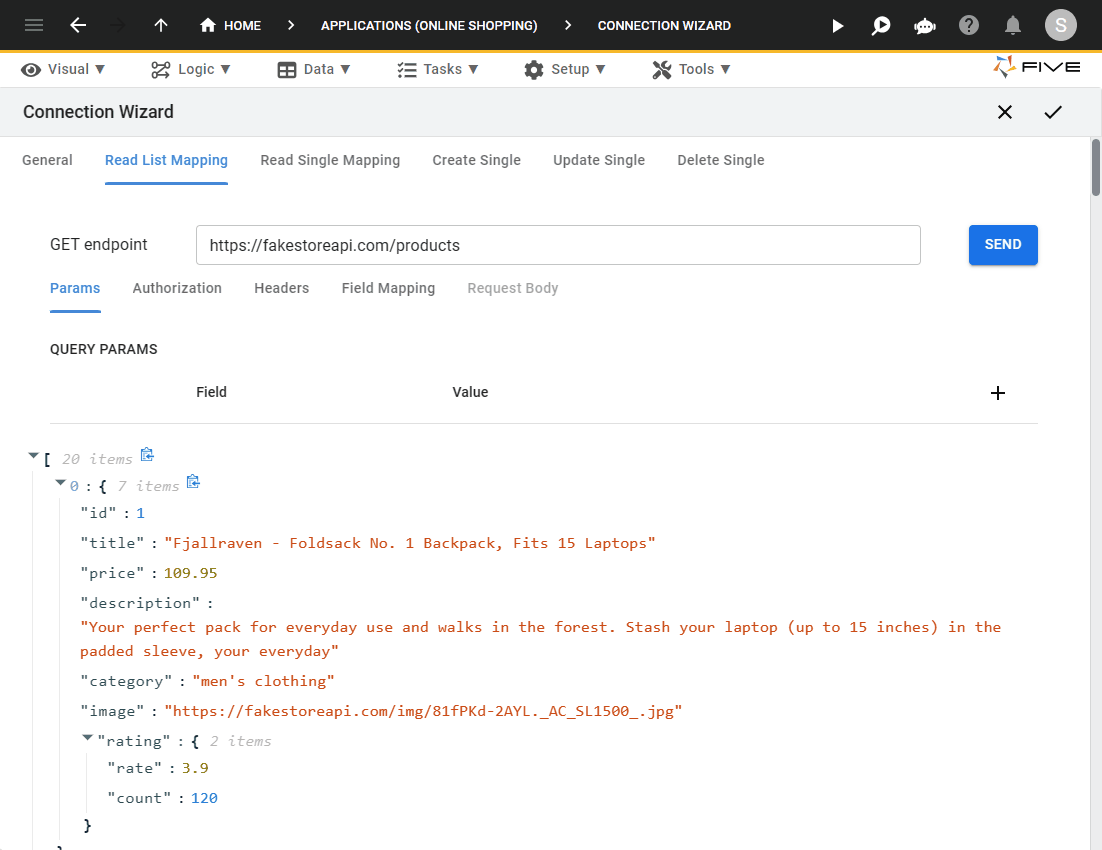
Figure 7 - Response data
8. Click the Field Mapping tab.

Figure 8 - Field Mapping tab
info
In the image below, you will see this is the mapping of the fields from the REST data to a field in a Connection data source. Five will try its best here to automatically perform the following tasks:
- Calculate the primary key field, however, you should ensure it is correct as this field is used to map a single record.
- Map the fields, however, you are free to add, edit, and delete fields here to suit your requirements.
Recommended
Use the Data Type field to ensure your data is stored how you want it, and the Default Display Type field to ensure your data is displayed how you want it.
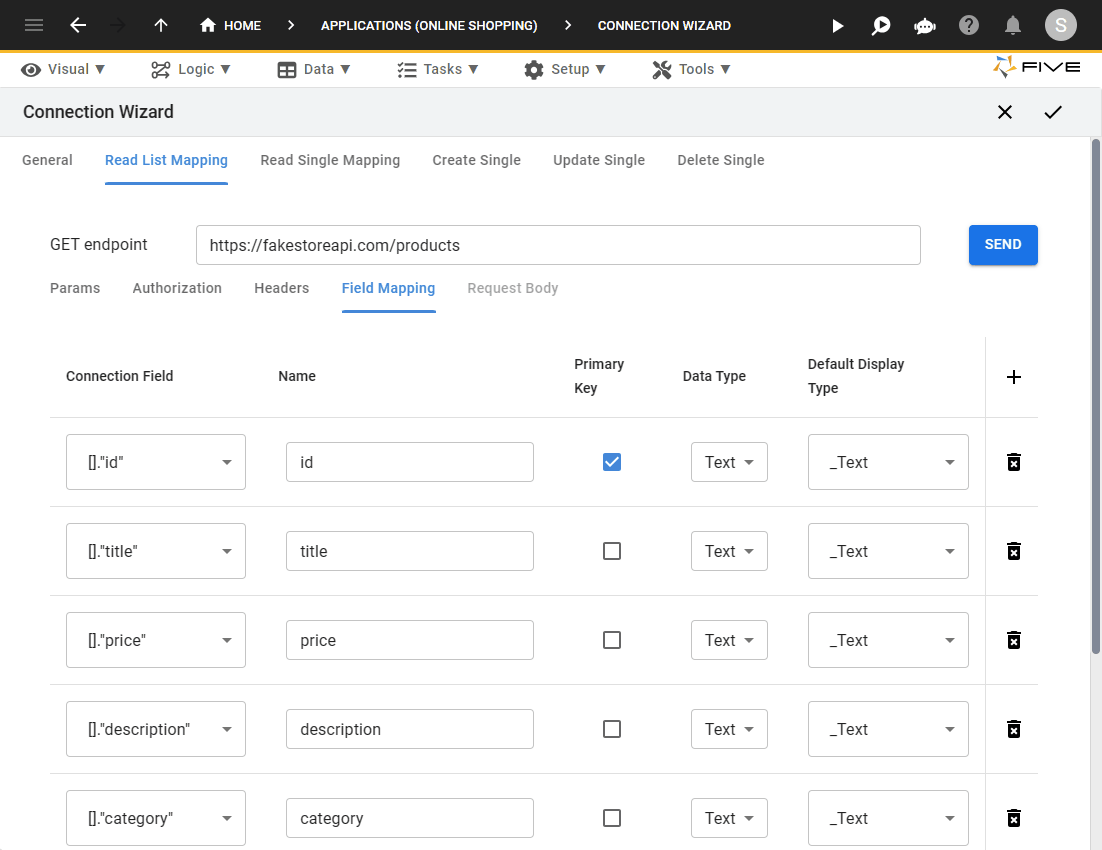
Figure 9 - Field mapping
Create a Single GET Request
info
You can create a single field mapping, this is so you can view the entire data for a single record on a form in an application and have the ability, if required, to update and delete records . The
:id
placeholder, which is typically the primary key of the selected record, is used by Five to request a single record from the REST endpoint.9. Click the Read Single Mapping tab.
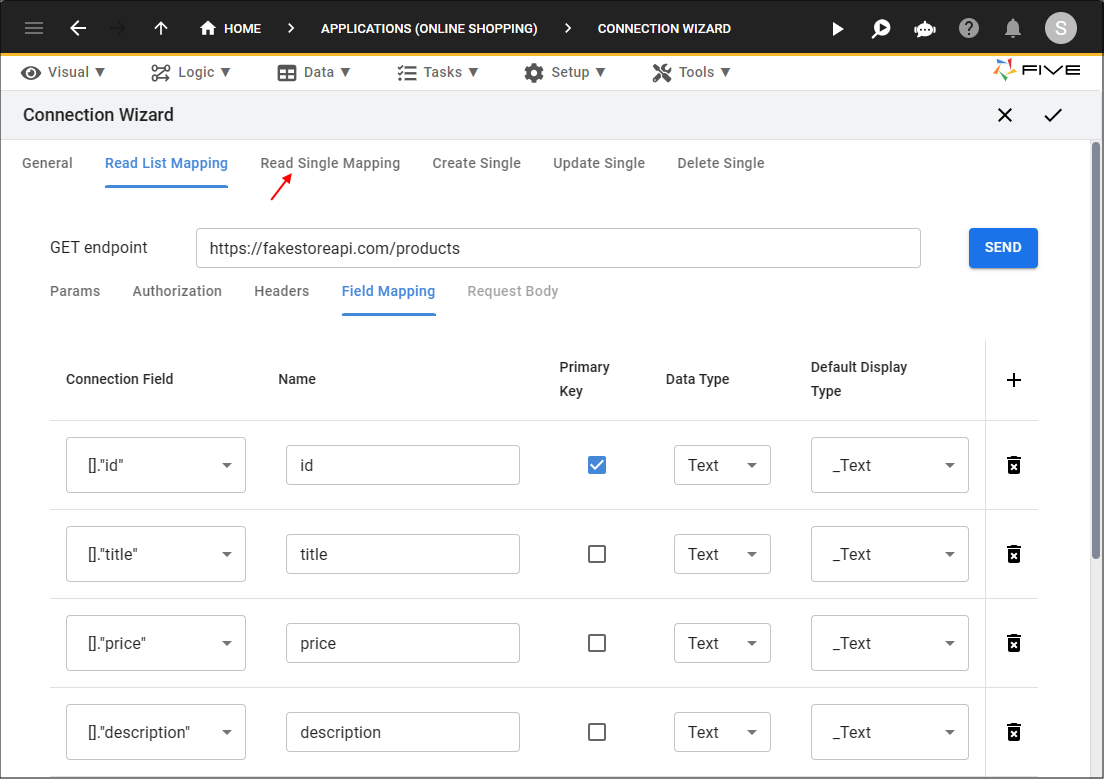
Figure 10 - Read Single Mapping tab
10. Paste the endpoint URL link in the GET endpoint field.
11. Append the
:id
placeholder to the endpoint URL link.Example
https://fakestoreapi.com/products
/
[ resource ]
/
:id
12. In the Path Variables section, add an ID value in the Value field.
caution
Your placeholder and input values may differ here, it all depends on the API documentation you are working with.
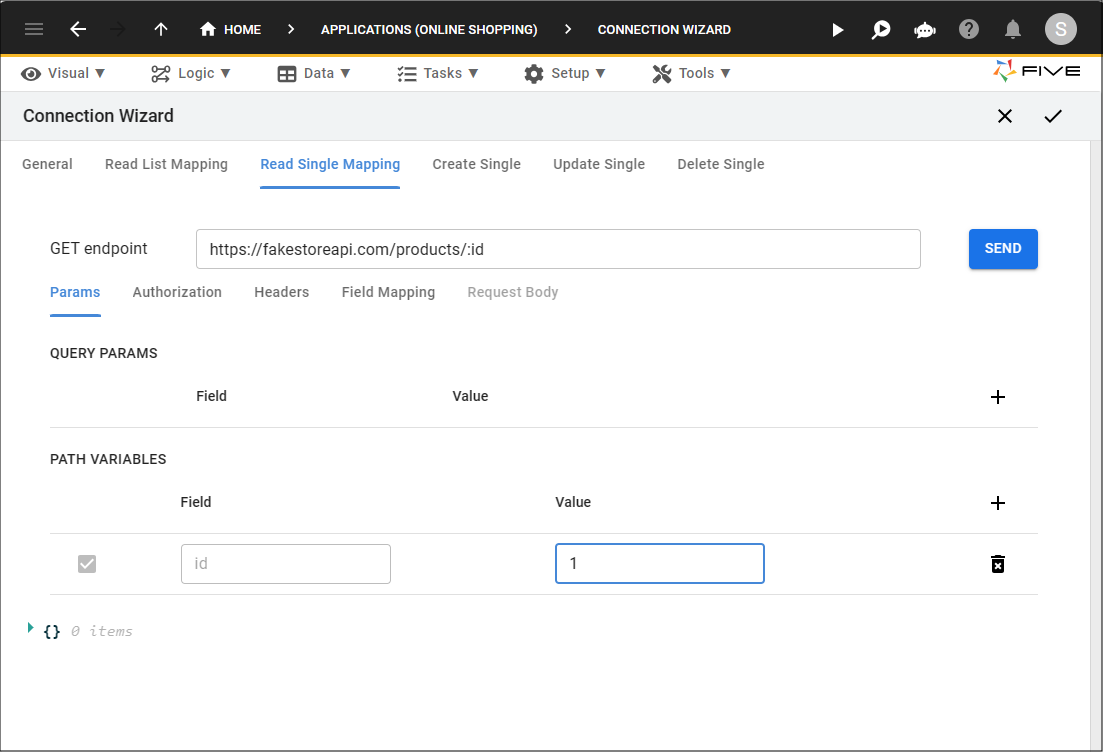
Figure 11 - Add URL endpoint
13. Click the Send button.

Figure 12 - Send the GET request
info
A single record is returned, selected by the primary key field value.
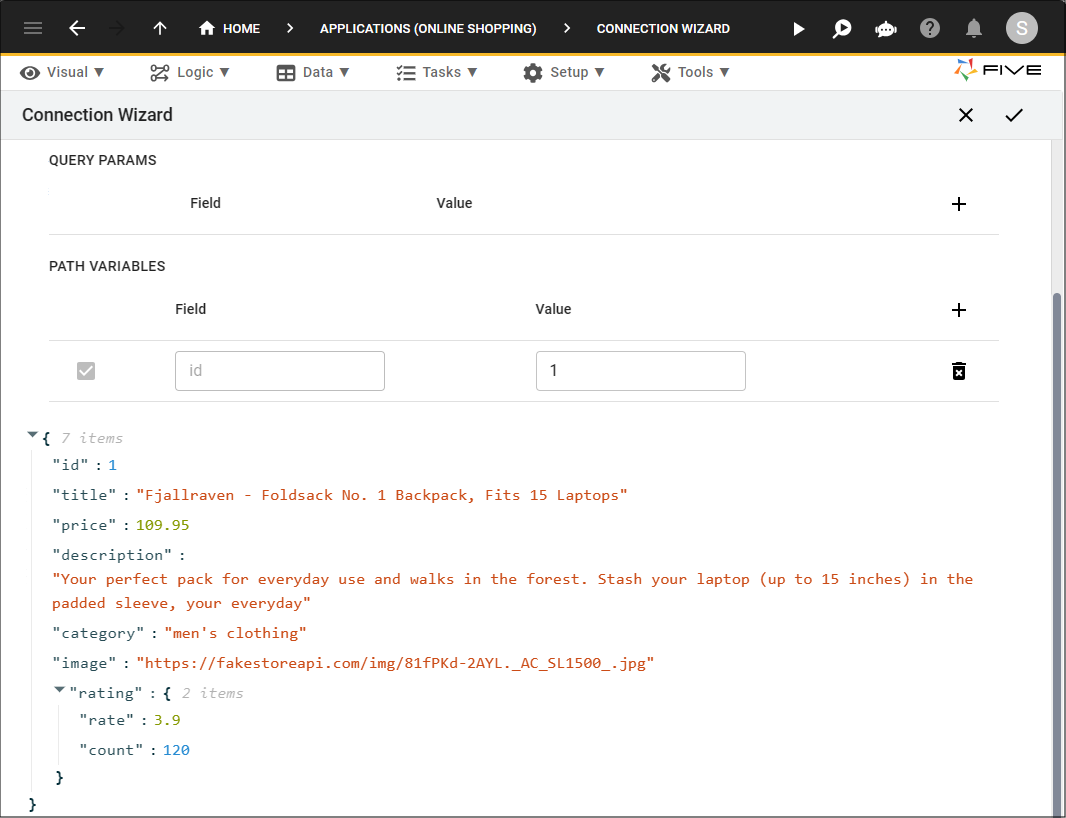
Figure 13 - Response data
14. Click the Field Mapping tab.
info
The single mapping of a field needs to be mapped in a similar way to when you returned all the records, however, this is now per single record.

Figure 14 - Field Mapping tab
tip
Remember to use the Data Type field and the Default Display Type field to store and display your data correctly!
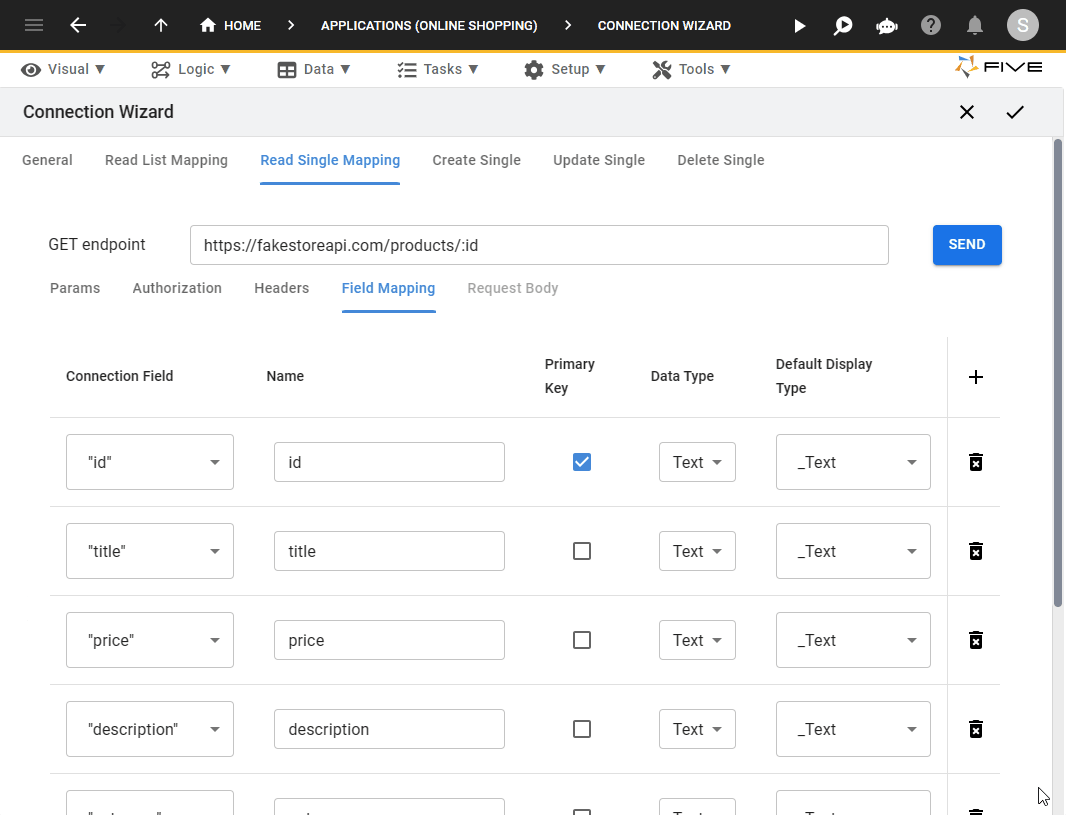
Figure 15 - Field mapping
Create a POST Request
info
The POST request, gives your application an endpoint to post a new resource.
15. Click the Create Single tab.
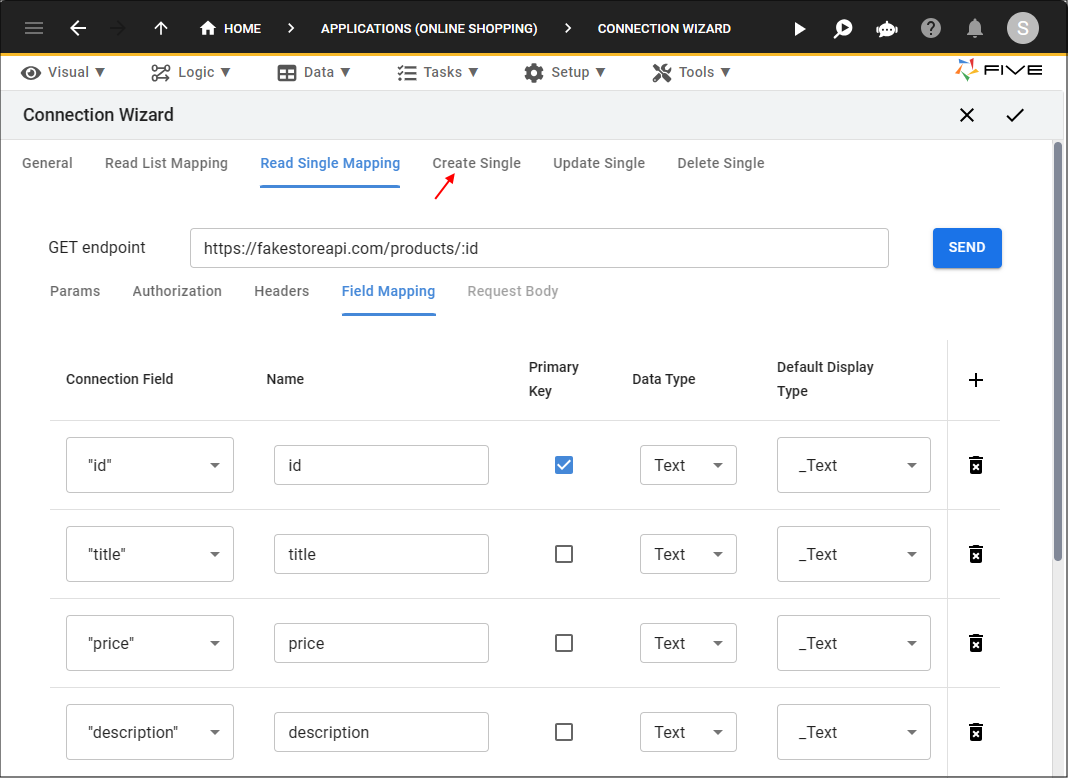
Figure 16 - Create Single tab
16. Paste your endpoint URL in the POST endpoint field.
Example
https://fakestoreapi.com
/
[ resource ]
tip
Your input values may vary here depending on the API documentation you are working with.
info
The
id
placeholder is not required here for this example.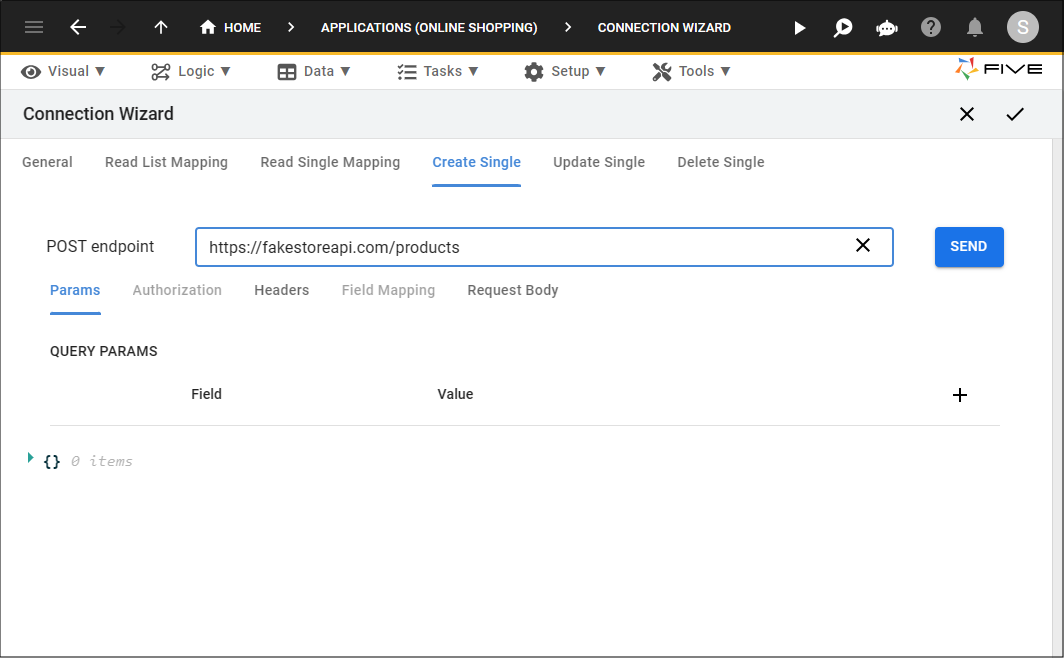
Figure 17 - Add URL endpoint
info
In the majority of cases, your POST request will require some data in the Request Body section. This can either be in JSON or text, it all depends on the API documentation you are working with.
You will need to add a single record that you can test with, this can either be copied from the Read Single Mapping page, or from your API documentation.
You will need to add a single record that you can test with, this can either be copied from the Read Single Mapping page, or from your API documentation.
17. Click the Read Single Mapping tab.
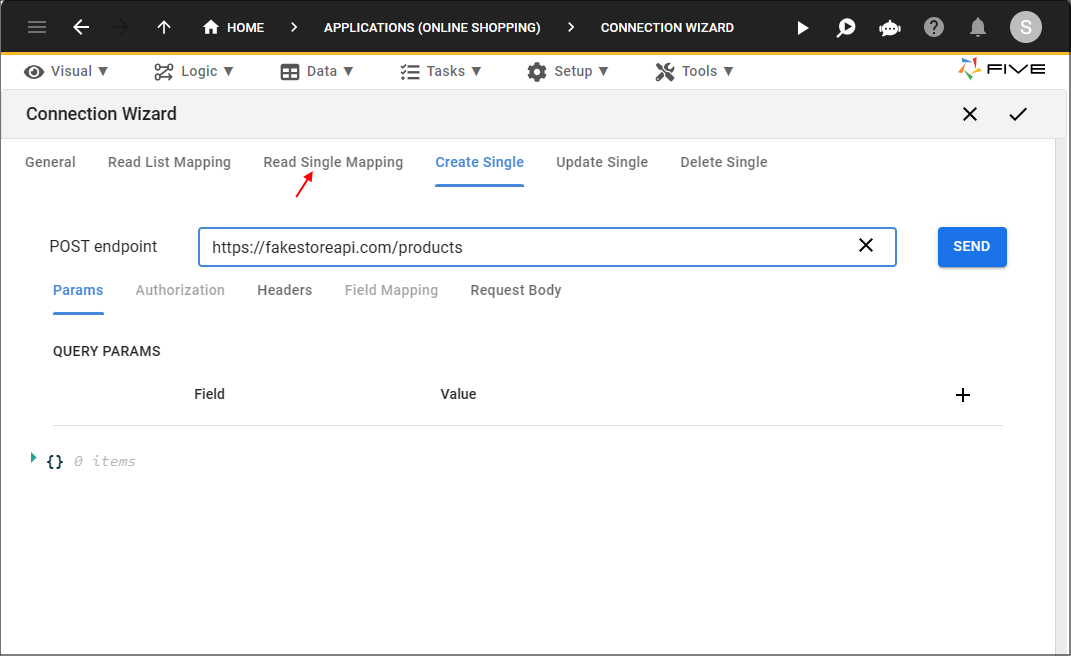
Figure 18 - Read Single Mapping tab
18. Click the Params tab.
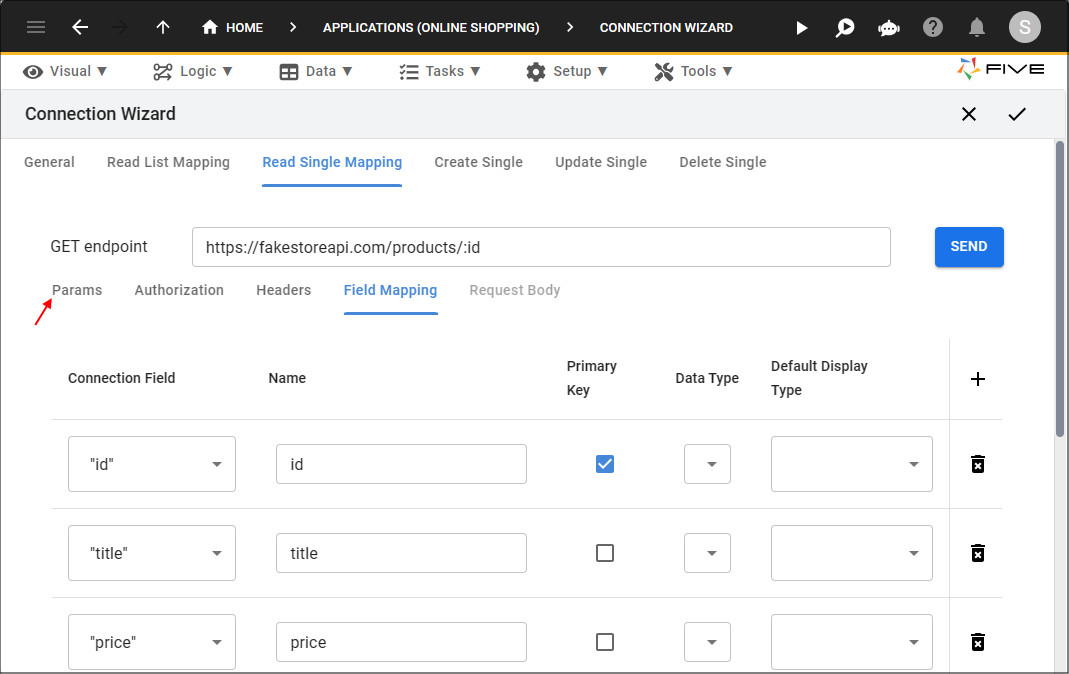
Figure 19 - Params tab
19. Click the Copy to Clipboard button for the entire record.
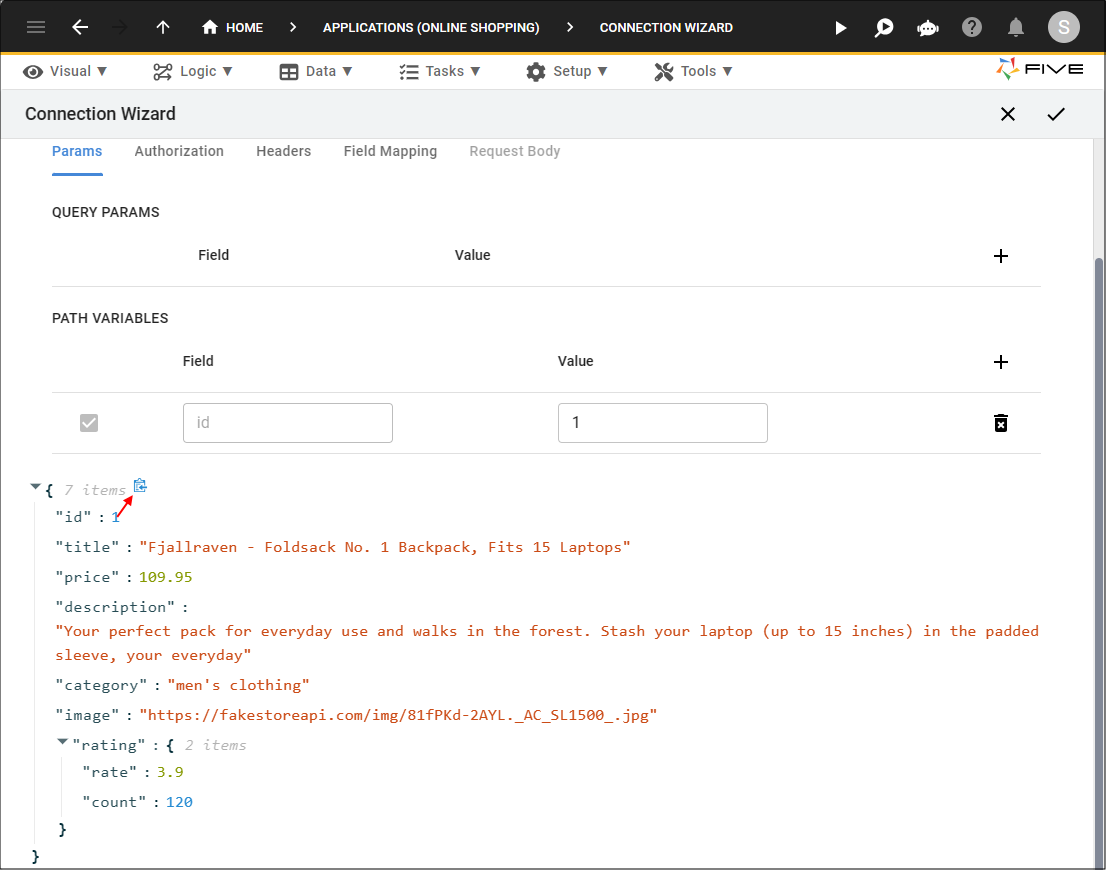
Figure 20 - Copy to Clipboard button
20. Click the Create Single mapping tab.
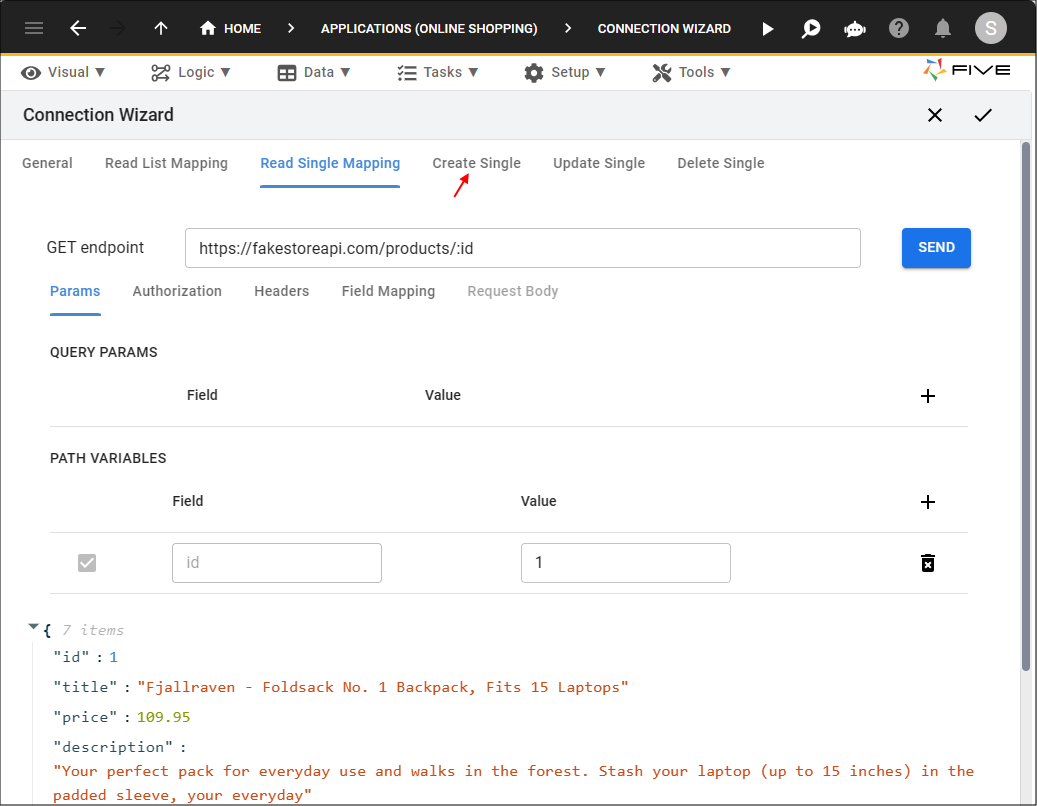
Figure 21 - Create Single tab
21. Click the Request Body tab.
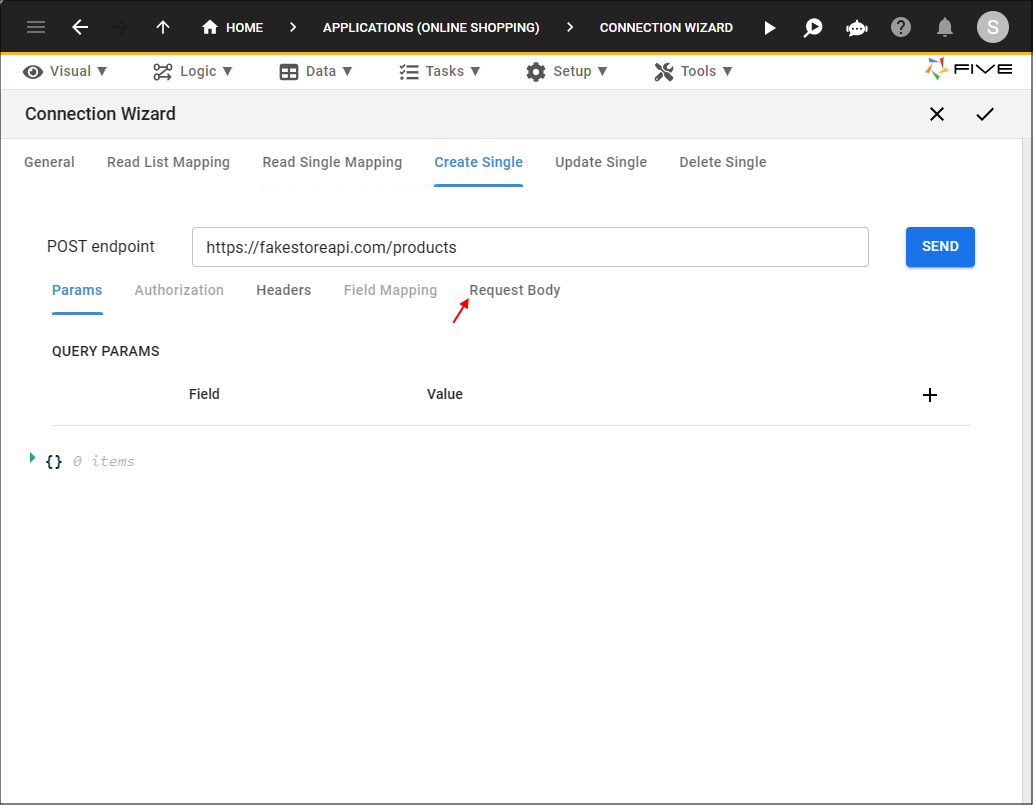
Figure 22 - Request Body tab
22. Paste the JSON data in the Request Body.
tip
Click the lookup icon and change to Text if this is required by your API documentation!
23. Click the Send button.
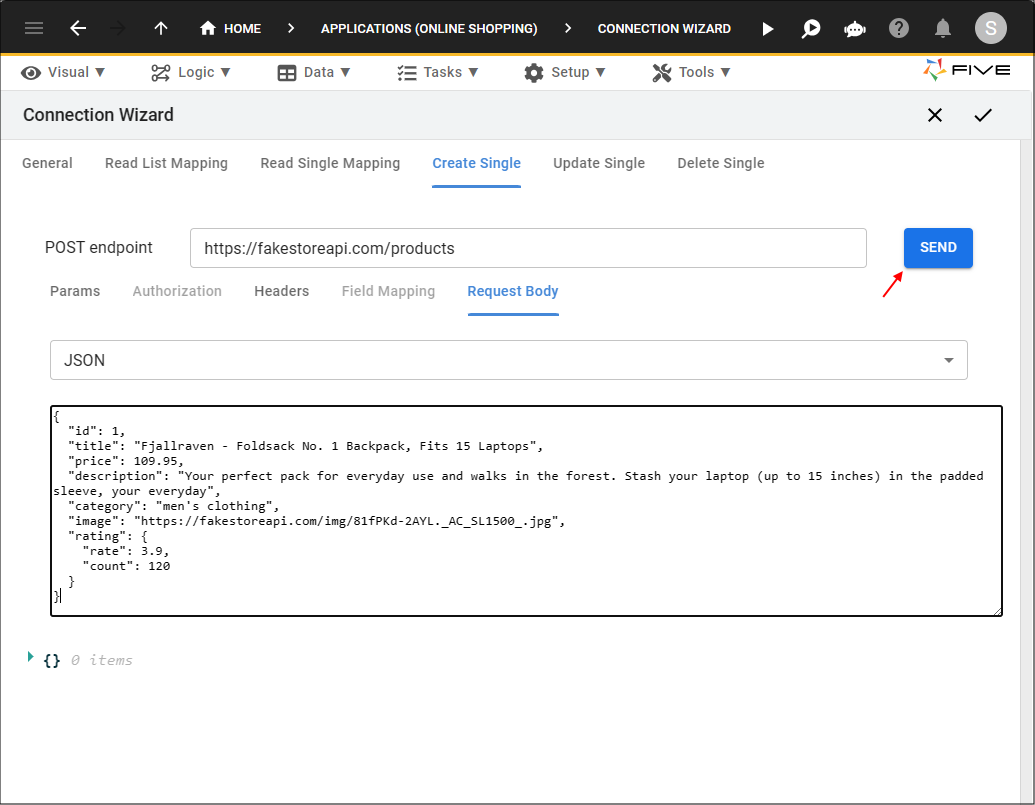
Figure 23 - Send POST request
info
A new record is created for you to test with.
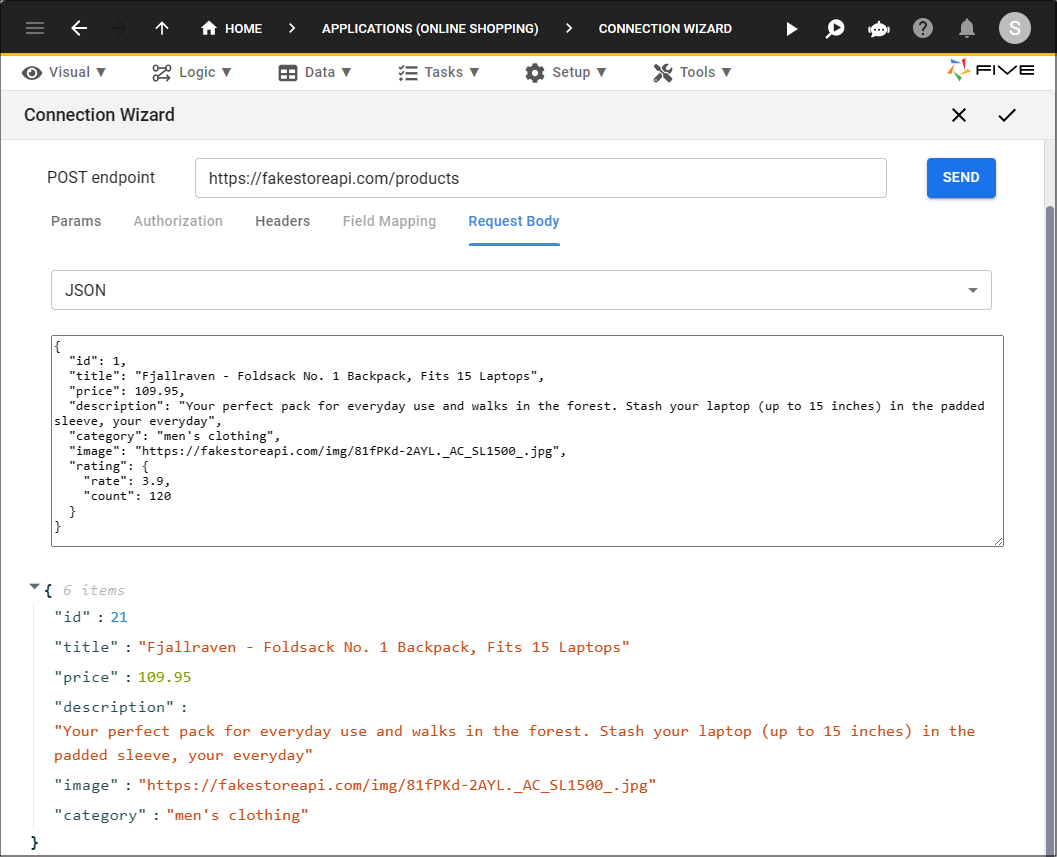
Figure 24 - POST response data
Create a PUT Request
info
The PUT request, gives your application an endpoint to update a resource.
24. Click the Update Single tab.
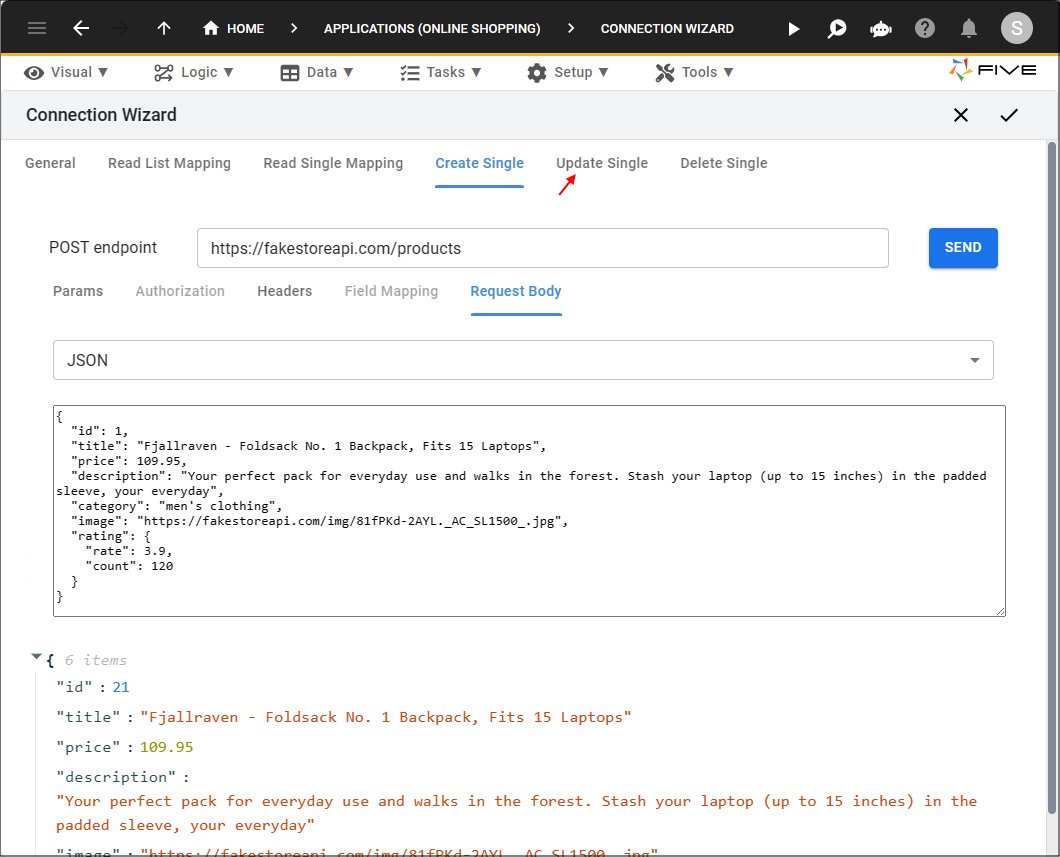
Figure 25 - Update Single tab
25. Paste the endpoint URL and add the
:id
placeholder in the PUT endpoint field.Example
https://fakestoreapi.com
/
[ resource ]
/
:id
26. In the Path Variables section, add an ID value in the Value field.
tip
You need to add the ID to know which record is being updated!
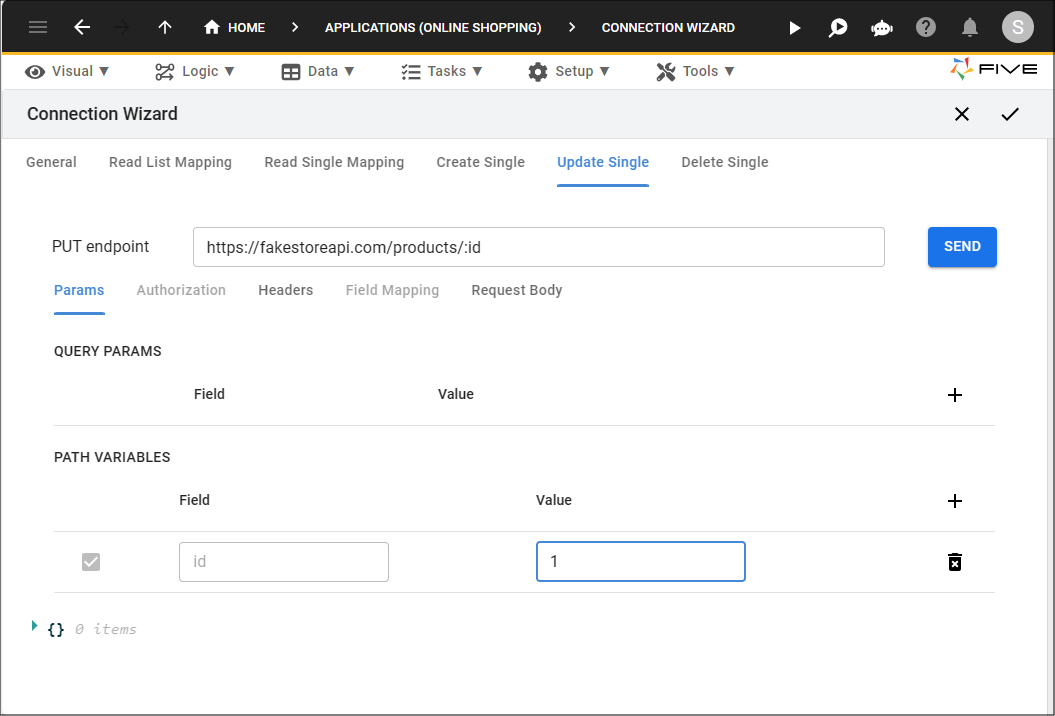
Figure 26 - Add URL endpoint
27. Click the Request Body tab.
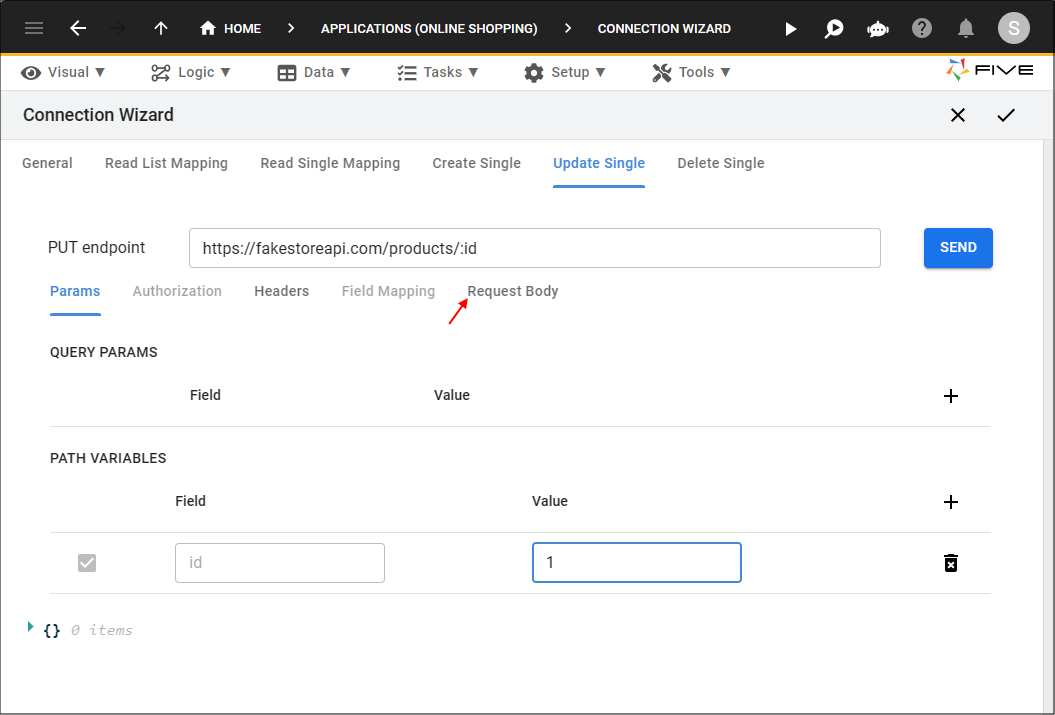
Figure 27 - Request Body tab
28. Paste the JSON data in the Request Body.
29. Click the Send button.
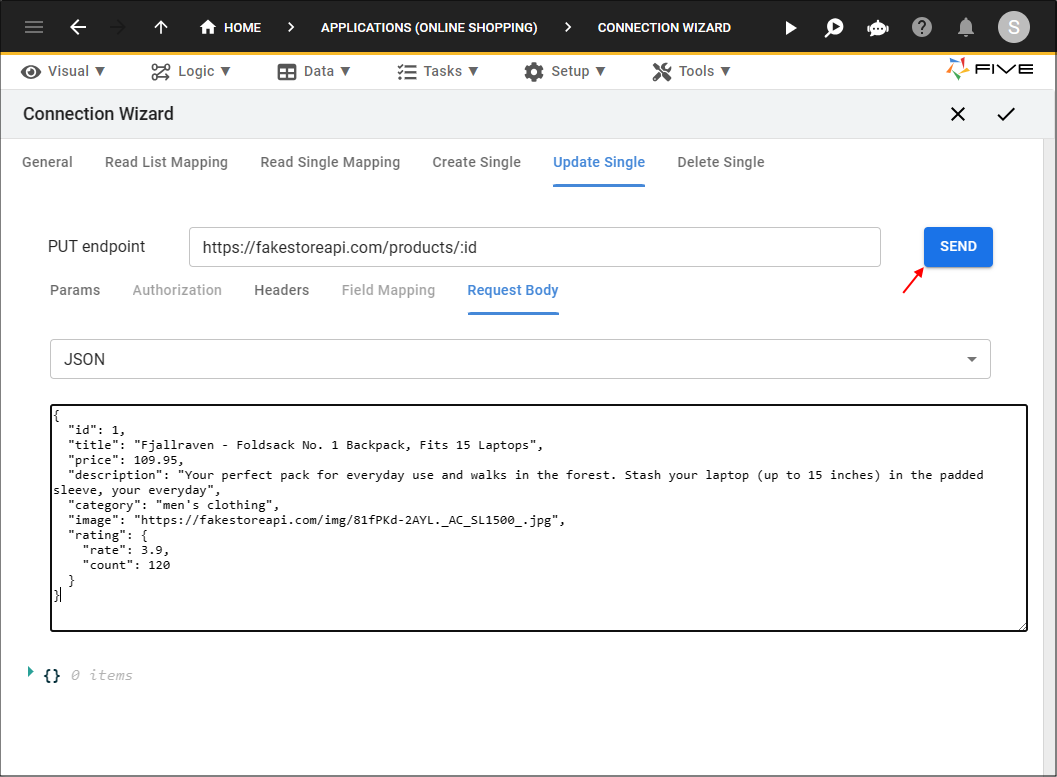
Figure 28 - Send PUT request
info
The record is selected from the ID and is now available for you to test with.
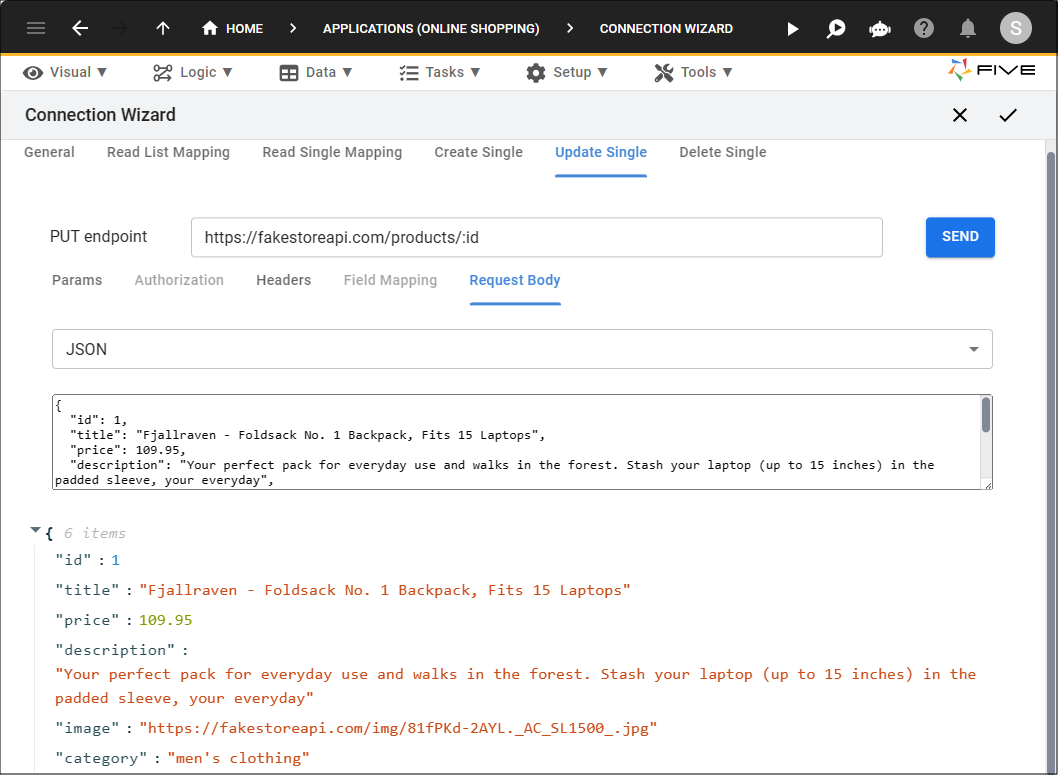
Figure 29 - PUT response data
Create a DELETE Request
info
The DELETE request, gives your application an endpoint to delete a resource.
30. Click the Delete Single tab.
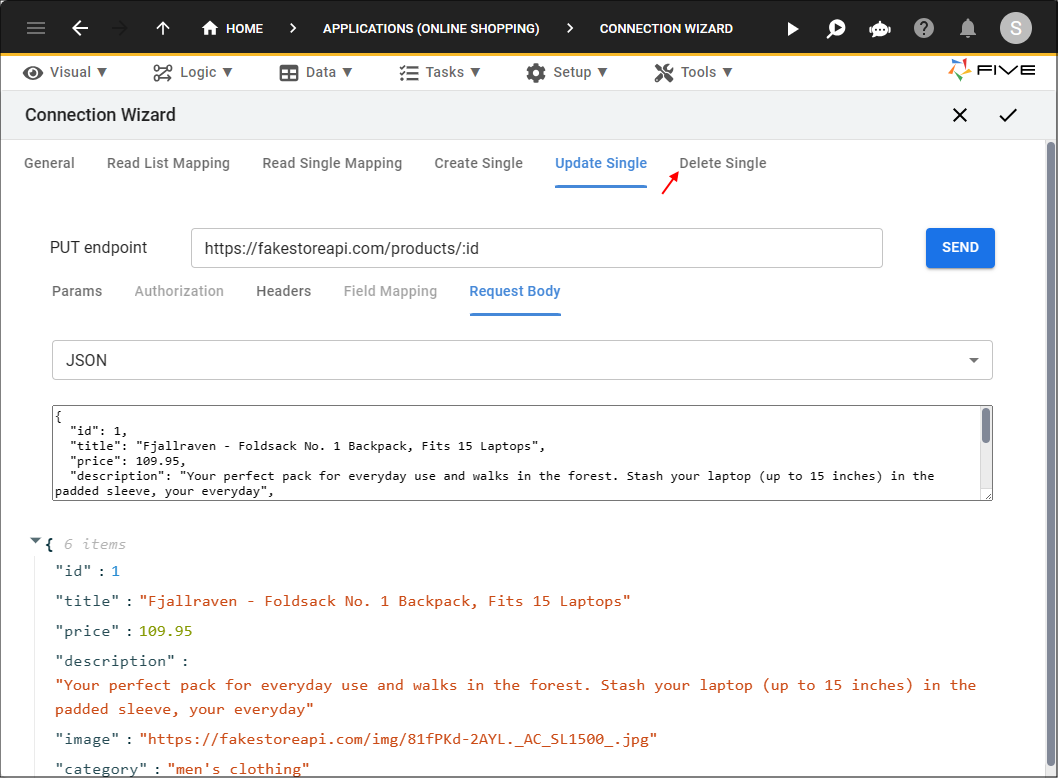
Figure 30 - Delete Single tab
31. Paste the endpoint URL in the DELETE endpoint field and add the
:id
placeholder.Example
https://fakestoreapi.com
/
[ resource ]
/
:id
32. In the Path Variables section, add an ID value in the Value field.
tip
You need to add the ID to know which record is being deleted!
33. Click the Send button.

Figure 31 - Send DELETE request
info
The record is selected from the ID and is now available for you to test with.
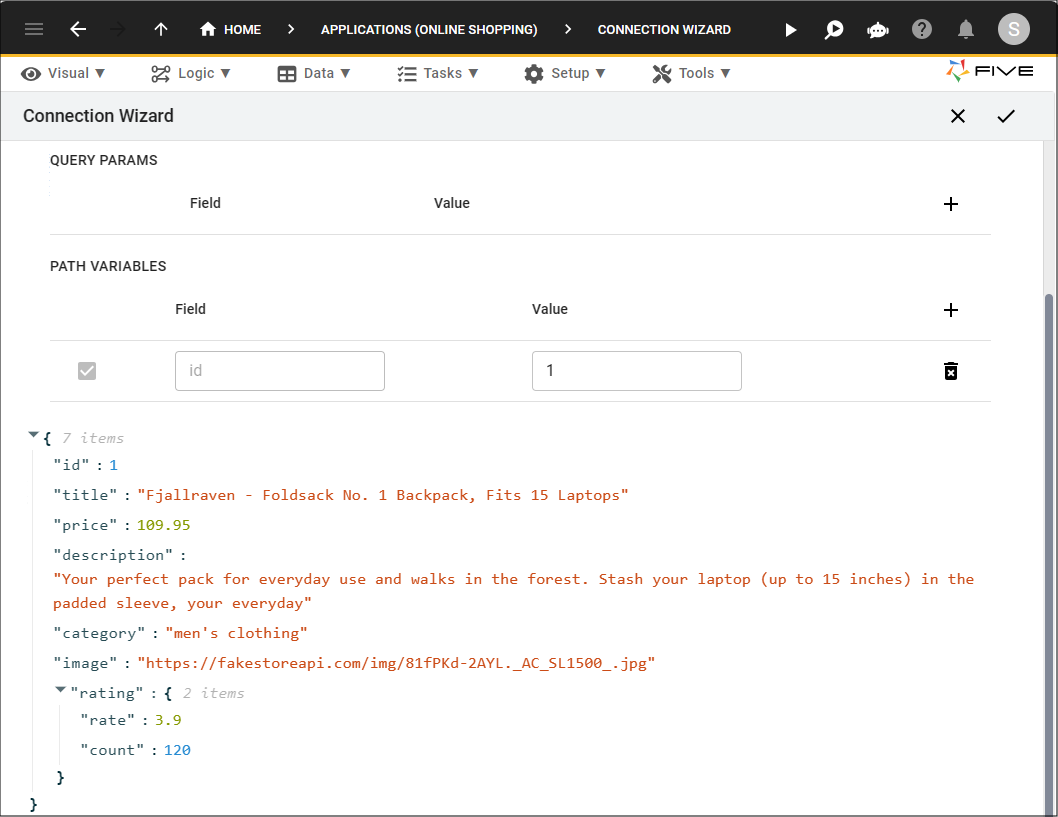
Figure 32 - DELETE response data
34. Click the Save button in the REST Wizard app bar.

Figure 33 - Save the Web Service record
What Has Happened?
In this example, Five is acting as the client application and is communicating with an API server. When you clicked the Send button for the GET request the following happened.- Five sent a GET request to the server hosting the Fake Store API rest endpoint.
- The API server received the request, processed it, and returned a response.
- Five received the response and displayed it in the lower panel of the REST Wizard.
- By providing the endpoint and ID on the Read Single Mapping page, a record can be selected and viewed in your application.
- By providing the endpoint on the Create Single page, a new record can be created in your application.
- By providing the endpoint and ID on the Update Single and Delete Single pages, a record can be updated and deleted in your application.