Team
Last updated 19/02/2026
Overview
The Team plan provides a structured deployment workflow with separate development and production environments. This separation ensures that application changes can be safely tested before being released to your end-users.
The deployment process follows three core stages:
- Deploy to development - used to publish and test changes in a non-live environment.
- Deploy to production - used to make the application live and accessible to your end-users.
- Upgrade production - used to apply subsequent application updates and image updates to an already deployed production environment.
For the initial deployment to the production environment, both the application and its associated image are deployed together from the last run of your development environment. Once an application is live in production, future updates are not applied automatically. To update production with new application changes or image versions, the Upgrade button must be used.
Removing a production deployment and re-deploying does not perform an upgrade. The upgrade action is the only method that applies new application or image changes to an existing production deployment. The upgrade action will update all application changes performed in the development environment and updates the image (version) if your Five account has been updated so you can apply this to your application.
The first deployment to each environment may take up to five minutes to be available as the new DNS (Domain Name System) entry for the URL needs to propagate. In the event of a timeout, wait for one to two minutes and click the Run button as the location may not be found yet because the DNS has not propagated.
How Deployment Works
1. Deploy to Development- When changes are made to your application, you must click the Deploy to Development button
- This updates the development environment with your latest changes
- From here on in, you can click the Run button to apply changes
- You can review and validate the application here before going live
- Once you are satisfied with the changes in development, you need to make your application production ready
- On the first deployment, Five will apply all changes that have been made to the development environment
- For future upgrades to the production environment, you must use the upgrade action
How to Deploy to Development
For the default instance of your application, you can deploy it from either Five's toolbar or via the Cluster Management page on the instance record. An instance of your application that is not set as the default, can only be deployed via the Cluster Management. It is recommended that while you are developing you application to have the instance record set as the default so you can deploy from any view in Five rather than needing to return to the Cluster Management.
Deploy via Five's Toolbar
The default instance can be deployed from any view in Five via Five's toolbar.
1. Ensure the instance of your application you are developing is set as the default.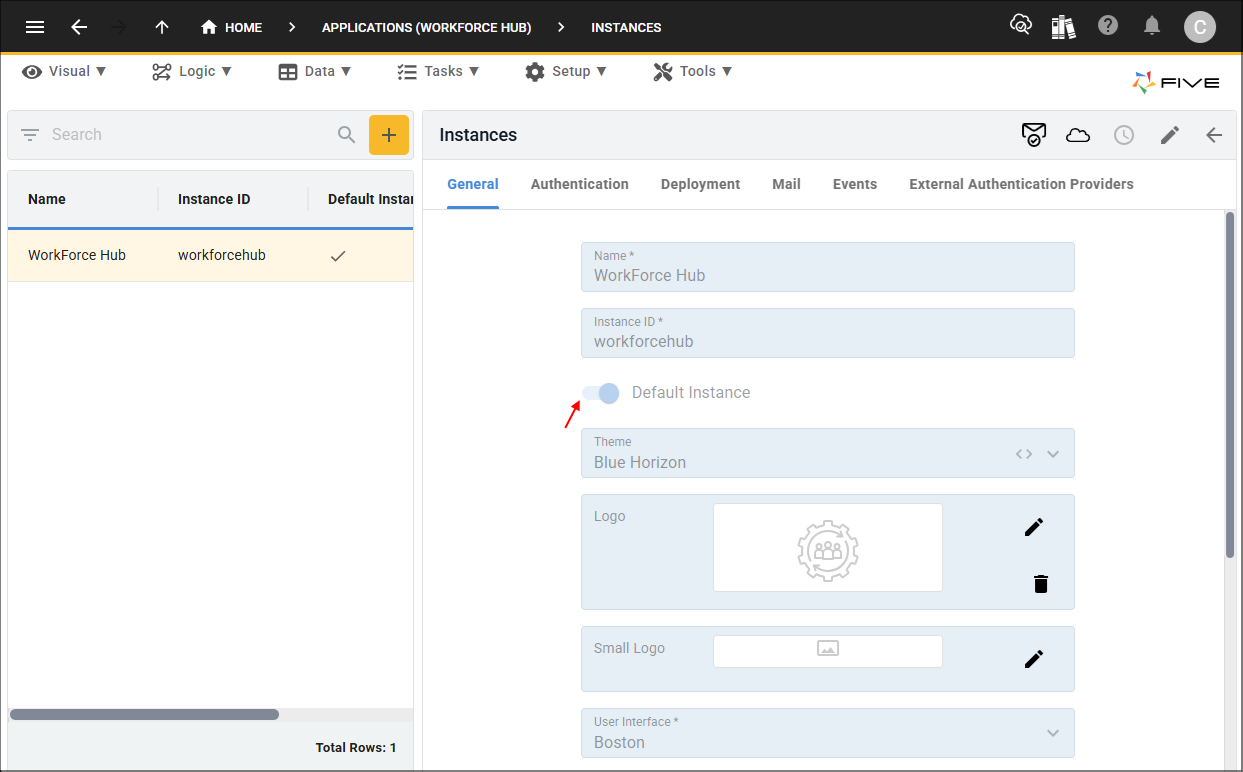
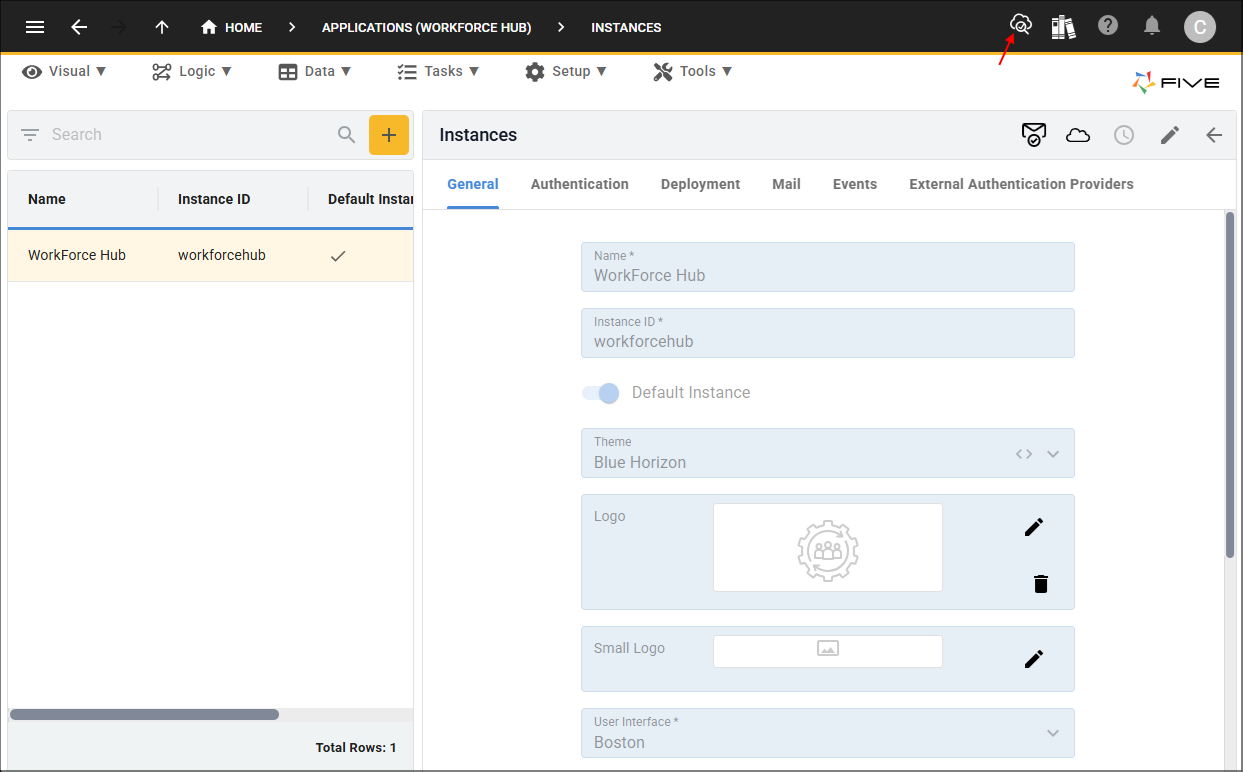
2. Click the Deploy to Development button in Five's toolbar.
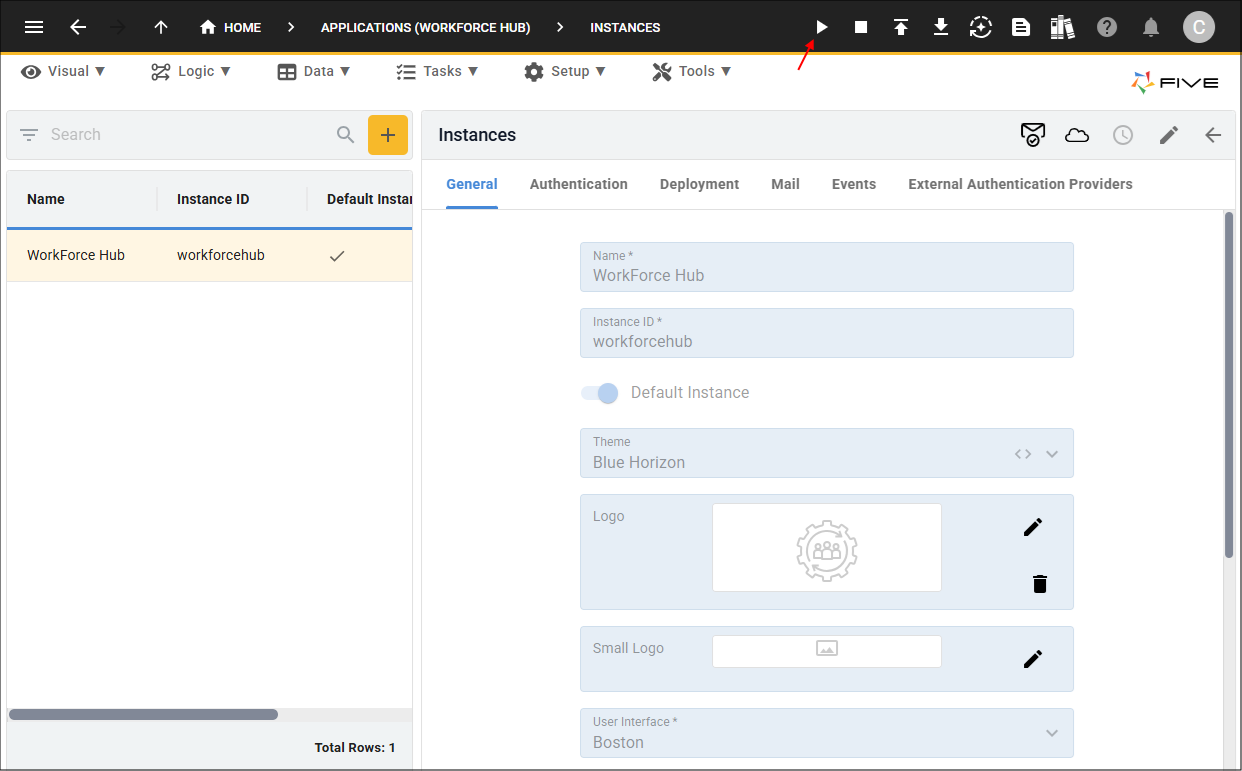
3. Click the Run button from here on in to see your changes.
Deploy via Cluster Management
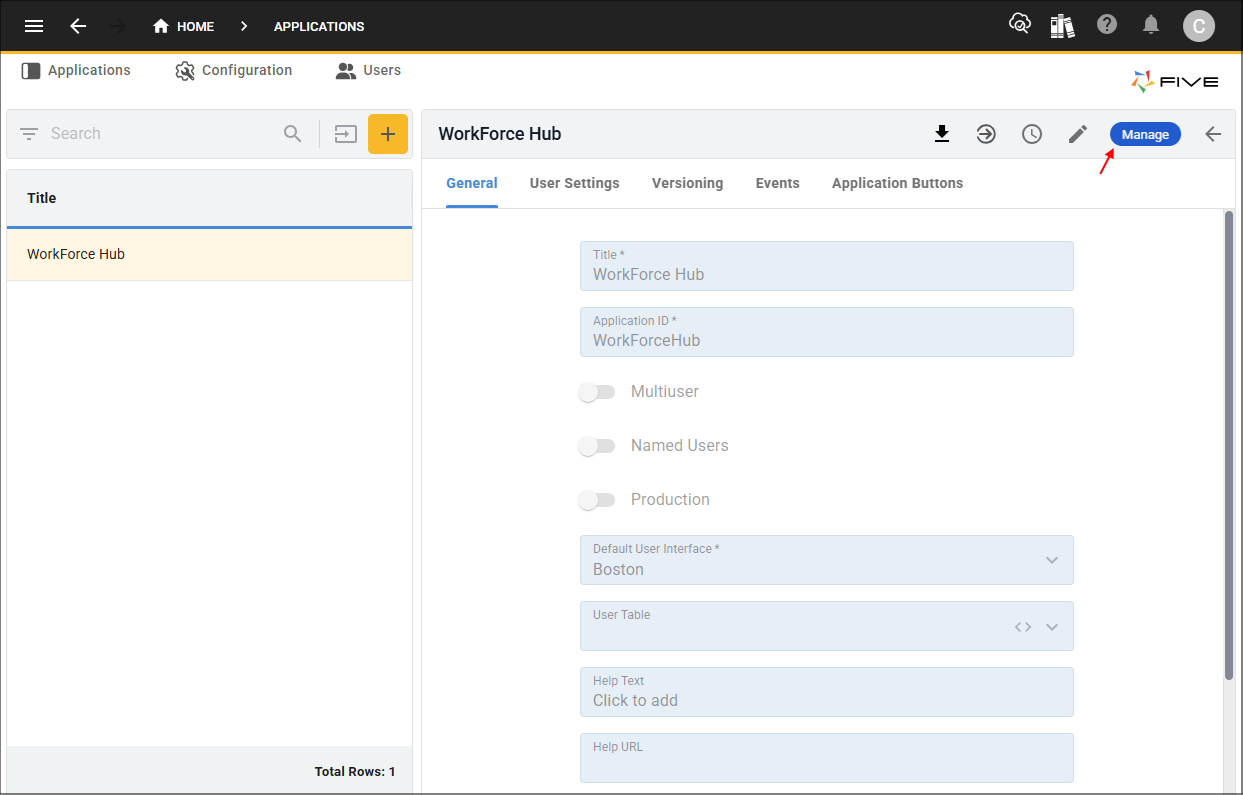
1. Click the Manage button.
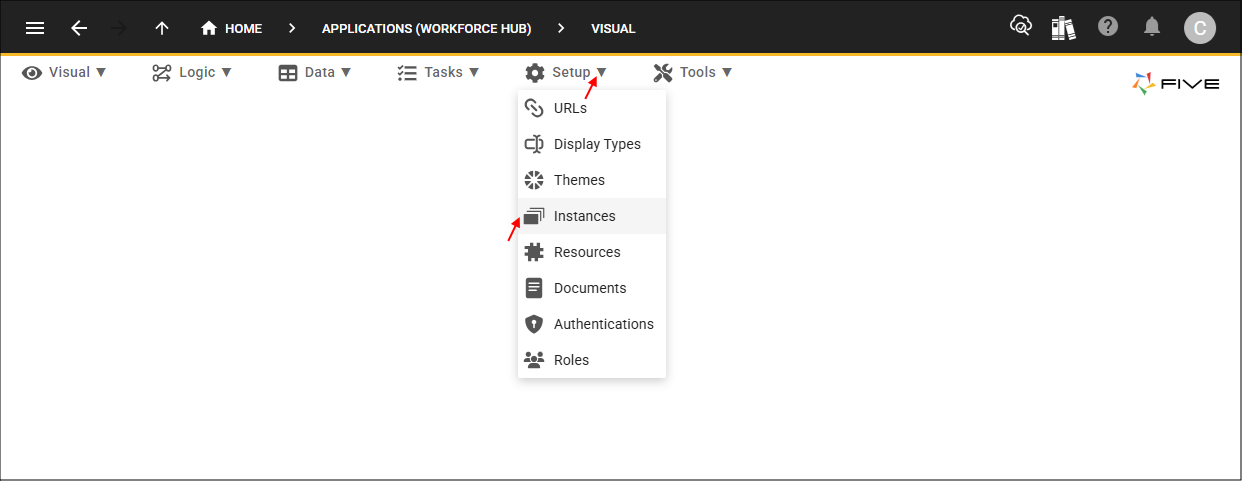
2. Click Setup in the menu followed by Instances in the sub-menu.

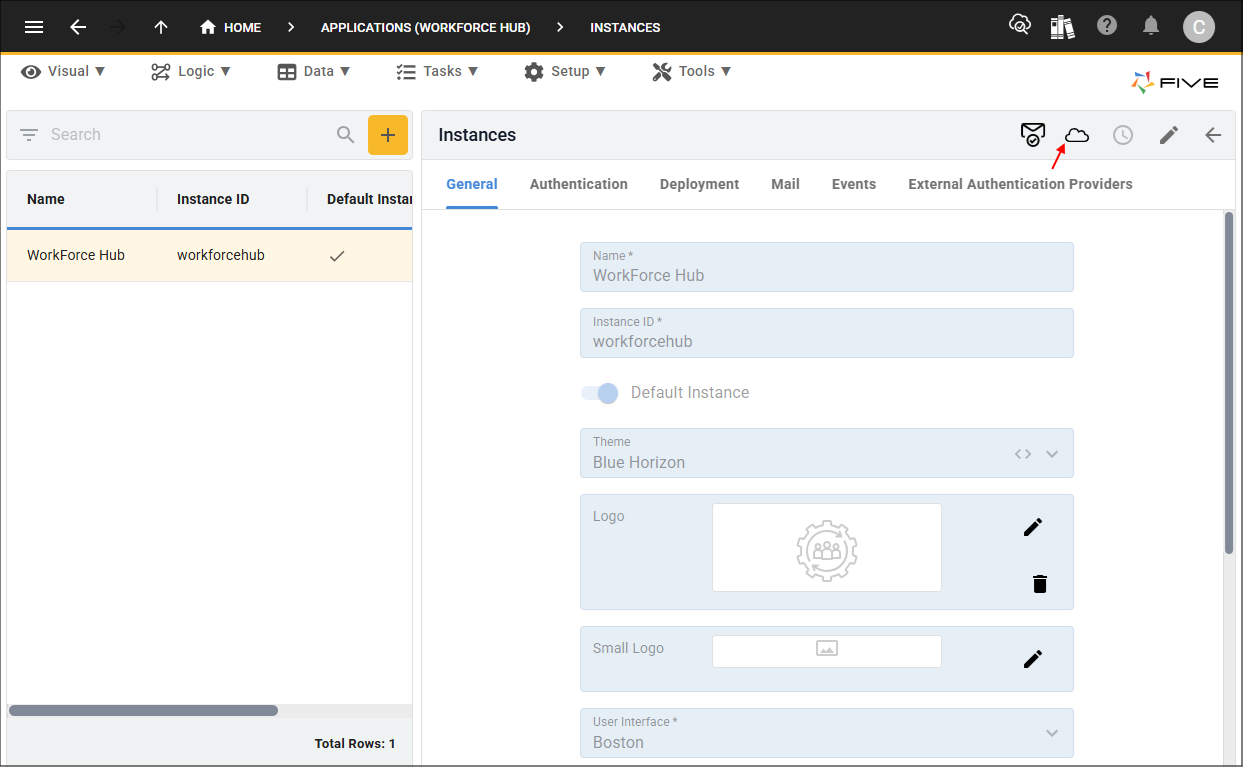
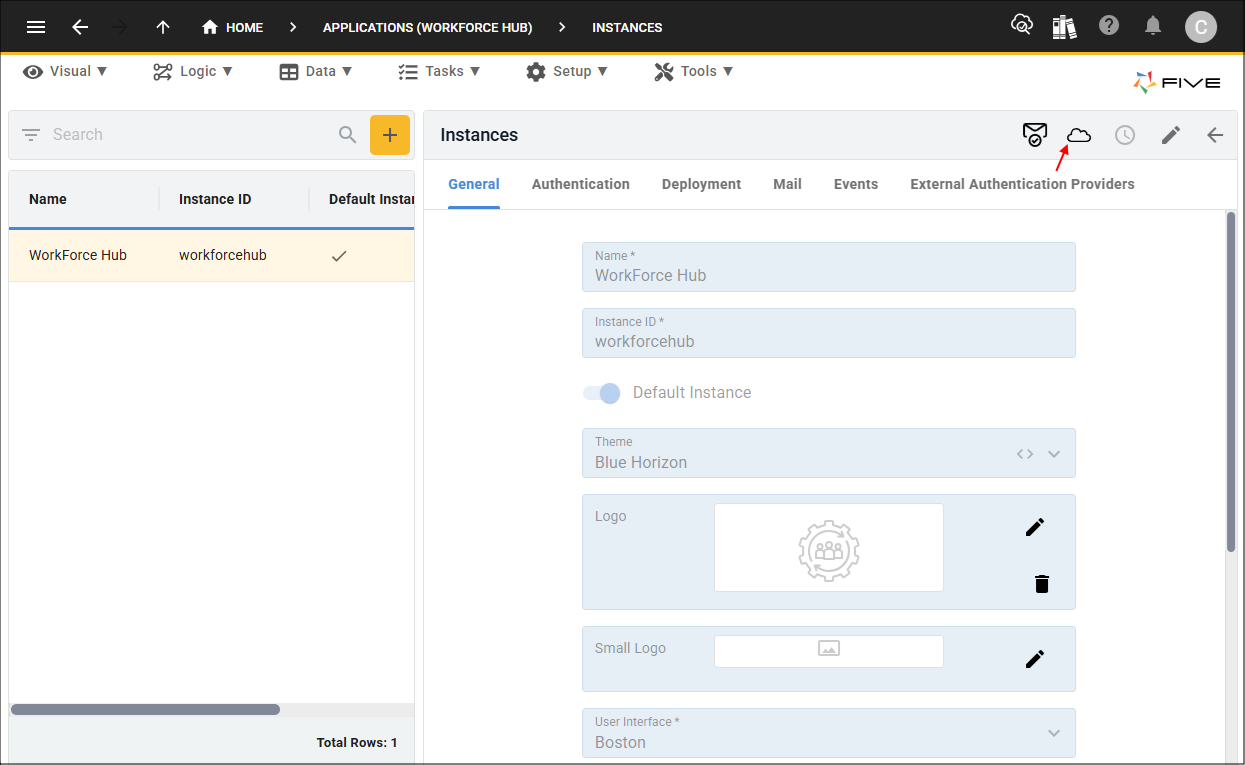
3. Select the instance record in the list and click the Cluster Management button.
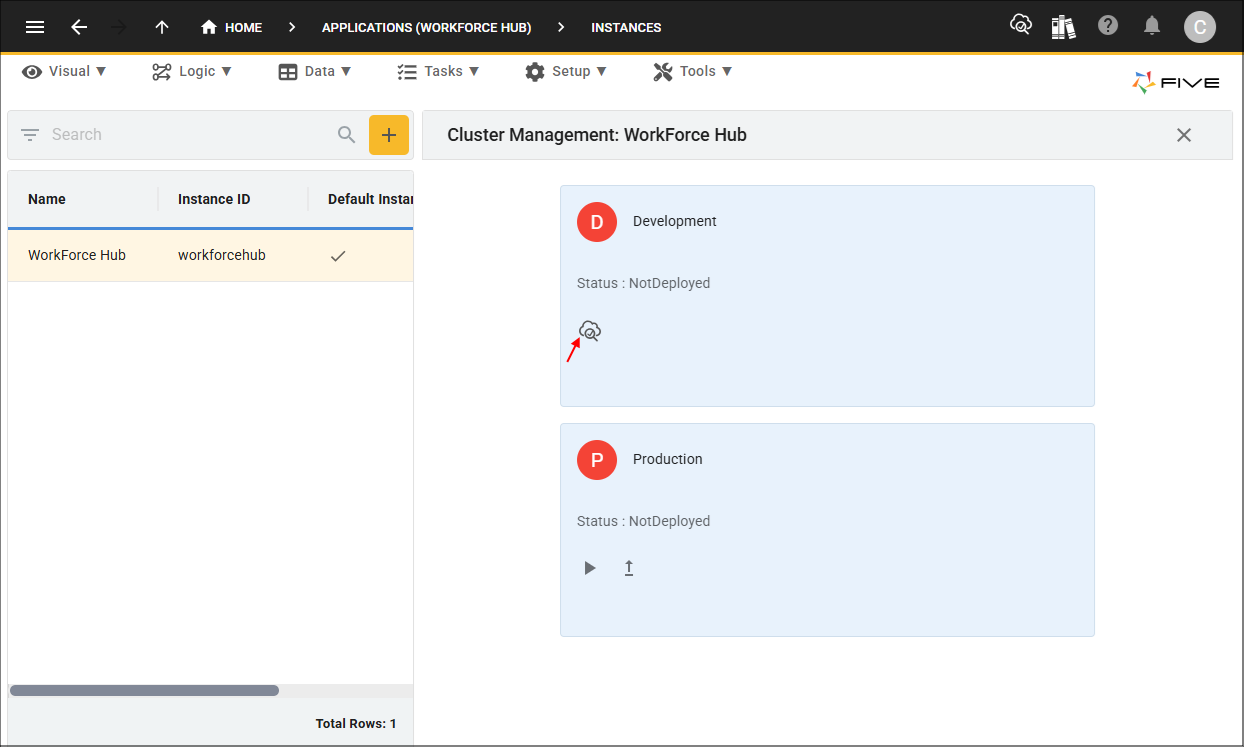
4. Click the Deploy to Development button.
How to Deploy to Production
Ensure you have deployed/run the instance of your application to the development environment before deploying to the production environment so all your changes are applied to the production environment.
For your initial production deployment, Five will automatically take what has been deployed in the development environment and deploy it to production.
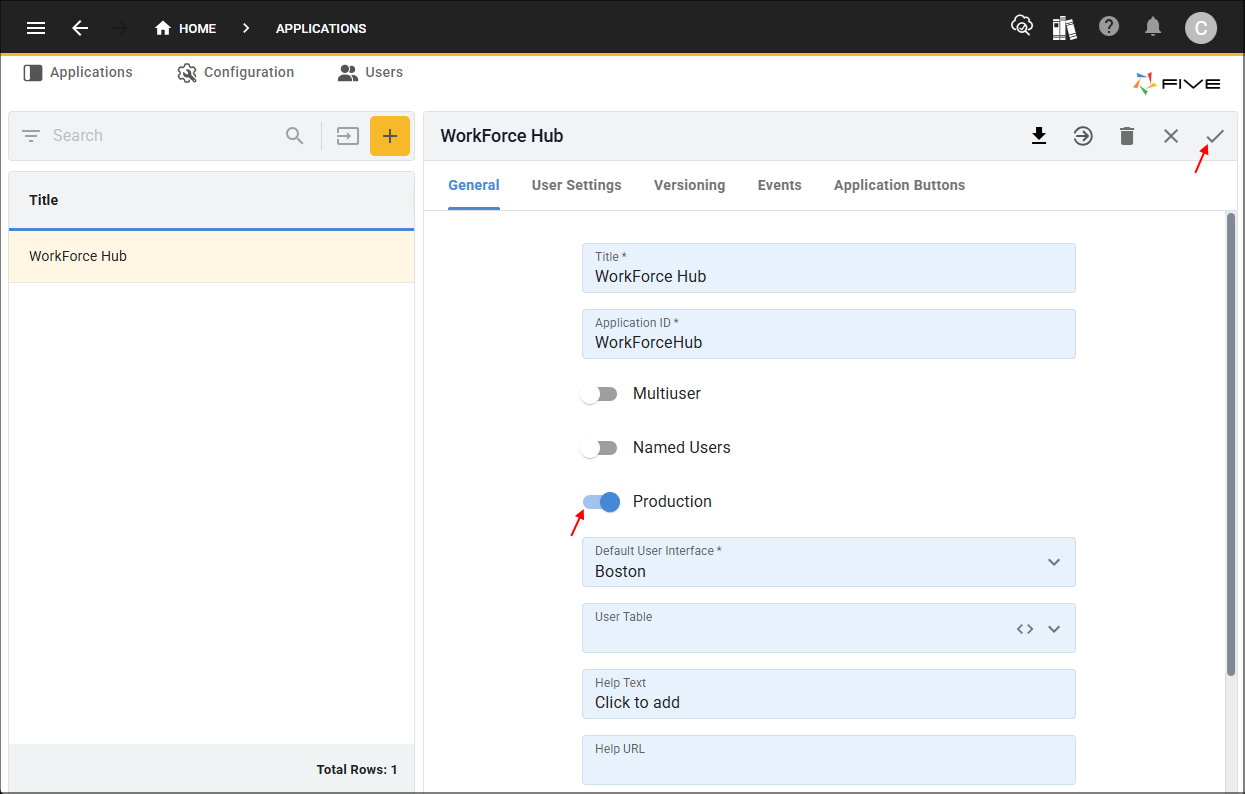
1. Click the Production switch for your application.2. Click the Save button in the form app bar.
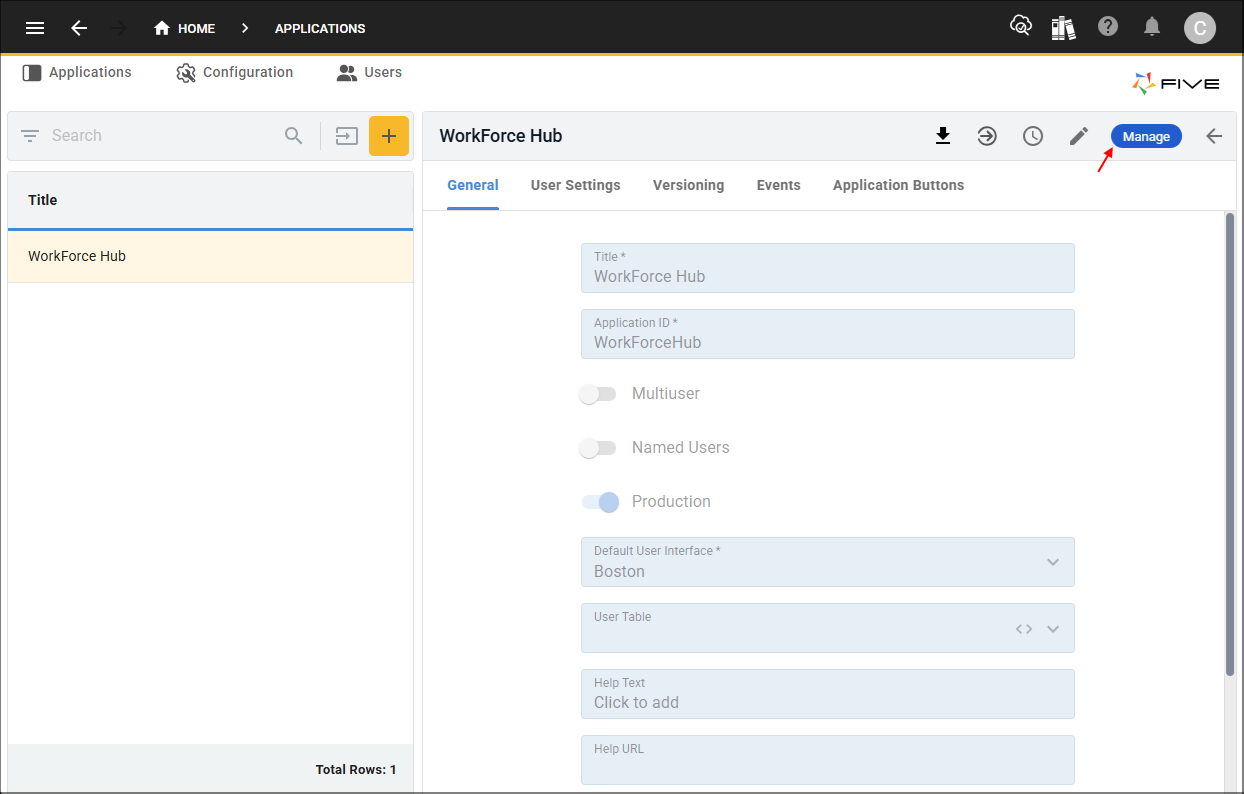
3. Click the Manage button in the form app bar.
4. Click Setup in the menu followed by Instances in the sub-menu.
5. Select your instance record in the list and click the Cluster Management button.
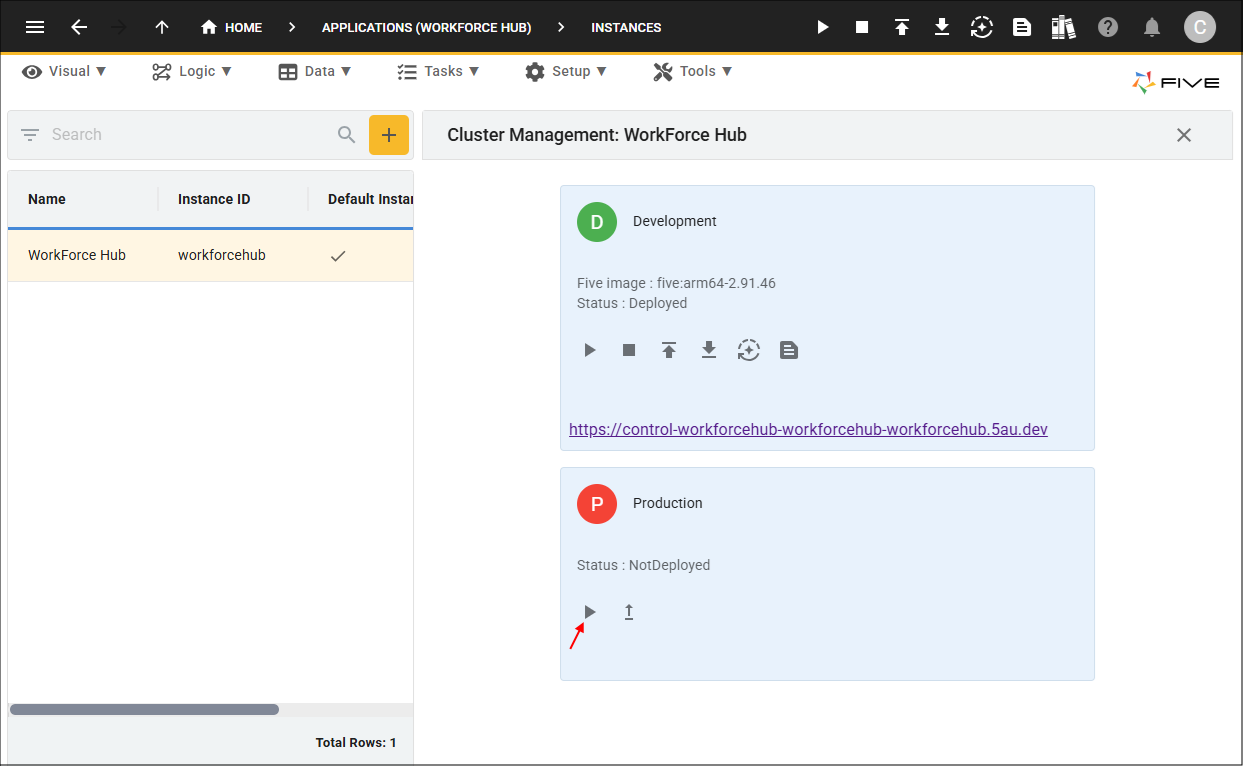
6. Click the Run button in the Production window.
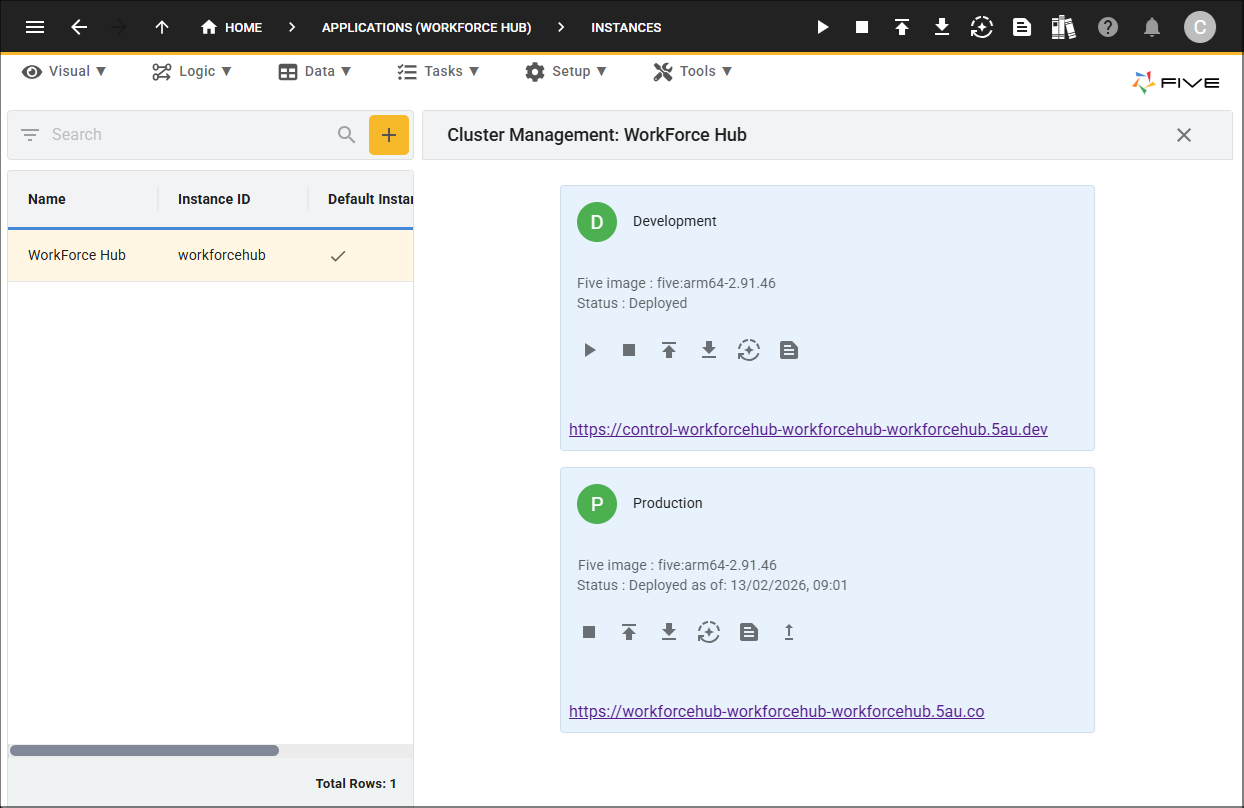
Upgrade
Stopping and starting your production application will not perform any upgrades. You need to perfom the upgrade action if you need a new version of your application in the production environment. When upgrading the production environment, all application changes and image upgrades will be applied.
1. Click the Upgrade button.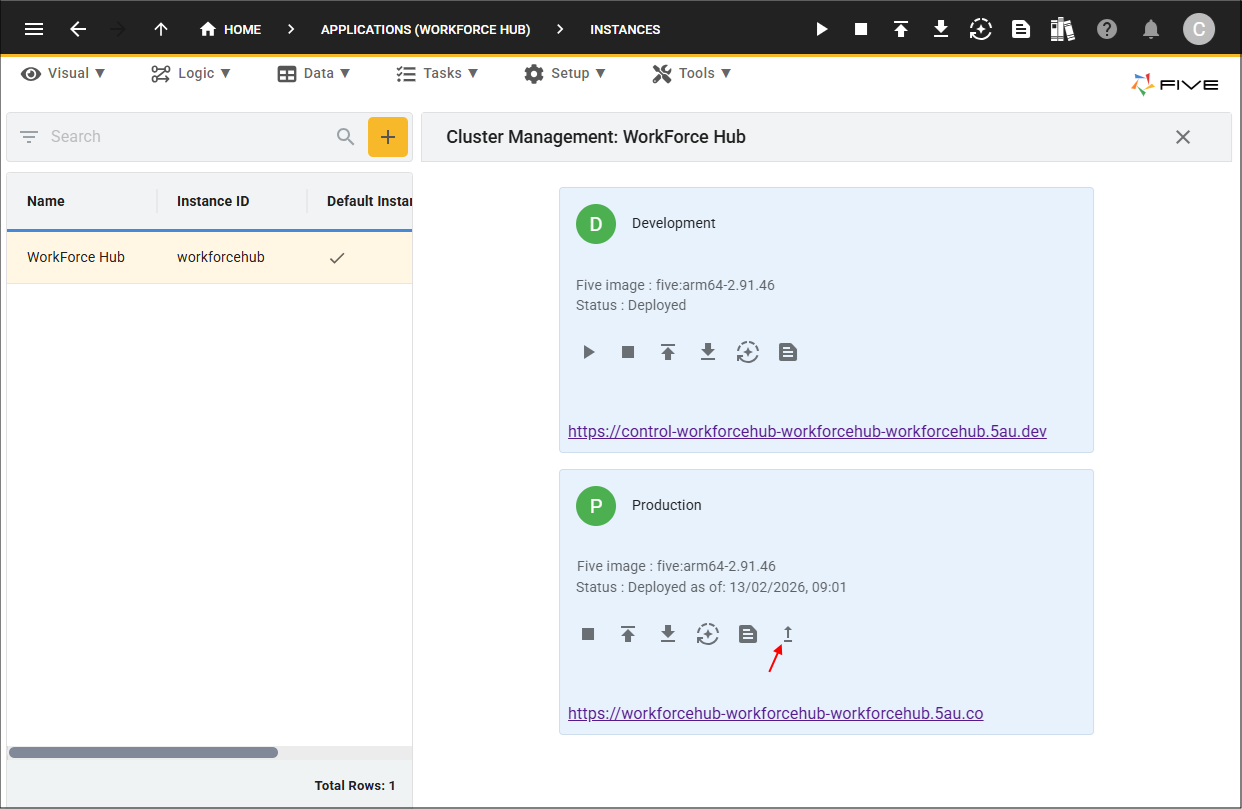
Summary
Applications must move through two environments:
- Development
- Production
Initial deployment to the production environment will take everything from the development environment without having to upgrade.
Upgrading production:
- When you are happy with the application in your development environment:
- Click the Run button followed by the Upgrade button; or
- Click the Upgrade button (will perform the upgrade and run your application in one click
- Deployment moves the build to the environment
- Upgrade applies the new application version and image
- Skipping the upgrade step means changes will not be applied after initial deployment
- Stopping and restarting an environment does not update the application or image