OR Condition
Last updated 6/04/2022
OR Condition in Five
The OR condition is used to test two or more conditions where records are returned when any one of the conditions are met. The Criteria field
is used to filter records. It is used to extract only those records that meet a specified condition. The criteria condition used together with the OR logical operator, is
executed when one or more conditions are met.
WHERE Condition_1
OR; Condition_2
OR; Condition_3
...
OR; Condition_4
Create a Query with an OR Condition
Select Menus in the menu.
Click the Add Item button in the list app bar.
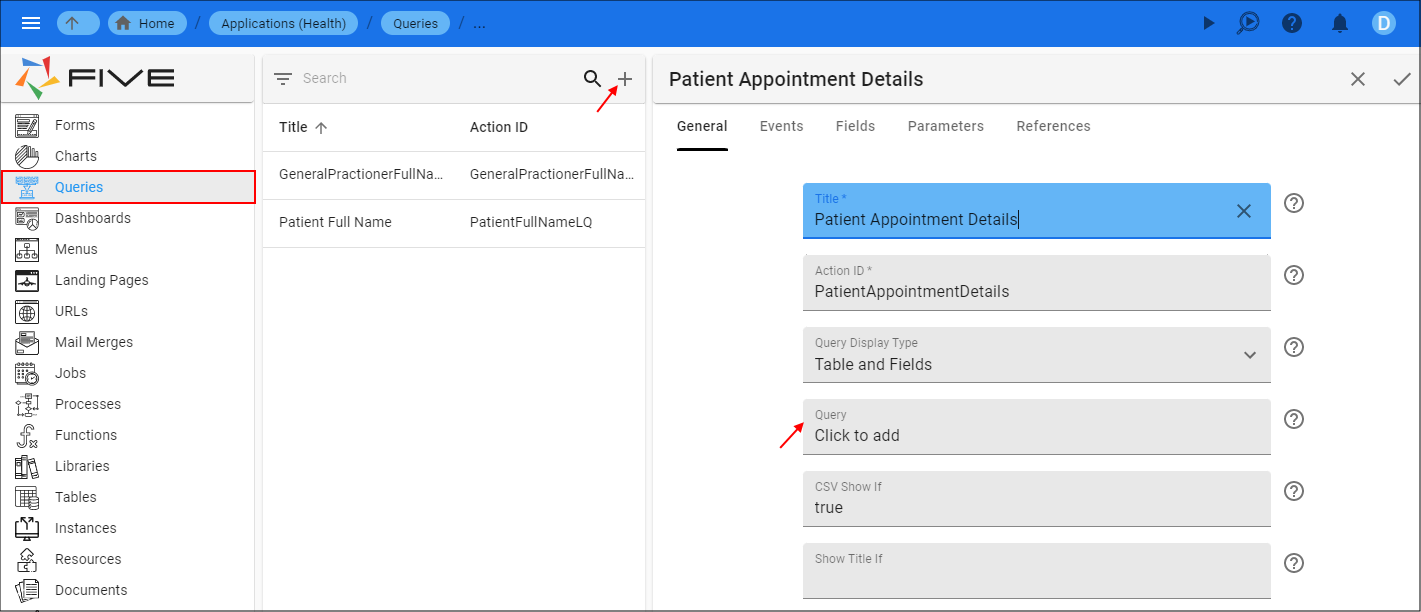
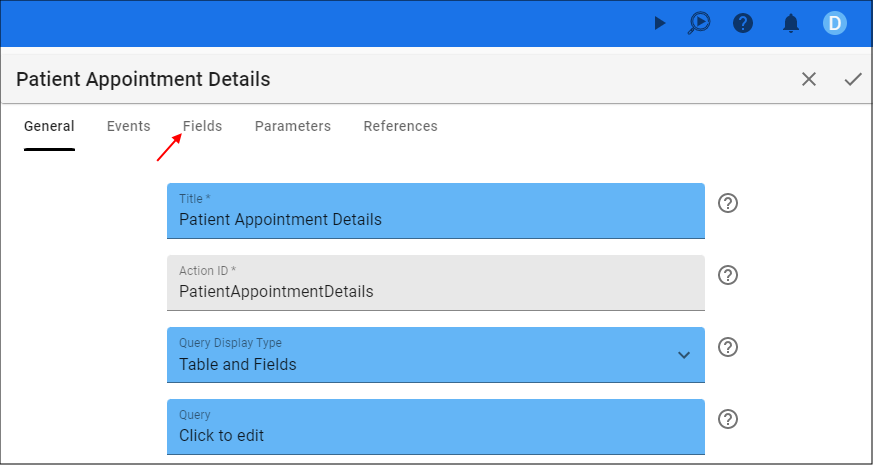
Type a title in the Title field.
Click in the Query field to open the Table and Fields Designer.
- Click the Add Table button.

- Select a table.
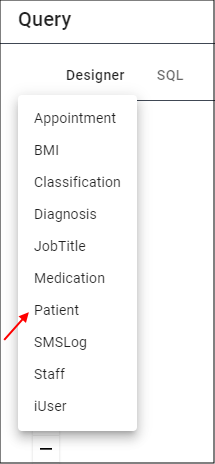
Click outside of the Table Selector dialog box to close the window.
Select the table and drag to the desired position on the Designer.
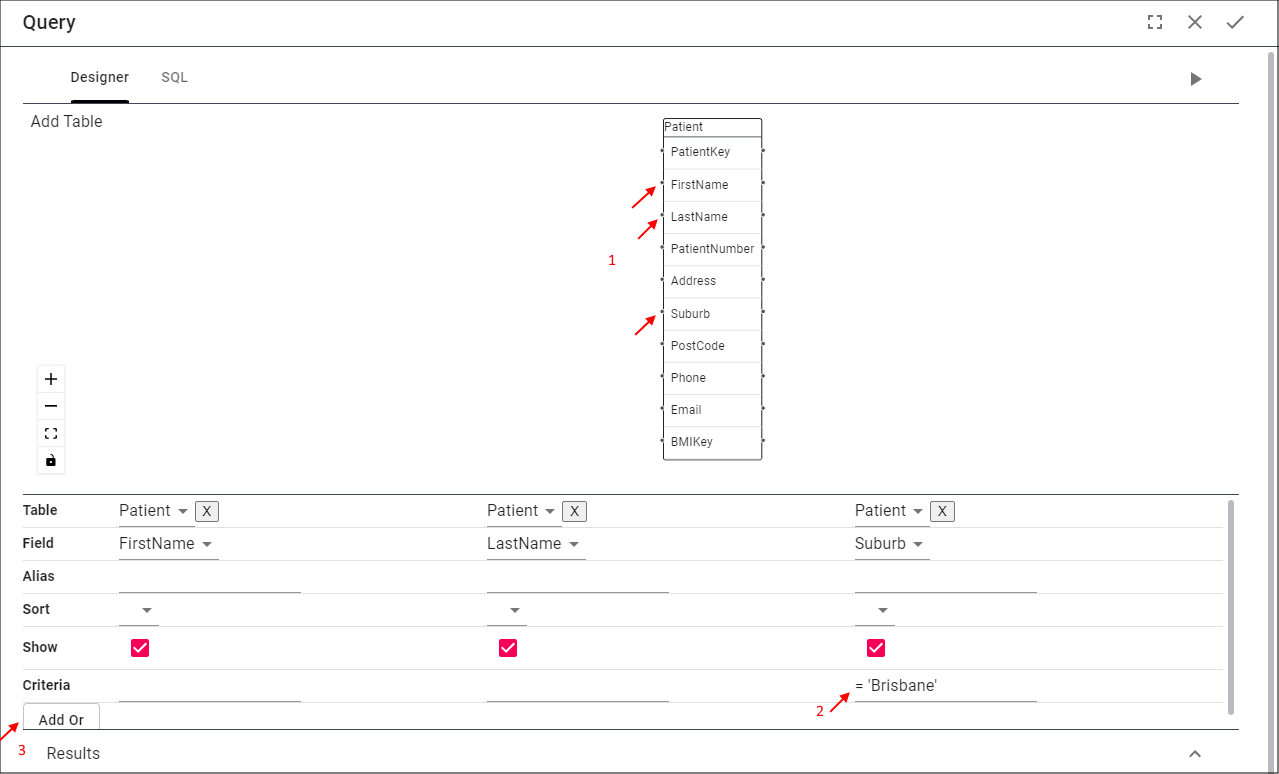
Double click the field names required for the query.
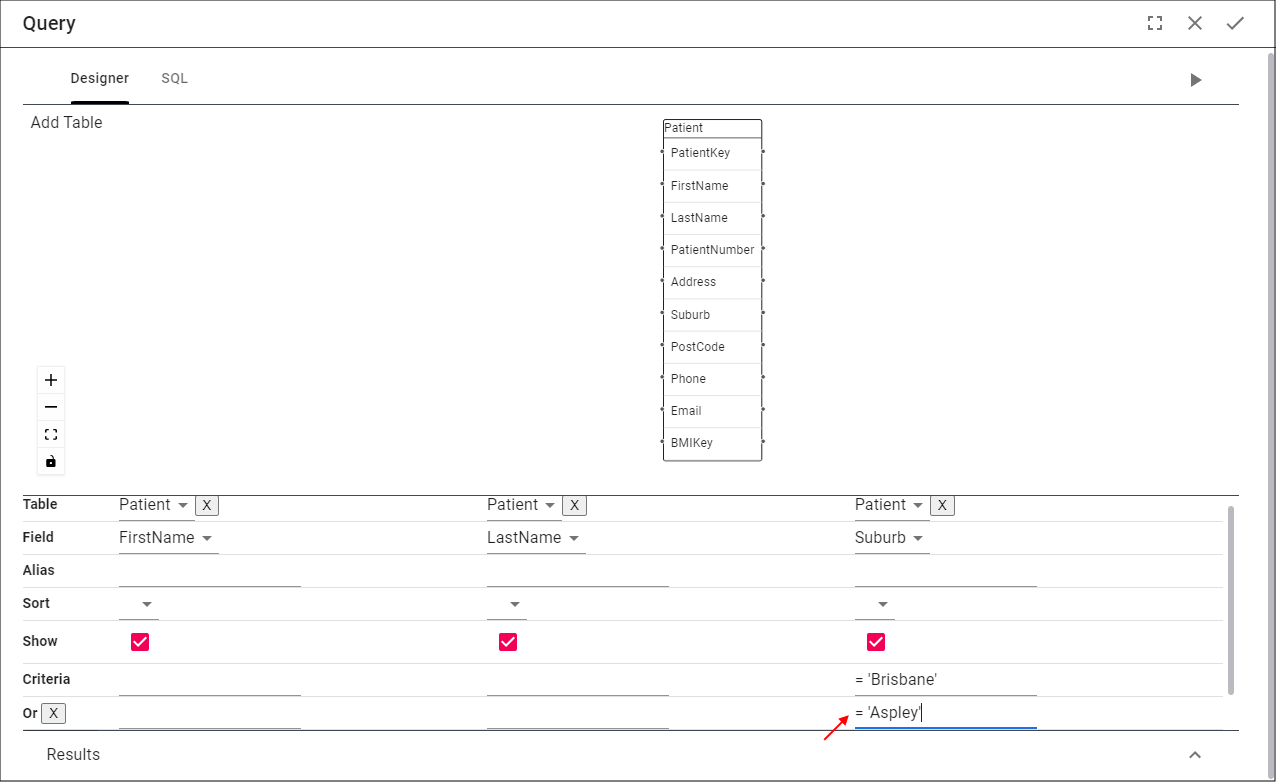
Type a condition in the Criteria field for a field.
Click the Add Or button.
- Type an
ORcondition in a Criteria field for the new row.
Criteria Examples
= 'Brisbane'
= 'Aspley'
info
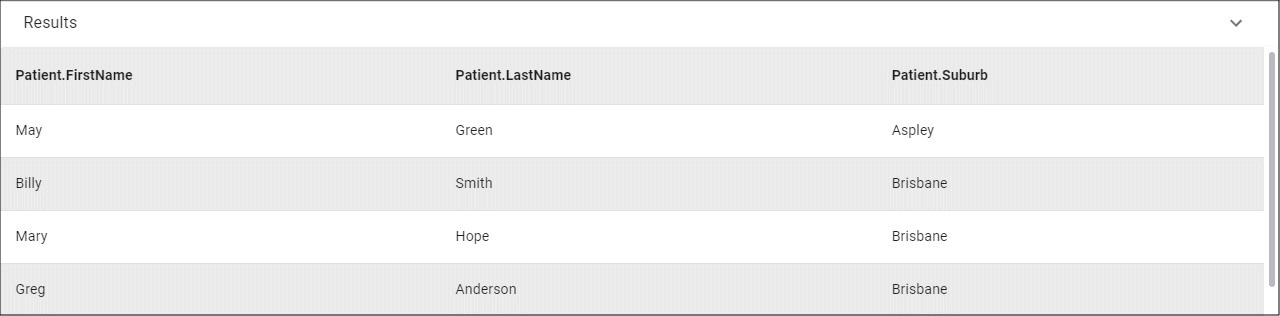
This OR example will return all patients in the Brisbane or the Aspley suburbs. Because the first name and the last name fields are included in the query, these are also
included in the result set.
Tips
- When entering a string it is strongly recommended to use quotes
''around the value to clearly define that it is a string.
- The
ORcondition can be set for any field that makes logical sense in the Query Builder.
- Click the Save button in the Table and Fields Designer app bar.

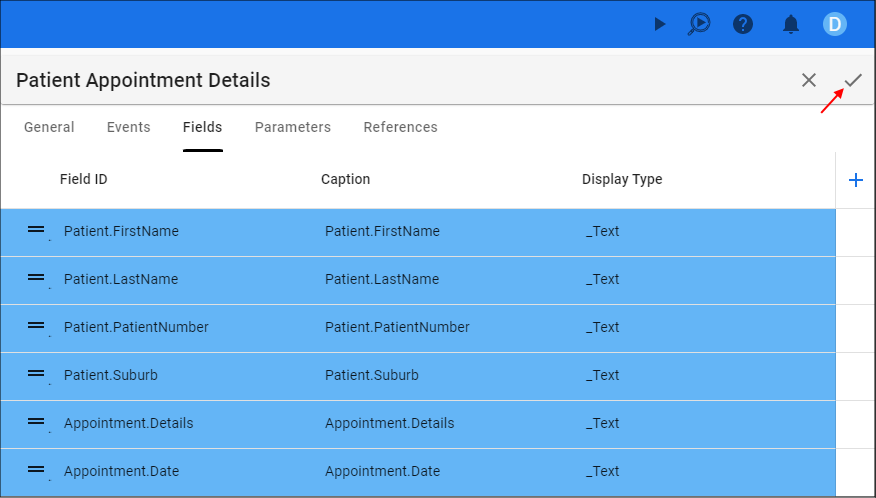
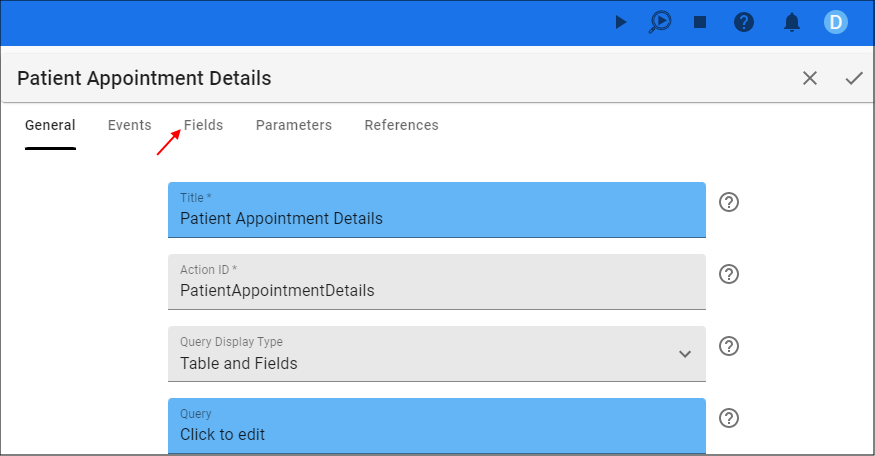
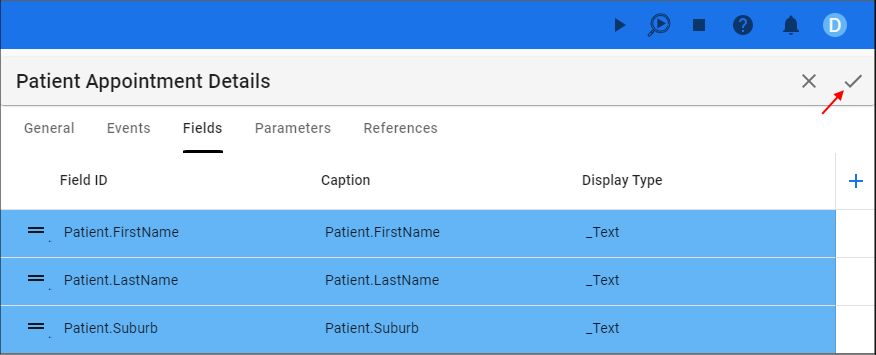
- Click the Fields tab.
- Click the Save button in the form app bar.
warning
Ensure to click the Fields tab to have all your query fields saved before committing the form.
Add an OR Condition with Multiple Tables
When creating OR conditions with multiple tables, Five will automatically create the JOIN for tables that have relationships defined.
Select Menus in the menu.
Click the Add Item button in the list app bar.
Type a title in the Title field.
Click in the Query field to open the Table and Fields Designer.
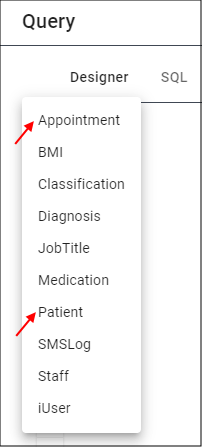
- Click the Add Table button.
Select a table.
Select table two.
Click outside of the Table Selector dialog box to close the window.
Select each table and drag to the desired position on the Designer.
In table one, double click the field names required for the query.
In table two, double click the field names required for the query.
In table one, type a condition in the Criteria field.
Click the Add Or button.
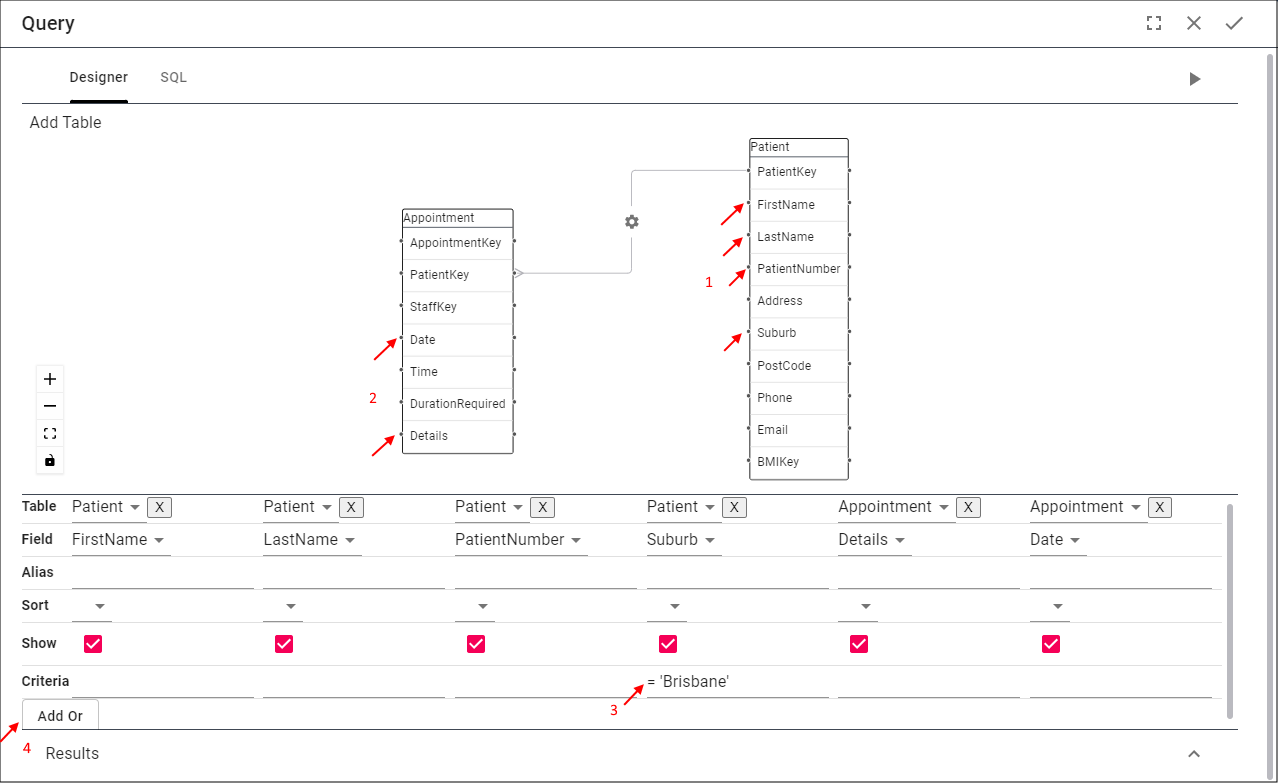
- In table two, type a condition in the Criteria field.
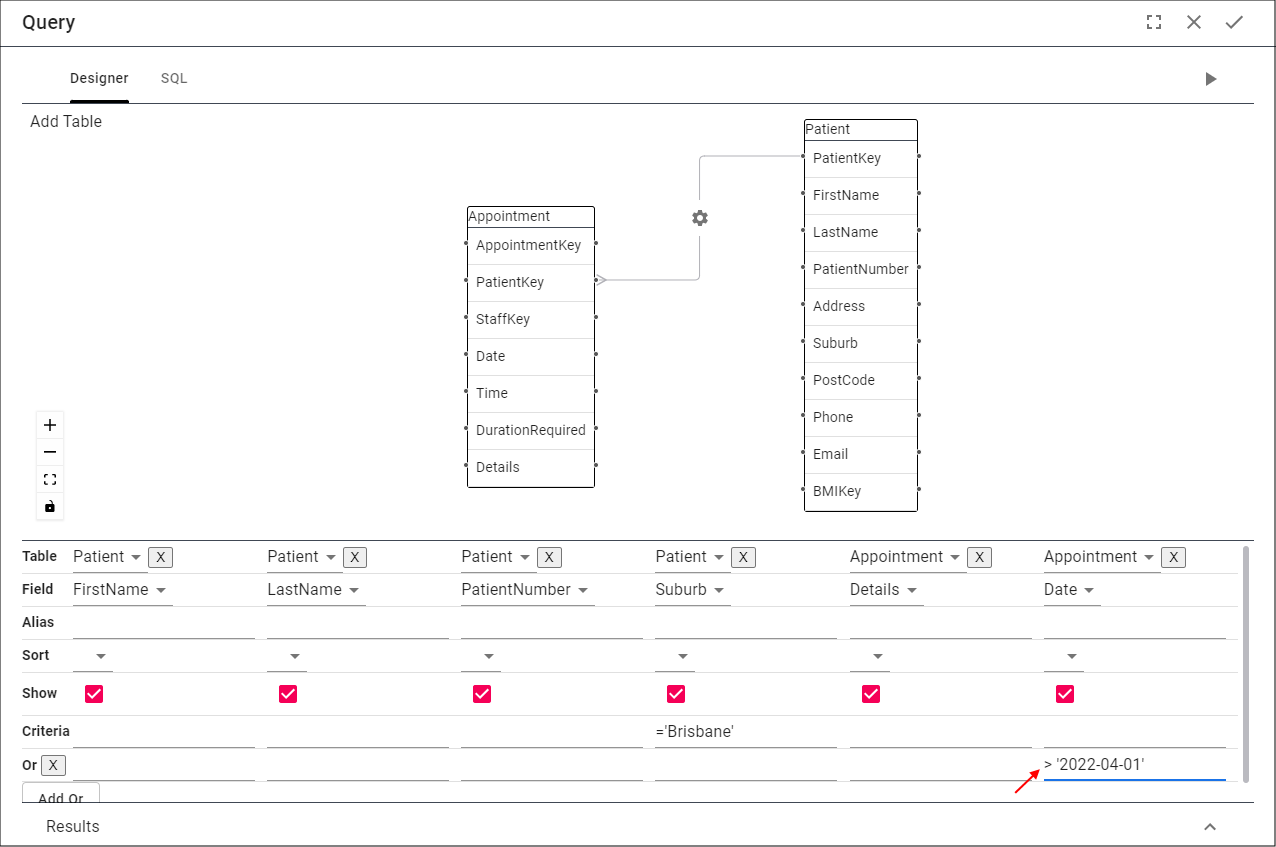
Criteria Examples
= 'Brisbane'
> '2022-04-01'
info
This OR example will return all patients in Brisbane OR patients with an appointment date after the 2022-04-01. Because the first name, last name, patient number, and details
fields are included in the query, these are also included in the result set.
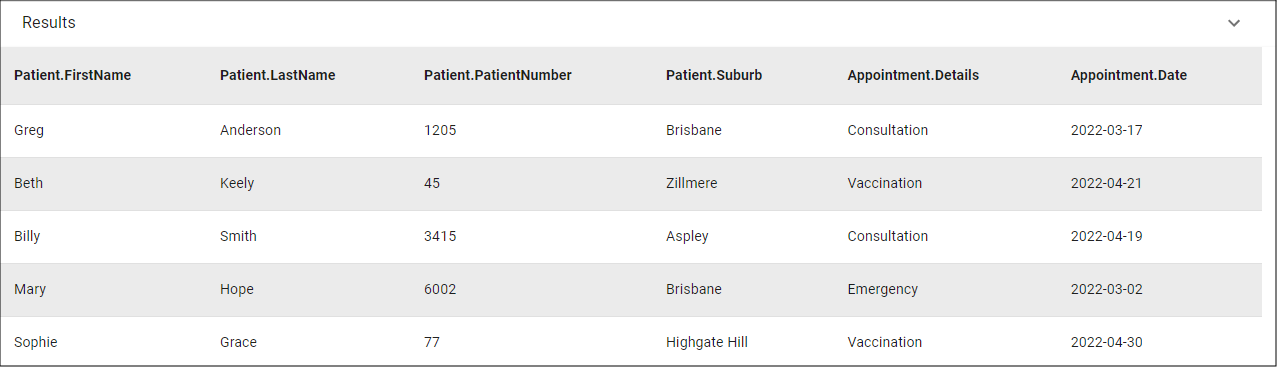
You will notice Five has prefixed all fields with their table name, for example, Patient.firstName. This is required to eliminate any ambiguity as to which field is being referenced, as the same field name may exist in both tables.
- Click the Save button in the Table and Fields Designer app bar.
- Click the Fields tab.
- Click the Save button in the form app bar.