3.5 - RequestBook Function
Last updated 12/06/2023
In order for the frontend to interact with the backend, the RequestBook function will call a backend function to interact with. The RequestBook function will execute on the frontend and call the RequestBookServer function from the backend to get the data we need from the database.The RequestBookServer will get the full name of the current logged in user in the Book Club application, and also the name of the owner of the book. Five's sendNotification() is then used to send a notification to the owner of the book when a member requests to borrow their book.
The RequestBook function puts the name of the book owner and the book title on the context variables and uses Five's executeFunction() to pass on the context into the RequestBookServer on the backend.
Finally, we'll need to add a button onto the Find Book query, this will enable a member to click the button and request a book from the owner. The owner of the book will receive an in-app notification holding the request information. If the owner is not logged into their account, the notification will be cached and available when they log in.
Navigate to the Code Editor
1. Select Logic in the menu.2. Select Code Editor in the sub-menu.
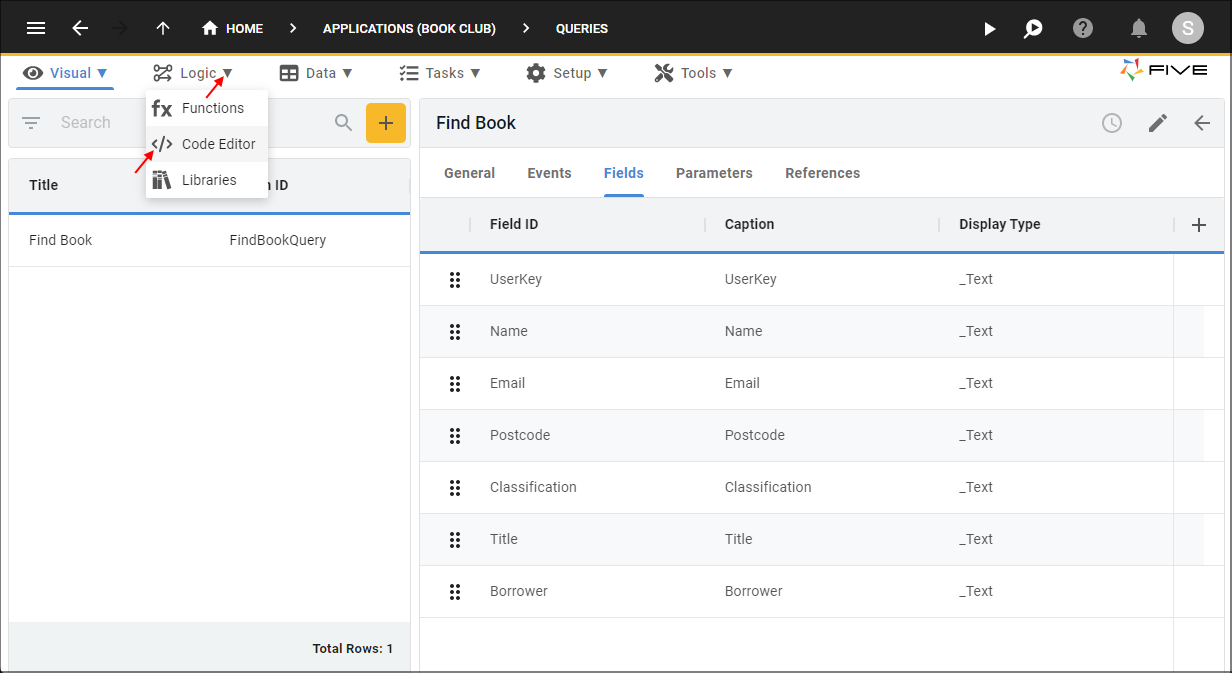
Figure 1 - Code Editor menu item
Add the RequestBookServer Function
1. Click the Add New Code button.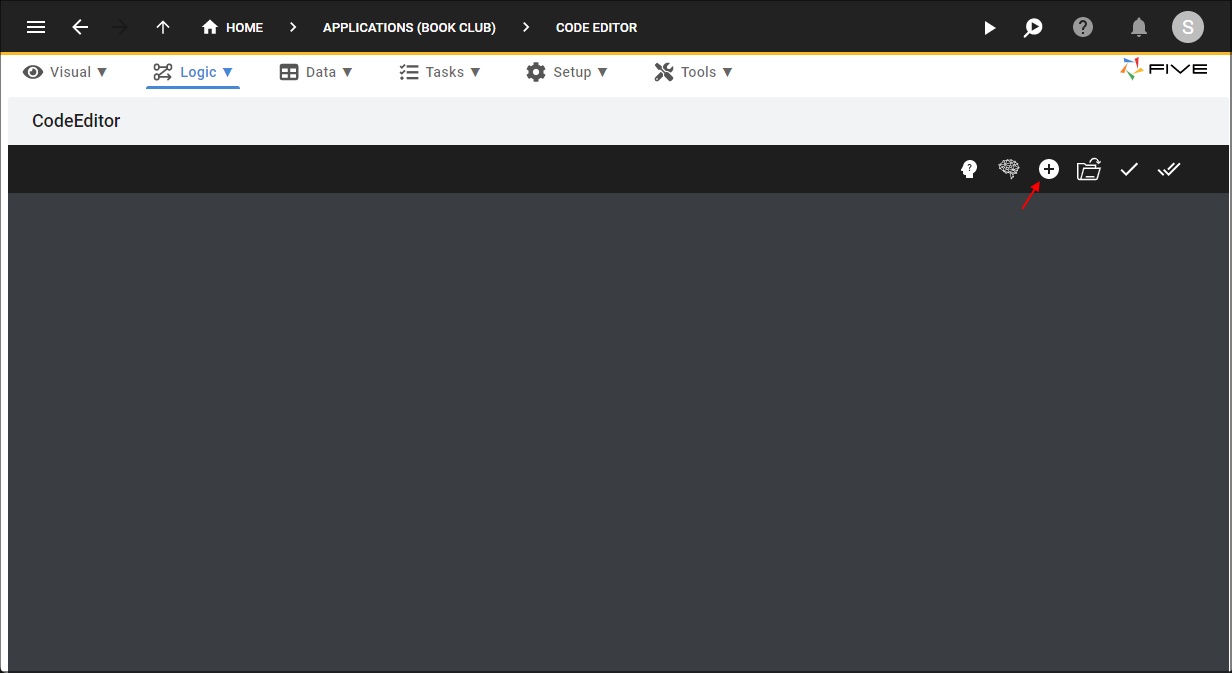
Figure 2 - Add New Code button
2. Type RequestBookServer in the Function ID field.
3. Click the lookup icon in the Language field and select JavaScript.
4. Click the OKAY button.
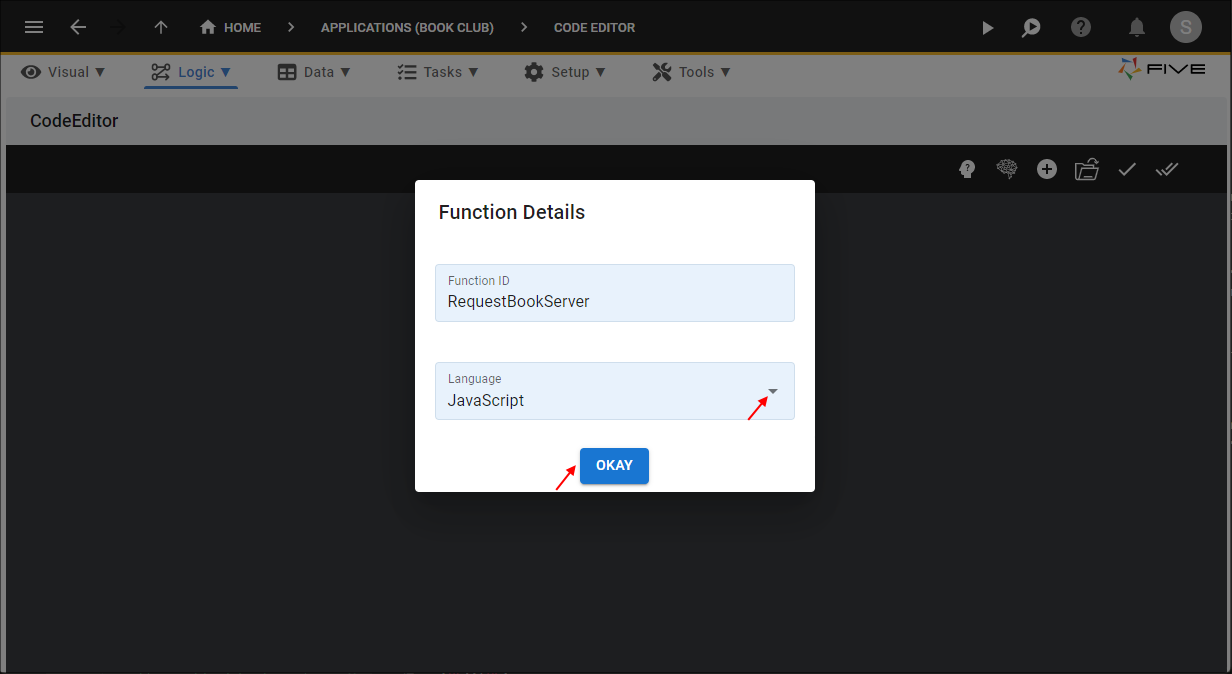
Figure 3 - Add the RequestBookServer function
5. Highlight and delete the template in the Code Editor.
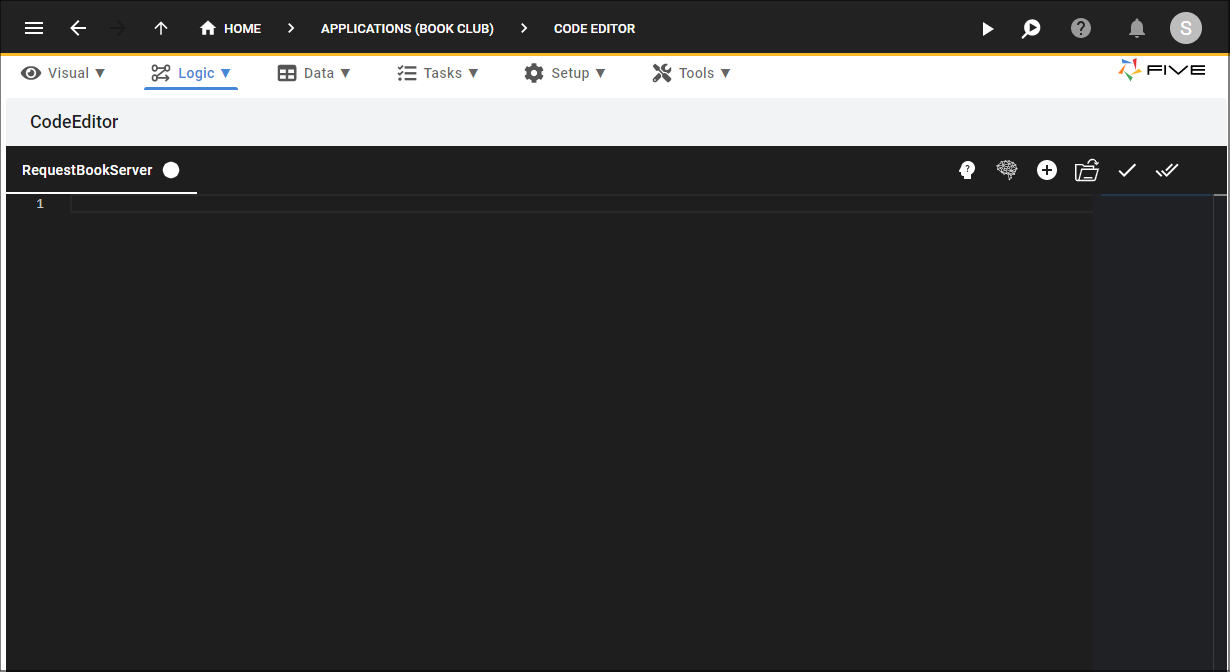
Figure 4 - Clean the Code Editor
6. Click the Copy button on the code block below.

RequestBookServer()
function RequestBookServer(five, context, result)  {
    const currentUserKey = five.currentUserKey();
    let userResults = five.executeQuery("SELECT FullName FROM iUser WHERE iUserKey = ?", 1, currentUserKey);
    if (userResults.isOk() === false) {
        return five.createError(userResults);
    }

    const currentName = userResults.records[0].FullName;
    userResults = five.executeQuery("SELECT FullName FROM iUser WHERE iUserKey = ?", 1, context.UserKey);
    if (userResults.isOk() === false) {
        return five.createError(userResults);
    }

    const ownerName = userResults.records[0].FullName;
    five.sendNotification(context.UserKey, `Hi ${ownerName}, ${currentName} would like to borrow your book : ${context.Title}`);
    return five.success(result, `Your request has been sent to ${ownerName}`);
}
7. Paste the code in the Code Editor.
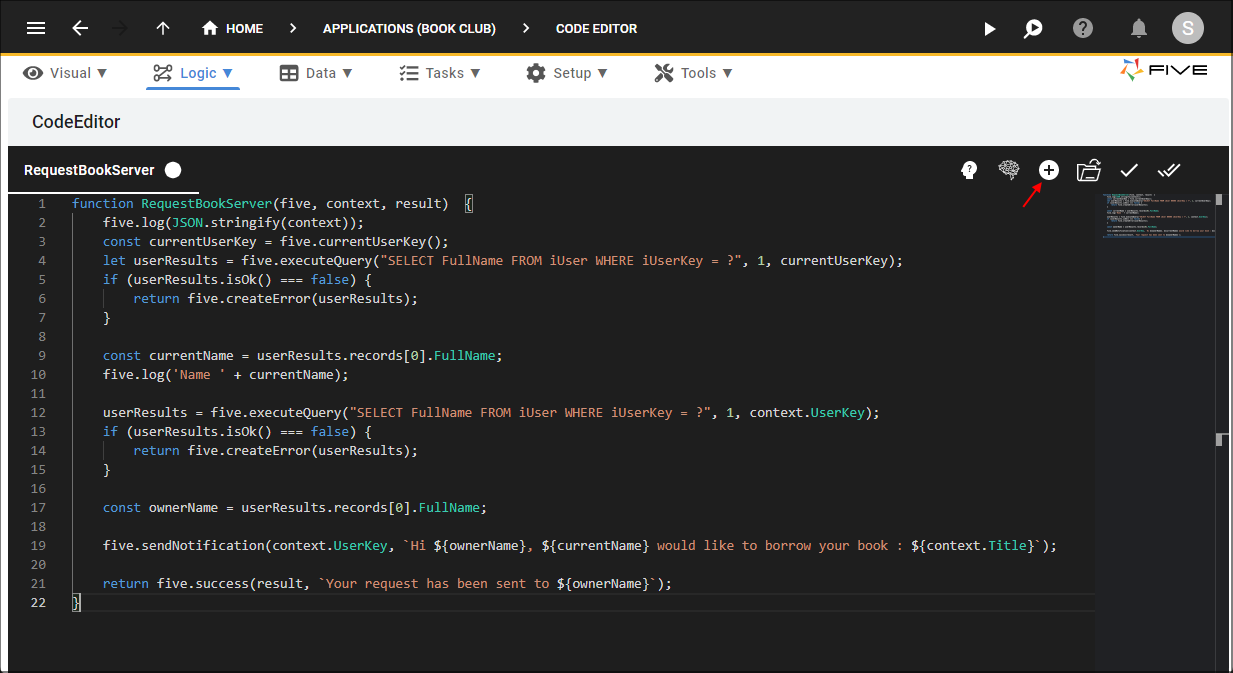
Figure 5 - Add the RequestBookServer code
Add the RequestBook Function
1. Click the Add New Code button.
Figure 6 - Add New Code button
2. Type RequestBook in the Function ID field.
3. Click the lookup icon in the language field and select JavaScript.
4. Click the OKAY button.
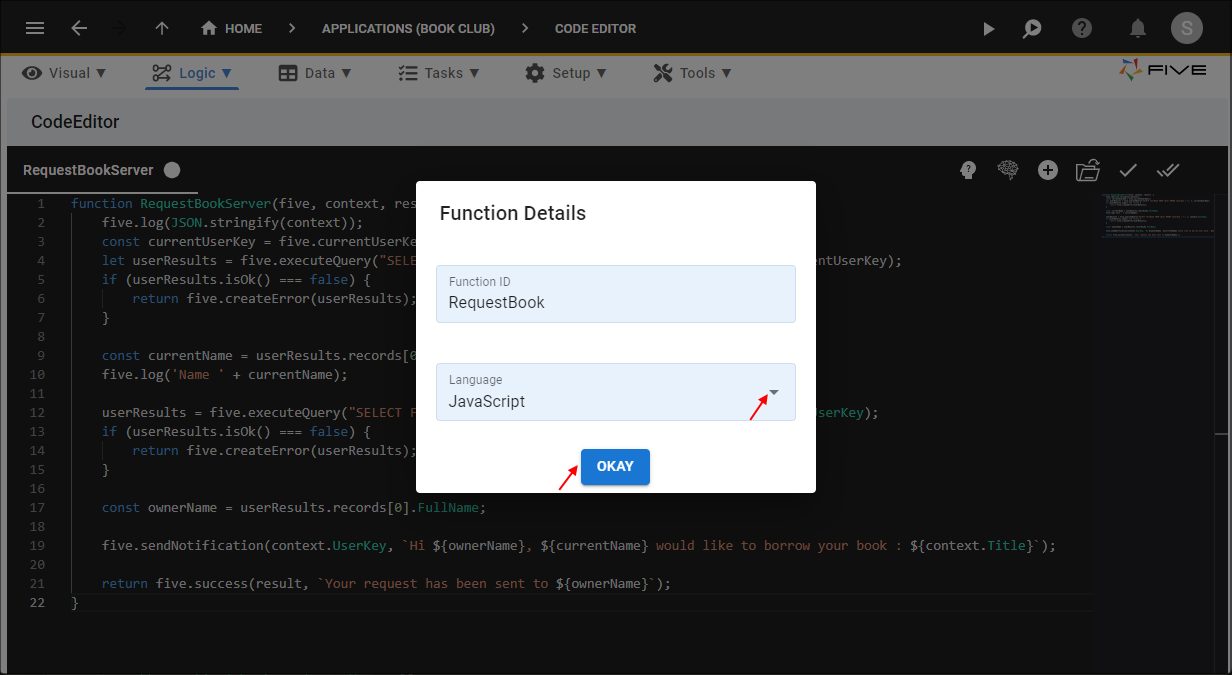
Figure 7 - Add the RequestBook function
5. Highlight and delete the template in the Code Editor.
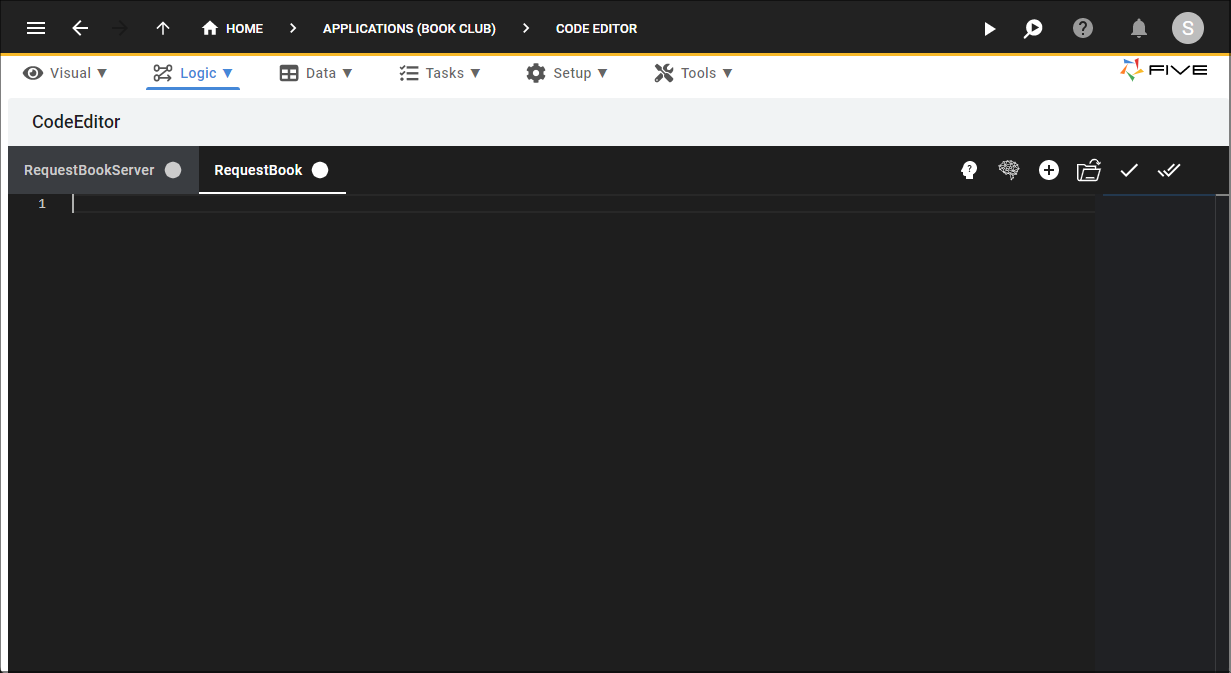
Figure 8 - Clean the Code Editor
6. Click the Copy button on the code block below.
RequestBook()
function RequestBook(five, context, result)  {

    const variables = {};
    variables['UserKey'] = five.field.UserKey;
    variables['Title'] = five.field.Title;

    const _five = five;
    five.executeFunction('RequestBookServer', variables, null, '', '', function (result) {
        if (result.serverResponse.errorCode === 'ErrErrorOk') {
            return;
        }

        const functionMessage = result.serverResponse.results;
        if (functionMessage !== '') {
            _five.message(functionMessage);
        }
    });

    return five.success(result);
}
7. Paste the code in the Code Editor.
8. Click the Save All Tabs button.
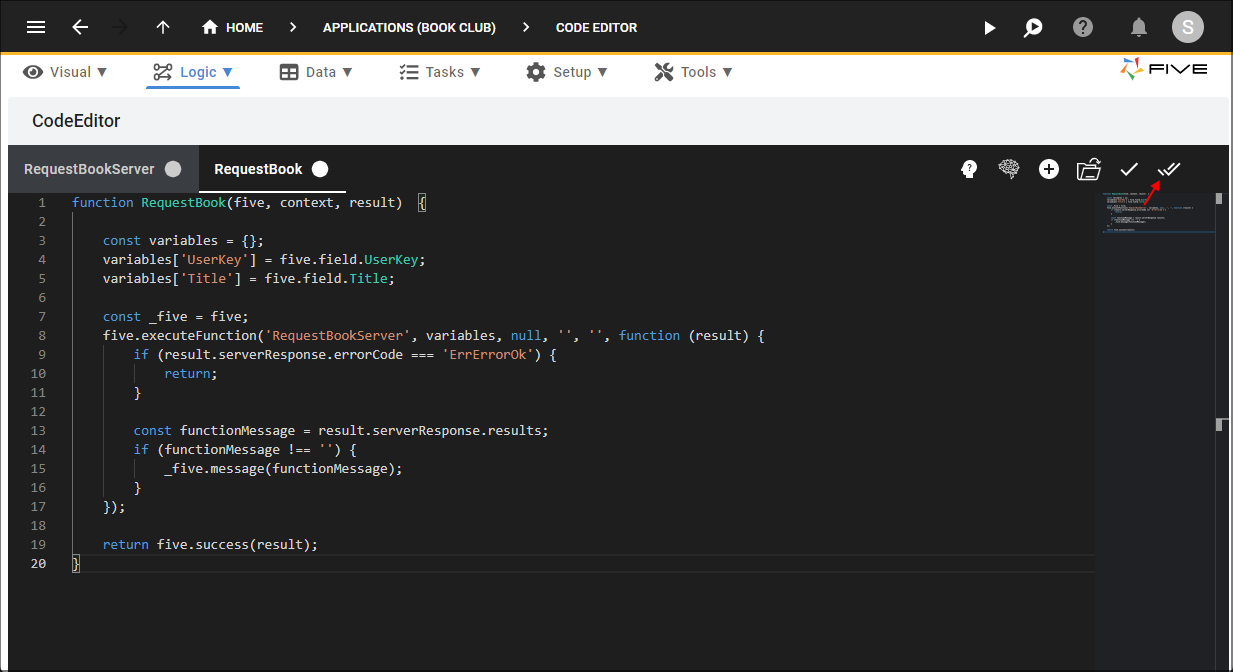
Figure 9 - Save All Tabs button
Navigate to Queries
1. Select Visual in the menu.2. Select Queries in the sub-menu.
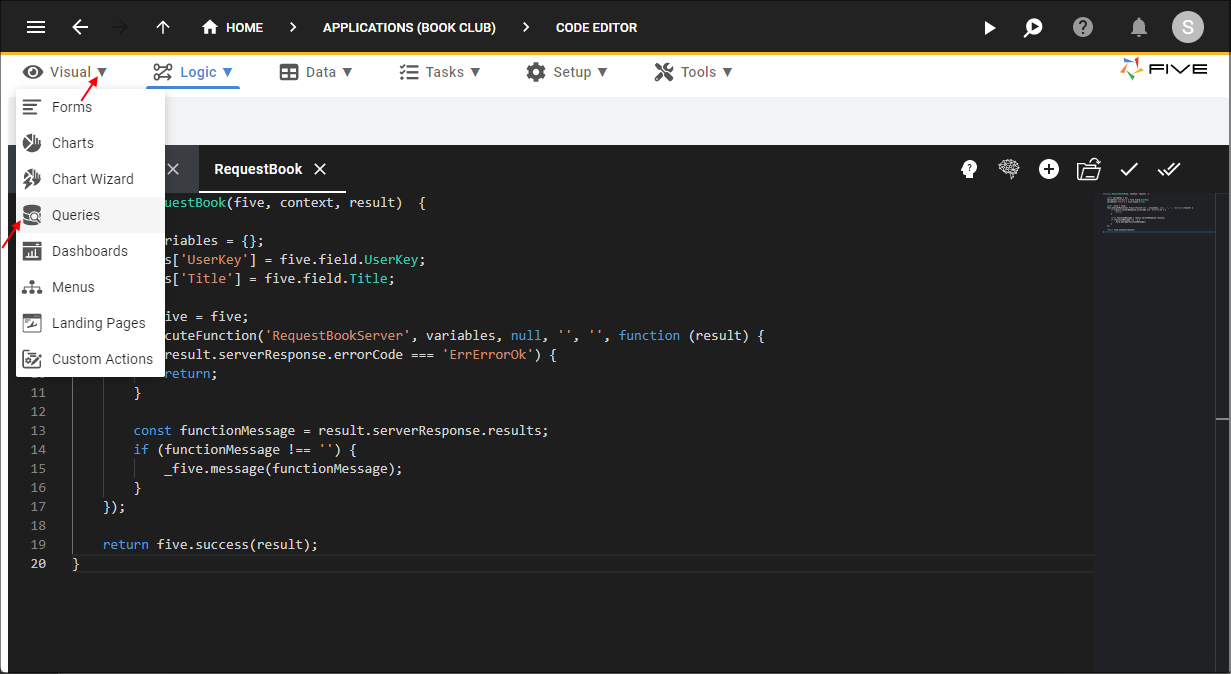
Figure 10 - Queries menu item
Add the Request Book Button
1. Select the Find Book record in the list.2. Click the Fields tab.

Figure 11 - Fields tab
3. Click the Add Fields button.
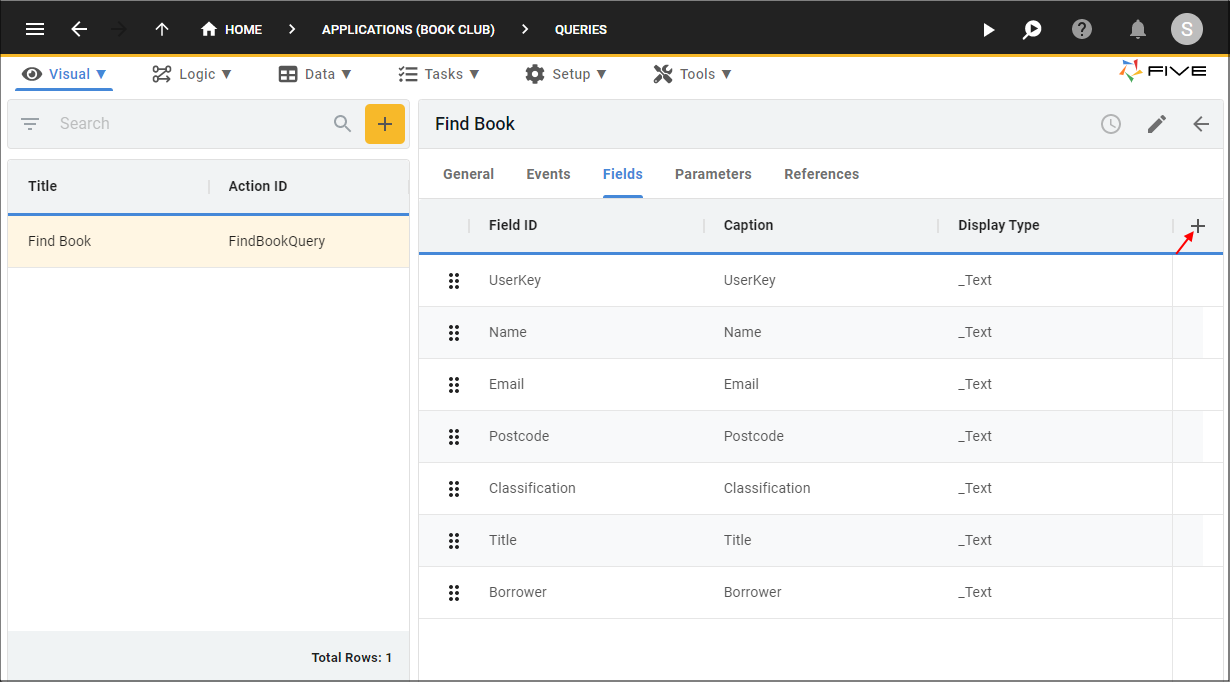
Figure 12 - Add Fields button
4. Type Request Book in the Caption field.
5. Click the lookup icon in the Display Type field and select _Button.
6. Click the Cancel button in the Show If field and type (!five.field.Borrower).
info
Remember in our Find Book query we had the BorrowMemberKey field with an alias of Borrower. This field is used here in the Show If field, a Javascript condition is added in the Show If field to only show the button for the book records in the results if the book is available to be borrowed, meaning, the books are not currently lent out by another member.
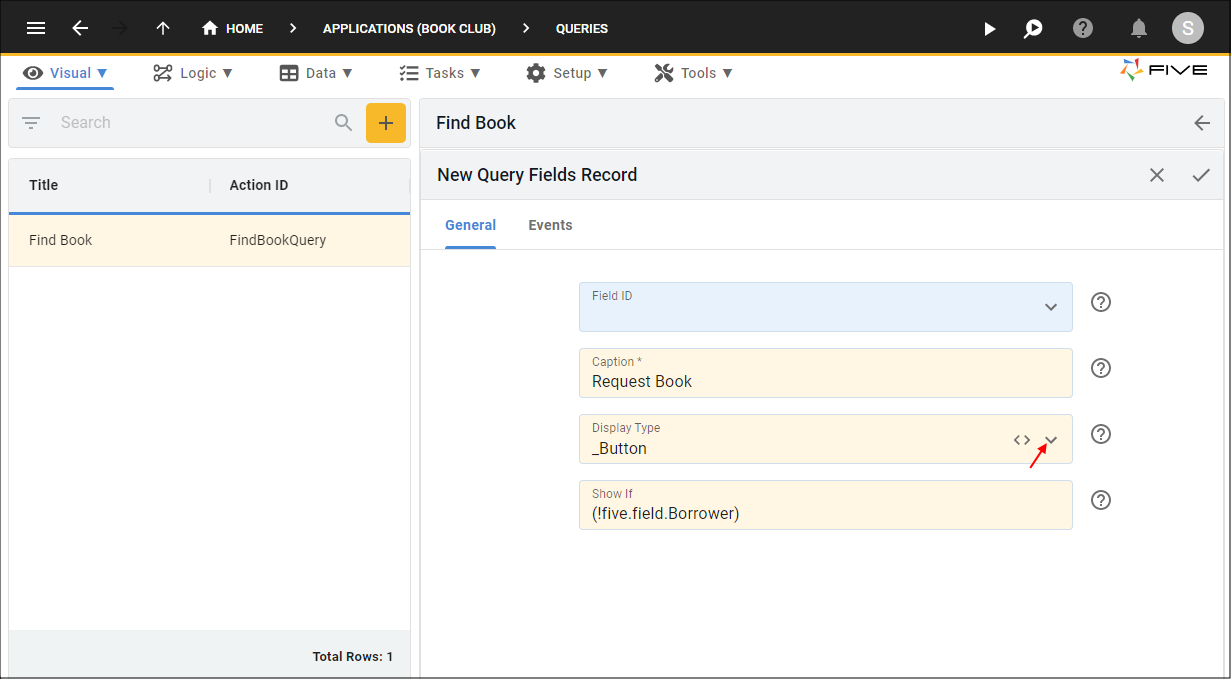
Figure 13 - Add the Request Book button
7. Click the Events tab.
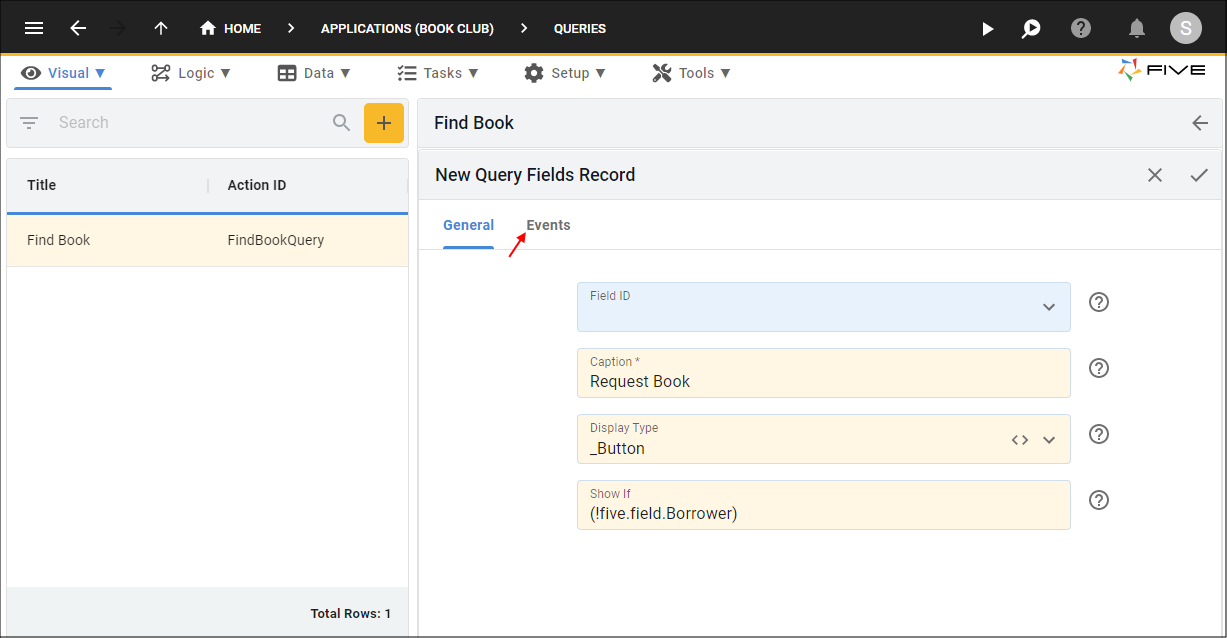
Figure 14 - Events tab
8. Click the lookup icon in the On Click field and select RequestBook.
info
When the Request Book button is clicked in the Book Club application, the RequestBook function will execute on the frontend and call the RequestBookServer function which will execute on the backend.
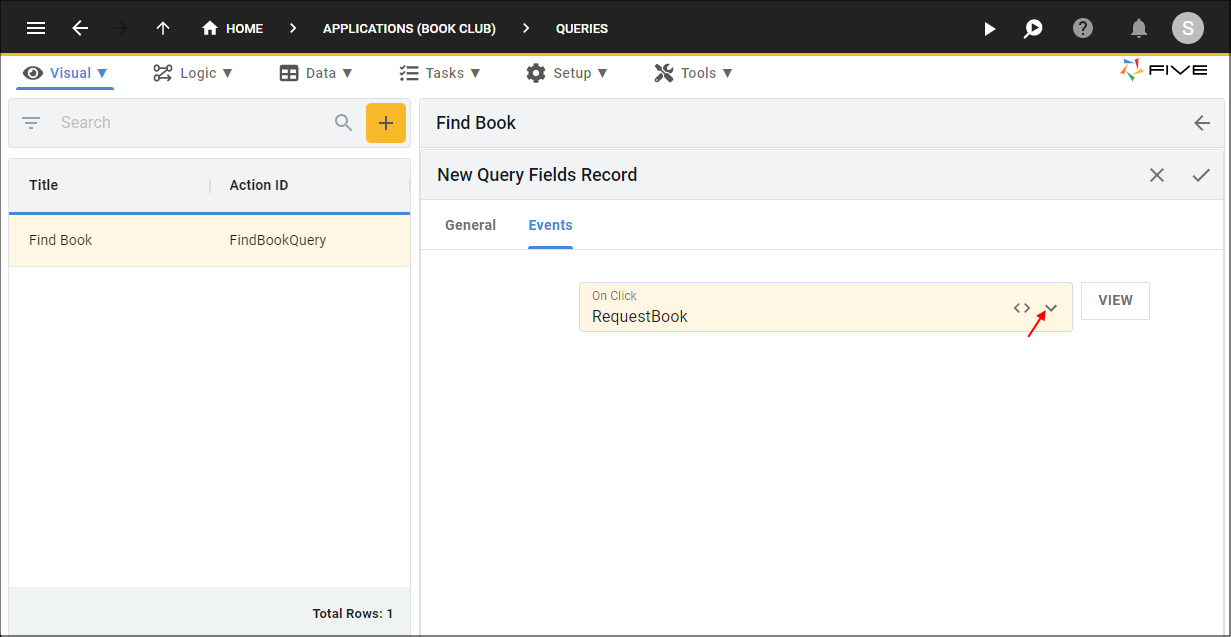
Figure 15 - Attach the RequestBook function
9. Click the Save button in the form app bar.
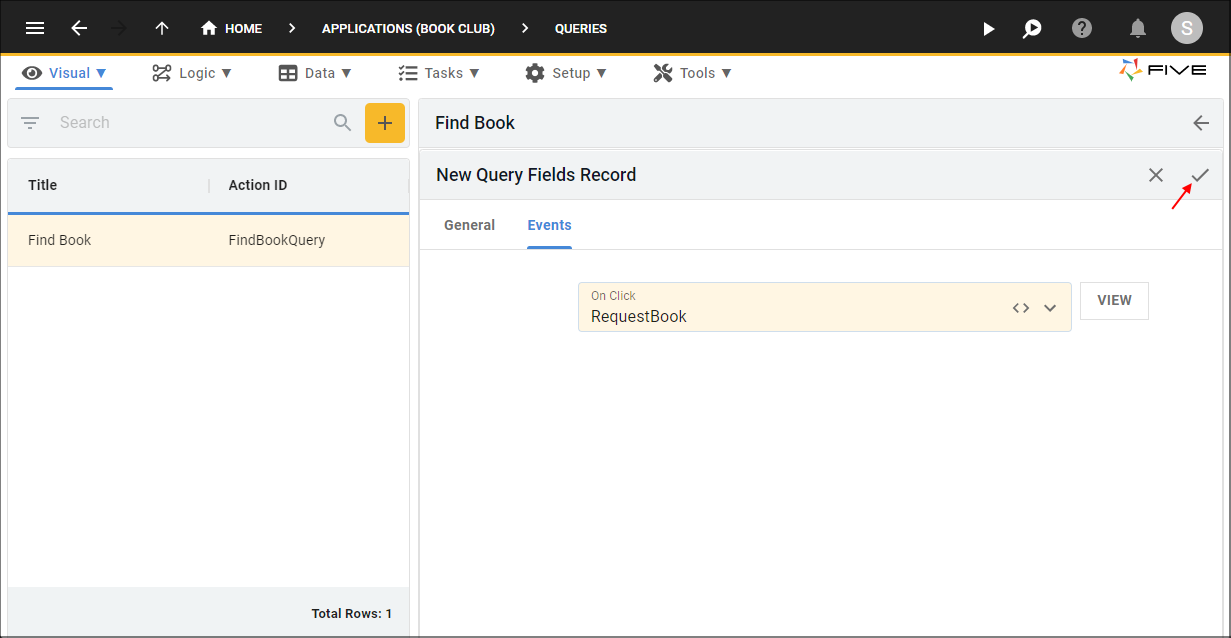
Figure 16 - Save the On Click event
10. Click the Save button in the form app bar above the list.
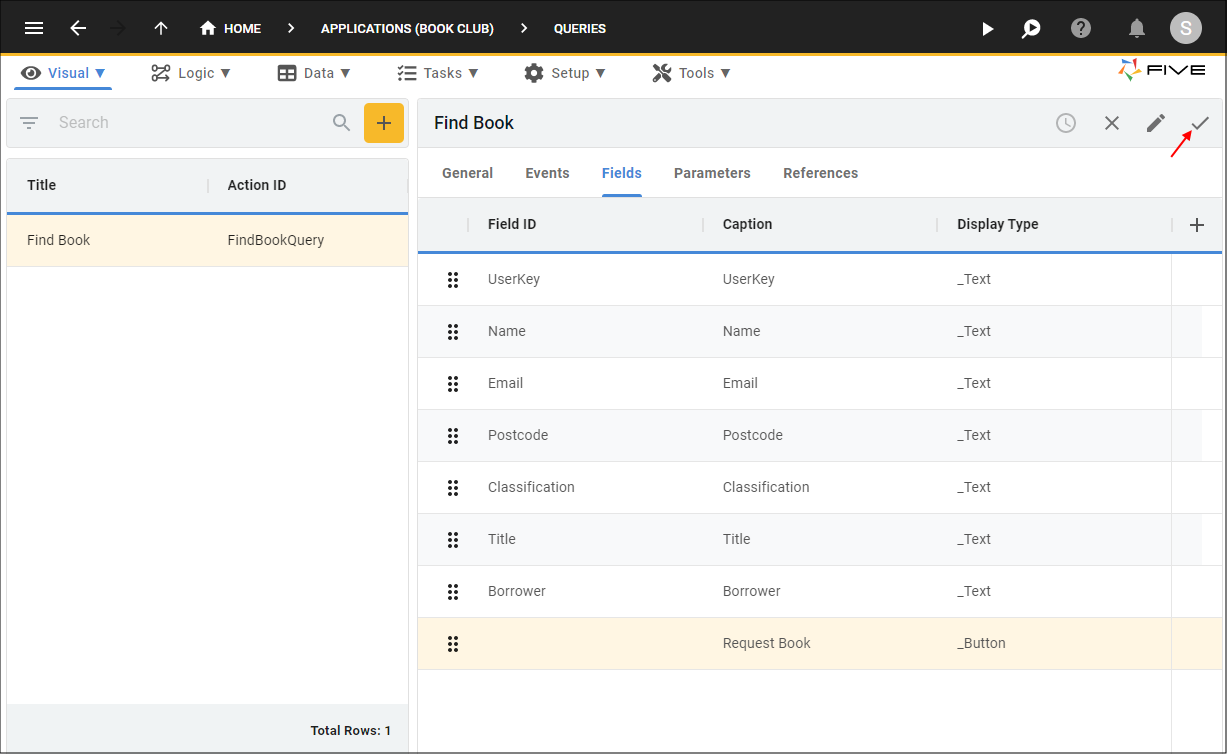
Figure 17 - Save the Find Book query