How to Export Data Results to a CSV File
Last updated 3/05/2023
This documentation is to explain how you can add an Export to CSV button in your application to export the results from a query into a CSV file.By default, when you create a query the Export to CSV button will not be available in your application to export the data.
note
The following steps are for a query that is saved in Five, you can add the Export to CSV button on creation of a new Query record simply by using the CSV Show If field before saving the record.
Add the Export to CSV Button
Prerequisites- A query saved in Five.
- A menu item created for the query, or the query made available on a dashboard or form page.
Steps
1. Select Visual in the menu.
2. Select Queries in the sub-menu.
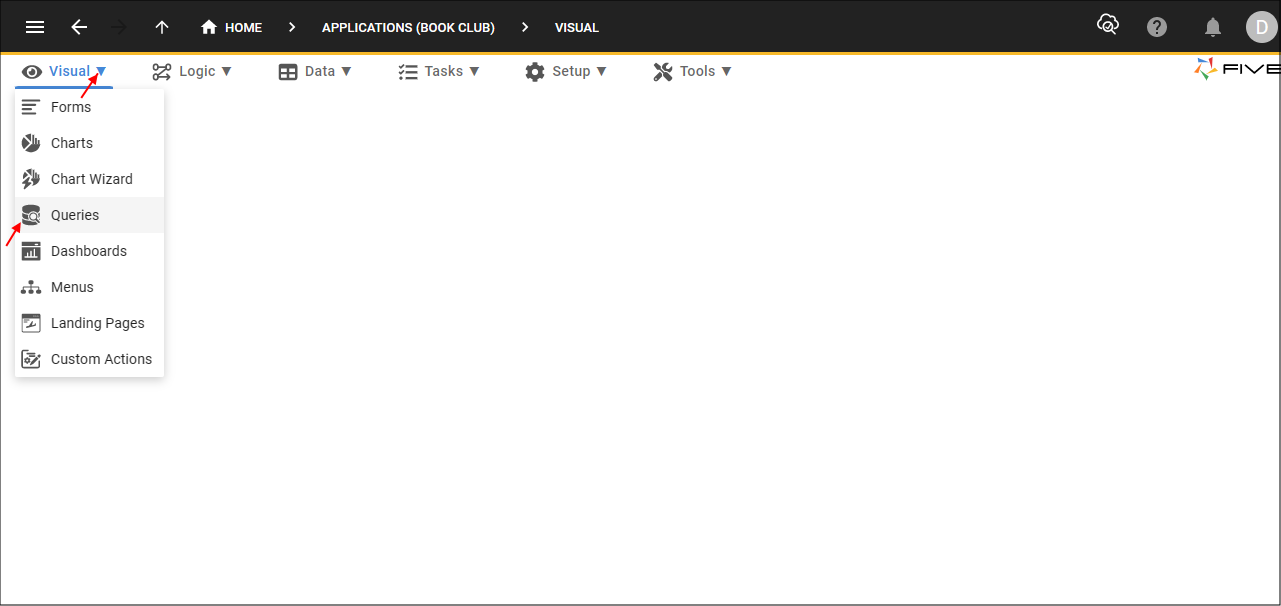
Figure 1 - Queries menu item
3. Select a Query record in the list
4. Either click the Edit button in the form app bar, or click directly in the CSV Show If field.
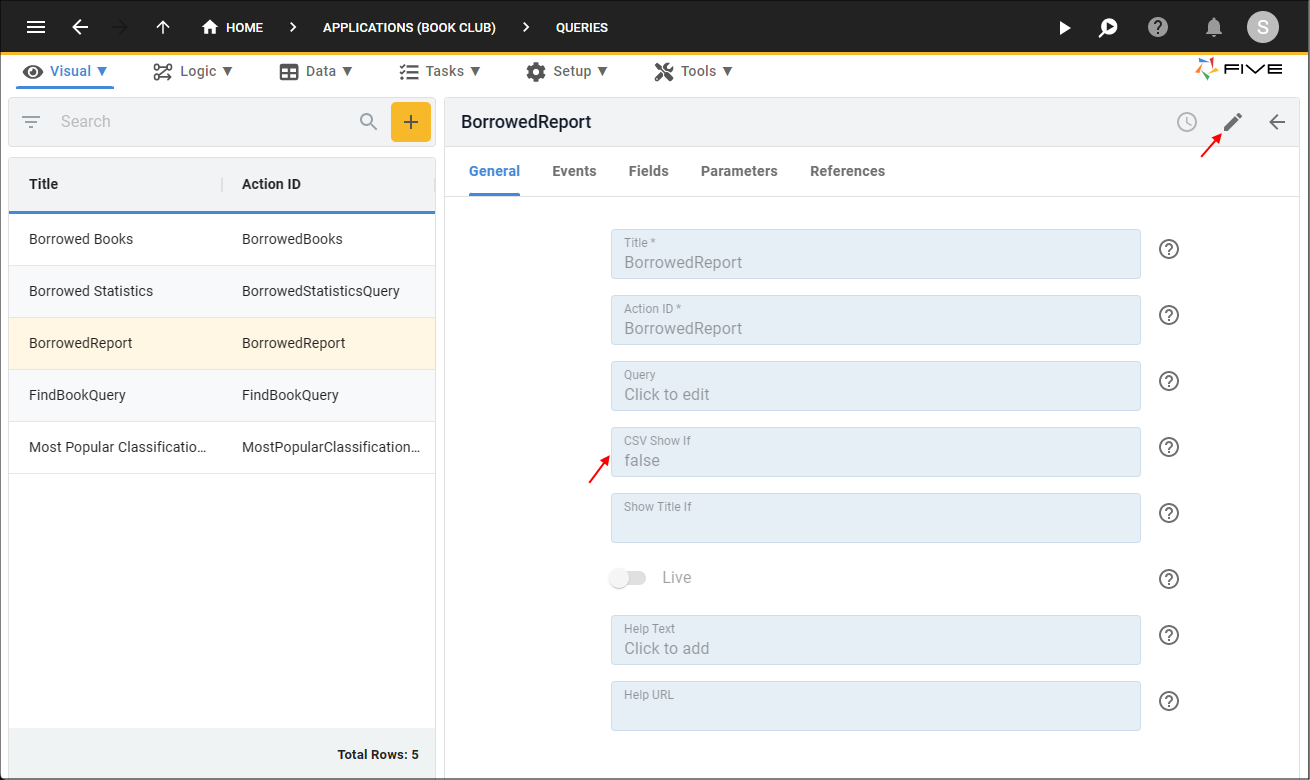
Figure 2 - Edit the Query record
5. Click the Cancel button in the CSV Show If field.
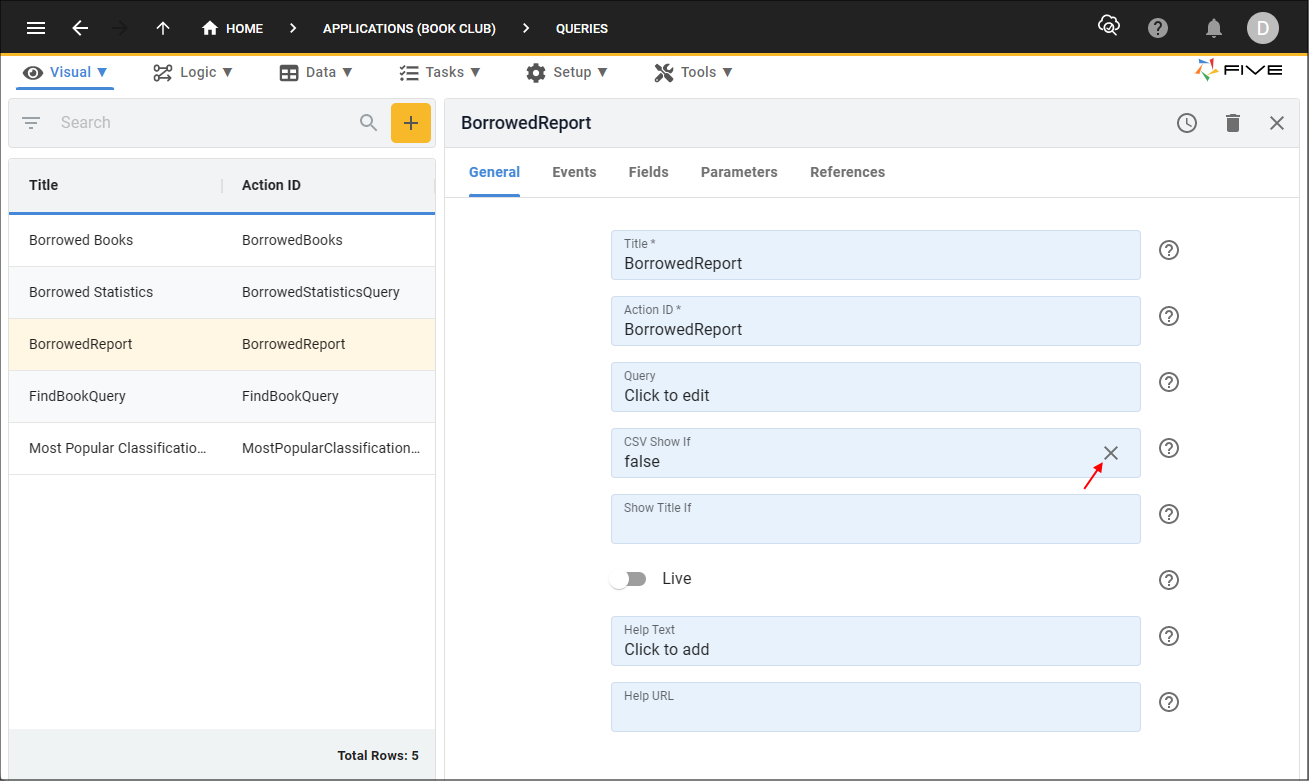
Figure 3 - Cancel button
6. Type true in the CSV Show If field.
info
The CSV Show If field takes a JavaScript statement, this means in its most basic form you can write true or false in the field, however, you can add a condition to only show the button in certain scenarios.
7. Click the Save button in the form app bar.

Figure 4 - Save the Query record
Export to CSV Button in Your Application
1. Click the Run button.
Figure 5 - Run button
2. Navigate to the query that you made the Export to CSV button available.
3. Click the Export to CSV button in the app bar.
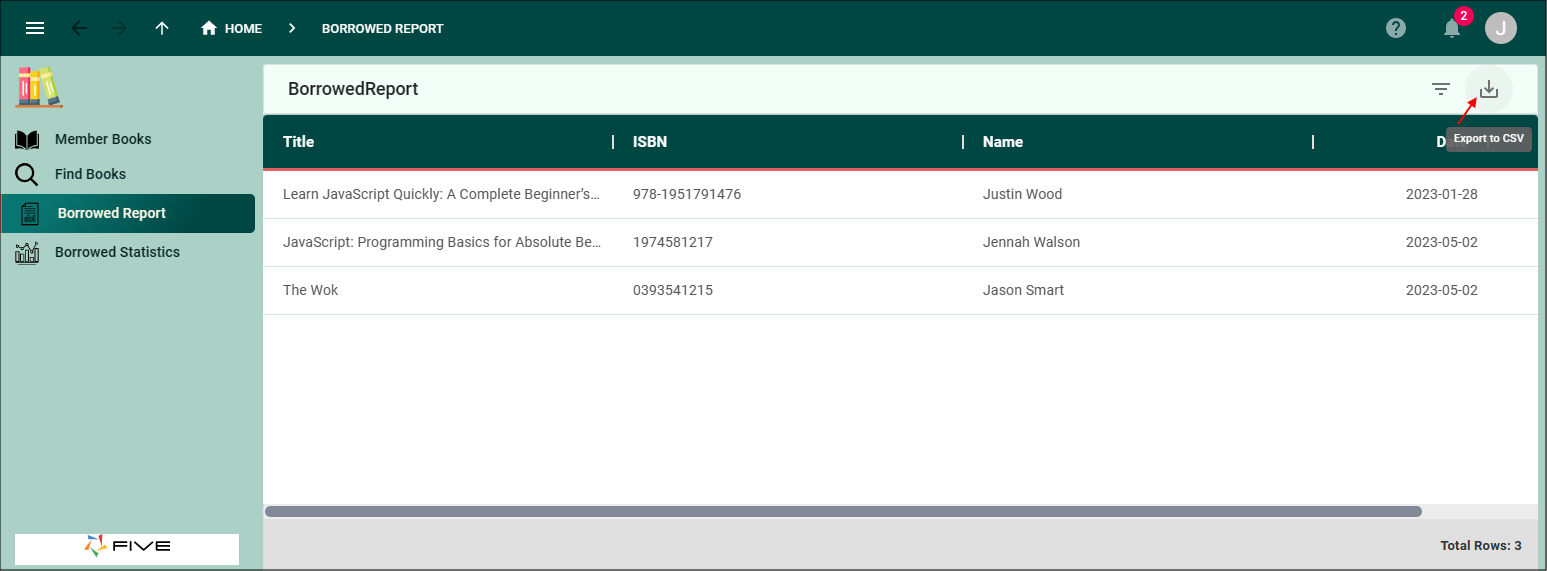
Figure 6 - Export to CSV button
info
This will export the query records in the list to a .csv file
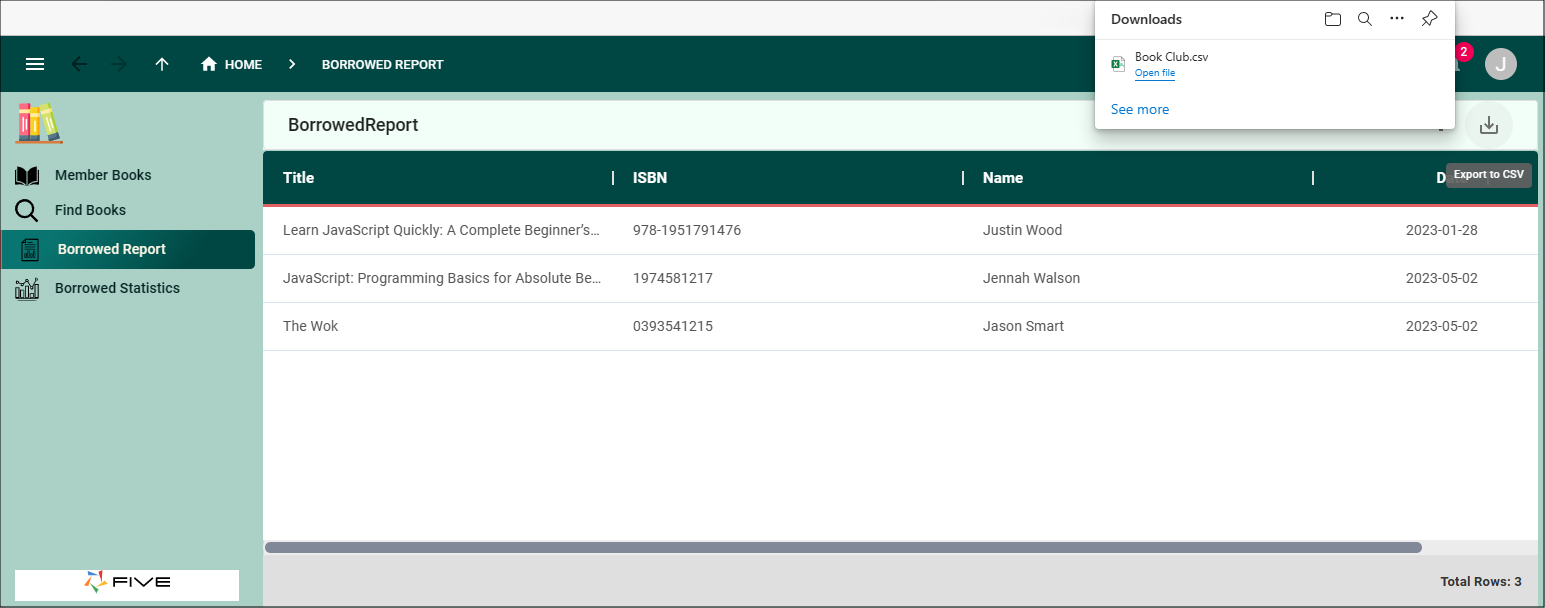
Figure 7 - Download in a .csv file
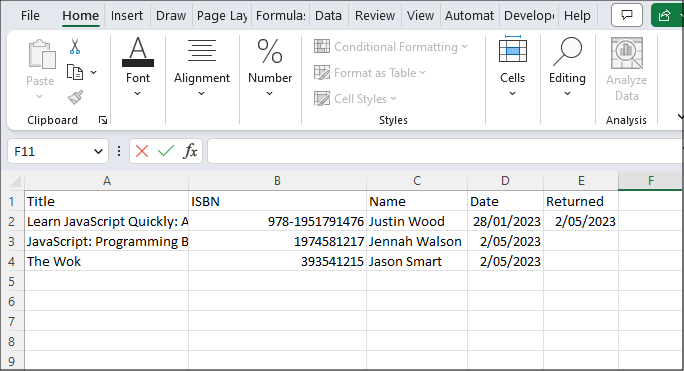
Figure 8 - Open the CSV file