Creating Menus
Last updated 6/12/2021
Building Menus in Five
The following documentation will explain the general steps to create different types of menu items to begin to build out your menu.
General Steps to Add a Menu Item
Prerequisite
The action being referenced must be saved in Five to be available in the Action field lookup list.
Steps
- Select Menus in the menu.
- Click the Add Item button in the list app bar.
- Type a caption in the Caption field.
- Type an integer value in the Menu Order field to order the menu item in the menu.
- Use the lookup icon in the Action field and select the Action ID to reference.
- Click the Edit button in the logo field, navigate your files and open the required image file.
- Click the Save button in the form app bar.
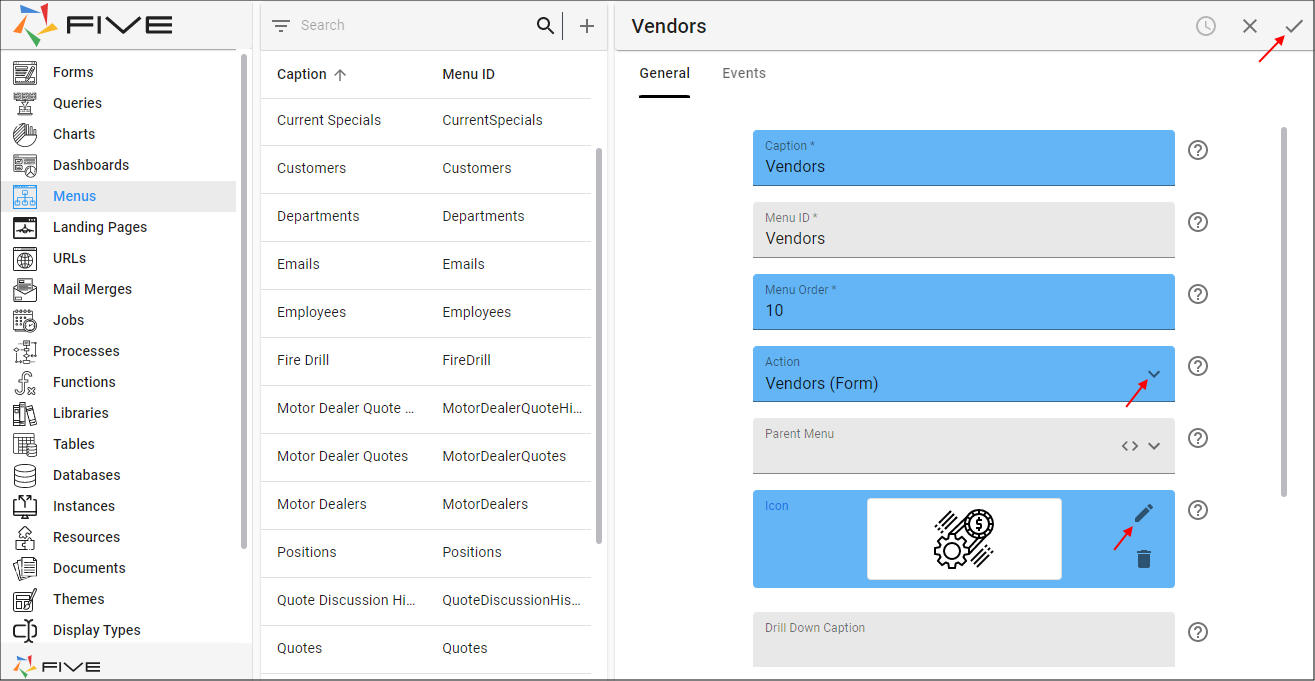
Figure 1 - Add a menu item
Create a Parent Menu
A parent menu will be at the top-level and will hold the nested menu below it. The customizable Down button on a saved form record will become available to drill down to the child menu. The child menu will be filtered by the record selection made in the parent menu.
Requirement
The parent menu item must reference a Form action.
Prerequisite
The parent menu item must be saved in Five to be available in the Parent Menu field lookup list.
Steps
- Select Menus in the menu.
- Click the Add Item button in the list app bar.
- Type a caption in the Caption field.
- Type an integer value in the Menu Order field to order the menu item in the menu.
- Use the lookup icon in the Action field and select the form Action ID to reference.
- Use the lookup icon in the Parent Menu field and select the Menu ID to be the parent.
- Click the Edit button in the logo field, navigate your files and open the required image.
- Click the Save button in the form app bar.
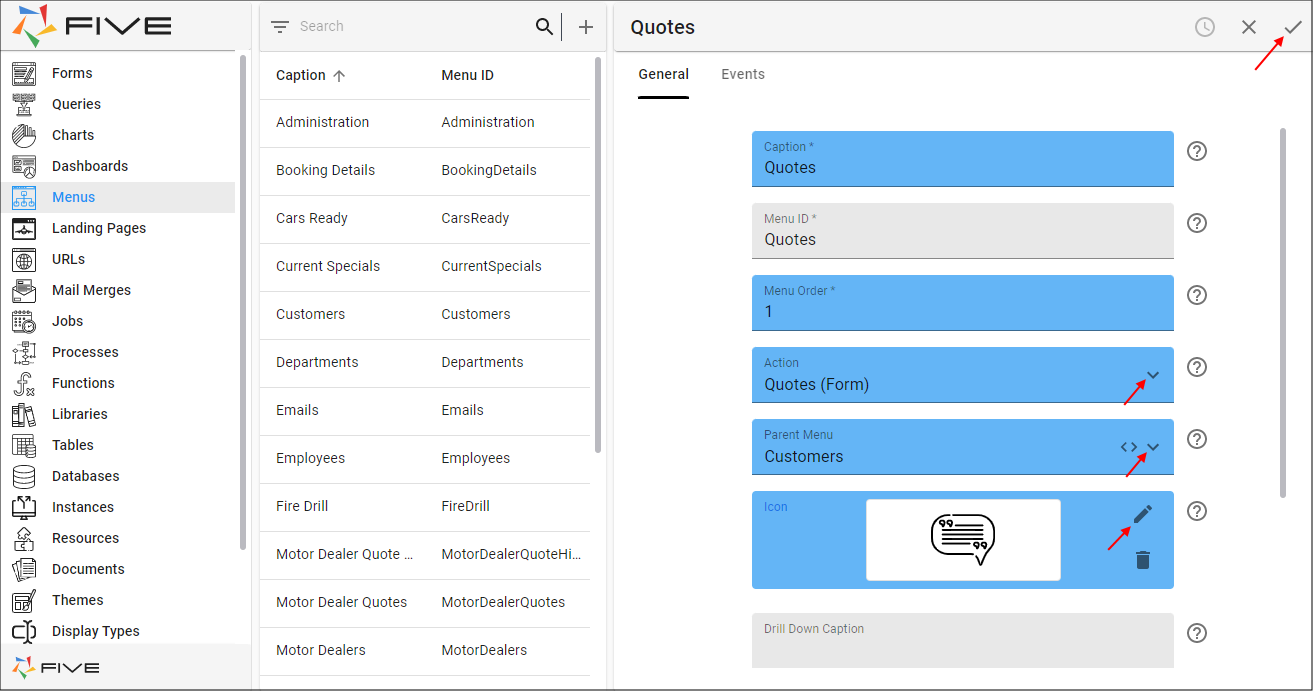
Figure 2 - Create a parent menu
How This Will Look in Your End-User Application
Once a record has been completed, the Down button will be available in the form app bar to drill down to the child menu.
- Select the parent menu item in the menu.
- Complete and save the form, or
- Select a saved record.
- Click the Down button in the form app bar.
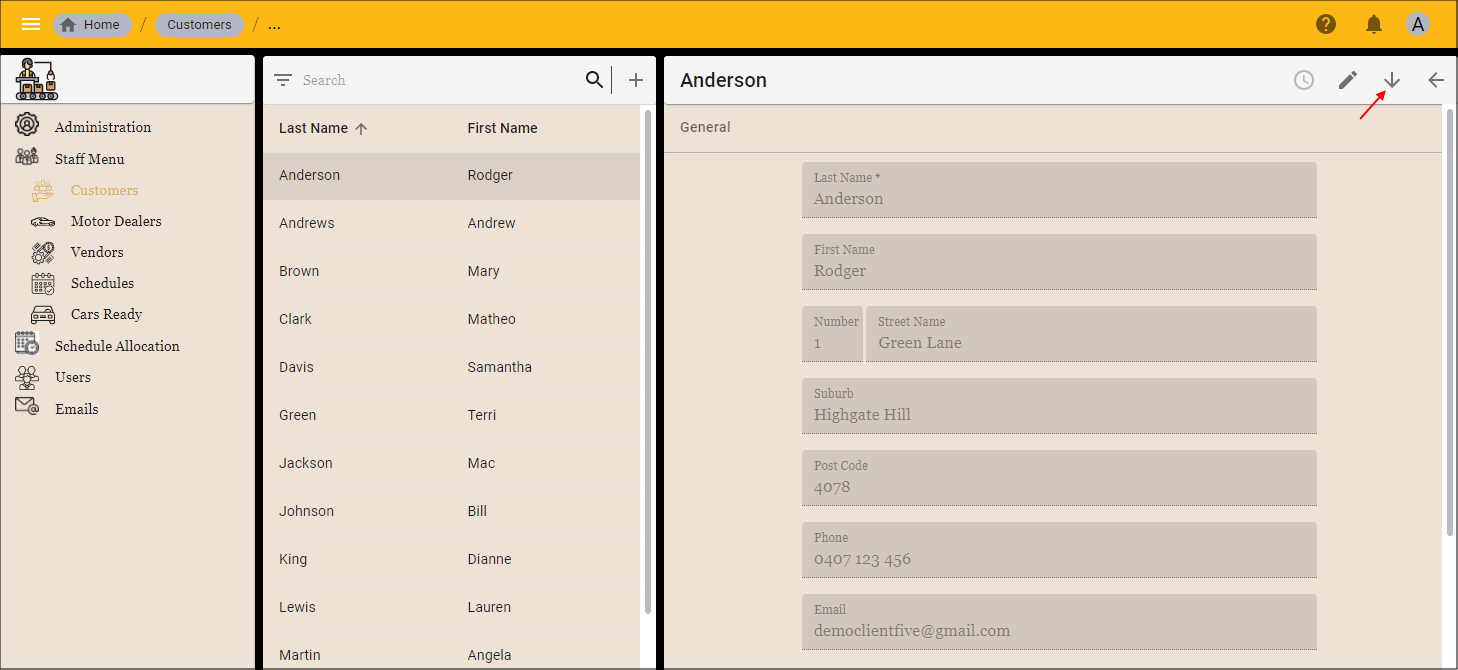
Figure 3 - Select the parent menu item to drill down to the child menu
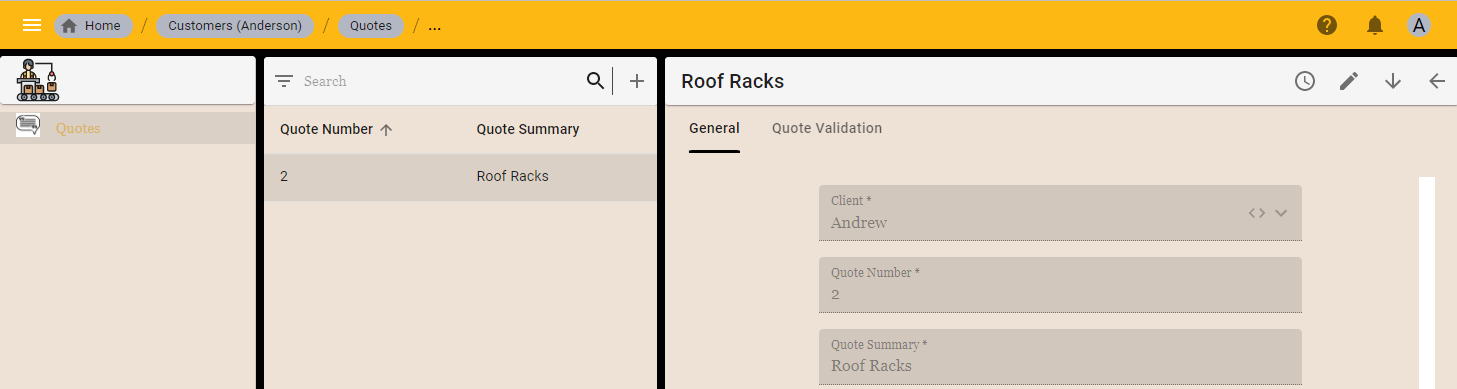
Figure 4 - Child menu is available
info
Further parent menus can be created under the top-level parent menu.
Create a Sub-Menu
A sub-menu will hold a secondary menu with a list of options for your end-users.
Requirement
The menu item that holds the secondary menu can not reference an action.
Prerequisite
The sub-menu item must be saved in Five to be available in the Parent Menu field lookup list.
Steps
- Select Menus in the menu.
- Click the Add Item button in the list app bar.
- Type a caption in the Caption field.
- Type an integer value in the Menu Order field to order the menu item in the menu.
- Use the lookup icon in the Parent Menu field and select the Menu ID to hold the secondary menu.
- Click the Edit button in the logo field, navigate your files and open the required image file.
- Click the Save button in the form app bar.
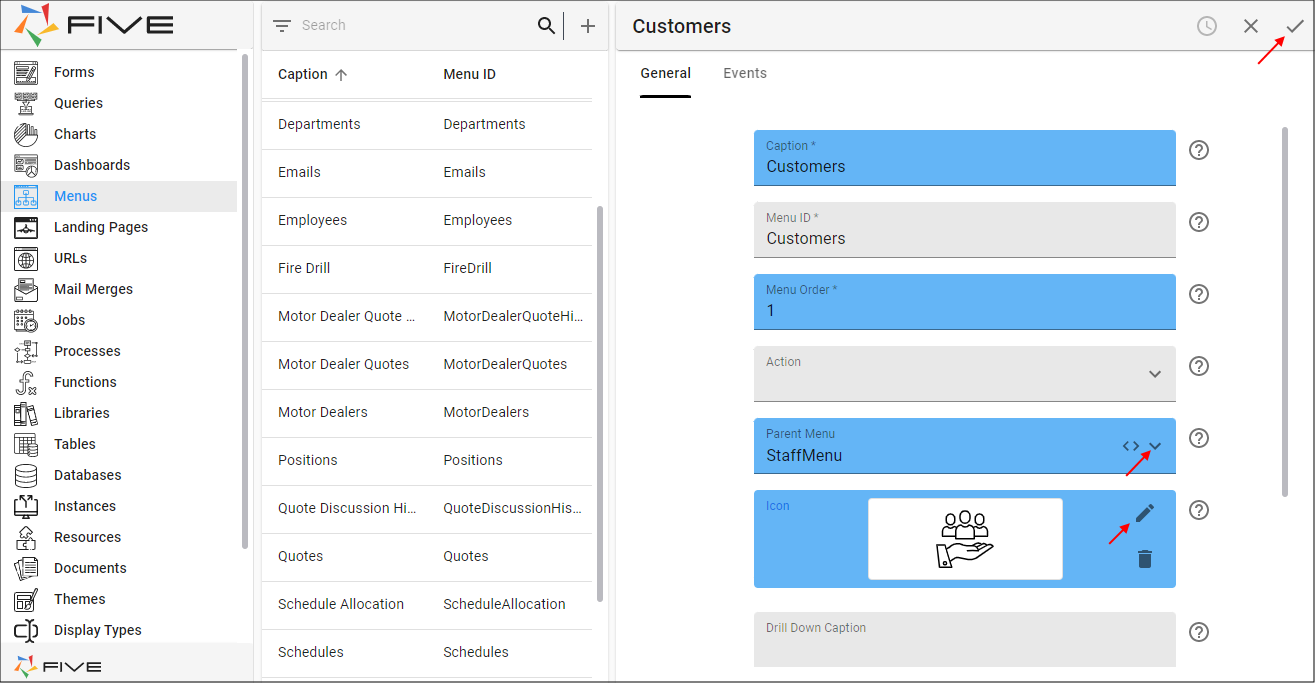
Figure 5 - Create a sub-menu
How This Will Look in Your End-User Application
When a user selects the sub-menu item, the menu will open and display all the menu items in the secondary menu.
Step
- Select the sub-menu item in the menu.
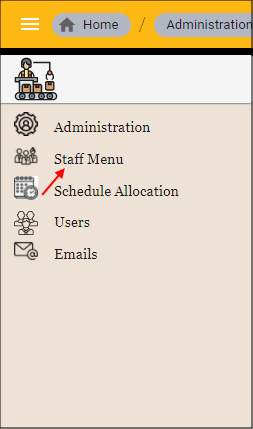
Figure 6 - Select the sub-menu item
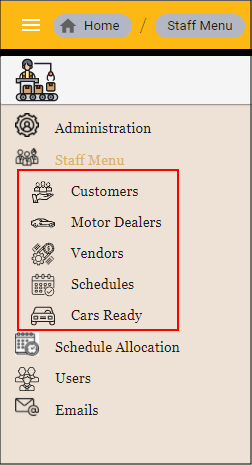
Figure 7 - Secondary menu is available